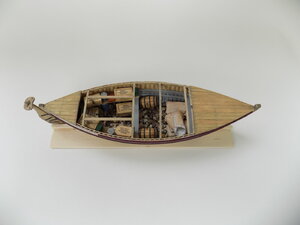
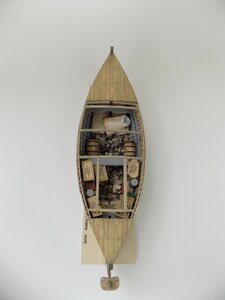
James Caird - 1/24 scale - scratch built

Joined
Apr 14, 2020
Messages
104
Points
113

Location
Southern Maine
Some of the SoS members have suggested that I create a blog for my latest model, the James Caird. I am well into the work on this model, but can provide some information and images of its early stages so that readers of this blog can see what I have done so far. I am building the model with the modifications created by the carpenter Henry "Chippy" McNeish while the Endurance crew was trapped on the ice as well as the final modifications made by McNeish in Elephant Island prior to the 800 nautical mile voyage to South Georgia Island (yet to come).

The initial modifications made to the James Caird by McNeish while on the ice included raising the gunwale of the double-ended whaler carried by the Endurance by almost two feet by the addition of three additional planks, using wood from the ruined Endurance and one of the other lifeboats, and the construction of "whalebacks" at the bow and stern. The latter would greatly reduce the amount of water that would splash into the boat in heavy waves.

The final modifications made on Elephant Island included building a lattice-like framework over the open boat using sled runners, installing a flimsy deck over these supports using the lids of plywood packing cases, and covering the whole topsides with a canvas covering stitched together from sections of sail. A 5' by 2.5' "cockpit" was left open just in front of the mizzen mast so that the crew could work the halyards, sheets, and rudder.

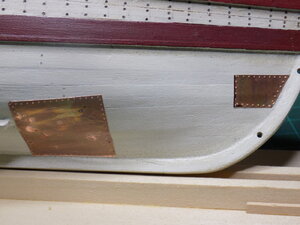
There was some damage to the hull because of the hauling of the boats across the ice on sledges and because of collisions with ice floes during the 9-day trip taken by the three remaining boats from the edge of the melting ice to Elephant Island. The damage was repaired by McNeish on Elephant Island in a variety of ways, one of which involved creating patches using the Muntz metal flotation tanks originally installed on the Caird when it was built as a lifeboat. The remarkable work by McNeish to transform the boat for its open sea journey was accomplished using only a hammer, a saw, a chisel, and an adze.

I intend to make the model represent the boat just before its launching, with all of the above modifications including the stone ballast, supplies, sleeping bags, brass patches, and figures of Shackleton and some of the Endurance crew.

I want this model to tell the incredible story of the preparations for Shackleton's incredible 16-day voyage across the South Atlantic, in winter, from one speck of land - Elephant Island - to another - South Georgia. This model certainly fits with my plan to model small open boats that have made historic voyages.

Hope you enjoy the postings that will appear below. As I stated above, the first few will be historical, that is, they will show work I have done on the model to date. Once I am caght up with that, I will start posting my progress in "real time".
 
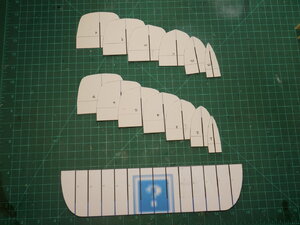
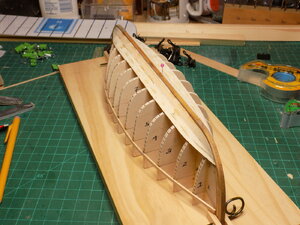
Below is a series of photos showing the early steps in the construction of the model. The first photo below shows the templates used to build the mould. Each template represents a cross-section, or station, at a certain point along the hull, and the positions of these stations are visible as vertical lines on the side view at the bottom. These templates were supplied by an Australian modeler who is(was?) building a model of the James Caird and posting his progress on another modeling website. He used well-researched documentation of the dimensions of the Caird, photogrammetry, and a 3D CAD program to develop the lines of the boat. I was glad and thankful to accept the results of his work and use his lines for my own model.

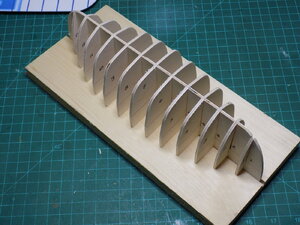
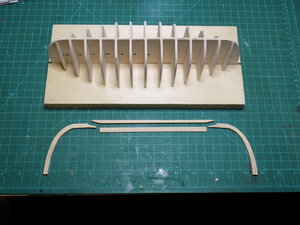
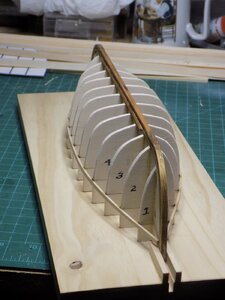
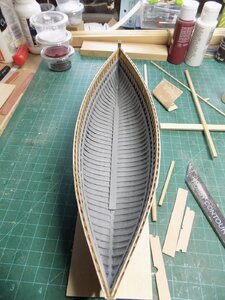
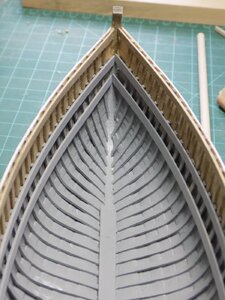
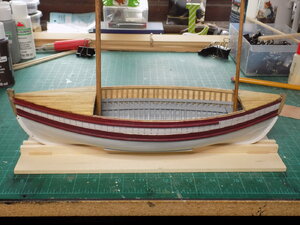
Subsequent photos show the construction of the mould; the construction of the keel, stem, and sternpost; the stained keel assembly in place; the first few rows of planking; the painted inside of the boat with planking completed; a closeup of the planking at the bow; and a side view of the model with the outside and inside of the hull painted.

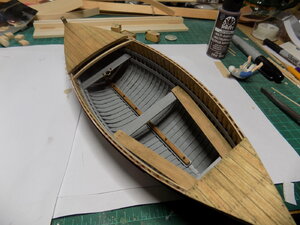
Some explanation is needed regarding the last couple of photos. On the inside of the boat, the portions painted gray represent the planking and stringers of the original whaleboat. The unpainted portions represent the three additional planks, and the partial ribs associated with them, added by McNeish. On the outside, the lower maroon stripe represents the gunwale strake and rubbing strake of the original lifeboat. The upper maroon strip and the planks with visible nails represent planking taken from one or more of the other lifeboats carried by the Endurance and added to the James Caird. The photos taken at the time by Frank Hurley, the expedition photographer, are black and white, but clearly show these two darker strips. The maroon color I used to paint them was based on the standard colors for British lifeboats of the time. These three additional planks would not have been repainted, so the nailheads would have been visible, as opposed to the original part of the hull which would have been painted and finished so the nailheads fastening the original eleven planks would not be visible.

Also shown in the last photo are the whalebacks added by McNeish at the bow and stern, to make the boat a little more seaworthy. Shackleton anticipated that the Endurance crew may have to take to the boats when the ice pack melted under them, and they did. The last photo represents the extent of the modifications made by McNeish while the crew was on the ice and before they actually got to Elephant Island. The remaining modifications - especially the canvas covering - were done on Elephant Island under very adverse conditions.

DSCN7057.jpeg
DSCN7060.jpegDSCN7061.jpegDSCN7064 (1).jpegDSCN7072.jpegDSCN7202.jpegDSCN7204.jpegDSCN7210.jpeg
 
Last edited:
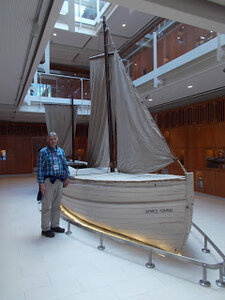
During a trip to southwest England last year, we made a detour towards London to visit Dulwich College and the James Caird. The Caird is now in its new location in the center of the Dulwich College building called the Laboratory. The Laboratory was apparently designed around having the Caird displayed there, and the building has a multi-story open atrium in the center that accommodates the Caird with its masts. It took a train ride, a bus ride, and a half-mile walk through Dulwich village to get us there, since I did not want to try to drive into London, but it was certainly worth it. I took many pictures, mostly of details about the rigging, cleats, blocks, sails, etc.

It was quite an experience to be right next to a boat that I have read so much about and that is at the center of such an epic boat journey. It seem smaller than I imagined, even though I was aware of the dimensions. This visit was actually more like a pilgrimage, but it had the practical value of informing the construction of my model of the James Caird as it began its journey from Elephant Island to South Georgia Island.

My model will look much different from this restoration, but I believe it will more accurately represent the boat on Elephant Island just before its launch and historic voyage across 800 miles of the stormy South Atlantic, in winter, to South Georgia.

DSCN1851.jpg
 
Rudder and brass patches:

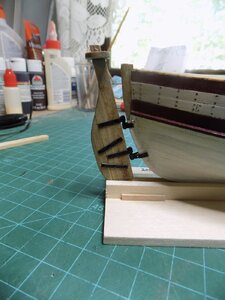
The rudder on the James Caird reconstruction at Dulwich College is not the same as the one that was on the ship during its voyage to South Georgia. McNeish constructed a much sturdier rudder out of spare timber and reinforced it with metal straps. Because of the addition of a mizzen sail, the rudder had no tiller, but was instead controlled by two ropes extending from a T-shaped device installed where the tiller would otherwise be, and the ropes extended into the "cockpit", the open space left in the canvas covering. The boat could then be steered by a crew member in the cockpit by pulling on one or the other of these ropes.

I experimented with adding the Muntz metal patches that feature prominently in Frank Hurley's photos of the Caird on the ice prior to her launch from Elephant Island. I ordered copper tape, similar to the aluminum tape I used on a previous model, cut pieces of it to the desired shape, used a pounce wheel to simulate the nails around the edges of the places, weathered them with a blackening solution, and stuck them on the boat.

DSCN7230.jpegDSCN7233.jpeg
 
Ballast

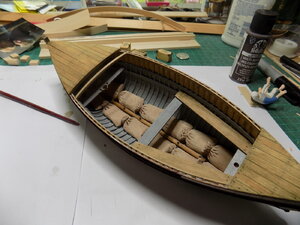
I did a little digging on the Internet, looking for information about how ballast was added to the boat. I learned that most of the ballast in the James Caird consisted of bags made from blankets that were filled with sand and placed in the bottom of the boat. Larger rocks were added afterward for additional weight and to keep the sandbags (which is essentially what they were) from moving around.

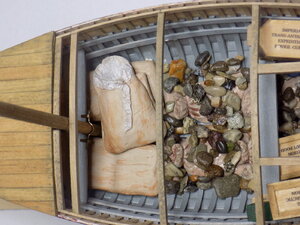
I used epoxy clay to make rectangular shapes 1.5 by 0.75 inches (1/24 of the average sandbag dimensions). I rounded the edges of the rectangles, textured them by pressing into the surface of the clay a fabric with prominent weave, and test fit them in the model so that they appeared like they are conforming to the interior of the boat and to each other. Once the epoxy clay had cured completely, I painted the simulated blanket bags various shades of mottled grey or brown, to represent old blankets, and glued them into their places inside the hull.

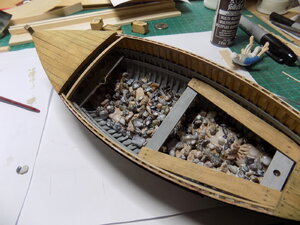
Once the bags were in place, I made a slurry of white glue and aquarium gravel, and glued a thin and irregular layer of stones in between the bags. Looking into the open side of the model, the viewer would see sandbags and scattered stones in the bottom of the boat. In retrospect, I may have added a few too many loose stones, but it's too late now.

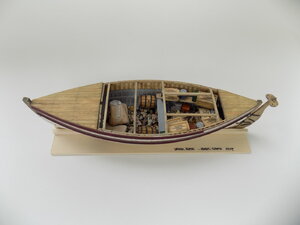
Below are three photos of the interior of the boat, showing the addition of the ballast.

In the top photo, the viewer can see the mast from one of the other boats bolted to the keel of the James Caird, to strengthen the boat in anticipation of encountering heavy seas on the way to South Georgia. This feature is preserved in the restored Caird at Dulwich. Also visible are the boards fastened to two of the Caird thwarts, on which could be stored supplies that might be damaged by sea water that might have collected in the boat.

DSCN7237.jpegDSCN7238.jpegDSCN7239.jpeg
 
Last edited:
Supplies:

The James Caird carried supplies for six men for a month, which severely limited the space inside the boat for the men. Shackleton apparently thought that if he and the five others with him needed more than 30 days' worth of supplies, they would have missed South Georgia!

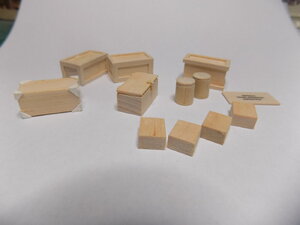
I spent some time making a variety of crates and tins to be placed inside the Caird. I modeled the shapes and styles after images of Antarctic supplies from the expeditions of Scott and Shackleton. The pieces are shown in the photo below. These would eventually be stained and/or painted, but I wanted to record how they looked in their rough form, as shown in a photo below. The larger crates measured 1.25" by 5/8", corresponding to a scaled size of 30" long by 15"wide. The thickness or depth of these crates was 12". This was based on an advertisement from a crate company that quoted Shackleton as saying that he had ordered several thousand Venesta plywood crates of this size for his 1906 expedition.
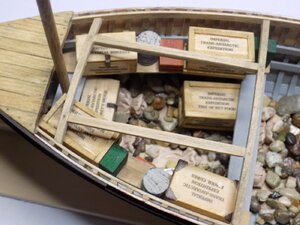
The two cylinders (and probably more) became tins, and the four smaller blocks became various small boxes of supplies. I printed out the words "Imperial Trans Antarctic Expedition" on some transparent labels and attached one to a piece of 1/32 basswood for this photo, to see how it looked. It can be seen at the middle right of the photo. I made 33 of these standard labels as well as 33 additional labels with specific information such as "pickled cabbage", "Trumilk", "assorted fruit", etc. (Some of these labels, I have to admit, were fun in-jokes involving my young grandchildren, such as "Aubrey's Moxie", "Remy's oatmeal", "Mary's asparagus", and "Riley's pig's feet".) The font is quite small (5 point), being to scale, and the labels will be hard to see, so no one may actually read them. Regardless, I positioned some of these fun labels so they could be seen if the model was examined closely, a sort of reward for anyone who takes the time to inspect the inside of the model.

Some of these labels were placed on simulated packing case lids such as those used by the carpenter McNeish to make the flimsy deck that was subsequently covered with canvas. Since my plan from the start was to have the canvas cover folded back to show the interior, the packing crate "deck" will also have to be incomplete. The edges of the some of the little packing case lids would purposefully extend slightly beyond the edge of the canvas and would therefore be able to be seen.

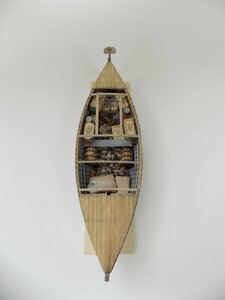
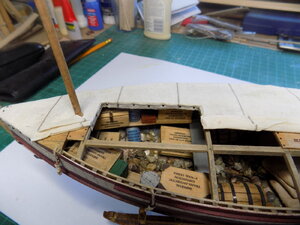
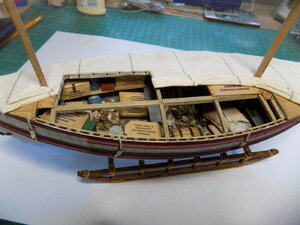
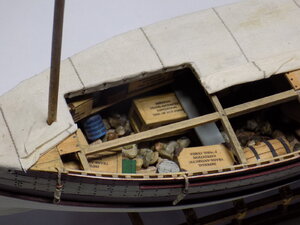
The crates and tins in their final spots inside the boat are shown in the second photo below. The rectangular opening that defines the cockpit can be seen in this photo. Also visible is the mizzen mast inserted into a socket in the sternmost thwart. My decision to have the canvas cover incompletely over the deck was made to allow the viewer to see more of the inside of the boat than could be seen through just the small cockpit opening.

DSCN7236.jpegDSCN7256.jpeg
 
Last edited:
The crew of the James Caird slept in reindeer skin sleeping bags that, in retrospect, were not the best choice. The bags rotted due to constant exposure to sea water, and reindeer fur eventually contaminated the inside of the boat, even getting into the food. I made sleeping bags out of epoxy clay, and painted them to resemble tanned but unstained leather, with tufts of grayish-white hair sticking out of the seams and out of the hood area. I am not 100% satisfied with the result, but the viewer will be able to tell that they are sleeping bags, and maybe even that they are made from leather with fur inside. That's good enough for me. The photos below show the three bags glued in place, two are flat and one is folded up.

The men had to crawl under the canvas cover, in between crates and barrels and over rocks, to get to the bags. Needless to say, the crew did not sleep well during that voyage.

DSCN7257.jpeg
 
Last edited:
Water barrels:

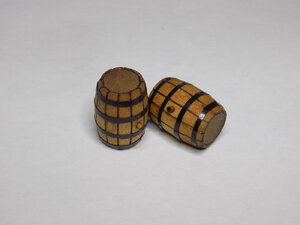
I used 1" lengths of a 3/4" hardwood dowel as the start for making water barrels, and carved and sanded the ends to produce the curvature that characterizes the barrel shape. I added lines by wood burning to simulate the seams between the barrel staves, carved in the chines at each end, stained the barrels, and add blackened paper hoops. I chose the scale size (1" high by 3/4" wide at the belly of the cask) based on the dimensions of commercially available scale model barrels I found on line. They seemed appropriately scaled when I put them into the model.

DSCN7268.jpeg
 
Canvas deck cover in place:

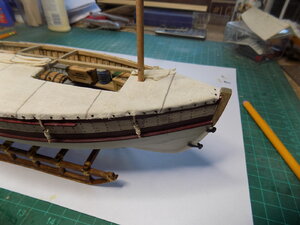
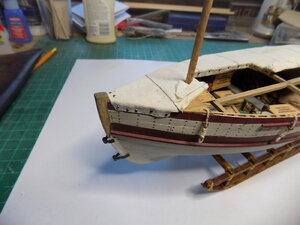
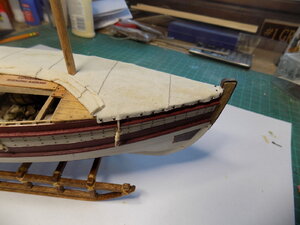
I used a piece of sailcloth to make the canvas cover, cutting it to shape and stiffening it with a solution of thinned Elmer's glue. The seams, which were sewn with great difficulty by frostbitten hands on Elephant Island, were sewn by me with relative ease on my dining room table using my wife's machine. The cover was designed to be intact on the port side, and partially folded back on the starboard side, as if it hadn't yet been completely attached. This way, the model would seem to completely covered when viewed from port, but viewing it from starboard would allow visualization of the interior.

I used very small nails to attach the canvas to the boat, overlapping the canvas onto the uppermost strake. I also nailed the canvas to the inside edges of the cockpit. The folded look of parts of the cover was achieved by soaking these areas of the cover and turning them back in the most realistic way I could. The edges of some of the packing lids used by McNeish to cover the deck can be seen peeking out from under the canvas.

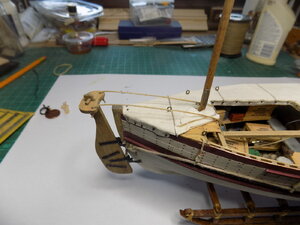
The model, at this point, is sitting on what will be its cradle, a sledge of the type that was used by the Endurance crew to drag the boat across the ice. The sledge is not yet finished. A tow rope was passed through the loops hanging down from the gunwale, and can be seen in the last photo along with the rudder and the ropes used to steer the boat from the cockpit.

DSCN7416.jpegDSCN7417.jpegDSCN7418.jpegDSCN7419.jpegDSCN7420.jpegDSCN7421.jpegDSCN7429.jpeg
 
Some reference images:

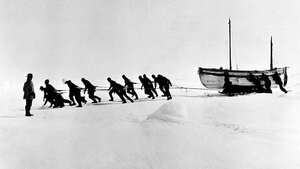
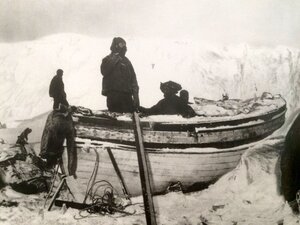
I thought I would provide some images and drawings that would support what I am trying to accomplish with this model of the James Caird. The first three photos were taken on the ice by Frank Hurley, the expedition photographer. The very first one is a famous image which was the real inspiration for this model. I plan to have the boat displayed in a custom case on its sledge, resting on a snowy base, being pulled by crew encouraged on by Shackleton. I won't make a 13-14 figures, but perhaps six or so. From the port side, the model should look much like the photo. From the starboard side, however, the viewer will be able to see the details inside the boat underneath the folded-back canvas cover. (Note the shape of the new rudder, which I have tried to duplicate on the model.)

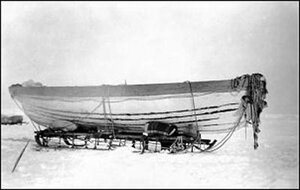
The second, smaller photo shows the Caird on its sledge, which I am trying to duplicate as the cradle for the model. In this photo you can see the makeshift caulking, which consisted primarily oil paints from the supplies of the expedition's artist. I may or may not include this level of detail, I haven't yet decided. The third photo shows the Caird on Elephant Island being fitted out for the voyage to South Georgia. The pole is the mast of the Dudley Docker, another of the boats, before it was bolted along the keelson on the inside of the James Caird.

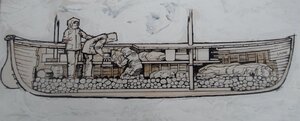
The last photo is an illustration from the book "Shackleton's Boat" (if I remember correctly) and shows the crowded conditions inside the boat with supplies, sleeping bags, etc. This is the look I was trying to achieve by putting the ballast, boxes, etc., into my model. (Note the shape of the rudder in this drawing; it is the same shape as the rudder currently on the restored James Caird in Dulwich College. I chose to go with the rudder depicted in Hurley's photograph.)

Thought I would share these with the group.

IMG_0746.JPG

IMG_3145.JPG

IMG_4022.JPG

photo apr 16, 11 54 10 am.JPG
 
Last edited:
To continue my account of the steps I have already taken in the construction of my model of the James Caird ...

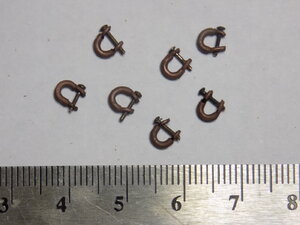
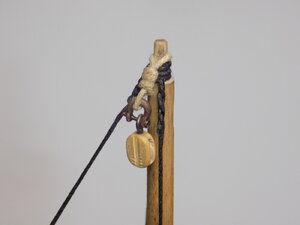
In preparation for the rigging of the model, I had to make a few parts and assemblies. I made shackles from short lengths of copper wire, hammered flat at the ends, drilled, bent into a U-shape, and blackened. The pins were literally just that - common pins that I could fit in place and then cut off as appropriate. These are shown in the first photo.

I assembled a block for the jib using one of these shackles, based on photos I took of the Caird at Dulwich College. This is shown in the second photo.

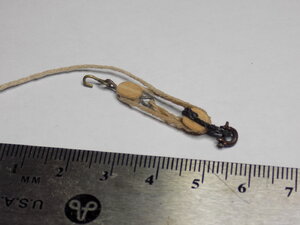
The tackle for the mizzen sail consists of a single block secured to a ringbolt on the deck with a hook, and a double block connected to a rope loop on the mizzen using a shackle and bullseye. The third photo below shows the mizzen block assembly next to a ruler with a metric scale.

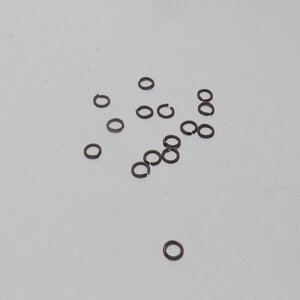
I needed rings for the jib so it could run up and down on the forestay. I wrapped thin copper wire around a 1/8" drill bit, drew a line along the coil with a black marker, cut the coil apart at the marks, flattened out the individual pieces so they formed a circle, and blackened them. The result is shown in the fourth photo.

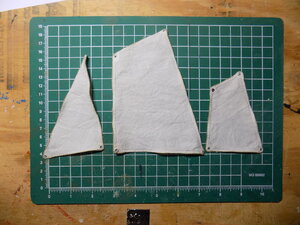
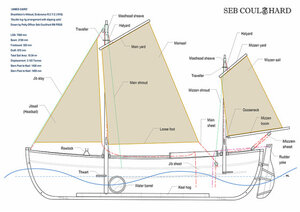
I found what appears to be the best plan for the James Caird's sails on the website of Seb Coulthard, who sailed on one of the Caird replicas (the Alexandra Shackleton) on a voyage from Elephant Island to South Georgia. (Check out the book "Chasing Shackleton" by Tim Jarvis for an account of this recreation of Shackcleton's voyage.) Seb has since built his own replica of the Caird, photos of which I have added to my collection and reference quite frequently. The sails are shown in the fifth photo below, with the folds along the edges, reinforcements and grommets at the corners, and bolt ropes sewn in place.

The sixth image shows Seb Coulthard's sketch of the James Caird and its sail plan.

These represent some of the steps I had to take before I actually started rigging. Not shown are the additions to the masts and deck of wooden cleats, as fashioned by McNeish on Elephant Island, and the addition of ringbolts at strategic places for attachment of the shrouds and for the double sheets that will control the jib.

I am almost caught up at this point to where I am currently in the building of this model, and I now can start posting in "real time", unless I find more "preliminary" info to post.

James
Maine

DSCN7439.jpeg

DSCN7441.jpeg

DSCN7445.jpeg

DSCN7461.jpeg

DSCN7467.jpeg

IMG_0739-3.JPG
 
Last edited:
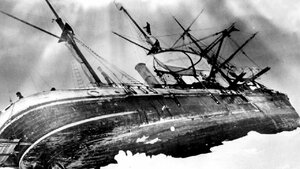
As a reminder that the James Caird was initially an unnamed lifeboat on the Endurance, below is a photo taken by Frank Hurley of the Endurance trapped in the ice and listing to port. The lifeboat hanging in the davits at the center of the picture is what would be christened the James Caird almost a year later.

IMG_6922.JPG
 
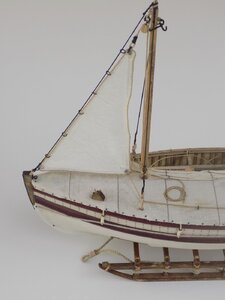
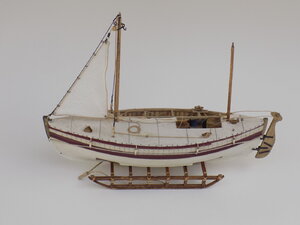
I am now in real time, but reserve the right to post earlier photos if appropriate. I did a lot of work on small things related to the sails this afternoon. I was able to put the jib in place, and have included a photo or two below to show how it looks. The jib had twin sheets, that passed through eyebolts on the deck back to cleats on either side of the stern end of the open cockpit. A crew member could therefore control the jib from the cockpit by pulling on the appropriate sheet. The halyard for the jib is secured to a ceat at the foot of the mainmast and the loose end is coiled on the deck. I have test-fitted the main and mizzen sails, but left them off when I took the pictures. One sail at a time.

DSCN7506.jpegDSCN7505.jpeg
 
Back
Top