Good evening. Freak Paul- this is so good! Said it before you have skills a plenty. Cheers GrantI'm a bit surprised to be posting again this weekend - but there was lots of modeling time that I was able to take advantage of.
Plus, the work completed was enormously gratifying! The planking is DONE!
I installed waterways to the forecastle deck and quarter deck - and then added the final planks bringing the inner bulwark to the level of the planksheer (is that the correct term?).
Quality clamping is underrated:
View attachment 481805
View attachment 481806
It was now time to refine the height of the inner and outer planking so that the cap rail will sit level (I have a problem at the waist that will require some work but otherwise this process went well):
View attachment 481807
View attachment 481808
And of course that meant I needed to add treenails. The final count is about 13,000 on this model:
View attachment 481809
View attachment 481810
View attachment 481811
And now on the painted side:
View attachment 481812
View attachment 481814
View attachment 481813
Again, seeing the ship arrive at this stage is enormously satisfying!
And I thank you for stopping by!
-

Win a Free Custom Engraved Brass Coin!!!
As a way to introduce our brass coins to the community, we will raffle off a free coin during the month of August. Follow link ABOVE for instructions for entering.
You are using an out of date browser. It may not display this or other websites correctly.
You should upgrade or use an alternative browser.
You should upgrade or use an alternative browser.
Kingfisher 1770 1:48 POF [COMPLETED BUILD]
- Thread starter dockattner
- Start date
- Watchers 146
- Joined
- Aug 8, 2019
- Messages
- 5,481
- Points
- 738

somehow I think he got a sixth sense, he sees how death wood should look like.Good evening. Freak Paul
Paul, somewhere in this epic log you must have described your treenailing techniques but I can’t find it. In a sentence, what’s your method?
Kingfisher 1770 1:48 POF [COMPLETED BUILD]
Hello Friends, With the completion of the fairing, I turned my attention to the addition of trenails at the locations of the frame chocks. For anyone interested there is a nice discussion about trenails (treenails, trunnels) on Dean's build log. That conversation runs for several pages...
shipsofscale.com
But for a great tutorial on making treenail stock check this out...
HMS Kingfisher/ King's Fisher - Tedboat [COMPLETED BUILD]
It's Sunday, the rain has stopped and the sun is breaking through. No jobs needing doing, so time for a few more photos (assuming you are all still interested!) More use of temporary splines to ensure full alignment, and a further view of the jig, which has aroused interest. Interior of...
shipsofscale.com
- Joined
- Jan 21, 2022
- Messages
- 845
- Points
- 403

I'm getting older and my sight is getting worse, but where exactly are those planks?The planking is DONE!

Just kidding, love your work Paul, hope you will build wole ship next time not only half

- Joined
- Dec 3, 2022
- Messages
- 1,547
- Points
- 488

Kingfisher 1770 1:48 POF [COMPLETED BUILD]
Hello Friends, With the completion of the fairing, I turned my attention to the addition of trenails at the locations of the frame chocks. For anyone interested there is a nice discussion about trenails (treenails, trunnels) on Dean's build log. That conversation runs for several pages...shipsofscale.com
But for a great tutorial on making treenail stock check this out...
HMS Kingfisher/ King's Fisher - Tedboat [COMPLETED BUILD]
It's Sunday, the rain has stopped and the sun is breaking through. No jobs needing doing, so time for a few more photos (assuming you are all still interested!) More use of temporary splines to ensure full alignment, and a further view of the jig, which has aroused interest. Interior of...shipsofscale.com
Thanks Paul. That's very helpful and taught me a lot that I didn't know I didn't know.
Incidentally, a hundred pages back I see that you got married - Congratulations!!
I also noticed how your woodworking has improved since then, the difference is quite striking. Please tell me I don't have to get married to improve my jointing.
Don't tell my current wife (39 years)...Incidentally, a hundred pages back I see that you got married - Congratulations!!
- Joined
- Dec 3, 2022
- Messages
- 1,547
- Points
- 488

Don't tell my current wife (39 years)...
Oops.
And yet...
My bride and I are headed to Yellowstone / Glacier National Parks for some sightseeing and hiking.
...not my fault.
Incidentally, are you aware of the traditional Royal Navy toast "Gentlemen, to our wives and sweethearts!" to which the reply is "May they never meet!"
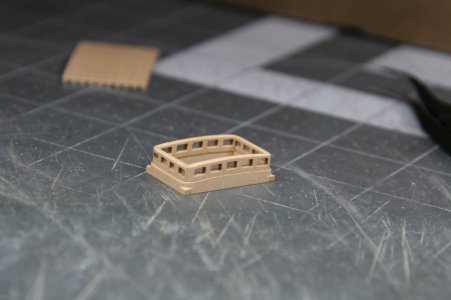
My attention now turned to outfitting the quarter deck. This first post will feature: coamings with gratings, a ladderway, and a companion with top. In a second post I will review the ship's wheel.
Of course, I have shown coamings under construction previously. But it is always good to remember that everything must be square:
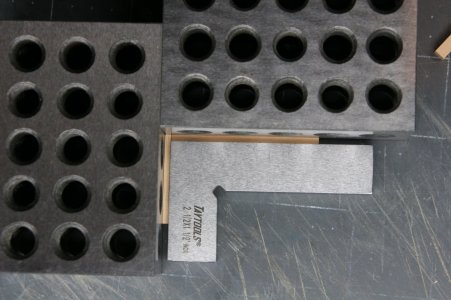
Square, that is, unless they have curved tops:
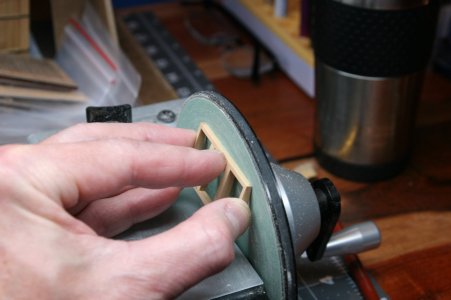
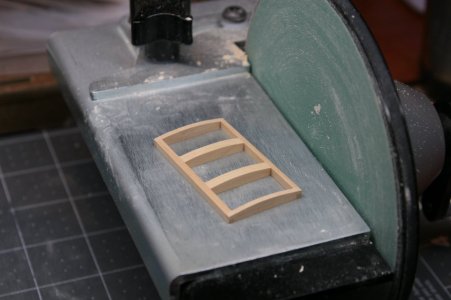
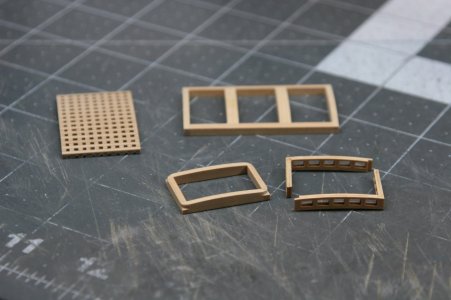
Components:
The companion has a top on it. My options were to either have a pitched roof skylight as we often see on models - or a curved top clerestory-style light. I chose the latter:
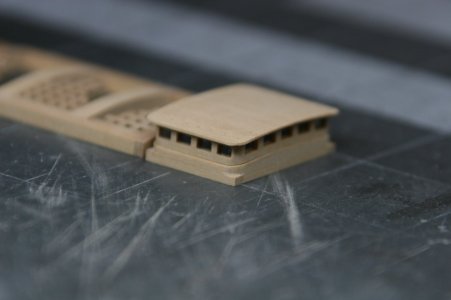
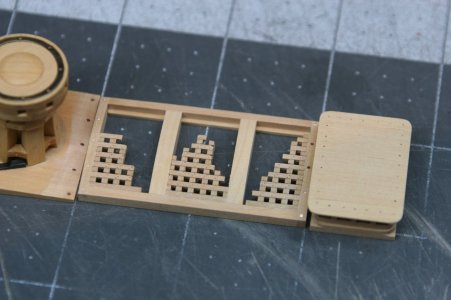
And my signature style broken gratings showed up here as well:
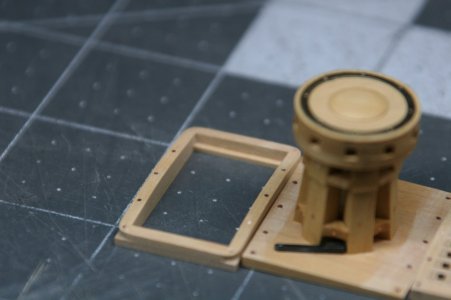
Ladderway:
And here are these components sitting loose on the quarter deck:
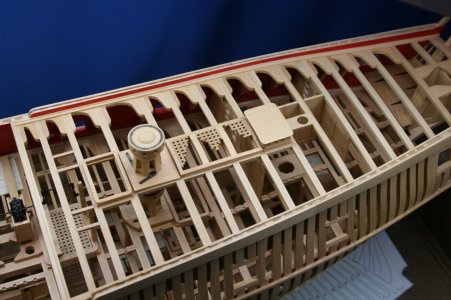
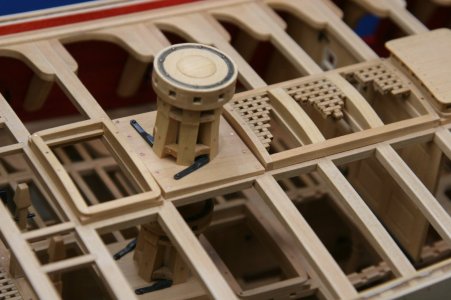
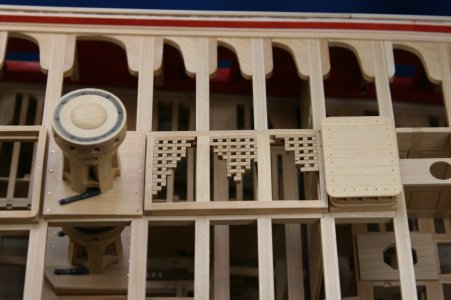
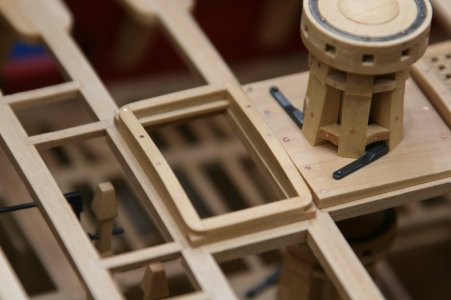
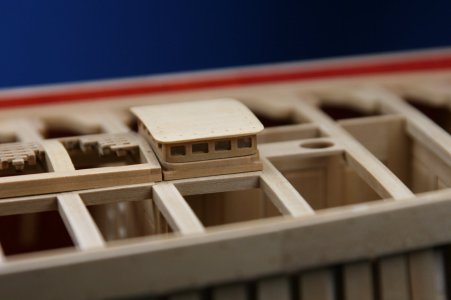
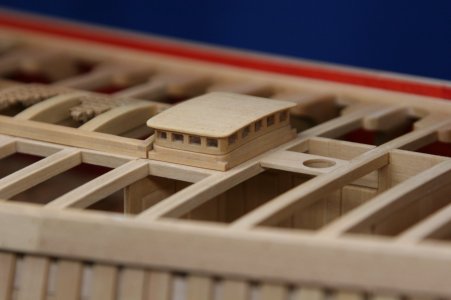
Stay tuned for a second post featuring the ship's wheel...
Of course, I have shown coamings under construction previously. But it is always good to remember that everything must be square:

Square, that is, unless they have curved tops:


Components:

The companion has a top on it. My options were to either have a pitched roof skylight as we often see on models - or a curved top clerestory-style light. I chose the latter:


And my signature style broken gratings showed up here as well:

Ladderway:

And here are these components sitting loose on the quarter deck:


Stay tuned for a second post featuring the ship's wheel...
Top class! Very precise, clear, I like to look at this!
I started with the kit provided steering wheel...and quickly discovered the central hub was not provided. Of course, it is no great difficulty to make a circle with a hole in it:

I then added the kit-provided spokes and the outer ring:
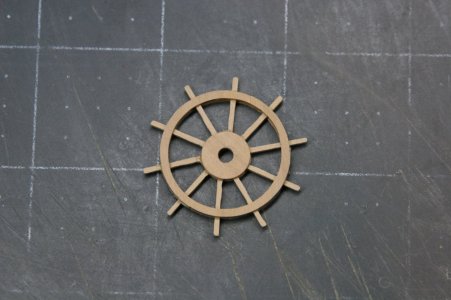
I wasn't too excited about this look, so I tried to round off the outer ring:
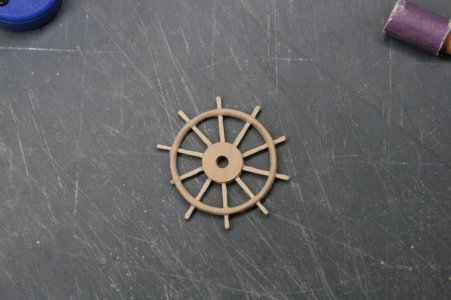
Hmm...not exactly a high-precision outcome .
.
After a bit of research and the accumulation of the requisite level of courage...I decided to give it another shot, but this time using milled parts. I created four 'worktables' that would fit into the dividing attachment of my mill. Each of these 'worktables' had a boxwood board attached to it with rubber cement (three with 1 mm box and the fourth with 2 mm box):
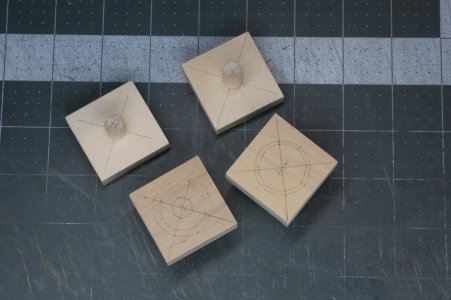
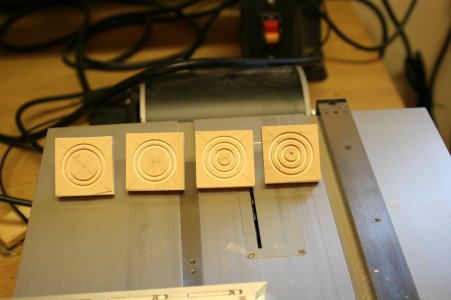
Time to make some circles:
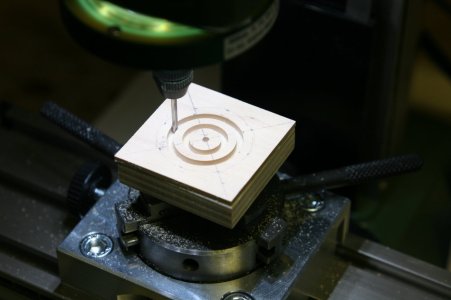
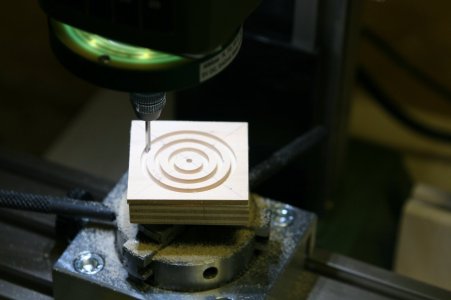
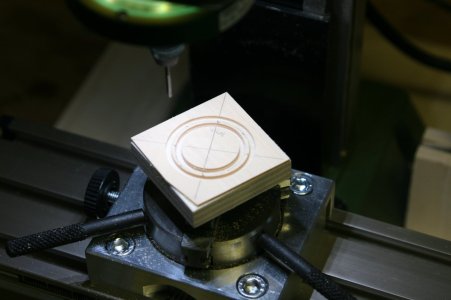
All four:
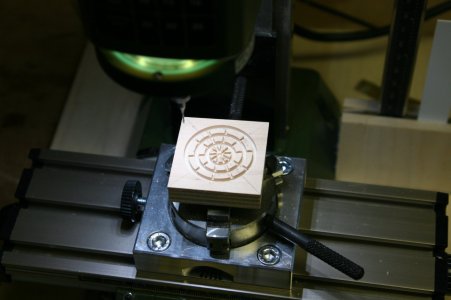
Now I needed to mill 1 mm slots in the 2 mm board to receive the spokes (every 36 degrees):
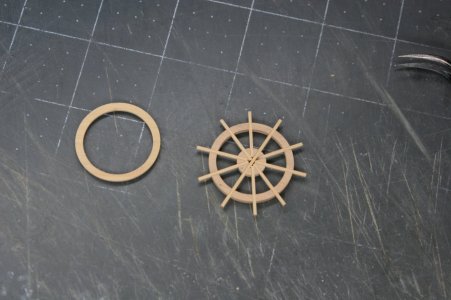
Here is the 2 mm hub and the 2 mm outer ring with loose-fit spokes - the opposing 1 mm outer ring sits to the left:
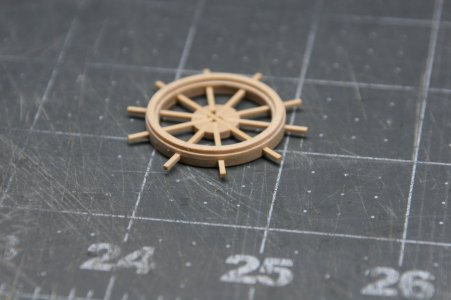
So why did I make four rings? Two of the rings were just barely dimensionally narrower than the main outer rings - I was hoping to use them decoratively. Here you can see one added to the main outer ring:
Next, I thinned down this decorative ring:
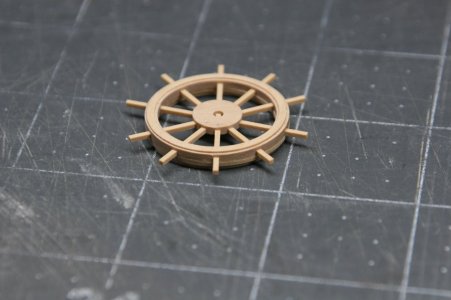
Progressing...
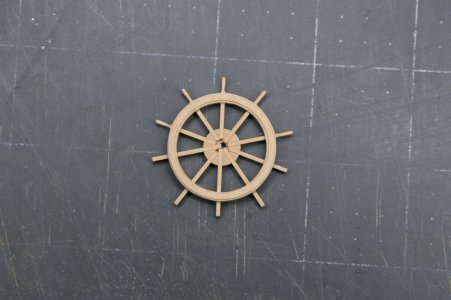
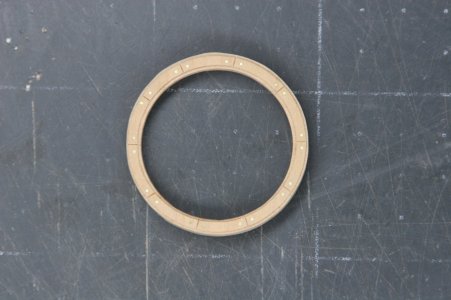
I decided to go back and add some details to the decorative ring:
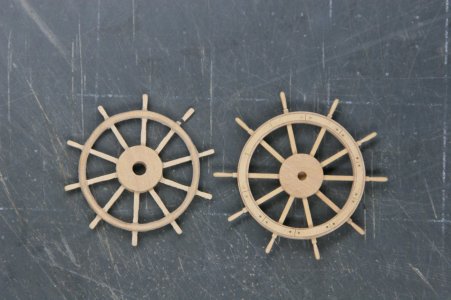
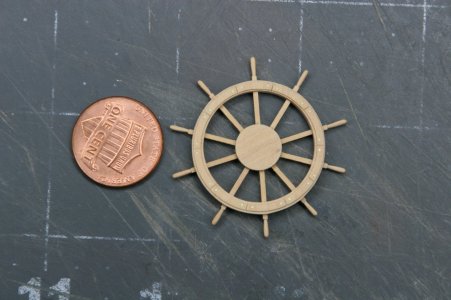
The kit-provided wheel is to the left:
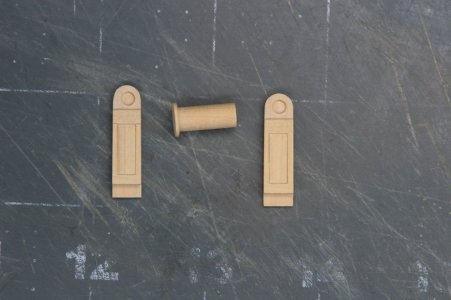
Below you can see the built-up stanchions and a central barrel where the rope will wrap (I made the barrel on the mill with the dividing accessory):
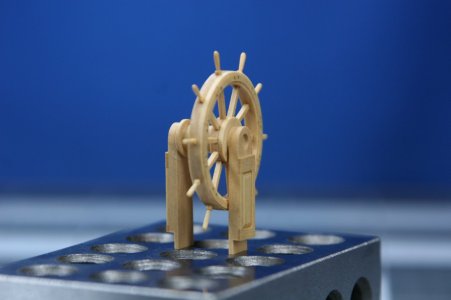
And now all the parts glued together:

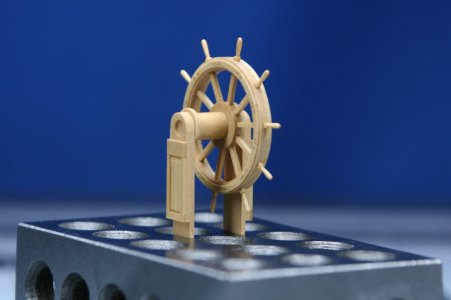
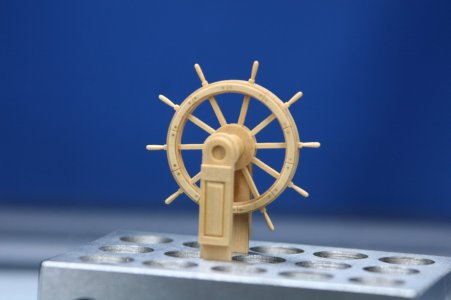
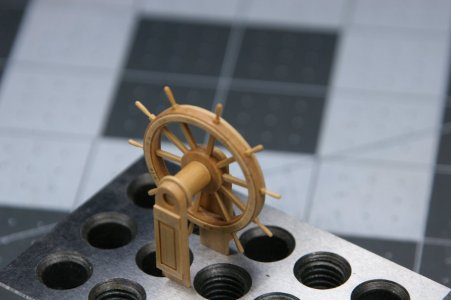
And finally, sitting loose on the ship:
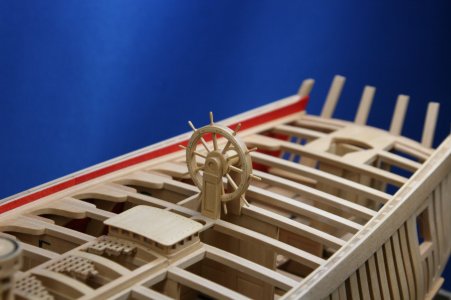
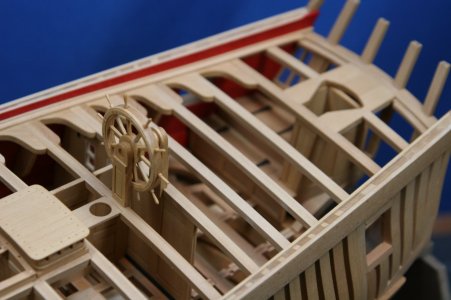
That's two full days of my life sitting there. I have now removed this breathtakingly fragile wheel and placed it into storage.
Thanks for the visit! You are a fine bunch!

I then added the kit-provided spokes and the outer ring:

I wasn't too excited about this look, so I tried to round off the outer ring:

Hmm...not exactly a high-precision outcome
After a bit of research and the accumulation of the requisite level of courage...I decided to give it another shot, but this time using milled parts. I created four 'worktables' that would fit into the dividing attachment of my mill. Each of these 'worktables' had a boxwood board attached to it with rubber cement (three with 1 mm box and the fourth with 2 mm box):

Time to make some circles:


All four:

Now I needed to mill 1 mm slots in the 2 mm board to receive the spokes (every 36 degrees):

Here is the 2 mm hub and the 2 mm outer ring with loose-fit spokes - the opposing 1 mm outer ring sits to the left:

So why did I make four rings? Two of the rings were just barely dimensionally narrower than the main outer rings - I was hoping to use them decoratively. Here you can see one added to the main outer ring:

Next, I thinned down this decorative ring:

Progressing...

I decided to go back and add some details to the decorative ring:

The kit-provided wheel is to the left:


Below you can see the built-up stanchions and a central barrel where the rope will wrap (I made the barrel on the mill with the dividing accessory):

And now all the parts glued together:


And finally, sitting loose on the ship:


That's two full days of my life sitting there. I have now removed this breathtakingly fragile wheel and placed it into storage.
Thanks for the visit! You are a fine bunch!
Last edited:
- Joined
- Dec 3, 2022
- Messages
- 1,547
- Points
- 488

signature style broken gratings
Hmm. I need a signature flourish. A fingerprint in glue perhaps?
Nice, as in ‘exact’ workings as usual Paul.

- Joined
- Dec 3, 2022
- Messages
- 1,547
- Points
- 488

Ooo!together:

- Joined
- Oct 9, 2020
- Messages
- 2,190
- Points
- 488

wow
Really great job on the wheel and some very nice millwork.
Last edited:
Now that was fun to watch!I started with the kit provided steering wheel...and quickly discovered the central hub was not provided. Of course, it is no great difficulty to make a circle with a hole in it:
View attachment 483217
I then added the kit-provided spokes and the outer ring:
View attachment 483218
I wasn't too excited about this look, so I tried to round off the outer ring:
View attachment 483219
Hmm...not exactly a high-precision outcome.
After a bit of research and the accumulation of the requisite level of courage...I decided to give it another shot, but this time using milled parts. I created four 'worktables' that would fit into the dividing attachment of my mill. Each of these 'worktables' had a boxwood board attached to it with rubber cement (three with 1 mm box and the fourth with 2 mm box):
View attachment 483220
Time to make some circles:
View attachment 483221
View attachment 483222
View attachment 483223
All four:
View attachment 483224
Now I needed to mill 1 mm slots in the 2 mm board to receive the spokes (every 36 degrees):
View attachment 483225
Here is the 2 mm hub and the 2 mm outer ring with loose-fit spokes - the opposing 1 mm outer ring sits to the left:
View attachment 483226
So why did I make four rings? Two of the rings were just barely dimensionally narrower than the main outer rings - I was hoping to use them decoratively. Here you can see one added to the main outer ring:
View attachment 483227
Next, I thinned down this decorative ring:
View attachment 483228
Progressing...
View attachment 483229
I decided to go back and add some details to the decorative ring:
View attachment 483230
The kit-provided wheel is to the left:
View attachment 483231
View attachment 483233
Below you can see the built-up stanchions and a central barrel where the rope will wrap (I made the barrel on the mill with the dividing accessory):
View attachment 483232
And now all the parts glued together:
View attachment 483234
View attachment 483235
View attachment 483236
View attachment 483237
View attachment 483238
And finally, sitting loose on the ship:
View attachment 483239
View attachment 483240
That's two full days of my life sitting there. I have now removed this breathtakingly fragile wheel and placed it into storage.
Thanks for the visit! You are a fine bunch!
The difference is obvious, the one on the left is smaller...The kit-provided wheel is to the left:
Very nice execution, mon ami, as usual...
Paul, I continue to have really irritating log-in issues with this site. If I reset my password from my phone, the site will work just fine from my phone. But, if I then use THAT SAME password to log-in to my home computer, the site won’t recognize it. I can re-set my password on the home computer - even using the same exact password, or not - but then the phone won’t recognize that password. It is seriously irritating that this site is so buggy.
Anyway, though I am not often visible, I am still following along. I love all of what is happening, here!
Anyway, though I am not often visible, I am still following along. I love all of what is happening, here!
@dockattner sorry for off top
I do really regret that you have experienced such obscured difficulties, and really would love to boil down fixing it, but it is kinda difficult to troubleshot if everyone else (I hope) doesn't have such issues.
I don't use my phone to browse SOS, but I use my PC at home, and use my laptop while on the road and never ever experience issues with login. It sounds like you may have problems with your password 'vault' ither on your phone or your laptop\pc where they both or one of them remember the password.
Sorry for the long explanation, Marc
... Before you blame the site for so many bugs, ask if anyone else has experienced such a problem. I cannot affirm nor decline that forum software doesn't have any (bugs), but, honestly..., no one else reported such an issue. I mean not another member, though.It is seriously irritating that this site is so buggy.
I do really regret that you have experienced such obscured difficulties, and really would love to boil down fixing it, but it is kinda difficult to troubleshot if everyone else (I hope) doesn't have such issues.
I don't use my phone to browse SOS, but I use my PC at home, and use my laptop while on the road and never ever experience issues with login. It sounds like you may have problems with your password 'vault' ither on your phone or your laptop\pc where they both or one of them remember the password.
Sorry for the long explanation, Marc
WOW just doesn't seem to cover it. Storage is certainly the place for such a gem until required for the finale.I started with the kit provided steering wheel...and quickly discovered the central hub was not provided. Of course, it is no great difficulty to make a circle with a hole in it:
View attachment 483217
I then added the kit-provided spokes and the outer ring:
View attachment 483218
I wasn't too excited about this look, so I tried to round off the outer ring:
View attachment 483219
Hmm...not exactly a high-precision outcome.
After a bit of research and the accumulation of the requisite level of courage...I decided to give it another shot, but this time using milled parts. I created four 'worktables' that would fit into the dividing attachment of my mill. Each of these 'worktables' had a boxwood board attached to it with rubber cement (three with 1 mm box and the fourth with 2 mm box):
View attachment 483220
Time to make some circles:
View attachment 483221
View attachment 483222
View attachment 483223
All four:
View attachment 483224
Now I needed to mill 1 mm slots in the 2 mm board to receive the spokes (every 36 degrees):
View attachment 483225
Here is the 2 mm hub and the 2 mm outer ring with loose-fit spokes - the opposing 1 mm outer ring sits to the left:
View attachment 483226
So why did I make four rings? Two of the rings were just barely dimensionally narrower than the main outer rings - I was hoping to use them decoratively. Here you can see one added to the main outer ring:
View attachment 483227
Next, I thinned down this decorative ring:
View attachment 483228
Progressing...
View attachment 483229
I decided to go back and add some details to the decorative ring:
View attachment 483230
The kit-provided wheel is to the left:
View attachment 483231
View attachment 483233
Below you can see the built-up stanchions and a central barrel where the rope will wrap (I made the barrel on the mill with the dividing accessory):
View attachment 483232
And now all the parts glued together:
View attachment 483234
View attachment 483235
View attachment 483236
View attachment 483237
View attachment 483238
And finally, sitting loose on the ship:
View attachment 483239
View attachment 483240
That's two full days of my life sitting there. I have now removed this breathtakingly fragile wheel and placed it into storage.
Thanks for the visit! You are a fine bunch!

