Kingfisher 1770 1:48 POF

Thank you, dear friends, for all the well-wishes and condolences over the passing of my father-in-law. He was a kind and generous man who I got along with wonderfully. He lived a long and full life - 84 spins around the sun. He was an avid sports fan: wrestled at Notre Dame, managed a Class A minor league team for the Red Sox, was an Olympic boxing judge, played golf in every state and in nearly 50 countries around the globe. He would travel to AZ for spring baseball, attended the Final Four many times, most every summer Olympics, the Masters Tournament, etc. Of course, because God has a sense of humor, he had four daughters none of whom was interested in sports in any way. The closest he got was his youngest daughter (my wife) who danced - which is more athletic than most sports - but not what he had in mind :rolleyes:.

His health has not been great the past several years, so he never saw my 'new' shipbuilding hobby in person, but he still asked me about it whenever we visited. I showed him several of the more impressive builds on the forum, but he always said my Vasa was the best. Sorry to all of you out there who feel like your work is the best ROTFROTFROTF... when Bill decides something there is little point in continuing the conversation.
 
Along the way I also completed the fabrication of the building jig for my Kingfisher. This was quite a project as there are nearly 100 individual pieces that all have to fit just so. The jig is made from particle board (fiberboard). Particle board is recognized for its stability over time and notwithstanding the age of this kit I found the panels to be relatively flat.
Paul, condolences to you and your family. Never a pleasant time. Nice to hear that your father-in-law made the most of his time here on earth, good for him. Cherish the memories.

As for your building jig, I think it deserves a build log of its own ;)
 
Last edited:
Thank you, dear friends, for all the well-wishes and condolences over the passing of my father-in-law. He was a kind and generous man who I got along with wonderfully. He lived a long and full life - 84 spins around the sun. He was an avid sports fan: wrestled at Notre Dame, managed a Class A minor league team for the Red Sox, was an Olympic boxing judge, played golf in every state and in nearly 50 countries around the globe. He would travel to AZ for spring baseball, attended the Final Four many times, most every summer Olympics, the Masters Tournament, etc. Of course, because God has a sense of humor, he had four daughters none of whom was interested in sports in any way. The closest he got was his youngest daughter (my wife) who danced - which is more athletic than most sports - but not what he had in mind :rolleyes:.

His health has not been great the past several years, so he never saw my 'new' shipbuilding hobby in person, but he still asked me about it whenever we visited. I showed him several of the more impressive builds on the forum, but he always said my Vasa was the best. Sorry to all of you out there who feel like your work is the best ROTFROTFROTF... when Bill decides something there is little point in continuing the conversation.
Good morning Paul. A life lived to the full for sure.
I showed him several of the more impressive builds on the forum, but he always said my Vasa was the best. Sorry to all of you out there who feel like your work is the best ROTFROTFROTF... when Bill decides something there is little point in continuing the conversation.
I think Bill got that one right…. ROTF…..family preferencE may influence….
Cheers Grant
 
Witaj
To smutne kiedy opuszczają nas najbliżsi ale takie jest życie . Wyrazy współczucia dla całej rodziny. pozdrawiam Mirek
 
As a first time POF model builder I have been devouring build logs of similar (POF) ships. And since the LSS Kingfisher is more of an assisted scratch build than some of the more recent POF kit offerings I have spent much of my time reviewing ships being built from scratch.

Confession: I was overly critical of some of your (meaning: you guys out there building from scratch) work. No longer. This is way harder than I thought it was going to be. It's one thing to build the centerline and some frames that mostly sit flat on a piece of glass - it's quite another thing to put those elements together in 3 dimensional space.

Case in point...

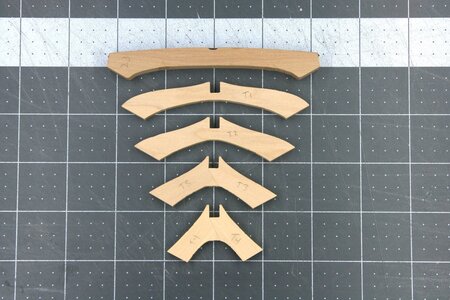
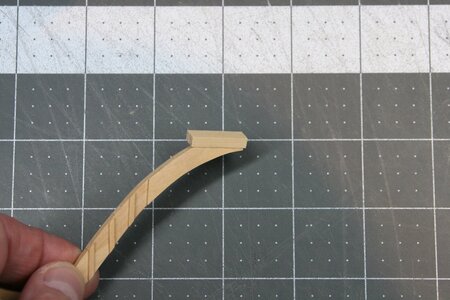
I have been working on the transom pieces. Cutting them out:

IMG_9433.JPG

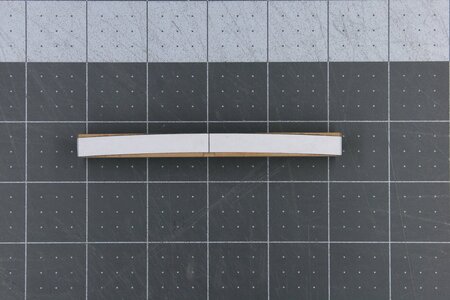
Mapping out the bevels:

IMG_9434.JPG IMG_9435.JPG

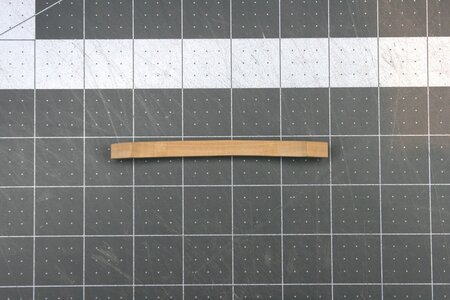
Easy so far. But then it gets more challenging:

IMG_9438.JPG

IMG_9440.JPG

Still feeling pretty good.

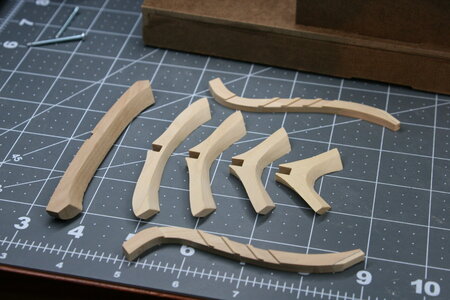
And then I started putting the pieces together. Ugh. Mistakes have been made...things don't fit...bevels are overcut...mortise pockets are in the wrong place...bearding line is 0.75 mm too high...getting three points of contact (transom pieces each have to fit the sternpost mortise and the two aft cant frame mortises) is like a game of jenga being played in zero gravity...swear jar overflows...

Aargh. Spent one day patching pieces to make repairs:

IMG_9436.JPG

Spent two days trying different methods of getting pieces to stay in place during dry-fitting...

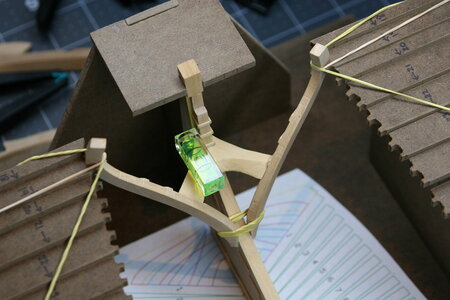
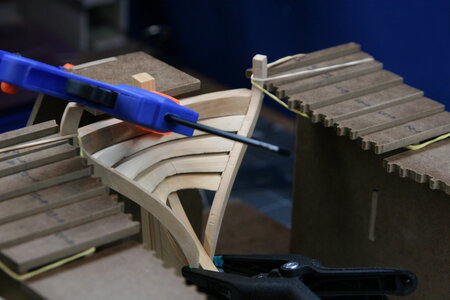
Finally! Rubber bands!

IMG_9441.JPG

Ooooh! A perfect 1 degree tip up! Then transom piece 2...

IMG_9445.JPG

Feeling sassy!

IMG_9446.JPG

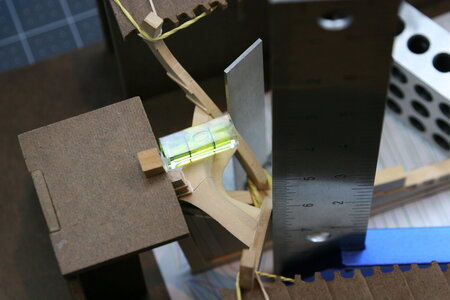
Nice straight run ready for gluing the aft cant frames in place:

IMG_9448.JPG

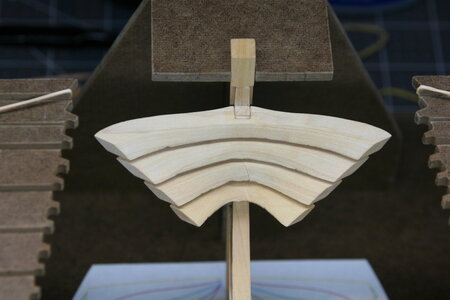
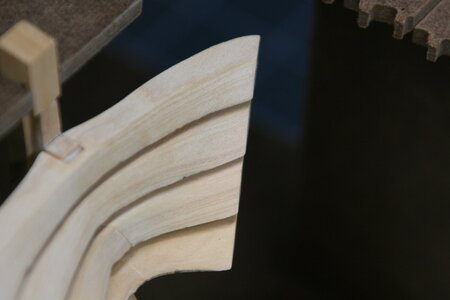
And then...wing transom fits like %$#*&%...(looks better in the photo than in real life):

IMG_9451.JPG

Put it away, before I throw it away. I'll live to fight another day. Time for a cigar...

Thanks for stopping by!
 
Paul, with the aid of the rubber bands it looks like you have solved your "method" of attack. At least that much is taken care of, (based on my extreme lack of knowledge for this kit) the dry fit gaps are surprising considering the CNC milled pieces. The only suggestion I have would be to make a small, sloped piece of wedge material at the correct angle (set it on your work) then set your bubble level on it so you can always read a 'level' bubble.
 
Paul, with the aid of the rubber bands it looks like you have solved your "method" of attack. At least that much is taken care of, (based on my extreme lack of knowledge for this kit) the dry fit gaps are surprising considering the CNC milled pieces. The only suggestion I have would be to make a small, sloped piece of wedge material at the correct angle (set it on your work) then set your bubble level on it so you can always read a 'level' bubble.
Good thoughts Daniel. This kit is CNC cut but everything is cut oversized (about half the thickness of whatever milling head was being used). Operator error (that is: dockattner error) creates the gaps.
 
I feel for you Paul.
You are working i reckon on one of the hardest parts, maybe the hardest part of the hull where all parts gather together and should be joined in holy ...$#*&%.

I don't have any experience in pof building so can not be of real help to you. My method would be to first make the parts fit together and only then bring them to the correct shape.

Enjoy the cigar and sleep on it. I am convinced you wiil work it out.

BTW On the photo it does not look too bad.
 
Some deja-vu here. Only I didn't had that mold to work in.
Advice? Yes got some for you. First get the pieces together before beveling them to much. Just enough to fit them in.
Take time, this is PoF and not PoB. Getting 2 pieces of wood together could take a day work. And most important, take a break when it doesn't work out. You did that already right.
Sometimes I look to a part half a hour before I start to work on it. Just to make sure the sanding I do is correct.
I'm sure you will manage it in the end.
 
I feel for you Paul.
You are working i reckon on one of the hardest parts, maybe the hardest part of the hull where all parts gather together and should be joined in holy ...$#*&%.

I don't have any experience in pof building so can not be of real help to you. My method would be to first make the parts fit together and only then bring them to the correct shape.

Enjoy the cigar and sleep on it. I am convinced you wiil work it out.

BTW On the photo it does not look too bad.
Some deja-vu here. Only I didn't had that mold to work in.
Advice? Yes got some for you. First get the pieces together before beveling them to much. Just enough to fit them in.
Take time, this is PoF and not PoB. Getting 2 pieces of wood together could take a day work. And most important, take a break when it doesn't work out. You did that already right.
Sometimes I look to a part half a hour before I start to work on it. Just to make sure the sanding I do is correct.
I'm sure you will manage it in the end.
Thanks for the good advice, guys! I thought I left enough wiggle room in my shaping but clearly not. Learning.
Get it to fit before final shaping - check.
 
Utterly unfamiliar with your build, but one of my grievances with the BN POF is the lack of part fixtures, locating the parts properly. I don't count part features as such. Understandably, kit manufacturers will not want adding more effort/cost into their kits than necessary, but since you're building from scratch, you should be able to add fixtures to the tool for critical features. Another option might be to create some form boards, which allow you to check various contours.
And occasionally one cannot in all conscience continu to build with what you've gotten.
 
As a first time POF model builder I have been devouring build logs of similar (POF) ships. And since the LSS Kingfisher is more of an assisted scratch build than some of the more recent POF kit offerings I have spent much of my time reviewing ships being built from scratch.

Confession: I was overly critical of some of your (meaning: you guys out there building from scratch) work. No longer. This is way harder than I thought it was going to be. It's one thing to build the centerline and some frames that mostly sit flat on a piece of glass - it's quite another thing to put those elements together in 3 dimensional space.

Case in point...

I have been working on the transom pieces. Cutting them out:

View attachment 367536

Mapping out the bevels:

View attachment 367537 View attachment 367538

Easy so far. But then it gets more challenging:

View attachment 367540

View attachment 367541

Still feeling pretty good.

And then I started putting the pieces together. Ugh. Mistakes have been made...things don't fit...bevels are overcut...mortise pockets are in the wrong place...bearding line is 0.75 mm too high...getting three points of contact (transom pieces each have to fit the sternpost mortise and the two aft cant frame mortises) is like a game of jenga being played in zero gravity...swear jar overflows...

Aargh. Spent one day patching pieces to make repairs:

View attachment 367539

Spent two days trying different methods of getting pieces to stay in place during dry-fitting...

Finally! Rubber bands!

View attachment 367542

Ooooh! A perfect 1 degree tip up! Then transom piece 2...

View attachment 367543

Feeling sassy!

View attachment 367544

Nice straight run ready for gluing the aft cant frames in place:

View attachment 367545

And then...wing transom fits like %$#*&%...(looks better in the photo than in real life):

View attachment 367546

Put it away, before I throw it away. I'll live to fight another day. Time for a cigar...

Thanks for stopping by!
Good morning Paul. Eish. A Beautifully written and presented tale of your woes…..
is like a game of jenga being played in zero gravity...swear jar overflows...
This is pure literary magicROTF. Now I know why I’m not even attempting a POF build yet. Enjoy the challenge Paul, life would be dull without them. Cheers Grant
 
Paul,
don't give up. I use since one year also an CNC. The only difference beteeen your build and my is, that I also have to think about the preparation of the parts, the jig, necessary tolerances and so on. The rest is exactly the same work as you are doing. After preparing the parts, there is no difference to a scratch build.
The stern and also the stem are the most complicated parts of the whole build.
So don‘t give up. You are doing a great job.
 
Wow Paul, speaking of another level of building and preserverance. Love the way you explain your challanges and the pictures say it al. Still you'll manage and get it done after a cigar or two that is. :p

regards,
Peter
 
Back
Top