Kingfisher 1770 1:48 POF

Hello Frank,
you can also see it with Johann, Rüdiger and me, as well as with some others. However, all images are protected by copyright, whether with or without the copyright sign. The well-known © copyright sign does not exist in German copyright either, it comes from Anglo-American copyright. A copyright sign can at most serve to facilitate evidence when a lawsuit is about the question of whether the picture was actually taken by the photographer. If you create images and want to prevent them from being spread wildly on the Internet, you should watermark them. However, this is only for provability. Copyright protection arises with the creation of the photo.
 
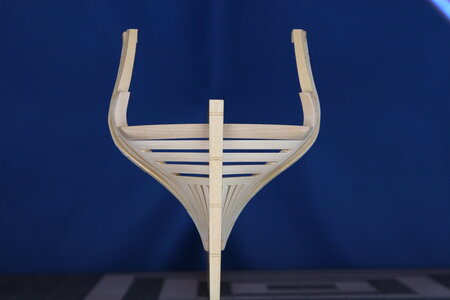
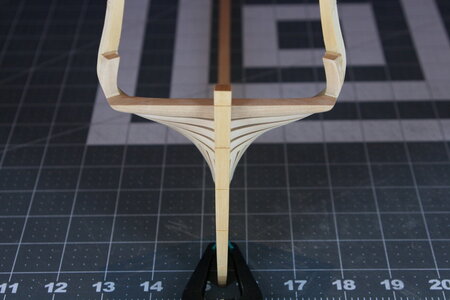
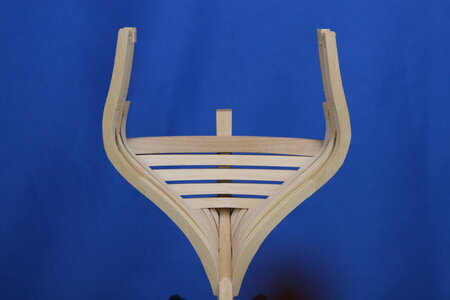
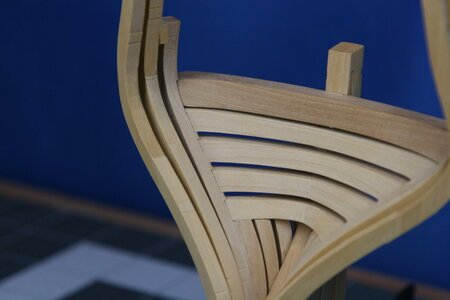
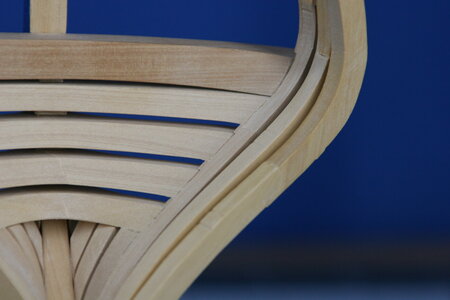
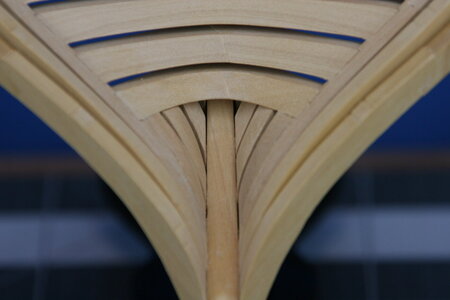
Work continues on the stern...

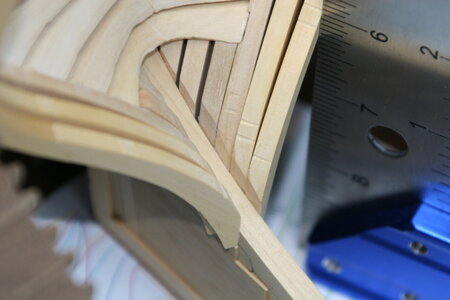
The instructions call for a preliminary fairing of the transom pieces (and their junction with the aft cant frame), but I'm not convinced I have everything in the right position so I elected to add a few more of the cant frames so I would be able to better visualize this part of the ship.

Here you can see that I am being careful to get these frames nicely vertical (there's enough wiggle room in the notches of the building jig that it's necessary to check for accuracy):

IMG_9453.JPG

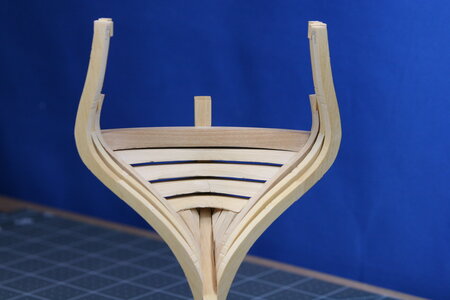
Careful work on the disc sander (my most valued purchase to date) has kept the joinery gaps to a minimum:

IMG_9456.JPG

IMG_9459.JPG

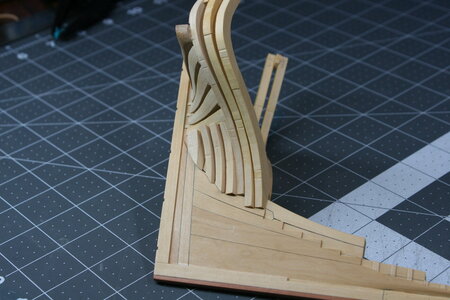
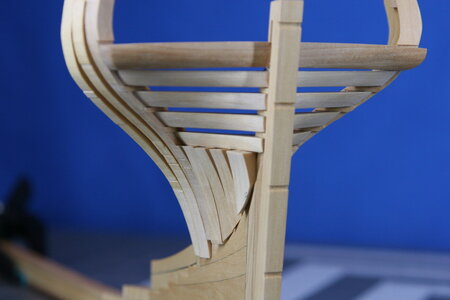
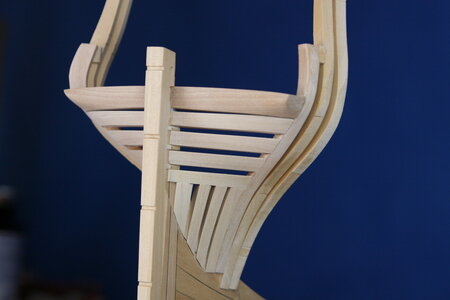
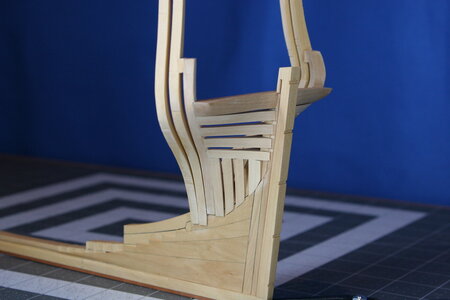
Below the lowest transom piece there is a fashion piece (against the full size frame) and some filler pieces. These elements were not provided in the kit so they were made up from unused portions of the billets.

IMG_9458.JPG

IMG_9462.JPG

IMG_9460.JPG

People familiar with this area of swan class ships might object that I don't have all the filler pieces in the correct position - but I have seen some variability on other builds so I just went with something I thought would look good.

Once I have allowed the glue to set up fully I'll do some preliminary fairing of the interior surface of the transom. Access will be better now than later. I'll also do some very rough fairing of the aft profile of the filler pieces, but I'll try to resist the urge to do much to the aft surface of the transom pieces - the flow into the hull is still not clear to me.

Happy Easter (if that's the side of the plate you swing from)!
 
I like the way you show the precision with which you work. Just curious Paul, are those horizontal marks or half circle looking lines on the exterior face of the frames the tattletale marks you end up sanding down till they disappear?
 
I like the way you show the precision with which you work. Just curious Paul, are those horizontal marks or half circle looking lines on the exterior face of the frames the tattletale marks you end up sanding down till they disappear?
Yup. I have not sanded the inboard or outboard surfaces of the frames at all. I figured the cleanup could happen during fairing.
 
Question, is it normal that the transom is in the inside even with the bilge and on the outside it isn't?
View attachment 367990
I have observed this same pattern on a few other builds, so I hope so! BUT, my transom pieces don't sit as deeply into the sternpost as on other builds so I might have a problem.
I know the most aft cant frame is perfectly positioned relative to the plans. The frame is very oversized, so I was hoping it was going to be resolved in the fairing.
On the inside the transoms are not as flush as the pictures make them appear (but not as far off as the outside).
Thank you for asking! We'll find out together!

Giampy:

040-jpg.236098
 
I see now how the construction is made.
You need to sand a lot to get it smooth. There must be of course room for the planking on the stern beam and those transom beams. You will get this right, I seen what you did to the Wasa. So I'm sure this will no problem for you.
Just watch out with those big elektric tools to sand. Sometimes sanding by hand, how much time it takes, is safer.
 
Work continues on the stern...

The instructions call for a preliminary fairing of the transom pieces (and their junction with the aft cant frame), but I'm not convinced I have everything in the right position so I elected to add a few more of the cant frames so I would be able to better visualize this part of the ship.

Here you can see that I am being careful to get these frames nicely vertical (there's enough wiggle room in the notches of the building jig that it's necessary to check for accuracy):

View attachment 367951

Careful work on the disc sander (my most valued purchase to date) has kept the joinery gaps to a minimum:

View attachment 367952

View attachment 367954

Below the lowest transom piece there is a fashion piece (against the full size frame) and some filler pieces. These elements were not provided in the kit so they were made up from unused portions of the billets.

View attachment 367953

View attachment 367956

View attachment 367955

People familiar with this area of swan class ships might object that I don't have all the filler pieces in the correct position - but I have seen some variability on other builds so I just went with something I thought would look good.

Once I have allowed the glue to set up fully I'll do some preliminary fairing of the interior surface of the transom. Access will be better now than later. I'll also do some very rough fairing of the aft profile of the filler pieces, but I'll try to resist the urge to do much to the aft surface of the transom pieces - the flow into the hull is still not clear to me.

Happy Easter (if that's the side of the plate you swing from)!
Good morning Paul. Happy Easter. Being a layman here your filler prices look good. Perhaps the guys in the know will advise otherwise tho. Sometimes when it just not working for us we make a plan B,C …etc. I think you pulled it off. I have to get a proper disc sander. I have noticed those who have one get so many parts, joins, scratch parts so much cleaner and accurate. Cheers Grant
 
Paul,
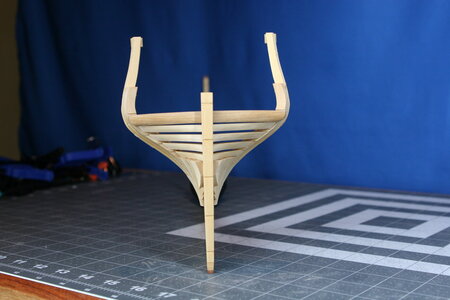
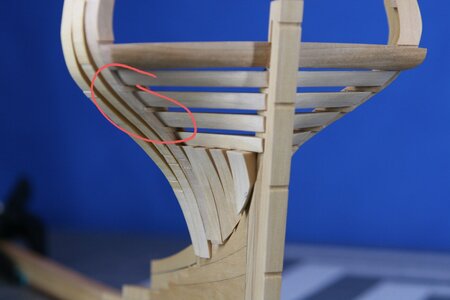
have you ckeced the height of the wing transom? It looks for me that it is a little bit deep. But it is also possible that the notches in the after cants ar to big.
The rest of the ensamble is looking perfect.
 
Paul,
have you ckeced the height of the wing transom? It looks for me that it is a little bit deep. But it is also possible that the notches in the after cants ar to big.
The rest of the ensamble is looking perfect.
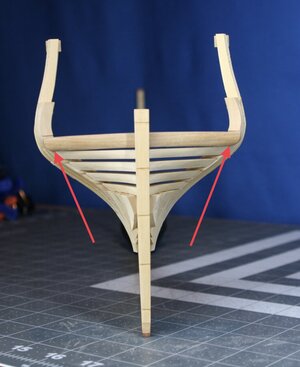
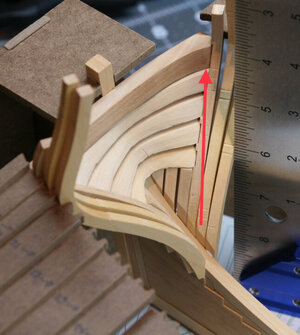
Hello Paul, what I see looks very good. I would like to agree with Christian's thoughts. It is often difficult to see in pictures and it seems that the top bar almost rests on the 2nd. Red Arrows

View attachment 368081

View attachment 368082
Very good observation gentlemen. Hmm. The wing transom is sitting properly on the top of the inner sternpost so that must mean it is improperly shaped (too curved). Could be a difficult fix at this point as that part doesn't simply drop in from the top - it has to be placed at the time of the aft cant frame and it is now locked in place. I'll do some measuring and see if I can come up with a diagnosis.
 
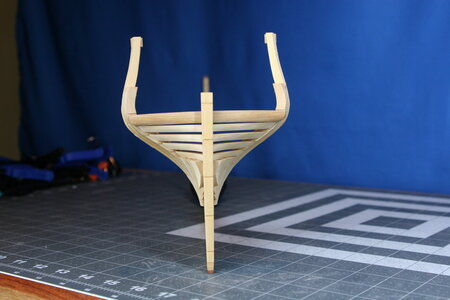
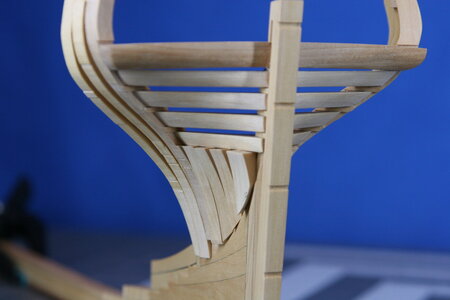
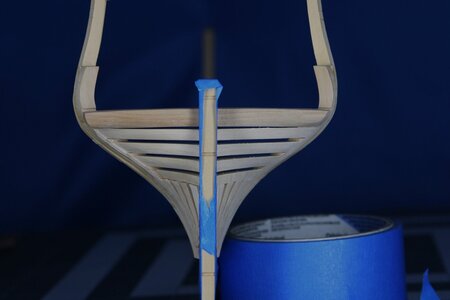
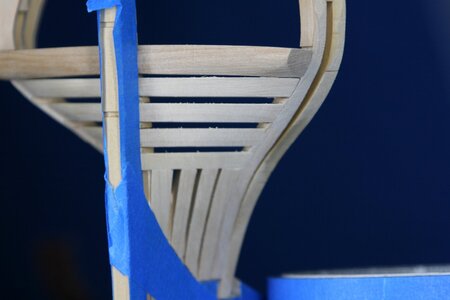
Since my last posting several modelers (Stephan, Tobias, Christian, Frank - all modelers I deeply respect for their knowledge and skill) shared concerns about the fit of the transom pieces, especially relative to the most aft cant frame. The more I thought about it the more concerned I became. While I took some level of comfort from having studied other build logs (as well as TFFM - Antscherl) I decided it would be best to not only fair the inside of the transom at this time but the outside as well. If there was a redo necessary, it would be better to do that now rather than later.

First, a review. Here is where I was last week:

IMG_9460.JPG

IMG_9462.JPG

I taped off the sternpost and aft deadwood and went to work. As suggested by Stephan I mostly sanded by hand (some gross removal was carefully completed using a rotary tool and sanding wheel).

Hand sanding boxwood is no joke.

Here you can see the result of bulk removal with a rotary tool on the left side - and then the right side was also sanded to shape with 80 grit sandpaper:

IMG_9463.JPG

IMG_9464.JPG

Encouraged, I spent the next several days sanding and contouring, sanding and contouring, sanding and contouring (oh, and breaking off cant frames).

Here is the result of hours and hours of work (the second and third cant frames have not been faired - and the first cant frame only partially faired):

IMG_9469.JPG

IMG_9472.JPG

IMG_9470.JPG

IMG_9477.JPG

IMG_9478.JPG

And now the inside:

IMG_9473.JPG

IMG_9476.JPG

IMG_9468.JPG

IMG_9474.JPG

I just measured the most aft cant frame and I still have 11.5 inches (corrected for scale) of frame depth that will be available for additional fairing as needed (goal will be 9-10 inches depending on location).

Several concerns remain. I believe the wing transom (the top transom piece) may not have retained the proper shape/dimension. I don't know how big of a problem this will be (or, frankly, how much it is off). I am also concerned that the transom pieces do not sit as deeply on the inner sternpost as they should - especially relative to the rabbet. I left some wiggle room in the rabbet (it's undersized) but I don't think it will come out quite right.

Alas...a rich learning experience.

Did I mention that hand sanding boxwood is NO JOKE?!?
 
Hi Paul

That looks good. I have kept quiet as I looked at the pics of your concerns and did think it would be OK but wasn't confident without seeing the assembly in person. Looking at your pics which is not the same as giving it a proper "eyeball" from every angle plus not knowing exactly how much green you have to work with is not definitive.This is the reason I refrain from giving advice on these things.

I remember once trying to give advice on fairing and shiming bulkheads on a large ship of the line because the factory kit profiles looked like the North Sea.Video calls and several days to and fro and the builder couldn't grasp the concept.If I was actually there, I could have fixed it myself in a couple of hours and shown him the process.The net has it's limits, advice via pictures from the other side of the world on the flow of hull profiles is touch and go.

Congrats on completing the second worst section of rough sanding on this model, the bow is till to come:rolleyes:ROTF

Kind Regards

Nigel
 
Since my last posting several modelers (Stephan, Tobias, Christian, Frank - all modelers I deeply respect for their knowledge and skill) shared concerns about the fit of the transom pieces, especially relative to the most aft cant frame. The more I thought about it the more concerned I became. While I took some level of comfort from having studied other build logs (as well as TFFM - Antscherl) I decided it would be best to not only fair the inside of the transom at this time but the outside as well. If there was a redo necessary, it would be better to do that now rather than later.

First, a review. Here is where I was last week:

View attachment 368806

View attachment 368807

I taped off the sternpost and aft deadwood and went to work. As suggested by Stephan I mostly sanded by hand (some gross removal was carefully completed using a rotary tool and sanding wheel).

Hand sanding boxwood is no joke.

Here you can see the result of bulk removal with a rotary tool on the left side - and then the right side was also sanded to shape with 80 grit sandpaper:

View attachment 368808

View attachment 368809

Encouraged, I spent the next several days sanding and contouring, sanding and contouring, sanding and contouring (oh, and breaking off cant frames).

Here is the result of hours and hours of work (the second and third cant frames have not been faired - and the first cant frame only partially faired):

View attachment 368811

View attachment 368813

View attachment 368812

View attachment 368817

View attachment 368818

And now the inside:

View attachment 368814

View attachment 368816

View attachment 368810

View attachment 368815

I just measured the most aft cant frame and I still have 11.5 inches (corrected for scale) of frame depth that will be available for additional fairing as needed (goal will be 9-10 inches depending on location).

Several concerns remain. I believe the wing transom (the top transom piece) may not have retained the proper shape/dimension. I don't know how big of a problem this will be (or, frankly, how much it is off). I am also concerned that the transom pieces do not sit as deeply on the inner sternpost as they should - especially relative to the rabbet. I left some wiggle room in the rabbet (it's undersized) but I don't think it will come out quite right.

Alas...a rich learning experience.

Did I mention that hand sanding boxwood is NO JOKE?!?
Good morning Paul. Similarly to Nigel I don’t give advice on POF builds fairing and structure, for a different reason however - I have no idea what is correct or not ;). To my layman eye it all looks wonderful.
OH I heard sanding boxwood is no joke….ROTF
Cheers Grant
 
Back
Top