Thank you, everyone, for your kind words and all the likes.
You are using an out of date browser. It may not display this or other websites correctly.
You should upgrade or use an alternative browser.
You should upgrade or use an alternative browser.
Kingfisher 1770 1:48 POF [COMPLETED BUILD]
- Thread starter dockattner
- Start date
- Watchers 147
True storyHat's off to your wife. It must be hard living with a perfectionist

Work of art Paul 
And then we have to take into consideration this to be the DRV (Dockattner Rough Version) needing further refinement .
.

And then we have to take into consideration this to be the DRV (Dockattner Rough Version) needing further refinement
- Joined
- Jan 9, 2020
- Messages
- 10,522
- Points
- 938

This is beautiful work, Paul! For me who has been away at times your last picture posts were a true revelation of just how far you have come in this build - and I am not only talking about your actual building. This is simply stunning work - every penny's worth of a true perfectionist at work!
Thank you for your kind words Heinrich.
Paul,
You're way on your voyage reaching the next level in this hobby
You're way on your voyage reaching the next level in this hobby

What nice and patient work.When we last spoke, I was frozen by my own inexperience (incompetence? ignorance?). How to get the bollard and hawse timbers in the right place?
Nigel and Maarten (and others) to the rescue! I basically did exactly what they suggested (not building OFF the ship - but creating templates taken from the plans I purchased from SeaWatch). I won't say it all came together easily (indeed, I needed to remake hawse timber #3) but I ended up with something that looks like the bow of a swan class ship.
With the forward cant frame in place, I fit the bollard timber to the bearding line - and then using these fixed reference points set my templates. Here you can see the bollard timbers and the first of the hawse timbers in place (templates were removed for the photo):
View attachment 373785
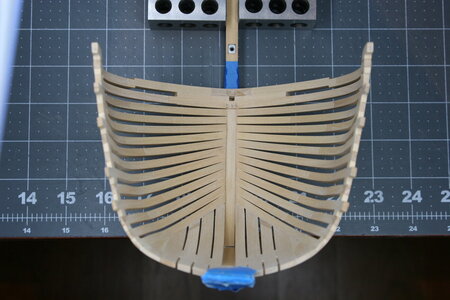
Next, I added the remaining hawse timbers and some filler pieces. Here is where I was this morning after using a rotary tool to roughly fair the inside of the bow:
View attachment 373788
View attachment 373789
And about four hours later I have roughly shaped and roughly sanded (120 grit) the inside of the bow:
View attachment 373790
View attachment 373791
View attachment 373792
There is still a lot to do here (refine airspaces, refine joinery, more shaping and sanding) but I'm in the right neighborhood. Nothing was faired on the outside (there is no issue with access there and I want to wait until the rest of the forward cant frames are installed before tackling that).
As you might have noticed I also roughed in the chock for the bowsprit:
View attachment 373786
View attachment 373787
I'll finish shaping the chock - and then start adding the forward cant frames.
What a blessing it is to share this journey with all of you friends on our forum. This is the second time I was completely befuddled on a build and was saved by members of the community. My humble thanks!
Finally had an opportunity to catch up with your log. Fascinating to see what you have accomplished. I admire your patience.
What a beautiful piece of work Paul, your bow section looks fabulous, i 'l make a deep bow for you, and your persistance.
Thank you again, friends, for your kind and encouraging posts and all the likes.
On his brilliant Bluenose build report, Daniel mentioned "your next post" in response to a comment I had made. And when I read that I realized it's been a while since I've reported any progress.
Well, that's because I have abandoned normal life and entered: the sanding zone. I have not left my workshop in three weeks, have not eaten in three days, my children tell me that my wife has left me in favor of a man who does not become consumed by his hobbies, and my office manager assures me that the new orthodontist is skilled and kind to the staff...
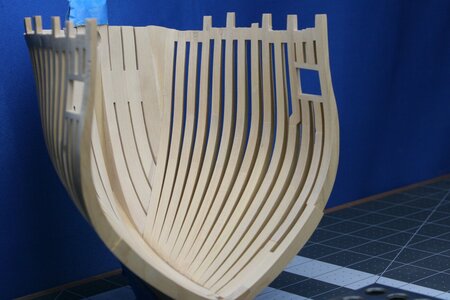
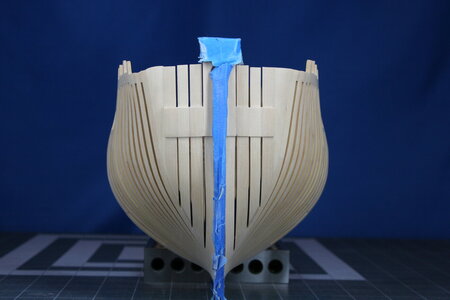
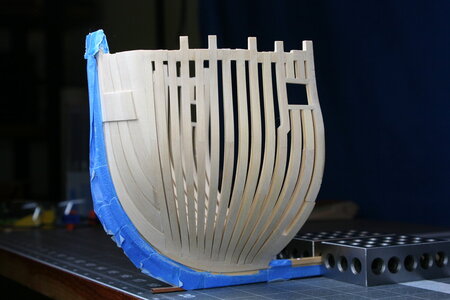
Here are the forward cant frames in place:
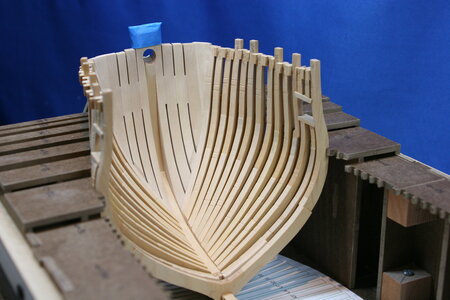
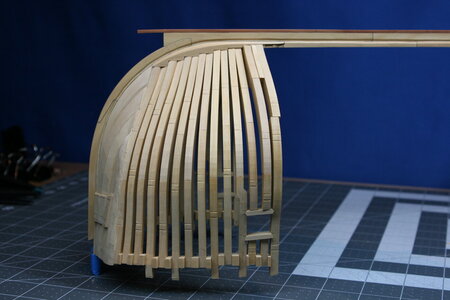
And now after preliminary shaping with a sanding wheel in a rotary tool:

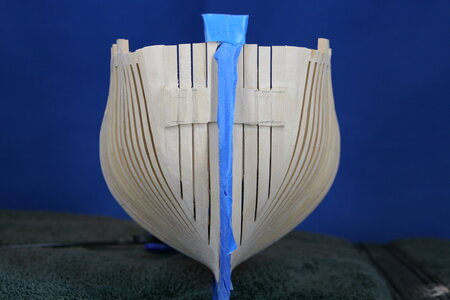
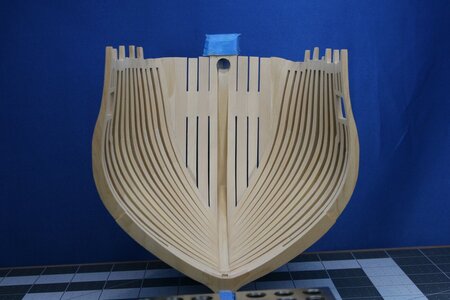
And now partially sanded:
Here is my new avatar photo:

Sanding boxwood is like sanding slate. The sandpaper slides over the top of it with a rattling sound without digging in. And every time I think I might have accomplished something I put it down only to pick it up the next day and discover there is still more work to do.
One more overall shot:
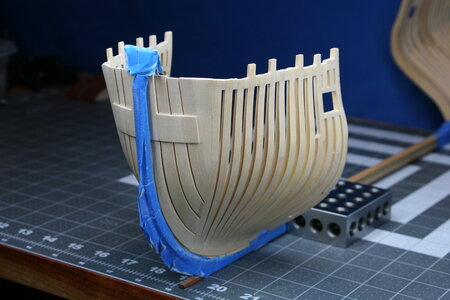
And a closer look at the boxing (pending hawse holes):
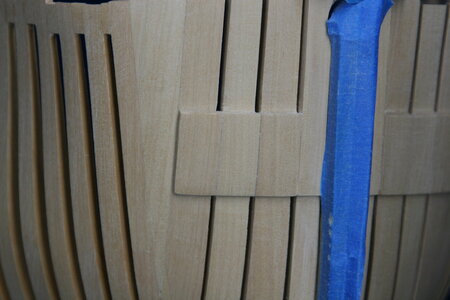
Thanks for the visit!
Well, that's because I have abandoned normal life and entered: the sanding zone. I have not left my workshop in three weeks, have not eaten in three days, my children tell me that my wife has left me in favor of a man who does not become consumed by his hobbies, and my office manager assures me that the new orthodontist is skilled and kind to the staff...
Here are the forward cant frames in place:


And now after preliminary shaping with a sanding wheel in a rotary tool:


And now partially sanded:


Here is my new avatar photo:

Sanding boxwood is like sanding slate. The sandpaper slides over the top of it with a rattling sound without digging in. And every time I think I might have accomplished something I put it down only to pick it up the next day and discover there is still more work to do.
One more overall shot:

And a closer look at the boxing (pending hawse holes):

Thanks for the visit!
Your model probably has a significantly nicer finish than the original even taking into account the scale!
Last edited:
Kurt Konrath
Kurt Konrath
The hobby in general and the task at hand can overtake you make you oblivious to time spent.On his brilliant Bluenose build report, Daniel mentioned "your next post" in response to a comment I had made. And when I read that I realized it's been a while since I've reported any progress.
Well, that's because I have abandoned normal life and entered: the sanding zone. I have not left my workshop in three weeks, have not eaten in three days, my children tell me that my wife has left me in favor of a man who does not become consumed by his hobbies, and my office manager assures me that the new orthodontist is skilled and kind to the staff...
Here are the forward cant frames in place:
View attachment 376119
View attachment 376120
And now after preliminary shaping with a sanding wheel in a rotary tool:
View attachment 376121
View attachment 376122
And now partially sanded:
View attachment 376123
View attachment 376124
View attachment 376125
View attachment 376126
View attachment 376129
Here is my new avatar photo:
View attachment 376130
Sanding boxwood is like sanding slate. The sandpaper slides over the top of it with a rattling sound without digging in. And every time I think I might have accomplished something I put it down only to pick it up the next day and discover there is still more work to do.
One more overall shot:
View attachment 376128
And a closer look at the boxing (pending hawse holes):
View attachment 376127
Thanks for the visit!
The bow section alone would make a great sectional model by itself, with full interior you could spend another year without any time on the other parts of the ship.
- Joined
- Aug 8, 2019
- Messages
- 5,075
- Points
- 738

Always nice to see an update of you. Great looks.
About your avatar photo I can tell a story.
A time ago I got a business, a fastfood restaurant. We sell French fries, homemade. And I got an employee in service who started very young in my business, cutting these fries on a cutter mouth to the wall. Put the potato in and turn the handle down. After 3 years working in my shop he looks like your avatar. he got a lot of comments at school about it. His brother followed him up and was a little smarter. One bucket with the left and one withe right arm.
About your avatar photo I can tell a story.
A time ago I got a business, a fastfood restaurant. We sell French fries, homemade. And I got an employee in service who started very young in my business, cutting these fries on a cutter mouth to the wall. Put the potato in and turn the handle down. After 3 years working in my shop he looks like your avatar.
 he got a lot of comments at school about it. His brother followed him up and was a little smarter. One bucket with the left and one withe right arm.
- Joined
- Oct 23, 2018
- Messages
- 749
- Points
- 353

Paul,
do you have a picture from the finished starbord side? I like to compare the final result with your second and third picture. The difference between the first three picture and the last three is enorm. Very well done!
do you have a picture from the finished starbord side? I like to compare the final result with your second and third picture. The difference between the first three picture and the last three is enorm. Very well done!
Now this is a good update showing great progress Paul. The boxwood sands out so very nice and what really impresses me is the symmetry you are maintaining between the left and right members. That cannot be easy. Hey BTW I understand the potential new avatarOn his brilliant Bluenose build report, Daniel mentioned "your next post" in response to a comment I had made. And when I read that I realized it's been a while since I've reported any progress.
Well, that's because I have abandoned normal life and entered: the sanding zone. I have not left my workshop in three weeks, have not eaten in three days, my children tell me that my wife has left me in favor of a man who does not become consumed by his hobbies, and my office manager assures me that the new orthodontist is skilled and kind to the staff...
Here are the forward cant frames in place:
View attachment 376119
View attachment 376120
And now after preliminary shaping with a sanding wheel in a rotary tool:
View attachment 376121
View attachment 376122
And now partially sanded:
View attachment 376123
View attachment 376124
View attachment 376125
View attachment 376126
View attachment 376129
Here is my new avatar photo:
View attachment 376130
Sanding boxwood is like sanding slate. The sandpaper slides over the top of it with a rattling sound without digging in. And every time I think I might have accomplished something I put it down only to pick it up the next day and discover there is still more work to do.
One more overall shot:
View attachment 376128
And a closer look at the boxing (pending hawse holes):
View attachment 376127
Thanks for the visit!
 , sanding with my left hand in control has about the same outcome as trying to throw a ball left-handed, really ugly and funny looking to boot. Thanks for the update, Paul.
Here you go @AnobiumPunctatum (Christian). I'm sure you've noticed I still need to add the bridle ports...
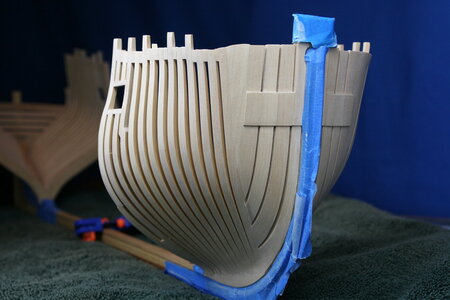
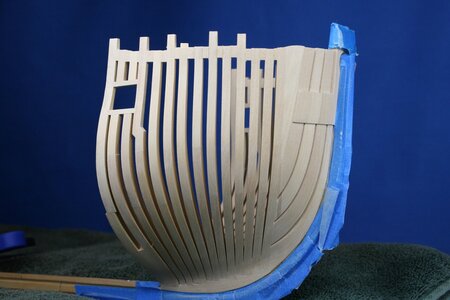
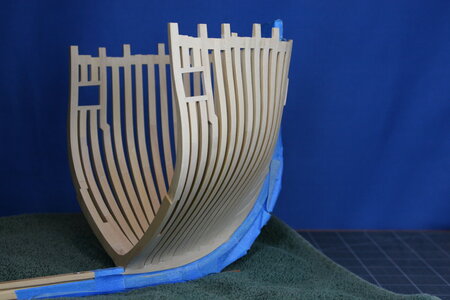


Beautiful work Paul! Hardwood can kill blades and sandpaper with a single swipe! 
I am sure your perseverance will prevail. We know you by now!
Ps - Daniel is correct, it will sand and cut very sharp and clean. You probably know this already, but that is why it is preferred for carving and turning.

I am sure your perseverance will prevail. We know you by now!
Ps - Daniel is correct, it will sand and cut very sharp and clean. You probably know this already, but that is why it is preferred for carving and turning.
Last edited:


