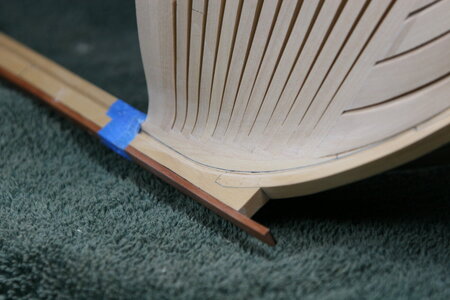
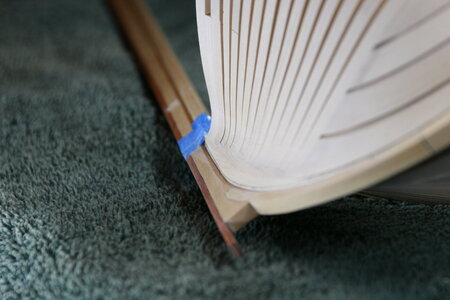
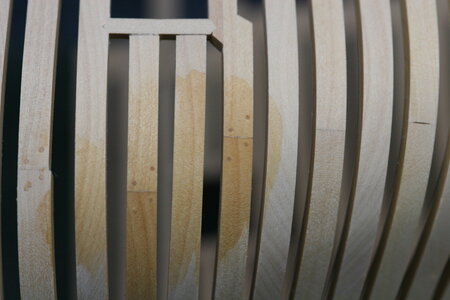
Good morning Paul. No more compliments for you , you get enough…I know none of you have slept well in anticipation of the preliminary sanding of the aft cant frames... So here is a photo tour:
View attachment 376701
View attachment 376702
View attachment 376703
View attachment 376704
View attachment 376705
View attachment 376706
There is still more to do but I need to take a break. In particular I need to further refine where the frames merge with the deadwood (and this is true at the front of the ship as well) but sanding has lost its charm (if it ever had rare and desirable quality).
The overall appearance:
View attachment 376707
View attachment 376708
Onward!
-

Win a Free Custom Engraved Brass Coin!!!
As a way to introduce our brass coins to the community, we will raffle off a free coin during the month of August. Follow link ABOVE for instructions for entering.
You are using an out of date browser. It may not display this or other websites correctly.
You should upgrade or use an alternative browser.
You should upgrade or use an alternative browser.
Kingfisher 1770 1:48 POF [COMPLETED BUILD]
- Thread starter dockattner
- Start date
- Watchers 146
Most probably these are the frames left that are not broken.You mean you’ve been sanding so much the midships section is no longer there and has turned to saw dust?
Stunning work Paul, truly impressive.
No kidding Paul, You're pictures are an advertisement for this kit. Looks brilliant.
I love watching your work, Paul.
This is a valid observation Grant. I'll think on that a bit. My thanks!Good morning Paul. No more compliments for you , you get enough…. Just a question…is there a reason why you are doing each gun port as you work on the individual frames? Does this not increase the risk of misalignment rather than positioning them after all the frames are completed? Your measurements have to 100%. Cheers Grant
Thanks for the likes - it is very much appreciated.
I wrapped up the holiday weekend running some 'trials' and tuning up a few bits. First, it was necessary to improve the run of the (pending) planks into the rabbet at the curve near the bow - basically I extended the fairing of the frames into the deadwood and into the rabbet. @Frank48 this was an area you had expressed some concerns about - I hope I have this right!


I also spent some time looking at other builds of swan class ships and made the tentative decision to fully plank the starboard side of the ship and leave the port side largely exposed. This means I only need to add trenails to the frames on the port side. Here are some trials on the outside of the ship:

And now on the inside of the ship showing my solution to create a faux chock in place of the kit's scarph joint...

The trenails are boxwood drawn down to roughly 0.54 - 0.56 mm. I'll be installing these on the frames and also the planking / decking...
I am beginning to realize how much work is involved in building a POF ship that hopes to show the details of the construction. I am enjoying working with wood - on my previous build there was a lot of decorative work and painting of metal bits. It's good for me to stretch myself into something different. Thanks for the visit and for inspiring me with your work! What a great hobby!
I wrapped up the holiday weekend running some 'trials' and tuning up a few bits. First, it was necessary to improve the run of the (pending) planks into the rabbet at the curve near the bow - basically I extended the fairing of the frames into the deadwood and into the rabbet. @Frank48 this was an area you had expressed some concerns about - I hope I have this right!


I also spent some time looking at other builds of swan class ships and made the tentative decision to fully plank the starboard side of the ship and leave the port side largely exposed. This means I only need to add trenails to the frames on the port side. Here are some trials on the outside of the ship:

And now on the inside of the ship showing my solution to create a faux chock in place of the kit's scarph joint...

The trenails are boxwood drawn down to roughly 0.54 - 0.56 mm. I'll be installing these on the frames and also the planking / decking...
I am beginning to realize how much work is involved in building a POF ship that hopes to show the details of the construction. I am enjoying working with wood - on my previous build there was a lot of decorative work and painting of metal bits. It's good for me to stretch myself into something different. Thanks for the visit and for inspiring me with your work! What a great hobby!
True story.What a great hobby!
- Joined
- Oct 23, 2018
- Messages
- 863
- Points
- 403

Respect, that you can prepare <0.6mm treenails. The smallest size for me is 0.75mm. Which tool do you use for such small treenails?
The result of your work is very good. The shape of your bow is looking really similiar to the results from Gregs masterpiece.
My favorite photo is this of the back Of your model. She (I mean your model ) has fantastic curves.
The result of your work is very good. The shape of your bow is looking really similiar to the results from Gregs masterpiece.
My favorite photo is this of the back Of your model. She (I mean your model ) has fantastic curves.
Wonderfully done Paul. How do you achieve the contrast of the treenails with the boxwood frames since both are boxwood?
- Joined
- Oct 11, 2021
- Messages
- 739
- Points
- 403

You are stretching your abilities and talent but will come out fine. If someone can do it, it's proven to be you!
Love the idea of planking one side of the ship and leave the other open to show the construction work. I don't know how much of the treenailing you can see from the open side towards the inner frames of the closed / planked side. So perhaps treenailing on the inside is needed only on the closed side of the hull and treenailing on the outside of the open side.
Peter
Your bowsection loos great Paul, and that is an understatement for sure 


Well, comparing my work to Greg's might be a stretchRespect, that you can prepare <0.6mm treenails. The smallest size for me is 0.75mm. Which tool do you use for such small treenails?
The result of your work is very good. The shape of your bow is looking really similiar to the results from Gregs masterpiece.
My favorite photo is this of the back Of your model. She (I mean your model ) has fantastic curves.
 but I appreciate the sentiment...
So, to answer your question, I am starting with strips of 1mm x 1mm box and using this drawplate: Byrnes Model Machines Drawplate.
I actually tried several other drawplates before discovering this one. For whatever reason this is the only one that works in my hands.
There is a bit of a learning curve to what would appear to be a rather simple task. I found this tutorial from Ted and have followed it pretty much to the letter: https://shipsofscale.com/sosforums/...isher-tedboat-completed-build.3244/post-64559
You actually can't see them at all when everything is dry - but when I make the area wet the endgrain seems to pick up a different look. Here they are under a coat of wipe-on-poly:Wonderfully done Paul. How do you achieve the contrast of the treenails with the boxwood frames since both are boxwood?
Thank you, friends, for the kind posts and the likes. I feel blessed to have your encouragement!
Just stunning Paul.
I was not visiting you log for a while, Paul. And on the last few pages I see a very beautiful bow and stern part. What ‘a bit of sanding’ can do! My compliments for your perseverance.
Regards, Peter
Regards, Peter
Thank you, kindly, kids / Peter.


