• LUCZORAMA SHIPWRECK SCAVENGER HUNT GIVEAWAY. 4 Weeks of Fun • 1 Legendary Prize ((OcCre’s Fram Ship)) • Global Crew Welcome!
    **VIEW THREAD HERE**

Kit Versus Scratch Build

it's all in your head.

I can only speak for mine, and even that can't be relied on. So called scratch building is merely taking a set of line drawings, and some trees - well, some timber - and making the full size ship, but smaller.
If you have simple tools, such as shipwrights used, and the desire, you can build anything at all.
Ignore whatever the kit makers want to sell you. Use the drawings to produce the individual frames. Use saws and hand planes, (and some thicknessing jigs) to produce the raw material a shipwright would start with, then chisels, or scalpels, to accurately cut the parts to size. Make a miniature dowelling jig, and use it to make toenails to fasten the parts together.
Read all about how best to fit the planks and other parts, and how the rigging supports the masts and controls the sails, and replicate it all in miniature. Look at your work and smile.
Then think 'I can do better next time'. and look for another interesting ship or boat and some drawings....
Repeat.

You will enjoy al the knowledge and support here.

Jim - in Northumberland, still making wooden boats by 'hand' (and 'lectric)

Very wise for one so young.
 
In many ways the question is like "should I take up golf or fishing?" It's up to you as far as what your interests and skills and objectives are. My feeling is FAFO (F around and find out).
Choosing betwen golf and fishing I would first learn about each sport, the ins and outs, who plays the sport, what equipment isused, books on the sport. That is what I am doing.
 
For me, same idea though my current model is a steel hulled steamship.
I’m also working on a steel hulled ship building plank on bulkhead. But how to make it smooth enough to look like metal? Photographers foil? How big would the individual plates be? Try to simulate rivets? I’ve always built wooden hulled ships but this is new to me. Thanks. Lou
 
Museum Archival Material.- This is the ultimate scratch building resource. Although this includes drawings held by Royal Museums Greenwich, (UK) this is not my area of interest so I’ll leave this to others.
I would add the National Archives, Kew England, especially for contracts with all the dimensions of near every piece of a given vessel, as well as the maritime museums in Paris and Madrid for French and Spanish vessel research.

For detailed dimensions of English ships from 1719 into the 19th century:
1719, 1745, and 1750 Establishments
Shipbuilder's Repository 1788
David Steel's The Elements and Practice of Naval Architecture
These can be found in several place, but all of these can be found in one book from Seawatch, Scantlings of Royal Navy Ships.

All of these sources can be useful for scratch builds as well as kit building.
 
Hmmm, interesting question. As many of the posts have pointed out, it really is a matter of personal preference and practical considerations such as workshop facilities etc. For my part, I find scratch building much more rewarding than building from a kit. With the former I can say "I built that", even if it is a bit rough, but with a kit I feel I can only say, "Well, I put it together." On the other hand, the quality of workmanship that many of our fellow modellers display here in putting together (and improving) their kit models is absolutely astounding.
 
My suggestion is not to go from kits to scratch build in one step. Research and add touches to a kit 1.st. When ready choose a simple model - very simple. Build in full, no matter what it looks like. Tools to jigs to scale to …. Comes. Part scratch with bought in ready made : speeds up / stops receptive / frustrating work. Step by step. Of course there is a genius about. But I was not one of them.
 
Lou,

Your best option is to plate the hull. Wood naturally expands and contracts over time so these hull planks are likely always to be with you.

I would suggest paper. Invest in some high quality acid free paper. It is easily cut into plates with a guillotine type paper cutter (a surprisingly useful tool for the model shop). I first paint the plates with a coat of shellac and let it dry. The plates are then easily glued onto the model with your favorite PVA glue.

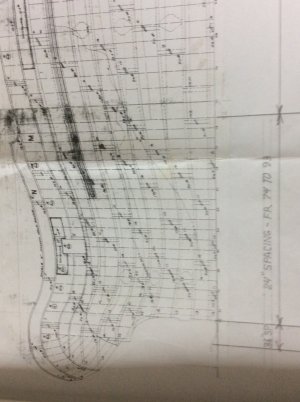
Shipyards were furnished with a plating expansion plan. (First photo). I’m assuming that you don’t have one of these so some guidance:

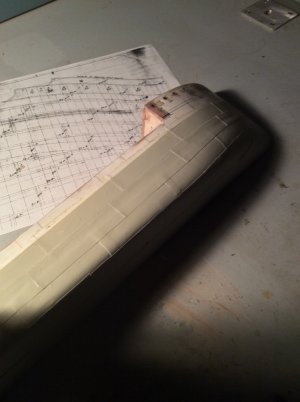
First there are two types of plating depending on the way it was fastened; Riveted and Welded. If your ship was built before WW II it was most likely riveted. The plating seams of a plated ship are lapped and are a distinguishing feature. (2nd photo) Don’t worry about showing rivets. The plating seams of a welded ship are butt welded so are invisible at any scale viewing distance.

Plating is arranged in strakes. Each strake usually runs continuously fore and aft. Drop strakes and stealers can be found at the bow and stern where there are large chances in the girth of the hull.

In laying out plating care in the drawing room was taken to minimize scrap and cutting of plates. Plating was therefore arranged to completely utilize standard sizes received from the mill.

Some plates had to be hot formed to fit the shape of the hull. The bilge plates were formed by rolling in a set of pyramid rolls and designers were careful design the bilge radius to fit the shipyard’s rolls. A few plates. required hot forming in more than one dimension. As this was very expensive, care was taken to minimize the need for them.

IMG_0608.jpegIMG_1279.jpeg
 
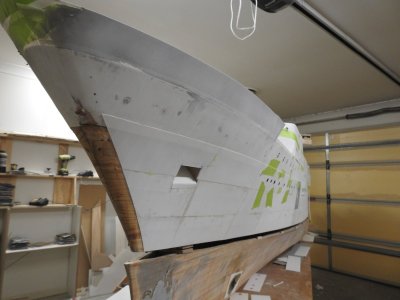
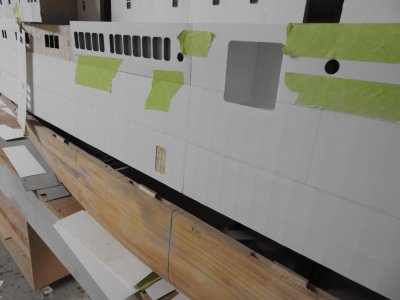
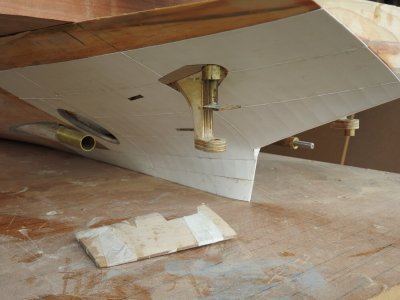
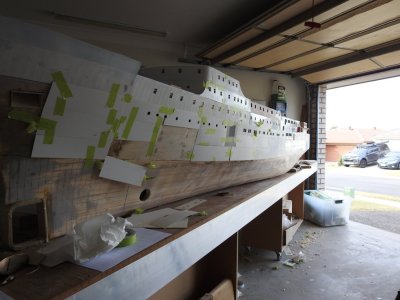
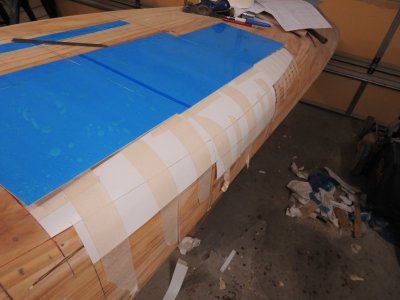
Lou to demonstrate welded plates in styrene. and yes you can form in 3 directions by heating and stretching over the hull by hanging counter weights on sheet styrene. But this demonstrates the realism that can be achieved, weld seams and weld distortion to done with a pizza wheel on the back of the plate on a hard rubber mat.
Good Cyano is imperative, I only found Starbond to be any good, and it does not come off trust me.
DSCN0071.JPG
DSCN0072.JPG
After weld bead are glued into edges.
DSCN9667.JPG

DSCN9465.JPG.435fc72eb4e608e75e16e27113dd0de1.jpeg
3d Formed plates on bilge, no bubbles or burn through
DSCN9519.JPG.777cd5b341edddbf005ba737bc39346c.jpeg
 
Last edited:
In regards to the Kit Vs Scratch debate I would weigh in and say that I am a 100% scratch purest, I have an unflinching, uncompromising desire for accuracy and have never found the more readily available or mainstream kits accurate or fully to scale, they always have issues such as incorrect hull lines or way over scale deck planking etc, of course you can change this by scratch building that but doing your own research will set you in good stead for future projects as you will learn a lot more about ship and model construction.
I think finding a ship you want to build for whatever reason is the way to go provided you can get good plans for it, ideally AS FITTED Shipyard plans.
Of course it has to be said that some people do not have the skills to pull off scratch built, and that's fine to, but everyone should try, it's far more satisfying and you know what you have is right.
If you buy a kit do not assume they did the research correctly and it's right, a lot of people think "oh they would not sell this if the lines were wrong would they" yes they would and they do, because it makes it easier to build in most cases, but it's not a scale model then, which in my opinion is what we are all trying to build isn't it?.
Their are excellent good kits out there done in small runs but you pay a bit more for them.
 
Last edited:
Lou to demonstrate welded plates in styrene. and yes you can form in 3 directions by heating and stretching over the hull by hanging counter weights on sheet styrene. But this demonstrates the realism that can be achieved, weld seams and weld distortion to done with a pizza wheel on the back of the plate on a hard rubber mat.
Good Cyano is imperative, I only found Starbond to be any good, and it does not come off trust me.
View attachment 521819
View attachment 521820
After weld bead are glued into edges.
View attachment 521821

View attachment 521823
3d Formed plates on bilge, no bubbles or burn through
View attachment 521824
This is an excellent tutorial for modelers.
 
Back
Top