• Ships of Scale has incorportated an extra level of security when you log In. Please follow on-screen prompts to acknowledge that you are not a robot via a "Check Box" or a "Pictorial Check Box Puzzle". This is needed due to higher level of AI Activity Security.
  • SUBSCRIBE TO SHIPS IN SCALE TODAY!

    The beloved Ships in Scale Magazine is back and charting a new course for 2026!
    Discover new skills, new techniques, and new inspirations in every issue.

    NOTE THAT OUR NEXT ISSUE WILL BE July/August 2026
  • Win a Free Custom Engraved Brass Coin!!!
    As a way to introduce our brass coins to the community, we will raffle off a free coin during the month of August. Follow link ABOVE for instructions for entering.

La Renommee 1744 1:48. (CAF) by Salty

Paul, I’m glad to hear the filler blocks came out OK and the frames are at the right height. I think this made a huge difference to the appearance of the hull.

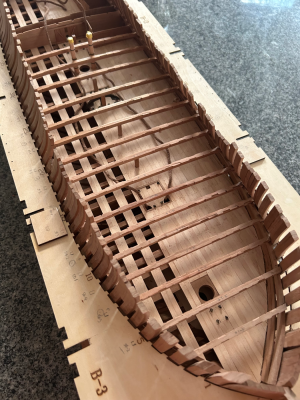
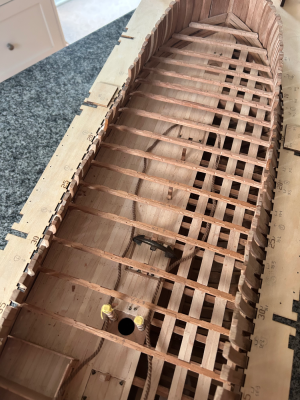
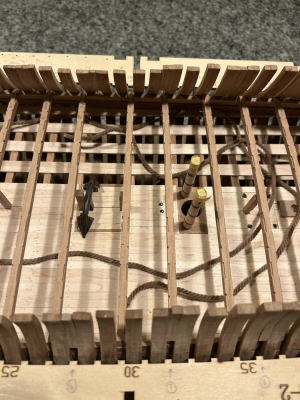
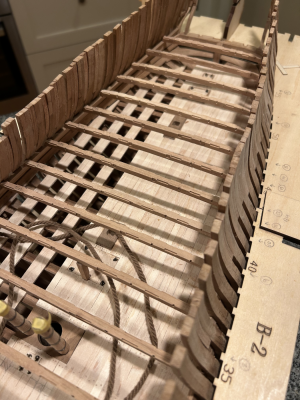
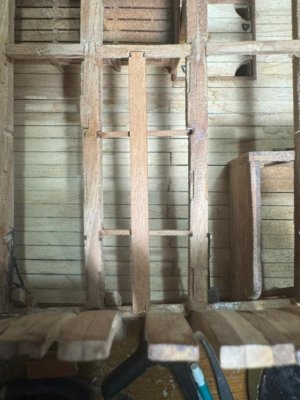
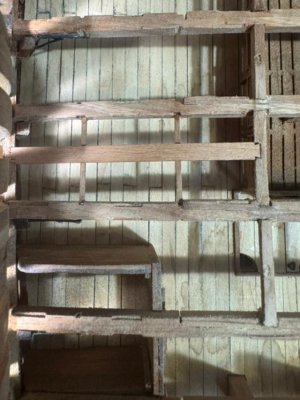
Unfortunately, my progress fitting the beams has been slow:

View attachment 635559

View attachment 635560

If I had had my wits about me, I should have installed the cabin partitions and beams at the same time. It’s compounded by a very tight fit to get the beams sitting on the deck clamp with the overhanging frames.

After trying one beam, I decided to remove the partitions. It turned out I had to do this anyway as I had to adjust a notch in one hatch partition. In addition, all the partitions which run at 90 degrees to the hatches were all a little high and had to be reduced so the carlings will fit over the top of them. I guess it’s easier to take off now rather than later.

All the partitions and beams are just sitting in place, because I still have to fit the riding bitts on the fifth beam back from the bow and, to do that, I have to make two holes in the lower deck.

The upshot is no damage done, except perhaps I’m feeling a little deflated at present.

Kind regards

Salty

looking good
 
Paul #1, thanks for the suggestion regarding sliding beams into place. It’s been a help, but not a cure-all. Mid-ship in the hull, the frames have a real curve and the fit is especially tight. All my problems are self-inflicted and I probably should have thought twice before installing the partitions in an effort to finish the previous part of the kit!

Paul #2, I’m eagerly awaiting an update on your La Renommee. It’s been an epic effort to get as far as you have.

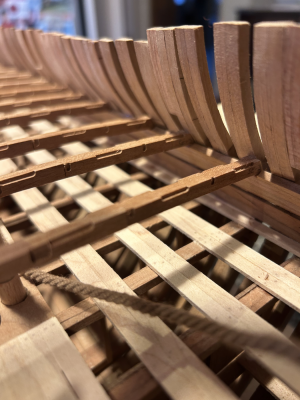
A few more beams made and temporarily fitted:

IMG_4834.jpeg

IMG_4833.jpeg

Fixing the scarfs is slow because my hands tend to get sore and tired quickly, so I only make up a couple of beams at a time. I use a knife with skew blade to gradually deepen the joint, but need to hold both wood and knife very firmly to get the necessary control.

1789542480684.png

On the positive side, trimming the beams to fit is becoming easier. I trim the end of beam to the same shape as the previous beam, but leave it about 2mm longer. I then do a test and gradually whittle the ends down on my disc sander.

Kind regards

Salty
 
On the positive side, trimming the beams to fit is becoming easier. I trim the end of beam to the same shape as the previous beam, but leave it about 2mm longer. I then do a test and gradually whittle the ends down on my disc sander.
Yup. The perfect approach. Beware the midline of the beams - the length adjustments need to be symmetrical.
 
Paul #1, thanks for the suggestion regarding sliding beams into place. It’s been a help, but not a cure-all. Mid-ship in the hull, the frames have a real curve and the fit is especially tight. All my problems are self-inflicted and I probably should have thought twice before installing the partitions in an effort to finish the previous part of the kit!

Paul #2, I’m eagerly awaiting an update on your La Renommee. It’s been an epic effort to get as far as you have.

A few more beams made and temporarily fitted:

View attachment 636602

View attachment 636603

Fixing the scarfs is slow because my hands tend to get sore and tired quickly, so I only make up a couple of beams at a time. I use a knife with skew blade to gradually deepen the joint, but need to hold both wood and knife very firmly to get the necessary control.

View attachment 636614

On the positive side, trimming the beams to fit is becoming easier. I trim the end of beam to the same shape as the previous beam, but leave it about 2mm longer. I then do a test and gradually whittle the ends down on my disc sander.

Kind regards

Salty
Looking good! Yes those beams were tricky. Other than that Paul#2 has been down with Covid for 2 weeks, so have not progressed on La Renommee. Have one side of the fillers corrected, then need to do the other side. Been fiddling with the metal braces for the beams a bit
 
Paul #1, I must admit the carlings on Le Coureur weren’t entirely symmetrical, so I’m paying particular attention to make sure the outer most notches on each side of the beams are the same distance from the end.

Paul #2, I am sorry to hear you have been under the weather. I hope you make a full recovery and don’t have any lingering symptoms which can sometimes occur with COVID.

Grant, thanks for your kind words. According to Mr Google we live almost exactly 10,000 km apart. At least we are both in the southern hemisphere.

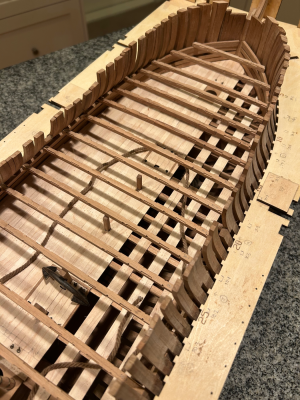
I have now finished the rest of the beams:

IMG_4850.jpeg

1789803725295.png

1789803836017.png

You can see that I have taken out all the partitions aft of the main mast. This was necessary to fit the beams. It will be a little work get them back in, but no real damage done.

I feel it has been a rough start to this part of La Renommee as I have made heavy work of two seemingly simple steps, the fillers and the beams.

Kind regards

Tom
 
Paul #1, I must admit the carlings on Le Coureur weren’t entirely symmetrical, so I’m paying particular attention to make sure the outer most notches on each side of the beams are the same distance from the end.

Paul #2, I am sorry to hear you have been under the weather. I hope you make a full recovery and don’t have any lingering symptoms which can sometimes occur with COVID.

Grant, thanks for your kind words. According to Mr Google we live almost exactly 10,000 km apart. At least we are both in the southern hemisphere.

I have now finished the rest of the beams:

View attachment 637651

View attachment 637652

View attachment 637653

You can see that I have taken out all the partitions aft of the main mast. This was necessary to fit the beams. It will be a little work get them back in, but no real damage done.

I feel it has been a rough start to this part of La Renommee as I have made heavy work of two seemingly simple steps, the fillers and the beams.

Kind regards

Tom
Beautiful work
 
Thanks to everyone who has been keeping up with my progress.

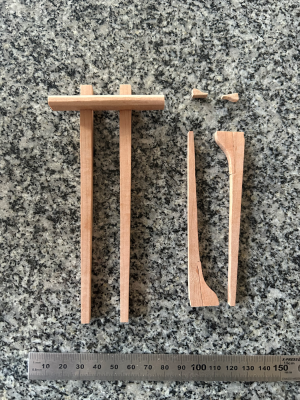
The instructions recommend making up and temporarily fitting a number of things before fixing the beams in place.

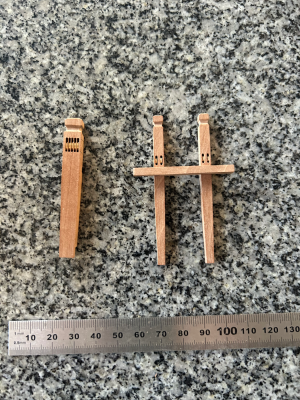
One of those are the riding bitts as they pass through two holes in the lower deck. I think they are actually supposed to sit on the ceiling planking, but they will just have to rest on the cable tier sole. Here is the start:

IMG_4828.jpeg

And here are the fore jeer bitts and tie block and fore topsail-sheet bitts which sit on beams just forward of the riding bitts:

IMG_4826.jpeg

These seem to be made from different wood to the rest of the kit - possibly pear?

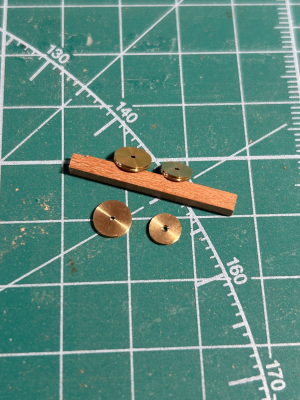
Here is a close-up of the beautiful little sheaves which come with the kit:

IMG_4824.jpeg

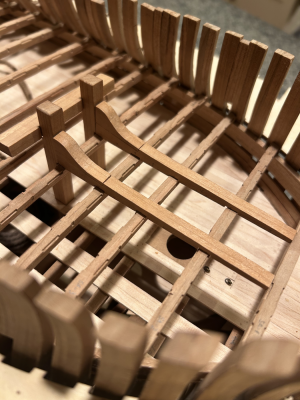
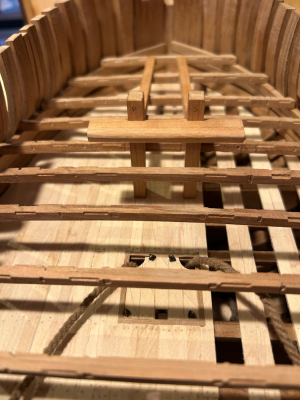
Here are the bitts in place:

1790063904378.png

1790065268468.png

There are still a few details that need to be added, but that happens at a later stage in the instructions.

Kind regards

Salty
 
Back
Top