HI MUCHI, WHERE DID YOU GET THE ROUTER THAT YOU SHOW HAVE BEEN TRYING TO FIND ONE ON AMAZON THEY HAVE SOMETHING CALLED DENTAL WAX CARVER IS THIS ONE SAW A BETTER TYPE BUT CAN NOT FIND IT NOW. APPRECIATE IT. GOD BLESS STAY SAFE YOU AND YOURS DON
-

Win a Free Custom Engraved Brass Coin!!!
As a way to introduce our brass coins to the community, we will raffle off a free coin during the month of August. Follow link ABOVE for instructions for entering.
-

PRE-ORDER SHIPS IN SCALE TODAY!
The beloved Ships in Scale Magazine is back and charting a new course for 2026!
Discover new skills, new techniques, and new inspirations in every issue.
NOTE THAT OUR FIRST ISSUE WILL BE JAN/FEB 2026
You are using an out of date browser. It may not display this or other websites correctly.
You should upgrade or use an alternative browser.
You should upgrade or use an alternative browser.
Hello don.
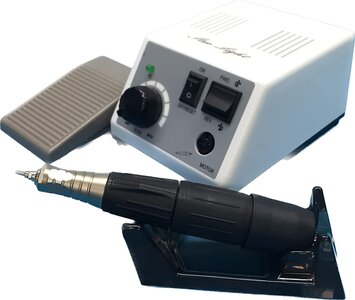
I bought it on Amazon at Argofile SBH-35...
It's quiet, precise, powerful, and has an adjustable rotation speed.
The chuck is also solid with one touch. A switch pedal is also included.
I've been using it for more than 3 years, but it's durable and a little expensive, but I recommend it.
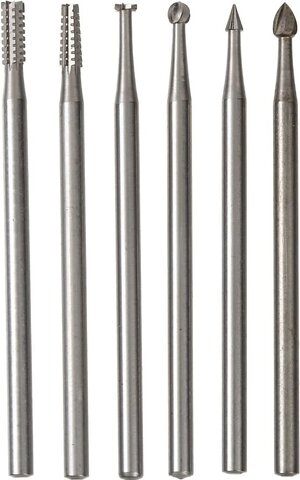
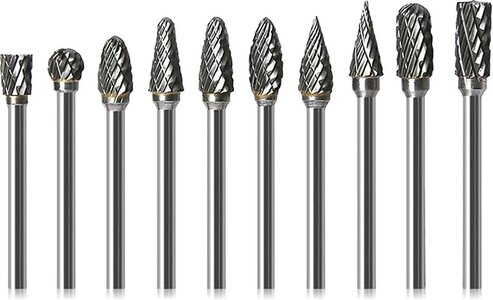
The bit (tip tool) was purchased separately.

Normally, it is used with clockwise rotation, so if there is a corner at the beginning of shaving, it will be repelled and dangerous.
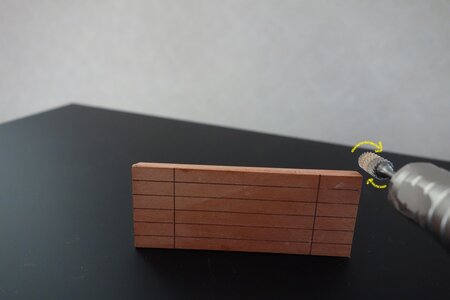
When removing laser soot or cutting bevels,
Scrape lightly from a place where there is no step.
When scraping small steps, use a thin bit so that the excess will not dry out.
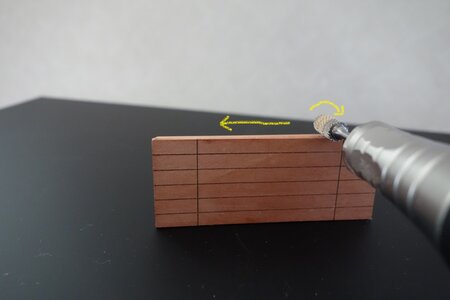
Soot removal is easy and quick.
Please wear a mask.
Of course, the accuracy of drilling holes by attaching a drill is also the best.
I bought it on Amazon at Argofile SBH-35...
It's quiet, precise, powerful, and has an adjustable rotation speed.
The chuck is also solid with one touch. A switch pedal is also included.
I've been using it for more than 3 years, but it's durable and a little expensive, but I recommend it.

The bit (tip tool) was purchased separately.

Normally, it is used with clockwise rotation, so if there is a corner at the beginning of shaving, it will be repelled and dangerous.

When removing laser soot or cutting bevels,
Scrape lightly from a place where there is no step.
When scraping small steps, use a thin bit so that the excess will not dry out.

Soot removal is easy and quick.
Please wear a mask.
Of course, the accuracy of drilling holes by attaching a drill is also the best.

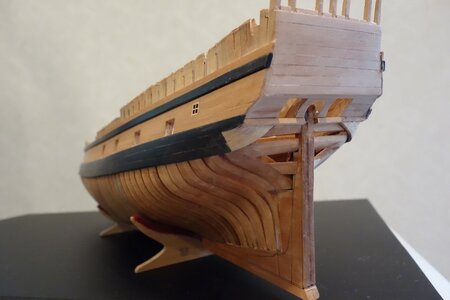
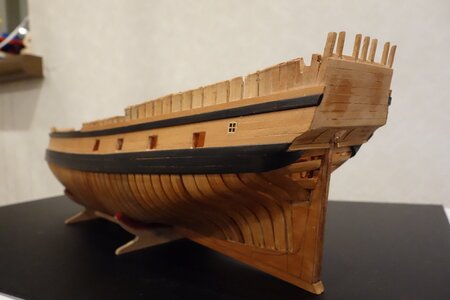
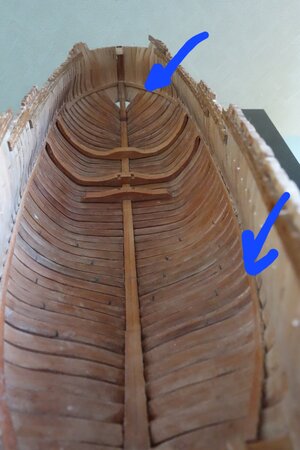
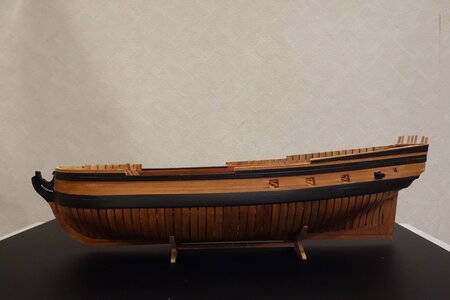
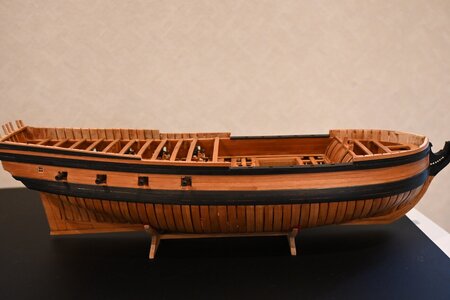
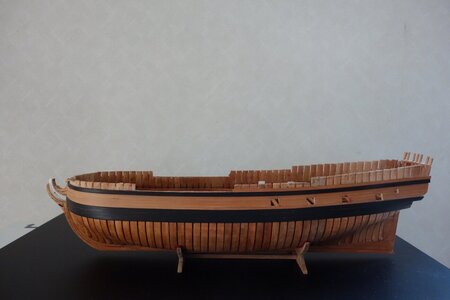
I glued the deck clamp 2.5x8mm down one step from the 8th rib to the front.
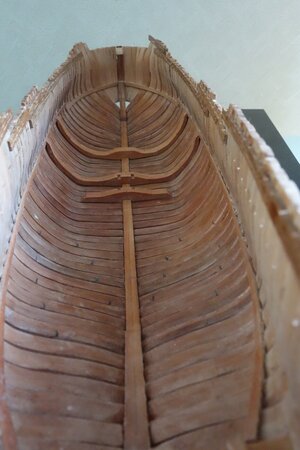
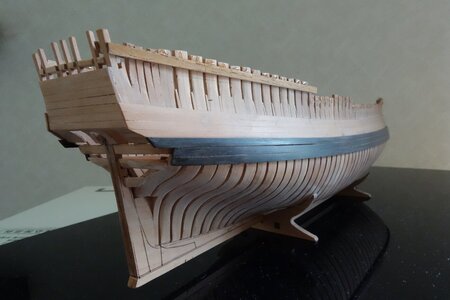
I pasted the side plate of the stern part, and pasted it based on the side planking of the upper main wale.
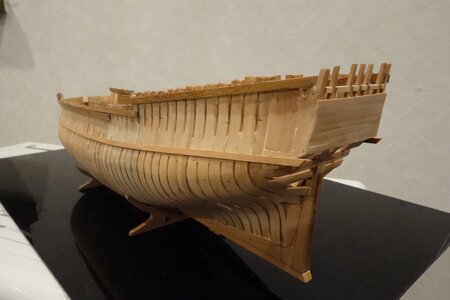
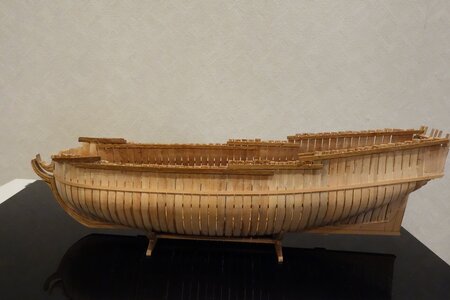
I pasted 4 pieces of Ship's side planking, bent ebony on the main wale with a trowel and pasted 3 pieces below.
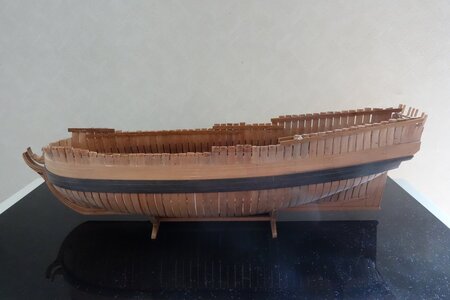
Since it is difficult to process the wale of the stern, it will be postponed.
It was my first time using ebony, so it was hard and there were gaps.
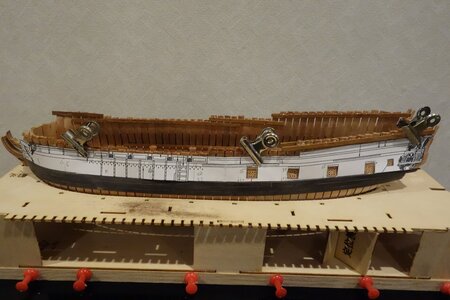
I copied the drawing and positioned the gun port.
A positioning jig is included, but I didn't use it because it is far from the hull.

I pasted the side plate of the stern part, and pasted it based on the side planking of the upper main wale.


I pasted 4 pieces of Ship's side planking, bent ebony on the main wale with a trowel and pasted 3 pieces below.

Since it is difficult to process the wale of the stern, it will be postponed.
It was my first time using ebony, so it was hard and there were gaps.

I copied the drawing and positioned the gun port.
A positioning jig is included, but I didn't use it because it is far from the hull.

THANKS MUCHI, FOUND IT QUESTION IF I MAY DO THEY SHIP TO USA AND HOW MUCH IN DOLLARS THIS IS EXACTLY WHAT I AM LOOKING FOR THANKS. GOD BLESS STAY SAFAE YOU AND YOURS DON
Hi Don.
I am inquiring to argofile japan if it is possible to purchase items that can be used in the United States.
Japan is on long holidays.
It will take some time.
It's about $120 in Japan.
I don't know how many years it can be used, but it comes with a replacement motor brush.
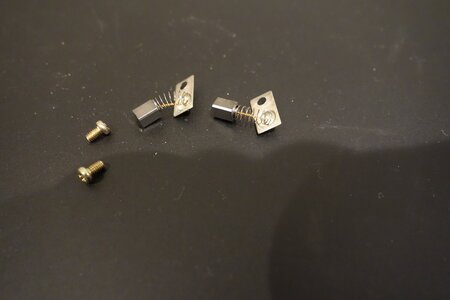
There are similar ones sold in China.
I'm not sure, but it doesn't seem durable.
I am inquiring to argofile japan if it is possible to purchase items that can be used in the United States.
Japan is on long holidays.
It will take some time.
It's about $120 in Japan.
I don't know how many years it can be used, but it comes with a replacement motor brush.

There are similar ones sold in China.
I'm not sure, but it doesn't seem durable.
Last edited:
HI MUCHI AGAIN THANKS FOR QUICK REPLYS, I FOUND THIS ONE ON AMAZON USA HANFBB. PRICE IS $109.00 LOOKS THE SAME BUT NO REVIEWS, THERE ARE OTHERS IN THE SAME PRICE $129.00 AGAIN NO REVIEWS WHAT DO YOU THINK. GOD BLESS STAY SAFE YOU AND YOURS DON
Hi don
There was an answer from Argofile Japan.
SBH35 is not made for America.
Although they don't sell directly, Maxima MAO35st, 40st and Eco Grande BLS900ST, GS800ST, 600ST are made to American specifications and shipped, but the price is about three times higher.
There was an answer from Argofile Japan.
SBH35 is not made for America.
Although they don't sell directly, Maxima MAO35st, 40st and Eco Grande BLS900ST, GS800ST, 600ST are made to American specifications and shipped, but the price is about three times higher.
create gunport
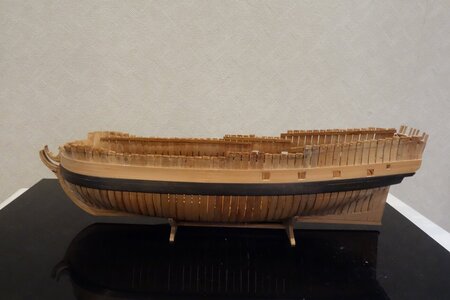
D3's platform deck was huge and had to be cut down quite a bit.
It was easier to glue the beam to the platform deck than to attach the platform beam to the hull.
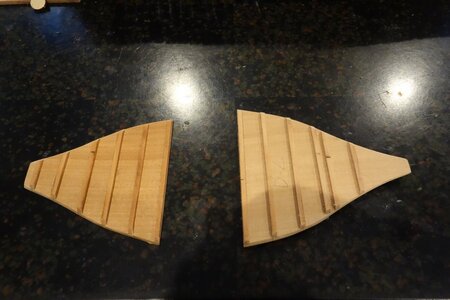
I used a simple jig with a 5x1mm board to keep parallel and spaced.
You have to cut the height to match.
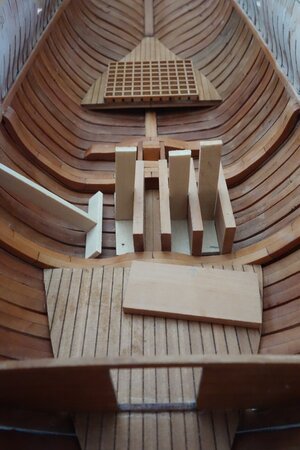
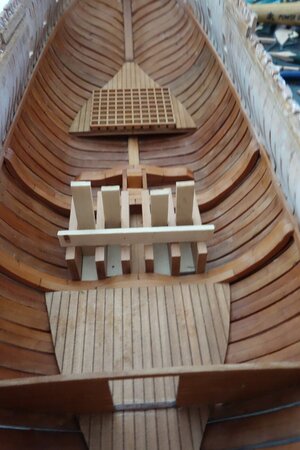
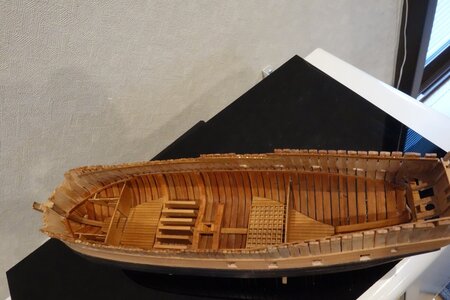
I processed the bulkhead and the magazine wall a little and glued them together.
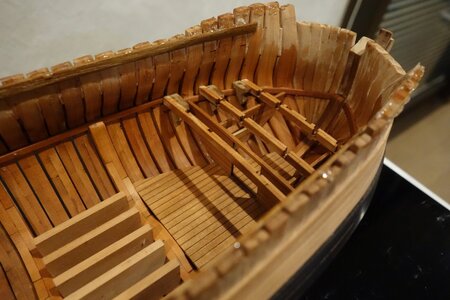
Bulkhead and magazine walls are precisely cut.
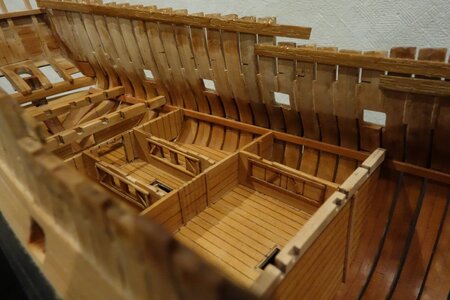
The beam consists of 3 pieces of parts A and B pasted together on E, but I mistakenly pasted two pieces of A and B together and uploaded the image. Be careful (my kit didn't come with an English manual, so I don't understand Chinese.)
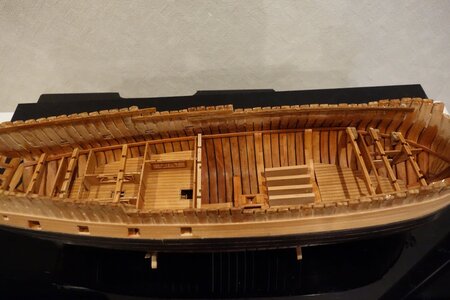
The beam has no strength at all with 2 instead of 3.
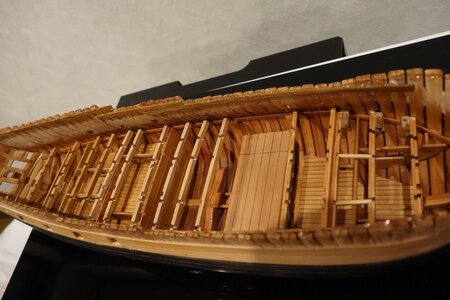
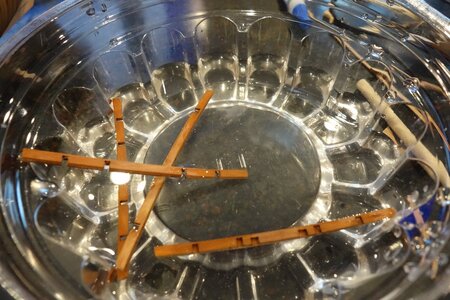
I used PVC water-based bond, so I soaked it in water for about 10 minutes, and then put a knife into the glued surface and it came off easily. I was able to remove it without breaking a single piece.
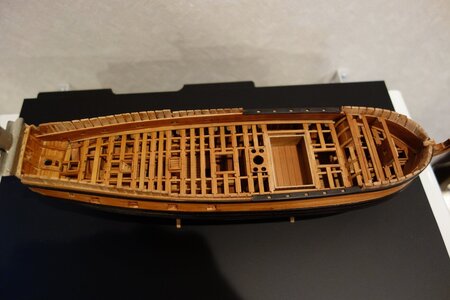

D3's platform deck was huge and had to be cut down quite a bit.
It was easier to glue the beam to the platform deck than to attach the platform beam to the hull.

I used a simple jig with a 5x1mm board to keep parallel and spaced.
You have to cut the height to match.


I processed the bulkhead and the magazine wall a little and glued them together.

Bulkhead and magazine walls are precisely cut.

The beam consists of 3 pieces of parts A and B pasted together on E, but I mistakenly pasted two pieces of A and B together and uploaded the image. Be careful (my kit didn't come with an English manual, so I don't understand Chinese.)

The beam has no strength at all with 2 instead of 3.

I used PVC water-based bond, so I soaked it in water for about 10 minutes, and then put a knife into the glued surface and it came off easily. I was able to remove it without breaking a single piece.


Last edited:
more and more this model is looking like a big one - means in a scale like 1:48
The interior is looking really good - you are on a very good way to make a fine model!
The interior is looking really good - you are on a very good way to make a fine model!
Thank you for kind words and following.
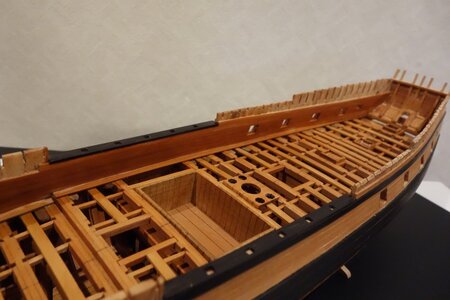
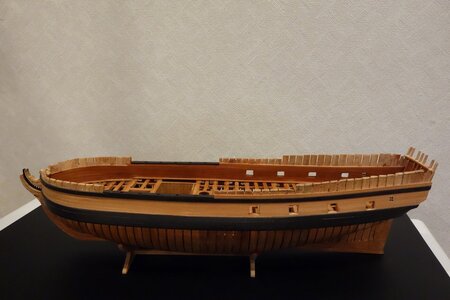
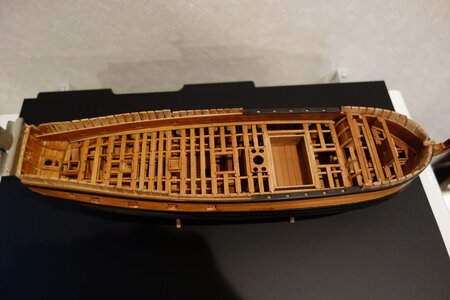
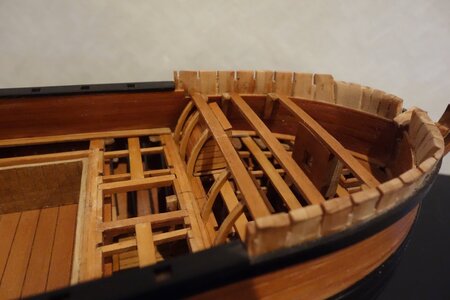
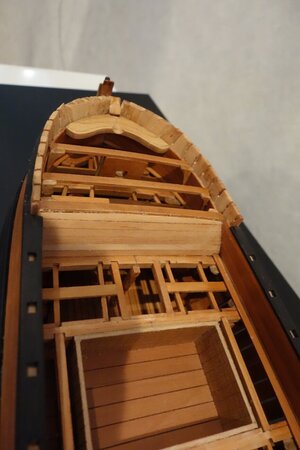
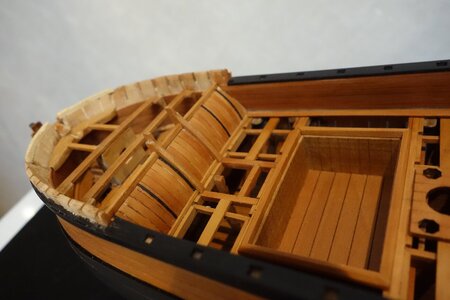
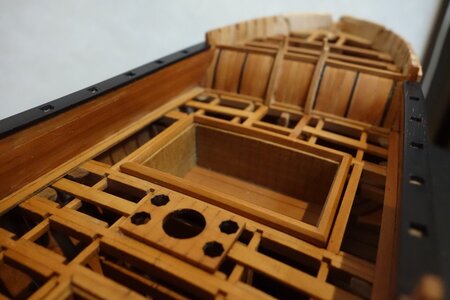
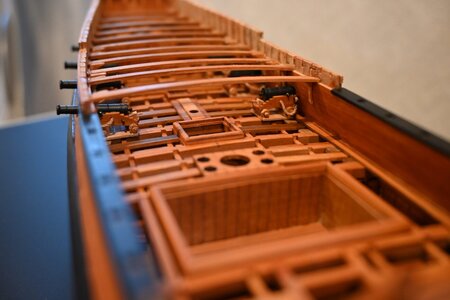
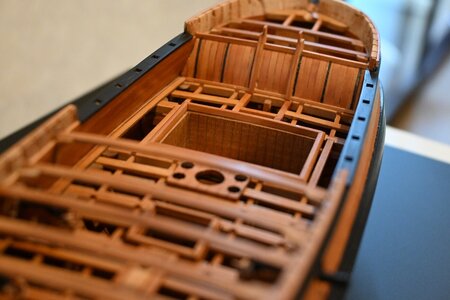
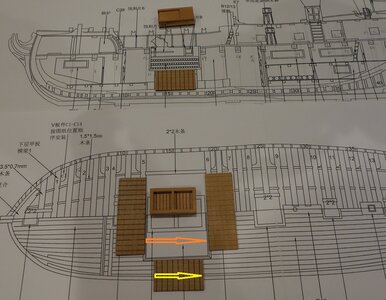
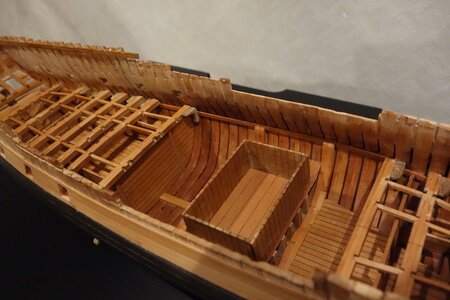
The size of the mortar pit is quite different from the drawing, but since it is necessary to remake parts such as the mortar bed, I decided to make it with the size of the materials in the kit.
Since the deck clamp is attached, the height of the upper deck beam is aligned.
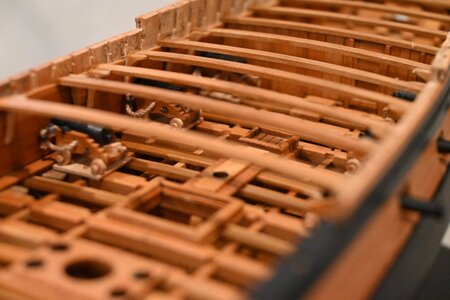
Carling needs a little adjustment.
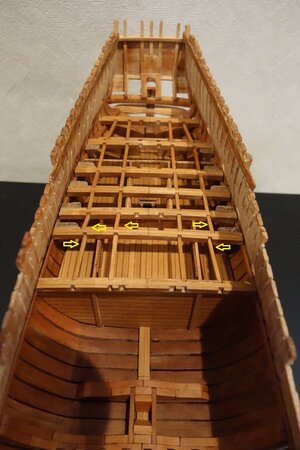
A thin beam is placed on the carling between the beams, so it is necessary to adjust the height direction a little.
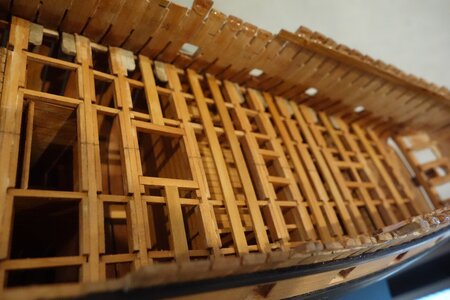
I also adjusted the hanging knee because I attached the deck clamp. The caring height adjustment has shaved the underside of the carling.
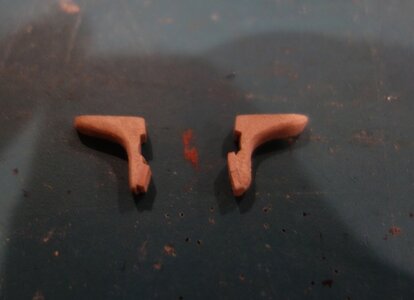
Well, I'm worried about how far to put the deck.
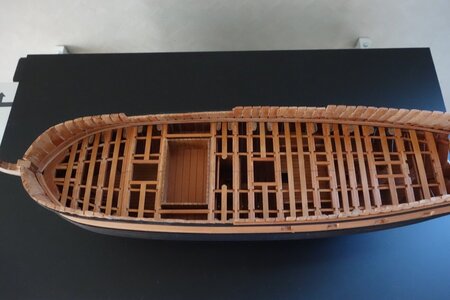
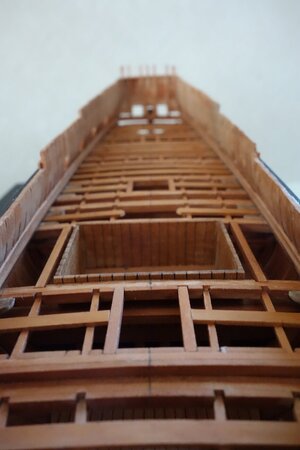
The size of the mortar pit is quite different from the drawing, but since it is necessary to remake parts such as the mortar bed, I decided to make it with the size of the materials in the kit.

Since the deck clamp is attached, the height of the upper deck beam is aligned.

Carling needs a little adjustment.

A thin beam is placed on the carling between the beams, so it is necessary to adjust the height direction a little.

I also adjusted the hanging knee because I attached the deck clamp. The caring height adjustment has shaved the underside of the carling.


Well, I'm worried about how far to put the deck.


- Joined
- Apr 20, 2020
- Messages
- 6,205
- Points
- 738

great work muchiThank you for kind words and following.
The size of the mortar pit is quite different from the drawing, but since it is necessary to remake parts such as the mortar bed, I decided to make it with the size of the materials in the kit.
View attachment 376292
Since the deck clamp is attached, the height of the upper deck beam is aligned.
View attachment 376293
Carling needs a little adjustment.
View attachment 376300
A thin beam is placed on the carling between the beams, so it is necessary to adjust the height direction a little.
View attachment 376301
I also adjusted the hanging knee because I attached the deck clamp. The caring height adjustment has shaved the underside of the carling.
View attachment 376306View attachment 376307
Well, I'm worried about how far to put the deck.
View attachment 376303
View attachment 376304
View attachment 376305

Hello Lucian.Great work so far. what is the number of these longitudinal beams?I have the same ship. Cheers
View attachment 378193
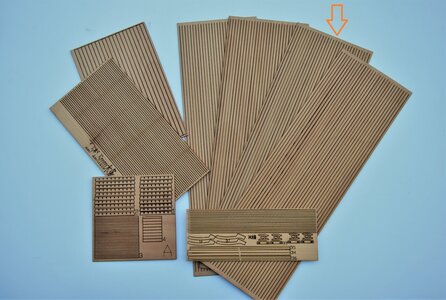
I used 2.5x0.8mm pear deck board material.
thank you. following your really nice workmanship
- Joined
- Jun 17, 2021
- Messages
- 3,184
- Points
- 588

Much smaller than I realized at first. VERY fiddly and tedious! You are doing a marvelous job! Very inspiring! I'd have thrown it against a wall by now in exasperation!
You are an inspiration in patience and dogged determination, She's looking beautiful as a result. I anticipate a spectacular result.


You are an inspiration in patience and dogged determination, She's looking beautiful as a result. I anticipate a spectacular result.


Thanks Peta. I got well.Much smaller than I realized at first. VERY fiddly and tedious! You are doing a marvelous job! Very inspiring! I'd have thrown it against a wall by now in exasperation!
You are an inspiration in patience and dogged determination, She's looking beautiful as a result. I anticipate a spectacular result.


