You are using an out of date browser. It may not display this or other websites correctly.
You should upgrade or use an alternative browser.
You should upgrade or use an alternative browser.
Looking forward to see this version of the Santa Maria growing
I have the Mantua version Santa Maria under construction,check my signature for the build log,I am also looking forward to see your version.
I saw that build I love the Mantua and Mamoli ships so I cant wait to see your build complete after looking at your kit and mine I wish I had bought the Mantua kit. I got the Latina very cheap so figured I'd have at it.I have the Mantua version Santa Maria under construction,check my signature for the build log,I am also looking forward to see your version.
I saw that build I love the Mantua and Mamoli ships so I cant wait to see your build complete after looking at your kit and mine I wish I had bought the Mantua kit. I got the Latina very cheap so figured I'd have at it.
Thanks ,but I made a lot of modifications and used different woods to build her,basicly almost scratch,I have ditched most of the kit content,especially the cheap and ugly plywood parts.The Mantua kit larger than the AL kit.
ahh I have a love for those brands I built the Thermophile a couple years ago and it was one of the best ships I have ever built. Ive also built the Golden Hind and Flying Cloud. I speak Italian so I understand the kits easily. I know some folks hate them though because they can be hard to follow. Was the wood not good in your kit? I have fould them to be fairly nice for materials with the ships I built.
Progress So far got the frame built, Trued and Faired For once I didn't have to lock the main frame into a jig to hold it straight while I installed Bulkheads It was true and remained true throughout the process.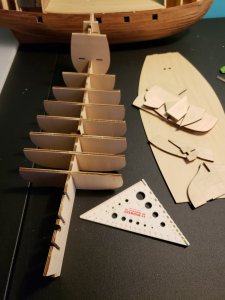
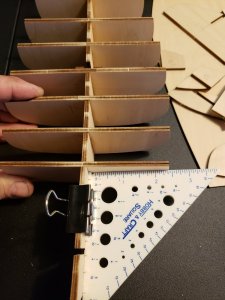
Getting her Faired in
Main deck on and Planking started
Used a Pencil to edge color the thin plank strips this is the easiest way I have found to do it.
Planking complete and sanded smooth. All Butt joints penciled in.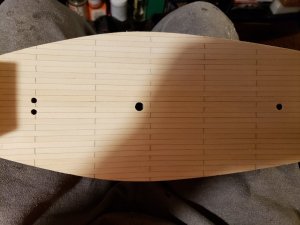
Here is how I like to do this step once the lines are drawn on I go back and cut the lines with a sharp #11 blade The cut is only half way through the strip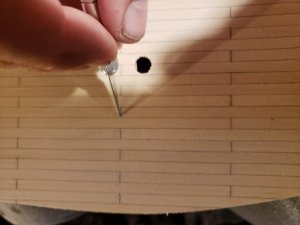
Next I take a mechanical pencil and go back over the cuts so it gets down into the cut
Now I re sand till the lines blend with the caulk lines between planking
Complete and ready for the Bulwarks
Got one side done minus sanding and my favorite little buddy came over he wanted to help so I let him sand the completed Bulwark while I worked on the other side getting it planked

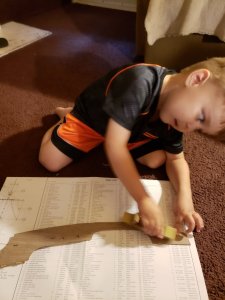
Should get the deck clear coated and Bulwarks installed and get the planking of the hull started tomorrow.


Getting her Faired in

Main deck on and Planking started

Used a Pencil to edge color the thin plank strips this is the easiest way I have found to do it.

Planking complete and sanded smooth. All Butt joints penciled in.

Here is how I like to do this step once the lines are drawn on I go back and cut the lines with a sharp #11 blade The cut is only half way through the strip

Next I take a mechanical pencil and go back over the cuts so it gets down into the cut

Now I re sand till the lines blend with the caulk lines between planking

Complete and ready for the Bulwarks

Got one side done minus sanding and my favorite little buddy came over he wanted to help so I let him sand the completed Bulwark while I worked on the other side getting it planked


Should get the deck clear coated and Bulwarks installed and get the planking of the hull started tomorrow.
Nice planking there,but you have a good helper thou 

or is it epicdoom by himself sanding ......Nice planking there,but you have a good helper thou
Good to see that you have already follower in your hobby
Thank you Brother. I'm happy he isn't the type that wants to sit and watch, he's a doer for sure. He learns fast and at times seems to understand better then most adults I talk to almost like he is an old soul and lived many lives prior. He just knows stuff he shouldn't at 4 Years old and he takes to things very naturally.Nice planking there,but you have a good helper thou
LOL now that made my day a bit brighteror is it epicdoom by himself sanding ......
Good to see that you have already follower in your hobby
He loves doing anything I'm doing. We fish a lot together and I cant wait to get him out hunting with me. Teach them young to put in work for the rewards is how I plan to bring him up, no participation trophies.
More Progress on the Build I have the Primary planking done, now lots of sanding and smoothing to prep for the second planking
Bulwarks installed and some more decking
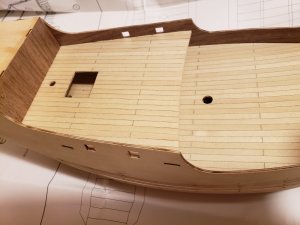
Planking going on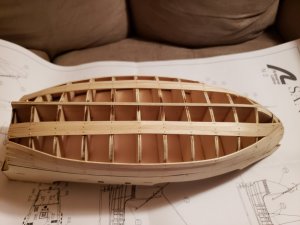
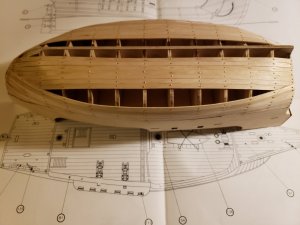
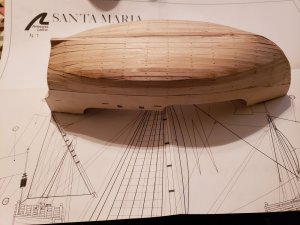
Planking was fairly uneventful no surprises and went down easy. I do hate the tiny brass nails they bend so easily. Next up is to sand everything smooth and even get the second planking down and remove planking material from the Keel area to fit the Keel on. I use a dremel with a cut off blade for that taking my time so the Keel fits the groove nice a with a slight snug fit. I usually epoxy the Keel on with pins I make from the remaining nails. Ill show that Process when I get to it. The nails give extra purchase for the epoxy to hold onto.
Bulwarks installed and some more decking


Planking going on


Planking was fairly uneventful no surprises and went down easy. I do hate the tiny brass nails they bend so easily. Next up is to sand everything smooth and even get the second planking down and remove planking material from the Keel area to fit the Keel on. I use a dremel with a cut off blade for that taking my time so the Keel fits the groove nice a with a slight snug fit. I usually epoxy the Keel on with pins I make from the remaining nails. Ill show that Process when I get to it. The nails give extra purchase for the epoxy to hold onto.
Very neat planking, you are building this quickly,
Cheers Andy
Cheers Andy
Thank you, I have a few years building under my belt. I try to get the planking as clean as possible it makes for a lot less work sanding. I do the best I can with it but Planking is my least favorite thing to do on a ship. I like doing the frame work for Plank on frame kits and rigging most of allVery neat planking, you are building this quickly,
Cheers Andy
.....I like doing the frame work for Plank on frame kits and rigging most of all
Most of modelers hate the rigging works - so you are a lucky guy
BTW: very good work -> looking forward to see your work on the second planking
Thank You for the complement. I like difficult and I don't know why, I just do. I work smart when I can, but that's not always an option. I love ships with a ton of rigging. Provided I get decent instructions and can find enough Pictures and Info on the rigging. I don't really find that job to difficult, but I also work with hundred + wire bundles in the some of the equipment I work on so I guess I'm just used to spaghetti.Most of modelers hate the rigging works - so you are a lucky guy
BTW: very good work -> looking forward to see your work on the second planking
I sanded everything even and now I just have to do some fill work and sand it smooth, then prep for second planking should happen later today if the Grandson manages to fall asleep early enough. I try to wear him out when he comes for an overnight, but he usually ends up wearing my old Butt out first.
Hull smoothed low spots filled and second planking going down, second planking complete and Smoothed and Keel installed

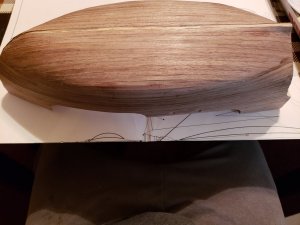

Worked on the stern got it second planked smoothed and ready for Rudder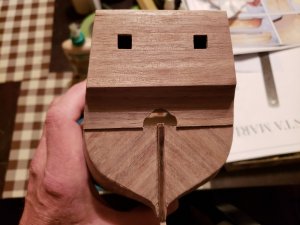
trim installed on main deck, some inner rail work done Needs cleaned up. Still needs trim on second deck edge
front deck down, planked and trimmed
Rub Rails installed trimmed out stern installed Rudder and ports and window frames needs cleaned up and then ready to clear coat


Got a lot of clean up to do before I move on to the next parts. I try and keep all glue cleaned up as I go but I get antsy to get more done so now it will be a few hours of cleaning up glue and prepping for more fun.


Worked on the stern got it second planked smoothed and ready for Rudder

trim installed on main deck, some inner rail work done Needs cleaned up. Still needs trim on second deck edge

front deck down, planked and trimmed

Rub Rails installed trimmed out stern installed Rudder and ports and window frames needs cleaned up and then ready to clear coat


Got a lot of clean up to do before I move on to the next parts. I try and keep all glue cleaned up as I go but I get antsy to get more done so now it will be a few hours of cleaning up glue and prepping for more fun.
Looking good.
Mike
Mike
Not sure what happened to some of my progress pictures I just know I don't have them in my phone, But here is what I do have and I'm and now ready to work on the Masts getting them tapered, rigged and Installed is my next step.
I like to Pin all rails and anything else that will have tension from rigging lines so I take the extra step to drill and pin the uprights down onto the deck

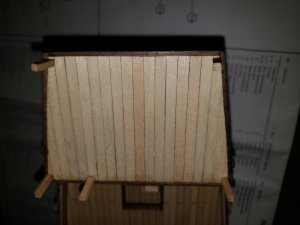

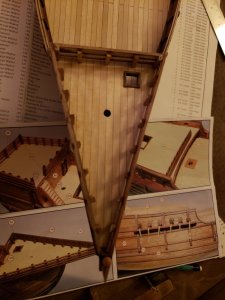
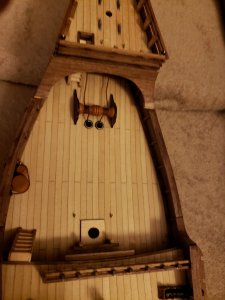

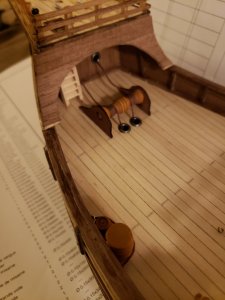
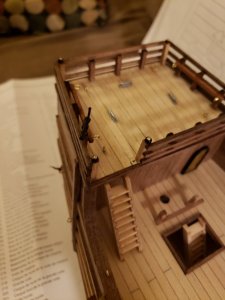
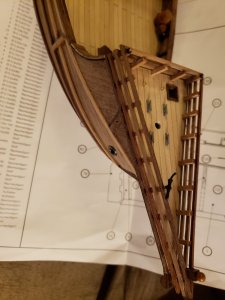

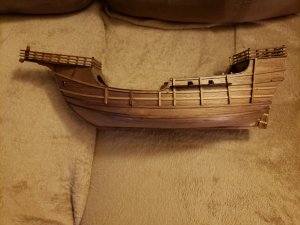

I like to Pin all rails and anything else that will have tension from rigging lines so I take the extra step to drill and pin the uprights down onto the deck


How do you taper the masts,I had fun with an electric drill ,tucked into it and vrapped sandpaper arround the mast.
You are making good progress, the finish is very neat and tidy. I always have problems making Masts and Spars so I'll be interested to see how you go about making them,
Cheers Andy
Cheers Andy


