• Win a Free Custom Engraved Brass Coin!!!
    As a way to introduce our brass coins to the community, we will raffle off a free coin during the month of August. Follow link ABOVE for instructions for entering.

Le Gros Ventre 1767 1/48 POF from Ancre plans

Joined
Nov 12, 2025
Messages
8
Points
43

Location
Perth, Western Australia
As I am new to this site, I feel it is incumbent on me to contribute something. In consequence, I present an abbreviated log of my build of this historical ship.
It was in fact the transport ship (or gabare/flûte) provided for the Kerguelen expedition of 1771 to the Southern Ocean, under the command of M. de St. Alloüarn. Becoming separated from the expedition, the Gros Ventre (which means Fat Belly), proceeded to the arranged rendezvous at the south-western tip of the Great Southland, previously mapped after a fashion by the Dutch. Kerguelen having failed to attend the first rendezvous, the Gros Ventre sailed to Shark Bay on north western coast of the Southland, well known to the Dutch since 1616, where Dirck Hartog of the Eendracht left an inscribed pewter plate and fixed the latitude. Here officers of the Gros Ventre planted a document in a bottle with two french coins claiming the coast of the Southland for the french king Louis XV. This done, they sailed for Batavia, Timor, Mauritius and oblivion.
Le Gros Ventre ended its life as a hulk in 1779.

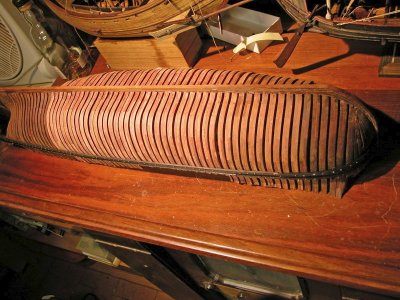
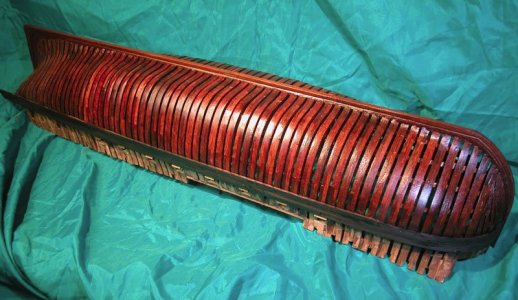
Plans for this ship (or at least its sister ship) have survived and have been worked into a lovely monograph in the Ancre series by Gerard Delacroix. I have used this monograph to build a fully framed "Admiralty style" hull model in jarrah (a very hardwood from Western Australia where I live) as it is a historically important but little known ship for Western Australia.
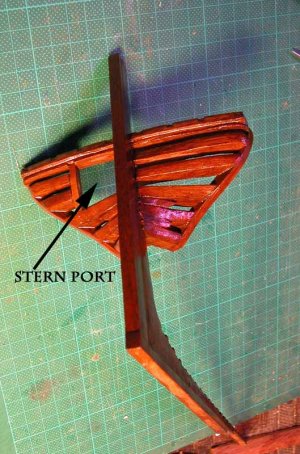
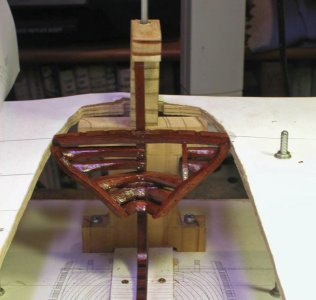
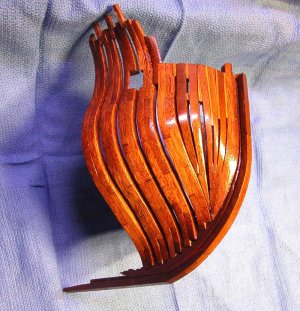
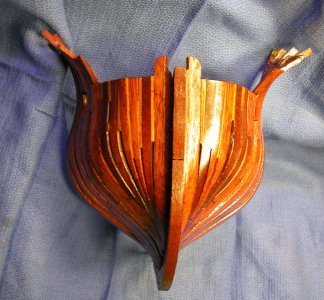
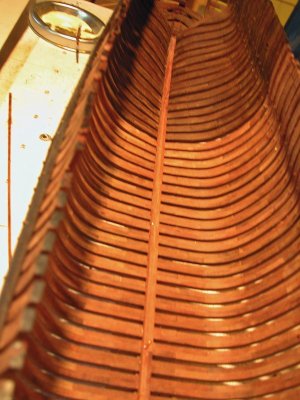
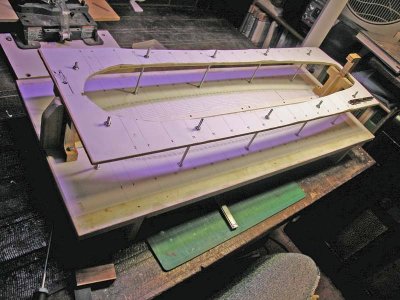
I commenced this in 2013, completed bow and stern framing and then put it aside for several years to complete other projects. Taking up the build again in 2021, I have completed framing and decking and am presently building the head of the ship. As a start, I show the building frame as well as the bow and stern framing. You will note the loading port in the larboard transom timbers used for loading of timber and spars. The temporary shiny appearance is due to orange oil which gradually darkens the red hue of jarrah.

Cheers
Dick
DSCN0704a.jpgDSCN0777a.jpgDSCN0778a.jpgDSCN0840a.jpgdscn0843a.jpg
 
Thanks for the likes, folks.
  • It's a bit daunting to consider a fully made frame and certainly for the first few you make mistakes but with perseverance, a repeatable method is worked out and then it starts to become a factory line. Here is how the last true frame was made. 6 copies of the frame plan were made at the local copy shop, you need 6 because on the plan the adjacent frames overlap.
  • One copy of the frame drawing is cut out and double sided tape used to stick it to the special frame compression jig.
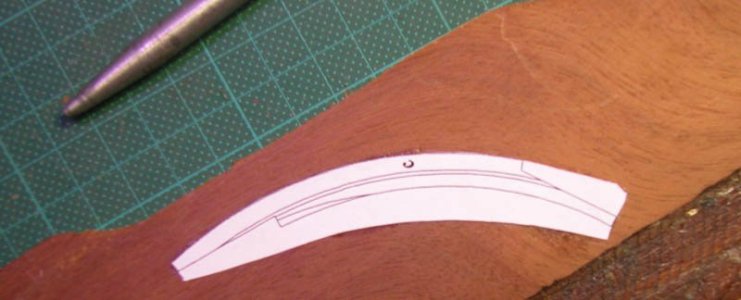
  • All the pieces for the aft half of the frame are cut out just outside the line and stuck on the thicknessed wood plank with Glue-stick( I love my Byrnes thickness sander) .DSCN0719a.jpg
  • The same is done for the forward pieces of the frame
  • DSCN0788a.jpg
  • On the full drawing, pencil lines indicate where each forward piece ends
  • DSCN0788b.jpg
  • Each piece is labelled carefully
  • Each piece is sawn out with a jigsaw. cut outside the line. No fairing is done at this stage.
  • Outside curves are sanded to the line with a disc sander, inside curves with a rotary sander. Use a face mask. Wood particles are toxic.
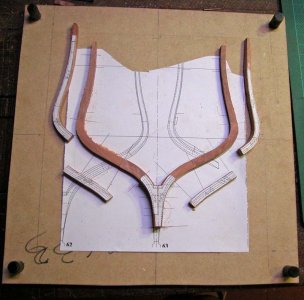
  • Glue-stick the aft pieces to the frame drawing. They should line up perfectly. Glue is applied only to where 2 pieces abut.
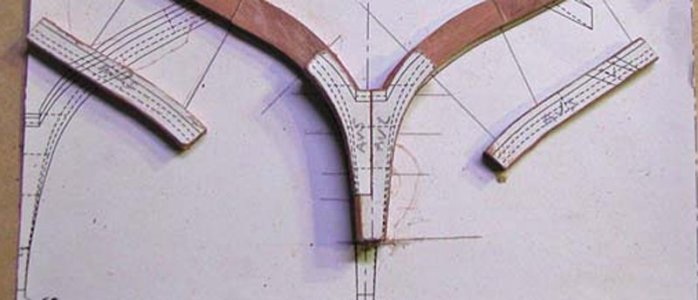
  • The forward pices are then glued to the aft half of the frame , carefully aligning to the midline and the pencil marks.
  • I use 2-part resin to glue the frames.
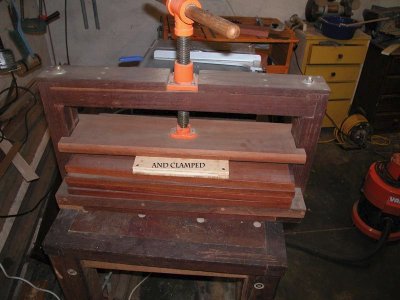
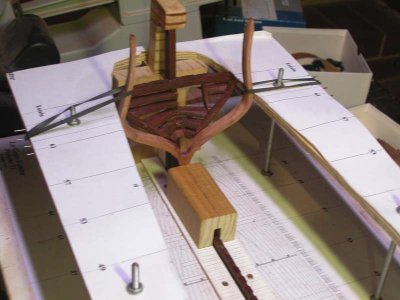
  • The front of the special frame ig is placed over the alignment rods
  • Compression is appliedDSCN0783a.jpg
  • When set it is easy to separate the frame from the main drawing
  • It's up to you if you want to pin the frames as well
  • Fairing can be done now to the dotted lines which show how much of the aft pieces to sand awaydscn0789a.jpg
  • I recommend doing some trial midship frames to get the technique down
  • The paper is easily sanded off and the frame is ready to be temporarily pinned to the keel and aligned to the building jig.
  • This is just my way and you can probably figure out a better way. I am sure there are tutorials on this subject in the SOS forum

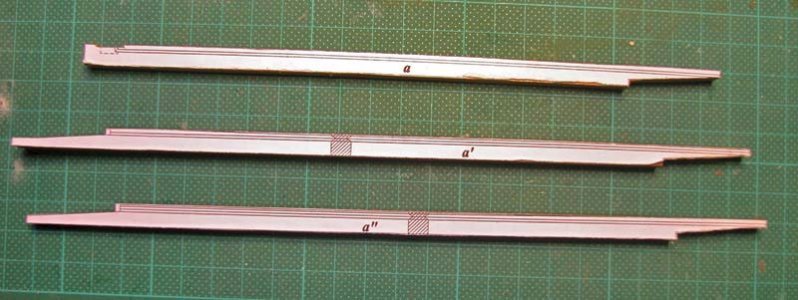
The three pieces of the keel and their scarfsDSCN0713a.jpg

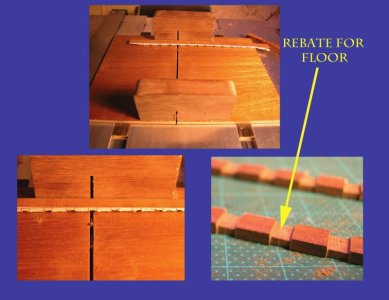
The mortices for the frame can be made with a cross slide or jeweller's saw
DSCN0744a.jpg

clear as mud in a beer bottle, eh?

Cheers
Dick
 
Last edited:
Thanks for the likes, folks.
  • It's a bit daunting to consider a fully made frame and certainly for the first few you make mistakes but with perseverance, a repeatable method is worked out and then it starts to become a factory line. Here is how the last true frame was made. 6 copies of the frame plan were made at the local copy shop, you need 6 because on the plan the adjacent frames overlap.
  • One copy of the frame drawing is cut out and double sided tape used to stick it to the special frame compression jig.
  • All the pieces for the aft half of the frame are cut out just outside the line and stuck on the thicknessed wood plank with Glue-stick( I love my Byrnes thickness sander) .View attachment 557633
  • The same is done for the forward pieces of the frame
  • View attachment 557630
  • On the full drawing, pencil lines indicate where each forward piece ends
  • View attachment 557631
  • Each piece is labelled carefully
  • Each piece is sawn out with a jigsaw. cut outside the line. No fairing is done at this stage.
  • Outside curves are sanded to the line with a disc sander, inside curves with a rotary sander. Use a face mask. Wood particles are toxic.
  • Glue-stick the aft pieces to the frame drawing. They should line up perfectly. Glue is applied only to where 2 pieces abut.
  • The forward pices are then glued to the aft half of the frame , carefully aligning to the midline and the pencil marks.
  • I use 2-part resin to glue the frames.
  • The front of the special frame ig is placed over the alignment rods


    I also love projects where everything hinges on the details, and I once dug through dozens of domain redirects in search of working traffic. It seemed like it was all in vain until I stumbled upon this is it — which explained how to avoid drowning in "garbage" and choose useful directions. After implementing these tips, my traffic finally became at least somewhat predictable, like a well-assembled model ship.
  • Compression is appliedView attachment 557638
  • When set it is easy to separate the frame from the main drawing
  • It's up to you if you want to pin the frames as well
  • Fairing can be done now to the dotted lines which show how much of the aft pieces to sand awayView attachment 557636
  • I recommend doing some trial midship frames to get the technique down
  • The paper is easily sanded off and the frame is ready to be temporarily pinned to the keel and aligned to the building jig.
  • This is just my way and you can probably figure out a better way. I am sure there are tutorials on this subject in the SOS forum

The three pieces of the keel and their scarfsView attachment 557639

The mortices for the frame can be made with a cross slide or jeweller's saw
View attachment 557640

clear as mud in a beer bottle, eh?

Cheers
Dick

There's a real sense of exploration, as if you're not building a model, but restoring a piece of maritime history. Particularly impressive is the choice of jarrah and the commitment to a full-fledged "Admiralty-style" construction, rather than a simplified version. The fact that you started the project back in 2013 and returned to it years later speaks volumes of your dedication. It will be interesting to see how the stern section ultimately takes shape and how the wood behaves after the oil has completely dried.
 
Thanks, Mark. The jarrah darkens in time with the oil. As you can see in this picture showing the new lighter frames and the several years older bow frames
View attachment 557948

Dick
Welcome Dick, from over East! Perth is a great spot. We were over there in 2014, doing the 17,000 km circuit with our caravan.

I, too, love your use of Jarrah. I'm just waiting for someone from Tasmania to pop up here and tell us they are building in Huon Pine!

For my scratch build I made the frames from silver ash and then discovered the amazing characteristics of jacaranda, (both grown on our farm), and have since used mostly jacaranda for everything except where grain needs to be seen.

Your framing looks fantastic and I'm following your progress from now on.
 
o what scale of other woods, of hardness, can you compare jarrah?
The Janka scale of hardness is used widely which measures the force in Newtons or lbf needed to press a steel sphere halfway into the wood. On this scale jarrah has a hardness of 8.5 kN or 1860 lbf. this puts it just above hickory at 1820 lbf. By comparison american cherry is 560 lbf an d the hardest wood in the world is australian buloke at 5,060 lbf. Jarrah machines beautifully when properly kiln dried but if not then it can become brittle and splintery with age. So, dont use old flooring planks or weathered timber. Remember to use masks and dust extraction when milling and sanding as the particles are very fine but this applies to all timber.

discovered the amazing characteristics of jacaranda
Ian, tell me more about jacaranda timber as we have a lot of jacaranda in Perth. Its Janka score is 2206 lbf.

Dick
 
Ian, tell me more about jacaranda timber as we have a lot of jacaranda in Perth. Its Janka score is 2206 lbf.

Dick
I'm no timber expert (despite growing farm forestry trees on our farm ;) ) but I salvaged the Jacaranda from a fallen tree. Cut into 20cm square billets and painted ends. Air dried under sheets of corrugated iron for about12 years. It is very fine grain, saws, planes and sands to a fine finish and holds its shape. I've worked it down to 1mm diameter on my mini lathe to make oars with no breakage.
Also bends nicely with steam. Glues securely with PVA.

As we live in a sub-tropical climate the trees have different characteristics to those grown at higher latitudes and I wouldn't class ours as Janka 2206 lbf.
 
The Janka scale of hardness is used widely which measures the force in Newtons or lbf needed to press a steel sphere halfway into the wood.
In the real world I witnessed (from on board) what happens when a steel water supply boat comes alongside an ex-Royal Navy ship of the early 19th century. The ship was the Training Ship Foudroyant (a.k.a. Trincomalee, frigate, 38 guns)) moored to buoys fore and aft in Portsmouth Harbour in 1960. The supply vessel had rigged a huge spherical rope fender (about 3ft in diameter) and approached at a snail's pace. I was leaning over the bulwark and was horrified to hear an ominous crunching sound as the fender buried itself halfway into the ship's side. I never heard any official statement but surely the timbers of the vessel (which accommodated about 50 youngsters) were quite rotten. A search of the internet found that the ship was transferred to Hartlepool and restored. I wonder how they managed from 1960 to 1986 while it remained in Portsmouth!

 
Well, thanks again folks for the welcome.
A search of the internet found that the ship was transferred to Hartlepool and restored
Chris, thanks for that, they should have restored the Trincomalee with jarrah! The Endeavour replica which was built here in Fremantle was built in jarrah and should last indefinitely barring accident or malice.
1763868021735.jpeg
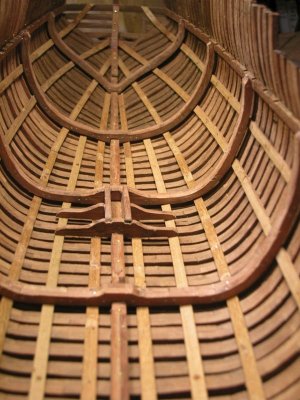
To resume the Gros Ventre, I resumed building in 2021 and was able to finish the framing quite rapidly and fit the keelson
DSCN2427a.jpgDSCN2425a.jpg

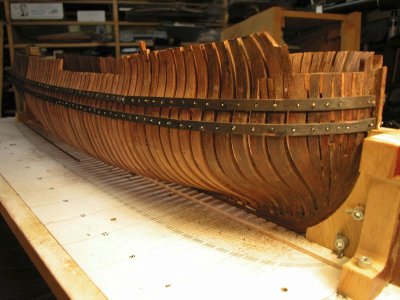
I elected to partially indicate the ceiling with ribands upon which were placed the futtock riders and mast steps
DSCN2441a.jpg
DSCN2446a.jpg
Cheers
Dick
 
Back
Top