Le Rochefort - 1787 Harbor Yacht 1:24 - build log by Nersch

Hello and a nice Saturday evening to all :)

I have started preparing the frames.

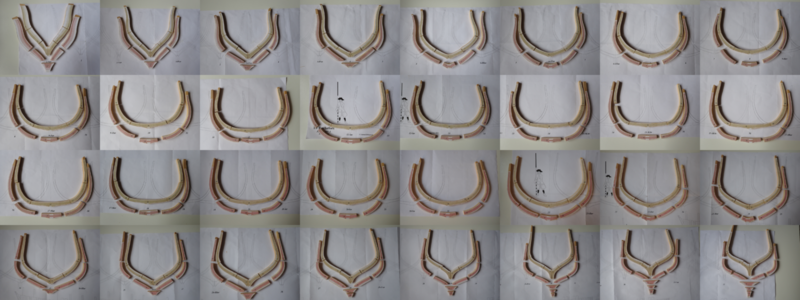
First I scanned all the frames and colored them on the laptop. I'm not sure if it was worth the effort, but at least I now have a detailed understanding of the plans of the 32 frames. By the way, there are 361 individual parts. Yes, I counted them. ROTF

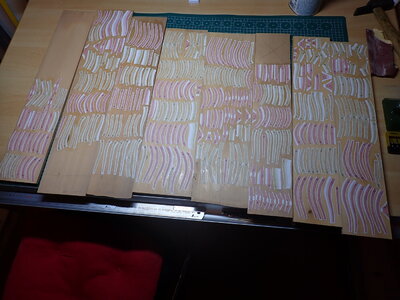
After cutting them with a cutter knife and scissors, I arranged them on 9 different boards. I tried to arrange them a bit randomly to get a mix of wood colors within each frame.

Do you think this arrangement makes sense? Would you do something different? Are the gaps okay? I will be cutting everything to size with my bandsaw. I would leave about 2 mm around the final shape.

View attachment 377657 View attachment 377662
View attachment 377661 View attachment 377663
Hello !
The drawings of the frames are sensational. A big help for me. If I could make a request, could you post the picture of the 1st and 3rd frame as well? My frame 1 somehow became too thick.
Thank you.
Laci

IMG_20230607_202554.jpg
 
Hello Laci,

Thank you very much for your kind words.

Here are the frames 1 to 3.
Please note that the red frames (half floor timbers) show the frames from the stem. So they are shown from the opposite side as they are shown in the plans from ancre.fr. I mirrored or rotated them to get the correct view after gluing the paper templates to the wood.
The yellow frames are the other half of the frames as shown in the plans (view from the center of the hull).

The filled areas are relevant to these timbers, the unfilled areas are from the other half of the frames.
Dark filled areas are the front, light filled areas are the sides that need to be beveled.

But there is no guarantee that I got all the lines right. The original plans from ancre.fr are still more valid than my interpretation.

2023-06-07_Frames 1-3.png
 
Hello Laci,

Thank you very much for your kind words.

Here are the frames 1 to 3.
Please note that the red frames (half floor timbers) show the frames from the stem. So they are shown from the opposite side as they are shown in the plans from ancre.fr. I mirrored or rotated them to get the correct view after gluing the paper templates to the wood.
The yellow frames are the other half of the frames as shown in the plans (view from the center of the hull).

The filled areas are relevant to these timbers, the unfilled areas are from the other half of the frames.
Dark filled areas are the front, light filled areas are the sides that need to be beveled.

But there is no guarantee that I got all the lines right. The original plans from ancre.fr are still more valid than my interpretation.

View attachment 378434
Thank you very much, these couple of frames will be of great help to me. The description is also useful in the interpretation.
This is how I first noticed that I followed the wrong line with my frame 1.
L.
 
Have a great Saturday night everyone.

In the meantime, I have made some progress with my frames.

After gluing on the templates, I cut everything out with the band saw.
2023-06-04_Templates Frames_2.JPG 2023-06-04_Templates Frames_3.JPG
2023-06-08_Frames_1.JPG

Then I sanded the rough outline with the disc and spindle sander.
2023-06-08_Frames_2.JPG 2023-06-08_Frames_3.JPG

On this picture you can see the current state.
2023-06-10_Spenten ausgesaegt_klein.png

Unfortunately, I can use my hobby room only until June 18. I'm already looking for a new possibility, but so far I haven't found anything suitable. So it may well be that I have to take a forced break for some time.

I keep you up to date ;)
 
Have a great Saturday night everyone.

In the meantime, I have made some progress with my frames.

After gluing on the templates, I cut everything out with the band saw.
View attachment 379047 View attachment 379048
View attachment 379050

Then I sanded the rough outline with the disc and spindle sander.
View attachment 379051 View attachment 379052

On this picture you can see the current state.
View attachment 379058

Unfortunately, I can use my hobby room only until June 18. I'm already looking for a new possibility, but so far I haven't found anything suitable. So it may well be that I have to take a forced break for some time.

I keep you up to date ;)
Wow, great progress. Your frames look very clean. It's a pity to hear that you have to look for a new hobby room. I wish you the best of luck and that your break doesn't last too long.
 
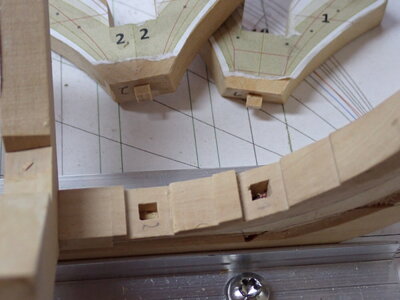
The first three floor-timbers and cross-chocks are fitted. The grooves have been adjusted to the final dimensions, the rest still has 1 - 2 mm too much to be able to sand the hull when all frames are installed at some point.

I hope to get the same state with most of the frames before I have to take my forced break due to my hobby room issue.

2023-06-12_Keel assembly_1.JPG

2023-06-12_Keel assembly_2.JPG
 
Hello Tobias,

Yes, I saw it also on the picture. This part needs to be shifted to the left. I was just too lazy to take another picture after shifting it to the proper position.
Also the paper templates should always be on the outer side and not between the woods. So I need also to turn around the second floor-timber from the right.

Thanks!
 
Hello all,

this weekend I made some progress again.
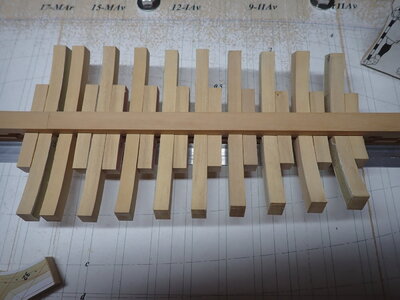
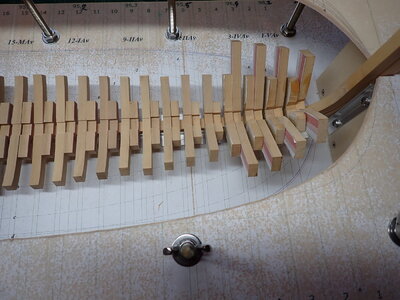
I have now prepared all floor timbers and cross shocks. Prepared means that they should fit on the bottom on the keel and on top in the keelson. I did not finally check the top, there might some adjustment be needed when the keelson is assembled.
2023-06-18_Keel Assembly_01.JPG 2023-06-18_Keel Assembly_02.JPG

2023-06-18_Keel Assembly_03.JPG 2023-06-18_Keel Assembly_04.JPG

2023-06-18_Keel Assembly_08.JPG 2023-06-18_Keel Assembly_07.JPG

2023-06-18_Keel Assembly_05.JPG 2023-06-18_Keel Assembly_06.JPG

Please do not get confused. For the floor timbers, I only milled a groove to fit the keelson. Everything to the left and right of it must be adjusted to the same height, but that will come when the frames are glued together and finally when I sand the interior at some point.
2023-06-18_Keel Assembly_13.png

2023-06-18_Keel Assembly_10.JPG

2023-06-18_Keel Assembly_12.JPG 2023-06-18_Keel Assembly_11.JPG
 
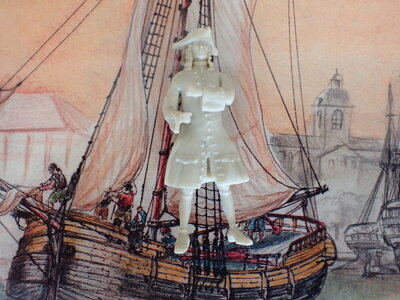
Today my new shipwright arrived from ancre.fr :)
He's at 1:24 and fits to my Le Rochefort
2023-06-24_Shipwright_1.JPG 2023-06-24_Shipwright_3.JPG

I have spent the last days breaking up my hobby room. Unfortunately, I have not yet found anything new, but I'll keep searching.
So I can't continue my work on Le Rochefort and therefore there will be no posts about her, but of course I will continue to read and comment yours :)

Today I have scanned the frames of Le Gros Ventre, as this may be my next model after Le Rochefort. Or L'Amaranthe, I have also already scanned these frames. At least I can prepare something during my break. And until I start with my next model. Maybe in 10 years ROTF
There are still 10 years until retirement and parallel to work there is not always as much time as I would like to have.

Have a nice rest of the weekend and see you soon.
 
Back
Top