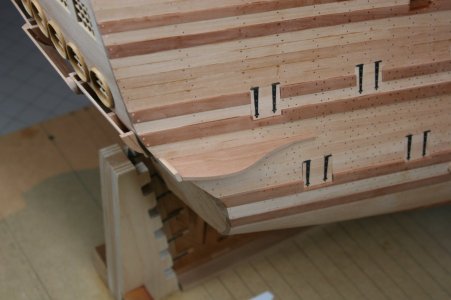
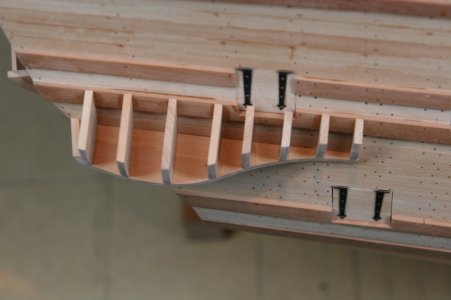
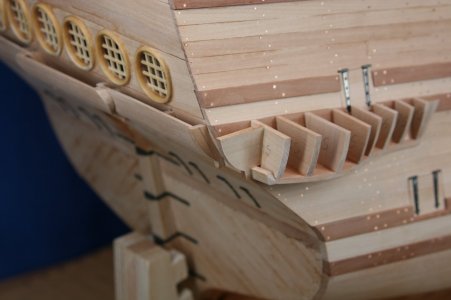
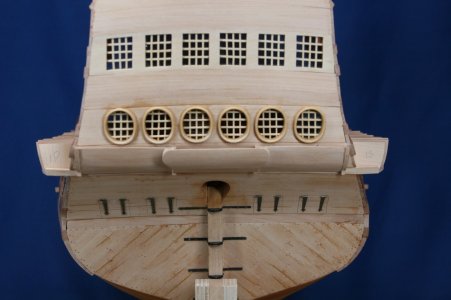
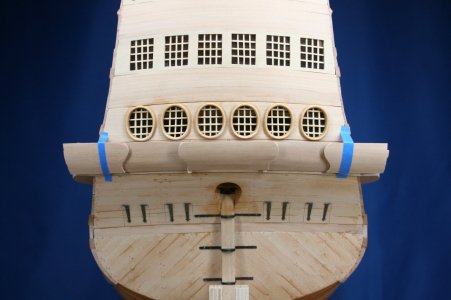
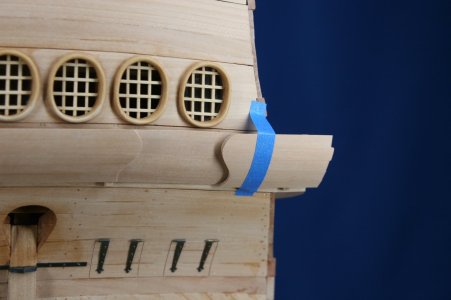
You have it right, Herman. Perseverance and patience...Your perseverance pays off. And including the curvatures of the panels and beautifully fitted together. Again an excellent job.

 |
The beloved Ships in Scale Magazine is back and charting a new course for 2026! Discover new skills, new techniques, and new inspirations in every issue. NOTE THAT OUR NEXT ISSUE WILL BE July/August 2026 |
|
 |
As a way to introduce our brass coins to the community, we will raffle off a free coin during the month of August. Follow link ABOVE for instructions for entering. |
|
You have it right, Herman. Perseverance and patience...Your perseverance pays off. And including the curvatures of the panels and beautifully fitted together. Again an excellent job.
That's an interesting idea, Maarten. I think if I was more skilled/experienced your thought becomes a good one. At this point I am still working out how to build this thing. To invest in carving pieces I'm not sure are going to fit could be frustrating (when they don't).Hi Paul,
I understand why mr Margerotte made his panels flat. The carvings covering this shouls now also have this curvature in front and rear.
Have you considered to make it one full carving, panel and carvings on it?
Indeed. These balconies and the side galleries are a 3D puzzle. As everyone knows I struggle understanding the drawings to begin with - and these structures just add to the challenge.That gives a compleet different view on your model, Paul. She is coming alive!
A lot of ‘3D-puzzling’!
Regards, Peter
Excellent critique, Dirk! I completely agree with you. I did struggle with this aspect during construction, but the shortcomings are painfully highlighted in a static image (less noticeable in real life).Mmmm, I am very sorry to say, you can do that better Paul. The lines are not nice, not parallel, not symmetrical were they should not pleasing to the eye in my opinion. Sorrry!
View attachment 606442
Thanks for this, Marc. It is good to be seen.Masterfully done, Paul. This area is quite complicated and I puzzled over it, myself, for quite a while; working one way, realizing mistakes and then having to correct for them. You have laid a solid foundation, here, and everything that comes above it will be well supported.
Yes, there was some imagineering needed to solve the problem I created for myself. I'll be getting even more inventive as I turn the corner and start building the galleries... What Mr. Lemineur presents is no doubt accurate - but the lightness of his framing just isn't going to work for me at 1:48.Very nice work Paul on a very difficult assembly. Ingenious the way your worked it out !
Nor do I when it comes from a good friend like Dirk. Indeed, I welcome the critical eye.Oh, well. I remember having to live with similar flaws in my own work. One Can always improve. Many times, I have gone back and re-done areas under such well-considered criticism at the Naval Academy workshop. I never took it personally.
Pete
Thank you, my friend. You posted earlier that deconstruction would not be necessary, so I challenged myself to find a simple solution.Nice work Paul. I had no doubt you will get it done without any unnecessary re-do




Nor do I when it comes from a good friend like Dirk. Indeed, I welcome the critical eye.
 Sometime nowadays I ask ChatGPT to rewrite such stuff :-D
Thanks for this, Heinrich. I understood Dirk to be highlighting the muntins (light divides) and those won't be hidden though they may get lost in the chaos of the stern in its finished form. And as I mentioned above, however, I'm not entirely certain how fixable this is. These rows of windows were built in such a way that nothing would break off in the future and as a result are not as amenable to correction as you would think. And if I break a piece of mica... I won't be able to easily repair that from the inside.Dear Paul. Kudos to you for accepting Dirk's critique in the way that I am sure it was intended - positive and constructive. There is, however, a condition to that critique. In my opinion, it would only hold water if the panel as shown in this posting was the final rendering - which it clearly is not. Once the balconies, panels and statues are added - and I am 100% positive that they will be absolutely symmetrical - none of the current lines will be visible or will present themselves as focal points (which they do at the moment). I have seen enough of your work to know that the final renderings are near perfect.
Quick aside question. What is causing those darker spots in the wood (it almost looks like grease marks) - especially around the top of rudder?
 .
.
Even the planking strakes you could easily simulate. Think it would make it more simple, but you do like challengesThat's an interesting idea, Maarten. I think if I was more skilled/experienced your thought becomes a good one. At this point I am still working out how to build this thing. To invest in carving pieces I'm not sure are going to fit could be frustrating (when they don't).
With that said, I think I did miss out on an opportunity to make these panels a solid block construction. That would have been easier. I thought it was important to be able to see the planking strakes but once the carvings are in place who would even notice?

Maybe I like them. Or maybe I'm just good at creating themEven the planking strakes you could easily simulate. Think it would make it more simple, but you do like challenges
 .
.
Much appreciated, Grant. Of course, now that Dirk has pointed out these imperfections, they cannot be unseenGood morning Paul. Your balcony insert are just superb. Some quality work here. I know you like to have everything perfect as you work however I think your "imperfections" will be sorted as you do more on the stern. I personally feel pretty much what Heinrich does. Cheers Grant
.
Yea…..thanks Dirk…now that Dirk has pointed out these imperfections, they cannot be unseen

Thanks, Marc. I took another swing at carefully removing the muntins on the offending lights and have elected to leave things alone. I epoxied the frame inserts and mica sheets and it's not letting go. Lesson learned.I see what Dirk is saying, here, and he's not wrong, however, I can tell you that these asymmetries will fade out of view as the structural and ornamental tableaux rounds into form. I had similar issues, but in the vertical from one balcony tier to the next. I got the horizontal muntins to follow the camber nicely, but I had some visual breaks in the continuation of the vertical muntins; there are a few areas where it's a little choppy.
It's there. I'm aware of it, but it really is not a glaring issue, now that my stern is complete. Similarly, the difficulty of removing and redoing my clear styrene panes would likely have destroyed the framed panels, where 95% of the work was invested. I decided it wasn't worth it, in the end.
And, yes - quarter galleries, or boutielles, in French, because they recall the shapes of perfume bottles of the time.