• Ships of Scale has incorportated an extra level of security when you log In. Please follow on-screen prompts to acknowledge that you are not a robot via a "Check Box" or a "Pictorial Check Box Puzzle". This is needed due to higher level of AI Activity Security.
  • SUBSCRIBE TO SHIPS IN SCALE TODAY!

    The beloved Ships in Scale Magazine is back and charting a new course for 2026!
    Discover new skills, new techniques, and new inspirations in every issue.

    NOTE THAT OUR NEXT ISSUE WILL BE July/August 2026
  • Win a Free Custom Engraved Brass Coin!!!
    As a way to introduce our brass coins to the community, we will raffle off a free coin during the month of August. Follow link ABOVE for instructions for entering.

Le Saint Philippe 1693 after Jean-Claude Lemineur (Ancre) in scale 1:48

Beautiful Paul, a feast for the eyes!
Thanks, Daniel. There will be plenty of eye-candy if I can pull this off.

We have al here witness the birth of a new ornament carver talent. It looks great. Did you use something to highlight them a little? It just looks great.
To say something funny; "You nailed it!" :cool:
Thank you, Stephen. Nothing has been done to highlight the carvings yet. They just have the tung-oil mix I used on the rest of the model.

All the accolades deserved Paul. Man I love the way the pear has come to life and the planking details defined after your finishing. Brilliant carvings. I think the contrast may look stark with the solitary carving in place, however as you add more (and there are a plenty) I have a feeling it will look brilliant. Cheers Grant
Agreed about the pear, Grant. It's far and away my favorite wood to work with. It's not great for miniature carving but for large timbers and planks it's a joy.

Hello Paul
ABsolutely wonderful work
Thanks for visiting, Gilbert - and for the nice post.
 
Hello Friends,

I mentioned previously that once the molding was installed over the exposed wing transom it would be possible to apply a finish coat to the pear on the lower half of the hull. That molding turned out to be quite easy to fabricate so already I am back to share a progress report.

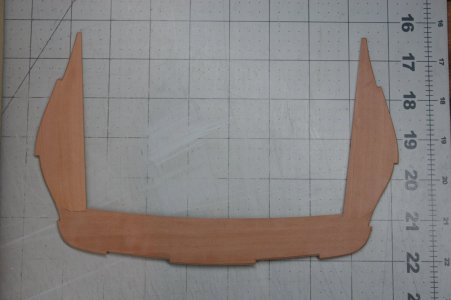
First, here is the molding:

View attachment 626941

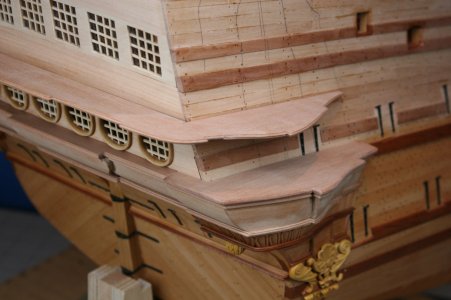
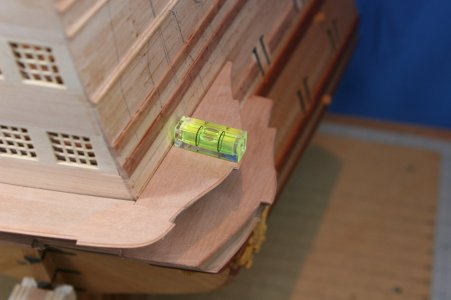
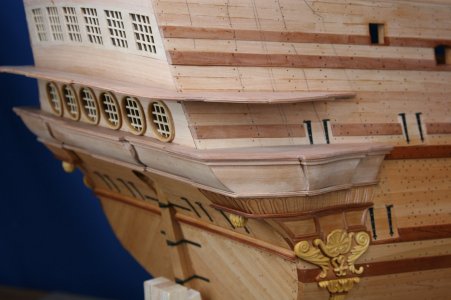
And now the current state of affairs allowing you to reflect on the carvings and how well they fit visually with the pearwood canvas they are being presented on.

View attachment 626937

View attachment 626939

View attachment 626940

View attachment 626938

I'll not be making any final decisions about whether more work is needed on the carvings for some time (until more decorations are created and installed on the model), so there is plenty of time for you to offer guidance or make suggestions.

Of course, the preliminary finish on the pear has exposed areas that need touch-up - but that can also wait for a later time.

Thanks for visiting!

That finish brings the wood completely to life, Paul. With a nice diffuse contrast to the woodcarving.
Regards, Peter
 
Carvings look very good, Paul. I particularly like the shells of the lower finishing.

I will make one small suggestion for improving the acanthus brackets of the lower finishing. Right now, your leaf tendrils are fully convex. These tend to look better, and provide more interplay of light and contrast, if each tendril is concave, along its top surface, if that makes sense.
 
Carvings look very good, Paul. I particularly like the shells of the lower finishing.

I will make one small suggestion for improving the acanthus brackets of the lower finishing. Right now, your leaf tendrils are fully convex. These tend to look better, and provide more interplay of light and contrast, if each tendril is concave, along its top surface, if that makes sense.
Thank you, Marc.

In the narrative of an earlier post I acknowledged that I did great harm to the acanthus leaves. Indeed, I was carving from memory while on vacation and didn't actually try to even make acanthus leaves. The fault, then, is less in the carved outcome than it is in the fact that I haven't replaced them with something more appropriate... :).

In any case, I sincerely appreciate your review, I'll try to do better in the future!
 
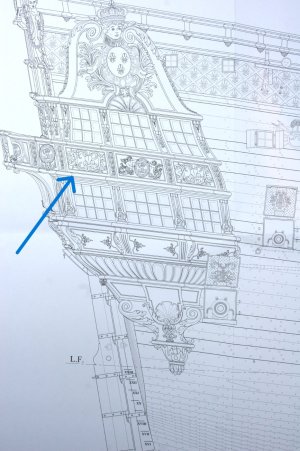
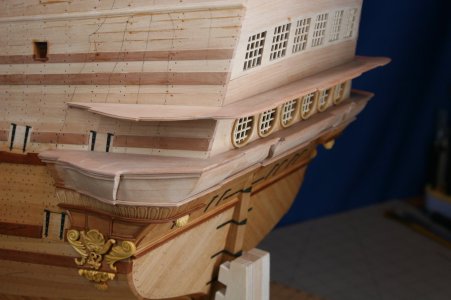
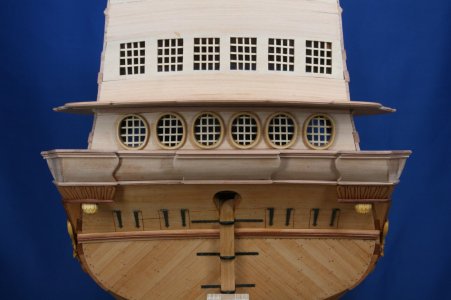
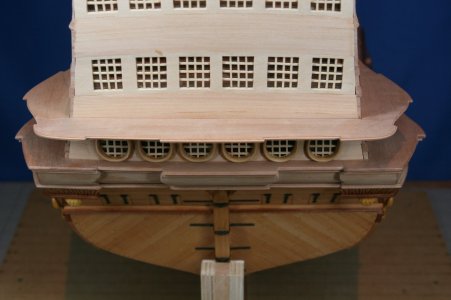
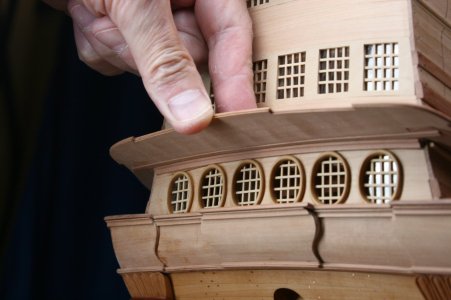
As we make our way up... the next major platform creates the floor of a formal balcony.

On the stern of the ship that balcony floor is supported by decorative brackets. On the sides of the ship that balcony floor provides spaces for three large windows per side (as part of the quarter galleries):

IMG_2209 - Copy.JPG

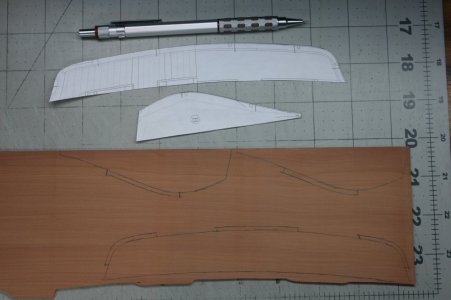
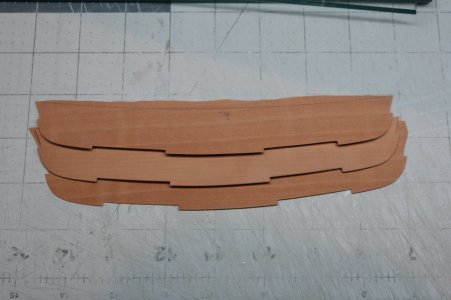
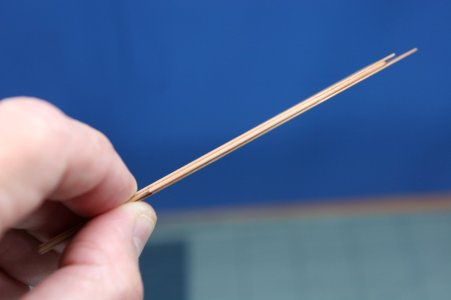
Once again, I tried to create the decorative molded edge of this balcony floor using a scraper - and once again I failed. Unfortunately, that meant I needed to build this part up in layers as I did with a similar structure previously. This layered approach is tedious and would best be avoided - though I cannot argue with the outcome:

IMG_2257.JPG

IMG_2259.JPG

IMG_2260.JPG

Joining the two sides pieces with the stern piece took some creativity with how the layers were overlapped at the junctions (none of this joinery will be visible - the underside will be hidden by a window box and the upper surface is going to receive deck planking).

IMG_2262.JPG

Test fitting:

IMG_2263.JPG

IMG_2267.JPG

IMG_2264.JPG

IMG_2270.JPG

IMG_2265.JPG

IMG_2266.JPG

IMG_2268.JPG

Thanks for stopping by to see what I have been up to!
 
I'm just noticing your waste-pipe rosettes - really nicely done. Also, great work on the QG level lifts!
ROTF ROTF ROTF Is that what those are? ROTF ROTF ROTF

You must be horrified by my tortured nomenclature, Marc! The fact that you continue to follow my work is truly remarkable.

I suppose I should drill a hole in the bottom of these pieces!
 
Last edited:
As we make our way up... the next major platform creates the floor of a formal balcony.

On the stern of the ship that balcony floor is supported by decorative brackets. On the sides of the ship that balcony floor provides spaces for three large windows per side (as part of the quarter galleries):

View attachment 628420

Once again, I tried to create the decorative molded edge of this balcony floor using a scraper - and once again I failed. Unfortunately, that meant I needed to build this part up in layers as I did with a similar structure previously. This layered approach is tedious and would best be avoided - though I cannot argue with the outcome:

View attachment 628409

View attachment 628410

View attachment 628411

Joining the two sides pieces with the stern piece took some creativity with how the layers were overlapped at the junctions (none of this joinery will be visible - the underside will be hidden by a window box and the upper surface is going to receive deck planking).

View attachment 628412

Test fitting:

View attachment 628413

View attachment 628417

View attachment 628414

View attachment 628419

View attachment 628415

View attachment 628416

View attachment 628418

Thanks for stopping by to see what I have been up to!
Absolutely wonderful work, Paul. You are an inspiration to me to keep trying to do better.
 
Back
Top