Le Soleil Royal, vaisseau de 104 - De Agostini - by Jack Aubrey

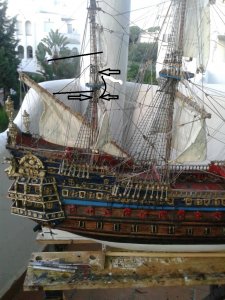
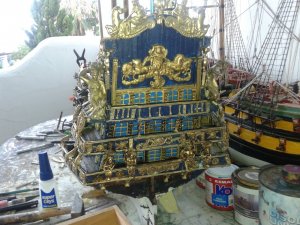
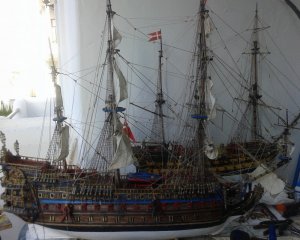
Additional images of the whole ship hull. I have to recognize that it is huge and bulky , , I'm a little worried where I will find the space at my home to keep it, if I will succeed to finish it. I'm thinking to alternative finishing ways . .

01 P1060967.jpg
y4muTkcOR_ZRo7vYCaEc2S-obF1uslMoVuUDFxrRrfMOdWF9EeJtcBHpmSVsxum_R-0auUX3-S5E4JqfaEk7hiRYqvIyzNZtsNa-71ULxTPM6FnrsuXIwovCu7sCk1u80GmqaP4KPZd8ixtpUYI0JR2fRzvDeLHaFPE0LvAjo36xPkekI5e5VwJvpgD2PTqFh6qEHcZlcwkTy4JOwINBm9pTg


02 P1060968.jpg
y4mea8wKkNisnD5kHF3ij_4XAmuRBsO1ovl5t_CNIe_tMa_anKoOsKPBoD-Djjgr2pPAoG2j5iaA2z8q3gETwkjPEDi6rdTdEiYSMwfsnmHMb_gmiybE1LbPUuMPlxEktivWC7YPVMQXSCVV0lJWGSwrChSGAkYyo0SjfT7adm5Q84mP1W7qH-wFxBEmzwPtNajHammkA22NvNB0G08Zw4ggg


03 P1060969.jpg
y4mPXVPLtvX_-DoYoVIhrqmS1gj-XCw8jq9Cna-21CDsH7KKcZLwfJiGqeeAUi1OnIXZYxpJAhWkJYIWt78yxT-8nm4BLfcc7DRRRIOH1tD6oSZ-yqi1M6BAZ4ux_myEwuKD0blnQtAXXuepFn-ibQTrYY1_W8D99wQxn2o0vqbm16eFoFfuyJUCYOg85vZ-bGkgfg7O6RJl_3d-ZNsvoiWww


04 P1060972.jpg
y4m8gNOQmHPuFtqiqN2HQMe8c2Va6Fjrsf-dsWpkqzC7Pn3H3xv4JeZgl53jHxugcTZXCSKUPfUYYPtRWGaBhCt_EtmdDkcp124Ds8c3-TauWMcTxIM6Opqx36-9DzFKGhopAbHPjBOdfBfeDhaTGV3lFt7cOKVd1aSBQldFt3HGIuMsYekRvvdR5XP_KP1DPGiLYrjPRh-KXkP8rV82ARecQ


05 P1060975.jpg
y4m8YUss_HkaXgjm6czVUjy43sd9sVeN18kWbdNhOi5ML_LOEgSYo45sE7JwZ4W89zlmZJz-bZEDYg8E1N5rJu7oJi5KSAjl83YRm246gJ9WSmZDecT2T-OkocVBFSod1Ft5OgnglOczWLwF3Q0tEbOrFpfu8MW5g06LtB_s89gWRFuvQV5k6sByCpDwQQ60CT55inUlNaAEubA1Dm-j7JC1g


Kind regards, JackAubrey
 
Saturday October 23rd, 2010 - Gratings

One task planned in the building instructions for issues 18-25 is the construct and the installation of some gratings, on the upper gun deck and on the quarterdeck.

The only change I made was the wood used for the frames: instead of walnut I used boxwood.

Here below are shown the gratings I build and I have then fixed in place . .

Gratings installed on the upper gun deck:

01 P1060990.jpg
y4mfAh4so49vT8bp46G-AGDQvrZcyH-nVI9XGK2kzbQ4j0jLzhZtoeV1_lS0I9TeQLfDYqbKR5vlFXkrlG4dNIDHBrSuTW1ELuP9S8XGuxnISUhACfNGvhUQNz5sAZuKWQFWsMvqzEZe3GGHAWaf20zb7cmLsucRlU1gtQCEmWWksgK55vZMf0fnVUMre_1OIXACCLOc2E0DEEdher7y99DsA


Gratins installed on the quarterdeck:

02 P1060992.jpg
y4mi2TpnIoZYqJecVovS7lGi2tdjhpJ3yrW0X6bNe-ZIM4TavQEzi3T8mUY4N8MNjnqFKn1-VqvXcmWl-SfrDNj62BZdz7u80NTM9zuNtU3bXuDQHlPFwERONx2HwSIFULdEJ13xADVtPobFT5qskbMkfgzR4ZE8QcqND3Gn1zcVeAHBAHRg-ckbeSoOKAFmLOmkpjcIDMwvdS8VaicB__4TA


An overall view:

03 P1060993.jpg
y4mOdQGGvX4s9YFmbTwPUuOaqpwT7mftySL3oSUwlbUosIwSsMtIf6rXzpr7Cc_Sfz7rcng-NMVG6NxOWH-Ch4UsyW6vGWBiRA0IuN3I1HZ8cpDI5OvORDt9inP7lEzgbZNlSH2XR73bBphxL8Pv2dg0ow1j9nOhKmGAviK787cug7dEgIwKxK_Ur4JCVXoCvJ5Jl-BVmIgpgBAwhtOp8-ZVA


With this further work I have completed the material I have, but, in order to continue, I decided to build the doors and the windows that will be installed in the vertical walls between the decks. Having no ideas of the layout of these doors and windows I based my work on Mantua Models plans, just for reference. I'll show in the next messages.

Cheers, Jack.Aubrey
 
Saturday October 30th, 2010 - Doors & Windows - Part 1

As I disclosed, while I was waiting to receive additional material to start working on the hull sides, I began to study an alternative solution to the doors and windows supplied with the kit.

First I had to realize that there are several versions of these elements (i.e DeA, Mantua, Lusci and the famous model in Paris by Talleron)

With the structure anyway setup in my Soleil I wasn't able to made them as in the Paris' model, it was too late, so I decided, in lack of precise documentation, to inspire to Mantua's plans, but not 100%. There is no historical evidence but . .

In the first image in this message, taken with a scanner, I have inserted the outline that I choose for these elements on the various decks. Above the outline there is a semifinished piece from which I obtained some final elements, that are the doors and the windows. There are two kinds of doors and two kinds of windows. Windows are single and double. The semifinished here shown is for single windows.

01 PorteFinestre2R.jpg
y4mmRWOAF7un_kMhUdzM2-j6wX4K1whXpEQ6-_bjhMxTtIXz49_KarpS2NvxoN77BodJoZp3q9Akss4lmTiPdT91j9wY5NxwfmFU6iiCHw-Z0mB6fTMmR0EbG-HyxDmg3cNS-FneOjAizufOPNempcHDKdkcN5eo4W_GEz4jrDnmm_YZ9mWwUCHRflJLLmg4v4PeZL1o2mLay7r8uVhSMmwqQ


Here below a zoomed view of the semifinished. It is made with bitch ply of 0,4mm. thickness. The base is coloured before installing the frames, made with the same ply. External frames are 1,5x0,4mm. while the internal (not yet visible here) are 1x0,4mm.

To obtain these strips I used a home made jig as spacer.

02 PorteFinestre1R.jpg
y4maT42R2qGgyZhvHPs97KHBMfCDUfm2UxaQBor0rDIw9-OdWEY3Nz0prpUWdXa8cRXgPWhNM_zaDIXiZTTW26okYKizh2fI8oyrGlwCjhsmBjvB4n6eN60N5IUmUoY_UVMqRrEWjol_W2qwS4pYJwmeMOryBS26jR9rqKwi18yw3F34209_6su5nKyG5BSu2JEdA1BZRufVAa3b2RfxymN4Q


Here below the semifinished of the double windows.

03 P1070001R.jpg
y4mXjIPGuScb6k4xn3J-1Nguo41tjuZ5et_7D0fX6_2BkRT4pGUDSt7b0lx3mwu5RN_8JASZr5Gsm15IYMRqix0ebf9fgKHjCh4x-xKxDUl9A4RIY6Az9P16D1lUGST8PvpHwtp_35gl9oIWQSaZ1vCHTBErY4JT4IGltkGRS4gRfh8nNJ6KIuWNCV6NVgLChViU_fQE2eNbCiI0rWCMRppcQ


to be continued . . .

Saturday October 30th, 2010 - Doors & Windows - Part 2

Once finished the single elements I cannot resist to see the result on the model . . . also because I spent an entire week to build them. So, as soon as they became available, I installed them. Here below how they appear once applied on the model.

04 P1060995R.jpg
y4mnS2VG2B9JhMscDiWTBazN2mu7-gbZwpBCVK0AAlAQCsWLpvgYitFHHjWPBgyDpgKJwobXqj60LHl3LXy8ShIUCCaFj22muh3mBzztQCOwy8IUQgqBWsBYt_Dcmb8o0WFse2gmDJ0cvyPjLAGkgBk9y9vmeTw8CvkepDtKKeIsJUgVZN0dOEtZXv7PAOy3QkJPgbJh_S17FRdocOzY-xRXQ


05 P1060996R.jpg
y4mQeZtZuQR8ChX6SCKememPKVaQBoP5iDlnMs6BSSOLooIq5JCfr6atkot-gLE4vqjlAdOgpIGiSpn0F-IT9KJxQu54_fvpClUeFzh-v6AOty96TKc7IjBjjvIP630vicGnS0iLkZdzgitE9VMp7UqLOwJnM3glCPVgVQP9fcQLphEAOPXyhZoUaV5x6W5GUPfjDiT46MXxzrh1AbdfPApGQ


06 P1060997.jpg
y4mkv7XHWlq8I563v0rciFl05HRE3y2I8N13ShbmyIEYcXeCksIRLvNhq3JeH9ugAqdxbnXe7zerZqbxhnBRh4VTiOjv6M-MvZ0YWFtJl6z5J7Ya5Q7NUB_IZbhYPmhin75bQEX7YticnJ8HD3C25Dm736tPrRfB2XAHqQ5l5wPzvA_Blgx-3bqqaTjidwen_omnvzgarbxo-Sm7ePNcX4Q9A


Something is still missing and I need to think to handles and joints, but It's a great achievement for me . .

Here below some news in the bow area . . the beakhead bulkhead.

07 P1060998.jpg
y4mmXzSGCUngFkJArkIuHOHuvXVG2agh7gkfMROKPYbB-dDBf5NxaZfg0TvwvBe8jHJrPrxUWnXaYNv20ivoq0VicbSo2-pe5VCqfRbc4uXUWVSUyJTJ4OvewoCezfBeSl41QerivM0aGpTWfP6_8vO3pABH_jOFazLB7GRgyUf-HCQIRZkXDeRY5WEUBcM2bkxA0pkmeoAcm0-zoqLFSJkbw


Cheers. Jack.
 
Sunday November 14th, 2010 - hull sides and gun ports

After having at last terminated the work on the ship decks (. . for now . .) and having finally available all the pieces needed I started to work on the hull sides. In practice at this point the hull structure is complete and the next activities will go towards the external plaking.

Before the planks there is some other work to do, and this is the matter of this and the following messages.

What I have now to do is to mount on the upper side of the hull some pieces made with ply of 1.5mm thickness where there are pre-cutted the gun ports. Before mounting them is necessary to finish their sides with sandpaper and small files.

Given that these pieces can be weak, in order to be able to reproduce them in case of breakage, I made a photocopy of all of them . .

As glue I used the aliphatic glue but I helped myself also with some brass nails. It is obvious that all this work was not done in a sigle day, I spent five days to reach this result.

Here some images of the work done.

Left side near bow . .

01 P1070008.jpg
y4mbDEU5-uLTF596gHomRdrYa8G3cM7ayS3I9bZUh6TPSaoxRn7zXPyeBi34b6i3XtcplEcu_cYmdfsEUExUqfHB0sejp6s0LSqaj3meDjNB8_72JeyyGMGxN0AxTLL69rNUM5pp94mIYnulKrzjb0hw9wJS54fQfbyxjhRWcFpqxB6aZjy3LRSgqVqRdbIQWawZxpdYaSXezG6XjRpva23sg


Left side near poop . .

02 P1070009.jpg
y4mLL_TM9tAO_uhqZiWSnXTRclW9i5F-7-b8bQtQGPny2EpENDhr8-ISaaOGu6QNpGuCE_lFQxt5vGnRrptJigwan8CF70Mg5pm1APRm056G-tI2z6FZ-J27RoE5Nju3sjZ7PzRJ4ZIPWEt3W7WcHdF1N2LOqxqXOytZSR5NpjCo3DRT1FAD0rjwEiaMN89JIDXQjjo1c5OqTBvW_Vz_M3RbQ


Right side near bow . .

03 P1070010.jpg
y4mRPa64Luw_VafSDdWWH9TO2y7m_Dido94-IOLdYtSyYP8h04y0HEpUsGm_dzgBLruFK6MDgmu2_JusOfhzJLyKggw82XF7oriAexcgveugcoD8TLzBCZWSaKPDFdddL2bUwiZTjj1K5MQurY_Z8B-4LGr2IzvP72x1nrGMQCsTmUbNGVMw9FGD3NM2hk4kXxyE7XOo_HzBuAC6BjXyA560Q


Right side near poop . .

04 P1070011.jpg
y4m1cnr0sVp2w5yBmwYQc-o-FrWtWw5bNAPfj_puuPX84eo9cnuIc_sd3N5czmdg_8hY-pvR1TGGNqXPDZu_d7MkQhv6LkCSpYuJfrh4KORdePMnA1A9TUTzU5Mc3sGDOV7lf_H8MUjiU8heXapq7fKXx-qJnoWtL0B-d8rOWocM73KWOqT9nJOtY4AhwAUScHAp3xpmTAr5t9otqAmVLqi6Q
 
November 14th, 2010 - Continuation

Here below four other images. In the first two images you can see the entire model. It is very big and to focus it with my digital camera I need to stay quite far from it !! It has not the size of Dolphyn, that you can se in the background on the left.

01 P1070012.jpg
y4mQJ2x5TmlYMfy8ZEM6x7phKLp-vUxMX1uSjYOWbfIhxsOSeNhwTFraqSKnO2AinbzvskSBqAsoTB9hTOAkgtBMSzckVz1n87eX-2TQ9PZJq6J4Z_hiKW7SZ4fvnTTGjs9xWARjosADRD9UISZQA5xQsQufUoYg31kOP_i3y-IAq_YkqeALzBvY7nbH7-IC_HD48MPyylYdSkoO0swwUA7IQ


In these other images it's possible to see also all the doors and the windows in place . . elements not totally implemented when I published the images of them.

02 P1070013.jpg
y4m1JYCpBzn6gy5LLc7g5Ex1ZoOQfnRUMzJXiQX1FkiT7uLCzgnGsKsgr5Rw7mcrWl-KQaDtamZP6nvxpRVN9MhM_iXnIbgXULu1mmFJDcrkF6_wW1kfRZF8-Z-mOrOpXHjy18N2BSRDjK2eBhFwmUnwdHvkIWzVZTL3HG9T6L_vLkdl0ncKJmMEozGcfqp45v0mBH2C-ss-FRbgZkgRGxXKQ


03 P1070015.jpg
y4m1vriG13bb_wglNoKXfUgBSAnlWb_1T2Vyl1cQhl88y5urhKU1vd9-k259uesUnXGo8eODF1ssKynYZvB6kmhnbcTCk4FA5r8mJHo0VdPbnRKqE24a9Bwcuv4aIQ_NVvXWfj6pR_IIZahD66n9X8WbhOF-0JBI2Z9ueXdya_Ruial0AwJKdcAP9D28jkkDz8SUNZlOvsZQy-veIOkKSNREw


04 P1070014.jpg
y4mBcq4iSHvl5_a85CHB9iNIZsky1eY4yri-iQsH8Wdw4-syRK3s9EEBveHHfhQ91aWqddiVsvl2z9b7JIRhCkzxapSUg_xekP9RKGYmXo3TtI6sRCgHNFGo4wtwX9HC6ZH_U5bpPEwFI4BbYfpRpAHBPjZc4JH43iwyeVcDlYBemh7aHNn8Di6oNrdKIAt89wre4nUBKa4G2Lz2JENToNCFQ


See you next time, Cheers, Jack.
 
This Ship was my last build. Yes, it took 4 Years to build it- 900€ plus- apart from all the other materials I bought. I did Not use a single one of the Planke. I used full-length strips. I was so lucky as I found a link in the Net from Italy, where every single delivery was scanned, so when I started, I knew exactly what was in the next delivery and so on. I must admit that I today is an Enemy of the Agostini. The Weekly delivery is always made so that you must wait a few weeks to make your build correct. de Agostini is NOT a KIT manufacturer- Selling Books etc_- so they will make sure that you will need to buy the next one.No plans 1:1 is giving out before the end. With the help of the Italien info and Book of Drawing -scale 1:100- made by one of Spain's top modeller Isidre Olivera- to book can be bought for 60 € about, with all plans needed to make even an admiralty model I finally finished it, but be careful, there is some big mistake in the rigning and sail both on the "fore" mast but mainly the mizzen mast. I did this mistake. With the result, I did NOT like the Ship.after 4 tears standing out on the terrazzo, last Feb it went to the Wast mill, recovering all the metal parts and a few other things. I know that special in Germany de Agostini is selling a lot, but in spain, they are out. Tried with Bismark and a few others on the facebook, but no sales.
These NOTES are not to criticize you and other builders but meant to thing. Here in Spain, they used to advertise on

pea mobil 058 - copia.jpg12-06-14 006.jpgsoleil1.jpg

TV, Magazines with the Message, that even a boy of 14 could build it
 
Wednesday November 24th, 2010 - Upper hull sides and gunports - continuation

Thanks to new materials just arrived i can continue to install the preshaped ply on the hull sides . . Now it's the right time for the upper gun deck. In terms of experiences, nothing new with respect of previous similar work but I had to close the background of some gunports otherwise I will not reach them after the installation. This is clearly visible in the images.

As usual, here below the poop zone on the right:

01 P1070016.jpg
y4mMGGKEtB6bFcs0LFK3glxSgK1-S5RlOzSD2Im1Ki4vEHLMqNodJ6TjNrqG4fd37DWM6du-4d6dw_GONlRUKZfGON7i7ByeKyxMeU0EjQmwWv8rwIomiHHAOUSg9SuRMSAdEXy8kSKX10bRHfcoORsQOYHGRbhdVEFVY8YH5ttqbdUJ5Fio7zixOvT1IpwAKa16JSnq2Oq4ZXeuSS4rOc2JQ


And here the bow zone on the right:

02 P1070017.jpg
y4m0YVUbD3YLyT-UQAupgyCTkLanxLCiGSyHLh3xcR4vQrgoYCtljXYauqqRlalY38MFO9VwysV2KvEBKnw2L-qJHHSqsuS2lhVjGYPUPhb4VlXlKMQ5xDa1WCBH7uFj5l4rveBoHK8Wv7CNxSLTcY1JrDj9k0ZQjZMqSap_P5w9_OR3EhpB1l1GUVG9Mm6PyldDrUl0XXx49efTGDqPqWISA


Here below the bow area on the left side:

03 P1070018.jpg
y4mBj_BU4_I3y-_KCr5DrW0u3vBrq8OGjmM7l052pZVVVf5PPQXB06lsMRxTf6W1d0IKjAzjsF25oEyNi9IEpAKBq6MNdFcgvqB6QsEBXlsyW7deSpX5dbxbBZHtQOYZJazTYQZQqBTeRC_yWJJQ4mXPWfIUNTeMPpNq8W_TDlqfBxy_i5syhvJ4fSNClcCBjEgyXKnc4DTZwCP_ejkmjzhXA


and the poop zone, same side:

04 P1070019.jpg
y4m3B2Gimb_d-vythJsUBtKAoZ47Bz6DfnsxgCN6yC8s622_RWE8N1Pn6jTWsQLB5ZcOaJxoyNPxJlbwFAQpiOqHDCb8nik8k7mcVDU6KhD6WarDLTiyGq-EjF3CqBvn6HpNghKyVJ2inaF52jGXwAz3PbDuWa2zr0y3yMfYIGSX_xtQf-fVmfTeGk34tmjm3OriRTUxfqRtxjUWR_xhZjHIw


I have coloured with mahogany stain the internal side of the ply that simulates the handrails, but I don't like this kind of finishing, it is not realistic. I will plank this internal side with walnut stripes of 1mm. thickness. In addition, before starting this planking I will install a shaped stripe to simulate the waterway.

But these are for now only plans or ideas, before this become true I must finish the hull sides, where two pieces are still missing . . See you next time, Jack.Aubrey
 
Continuation . .

Here below some other images belonging to November 24th. With this work done I am aligned to the work that should be completed with the material and instruction provided with the 36th issue, with some small exceptions that are not important for now.
In the background of the first image a german heavy cruiser I made +/- 40 years ago.

01 P1070020.jpg
y4mG2athTAX5Q6Eql8KimOolQ5ImXSwJOKdsg07vyY5Y8uQyNs9wZR7sypmcgcm9FiR443owiYsx7AVmNWlD8co1bqn3Yx8WPk7LkhxREpQFZACEYv5OI4XpB7evjJ0tVv1huoi9LQLsXBjRimkF1REbegXNBBMa50t6iD9RRV0Hee4oTC001HYrTRcDnDC4yffuZ2DLaThjzfd1GhS_IeCvQ


02 P1070021.jpg
y4mUSPAFgNm4I_z5OMzQsu3v_JxgfysMX04mcnmJGT8auHCpclvplg2Nb7BSyzVN254fm6vqYiBiZAxDUeUoZYb0McuqremD30ZkcktBII7kbQ03YZHYbrvYYOJV0Hc7CKB834RmeRndxYlBA6O_IaOmO7y41kqWpY2r3brPoCom_DtT5tLcKkk-F2qEkV9L-cxWdBJ-6jJIXh0K17PEDYPuQ


03 P1070022.jpg
y4mBkD3weFPy3coPvQBsRhvc2-Bhz7wT06aqzXoR3heZ_-O5TCTZFFH4Qx-ZjtclygJqsr4ciWvXtXIJY_Lv75XCpHh8c6ztpQeZRFTzEFFJptfPZZv-e-eRXW8KF8dJdRAMQVqtGfTYSHA1D31nCB-lsZBk-viSMhpBUf5rar8vlpmk8hCW386M6baapqwQe8ttT84HW9j5BoCWS6Cuix09A


04 P1070025.jpg
y4mNJYLJpNk-1MgXNb6Yo4LGTAHLzz71T45ccMY2jzW1QlmJHWSef0nQR1d12m5oFi9_MklmaIqfqt9F5V0vi0sAsDkWLe1DN6oDa-ThS64Wcj6nzJwQmA4ZGUGh3D36tOjDn4Q21GZphQbqd54eJAFxB5KgDvQ0ql4WEvnAdWMwxVgMBQQvCxR-Nt5RYnmUjHiWNsRn_gGdpkpcZ7c5Gx_dQ


See you next time. Cheers, Jack.Aubrey

PS: I have received a new shipment from De Agostini, package n° 10 containing the issues n° 38, 39, 40 and 41. There is some new interesting work to start . . although I have some new ideas for a more realistic and practical result.
 
Friday November 26th, 2010

Here are the last two ply preshaped panels . . They completely close the upper part of the Soleil Royal hull.

Left side:

01 P1070027.jpg
y4mSykN5CAKss38Ke4Y2J0f1yitG-pzKaXiGbbh1mgtSb7UtCcoe7sT0OJSe9AO-HDjfYsj7IYt-FScCLE69wQe6802sEutuXvNO3YjBnForlYLtrZ8GpTkpEiw9Fd9R4ESEzzBfZrjwe0q68Fm9TRUGm5PgqsCdNjcP_lCZ_VRtGuolZkdp-u4JJGnBorz1jCeaRg46sxvBwQGr2yF9ryz3g


Right side:

02 P1070029.jpg
y4m6aueC74c9rB5OX9uqbcJgQoaAie998sf0t0zD7nQ-6LgFfqF50Gr5JLmrLPHWOKlBz5npYgtpSfWqCfFC4EaPMtK9K4MmCTYOpSdXFWmL6rgtzptP8I9MQDD5bPUn-Af3VMKoql8ybfxhxdjvRAL8KYo3oDyixqRz_KpYv9U870G0Ps-LXpmGInWECh5zIymDp7wsrAFdftHqr26i_l1zw


A view from the decks:

03 P1070028.jpg
y4mgWLszdkGsyKn80Cc3xLq76CrjGuKgcnC3CgUeDh5sJNbslwziCDTPez089pphdWIQq8Jnkb6sjhs5bpyYdCKFt21lySuKWStUqyMK2-Z8jsavVPT_D93EynvQ-UjiX_AKAlilVY51MKG5eTUdP_DHitgBIfc6Ab9M1LChqndDnoI6nDIl5gv_67WY6IkVt3rrHizcPwzFeHDQOTvPSlzKQ


04 P1070030.jpg
y4msHAGQhmYgbxKx2fTrn3GubDBAz8mmM47ZBHEDzaNhJj9ekuObMi61aV5qEqflXBQLXLLB-5ZdT4fcnCLShPSUINc0LNaT7INu9hbYOu25SHCqKNuBkv7AnxmQb8t0rhKqEMpOPp8nwMQ8QZVPFSI_iC7auh9shEOdCUx6c9SUXRfdSo-1E3NPKrLgEWZhSf31CrCtcddllFCsLQeW7EEAA


And a view aback:

05 P1070033.jpg
y4m6yeY2a99549ArdMyUU8y5WWiD9igE-5e8x0b1b1OOqf45Ij6DkVJIR-bl7uDbxVX0rUyMl6IIUIZv3BhC5HIm1qdvKgBViAfoX7rpJ4lvLE7Jqa95VWqvnjHyZ5byfbLwIJM9eurRNzkb-cCob5nKMcpJVa9lXkctGbWchqSLmlWb92GW7q7UkbqDI6qi8VtVCC39F-8LjqVu2Two_hJdg


I'm now in sync with issue 38th.

Next steps are to start planking all this ply covered area with strips of softwood 5x2mm.

But, at this point I need to implement some of my planned customisations to enhance this model: I will show these tasks in the next messages.

That's all for today, cheers, Jack.Aubrey
 
Friday November 26th, 2010

Here are the last two ply preshaped panels . . They completely close the upper part of the Soleil Royal hull.

Left side:

01 P1070027.jpg
y4mSykN5CAKss38Ke4Y2J0f1yitG-pzKaXiGbbh1mgtSb7UtCcoe7sT0OJSe9AO-HDjfYsj7IYt-FScCLE69wQe6802sEutuXvNO3YjBnForlYLtrZ8GpTkpEiw9Fd9R4ESEzzBfZrjwe0q68Fm9TRUGm5PgqsCdNjcP_lCZ_VRtGuolZkdp-u4JJGnBorz1jCeaRg46sxvBwQGr2yF9ryz3g


Right side:

02 P1070029.jpg
y4m6aueC74c9rB5OX9uqbcJgQoaAie998sf0t0zD7nQ-6LgFfqF50Gr5JLmrLPHWOKlBz5npYgtpSfWqCfFC4EaPMtK9K4MmCTYOpSdXFWmL6rgtzptP8I9MQDD5bPUn-Af3VMKoql8ybfxhxdjvRAL8KYo3oDyixqRz_KpYv9U870G0Ps-LXpmGInWECh5zIymDp7wsrAFdftHqr26i_l1zw


A view from the decks:

03 P1070028.jpg
y4mgWLszdkGsyKn80Cc3xLq76CrjGuKgcnC3CgUeDh5sJNbslwziCDTPez089pphdWIQq8Jnkb6sjhs5bpyYdCKFt21lySuKWStUqyMK2-Z8jsavVPT_D93EynvQ-UjiX_AKAlilVY51MKG5eTUdP_DHitgBIfc6Ab9M1LChqndDnoI6nDIl5gv_67WY6IkVt3rrHizcPwzFeHDQOTvPSlzKQ


04 P1070030.jpg
y4msHAGQhmYgbxKx2fTrn3GubDBAz8mmM47ZBHEDzaNhJj9ekuObMi61aV5qEqflXBQLXLLB-5ZdT4fcnCLShPSUINc0LNaT7INu9hbYOu25SHCqKNuBkv7AnxmQb8t0rhKqEMpOPp8nwMQ8QZVPFSI_iC7auh9shEOdCUx6c9SUXRfdSo-1E3NPKrLgEWZhSf31CrCtcddllFCsLQeW7EEAA


And a view aback:

05 P1070033.jpg
y4m6yeY2a99549ArdMyUU8y5WWiD9igE-5e8x0b1b1OOqf45Ij6DkVJIR-bl7uDbxVX0rUyMl6IIUIZv3BhC5HIm1qdvKgBViAfoX7rpJ4lvLE7Jqa95VWqvnjHyZ5byfbLwIJM9eurRNzkb-cCob5nKMcpJVa9lXkctGbWchqSLmlWb92GW7q7UkbqDI6qi8VtVCC39F-8LjqVu2Two_hJdg


I'm now in sync with issue 38th.

Next steps are to start planking all this ply covered area with strips of softwood 5x2mm.


But, at this point I need to implement some of my planned customisations to enhance this model: I will show these tasks in the next messages.

That's all for today, cheers, Jack.Aubrey
Your build looks very good- as the instruction says- I have only one COMMENT -and that is not only to You- Why do all KIT manufacturers insert and finish the Decks, before the Planking. It is not only your build. By doing your and others way, you are forced to insert False Gunports and use the Small Nose guns (Just the save money from the manufacters side. If later, when planked, one or more of this guns+port are getting loose, it will fall into the hull, and cannot be recovered. apart from you cannot reinforce the hull from Inside and it will later give some rignings problems. Anyway according to instruction "WELL DONE" you can always contact me. p:S. when coming to the BOW, be careful here as there is some very fragile part-bad wood and to thin. it is made by bad wood and breaks easily in the curve, apart from to thin. One of my German friends got it made finally in metal.

1367.jpg
 
Buen Giorno Jack. I see that you are living in Italy- Milan- where I was travelling to until 45 Years ago to Mainly Milan, visiting customers from Tutino, Genova, Modena, Bologna etc..I have a lot of information about Soleil Royal even a book of Drawings scale 1:100 made by maybe one of Spains best Modeller (nov mid 80th) If you are interested in something, send me a mail: peandersen@telefonica.net. My ship went into the wast Bin, but I recovered all metal part, guns etc. so interested you can have free of charge-only cost will be the shipment cost
 
Hi Jack,
I read you are building the Lennox also, what is the status on that one? That is a very interesting project.
Hi, Maarten,
the built of the Lennox was in my plans some years ago.

To achieve that I purchased from Richard Endsor, the author of the book "The restoration warship", the ship plans in 1/48 scale. Then I worked with AutoCAD to scale the original plans to the planned dimension.

The intent was to setup a cooperative project with a friend of mine, but, unfortunately, he went hill and the project was abandoned. I tryed to continue alone but at the end I decided for the HMS Guadeloupe, another cooperative project with another modeler.

The original idea for the Lennox was to build one single model with the work of two people and the hillness of the second project member was fatal. The Guadeloupe, instead, is a project that shares the experiences but anyway consists in building two separate models.
The log I'm presenting on this forum is my side of this second project.

Regards, Jack.
 
Buen Giorno Jack. I see that you are living in Italy- Milan- where I was travelling to until 45 Years ago to Mainly Milan, visiting customers from Tutino, Genova, Modena, Bologna etc..I have a lot of information about Soleil Royal even a book of Drawings scale 1:100 made by maybe one of Spains best Modeller (nov mid 80th) If you are interested in something, send me a mail: peandersen@telefonica.net. My ship went into the wast Bin, but I recovered all metal part, guns etc. so interested you can have free of charge-only cost will be the shipment cost
Hi El Capi,
I appreciate your offer of help regarding the building of this model . . .
but . . .
probably you didn't take care of the dates listed on top of each message of this log.

I'm publishing events happened many years ago, more precisely I started this build in 2010 and I finished it in 2014.

I used to maintain records of my work in italian and now I'm publishing the english version on this forum.
If you are eager to see the finished model you may look at it here https://shipsofscale.com/sosforums/media/albums/jack-aubreys-soleil-royal.50/

Anyway, many thanks for your comments and if you like we can share ideas about De Agostini and partworks in general. Regards, Jack.
 
Saturday November 27th, 2010 - Waterways

As I wrote, before starting the external hull planking I decided to make some customisations: one of these customisations is the installation of the waterways and the planking of the internal sides of the headrails.

In the following four images you can see the waterway installed onto all the decks of the ship. With this operation it also becomes evident that a consequent benefit of doing so is to totally fill some gaps in the joints between the decks and the headrails. In effect without this "trick" the deck presented some small openings that the waterway simply hided.

01 P1070034.jpg
y4mehEjnzyOM8Kr6i2bBsjXj5A0kUIhAtsKp8wdhOvF3ZI0EOKRbAPe7A9Eb8g2IG6FmmzUAguqjyFK5YbcMrxZHAeYsvKmBvq8LY4tpw3VXsTCsNt6lIEU7EMKvlLP89FZIMrM5ZjewWSXnGRtA0gYyJ44flxw0JJdJPW7K3pMG81j0zNj7RHnvV_eYoiFfjiDqwX0dCjAeMfKJsi4F6a7kA


02 P1070035.jpg
y4mGy8ASCn5hBZqP2tgxLJ6wRxsDRpXPaQpSGbjA4WocNcG1e--llSVhcGwwg8sDcLdl5LQugPsNO6AnKZqhh2QbOQkeR40SCAGne6ROeETia-czfukmBGtVq048DGJGPB5eMI3U9zdyr-cKvhcYFSJy21jpEisI49YdgoxX3p0NHtjWnG6X7b_QYBFqxWp_3-DQ9uDozgew9-rOE7YVdIsHw


03 P1070036.jpg
y4msYCuRb1LnlLmB3sqntL5QXkvIDjzqqyA7qUmkpv05obVtrRqeE2ByjfCHO2O59yfnxw9qK3UOdtH9_sNClj9IBB2BPZBOrOZ0dE9B5VdK3EohfvPKTwYQ8mRVspy4Y1AHNGSaQRoLc_1i1oll6hwVITu6yb9UjmVvOW9rjM0O97MA_vObhIUxEt2qKiAKhjX6ekOnzCycOv5Ld4d2l7ehw


04 P1070037.jpg
y4m1MXpucjsOLervSLIneUVnAe6F_Uk3_K45UveqVeWpxaUMj6vhgCX8yd9lFnM25iVPLD6kVC2F0xl1lDE6Zpi12hXCbKuOvDzp_-DiOvAARb3xKlIfZQ-l1_o89-IhNXgvxc1j4eECDa59hUJuIU_fve-tcfUQboIkfciW1mrO3jgWZpfaekoCgxlgBKge8ZwuD7m3SLg2Vx8rejyP4n1aw


The waterways dimensions are 2,5mm. wide and 0,8 mm. thick. Its installation was quite simple: the main problem was to remove as well as possible the exceeding glue.

Now let me spend some time writing about the shape of this element and how I obtained it.

The section of the waterway is visible in the left side of the next image. Having in mind the strip dimensions, I did not though to obtain it by starting from a simple small strip and rounding a part of it. So I tried an alternate way.

05 Trincarino.jpg
y4mfrJVoekodtzyf94-D34JCm5wL94Dhvm3cnjhRW3N0kNp3FLr1nTVHZdb24AG0TrVT9_WbCfKl0qhuaN4rnF5OjdVm0MFcDP_aWnBfo_YSectW5e9t8T03lj8WcqRaAMpOw_giP8T78RYlYoV4j7lNwwW04NYvXVi3W6Ul-iFeDHk6sJGrjDFbMYWXHGfBMbvjOk7p5evL1D5_vgXWtM9_g


The right side of the image shows the section of a beechwood tablet found in a wood store. It is 1cm thick and 8cm wide.
I rounded the external angles as shown in the picture. With my circular saw I cut the highlighted (Yellow) parts obtaining two strips of 10x0,8mm with a rounded side. At this point, with a cutter and an iron ruler I obtained my strips of 2.5x0.8. That's all.

See you next time. Jack.Aubrey
 
Here are some detailed images about the internal planking of the headrails. The gun ports are not yet refined and the rounded ones on the higher decks are for now closed to avoid possible crashes. At the right time they will be reopened and refined. The visible part of the waterways is now smaller.

01 P1070042.jpg
y4mj52c3dYoI2Xsg4fDUfbFxCAVZ9478OSjTRlD1D5IWgDrd8wVBjvQWJ_xoUCNBh9cxedfEUInT0kcWQdLYW7h293AsBvColGTnU5u8sf7Af8Qvg91ROWuaxbCV5gn8hGke7bnxYPAl-Wovepu_gYDy4j8JaPF-fJlpWBpubNn7IgrM41navEjJikj4b7P2HYfPTtI_C1HHVXE5V-zxTkjqA


02 P1070043.jpg
y4mZOZY_04qTv6OecWSbfruQBiaXzbp5c7hgD7XDkmakrLERNSxeEdc0Pee4vy5Wx9EHqFxO4IPmraj5hmnQqOfRIWF85Ikcf-KZYhnvbXeY6qZH1_wvZm95VTXtb9KZLrU3kYZeyzGqK3vTwvPSW_f7FsZIQgBr9dD6dis59BytIsvihQnkkq4p8Z39pqCvu0o8QCUNq-yJyDgJ4n5ywFsrw


03 P1070044.jpg
y4meRSv782fD7c-TmETnFDbMIz9olnINKiyKm1v2VgqJqcs_c7LjRtQuI4EHPavuTsdr9Wo6jqTflsq8yg2Do4crCTqjt1QwpUwVTLGfiDwkrHB5metjx4nlbTAFjWNprmRp6e7zs04eYWMCEi-XoQeW0Hxr4_I1TmRy0advz_mGMMj82AXypObE9-OWayLTGaxtzbatJn1qwx36ILRnF1A7Q


04 P1070046.jpg
y4meVvk1bLC2D6mfb1bjTOAiTV2_fGn2SpxliK__BULUE-rDHKrZf5OLHSBfR6-IySfhJnBRJfzCsQ54btbGr4ITHiTV8Z1exsdldD-etGwrysthmTUEa72zlNOFafDl81vq-8qkHd4CESjhOK1NHGpA5NubOFa34SytzZc_z55mAsJjIEe-w2sWITtQXyvHRFwkcUKlrO61GXLEFr4Aei5Tw


05 P1070047.jpg
y4mhLQ377EkR_JBxRyhVdguC54SrtUy1mIwOAO86nG06nPMarPyLYg6S1aa1D04wGo-UVo00cp41KKJ9PoUcgpp2NCum3eP10es7pYFTQh37_TjPUW7xJL1tdMnqPF6BpNCcRQhRWTdSJRS_lpnKJaNvb6U9WxkxQmyl19LL4aNca0eoAnqB8aXXp6Xf9B89j8OfPeAFOjfzolVkwGptw_VTg


Cheers, Jack.Aubrey
 
Friday December 3rd, 2010 - Hull enhancements before planking

Let's now show another small enhancement I planned and realized.

The idea is to fill the bow area with some softwood blocks in order to make easier the installation of planks in this traditionally difficult area. I used several layers of 1.5cm wood to fill the area and then I shaped it correctly with some levelling blocks. I made a lot of sawdust.

In the same task I shaped the bevel of the first 3-4 bulkheads. This is particularly well visible in image n° 3.

I have also doubled the thickness of the keel reinforcement, visible in the first image with a lightning shaped mark.

01 P1070040.jpg
y4m2I2HZbDZYPDxTgEAIVPuBmrecjB5OGh0-Qi-sykgeHm_LjitpLvKsci6ujRy4FOIChKS2E3YUe3Q8CrSdMy-tOVF9zKNH5NxKj8YidRnMx0x6U0yOWjanSMgWGrATw8syik5LErLXV1WlbJF-j-p8ggFnj8t-PjnB57utW7BiWy8UoBfQ-BSpFzq8vn9dHReSGOyL_W8HsarawsKuQ5E7A


02 P1070041.jpg
y4mWIQd9W1pvB1KjS7lqnbMyHC4Z1Tn7_rhz3iOYW1YwCcs7BNmI10LY3KaJVcB8b_KeGLKpMdWUlS4lB6bjIq2f9mhog3OJSszc0F3CvewrXnxWVhWQjvBbsWqhY0dGMx7D8AoZ4FYMdJUrhhpA-DGVcuo7TXApL4wajlXBUgoHUZ6V5lux7Ydv0Qse2N5xv2i-H5ivJ_dcAu_tFmmgbLpHw


03 P1070048.jpg
y4mWOVi3wrRM88A_m59uxOQFvJ4-M-k2PFqtHlj5g2bVvSMsr9RuIDiiUl4rK5YyHsvG7BHrhF_pR9zWEiuYvBMG5zovV9oEXzmb8KFnH92G-14Qb4YzUh_RGUCIDIqqduwAj2Hqz2aGRpH1LOzFBpVJwIYXnvsrifMvdxgpvln7QQYZc1w3NTFnTR8fJVutcnBIqzPLiqix1ryKsYcJu9Hqw


Cheers, Jack.Aubrey
 
December 6-12, 2010 - Leveling blocks

In my previous message I introduced the term "leveling block".

Here follow two images of these blocks I specifically built to fair the hull. The raw material I used is 1) wood blocks of different shapes (rectangular, semi circular, circular), found in wood stores and 2) sheets of sandpaper of different grain but of very high quality. High quality is mandatory if you want to be able to use the block for long time.

Sandpaper is glued on the block in a way that you can remove it and eventually change it with another piece with higher or lower grain. If you use these blocks for wood only, they are long living, but they can also be used succesfully on metals, such as copper or brass, obviously with a shorter life.

01 P1070054.jpg
y4mXZp1cE0-G6MWis_wYm1ht6ZvCpICIkSzntFPxl7wU1bM05GOpIeCJSP8Vr0fMUaCso117Iea-COxYAdJ58L93-FiRA5zM_8-mMlXTU1de_UBqe6Dm-GJJhOAMSeYTmMsLSSYS5c0InU6AlNMTrFzmkn6xiVAAa51tJtcaNeFxKyLbllfEpyGRnd9LPI6EXtsnFj_6XU2Nm82moXEiWPe_w


02 P1070055.jpg
y4m4zXeGp6MCV5M3Kom7cfGF1NFr9wvnSQj4Oj2SwViYf87d8scWlbDCqox4yQrQEAO5D1ZJ2MZuYXiPUk6RMJjRXtLenPhs9JtscAVHDEErYmIqwW6UIVfLz8f1LlRzSWXtxu5WJeAxajzFI6vFuTc_Vfd0YP28TuqRgg6ZHuCc3C_98QGlA6izZMdCppXm6mgmMBNXUDFizCkEUKSlYdl5g


Here below a collection of some blocks made just for the gun ports of the Soleil Royal.

03 P1070056.jpg
y4mtbm1xN_PmTbEFgWiIAhh_SWkvXOvCDvGiMQevum2watRnyffmXIDX8Fmb11fBUT7zFRc8r-wsSTUfzxutkbAcAenaUnuGTiNBRf6mQrSPVZJ45nscxG24wkISdHcGUIK6p3ZQEUO-pfI0E6cUORuCbxBw7yBrCUSH25RtRPOurvwydl2h5qUo29Z6wezxnHWGjkFnml1og77A8cIlKq50g


Cheers. Jack.Aubrey.
 
December 6-12, 2010 - Start planking

I finally finished the planned customisations and enhancements and now it is time to start planking the hull. This activity can be considered made of two main steps: first the planking from approx the waterline upwards and, second, from the waterline downwards.

Before I had to do a preliminary session for fairing and beveling the bulkheads. This is a mandatory activity and the best this work is done the best the result of planking will be. It is something very important that cannot be underestimated.

The instructions contained in issues 39, 40 and 41 describe with great detail how to proceed but I don't take much care of them because I know very well this process, having used it when I built the Santìsima Trinidad.

Then, I started and I spent three half days of work. I was able to install only nine planks of 5x2 on both sides, 18 in total. I know that I am not Speedy Gonzales, but one reason comes from the need to work around the gun ports, and this takes time.

In addition I prefer to level the planks as soon as a small number of them are installed and dry. I do this to maintain better control over the work and to avoid, at the end, a long, tedious and weakening leveling session.

Here below some images of the work done during these days.

01 P1070049.jpg
y4mg5ler5h35tQ500kfPMMz5ife8HUsrg-RgZPOviHF_rVDAXXCOEDXUgF4pUsk83PHGwe0OHEya03L3Jb7rsEnaF_fkc5w6OK4Ll8IBq-ePdrrdfULU1QgsfqSGw1vmYX79XR_6OWggVhHs5XPYhbbF9yFx21ZJ60PpWT05QT3yn0ZvujR_DxU1GmpB8_iRSlW_epNP6CcKHx2lvdHE2xrUA


02 P1070050.jpg
y4mh8TiblmZYf7hBhcnTCg9nXL0E2Tfuopn-UX_I8s6OFyiF0V-E-r32MacGFIaq-ZWwpvvCHqoGPiunkCh1e7C6_sI9bOf3e4OzobY49b8xX3fCEcTZ50vTDXjrLHpBuJnr7DTuL-BVD5i1_V4snre6ppv5MkDXORPhclY8nUbzOmxXoTy0JQfNHND8PHpif3y6diOZew2TigbmMc4NpdaJg


Just two words about the wood strips: they are made of softwood, erroneously, for me, called "ramin". They are about 30cm. long and it is necessary to install three or four of then to install a full plank. A little bit as in the real ships . . The problem is that they are not calibrated and I must keep great attention to find and use three or four of them equal before proceeding with a full plank.

03 P1070051.jpg
y4m9jkqNC04JRXgR9-EdmvMQmuUUpZUdg3TwWPz-N7wJYcxq7UBNZpHcujic3ZBXD0tU8p0fzbVBPCG-zVzKM2ozRe6ZQ2Xke5enkSPlvt0K-xwmgDmx3CpvHLuDWiTIAjM5jwgYUZw8zIXqwIiin1WV7G9BA_cgeLlsWiwZ2sMVyH9dgzwCIVpPb1Ocb9-F1mPy5ACjmtSVozb86ELlB5OAQ


04 P1070052.jpg
y4mwRJzyxaHCrbmVFBsJcpKmV9Q3n6YsneeD9X6bn6fCaPOTavtykFZIvyS6TgwrNJLoEG1cyY6AF6JYIox3beOBOtED8ma0NmE3B6g7DTQZD8Zya0IXGBurKZ-UlrZfkYXJd6WvJQ62pXXS0pt4i-SqLu3lVgYJBO3S0u3M6WUyi9jDj68qsPcZrwnQfNG6a_w1PwXd-3B2oB1gv_WmHpIog


Here below, in spite of the controls, an example of non perfect strip that was installed . .

05 P1070053.jpg
y4mFp_Z2S9ajI8MPLfh4FU4chDCnxyORvHHBKAPr6fWwux4tEaiGPvYK7CLl-YJ6Uo61aGmqlk_bra8kSq07qEbcUm2Nz9y-OoNXGpGDBlVOjKowbdBv_nmZrms1DWoM7TWmbZBafnh1zYGJ9rY8H42JyYwRC2VE_GtvJkmorWPzHbZWnMFuzf8Jc8Q9IzKxPU0omovaBxqAMsMN-t3A8Ffsw


That's all for this week. To the next one. Jack.Aubrey
 
Back
Top