You are using an out of date browser. It may not display this or other websites correctly.
You should upgrade or use an alternative browser.
You should upgrade or use an alternative browser.
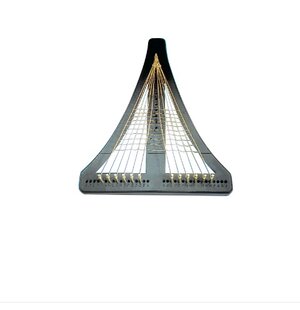
If you use a jig, you better ensure that the angle of the shrouds is correct before you start ratlining or the whole thing will look crooked on the ship. To save on that potential problem, most people do the ratlines with the shrouds on the ship. The access for work as you make ratlines directly on the ship is not that much more crowded than using the jig. Plus, tensioning your individual shrouds on the upper deadeyes without pulling the ratlines out of vertical alignment is an additional problem after you take the shrouds off the jig. It comes down to personal preference.
As allready mentioned by DarivsArchitecttvs, tensioning your individual shrouds on the upper deadeyes without pulling the ratlines out of vertical alignment is an additional problem after you take the shrouds off the jig.
I finished the ratlines of my models (3 pieces) on alteady fixed shrouds on the ship.You can make an easier vertical adjustment of the ratlines and have a healthier vertical neck position compared to a jig application
I finished the ratlines of my models (3 pieces) on alteady fixed shrouds on the ship.You can make an easier vertical adjustment of the ratlines and have a healthier vertical neck position
Additonally you have also less sitting time and more movement compared assembling it on jig
Years ago I tried it on such a similar tool, but it was a desaster.
So I can not recommend them from my side
So I can not recommend them from my side
While such a jig seems like a good idea, as far as getting spacing right and such, it prevents proper mounting of all the vertical lines (sorry, not sure of the terminology), which normally wrap around the mast in pairs made of a single line, and alternate side to side. This detail is usually quite visible and important and IMHO overshadows neat ratlines if proper cabling cannot be done.
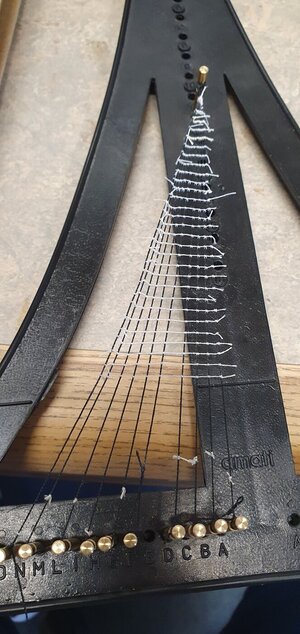
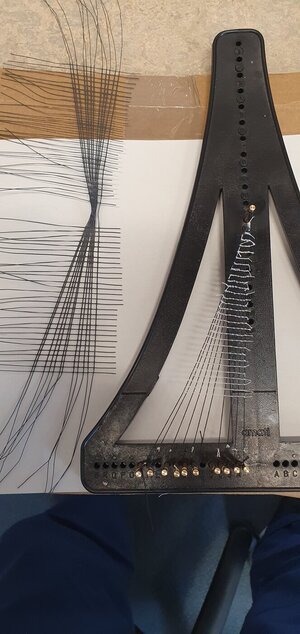
The jig can be used successfully but it takes very careful set up to get it right. The first step is getting the first shroud set at the proper angle from the mast head to the fore deadeye on the chain plate on the jig. That first shroud needs to be set precisely to avoid distortion when transferring from the jig to the model. Then very precisely set up the next shrouds the proper distance. Once the shrouds are aligned you can run the rat lines. You need to do two sets so when you go to mount the shroud set up on the mast head you can place the loops one at a time on alternate sides. The question then is the precise set up worth it in terms of time and effort as opposed to running ratlines directly on the shrouds that are already mounted on the model. It really is not difficult to tie up ratlines to the shrouds mounted in the ship…just agonizingly repetitive and tedious!
Are there any books or articles or illustrations of the shroud and ratline construction methods esp in the swan class ships?
Bought one; haven't found a use for it yet!
It was much more appropriate to add ratlines on installed shrouds.
It was much more appropriate to add ratlines on installed shrouds.
I bought a cheap wooden jig too before starting my first ship. Still unused. Maybe I can make the jig into a bulkhead in a scratch built model and recover my money...Bought one; haven't found a use for it yet!
It was much more appropriate to add ratlines on installed shrouds.
I used one on one of my ships it’s hard to get the shroud angles correct and ratlining is still ratlining . I usually tie 10-15 lines a session
I would not use a jig like that because the distance between the pins that the shrouds are tied to will probably not match the distance between the lower deadeyes, making some ratlines too taut and others too loose. A jig like this does not take into account the wider gaps between some pairs of shrouds that exist to make a gap large enough for a gun port to to be clear of obstructions. Shrouds are usually NOT evenly spaced, as shown below.

You don't get that much more working space using a jig like this either. To ensure that the ratlines are the proper length between each shroud from top to bottom, it's best to tie the ratlines on the model.
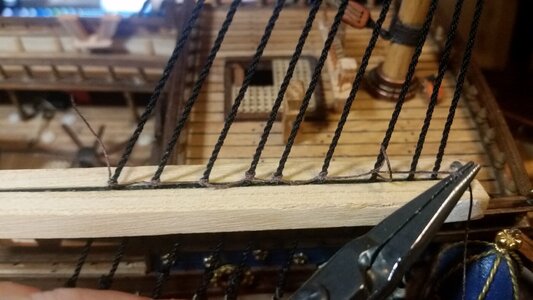
Use a tool like this, which is clamped onto the shrouds at each step, to keep the vertical spacing even.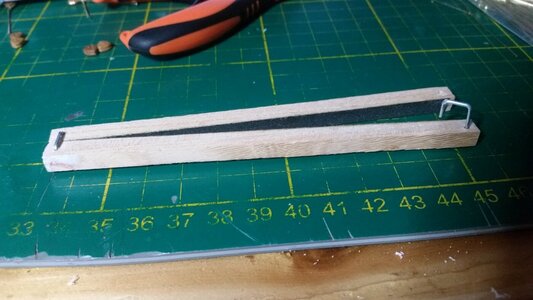
The tool not only helps keep the ratline clove hitches in straight, horizontal rows, but also prevents ratlines from being made too tight and drawing the shrouds too close together, distorting them from being straight. With the help of sewing needles, tweezers and/or needle nosed pliers, ratlining is just as easy one the model, and the results are better.
Ratlines are never perfect, but this is the very first ship model I made, and the first set of ratlines, and they aren't too bad. Some of the knots needed adjusting to make the rows horizontally straight, but the shrouds are not pulled out of position, and many of the ratlines have enough slack to form that slightly drooping downward hanging curve which is what real ratlines look like.
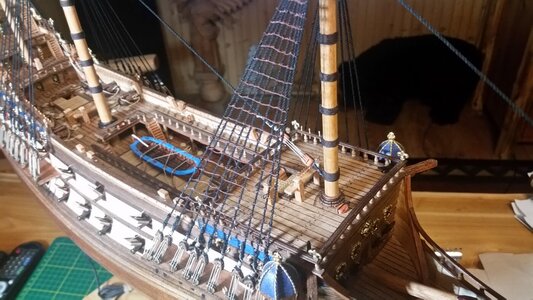
When you have moved to the other side of the ship to do ratlines, check the height location of the row you are working on using your machine rule, and compare the left and right ratlines rows to match their heights.
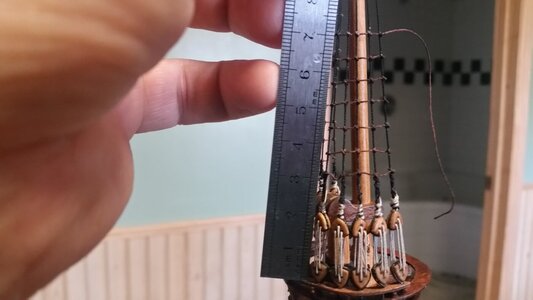

You don't get that much more working space using a jig like this either. To ensure that the ratlines are the proper length between each shroud from top to bottom, it's best to tie the ratlines on the model.
Use a tool like this, which is clamped onto the shrouds at each step, to keep the vertical spacing even.

The tool not only helps keep the ratline clove hitches in straight, horizontal rows, but also prevents ratlines from being made too tight and drawing the shrouds too close together, distorting them from being straight. With the help of sewing needles, tweezers and/or needle nosed pliers, ratlining is just as easy one the model, and the results are better.

Ratlines are never perfect, but this is the very first ship model I made, and the first set of ratlines, and they aren't too bad. Some of the knots needed adjusting to make the rows horizontally straight, but the shrouds are not pulled out of position, and many of the ratlines have enough slack to form that slightly drooping downward hanging curve which is what real ratlines look like.

When you have moved to the other side of the ship to do ratlines, check the height location of the row you are working on using your machine rule, and compare the left and right ratlines rows to match their heights.

Nice looking ship Kurt.
- Joined
- Oct 15, 2017
- Messages
- 986
- Points
- 403

I bought this very tool with great excitement. I can tell you, with equally great excitement, it's about 20 feet deep in some garbage dump somewhere on the east coast of the U.S..  Some tools, look great, but just don't work great.
I once remember looking through a Cabela's (sports/fisherman equipment) catalog. Seeing the pretty looking fishing lures I said to my friend, "These look like they really would catch some fish." He responded, "Those aren't designed to catch fish. They're designed to catch fisherman!" He may have been right.
I once remember looking through a Cabela's (sports/fisherman equipment) catalog. Seeing the pretty looking fishing lures I said to my friend, "These look like they really would catch some fish." He responded, "Those aren't designed to catch fish. They're designed to catch fisherman!"
 He may have been right.
I bought these tiny wood and brass mini wood planes, thinking they would be used for tapering yardarms and a host of other uses. They've sat for over 5 years now, unused. A better way of tapering yardarms was found, and the planes didn't save any time shaping parts since cutting with a band saw and sanding was faster and precise enough.. Sometimes, when you're new at this, you pick the wrong tools and your work style makes you choose others as favorites.
Hmmm...On my first build, the HMS Endeavour.I just completed my first rat line on the foremast and it was a real challenge. I purchased the loom a thing (delivery tomorrow). After reading everyones ideas on it I'll probably return it unopened. and continue as before, maybe with additional Tequila. Arghh Matey!!
It seem's to be easy to produce a more versatile version of that with 3d printing ? We can play with the angle, the distance from the top and increase the number of possibilities to takes the distance by adding parallel hole to the one pictured.


