-

Win a Free Custom Engraved Brass Coin!!!
As a way to introduce our brass coins to the community, we will raffle off a free coin during the month of August. Follow link ABOVE for instructions for entering.
-

PRE-ORDER SHIPS IN SCALE TODAY!
The beloved Ships in Scale Magazine is back and charting a new course for 2026!
Discover new skills, new techniques, and new inspirations in every issue.
NOTE THAT OUR FIRST ISSUE WILL BE JAN/FEB 2026
You are using an out of date browser. It may not display this or other websites correctly.
You should upgrade or use an alternative browser.
You should upgrade or use an alternative browser.
Mantua Model Group - Vasa Art. 737 1:60th Scale
- Thread starter KingDaddyo
- Start date
- Watchers 9
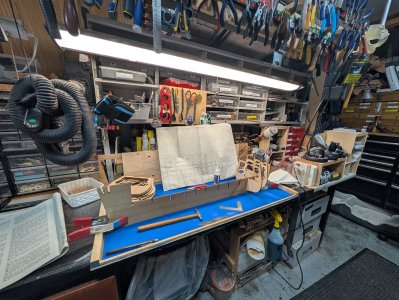
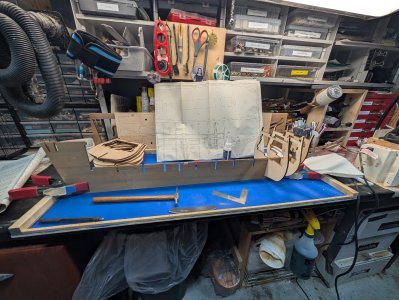
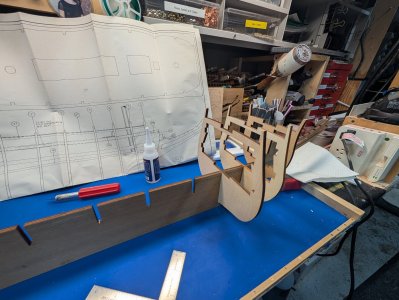
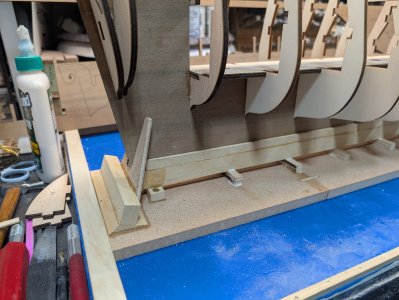
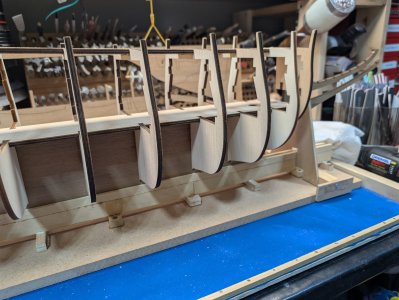
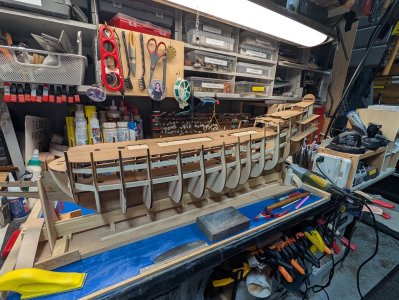
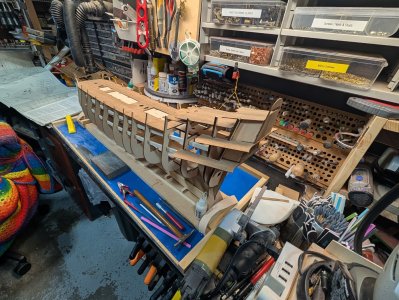
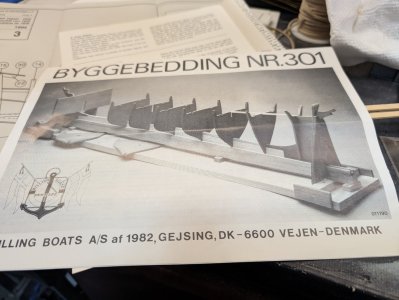
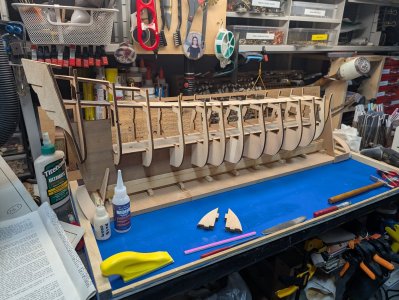
Took a day off from the build. Found a Billings Boat slip for longer ship kits on e-bay. Naturally came with "some assembly required". I modified it to fit my building board I use. It's the blue mat with the wooden frame under it. That's a rubber mat that no glue can stick to. Helps keep the small parts from wandering off of the work bench. Plus it helps to pick up and move whole ship if I need to.
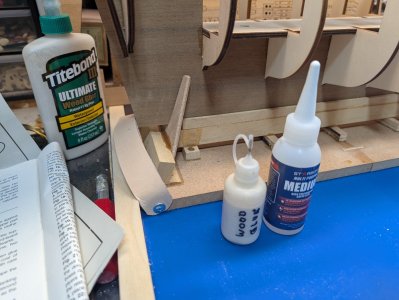
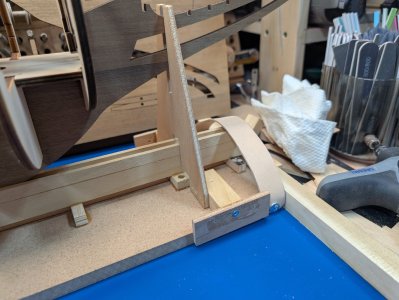
Came with larger screws and I hate to take a chance on splitting the wood so I used wood glue and longer brass micro-screws. I also put micro screws down the length in the keel slot. I'm also adding 5 more block supports under the base of the keel support. The kit only came with three and I don't want any room for warpage over time. I don't know how many of you cut the parts frames apart and save the good pieces in case you need what I call "repair wood" while building a kit. I was able to make the blocks from the frame of the parts for the Vasa. Should finish this today and back tot the Vasa build tomorrow!!
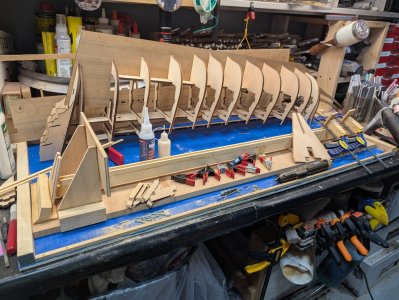
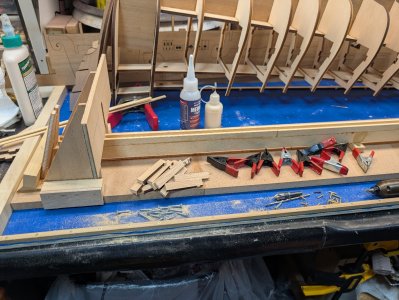
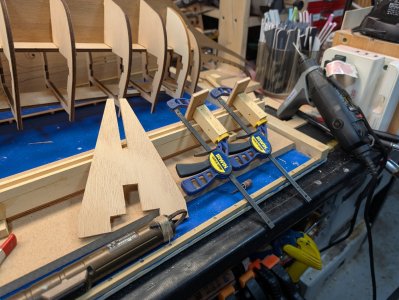
Came with larger screws and I hate to take a chance on splitting the wood so I used wood glue and longer brass micro-screws. I also put micro screws down the length in the keel slot. I'm also adding 5 more block supports under the base of the keel support. The kit only came with three and I don't want any room for warpage over time. I don't know how many of you cut the parts frames apart and save the good pieces in case you need what I call "repair wood" while building a kit. I was able to make the blocks from the frame of the parts for the Vasa. Should finish this today and back tot the Vasa build tomorrow!!


Ran into a little glitch. The slip is heavy and there is no way to pick it up easily. Keeping it on my silicon build platform makes it impossible to get fingers under it. So, I made two leather strap handles and attached them on each end. Easy Peasy. I'm not OCD but I do really like a clean surface to work on and the silicon pad is perfect. Glue doesn't stick to it and the parts don't go anywhere with the little hardwood lip I put on it. Makes for a clear work space.
If I'm over sharing please let me know. I've never joined a forum and I kind of like sharing my work. I'm hoping when I'm done there's a way to print this so I can share it with family and friends. Besides, somewhere in all my craziness someone might pick up on something that helps them and I'm hoping people more experienced than me take a peek once in a while and give me guidance.
If I'm over sharing please let me know. I've never joined a forum and I kind of like sharing my work. I'm hoping when I'm done there's a way to print this so I can share it with family and friends. Besides, somewhere in all my craziness someone might pick up on something that helps them and I'm hoping people more experienced than me take a peek once in a while and give me guidance.


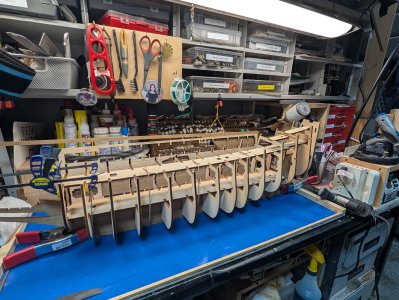
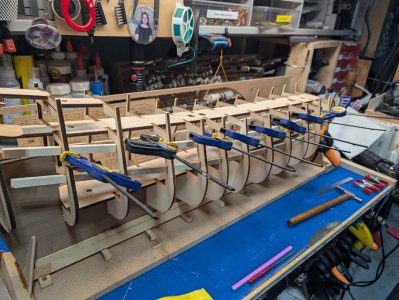
Attached both decks on the transom, added the lateral stringers between the bulkheads. Discovered when you have 30 clamps on the model with glue drying, there's no more room to work so a built in break time for glue curing.`
another trusium, if you have 40 clamps, buy more, you can never have too many clamps!!!!
After reading some of your posts, I've discovered I have a lot of reading to do. I just ordered Ships of the Line Volumes 1 & 2 in hardback.
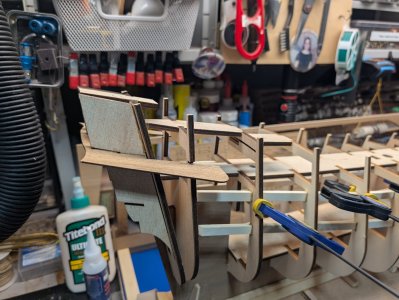
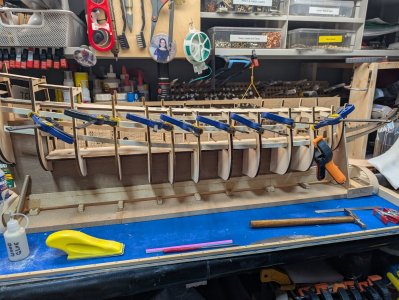
another trusium, if you have 40 clamps, buy more, you can never have too many clamps!!!!
After reading some of your posts, I've discovered I have a lot of reading to do. I just ordered Ships of the Line Volumes 1 & 2 in hardback.


This looks like a nice clean build, and I will happily follow along.
This will be the hardest build I’ve done. Looking forward to moving it along but I plan on taking my time so I can be proud of what I get done. Any suggestions would be welcome.
Working on the transom today. Got most of the rough work done. Strange but the drawings show a third port in the center above the stern post. To [plank this transom, it would recess the third port. I built out an extension to the port so as I finished the planking the third port would match the profile of the planking. I don't know if I'm weird, but I always cut the photos of the finished ship out from the box lid and the tape them together for future reference. Helps me when the instructions are not "clear". Anybody else do that?
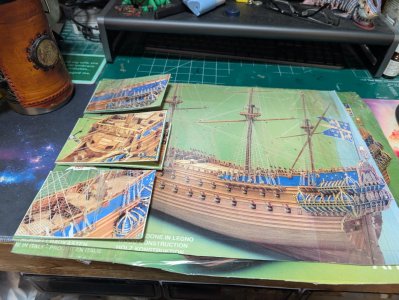

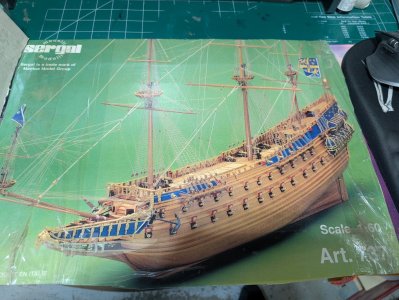
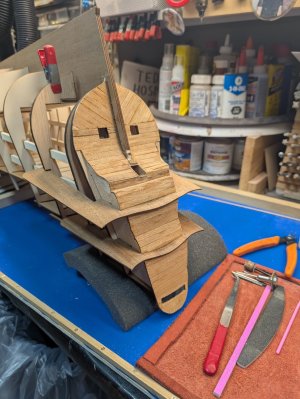


I believe this opening will be for the rudder head...Strange but the drawings show a third port in the center above the stern post.
Thank You!!
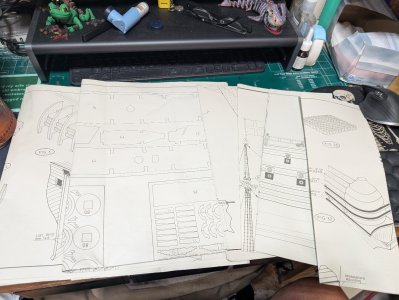
Thought I would post photos of the various parts and plans for my kit. The instructions are 3 pages long. They reference by part number and location where each part goes. There are six large prints with all of the construction layout. You have to locate the part number, then find the assembly note on the print and assemble per viewing of the print. No illustrations or photos included. There are six large sheets of all brass fittings including many of the crew cast in brass. Then there are three sheets of misc fittings, rope and other items. The long narrow box is a collection or bundle of wood strips of varying sizes and types of wood.
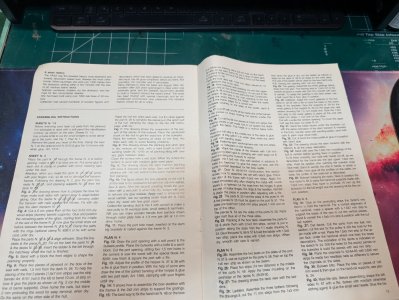
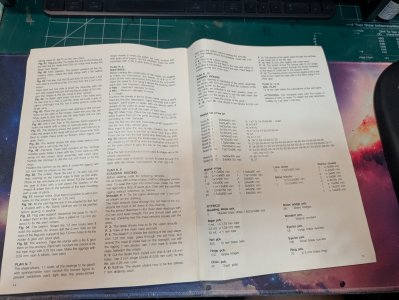
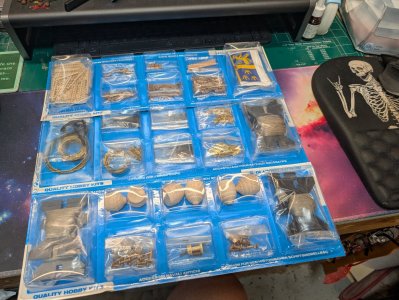
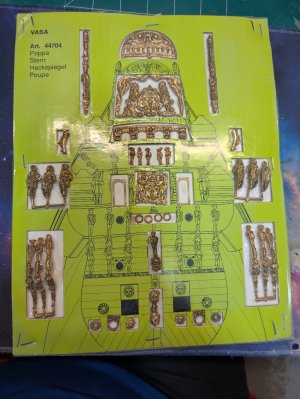
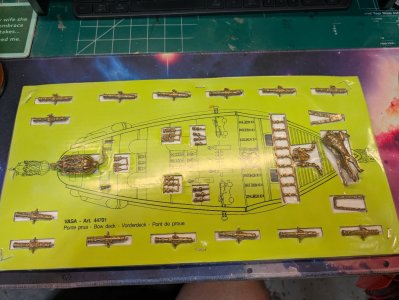
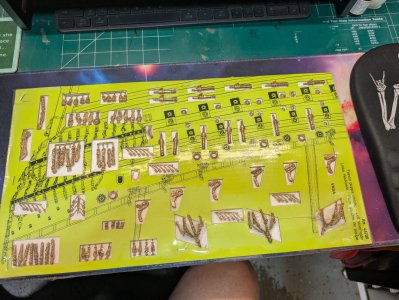
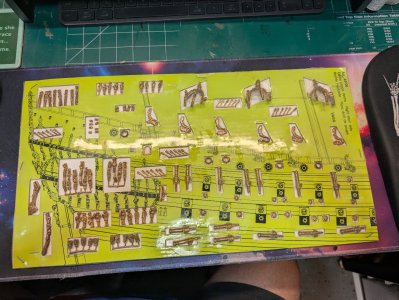
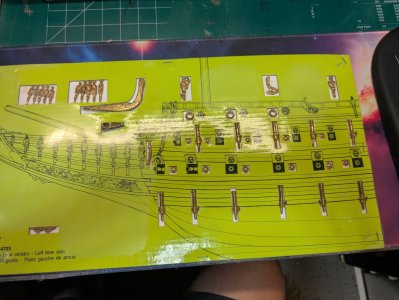
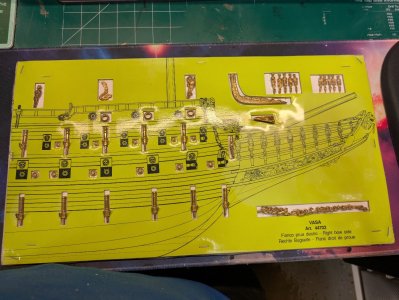
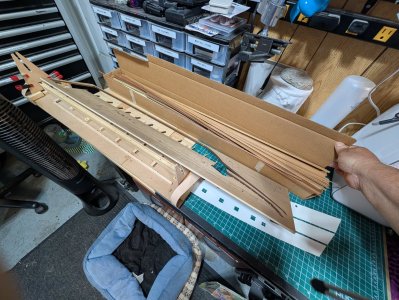


A little confession. While I have built several wooden ship kits and many plastic ship kits. I was never a sailor. I spent 34 years of my life as a forensic investigator and a few years in the 101st Airborne. Mostly Fatal automobile accidents and many fatal fires. So my expertise is in research and analysis of the physics and evidence collection at fatal scenes.
I've read many of the posts here and on the Vasa site and the breath of ship knowledge of many of you is amazing! I have been reading many many many articles on the Vasa and I ordered the two books titled Ship of the Line I and II. I am also trying to find a good detailed book specifically on the Vasa but the only one I found was over $400!! While I have a little money, I also have a wife of 49 years and I like to eat. Buying a book for $400 would severely affect both of those things!
I am going to research everything I can before I continue the build and as I'm building it. I can only hope to pick up a small percentage of what you all seem to know. Any help, suggestions or details anyone has to offer would be greatly appreciated! If there are any other reference books or guides that would help please let me know.The one thing I have in spades is time and a wealth of knowledge on research methods. But there's no substitute for experience as I've learned. As for all of the free ships, they are now all spoken for and I am in the process of getting boxes to ready them for shipping. I will contact each person who is receiving a ship when it goes out so they will know to look for it.
This is the second of a two-part series authored by the leading researchers and conservators of the Vasa:
Here is the first volume, which deals with the conservation and reconstruction of the hull:
Here is the first volume, which deals with the conservation and reconstruction of the hull:
Thank you for the leads. I’ll try to get both books!
Got my first copy of Ship of the Line Volume 1 today, Volume II should be here next week. I'm also ordering Vasa Volumes I & II. Quick question to anyone out there. I have a small long steam box for heating planking for the hull. I was wondering if anyone had tried one of those spot steamers for "targeted" heating in small areas if you don't need to steam the entire plank? Seems to me like that would be a simple way to profile the bow ends of the planking after you get it attached along the hull. Any thoughts? Anyone try this method for bending planking?
- Joined
- Dec 5, 2022
- Messages
- 1,119
- Points
- 443

Hey King Daddyo,
welcome to this wonderful forum. Nice that you are building this ship. I had a look at the Vasa in Stockholm. It's amazing. The museum around the ship alone. Marvelous. You've got yourself a really big kit. It's quite old. That's why the instruction manual is also quite old. As you can see on your packaging cover, the colors are already wrong. It was red and not blue and the figures, which are painted individually, are a mixed color. A beautiful ship, unfortunately not seaworthy...
I'm looking forward to your build report.
Cheers Günther

I bought this kit when I was working in Belgium in 2010 or so. Brought it home to save for retirement. This is now the 7th wooden ship model I've build but the largest by far!! I've ordered the two Vasa books and the Ship of the Line volume one and two hoping to get some more information to help me with this build. I've also been poaching dozens of build photos from other who have built this kit.
I had a solid layer of dust on top of this box when I got it off of the top shelf of my main work bench. Been up there for over 20 years!!
I had a solid layer of dust on top of this box when I got it off of the top shelf of my main work bench. Been up there for over 20 years!!
Last edited:
I wonder why some people who built the Vasa painted it in primary blue instead of the red it should be?


