Mayflower Build (1st time wooden model builder)

Joined
Aug 1, 2020
Messages
727
Points
298

OK, now that I have some time I'll start a build log. As mentioned in my intro I picked up Corel Line's pre-cut hull Mayflower model. Probably just my speed as don't think I'm yet ready for planking a hull. We'll see how this one goes before I think about what may be next.

So the pics attached today cover a week of activity - Last Saturday (8/1) to yesterday (Friday, 8/7). I am trying to work on the kit a couple of hours after work each day; we'll see how that goes.

1st pic shows the kit contents.
2nd & 3rd are with the upper sides, keel and bowsprit on - before the accident...
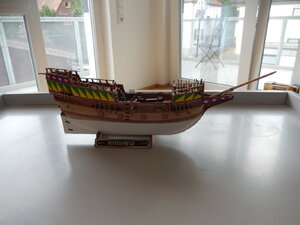
4th & 5th - What can I say? Definitely a case of butterfingers. I was able to find the 2 pieces that broke off so it was onto mending mode.
6th & 7th - While mending the bowsprit I added the rudder.
8th & 9th - Painted the bottom of the ship and added the rudder hinges.
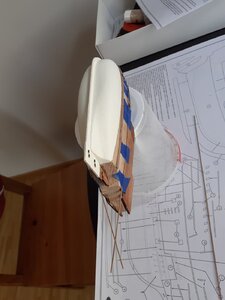
10, 11 & 12 - Started adding the decorative planks on the sides. (The 1" diameter hair curler paid for itself.)
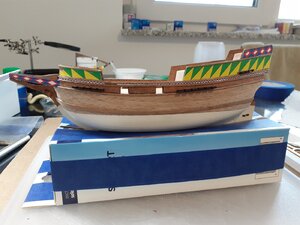
13 - 17 - Painted rudder hinges, added thin side decorative planks, added paper decorations (replicates paint on upper sides and forepeak), added ladders & decoration just forward of upper front gunports.

Now that I know how to do a build log, I'll post more frequently.

Lots still to do - still working on the 1st page of the plans but definitely not in a rush to get this done. Enjoying the experience.

20200801_125643.jpg20200802_063931.jpg20200802_064724.jpg20200802_070154.jpg20200802_070200.jpg20200802_071857.jpg20200802_091734.jpg20200802_171945.jpg20200802_174955.jpg20200802_192223.jpg20200803_181759.jpg20200803_185233.jpg20200804_061822.jpg20200804_184112.jpg20200804_204905.jpg20200805_201445.jpg20200807_193409.jpg
 
20200816-21

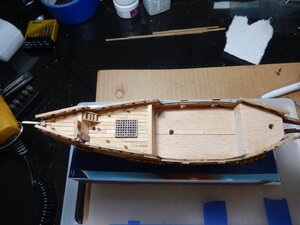
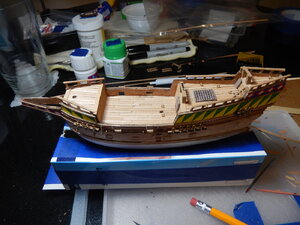
Have all of the decks planked and started adding ladders, grates, belaying pin racks. Have found that my fat fingers can make building things like ladders interesting. Bought a German 12v version of a Dremel to use to drill holes; plugs into a transformer. Did a couple holes with a manual twist drill but decided I needed something to make that particular task a bit easier (quite a few holes needed for eyebolts and belaying pins).

Plan for today (8/22) is to finish the rest of the belaying pin racks, a couple of cat’s heads and the bowsprit and then add the rest of the hatches, grates & ladders along with the deck guns and ship’s boat.DSCN6830.JPGDSCN6834.JPGDSCN6836.JPGDSCN6840.JPGDSCN6843.JPGDSCN6847.JPG
 
20200822

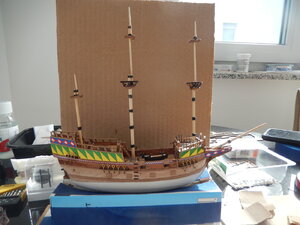
Rain this morning so spent time on the build. Belaying pins, doors, ladders, grates, etc. all finished and installed. Bowsprit installed and lashed down. Rain has stopped & sun is out; taking a break to enjoy the outside. Next week I’ll start working on the masts. Learning as I go...
DSCN6861.JPGDSCN6863.JPGDSCN6864.JPG
 
20200825

Started working on the main mast a couple of evenings ago. Sandpapered in the tapers, glued the pieces together and then started the lashings at the top. Let it stay that way for a day and then started looking at it – something just seemed a bit off. Then it hit me that the lashings needed to look like they had been tarred. I had some black enamel left from painting the flight deck of an aircraft carrier so I thinned a bit of that with some mineral spirits. Used a small paintbrush to put that on the lashings on the main topmast and the bowsprit (the thread supplied soaks it in quick). I liked the way it looked so I cut a length off of the provided line, dyed that, let it dry and then proceeded with the rest of the main mast lashings. Will do the same for the lashings on the other masts; not sure yet if I’ll dye the actual rigging to look like it is tarred. Have to look at some photos of Mayflower II and a couple of other rigged replicas of that era first.

Little by little the ship is taking shape.DSCN6868.JPGDSCN6870.JPGDSCN6872.JPG
 
8/31/2020

A couple of days ago I finished the yards and started hanging them and working on the standing rigging. After making a bit of a mess ‘tarring’ line with diluted paint I decided to try something a bit different – Sharpie permanent marker. Working like a charm – no paint specks around the workshop and doesn’t take any time to dry.

Yesterday I continued with the standing rigging. Was cruising right along; at least I thought so. After a few hours work I took a really critical look at my work. To say I wasn’t really pleased is an understatement. Along the way I managed to tilt the mizzen mast forward and the foremast to starboard; ship looked like it was being rigged by a drunken sailor after a storm. Since making the decision to de-rig and start over was a big one, I stopped for the day to take stock of resources (Do I have enough line? Can I de-rig without breaking anything? Do I have the patience to do this?) and figure out a way forward.

Can’t accept that I wasn’t as careful as I should have been so I started de-rigging the foremast this morning. Untying from the belay pins is a pain but not as bad as untying small knots from eyebolts or around masts. Beginning to wish I hadn’t fixed all of the knots with glue. Mizzen mast next to de-rig and then I’ll start the reassembly – slowly.

Need to remind myself not to get so focused on what I’m doing that I forget to step back & check the work more critically…it will all be worth it if I can get it looking correct.DSCN6883.JPGDSCN6884.JPGDSCN6890.JPGDSCN6891.JPG
 
May I suggest that masts are fixed and maybe wedged into appropriate position.Delay tying until most ,if not all rigging at any one stage, is ready. Maintain tension with pegs or heavier spring clamps, and fix knots with something reversible such as nail varnish/acetone or nitrocellulose/thinners or even dilute PVA glue/alcohol. Natural strings have a degree of elasticity and retightening is often necessary-overtightening must be avoided and certainly not used to alter mast or yard misalignment. Cut the surplus ropes as late as possible. Your idea about a marker to colour is good, I am running low on black thread.
Remember to remove watch and bracelets and roll up sleeves!!!
 
Last edited:
Back
Top