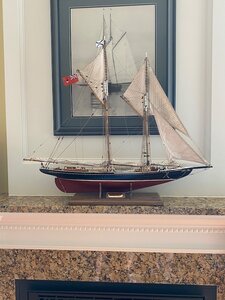
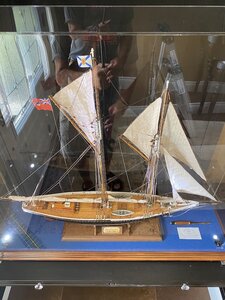
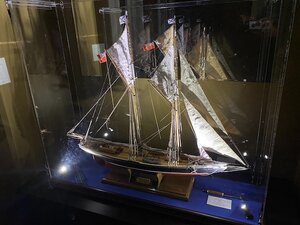
Model Shipways Bluenose, 1/64 scale by Hightflight [COMPLETED BUILD]

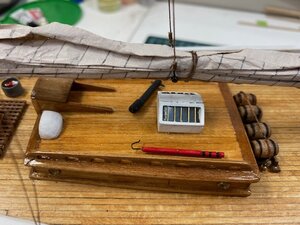
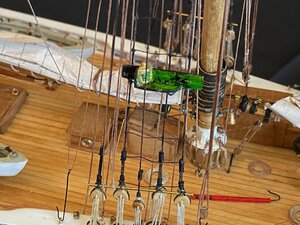
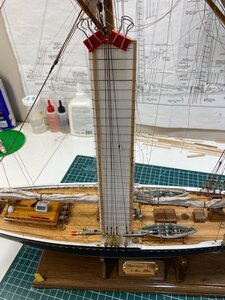
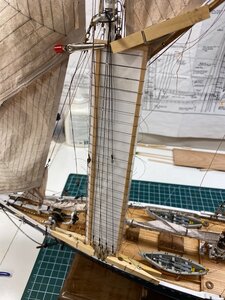
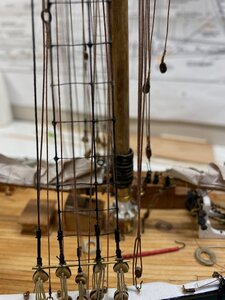
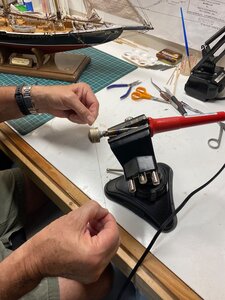
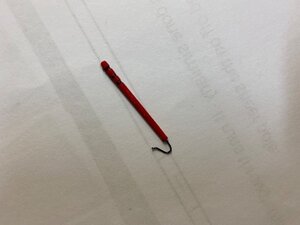
It was now time to secure the rest of the standing rigging. After the three jib stays were in place I worked my way aft by securing first the pullback stay then the spring stay followed by the main topmast stay. Continuing aft with the topping lift and the quarter lift on port and starboard. Next was the flying back stays which needed to reflect the ship on a starboard tack. I needed to slack the port one which would allow me to move the main gaff to port. I really wanted to delay the installation of the 20 deadeyes in order to give me better access to the inside of the deck. I continued with the throat halyards followed by the peak halyards. At this stage, I installed some deck details, rope hanks, coils of rope and two boat hook poles. I am still having some difficulty making decent rope hanks which kept falling apart on me. This is something I will need to work on a bit more. I use a plank bender in order to melt the beeswax into the rigging line.

Melting Beeswax.jpgBoat hook.jpgLazy jacks.jpgNavigation light.jpg
 
Final update:
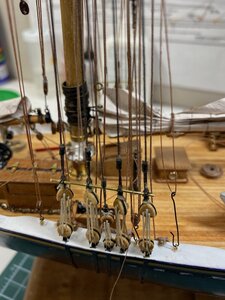
I had previously installed the upper rat lines before I stepped the main and fore mast. It was now time to complete the lower deadeyes. A note here, I had decided to include both the port and starboard dory tackle which meant I needed to include a means of attaching the upper portion which is lashed to shrouds. I used zip sizing which needed to be included on the shrouds before attaching the deadeyes. The sheer poles were installed followed by the lower ratlines. I decided to use a jig in order to complete this task which made the job a little easier and I was able to space the ratlines evenly. Unfortunately, this does not give the ratlines that little sag which in my opinion looks more appealing. All that was left to do was to make and install the dory tackles and the navigation lights. It was time to secure the ship inside the case I had previously completed along with the letter opener I made from a piece of wood from the Bluenose II.
Deadeyes.jpgRat line Jig1.jpgRatline Jig 2.jpgRat lines 1.jpg


It is now July 31, 2020 and I have finally completed my Bluenose build after 714 hours and a total of 182 days of work. This will be my last and final update on this build. I have learned so much in the building of a model ship and thoroughly enjoyed the build. I have now decided to build my second ship, the HMS Pegasus from 1776 by Amati.

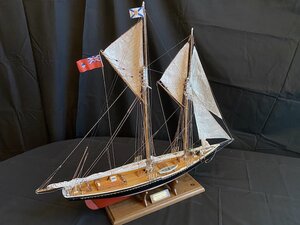
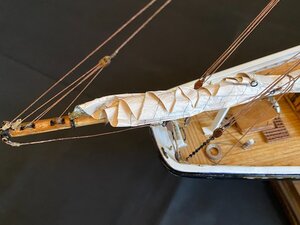
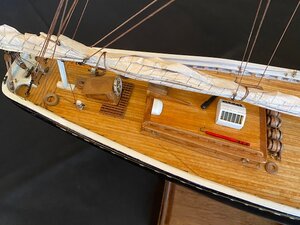
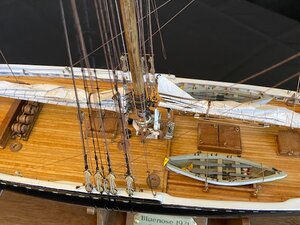
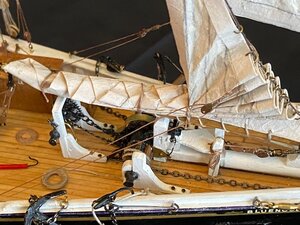
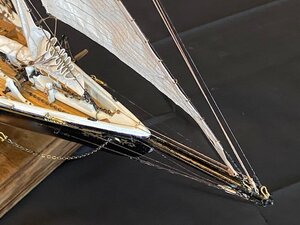
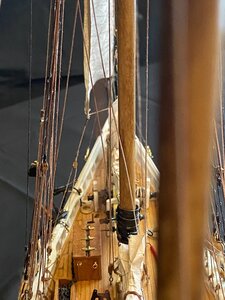
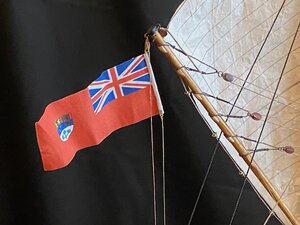
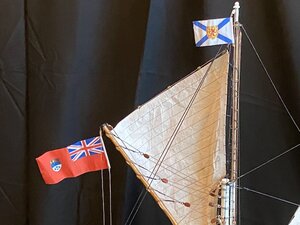
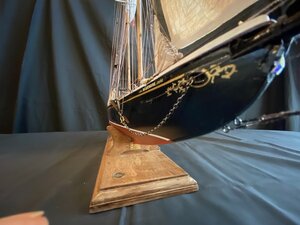
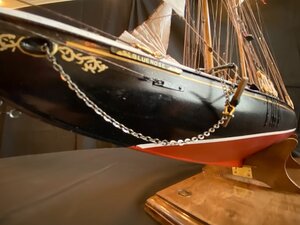
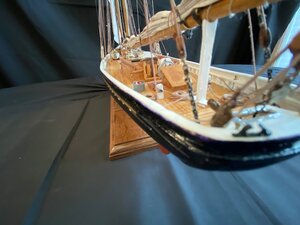
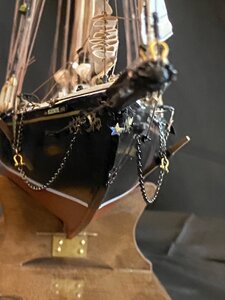
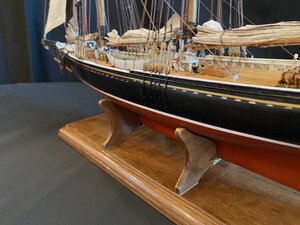
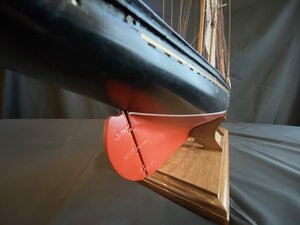
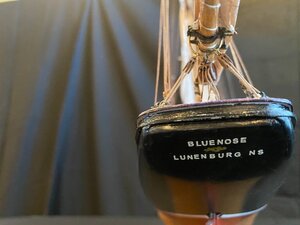
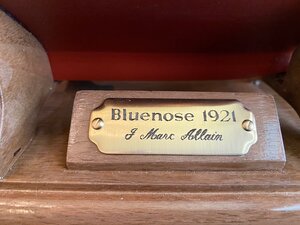
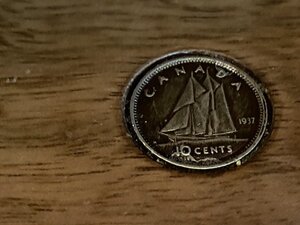
Here are some pictures of the completed Bluenose model

Model 1.jpgModel 2.jpgModel 3.jpgModel 4.jpgModel 5.jpgModel 6.jpgModel 7.jpgModel 8.jpgModel 9.jpgModel 11.jpgModel 12.jpgModel 13.jpgBow with star.jpgPort side.jpgRudder.jpgStern.jpgName plaque.jpg37 Dime.jpgBluenose on Mantel.jpgIn case 1.jpgIn Case lights.jpg
I want to thank all of you who have taken the time to read this log and who have commented on my Bluenose build. Your comments along with your encouragement have made this all possible.
 
A word of caution here don't do what I did. I realized only after the sails were installed that I needed to use some wire in order to achieve the full wind look. I inserted a thin wire on the port side of the sail in order to help keep the shape. This would be so much easier to complete before installing the sails while they are flat on a work bench. I used silkspan as I indicate in the build log. The wire is then glued with the help of wood glue and a thin piece of the same material used to produce the sails. When you paint the silkspan with your tinted acrylic paint make sure you have some extra pieces left. You can notice I have even installed a couple of patches on the main topsail. Hope this helps.
 
A word of caution here don't do what I did. I realized only after the sails were installed that I needed to use some wire in order to achieve the full wind look. I inserted a thin wire on the port side of the sail in order to help keep the shape. This would be so much easier to complete before installing the sails while they are flat on a work bench. I used silkspan as I indicate in the build log. The wire is then glued with the help of wood glue and a thin piece of the same material used to produce the sails. When you paint the silkspan with your tinted acrylic paint make sure you have some extra pieces left. You can notice I have even installed a couple of patches on the main topsail. Hope this helps.
I also saw a YouTube use of silkspan but it involved coating it with a paint substance, ironing, and letting the final remoistened cloth dry over a mold for the sail shape. A lot of work when we have multiple sails of different shapes and presentations. PT-2
 
Hi Marc
first of all , HAPPY BIRTHDAY Birthday-Cake, sorry about the delay
it's a beautiful model
 
Yes I followed the directions given by Tom Lauria in his Youtube video. This works well.
When I was behind the tide and had my somewhat wrinkled sails bent onto the masts and booms on a schooner rig as well as stepped and rigging underway, I got a spray bottle of fabric stiffener from Hobby Lobby. Spraying it onto the fabric and then gently smoothing and shaping the sail gave it a fairly fast and improved appearance that I was/am after. I'll try this a few more times as it didn't do any visible damage to the rest of the build. PT-2
 
Welcome to the Bluenose build. This ship is the famous racing schooner that appears on the Canadian dime. This kit is from Model Shipways and is 1/64 scale. I started the build my first on May 25, 2017 and have so far found the challenge very rewarding. First, I laid the keel and made sure all was straight then I cut the rabbit along the bottom of the keel. Next was positioning the bulkheads and made sure that they were perpendicular to the keel and straight. My next task was to sand the bulkheads that required shaping in order to ensure that all planks would sit flat on the bulkheads. Following this step, I glued and shaped the stern blocks according to the plans. Then the Horn timbers in the stern were completed. Next I installed the Waterway planks, which need to be installed before the fake stanchions. The next challenge was to complete all the stanchions, which I found difficult at the beginning, as I was, not cutting them straight but, with some practice I was able to finish, prime and paint these. It is better to have these stanchions a little longer than too short, which required removal and re cut. The next task was to install the Haws timbers, Knighthead and Cable chafe blocks. Once this was complete, I was able to make the main rail for both port and starboard sides. I used a piece of cherry 1/16 thick cut from a piece of cherry veneer. This seemed a better way to complete the main rail as the kit included stock, which would require gluing three pieces together in order to give me enough length to fabricate the rail in one piece except for the stern and the bow pieces. Before gluing the main rail in place, I completed the bulwarks as well as the cutting out of the scupper holes. Before installing the main rail, I cut out the slots for the chain plates, as they need to be close to the exterior of the hull, this also makes them close to the outer edge of the main rail. Then it was time to permanently install the main rail. I planked the section of the stern decking as this portion runs from port to starboard. Following this, the hull planking was initiated. This process took some time and can be tedious and a fairly long process about 44 hours. Each plank was treated as a separate task being careful to stagger each plank so that there are three strakes before you start planking on the same bulkhead. You must also ensure that you butt up to the previous plank as well as alternate from side to side in order to prevent distorting or warping of the hull. I used various clamps, and close pins in order to ensure that the strakes were tight to the previous row. I used a syringe filled with lepages wood glue to apply the glue to the planking only occasionally did I use CA glue as I realized that I was allergic to the regular version and switched to the odorless version of it. I also used pins to hold the strakes to each bulkhead while they dried. In order to keep the glue in the syringe from drying and blocking the flow I took a used pill bottle drilled a hole in the top and filled it with water. By keeping the syringe immersed in this bottle I could leave it there for up to one month without it drying out.

The decking was next which was started in the center and I worked from side to side completing the stern first followed by the bow section. In order to imitate caulking between each plank I used a black wax crayon in order to darken both edges. I decided to use full lengths of planking and did not cut or scribe the planking in order to simulate shorter planks, as we are all aware that they did not use planks that were in excess of 60 ft. on the real Bluenose. You will notice that I did nibbling on each plank as it meets the waterway plank. There are several other ways to achieve this look. The next step was to sand the deck and the hull. I did use a little filler on the hull only. I now have over 120 hours logged since the start of the build.

Once the decking completed, I started to work on completing the main rail at the stern. Be careful to install the “Main sheet boom buffer” which is under the stern main rail before you complete the stern main rail. Next came the main rail and the Buffalo rail at the bow. Now it was time to bend and install the Monkey rail at the stern. This can take some time to bend and align the holes for the chain plates, which run through both the Main rail as well as the Monkey rail.

Progress on my Bluenose build.

I have now stained and varnished the deck, with a mat water base varnish, completed the main rail as well as the monkey and the buffalo rails, drilled and installed the hawse pipe trim pieces at the bow.

I have also installed the mooring chocks at the stern. I drilled the holes and then covered them with a small piece of brass, in order to have them stand out. I have made several attempts at making chain plates.

My next project will be to install the fashion pieces at the stern. Following this I will prime the hull...
Dear @Highflight
we wish you all the BEST and a HAPPY BIRTHDAY
Birthday-Cake
 
Final update:
I had previously installed the upper rat lines before I stepped the main and fore mast. It was now time to complete the lower deadeyes. A note here, I had decided to include both the port and starboard dory tackle which meant I needed to include a means of attaching the upper portion which is lashed to shrouds. I used zip sizing which needed to be included on the shrouds before attaching the deadeyes. The sheer poles were installed followed by the lower ratlines. I decided to use a jig in order to complete this task which made the job a little easier and I was able to space the ratlines evenly. Unfortunately, this does not give the ratlines that little sag which in my opinion looks more appealing. All that was left to do was to make and install the dory tackles and the navigation lights. It was time to secure the ship inside the case I had previously completed along with the letter opener I made from a piece of wood from the Bluenose II.
View attachment 170191View attachment 170192View attachment 170193View attachment 170194


It is now July 31, 2020 and I have finally completed my Bluenose build after 714 hours and a total of 182 days of work. This will be my last and final update on this build. I have learned so much in the building of a model ship and thoroughly enjoyed the build. I have now decided to build my second ship, the HMS Pegasus from 1776 by Amati.

Here are some pictures of the completed Bluenose model

View attachment 170195View attachment 170196View attachment 170197View attachment 170198View attachment 170199View attachment 170200View attachment 170201View attachment 170202View attachment 170203View attachment 170204View attachment 170205View attachment 170206View attachment 170207View attachment 170208View attachment 170209View attachment 170210View attachment 170211View attachment 170212View attachment 170213View attachment 170214View attachment 170215
I want to thank all of you who have taken the time to read this log and who have commented on my Bluenose build. Your comments along with your encouragement have made this all possible.
Your combination of bent and furled sails gives a presentation that I had not thought of in that arrangement. The lighting shows it well. Congratulations. Rich (PT-2)
 
Thank you I found the dime on the internet for $10.00 not sure if that was a good deal
That 1937 dime for $10.00 is finding a diamond in the sand and only having to pay for a pound of sand. Fantastic purchase as the collectors value I think is much more. Rich (PT-2)
 
It was now time to secure the rest of the standing rigging. After the three jib stays were in place I worked my way aft by securing first the pullback stay then the spring stay followed by the main topmast stay. Continuing aft with the topping lift and the quarter lift on port and starboard. Next was the flying back stays which needed to reflect the ship on a starboard tack. I needed to slack the port one which would allow me to move the main gaff to port. I really wanted to delay the installation of the 20 deadeyes in order to give me better access to the inside of the deck. I continued with the throat halyards followed by the peak halyards. At this stage, I installed some deck details, rope hanks, coils of rope and two boat hook poles. I am still having some difficulty making decent rope hanks which kept falling apart on me. This is something I will need to work on a bit more. I use a plank bender in order to melt the beeswax into the rigging line.

View attachment 170187View attachment 170188View attachment 170189View attachment 170190
Your sequence with the stays trigged my mind to consider the sequence. I had not done that for those yet as they are over the bow horizon but as our orb rotates that phase is approaching. Your inside out serves you well with the small detailing that you have included in many places. I think those are what bring the model to life except for the ghost crew who are another story. Nicely done. Rich (PT-2)
 
Welcome to the Bluenose build. This ship is the famous racing schooner that appears on the Canadian dime. This kit is from Model Shipways and is 1/64 scale. I started the build my first on May 25, 2017 and have so far found the challenge very rewarding. First, I laid the keel and made sure all was straight then I cut the rabbit along the bottom of the keel. Next was positioning the bulkheads and made sure that they were perpendicular to the keel and straight. My next task was to sand the bulkheads that required shaping in order to ensure that all planks would sit flat on the bulkheads. Following this step, I glued and shaped the stern blocks according to the plans. Then the Horn timbers in the stern were completed. Next I installed the Waterway planks, which need to be installed before the fake stanchions. The next challenge was to complete all the stanchions, which I found difficult at the beginning, as I was, not cutting them straight but, with some practice I was able to finish, prime and paint these. It is better to have these stanchions a little longer than too short, which required removal and re cut. The next task was to install the Haws timbers, Knighthead and Cable chafe blocks. Once this was complete, I was able to make the main rail for both port and starboard sides. I used a piece of cherry 1/16 thick cut from a piece of cherry veneer. This seemed a better way to complete the main rail as the kit included stock, which would require gluing three pieces together in order to give me enough length to fabricate the rail in one piece except for the stern and the bow pieces. Before gluing the main rail in place, I completed the bulwarks as well as the cutting out of the scupper holes. Before installing the main rail, I cut out the slots for the chain plates, as they need to be close to the exterior of the hull, this also makes them close to the outer edge of the main rail. Then it was time to permanently install the main rail. I planked the section of the stern decking as this portion runs from port to starboard. Following this, the hull planking was initiated. This process took some time and can be tedious and a fairly long process about 44 hours. Each plank was treated as a separate task being careful to stagger each plank so that there are three strakes before you start planking on the same bulkhead. You must also ensure that you butt up to the previous plank as well as alternate from side to side in order to prevent distorting or warping of the hull. I used various clamps, and close pins in order to ensure that the strakes were tight to the previous row. I used a syringe filled with lepages wood glue to apply the glue to the planking only occasionally did I use CA glue as I realized that I was allergic to the regular version and switched to the odorless version of it. I also used pins to hold the strakes to each bulkhead while they dried. In order to keep the glue in the syringe from drying and blocking the flow I took a used pill bottle drilled a hole in the top and filled it with water. By keeping the syringe immersed in this bottle I could leave it there for up to one month without it drying out.

The decking was next which was started in the center and I worked from side to side completing the stern first followed by the bow section. In order to imitate caulking between each plank I used a black wax crayon in order to darken both edges. I decided to use full lengths of planking and did not cut or scribe the planking in order to simulate shorter planks, as we are all aware that they did not use planks that were in excess of 60 ft. on the real Bluenose. You will notice that I did nibbling on each plank as it meets the waterway plank. There are several other ways to achieve this look. The next step was to sand the deck and the hull. I did use a little filler on the hull only. I now have over 120 hours logged since the start of the build.

Once the decking completed, I started to work on completing the main rail at the stern. Be careful to install the “Main sheet boom buffer” which is under the stern main rail before you complete the stern main rail. Next came the main rail and the Buffalo rail at the bow. Now it was time to bend and install the Monkey rail at the stern. This can take some time to bend and align the holes for the chain plates, which run through both the Main rail as well as the Monkey rail.

Progress on my Bluenose build.

I have now stained and varnished the deck, with a mat water base varnish, completed the main rail as well as the monkey and the buffalo rails, drilled and installed the hawse pipe trim pieces at the bow.

I have also installed the mooring chocks at the stern. I drilled the holes and then covered them with a small piece of brass, in order to have them stand out. I have made several attempts at making chain plates.

My next project will be to install the fashion pieces at the stern. Following this I will prime the hull...
Hallo @Highflight
we wish you all the BEST and a HAPPY BIRTHDAY
Birthday-Cake
Are you working actual on a new project?
 
Back
Top