Model Shipways Massachusetts Privateer Rattlesnake

PGN

Joined
Dec 24, 2020
Messages
291
Points
238

Location
Stafford Virginia
I started the build on 26 December, I'm really enjoying it.

I didn't do an inventory of the parts in the box, I figure if something is missing, I'll order it.

I did get the Model Shipways jig, which helped prep me for beginning the build. As simple as the jig is...you have to fill in the blanks with the directions. It also gave me an opportunity to remember how easily the wood break. So far, I'm happy with the jig, the only pain is that when locking the jig, you need a pair of needle nose plyers to hold the bolt as you're tightening the butterfly nut.

133868493_10225276903895309_3587782994377179643_n.jpg133357748_10225276904135315_8033455969834849430_n.jpg
 
Lesson learned with the jig. I will draw gridlines on it for my next ship. It held the 90 degree angles perfectly but I just couldn't get out of 2 dimensional thinking. After the last bulkhead was dry, I held it up and notice the the tops of the bulkheads were not even. Not too bad but enough to start shimming and sanding more then I should have. Also bulkhead 'K' didn't really fit right, I needed to sand a lot to get it inline with bulkheads J & L.

134519483_10225309565391826_6801673569746221950_o.jpg
 
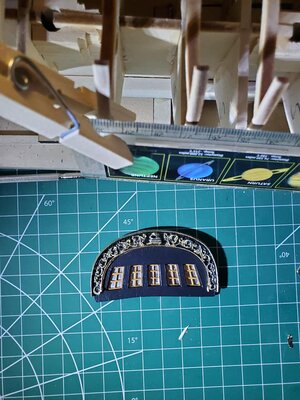
I monkeyed around with this craving a lot. I first tried to cut through it but too risky for me. Then I took the dremel to it. I figured I would grind through the back part and leave the cravings in tack. I was making progress but then I noticed that the metal was ever so slightly, starting to bend. I called it quits, painted it gold and then used a small brush to apply the black.

136746921_10225375128870872_1533688466219062313_n.jpg
 
I ended up soaking the tops of the bulkheads in hot water for 30 minutes to get them aligned properly.

Edit: DO NOT DO THIS!

While it did manage to even out tops of the bulkheads.....the bulkheads below soaked up the water an lost alignment.

139432000_10225435571101890_5608746871698787350_n.jpg139493372_10225435571461899_6500811134054291491_n.jpg
 
Last edited:
Next step was building the Forecastle rails. Something interesting from my perspective is the the knightheads come through the bottom of the rail. The original placement of the knightheads was too far back and too thick to go through the rail bottom. So I have 4 knightheads...... I brushed on primer and after it dried I broke out the paint gun and painted it black. Tonight I wanted a feel for drilling the rail for the belay pins. No major issues, no split wood.

139656034_10225453163261683_7279681964926041597_n.jpg

139144207_10225457920300606_818188989323166608_n.jpg

140759868_10225474337071015_6770503691253542938_o.jpg
 
Last edited by a moderator:
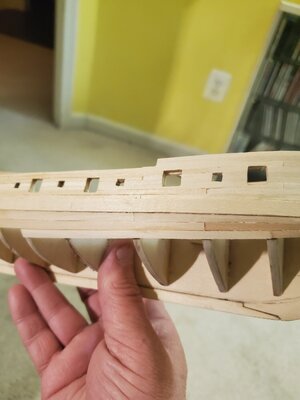
I started the gun & oar ports yesterday. I initially used the 1/16" square framing that the directions call for. My opinion, it is too thin and it would be difficult to get the bulkheads aligned with the ports. Would either have to make the bulkheads 1/16" thick, leave gaps between the planks and the ports, or bend the planks to attach to the ports. I ended up using the 3/23" x 1/8" x 24" strip. The kit only came with one so I have more ordered, should be here by the end of the week.

140076409_10225467029968342_8990896497091920427_o.jpg
 
Last edited by a moderator:
I started the build on 26 December, I'm really enjoying it.

I didn't do an inventory of the parts in the box, I figure if something is missing, I'll order it.

I did get the Model Shipways jig, which helped prep me for beginning the build. As simple as the jig is...you have to fill in the blanks with the directions. It also gave me an opportunity to remember how easily the wood break. So far, I'm happy with the jig, the only pain is that when locking the jig, you need a pair of needle nose plyers to hold the bolt as you're tightening the butterfly nut.

View attachment 206746View attachment 206747
Hallo Paul, alias @PGN
we wish you all the BEST and a HAPPY BIRTHDAY
Birthday-Cake
 
Had to realign the starboard strakes. I'm really enjoying screwing up with this and finding a solution. The 4th strake came out good. I'm increasing the width of the planks on the bow, had I kept using the fan....there would have been an over abundance of stealers. Looks like I will only need then in the stern.

20210208_100933.jpg20210209_221123.jpg20210209_221206.jpg20210209_221223.jpg
 
Tonight I installed the molding strip, it runs the length of the ship. I rounded the squire strip of wood.. The outboard covering strip towards stern of the ship, pretty easy as were applying the rail caps. On the stern I made the rail using my trusty curling iron. I also installed the rail caps. Next step is priming the hull.

20210217_212630.jpg20210217_212635.jpg20210217_212643.jpg20210217_212704.jpg
 
Did a quick test run for the weather decks. Top is untreated, bottom I penciled the sides and used a punch to simulate tree nails and then stained.20210223_121056.jpg
 
Last edited:
Back
Top