Model Shipways Sea Bright Dory Lifeboat [COMPLETED BUILD]

Joined
Jul 30, 2023
Messages
13
Points
48

Hello Everyone! This is my first public Build Log. It's my 3rd ship (well, maybe 6th counting those I've started and put aside (aka gave up on for now). It's a fairly easy one (I think) and I'm taking my time with it, practicing my patience as well as skills.

So, the Sea Bright Dory Lifeboat is an Apprentice Kit Skill Level 2, previously by Midwest, now Model Shipways. I really wanted to do a Made-in-America ship because of the instructions mainly. The other ships that I've temporarily abandoned had TERRIBLE instructions and if you're not a seasoned model ship builder, that can be very frustrating and discouraging.

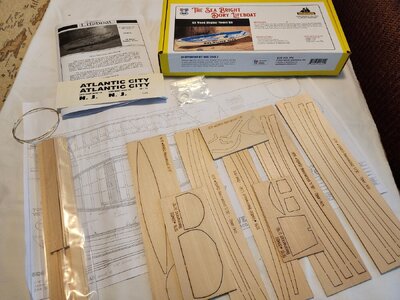
So, enough whining, let's get started! Here's the kit - looks good!2024-03-07 Sea Bright Dory Kit.jpg
In this model, the planks are shaped around two forms on a piece of strongback. Putting the Forms and strongback together was super-easy - no need for photos there. I then attached the stem and the stern to the bottom plank, along with the transom. Still, very simple.

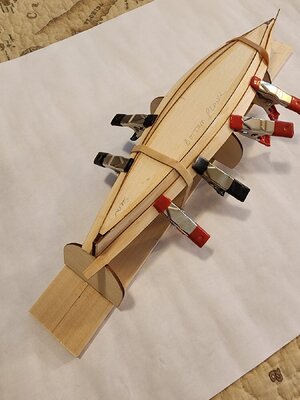
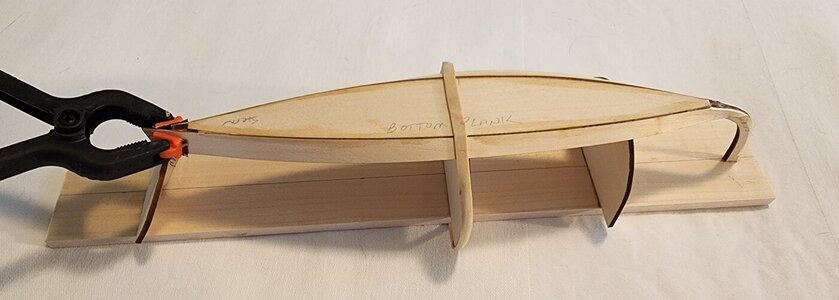
Well, the trouble came when I went to bend the bottom plank. I soaked it in hot water for about an hour. Picked it up, gave it a bend - nothing budged. After mulling it over, I decided to use rubberbands and let the forms do the work. Note that I left the stem hanging over the strongback. I thought more bend in the board would be better than less.
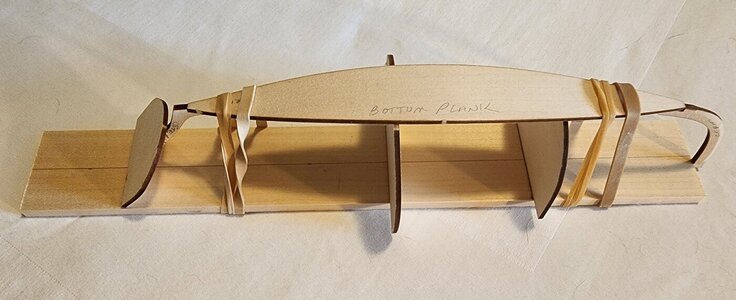
2024-03-21 Bottom Plank Formed.jpg
This worked well, until I went to glue (tack) down one side (the stern) at which point the stern snapped. I think that I was lucky to be able to repair it and gently try again. Starting the planking now. The instructions tell you to use Thin CA. Just not a fan ot it. So, I used it to do a quick tack, then used wood glue along the length to make it strong. Tomorrow, I will remove the forms and strongback. It seems a little early to do this - ooops - UPDATE - although the instructions say to remove from the form right after the 1st plank, subsequent pictures do not show the ship detached from the forms/strongback untill ALL planks are installed. So much for english-language instructions...
2024-03-23 Plank 1.jpg

Glad I read ahead ;)
 
Built the Midwest kit many years ago, fun build. Sometimes I've left planks soak overnight. If you're not experienced with applying decals, apply a coat of clear gloss before applying the decals and then seal with a flat coat. Otherwise, the sheen of the paint and decals won't match.
 
Built the Midwest kit many years ago, fun build. Sometimes I've left planks soak overnight. If you're not experienced with applying decals, apply a coat of clear gloss before applying the decals and then seal with a flat coat. Otherwise, the sheen of the paint and decals won't match.
Thank you for the decal advice. The Sea Bright Dory Lifeboat comes with a decal "Atlantic City". Being a Long Islander, I am going to try to make my own decal "Jones Beach". Bought the special inkjet paper and will likely try on scrap wood first. Looks tricky.
 
Hello Everyone! This is my first public Build Log. It's my 3rd ship (well, maybe 6th counting those I've started and put aside (aka gave up on for now). It's a fairly easy one (I think) and I'm taking my time with it, practicing my patience as well as skills.

So, the Sea Bright Dory Lifeboat is an Apprentice Kit Skill Level 2, previously by Midwest, now Model Shipways. I really wanted to do a Made-in-America ship because of the instructions mainly. The other ships that I've temporarily abandoned had TERRIBLE instructions and if you're not a seasoned model ship builder, that can be very frustrating and discouraging.

So, enough whining, let's get started! Here's the kit - looks good!View attachment 436968
In this model, the planks are shaped around two forms on a piece of strongback. Putting the Forms and strongback together was super-easy - no need for photos there. I then attached the stem and the stern to the bottom plank, along with the transom. Still, very simple.

Well, the trouble came when I went to bend the bottom plank. I soaked it in hot water for about an hour. Picked it up, gave it a bend - nothing budged. After mulling it over, I decided to use rubberbands and let the forms do the work. Note that I left the stem hanging over the strongback. I thought more bend in the board would be better than less.
View attachment 436973
This worked well, until I went to glue (tack) down one side (the stern) at which point the stern snapped. I think that I was lucky to be able to repair it and gently try again. Starting the planking now. The instructions tell you to use Thin CA. Just not a fan ot it. So, I used it to do a quick tack, then used wood glue along the length to make it strong. Tomorrow, I will remove the forms and strongback. It seems a little early to do this - ooops - UPDATE - although the instructions say to remove from the form right after the 1st plank, subsequent pictures do not show the ship detached from the forms/strongback untill ALL planks are installed. So much for english-language instructions...
View attachment 436974

Glad I read ahead ;)
4/19/24 - OK, it's been almost a month. I haven't worked on the boat 'every' day, but I have worked on it more than usual. I emailed Model Expo about the somewhat major mistake in the instructions and they emailed me back right away with corrected instructions attached.

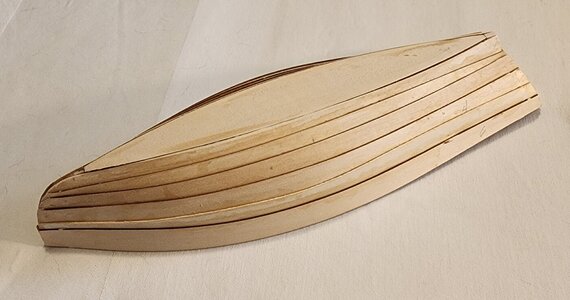
Started planking which went well except that eventually my spacing got too big and now I have an oversized Sea Bright Dory :(

20240324_151212.jpg20240406_073621.jpg20240406_073633.jpg
 
Last edited:
4/19/24 - OK, it's been almost a month. I haven't worked on the boat 'every' day, but I have worked on it more than usual. I emailed Model Expo about the somewhat major mistake in the instructions and they emailed me back right away with corrected instructions attached.

Started planking which went well except that eventually my spacing got too big and now I have an oversized Sea Bright Dory :(

View attachment 442809View attachment 442810View attachment 442811
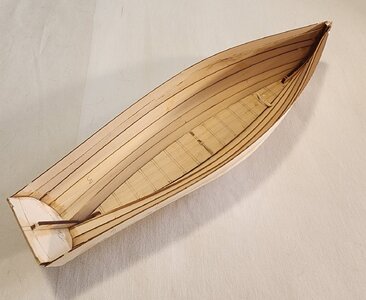
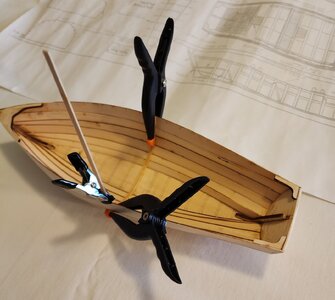
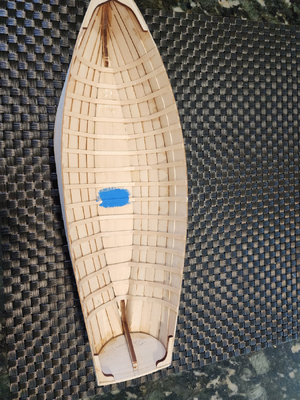
I am now working on the ribs. Instructions say to start at the stern but that 1st stern rib looks difficult, so I’m starting at the center. Hopefully by the time I get to the end ribs, I’ll be an expert!
20240413_145554.jpg
 
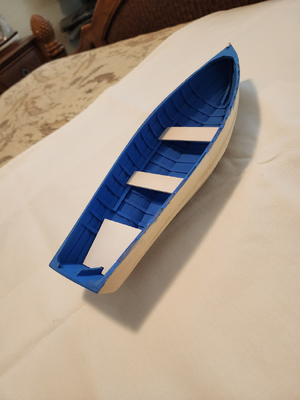
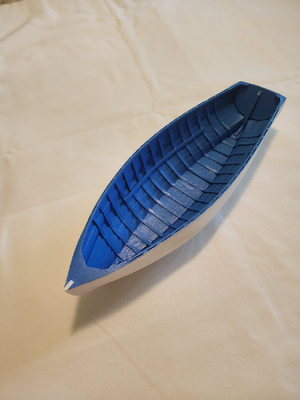
Well, it's been awhile, but I've kept plugging away. I finished the ribs and picked out my paint colors… I liked this blue. The hull and seats will be white (who wants to sit on a dark blue seat that’s been sitting in the hot sun?).
1717361261261.png
 
I am currently ‘fiddling’ with the paint. I had decided to finish the flat blue with a clear gloss sealer – I liked it flat but was thinking that it would be easier to dust if it was sealed. BUT, I don’t like it glossy – it shows off the many imperfections in the ribs. So, will try a matte finish as soon as the humidity lifts a little – it’s just not good painting weather out in the garage lately…

1717361426791.png1717361457527.png
 
Last edited:
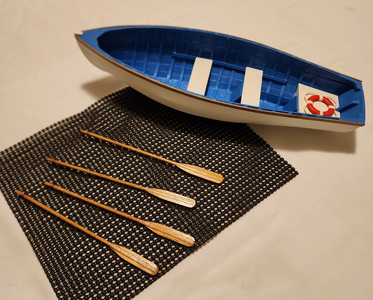
Rub rails are on - they will be left natural with a coat of varnish. I gave the Life Ring some color. The Oars are complete and I now wait for better (less humid) painting weather. I've been hesitant to form the oar locks because I think I'll not be consistent, but I'll try that next...
1717362581321.png
 
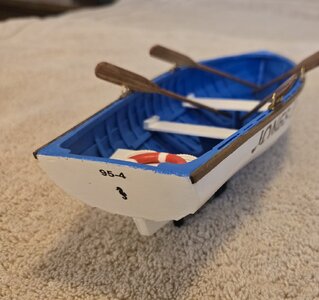
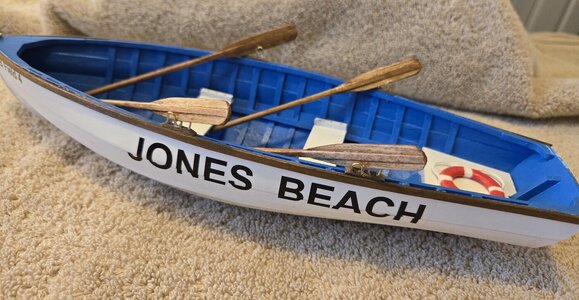
Well, it’s DONE! I put several coats of acrylic spray (gloss) on the outside. The inside started out as glossy, but I didn’t like it and tried to cover it with a coat of matte. It helped a little. Other things that I finished:
  • The Seats – the instructions call for fabricating and installing “knees” at the end of each seat. You’re supposed to use scrap from the die-cut material. Perhaps I’m not advanced enough but cutting them out just wasn’t going to happen. Looking back, maybe a different kind of wood would have worked. I compromised by painting some faux bolts at the ends – might be visible in the photos below
  • The Oar Locks – trickier than I thought they’d be. If I had to do it again, I would make the blocks under the oar locks slightly larger so that I had more room to drill the holes for the oar lock wire.
I really dragged my feet on the decals. The kit comes with decals for “Atlantic City” lifeboat, but being from Long Island, it was my intention to do a “Jones Beach” lifeboat. I bought the decal paper for my printer and spend some time researching the lettering that they typically used – plus finding a little “seahorse” emblem for the stern. I finally tried it and – believe it or not – I was successful on the first try! I was worried because the “Jones Beach” lettering traverses over one of the overlapped planks. But I watched some YouTube videos and bought some Micro-Set and Micro-Sol and it just worked great! Followed up with two coats of acrylic gloss over the hull.

I ‘may’ mount the dory on a plain board, painted with “sand”. Have to research some techniques…

Found some typos and steps out of place in the instruction book and will forward to Model Expo.

Here's the final photos. Now, to figure out what to do next? Resist the urge to start something new OR finish off a “previously-started” boat?
20240707_143113(SS).jpg
20240707_143312(SS).jpg
 
Congratulations from my side - well done
 
Back
Top