


- Joined
- Nov 15, 2022
- Messages
- 460
- Points
- 278

So no rest for the wicked, my next build will be The Montañés from OcCre.
Will star a full build log here on Labor day May 1st.
Some brief history of the Montañés (Wikipedia):
Montañés (class) was a 74 gun third-rate Spanish ship of the line.
Design was prepared by Julián Martín de Retamosa ,Following José Romero y Fernández de Landa's system under which the San Ildefonso class had been built.
Ordered in November 1792
Launched in November 1794
She was much faster than other ships of the same era, reaching 14 knots downwind and 10 knots upwind.
In 1795 she fought a French force of 8 ships of the line (including one three-decker) and 2 frigates single-handed in the bay of San Feliu de Guíxols - thanks to her superior speed, the Montañés managed to get within range of a coastal artillery battery, forcing the French to break off the chase.In June 1805 she was put under the command of Captain Francisco de Alcedo and made part of Alcalá Galdiano's division, defending Cadiz from a possible British attack. At the Battle of Trafalgar she was assigned to the second division of Gravina's squadron. the ship lost only 20 dead including the capitan and his deputy, and 29 wounded in the battle. And was able to recapture the Santa Ana and Neptuno after their capture by the British.
commanded by José QuevedoThe Montañés took part in the capture of the Rosily Squadron at Cadiz. She also made several voyages to the Canary Islands, Balearics and Havana before being lost in a heavy storm on 10 March 1810.

 en.wikipedia.org
Some illustrations of the Montañés from the naval museum in Madrid


more decks illustration and purposes can be found here:
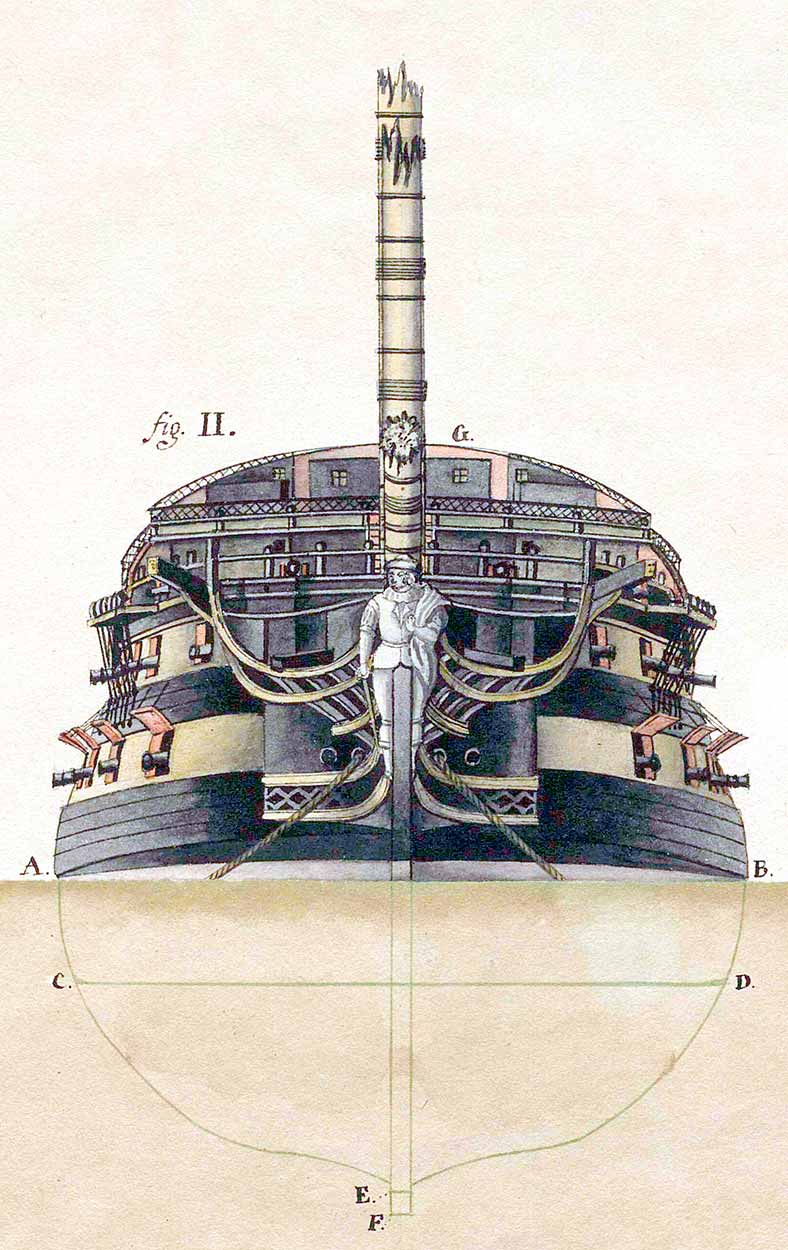
 www.todoababor.es
The kit:
1/70
LENGTH 1250
HEIGHT 895 mm
WIDTH 470 mm


Cheers
Guy

Will star a full build log here on Labor day May 1st.
Some brief history of the Montañés (Wikipedia):
Montañés (class) was a 74 gun third-rate Spanish ship of the line.
Design was prepared by Julián Martín de Retamosa ,Following José Romero y Fernández de Landa's system under which the San Ildefonso class had been built.
Ordered in November 1792
Launched in November 1794
She was much faster than other ships of the same era, reaching 14 knots downwind and 10 knots upwind.
In 1795 she fought a French force of 8 ships of the line (including one three-decker) and 2 frigates single-handed in the bay of San Feliu de Guíxols - thanks to her superior speed, the Montañés managed to get within range of a coastal artillery battery, forcing the French to break off the chase.In June 1805 she was put under the command of Captain Francisco de Alcedo and made part of Alcalá Galdiano's division, defending Cadiz from a possible British attack. At the Battle of Trafalgar she was assigned to the second division of Gravina's squadron. the ship lost only 20 dead including the capitan and his deputy, and 29 wounded in the battle. And was able to recapture the Santa Ana and Neptuno after their capture by the British.
commanded by José QuevedoThe Montañés took part in the capture of the Rosily Squadron at Cadiz. She also made several voyages to the Canary Islands, Balearics and Havana before being lost in a heavy storm on 10 March 1810.
Spanish ship Montañés (1794) - Wikipedia
Some illustrations of the Montañés from the naval museum in Madrid
more decks illustration and purposes can be found here:
¿Cómo es por dentro un navío de línea de 74 cañones? | Todo a babor
¿Quieres saber cómo era por dentro un navío de línea de 74 cañones? Planos detallados del navío Montañés, uno de los mejores de su clase.
www.todoababor.es
The kit:
1/70
LENGTH 1250
HEIGHT 895 mm
WIDTH 470 mm
Cheers
Guy
Last edited by a moderator:


