• Ships of Scale has incorportated an extra level of security when you log In. Please follow on-screen prompts to acknowledge that you are not a robot via a "Check Box" or a "Pictorial Check Box Puzzle". This is needed due to higher level of AI Activity Security.
  • SUBSCRIBE TO SHIPS IN SCALE TODAY!

    The beloved Ships in Scale Magazine is back and charting a new course for 2026!
    Discover new skills, new techniques, and new inspirations in every issue.

    NOTE THAT OUR NEXT ISSUE WILL BE July/August 2026
  • Win a Free Custom Engraved Brass Coin!!!
    As a way to introduce our brass coins to the community, we will raffle off a free coin during the month of August. Follow link ABOVE for instructions for entering.

Muscongus Bay Lobster Smack - Kitbashed from Model Shipways

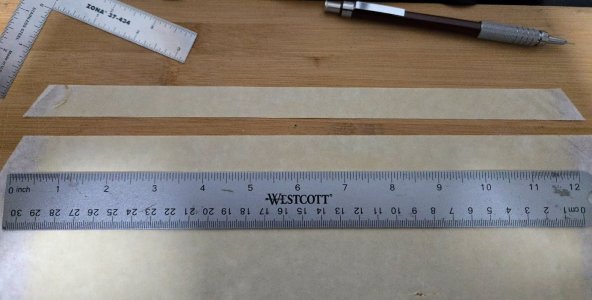
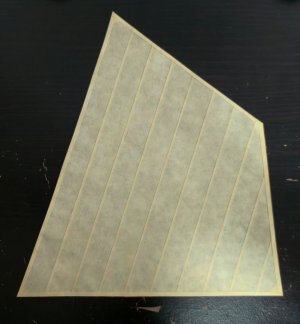
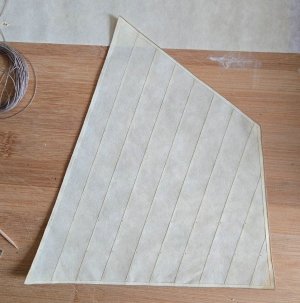
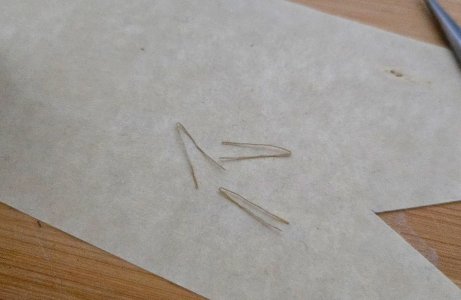
Next up, I removed the sail material from the frame and began cutting it into strips. I made these slightly wider than given in the instructions, more to preserve my own sanity by reducing the amount of gluing to do than anything else.
20260823_205243(1).jpg

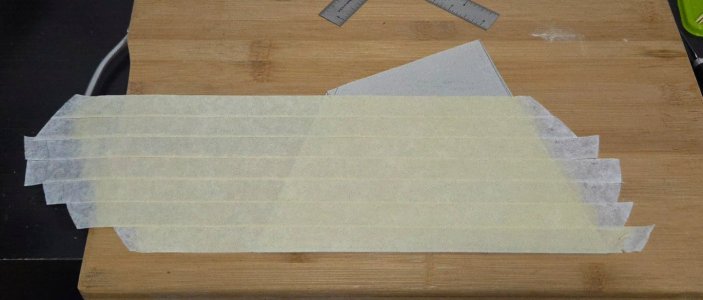
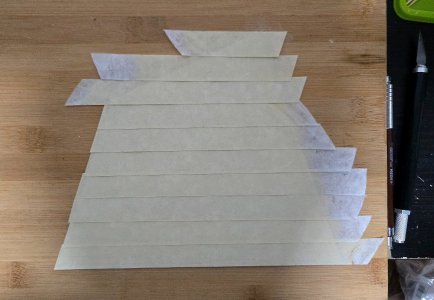
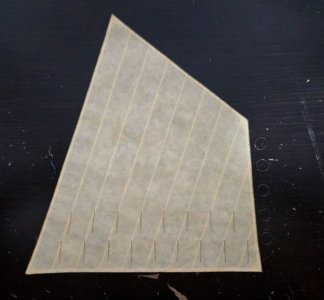
I then began arranging strips over the sail template, working out how best to order them.
20260823_220928(1).jpg

20260823_222022(1).jpg

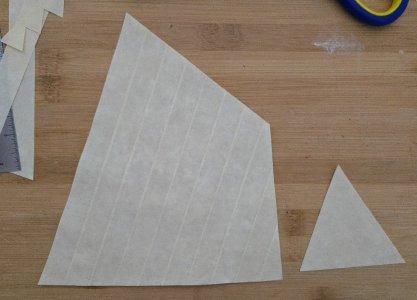
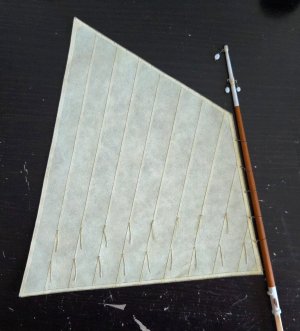
A bit of Aleene's Tacky Glue to attach the panels together, and then I trimmed to size.
20260823_233204(1).jpg

As can be seen, the sail stayed pretty flat during gluing, just a little bending. I will be attempting to shape it later by very slightly dampening it, if tests in that direction are promising. The main sail still needs the reinforcing bands. I'm happy with how it's coming along, I didn't paint it as much as I did on the Lancha Chilota so it's more translucent, which I like as it makes the seams between panels stand out slightly. The foresail is a single piece and quite small. Why is that? Well, I'm planning on furling it. These boats were often worked under mainsail alone. I'll need to do some tests and watch some Tom Lauria videos, though, to get a better sense of how to furl it (and if it still makes sense to glue on a bolt rope if it's just getting all folded up).
 
Thanks!

I've advanced a little on the sail, adding the reinforcing strips around the edges and the corner reinforcements.
20260828_164719(1).jpg

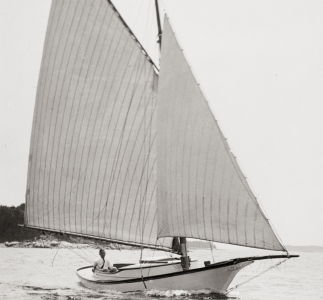
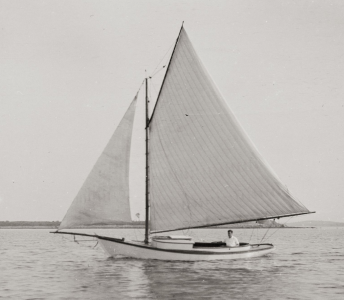
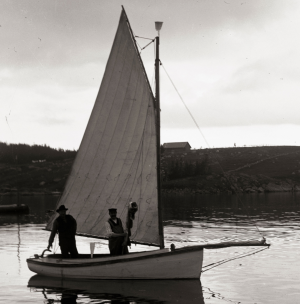
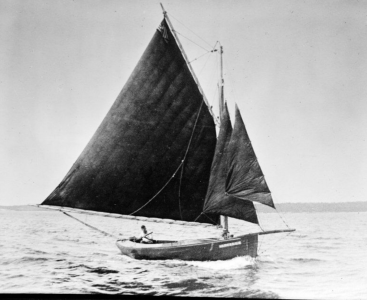
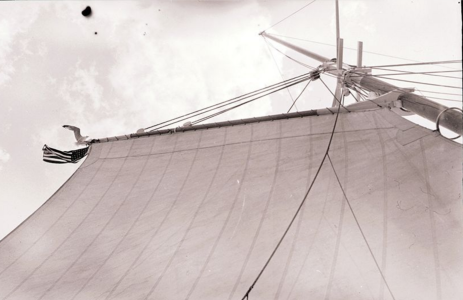
The instructions call for adding reef bands, as well. That said, looking at photos from the early 1900s, I don't see visible reinforcements--I'm sure they were there, but they seem to have been unobtrusive enough to not really be noticeable. Below, a few examples:

Screenshot 2026-08-28 at 8.11.12 AM.png
Source

Screenshot 2026-08-28 at 8.17.16 AM.png
Source

Screenshot 2026-05-10 at 10.07.23 PM.png
Source

So, I'm considering just adding reef points without the bands, but if anyone has any thoughts, I'd be happy to hear them.
 
I've made quite a bit of progress on the mainsail. First up, I added the boltrope (.3mm rope--all rope on this model is Syren-brand) and punched the holes for the reef lines. I glued the bolt rope with regular white glue, then once that dried reinforced it on the outside edge with Aleene's Tacky Glue. I've found that the latter is quite strong and, unlike white glue, water-resistant, but it leaves a shiny residue. As a result, I had to paint over a few shiny spots along the seams of the sail.
20260901_125722(1).jpg

I also thought that the knots on the gaff peak block loop looked too big, so I redid it with false splices (working one end of the rope through the fibers in a loop, gluing, and trimming). It looks much better now.
20260901_131957(1).jpg

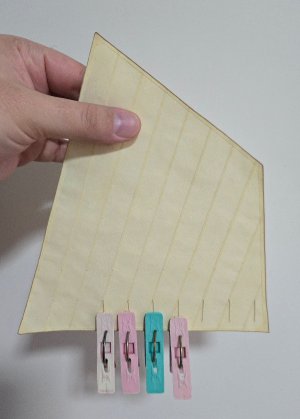
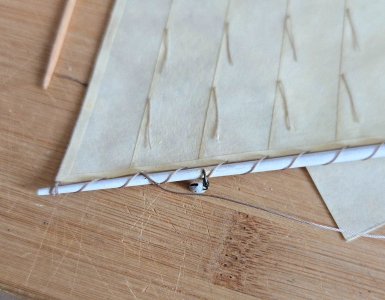
I then began adding the reef lines, passing a bit of .2mm rope through the holes, clamping it down, and adding white glue to the upper half to hold it in place. Part of my goal here was to avoid overly neat reef lines. If you look at the photos in my previous post, there's often some variation in the lay of the reef lines. While I don't want it to look messy (as it does in one photo), I think a bit of unevenness will help bring it to life.
20260901_170202(1).jpg

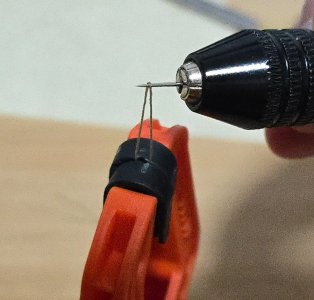
For the upper reef band, I couldn't use clamps because I don't have many that large. Instead, I pre-bent the lines by holding the ends evenly in a clamp, adding a drop of ca glue, and using a pin to hold them straight. This method actually was a lot easier than clamping and gluing in place as on the first band.
20260901_193724.jpg
20260901_200127(1).jpg

I then trimmed the ends even.
20260901_232952(1).jpg

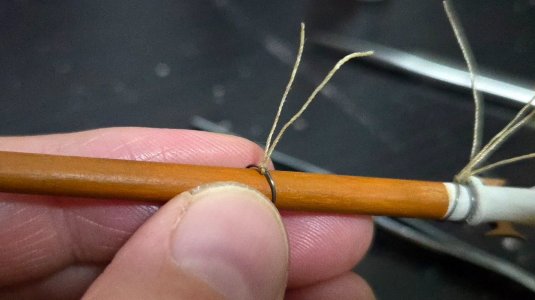
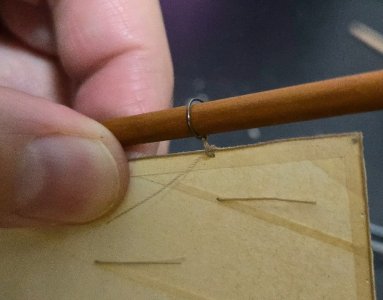
I also got started on the mast hoops. Originally, I was looking forward to making wooden ones. However, I realized that I missed the boat (ha) on these, as I would have had to add them before adding all the eyebolts and blocks to the masthead. Some photos show metal hoops, instead, so I made some out of 28-gauge wire. This is the same process as on my Lancha Chilota build. After putting the hoops on the mast, I tie on a little bit of .2mm rope:
20260902_001630(1).jpg

I then run each end through the hole in the sail:
20260902_002302(1).jpg

I then pull it tight, snugging the sail up nearly against the hoop. So far, this is following the scheme shown by John Leather in The Gaff Rig Handbook. He shows that the rope ends would next be looped back through the mast hoop before being tied off. That looks a little bulky to me at this scale (plus these tiny lengths of rope are a pain in the neck to manuever), so I just tie them together at this point and call it good.
20260902_002727(1).jpg

A drop of glue, trim the ends, and it's finished. With that, the sail is on the mast.
20260902_083114(1).jpg

I also did a couple tests with scrap of furling the jib. I found that adding a bolt rope to the jib made it a little hard to fold up tightly, so I think I'll be skipping the bolt rope on the furled jib. Yes, it's slightly inaccurate, but hopefully it won't be too noticeable.
 
I have no documented basis for the following but:

In past posts we discussed how bulky lobster pots could be carried on a small boat. The deck arrangement of your boat with the small cabin foreword and cockpit aft provides a flat working surface where lobster pots would be handled and transported to and from lobstering grounds. The problem would be clearing the mainsail boom.

Schooners in the lumber trades often had “lumber reefs” along the bottom part of sails. These allowed them to be reefed from the bottom up so that the boom could be raised to clear a deck load. Your reef points near the bottom of the sail would accomplish the same thing.

The boats that you show in the photos without reef points appear to be smaller than the boat that you are modeling, and they may be yachts. In the late 1800’s before the advent of small one design sailboats, small yachts evolved from workboat designs.

Roger
 
@Roger Pellett : thanks! Interestingly, I've found that the lobster pot fits well under the boom, I think it would only need to be raised if the pots were stacked on deck. From what I've read, it was fairly common to reduce sail while collecting pots. Some of the vessels I've shared photos of are indeed yachts, and some are smaller than this vessel (about 23 feet long overall), but I haven't found very many photos that show reef bands, including on what seem to be working vessels. I would guess that for some relatively small boats (and the sloop I'm modeling isn't that big, a good bit smaller than most Friendship Sloops), they didn't necessarily add in the reef bands, or they weren't very visible from a normal scale difference. But I do think this model could have gone either way.
 
Having attached the sail to the mast, the next step is to attach it to the boom and gaff. Here I have to pause a bit. From what I can tell from photos, a simple continuous loop lacing should work for both boom and gaff, rather than the gaff robands I’ve used on previous vessels—robands would be stronger, but this is not a very big boat. The sloop Lucille below, for instance, has a loop lacing.
Screen Shot 2025-04-16 at 9.07.33 PM.png
Source

The tricky part is figuring out what to do at the throat and tack. According to Leather’s The Gaff Rig Handbook, the throat is often “seized to an eyebolt under the gaff, or through two eyes bored in the wood gaff jaws” (40). As for the tack, Leather cautions against “the commonly-seen practice of lacing the tack around the gooseneck” (40), although this is not very useful for the jaw-ended boom I have here. I think that an eyebolt at the throat and tack of the gaff and boom, respectively, will work well. I went looking for photos in the Penobscot Marine Museum’s digital collections, and, although I didn’t find any examples of Muscongus Bay Sloops with this, there were several photos of other vessel types that showed what I was looking for.

Here, for instance, we can see how the looped lashing runs all the way to an eyebolt at the throat on the schooner Candage.
Screenshot 2026-09-02 at 1.20.40 PM.png
Source

This image of the gaff jaws on the Norwegian pilot ketch Oscar Tybring shows eyebolts on each side of the gaff (as well as the protective material—I think leather) on the inside of the jaws, and the pivoting piece inside the gaff jaws).
Screenshot 2026-09-02 at 1.17.44 PM.png
Source

Closer to Muscongus Bay, you can see something similar on the gaff of this Friendship-built catboat from the 1950s.
Screenshot 2026-09-02 at 1.18.44 PM.png
Source

So, I’ll be adding an eyebolt like that to the gaff, and to the boom, before lashing the sail to them.

I also realized that I need to make a new foresail. While I cut it to the same angle as the full sail would be, when it’s furled, the head ends up really far back over the clew instead of over the tack. So, I need to make a new one with the tack at about a 90-degree angle, so that it will properly line up with the forestay when furled.

In other news, I found some new-to-me photos in the Penobscot Marine Museum digital collections that I thought I would share here.

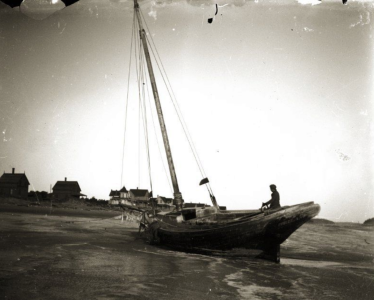
This is an intriguing one from 1898 or so, showing a waterlogged, algae-covered sloop, apparently having sunk some time ago at high tide and being periodically uncovered by low tide. I’m surprised that it still has its mast and rigging, which suggests it couldn’t have sunk that long ago, but has so much algae growth (especially visible hanging from the bowsprit rigging).
Screenshot 2026-09-02 at 12.56.12 PM.png
Source

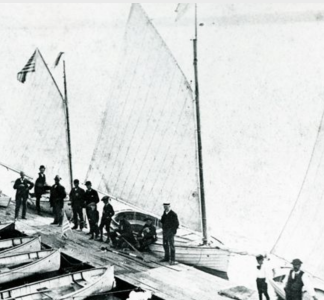
This photo, a detail from a larger one, is interesting in that it very clearly shows a lapstrake-planked sloop. The photo was taken at Belfast, Maine, around 1900. The caption suggests this was a boat rental service or perhaps some sort of yacht club. The lapstrake sloop appears to have a plumb bow and some sort of flagpole at the masthead,
Screenshot 2026-09-02 at 1.05.27 PM.png
Source

Finally, this photo—a detail from a larger photo of two sloops sailing in the Thomaston River (the second not shown in this detail, as it’s not a Muscongus Bay/Friendship Sloop)—is a great action shot and shows some interesting detail of the cockpit interior. It’s also interesting to see how loose the leeward stay is. Most relevant for my build is the location of the anchor poking over the starboard bow.
Screenshot 2026-09-02 at 1.02.25 PM.png
Source

Anyway, I just thought I’d share some of these. Digital collections, especially of photos, are a really great source of information for modelers. (At least when they’re available, that is.)
 
The last picture looks like the boat has reef points.
It definitely does! Pretty much every one of these sloops that I've seen in photos had reef points (unless the photo was blurry), but in many cases I don't see a clear reinforcement strip running the length of the sail, as the instructions fir the kit call to add.
 
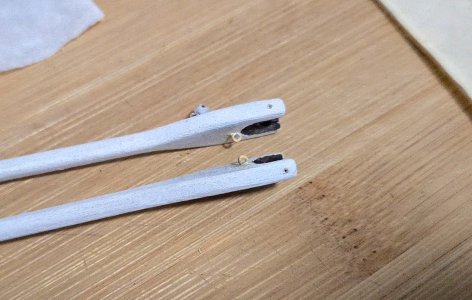
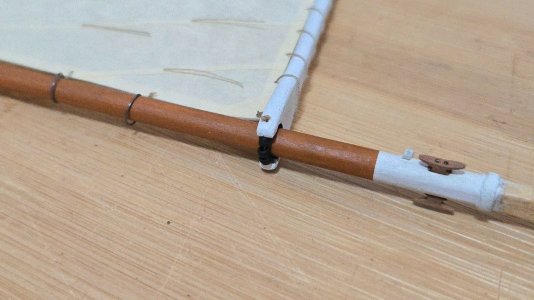
Following the previous posts, I added eyebolts at the throat and tack of the gaff and boom. I also weathered them and painted the interior of the gaff and boom jaws dark brown to represent leather padding.
20260902_220601(1).jpg

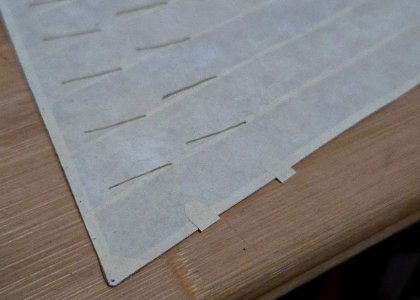
Before proceeding, I also added some reinforcements to the edge of the sail in line with the reef lines (seen below before trimming).
20260902_200220(1).jpg

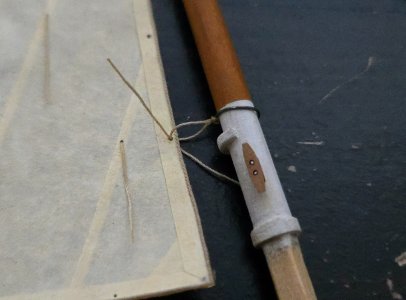
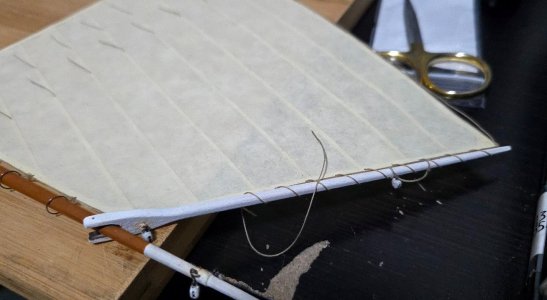
Lacing the sail was pretty straightforward although tedious and finnicky, not many pictures of the process. The eyebolt worked well to keep the throat from collapsing, which it tended to do on my lancha chilota build (where it was just looped over the jaws).
20260902_222304(1).jpg

With that accomplished, the mast could be temporarily stepped! After so long with so little advancement on this build, it's great to see it coming together.
20260902_230638(1).jpg

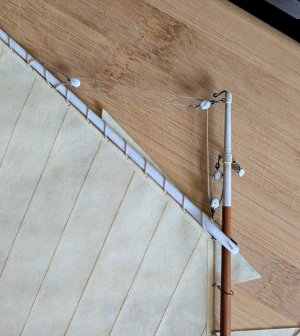
Finally, the parrel beads. It was tricky to fit the line (.2mm nylon thread) through the holes, I should have at least loosely fitted these off the mast. As it turns out, my seed beads are a little large and I could only fit two at the gaff jaws. Oh well, it doesn’t look bad. Rather than try to tightly tie a knot in the line itself, I found it worked better to use a separate bit of thread to tie a knot over the parrel line, snug against the jaws, then to glue and trim.
20260903_091638(1).jpg

At this point, there are still a few things left in this build. Specifically: mainsail running rigging, foresail (stay, hanks, furling, running rigging), anchor, gluing in the pump, additional fittings and fishing equipment (buoy? Gaff hook?). Still a bit to do, but I feel like I'm in the final stretch.
 
Following the previous posts, I added eyebolts at the throat and tack of the gaff and boom. I also weathered them and painted the interior of the gaff and boom jaws dark brown to represent leather padding.
View attachment 631744

Before proceeding, I also added some reinforcements to the edge of the sail in line with the reef lines (seen below before trimming).
View attachment 631742

Lacing the sail was pretty straightforward although tedious and finnicky, not many pictures of the process. The eyebolt worked well to keep the throat from collapsing, which it tended to do on my lancha chilota build (where it was just looped over the jaws).
View attachment 631741

With that accomplished, the mast could be temporarily stepped! After so long with so little advancement on this build, it's great to see it coming together.
View attachment 631740

Finally, the parrel beads. It was tricky to fit the line (.2mm nylon thread) through the holes, I should have at least loosely fitted these off the mast. As it turns out, my seed beads are a little large and I could only fit two at the gaff jaws. Oh well, it doesn’t look bad. Rather than try to tightly tie a knot in the line itself, I found it worked better to use a separate bit of thread to tie a knot over the parrel line, snug against the jaws, then to glue and trim.
View attachment 631743

At this point, there are still a few things left in this build. Specifically: mainsail running rigging, foresail (stay, hanks, furling, running rigging), anchor, gluing in the pump, additional fittings and fishing equipment (buoy? Gaff hook?). Still a bit to do, but I feel like I'm in the final stretch.
Great work JC. Such attention to fine details and a build that is much more than what came out of the box. I would add a colored buoy to the end of the line of the lobster trap. A basswood buoy came standard with the Maine Peapod when I built her last year. As for the anchor, I'm not sure if your getting your deck furnishings too busy with the trap and all. If it were me, I'd just fabricate 2 or 3 anchors and see how they look with your rope. If you don't use them, save'm for the next build.
 
Great work JC. Such attention to fine details and a build that is much more than what came out of the box. I would add a colored buoy to the end of the line of the lobster trap. A basswood buoy came standard with the Maine Peapod when I built her last year. As for the anchor, I'm not sure if your getting your deck furnishings too busy with the trap and all. If it were me, I'd just fabricate 2 or 3 anchors and see how they look with your rope. If you don't use them, save'm for the next build.
Thanks for the input! A buoy would work well with the trap. The anchor would be at the bow, so it wouldn't clutter the cockpit. My personal preference is to have a sense of balance between "realistic mess" (as working boats often were) and "pristine," in order to give some idea of what these boats were used for, without overwhelming the model. Of course, there are different ways to do it--if I were doing a diorama of a scene instead of a stand-mounted model, deck clutter would probably be more accurate.
 
Thanks for the input! A buoy would work well with the trap. The anchor would be at the bow, so it wouldn't clutter the cockpit. My personal preference is to have a sense of balance between "realistic mess" (as working boats often were) and "pristine," in order to give some idea of what these boats were used for, without overwhelming the model. Of course, there are different ways to do it--if I were doing a diorama of a scene instead of a stand-mounted model, deck clutter would probably be more accurate.
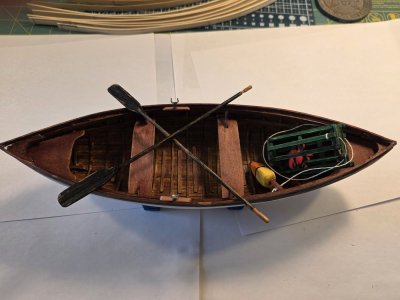
JC - FWIW, here's a pic of my Maine Peapod with trap and buoy.

1788538325686.jpeg
 
The mainsheet was pretty straightforward to attach to the boom.
20260904_095651(1).jpg

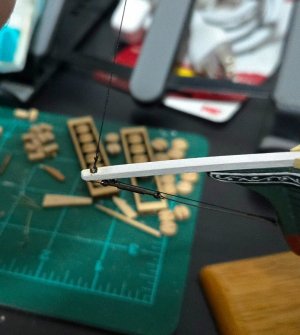
The halyard gave me a little more trouble. The small blocks needed to be slightly opened up to allow the rope to pass through. Unfortunately, many of my small drill bits are very poor quality, with a dull tip, which still works all right on soft woods like basswood but doesn't really work on harder materials. One block partially split when I tried to drill it out, although the wire strop held it together and I was able to repair it with glue. Getting the rope to lay right was a little tricky as well, with the unusual single halyard arrangement, and I had to redo and reverse the direction on the final block. Without a downhaul, it's also tricky to tension the lines, as the whole gaff-boom-sail assembly wants to just move up the mast when you tension it.
20260904_095643(1)(1).jpg

The topping lift is the only bit of mainsail rigging that still needs to be added. Before I add it, though, I wanted to ask about something. I have seen various comments about giving silkspan sails more of a billowing shape by propping up the edges of the sail, dampening it, and putting a form-fitting light weight on top (bag of rice, a cloth, etc) to give it shape while it dries. I was considering doing this on my sail, but I'm a bit concerned about 1) whether the glued seams will prevent the sail from really billowing in this way, and 2) wouldn't the sail get wrinkly from this? If anyone has any suggestions, I'd be happy to hear them.
 
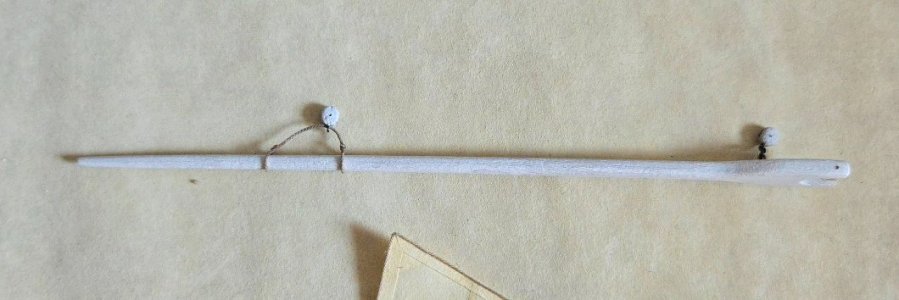
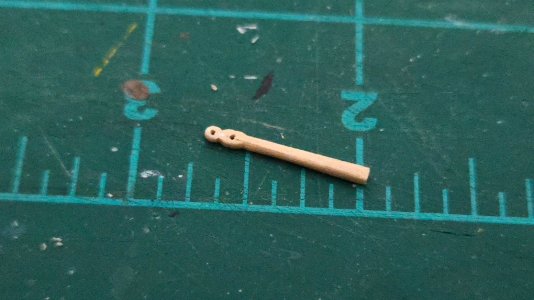
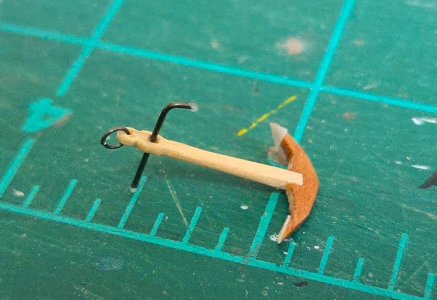
Next up, I decided to make an anchor out of wood, as I did on the Lancha Chilota build. I started by shaping the shank from a toothpick.
20260904_231354(1).jpg

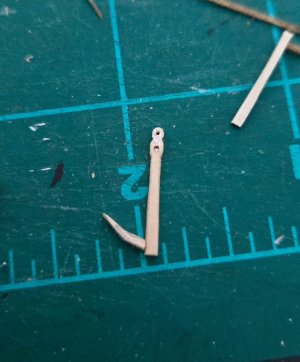
The arms gave me a lot more trouble. I was drawing on an anchor shown in Chapelle's American Fishing Schooners, which had angled arms, in contrast to the curved ones I'd made in the past. It was difficult to get these even, for one, and trying to glue them together was also really tricky because the end grain butt joints didn't really work. First I tried carving one for each side to glue on the sides of the shank. However, I couldn't get it to stick to the shank.
20260904_232157(1).jpg

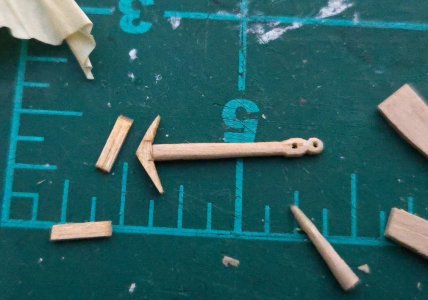
Next up, I tried making the crown first (with a bit of wire securing it to the shank), then gluing angled arms to it. Once again, I couldn't get a decent glue joint.
20260905_000750(1).jpg

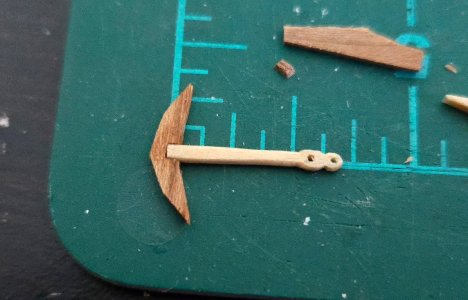
Finally, I carved an oversized piece and attached it to the shank.
20260905_083330(1).jpg

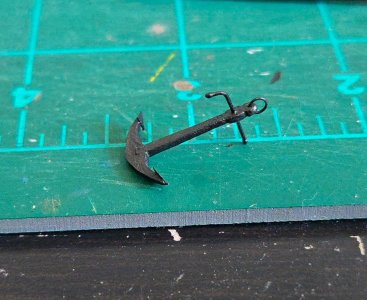
And then shaped the arms with files. This finally produced an acceptable result. After that, adding the stock and ring were pretty easy (using dots of glue for the balls at the end of the stock). The flukes were cut from card.
20260905_112307(1).jpg

I then painted it with a mix of black and gunmetal.
20260905_113906(1).jpg

Not quite perfect, but it will work. I need to figure out how to lash the anchor cable around the sampson post.
 
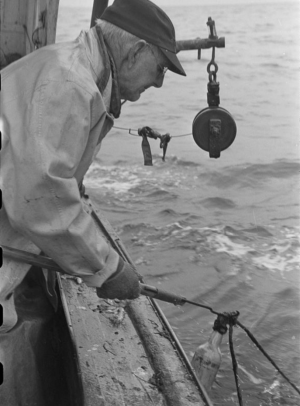
I'm procrastinating on the furled foresail, so in the meantime, I made a few accoutrements for lobster fishing. First, I was intrigued by the gaff hook being used in the photo below:
Screenshot2026-09-06at10_21_24PM.png.c30de9f0e2c983e642b231d42c7e6562.png
Source

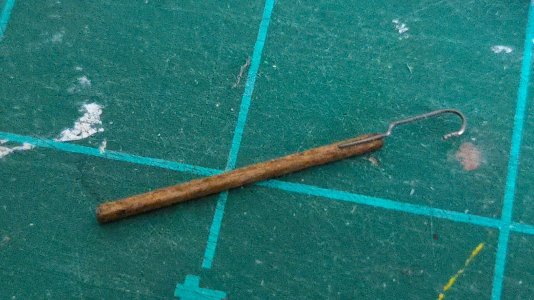
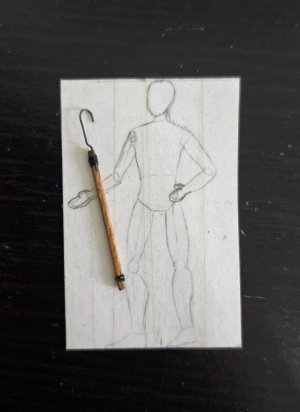
So, I made my own version. It's a bit wider mouthed than the above, and I think a bit longer, too--there's farther to reach out from the Sloop cockpit than in the more modern boat above.
20260905_164139(1).jpg

I then added lashings from fly-tying thread. Figure, height 5-foot 4-inches, for scale.
20260906_153135(1).jpg

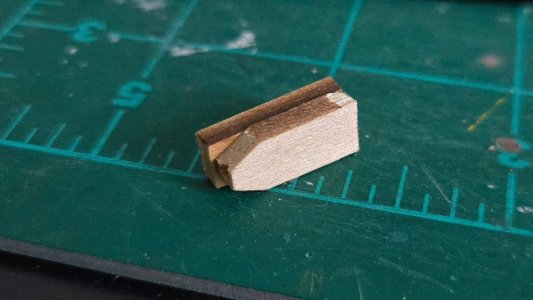
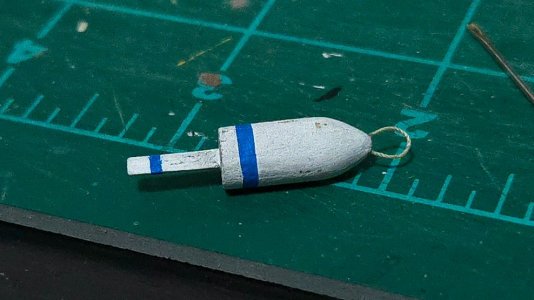
Next, the buoy for the lobster pot. I started by laminating together two bits of 1/8-inch scrap.
20260906_165109(1).jpg

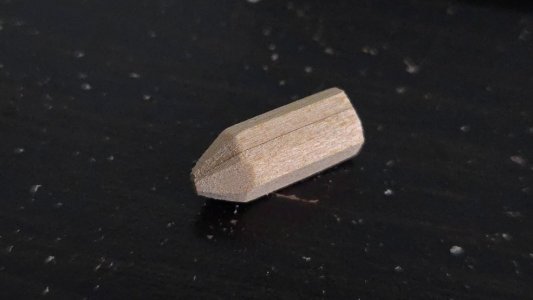
And then shaping roughly into an octagonal cross-section with a pointed end.
20260906_170000(1).jpg

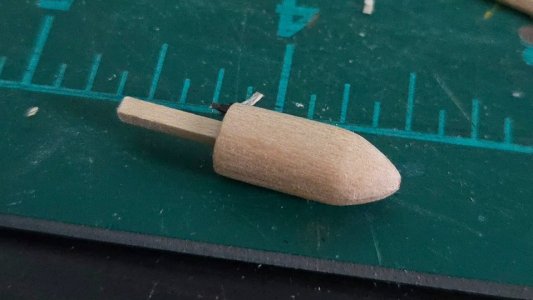
Then rounding and adding the shaft (not sure on the term there).
20260906_173233(1).jpg

Finally I painted it, added the rope loop at the tip, and weathered it a bit. I'll wait to tie it to the trap and fit it in the cockpit until after rigging.
20260906_221249(1).jpg

With that, I need to decide whether or not to add oarlocks and oars. In theory these could be useful for lobstering. In practice they would clutter the build a bit. The sail is not going to be very billowed, as my experiments with adding billowing on scrap were unsatisfactory, so maybe it is a fairly calm day and the sloop can effectively putter along from trap to trap under sail alone? In any case, if I don't do oars, all that's left is the foresail.
 
It’s interesting what you find and miss in digital archives depending on how things are classified and your search strategies! Previously I had mostly done keyword searches in the Penobscot Marine Museum's digital collections for things like “buoy” and “Friendship Sloop” (or just “Sloop”). In recent searches, though, I tried selecting broad tags like “lobster traps” and “sailboats,” ordering results by date from oldest to newest, and seeing what came up. I found some interesting images that I hadn’t come across before.

First up, there was this intriguing image from 1886 of fishing gear piled up on the Biddeford wharf (rather south of Muscongus Bay, admittedly). Quite the mess! Among other objects, there are several oars, an anchor (with a rounded crown, apparently I didn’t really need to bother with making mine angular), nets, bailing scoops, and a lobster pot. There are also a couple objects that may be lobster buoys—one just under the lobster pot, and one leaning against the barrel at bottom center. It’s hard for me to tell if that’s just what they are, though. The lower one, especially, does seem rather square-sided, I think.
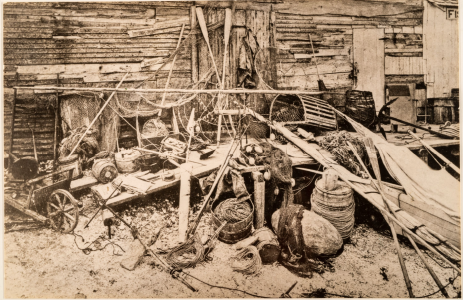
Screenshot 2026-09-09 at 2.35.13 PM.png
Source

There’s also this image, a detail from a postcard of a lobster shack around 1915. Besides the lobster pots under construction at right, there’s also a squared-off buoy (with chamfered edges).
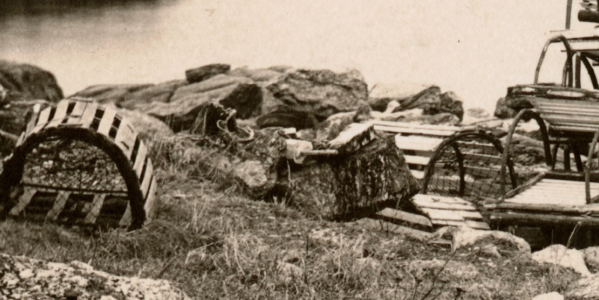
Screenshot 2026-09-09 at 2.43.20 PM.png
Source

In contrast, the buoys in this image from 1920 look a bit more rounded to me.
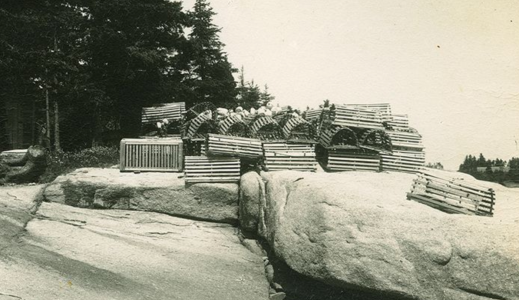
Screenshot 2026-09-09 at 2.42.14 PM.png
Source

As do these buoys from an undated, possibly much later photo.
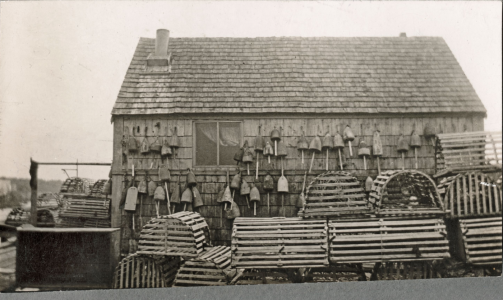
Screenshot 2026-09-09 at 3.00.11 PM.png
Source

Finally, this image of an undated lobster buoy does seem to have a rounded cross-section, but is also much longer and proportionally narrower than the one I made.
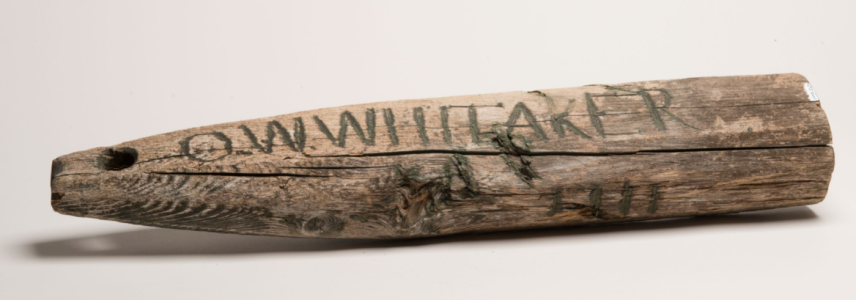
Screenshot 2026-09-09 at 3.00.39 PM.png
Source

It’s hard to draw a firm conclusion from these images. I think that there were a lot of possible ways to make lobster buoys in Maine around 1880-1920. I do now think, though, that my buoy may be a little too rounded and wide, so I may make another one with a somewhat different shape. Thank you to the commenter at MSW who brought this to my attention.

I also came across a number of photos I hadn’t seen before of small sloops in the period. The photo below from around 1900 is interesting, although the sloop is partially obscured by damage to the photo. It looks like a partially decked-in boat, possibly with an overhanging stern, but seemingly missing a cuddy forward (as far as I can tell, the photo damage is very unfortunately placed). The buoys stacked up next to the lobster pots also do have an octagonal cross-section.
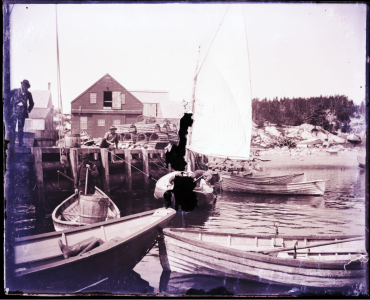
Screenshot 2026-09-09 at 2.38.16 PM.png
Source

This photo dated 1887 shows women waiting to board a sloop at Gilpatrick’s Boat Slip at Mount Desert Island. I assume it’s more of an excursion vessel than a fishing boat, although I suppose there could be some seasonal overlap between the two (I have no idea how fancy Mount Desert Island was). Notably, the sloop they’re boarding appears to have a gaff topsail. There’s also a smaller, lapstrake sloop (with very wide strakes) anchored among the rowboats, as shown in the detail shot.
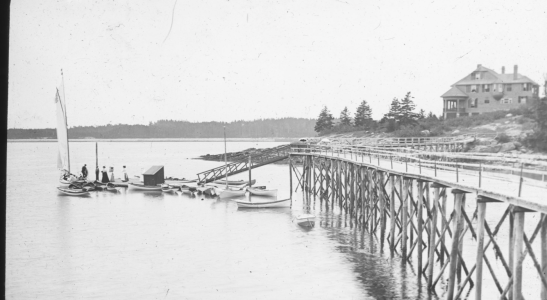
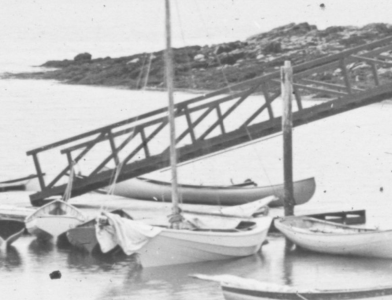
Screenshot 2026-09-09 at 2.57.44 PM.png

Screenshot 2026-09-09 at 2.58.03 PM.png
Source

Longtime readers may remember my difficulties in finding many photos of lapstrake-planked sloops early in this project. I found a few more, although they’re of rather smaller vessels than the one I’m modeling. I do have to wonder how many Muscongus Bay sloops were close to the design I’ve made, which is basically a lapstrake and centerboard Friendship Sloop, instead of the smaller, simpler, plumb-bowed types I’ve more often seen in photos. Perhaps my efforts at a more accurate model are less accurate than I thought. On the other hand, Chapelle is pretty clear that he thought there were lapstrake vessels like this, and I did find those photos of a lapstrake clipper-bowed sloop (at what looked to be a yacht club) and a lapstrake clipper-bowed schooner with a similar, so I suppose it’s fine. It really is something, though, to see how much variation existed among this broad vessel type. I increasingly think that a wholly accurate early Muscongus Bay sloop is something of a chimera, and there were instead so many variants that it would be difficult to pin down a single design as the most accurate (at least as far as generic models go—obviously, you could make a very accurate model of, say, the Ranger on the basis of plans and the reconstruction work I’ve discussed to add back in the centerboard that was later removed from that sloop). On the other hand, at least some of the photos I’ve found come from elsewhere on the Maine coast, and it’s possible that I’m conflating a variety of actually local types with the Muscongus Bay sloop. It may be that the Muscongus Bay sloop that Chapelle identifies as a precursor to the Friendship Sloop (and which, it shouldn’t be forgotten, also attracted the attention of Admiral François-Edmond Pâris) was simply a local variation of a broader family of small lapstrake sloops in common use across large parts of Maine, which only in Muscongus Bay developed into the better-known later types.

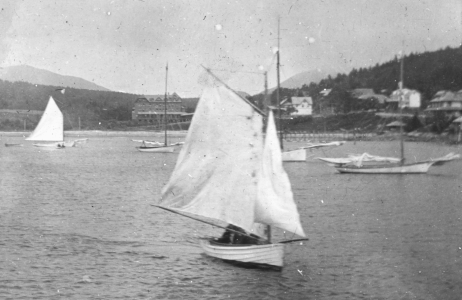
Anyway, the photo of Seal Harbor (not on Muscongus Bay) in 1890, below, shows a number of different sloops. Some appear to be Friendship Sloops or similar vessels. The vessel nearest to the camera is rather smaller and definitely lapstrake planked, without a cuddy.
Screenshot 2026-09-09 at 2.59.32 PM.png
Source

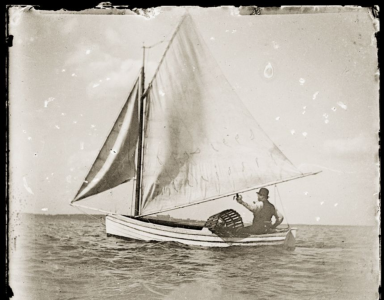
Finally, this 1908 photo of a lobsterman in a small lapstrake sloop at Rockland (not on Muscongus Bay, although not far from it) is very interesting. As a small vessel, its rudder is stepped directly on the transom, instead of having the overhanging stern more associated with Muscongus Bay Sloops. It very nearly looks like a rowboat with sails added, lacking a cuddy, although it does seem to have a small rim of decking around the large cockpit. Maybe this is a good (although rather late) example of the sorts of vessels that Muscongus Bay and Friendship Sloops developed out of? Especially if this was in fact a more widely-used design further out along the coast. It’s also notable how much space the single lobster trap takes up. It’s worth asking with photos like these: is this a photo of an actual lobsterman actually working, or was it staged in some way? Given that I’ve otherwise found very few photos of lobster boats in the era actually working—most close-ups are of yachts or boats being used more for leisure, and the cases where it’s clearly showing work are generally from rather farther away—and that this photo is a well-angled closeup, I’m inclined to believe that there was an element of staging involved here. But how much? Maybe the entire scene is faked, and the photographer just wanted a good image to sell postcards of a lobsterman at work, possibly using a non-workboat and maybe even not an actual fisherman. Or maybe it is indeed a real fisherman and fishing boat, but he agreed to stage the photo. More information about the circumstances of the photo’s creation would be needed to resolve these doubts.
Screenshot 2026-09-09 at 2.40.09 PM.png
Source

Images often seem obvious and simple to interpret at first glance—how could the camera lie?—but sometimes they can raise more questions than they answer when you start getting down to it. Anyway, hopefully I’ll be able to finish up this build in the next couple week. But that would take pulling myself away from questions of historical interpretation to actually get to work!

 
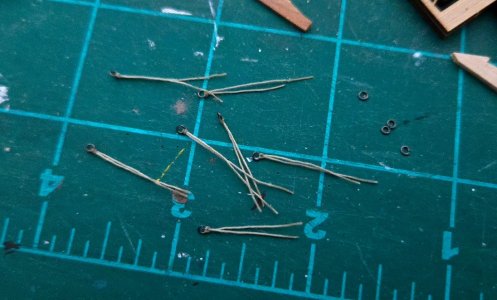
I've been working on the foresail. First, I made the hanks separately from tiny wire rings and some .2mm rope (currently overlong).
20260907_233416(1).jpg

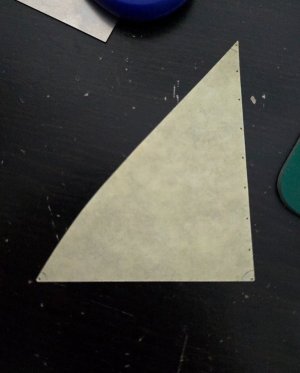
I modified the sail shape a bit so it would sit better when furled, and punched the necessary holes.
20260907_233430(1).jpg

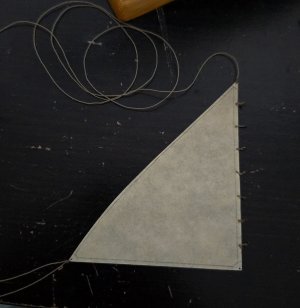
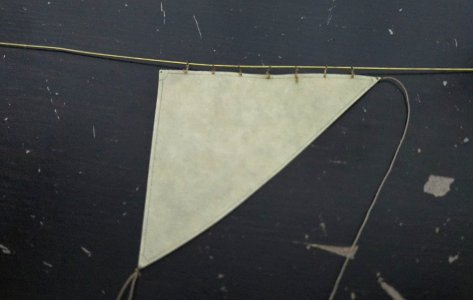
If I glued on a bolt rope and the edge bands, they would impede furling the sail up, so I just drew on the edge bands. I also added the hanks and the halyard and sheet (forgetting the line for the tack until later).
20260911_222307(1).jpg

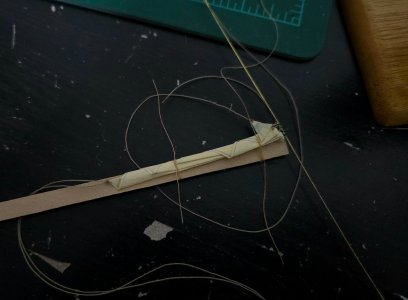
I was concerned that trying to fully furl it on the model would be challenging, so I decided to pre-furl it to nearly the right shape off-model and adjust it later. I used a thin brass rod to keep the hanks lined up.
20260911_223759(1).jpg

And a bit of scrap as my stand-in bowsprit. It furled pretty easily, although I'll be making some adjustments once it's on the model.
20260911_225303(1).jpg

I next added the forestay. According to Chapelle, this was a pretty thin wire. Ropes of Scale black .25mm line was about a perfect match. I attached it to the bowsprit first, and will tighten it at the masthead.
20260911_222258(1).jpg

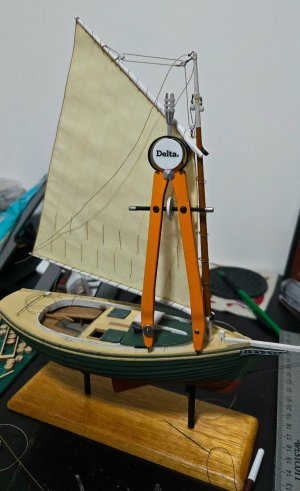
All of this requires getting the mast stepped. When I did so, I realized that, due to pressure from the main halyard on the boom and gaff jaws, the mainsail wants to point out on the right side. But I have the model set up to have the mainsail on the port side to look best. So, I added a little glue to the gaff jaws and propped it to the proper position with a compass. Precarious, yes, but I didn't leave it there for long.
20260911_231100(1).jpg

With that, I'm just about ready for the foresail to be set up. The model is nearly done!
 
Back
Top