-

Win a Free Custom Engraved Brass Coin!!!
As a way to introduce our brass coins to the community, we will raffle off a free coin during the month of August. Follow link ABOVE for instructions for entering.
-

PRE-ORDER SHIPS IN SCALE TODAY!
The beloved Ships in Scale Magazine is back and charting a new course for 2026!
Discover new skills, new techniques, and new inspirations in every issue.
NOTE THAT OUR FIRST ISSUE WILL BE JAN/FEB 2026
- Home
- Forums
- Ships of Scale Build Logs
- Super Detailing Static Models / Other Genres
- Historical Trailways, Guns, Aircraft, and Cars
You are using an out of date browser. It may not display this or other websites correctly.
You should upgrade or use an alternative browser.
You should upgrade or use an alternative browser.
The patina and panel line work is outstanding Dean. Must be a different experience having the engine roaring right behind the seat!
Thank you Daniel. I imagine it was a different experience for sure.The patina and panel line work is outstanding Dean. Must be a different experience having the engine roaring right behind the seat!
Painted the propeller tips yellow. Painted the canopy and added that. Going to finish the doors tonight and start on all the decals!
Some of the decals…
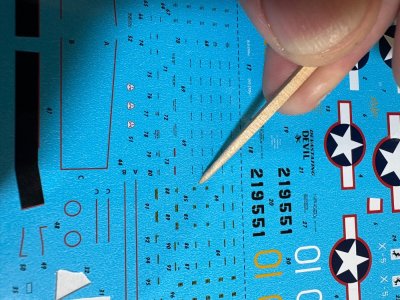
As you can see they are not much bigger than the end of a toothpick! But I’m used to these tiny decals. Doesn’t mean they are fun to work with, but I can manage with a few techniques I employ.

Some of the decals…

As you can see they are not much bigger than the end of a toothpick! But I’m used to these tiny decals. Doesn’t mean they are fun to work with, but I can manage with a few techniques I employ.
Thank you!Wow!! Fantastic modeling skills!! Very impressive.
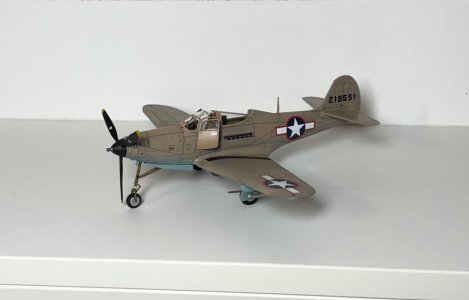
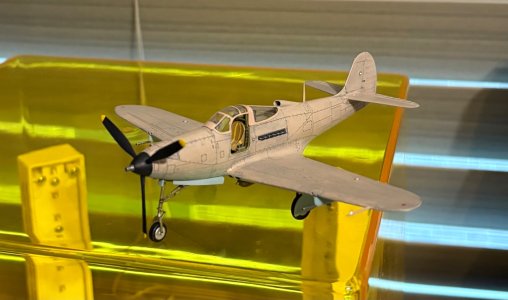
The P-39Q Airacobra is finally finished! It was a lot of work, but worth it. I have to be honest, I wasn’t too fond of it until I built the model and suddenly I really like this airplane. It was fun and educational at the same time.
Pics…
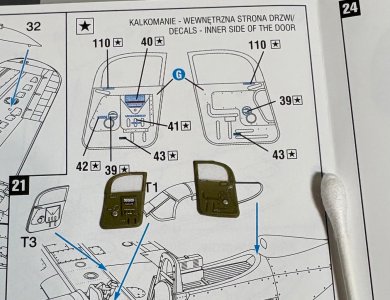
The doors, a lot of detail for such tiny pieces…but that’s one thing I am impressed with about this kit, excellent detail!
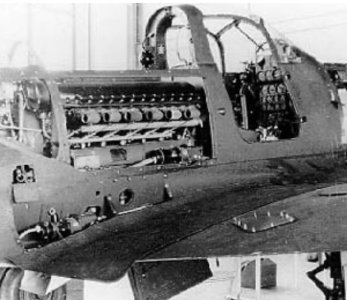
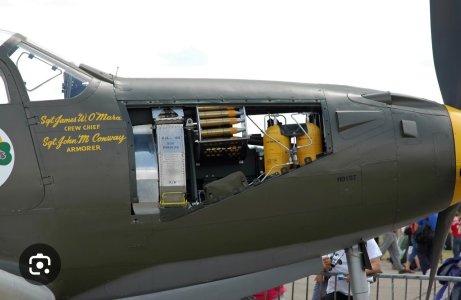
I decided to have the doors partially open to see inside since it has so much detail…
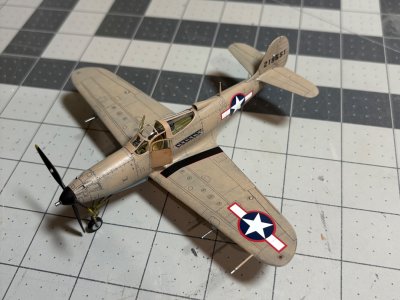
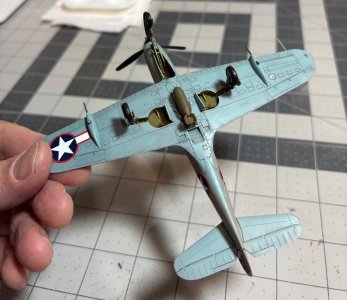
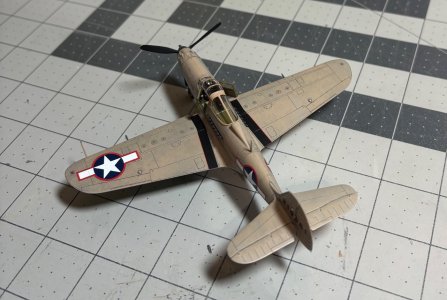
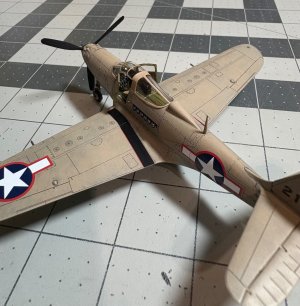
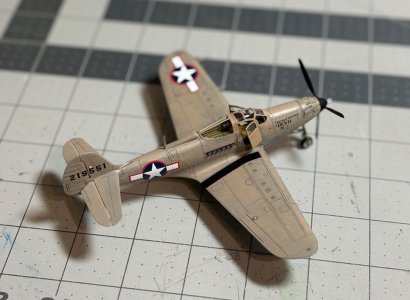
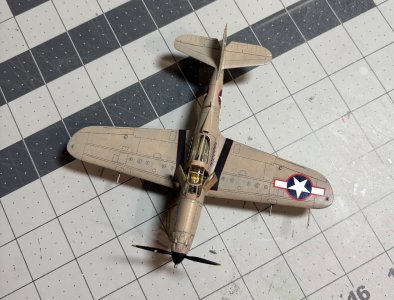
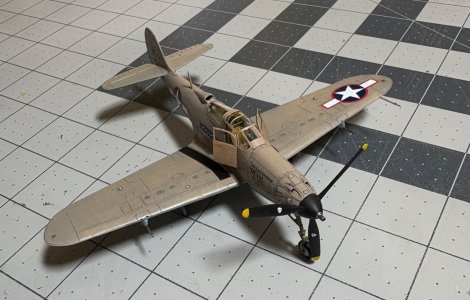
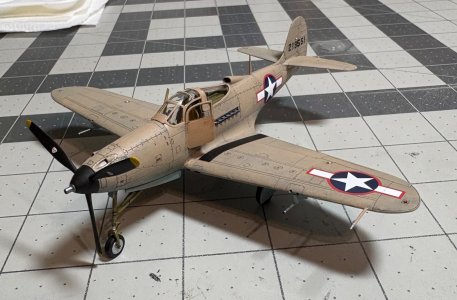
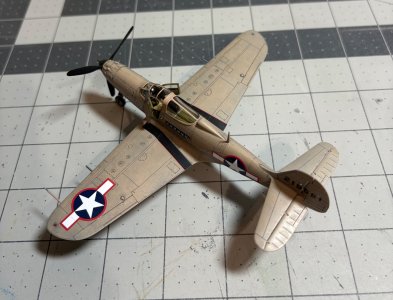
I’m not a photographer, so I figure if I take enough pictures, a few of them will be good!
And she got a front row spot on my shelf…
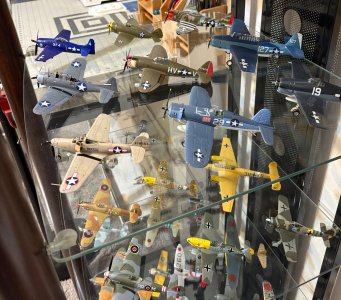
My Wildcat got booted to the lower shelf. I am really glad I went with the sand color.
Anyway, hope you enjoyed following along.
Pics…

The doors, a lot of detail for such tiny pieces…but that’s one thing I am impressed with about this kit, excellent detail!
I decided to have the doors partially open to see inside since it has so much detail…


I’m not a photographer, so I figure if I take enough pictures, a few of them will be good!

And she got a front row spot on my shelf…

My Wildcat got booted to the lower shelf. I am really glad I went with the sand color.
Anyway, hope you enjoyed following along.
- Joined
- Sep 10, 2024
- Messages
- 1,008
- Points
- 393

Beautiful job on your P39 - as usual.
Many of us would be interested in these techniques.
But I’m used to these tiny decals. Doesn’t mean they are fun to work with, but I can manage with a few techniques I employ.
Many of us would be interested in these techniques.
Thank you Russ!Beautiful job on your P39 - as usual.
Many of us would be interested in these techniques.
When I apply microscopic decals, and yes you can read the text with magnification, I only put 2 or 3 in the water at a time. If you put too many in the water, after applying a couple the rest will be floating on the water! And that’s a recipe for frustration!
So 2 to 3 at a time because you don’t want them to separate from the backing while in the water.
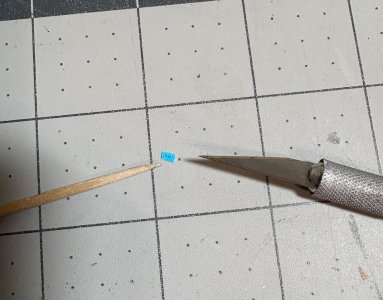
Microscopic decals common at 1/72 scale!
After the decals soak about 30-45 seconds, I stab the edge of the backing of the decal, so always leave enough excess backing around the decal…
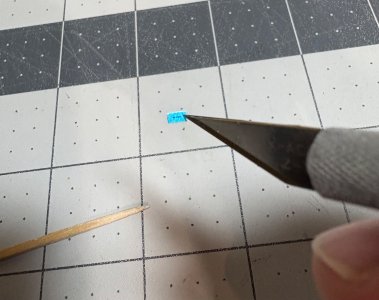
Now that you have the decal and backing on the end of your xacto blade, then carefully place near the final location on the model…
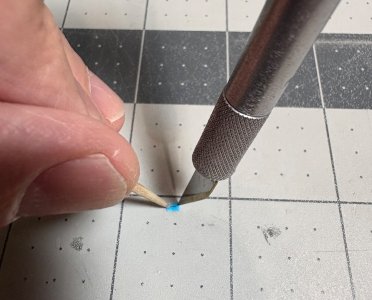
Then I use the end of a toothpick to slide the decal off the backing onto the model. Then I carefully slide into its final location with the xacto or toothpick. Then gently roll a q-tip over it to dry up all the water to fix it in place. Later I brush a little matte varnish over them.
Tips:
A microscopic decal will float on a drop of water, so dap the backing on a paper towel while on the end of the xacto blade prior to putting on the model. You don’t want it dry, but you don’t want a drop of water on the decal either. If you do end up putting it on the model and it’s floating on water, dap with a q-tip to wick up most of the water, and then slide into the final position and finish drying and pressing down by rolling the q-tip over it.
Also, should a decal end up separating from the backing prior to pulling out of the water, use your xacto blade to get it off the water. You have to gently place the blade near the decal and slowly raise it out of the water on the blade. Once it’s there, just slide it on the blade with a toothpick until 70 percent or more is hanging off the blade, then use the same method to slide off the blade with toothpick onto the model.
In conclusion…
It is really more of an exercise in patience than skill.
 …so I place the model where I can locate the decal without holding it. Once it’s transferred onto the model, then i pick up the model and slide the decal into its final position while holding the model.
Anyway, I hope I made that clear enough to be of use. Feel free to ask questions.
Dean,
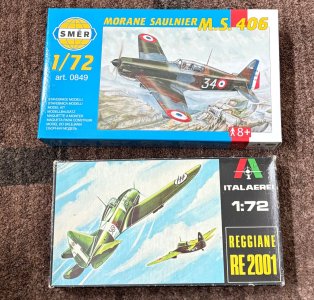
I'm really enjoying this thread showcasing your plane builds. So much so, that when I uncovered my own stash of 1/72 scale WWI kits I'm tempted to jump ship and build a few once we get settled in the new house!
Your P-39 is excellent! Did you use a wash technique to highlight the lines?
I'm really enjoying this thread showcasing your plane builds. So much so, that when I uncovered my own stash of 1/72 scale WWI kits I'm tempted to jump ship and build a few once we get settled in the new house!
Your P-39 is excellent! Did you use a wash technique to highlight the lines?
Thank you! I’m glad to know you are enjoying my thread.Dean,
I'm really enjoying this thread showcasing your plane builds. So much so, that when I uncovered my own stash of 1/72 scale WWI kits I'm tempted to jump ship and build a few once we get settled in the new house!
Your P-39 is excellent! Did you use a wash technique to highlight the lines?
Yes, I did a wash on the panel lines.
Last edited:
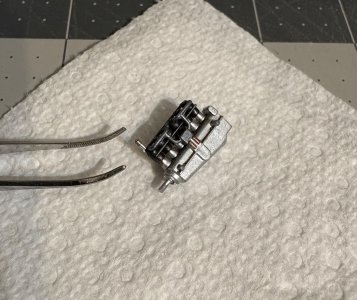
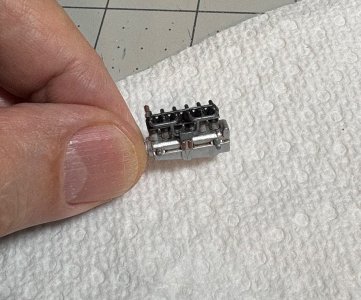
A 6-cylinder inline aircraft engine?What could I be building now?
- Joined
- Sep 10, 2024
- Messages
- 1,008
- Points
- 393

There weren't really any in-line 6's used in WWII, so I'm guessing you're going back to WWI aircraft.
That looks very much like a BMW IIIa engine which was used in a variety of aircraft, most notable the Fokker D. VII. Since that kit was in the photo of your stash, that's my guess. Do I get the prize?
That looks very much like a BMW IIIa engine which was used in a variety of aircraft, most notable the Fokker D. VII. Since that kit was in the photo of your stash, that's my guess. Do I get the prize?
If I am correct, it looks like a Mercedes D. III manufactured by Daimler. It was used throughout WWI on many different aircraft. Give us another hint. You've got me hooked.
Bill
Bill
- Joined
- Sep 10, 2024
- Messages
- 1,008
- Points
- 393

If I am correct, it looks like a Mercedes D. III manufactured by Daimler. It was used throughout WWI on many different aircraft. Give us another hint. You've got me hooked.
Bill
Bill, I think you're right, now that I looked up some different views of it. Since it was also used on the D. VII, I'm sticking with that guess.
Correct…what is it going in?A 6-cylinder inline aircraft engine?
Close…There weren't really any in-line 6's used in WWII, so I'm guessing you're going back to WWI aircraft.
That looks very much like a BMW IIIa engine which was used in a variety of aircraft, most notable the Fokker D. VII. Since that kit was in the photo of your stash, that's my guess. Do I get the prize?
As I recall, I think Dean has built a Fokker D.VII, Albatros D.II or D.III and a Junker CL .I. There are only a limited number of 1:72 WWI single engine German model aircraft, so I am going with the Pfalz D.III. Although, it could be a Roland D.II. I'm assume it will be 1:72 scale.
Bill
Bill


