• LUCZORAMA SHIPWRECK SCAVENGER HUNT GIVEAWAY. 4 Weeks of Fun • 1 Legendary Prize ((OcCre’s Fram Ship)) • Global Crew Welcome!
    **VIEW THREAD HERE**

new mode to make crewmen

I'd love to try this, but I'm having trouble finding the right website. The link mentioned in the video is not on my screen for some reason, and searching the name of the company brings up hundreds of sites. Anybody have the correct link?
 
Hello Jim,if you have an image I be happy to help
I have 19 stl/day free
Daniel
 
the stl file
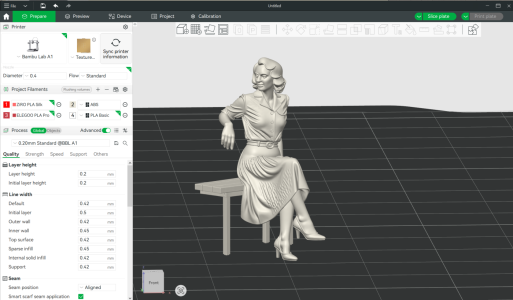
I sliced it in Bambu Studio (the app I use to print with my Bambu Lab A1), and this is what the file looks like when I import the .stl and then rotate it to fit on the build plate:
1752534146359.png

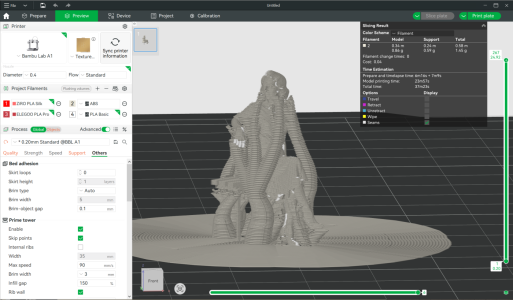
Then, as I add supports to allow the overhangs to print, this is what that looks like:

1752534347617.png

As you can see, there's a lot of support structures that get printed to deal with overhangs (you can't print on open air, there always has to be something below). But the supports are easily removed, and... more importantly, if it's only a figure... not one sitting on a bench, it would be far cleaner. There are a few free utilities out there for creating 3D models from images and photos as well... though the results from those can vary dramatically.
 
Hello Dan ,I waiting for a friend to get back from holiday and I will print my captain for my model
Daniel
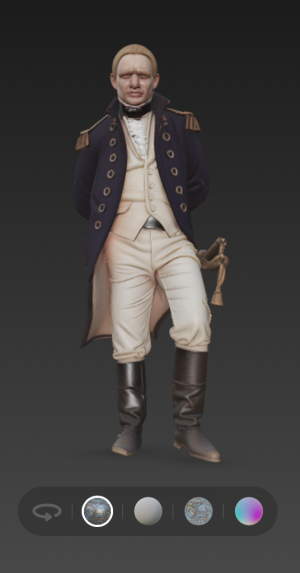
If you have an .stl file that you can share of the captain you want your friend to print, I'd like to print it out myself to see how it turns out... and then I can post the image here so you can see the results. I'd just need to know the height in mm that you would want the final figure to be.... and I can scale it accordingly. Because of the small size, it would only be a few grams of filament and very fast to print... even at high quality.
 
Here's what I came up with in a quick mess around. Can't try printing until I get home in a few days. It's supposed to be Russel Crowe as Jack Aubry.
Here's the image it's based upon.

View attachment 532029
And below is the STL for anyone interested.

Cheers,

Todd
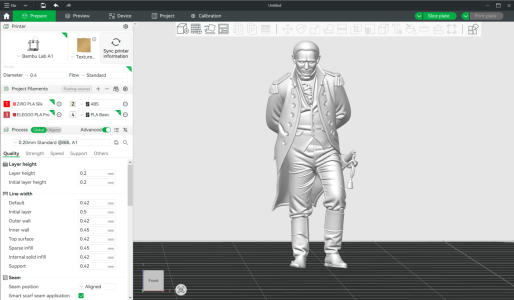
Looks pretty good in Bambu Studio (3D slicer)... I've just kicked off a sixteen hour print, but as soon as it wraps up, I'll give this a shot with white PLA filament, and post the results here.
1752559646586.png
 
Hello ,
For my model I will make 3 figures , one helmsman one captain/admireal and a lady seated on a bench ( i have to remouve the bench from stl)
The helmsman
To remove the bench, you can import your .stl into www.tinkercad.com. Use the rectangular void (hole) shape, and fit it in to replace the bench... then merge the two objects and you'll be left with just the model of the lady... sans bench. You can then export that as an .stl for 3D printing again. I've just done that for you, so you can check out the attached .stl file. The only issue with the model is that her left hand sits flat on the bench and is a bit amputated... and when you remove the bench, the hand is still compromised. The rest of the model looks okay though.
 

Attachments

Last edited:
So what is the next step in making these.
Is it just sanding
I'll try to answer you question.

Using the AI tool that this thread is discussing, these would be the basic steps:
- describe what you want the AI tool to create a model of
- the AI tool then generates the model file in an .stl format (.stl is what's commonly used in many 3D parametric modeling applications like AudoDESK's Fusion 360, or sites like TinkerCAD). If you want to "tweak" the model, you can open it in one of the 3D file creation tools I just mentioned (there are others, but these are two examples), and then you can modify the AI created model file. Again, save the modified .stl file.
- you then download the .stl file and open it in a slicer application that you use with a 3D printer. The slicer does what it's name implies... you provide the parameters you want applied for strength, quality, supports, etc.... and the application then creates a sequence of "slices" that the printer uses to build up the model, one slice at a time. Kind of like how a LEGO model might be built up layer by layer. That slice information is essentially a long list of plotter commands that tell the printhead where to move in the X,Y,Z axis)
- once the file has been printed, it will be stuck to the printbed... you pop it off, remove the supports, and trim any bits left behind from the supports. In most cases, and especially if you print using a fine printhead (0.2mm size), and very thin slices (0.1mm thick), there should be very little if any sanding required. Because of the very small size of these figures, especially if you're making them for model ships in the 1/72 to 1/100 scale... or smaller... you really need to be using a small nozzle printhead and very thin slice layers to ensure the detail possible is captured in the printed output.
- lastly, you would paint the model you've printed
- some printers have the ability to print multiple colours of filament into the model, but for something like these figures, they're too complex and contain way too many colours for that purpose... so painting is the obvious answer

One thing I hadn't thought of till now would be the concept of creating figures to scale, but doing so with a transparent filament such that when they're placed in our ship model, they appear as ghosts. Not for the Halloween scary ghost kind of aspect, but rather as a representation of human scale in the ship model, but not drawing attention away from the ship model itself. Kind of like looking at the HMS Victory in dock at Portsmouth and dreaming about what she might have looked like with the working crew members crawling all over her.
 
Back
Top