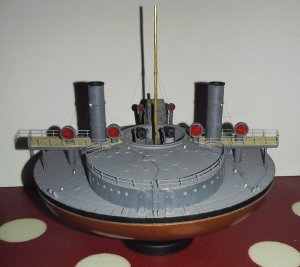
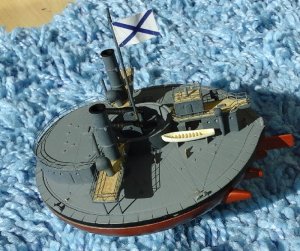
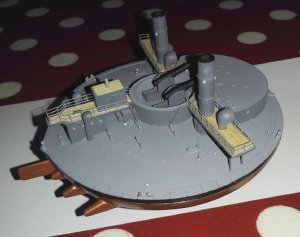
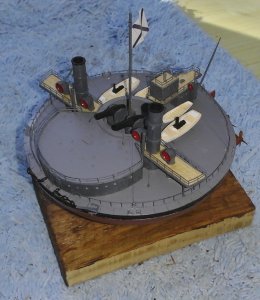
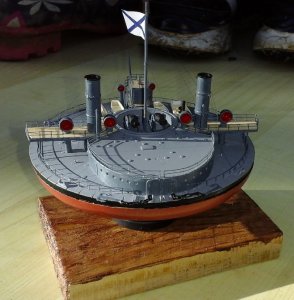
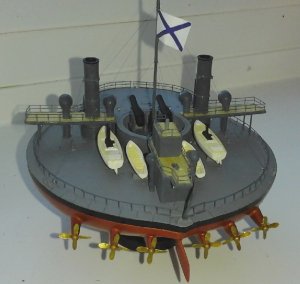
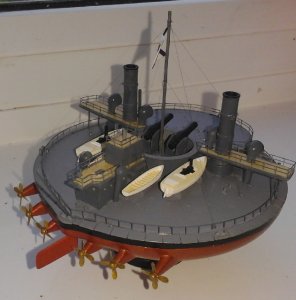
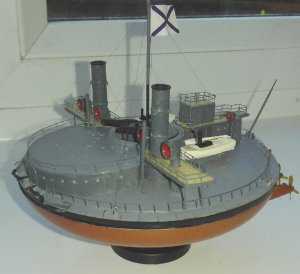
Novgorod 1/350 scale by Ropos

Joined
Aug 25, 2017
Messages
313
Points
193

Location
Moira N.I.
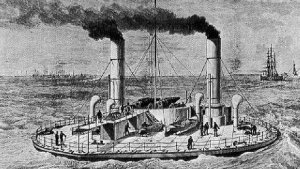
In 1868 Scottish ship builder John Elder suggested that widening the beam of a ship would reduce the area needed to be protected, allowing it to carry thicker armour and heavier, more powerful guns, and also have a shallower draught. Rear Admiral Andrei Alexandrovich Popov of the Imperial Russian Navy expanded on this idea of broadening a ship by designing one that was circular with a flat bottomed hull. Novgorod was built in 1871, had a diameter of 101 feet, a draught of 13.5 feet, displaced 2531 tons and a crew of 151 officers and ratings. The ship had 6 steam engines, each driving a single propeller, with a speed of about 6 knots, but consumed huge amounts of coal, 200 tons of coal gave about 480 miles steaming. Steering was a problem, the hull shape meant that the rudder was virtually useless, it was locked and the engines were used to steer the ship. Novgorod was armed with 2 20-calibre 11 inch rifled muzzle loading guns mounted on separate revolving turntables, which could be locked together. It could take about 10 minutes to reload each gun. The locks on the turntables were weak causing them to rotate when a gun was fired, leading to the myth that the whole ship rotated when a gun fired. During the Russo-Turkish war she was assigned to the defence of Odessa where she was fitted with extra guns. Novgorod was taken off the navy list in 1903 and scrapped in 1911. She has often been called one of the world’s worst warships.
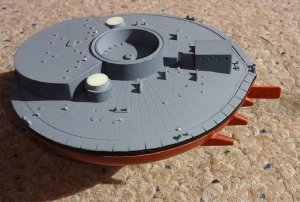
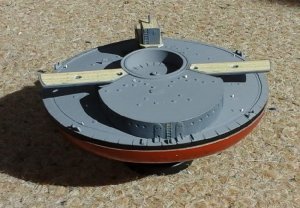
This model kit by Ropos is in 1/350 scale and is resin and photo etch. The resin is well cast, with good detail and only small pouring plugs. The instructions are just a few colour pictures which are not very clear, but it’s fairly obvious where all the parts go. This another ship I built earlier this year.
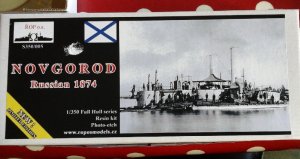
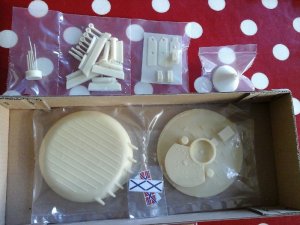
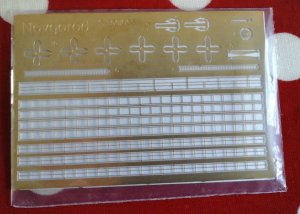
NovgorodA1.jpg


NovgorodA2.jpg
NovgorodA3.jpg
NovgorodA5.jpg
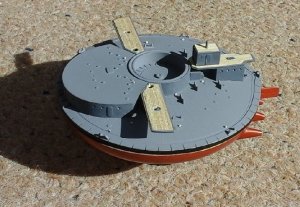
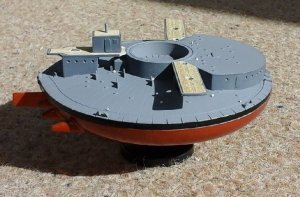
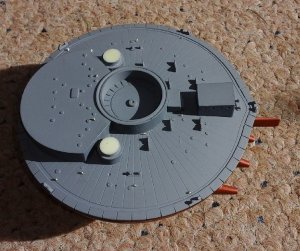
The main problem I have had is trying to work out what colours this ship should be. The only thing I know for certain is that the hull was covered in copper sheathing, so a trip to Halfords (Car supplies shop) resulted in a can of Vauxhall copper spray paint appearing at my shed. Any photo that I have found are black and white and seem to show the ship being grey overall. There are several models, but they are all different colour schemes, so I suppose I could choose a colour scheme and no one would be any the wiser. I have decided that I will paint the hull above the waterline black, top surfaces grey, ventilators grey and white funnels, with wooden decks on the bridge and walkways. The lifeboats have been sprayed with Halfords white primer and the insides painted with Humbrol tan. I am going to add some more detail to the lifeboats later. The rest of the ship parts and the photo etch were sprayed with Halfords grey primer. Leaving this for a week or so, I then fitted the rudder, and like the original, this was stuck in position to stop it moving. The hull was then sprayed with a couple of coats of the Vauxhall copper. I painted the above waterline hull with Tamiya matt black and once this was dry, the two hull pieces were glued together with Araldite, clamped and left for a couple of days. What is good about this kit is that you get a stand, I drilled a 2mm hole right through it and then sprayed it matt black. I had already drilled a 2mm hole in the hull as well and once the paint was dry and hardened I glued 2mm diameter brass wire to the hull. Once this is dry I will then attach the stand to the hull using the brass wire for extra support. The pictures show the ship just sitting on the stand at the moment.
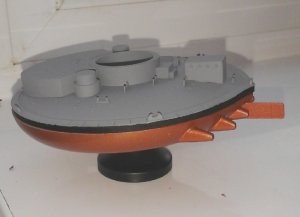
NovgorodA4.jpg


NovgorodC1.jpg

NovgorodC2.jpgCheers Andy
 
Last edited:
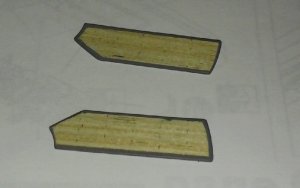
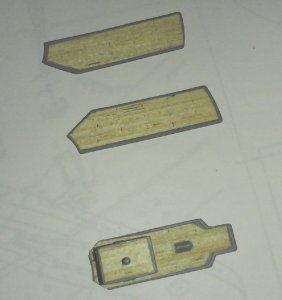
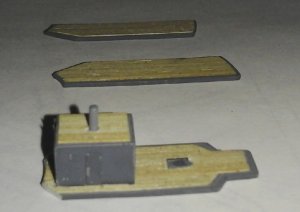
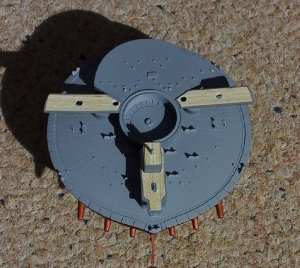
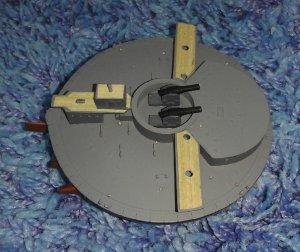
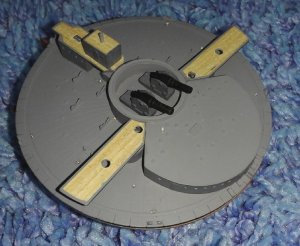
The kit itself is a little basic so I have decided to add a few extra details to make it look a bit more realistic. I thought the Wheelhouse decks and the two decks by the funnels would look better with a planked deck. I had some left over 1/350 scale Artwox wooden deck which would fit nicely. I started off by tracing round the two side decks onto some paper and then cutting the shapes out. I trimmed the paper down until it fitted onto the deck leaving a gap around the edges to fit the railings. This pattern was then traced round onto the wooden deck. I then cut this until I was happy with the fit, and then glued it in place. I just need to cut out 3 holes for the Ventilators and the Funnel. The deck on top of the Wheelhouse needed a hole drilled in it first and then trimmed to the right size. The lower Wheelhouse deck was more of a problem in that it needed to fit around the Wheelhouse, it took a while but I finally managed to get it to fit in one piece. The decks certainly look much better now.

NovgorodB3.jpg

NovgorodB1.jpg
NovgorodB2.jpg
In order to get the 2 side Decks to sit flat I had to file down the Funnel supports.Once I was happy with the fit the side Decks were glued in place and the upper Wheelhouse was then glued on.

NovgorodC3.jpg
Instead of just gluing the Funnel Stays and Main mast stays to the deck I wanted to have something that looked more realistic. I thought about making some rigging end plates using some of the P.E frame with a hole drilled in it, but before I started this I found some “Eye” plates on a Gold Medal P.E. set I have for the Borodino kit that is waiting to be built. A small hole was drilled in 14 locations on the main deck and then the “Eye” plates were fitted. I had previously sprayed them with white primer and I am going to leave them white until after I finish the rigging so that I can see them easier.
NovgorodC4.jpg

NovgorodC6.jpg
NovgorodC5.jpg

Cheers Andy
 
Last edited:
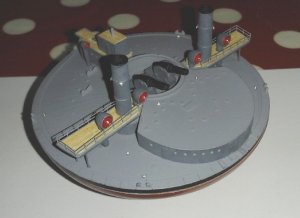
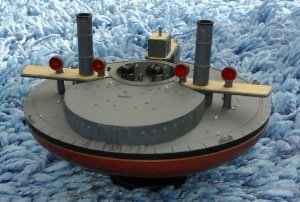
The two gun chassis were cleaned up and painted a darker grey, the 2 barrels were painted matt black and then glued to the chassis. The two assemblies were then glued in place On any colour picture I have seen of Russian ships from this era, the inside of the Ventilators is red, so I decided to paint the insides of the Ventilators red. The 4 Ventilators that fit along the side decks were dry fitted and each one had minor adjustments to them until I was happy with the fit. The main problem was that they all had to be the same height. Trying to get them all the same height left me with the well known “table leg” problem, I got them level (ish) before I ran out of Ventilator shaft. Any photos I take will be at an angle so you can’t notice anything. The two funnels were cleaned up and again the same problem occurred getting them the same height. The insides and lip round the top were painted matt black, and the rest the same dark grey that I am using for the vertical surfaces. Holes were drilled in the bottom of each Funnel and a metal pin glued in. I drilled a hole in the side deck into the lower Funnel base and then glued the Funnels in place. I have got one of the side deck supports fitted, this was great fun gradually filing down a piece of 0.75mm diameter brass wire until it fitted and trying to stop it bending.

NovgorodD1.jpg
NovgorodD2.jpg
NovgorodD3.jpg
NovgorodE1.jpg
NovgorodE2.jpg
A major problem that I have with this build is that there are no instructions to follow, just a couple of photos of the finished ship. I therefore have to work out what parts to fit and in what order, which often means that I have to sit there and study the ship and decide if I fit part A, will I be able to fit part B, or would it be better to fit part C first. I can’t fit the Lifeboats until I have fitted the Mast and Funnel Stays because some of the Stays are fitted to the deck between the Lifeboats and the Superstructure. I can’t fit the Stays until I have fitted the deck railings, so more planning being done than actual building work. The Ladder from the deck up to the Wheelhouse deck should fit between the Wheelhouse and the main gun area. I dry fitted a Lifeboat and found it would be in the way of the Ladder. I decided to fit the Ladder further down the deck towards the stern. The next day when I looked at it, it didn’t look right, so I tried fitting it where it should go, if I fit the Lifeboat at a slight angle it should fit without hitting the Ladder. All the railings come in long strips and need cutting to size. I carefully measured the side decks, cut the railing to size, bent them in the correct places, and then glued them, first with PVA to give me time for any small adjustments, and then finally fixed with CA gel. The two small Ventilators were cleaned up and, with the table leg problem, carefully made the same length. They were glued in place alongside the Wheelhouse deck. Finally I fitted 3 P.E. end plates to each Funnel making sure they were in line with the end plates I had already fitted to the deck.
NovgorodF4.jpg
NovgorodF8.jpg
NovgorodG4.jpg


I remember reading a build log, can’t remember if it was a ship or an aircraft, where the builder had used 20 denier nylon thread. I ordered a reel from a Fly Fishing website and decided to use it on this ship. I started with the Funnel stays. Talk about trying to get a camel through the eye of a needle, I had a couple of end plates where the hole was blocked by paint, the point of a new scalpel blade helped, and one end plate came loose. But eventually I had the 6 stays rigged. A touch of C.A. gel secured the knots and then the ends were trimmed.

The railings on the Wheelhouse deck were next on the list. I was able to use on length of railing but it needed careful measurement and folding to get the correct shape. This all took quite a while, I couldn’t use my P.E. bending tool because of the different folds that were needed, so I had to use some flat ended tweezers, this took longer and needed constant checking, at least the etch is not too fragile and can be bent both ways several times. I started at the out board end of the deck using PVA to position the railing, gradually working my way round the deck and then once I was happy with the fit, it was secured with C.A. gel.

I worked out that I had enough 3 bar railing left to fit round the front deck. I cut the railing in half and then using the handle of my scalpel rolled it along the railing on my cutting mat so that I got a nice even curve. Plenty of dry fitting and I soon had the railing matching the curve of the deck. Again using PVA to hold the railing in place and giving me enough time for any fine adjustments, it was then fastened with C.A. gel. This was then repeated for the other side of the deck leaving room for the ladder that comes up from the front lower deck.

The mast comes in 2 resin parts and needs to be glued end to end. There is no way I was going to accurately glue two 1mm diameter resin lengths together so I used some 1mm diameter brass wire instead. The mast was glued into a hole I had drilled earlier making sure it was vertical. I tied 2 lengths of Nylon thread half way up the mast and the 4 ends were then tied to the end plates on the decks before being secured with C.A. gel. I’ve made a start on the railings for the Wheelhouse roof, no pictures yet, this will take some time because the gaps between the railing posts don’t match the roof lengths so I am going to have to do some careful cutting and gluing to get railings the correct length.
NovgorodF1.jpg

Cheers Andy
 
Last edited:
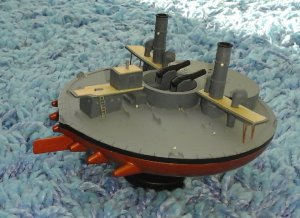
The railings on top of the Wheelhouse are now completed, it took some careful measuring and cutting because the support post spacing were the wrong distances. I decided to fit the flag next. Rather than just wrapping it around the top of the mast I thought I would fly it like a proper flag. I cut the flag out, I think it’s a waterslide decal but I didn’t fancy trying to get the two sides lined up, folded it half and glued some nylon thread inside the fold. I used the back of a scalpel blade to “curl” the flag up a bit. I tied the top part of the flag (hoist?) to the mast ok but had no end of fun (?) trying to get the bottom end of the thread tied to the base of the mast. Having spent the best part of an evening doing this you can hardly see it.

I finished painting the 2 Lifeboats and glued them in place. I am in the middle of painting the 2 Steam launches. When I painted the main deck with primer I accidentally dislodged one of the mounting brackets for a Steam Launch and couldn’t find it. I cut some P.E. fret to size and filed the cut out. It’s not exactly like the other mounts but once it has a Steam Launch on it no one will notice.

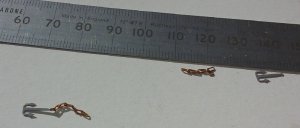
I have started to fit the railings that go round the edge of the ship. Using the handle of a scalpel to roll over the railing on my cutting mat to curve the railing, I soon had the correct curve. I have one railing fitted, and one partly fitted. The picture of the completed ship shows the 2 Anchors just sitting on the front of the deck. This to me looks a bit strange so I found some chain in a wooden deck pack I have for the Borodino that’s waiting to be built. I opened up a link on the chain and it fitted nicely in the hole on the Anchor, it was glued and the 6 links that are needed were painted black. I will fit them once the railings are finished. I am going to give the decks a coat of varnish to hid the numerous glue marks that show up and then fit the propellers, all 6 of them. I have them all made, remembering to angle the blades on 3 of them the opposite way to the other 3, and gluing on the small conical bits that go on Propellers.
NovgorodG6.jpg
NovgorodH1.jpg
NovgorodH3.jpg
NovgorodH4.jpg
NovgorodH8.jpg
NovgorodH9.jpg
NovgorodH12.jpg
Cheers Andy
 
Last edited:
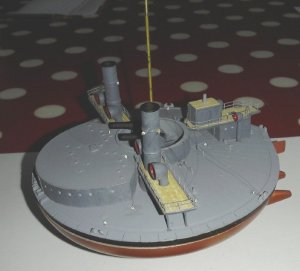
What an incredible ship! When 'Jackie' Fisher fought for and introduced the Dreadnought into the RN he had an enormous struggle with the older senior admirals in the Royal Navy who still remembered the days of sail with fond memories - wooden walls, Trafalgar, hearts of oak and all that. I can not begin to imagine the reaction of Their Lordships if they had been given something like the Novgorod to approve and any advocates would have been labelled lunatics.
An interesting story and a very nice build, Andy.
 
Thanks Graham. I have a feeling this was agreed one Friday afternoon after a few lunch time vodkas :lol:
Cheers Andy
 
Thank you Bob, I like building things that are a bit different, and researching this ship was also interesting.
Cheers Andy
 
Brian077 said:
Hi Andy, thats certainly an unusual topic for modelling, but then again its most interesting. Great work.
Thanks Brian, that's the good thing about these Resin kits, they are quite often unusual subjects that would never be done in Plastic,
Cheers Andy
 
The railings on top of the Wheelhouse are now completed, it took some careful measuring and cutting because the support post spacing were the wrong distances. I decided to fit the flag next. Rather than just wrapping it around the top of the mast I thought I would fly it like a proper flag. I cut the flag out, I think it’s a waterslide decal but I didn’t fancy trying to get the two sides lined up, folded it half and glued some nylon thread inside the fold. I used the back of a scalpel blade to “curl” the flag up a bit. I tied the top part of the flag (hoist?) to the mast ok but had no end of fun (?) trying to get the bottom end of the thread tied to the base of the mast. Having spent the best part of an evening doing this you can hardly see it.

I finished painting the 2 Lifeboats and glued them in place. I am in the middle of painting the 2 Steam launches. When I painted the main deck with primer I accidentally dislodged one of the mounting brackets for a Steam Launch and couldn’t find it. I cut some P.E. fret to size and filed the cut out. It’s not exactly like the other mounts but once it has a Steam Launch on it no one will notice.

I have started to fit the railings that go round the edge of the ship. Using the handle of a scalpel to roll over the railing on my cutting mat to curve the railing, I soon had the correct curve. I have one railing fitted, and one partly fitted. The picture of the completed ship shows the 2 Anchors just sitting on the front of the deck. This to me looks a bit strange so I found some chain in a wooden deck pack I have for the Borodino that’s waiting to be built. I opened up a link on the chain and it fitted nicely in the hole on the Anchor, it was glued and the 6 links that are needed were painted black. I will fit them once the railings are finished. I am going to give the decks a coat of varnish to hid the numerous glue marks that show up and then fit the propellers, all 6 of them. I have them all made, remembering to angle the blades on 3 of them the opposite way to the other 3, and gluing on the small conical bits that go on Propellers.
View attachment 32449
View attachment 32450
View attachment 32451
View attachment 32452
View attachment 32453
View attachment 32454
View attachment 32455
Cheers Andy
what a quirky,and neatly made model.these early ironclads are fascinating .its not a criticism because its your model and you obviously went for a clean finish but a few washes might have accentuated all that gorgeous surface detail.however im more experienced modelling armour and you know how we like washes!
 
A quirky ship turned into a great model!
Apparently the ship was impossible to keep on course, and with that screw and rudder combination you can see why.
Congrats

Ted
 
Back
Top