• Ships of Scale has incorportated an extra level of security when you log In. Please follow on-screen prompts to acknowledge that you are not a robot via a "Check Box" or a "Pictorial Check Box Puzzle". This is needed due to higher level of AI Activity Security.
  • SUBSCRIBE TO SHIPS IN SCALE TODAY!

    The beloved Ships in Scale Magazine is back and charting a new course for 2026!
    Discover new skills, new techniques, and new inspirations in every issue.

    NOTE THAT OUR NEXT ISSUE WILL BE July/August 2026
  • Win a Free Custom Engraved Brass Coin!!!
    As a way to introduce our brass coins to the community, we will raffle off a free coin during the month of August. Follow link ABOVE for instructions for entering.

Older but not wise

To the great amazement and incredulity of every school teacher who ever had the misfortune to cross my path, I have demonstrated that I can in fact, learn from my mistakes!

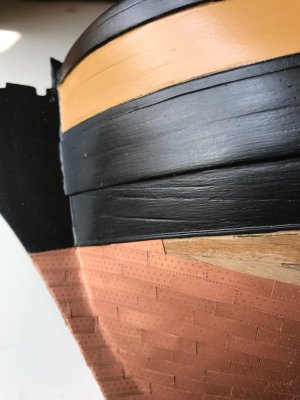
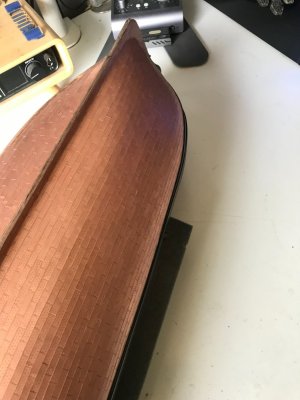
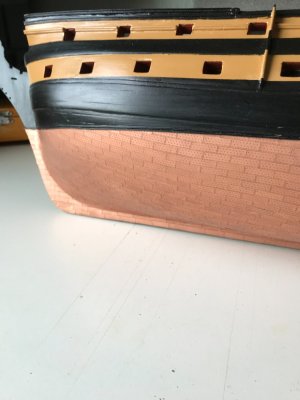
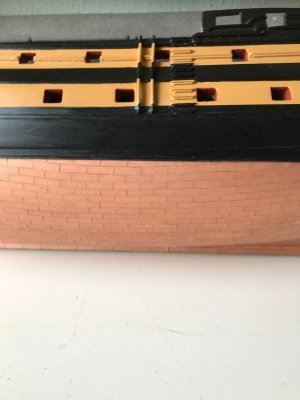
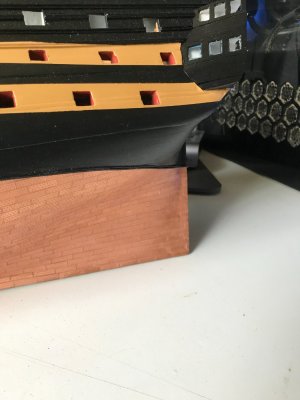
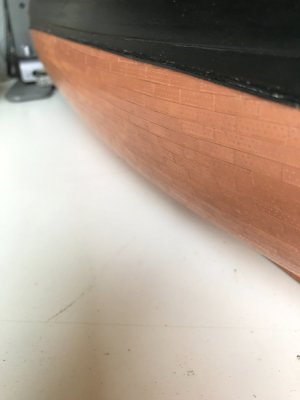
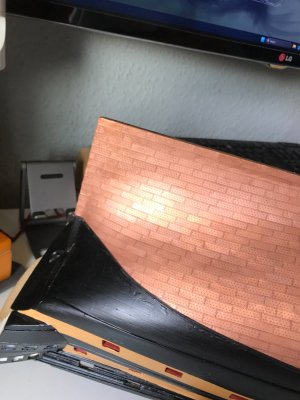
The port side coppering is going much more smoothly and I think, so far, has turned out much better.

A few thoughts on coppering for similar novices like myself.

I tried to do my best to...........

1. Take 50% more time doing everything.

2. Find the Goldilocks spot with the amount of glue used

3. Make sure that the next tile joint is completely clean and glue free

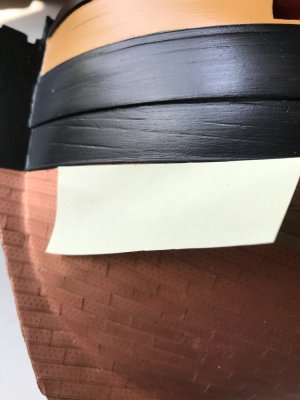
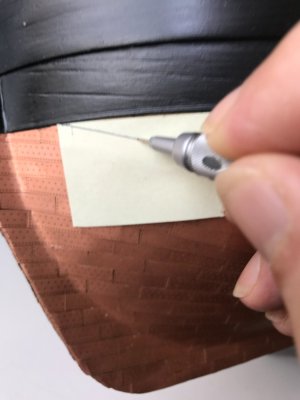
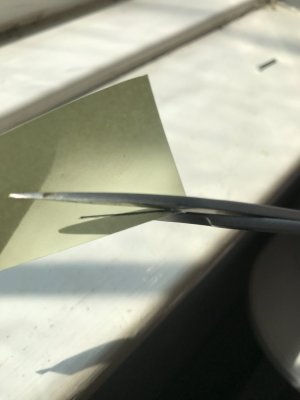
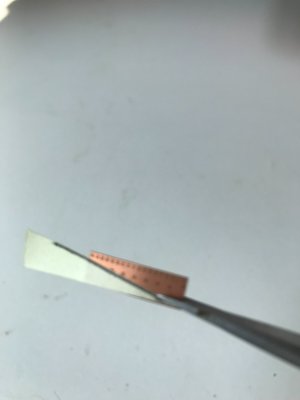
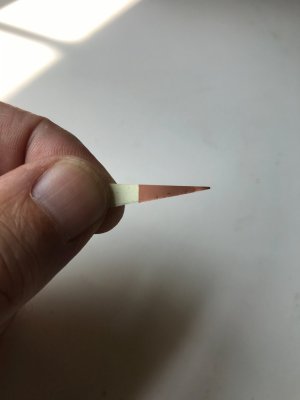
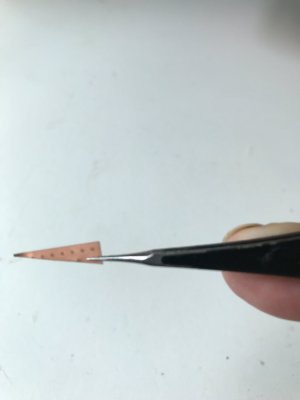
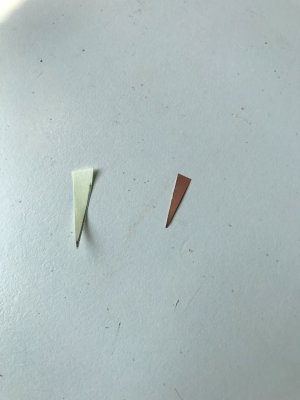
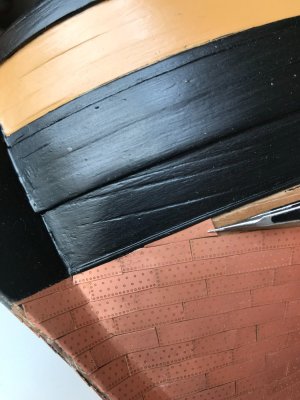
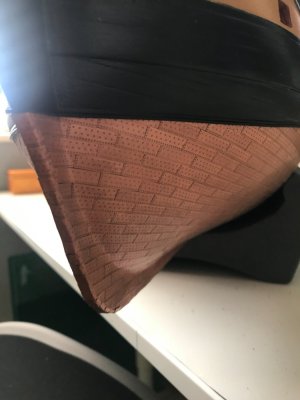
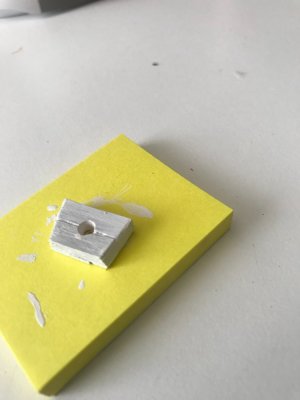
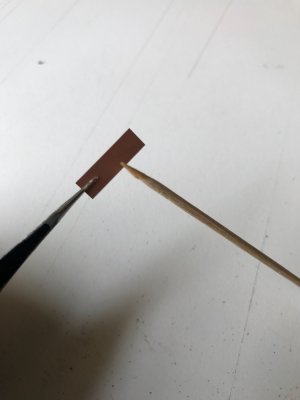
4. Use 'post-it' notes to get the precise shape of tight and awkward spots by pressing it to the hull and using a pencil to trace around the required area (see pictures below). Then cut it out and use the self adhesive on the back of the post-it note to stick the template to the copper tile. Then use small hairdresser scissors or a new sharp blade in a craft knife to carefully cut the tile - using the template as a guide. Also I also always ensure that that 'cut' edge of the tile is at the bottom (facing the keel) when placed on the hull. This may sound a little counterintuitive but in practice it works quite well and ensures that your upper copper line is nice and neat and any little discrepancies on the cut edge are quickly absorbed by the straight edge of the tile row below.

5. Small good quality scissors work well but you can also use a new blade in your craft knife to repeatedly score across the copper tile to get very neat cuts (I also use a small 6 inch steel ruler as a guide).

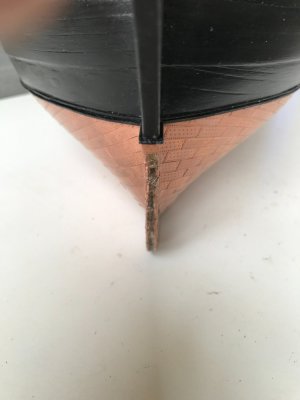
6. Tile straight across the stem onto the hull. On the starboard side of the hull, I coppered the stem and the hull entirely separately from one another, however on the port side, I ran the tile straight across from the stem onto the hull and this looked much tidier. I suspect it will depend on your vessel, but for Vanguard, this worked quite well.

7. Be very fussy - If a tile doesn't look 'just right' after placement, then rip it off and do it again. "It will do", will simply not do if you want to keep things crisp and clean and the coppering on a hull does tend to attract a lot of attention along with stern galleries and rigging.

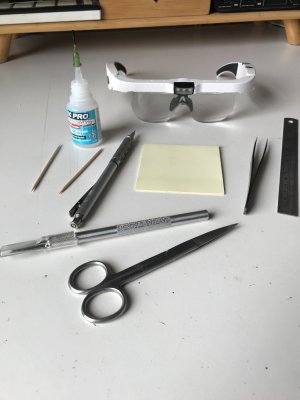
8. I used cheap magnifying glasses for alignment and a toothpick to apply glue to the tiles, a Swan Morton craft knife with a new No.11 blade to cut the tiles and scrape off small amounts of glue, a 6" steel ruler and a set of fine pointed tweezers.

9. The above only applies to copper plates and I suspect that other strategies will be needed for copper tape.


I have tried to illustrate my Copper Bottom Breakthoughs below.
v1.jpg

v2.jpg

v3.jpg

v4.jpg

v5.jpg

v6.jpg

v7.jpg

v8.jpg

v9.jpg

v10.jpg

v11.jpg
 
Slightly off topic, but generally relevant.
My mum recently bought me a T-shirt for my 60th birthday (see below).

If I wore this in public, I would be violently assaulted by salty nautical types!

Love my mum, bless her but she is a proper landlubber.

t1.jpg
 
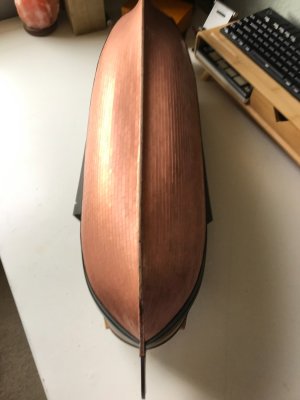
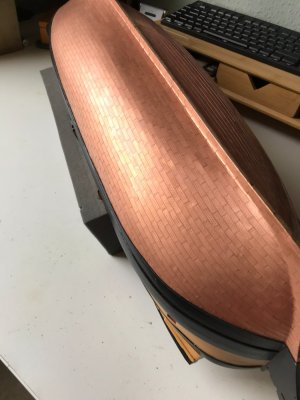
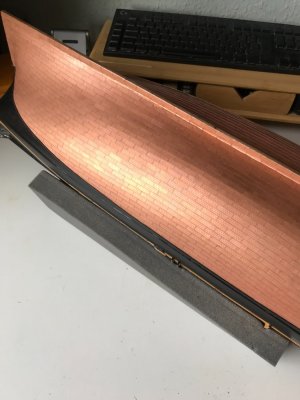
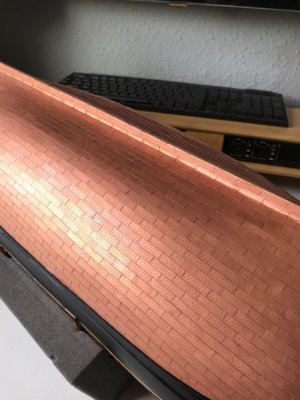
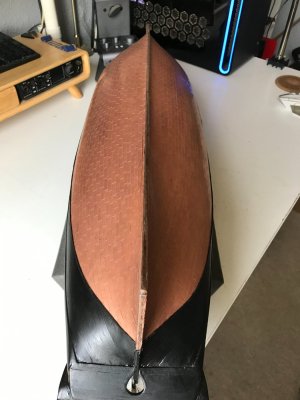
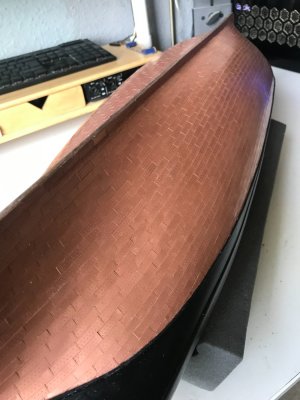
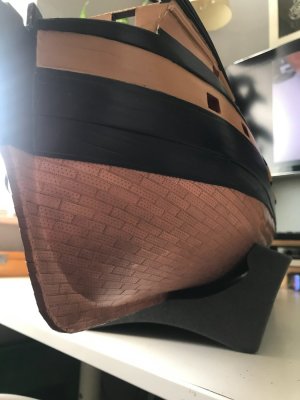
This week I managed to get the majority of the coppering done. Just the bottom of the false keel, stem and sternpost left to finish off.

I have always found the 'thought' of coppering to be quite daunting and probably over-stressed about it. After coppering my first bottom (hull that is - I do not work in a tanning salon), Occam's Razor is best and the process is in reality very straightforward.

Overall I am pleased that it all didn't turn out to be a disaster and in hindsight, perhaps a large expensive hull like HMS Vanguard was not the best place to cut my coppering milk teeth, particularly as this is a massive hull (32 inches) and all your mistakes sit loud and proud, front and centre!

But calm seas, never a sailor did make.

c1.jpg

c2.jpg

c3.jpg

c4.jpg

c5.jpg

c6.jpg

c7.jpg

c8.jpg

c9.jpg

c10.jpg

c12.jpg

c13.jpg

c14.jpg
 
Beautiful !

This week I managed to get the majority of the coppering done. Just the bottom of the false keel, stem and sternpost left to finish off.

I have always found the 'thought' of coppering to be quite daunting and probably over-stressed about it. After coppering my first bottom (hull that is - I do not work in a tanning salon), Occam's Razor is best and the process is in reality very straightforward.

Overall I am pleased that it all didn't turn out to be a disaster and in hindsight, perhaps a large expensive hull like HMS Vanguard was not the best place to cut my coppering milk teeth, particularly as this is a massive hull (32 inches) and all your mistakes sit loud and proud, front and centre!

But calm seas, never a sailor did make.

View attachment 621077

View attachment 621078

View attachment 621079

View attachment 621080

View attachment 621081

View attachment 621082

View attachment 621083

View attachment 621084

View attachment 621085

View attachment 621086

View attachment 621087

View attachment 621088

View attachment 621089
Excellent work! Magic Mike
 
So madame serendipity came calling on me tonight.


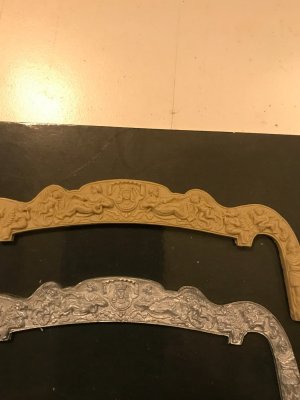
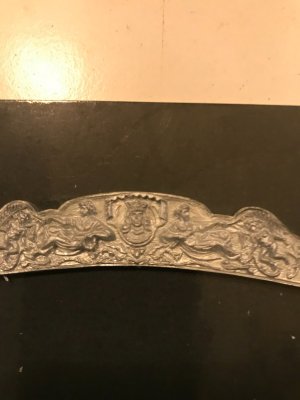
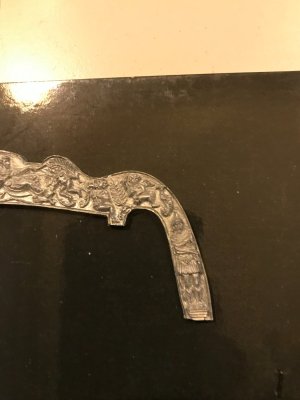
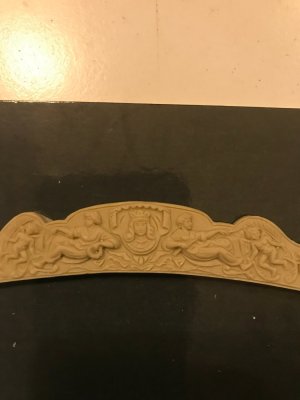
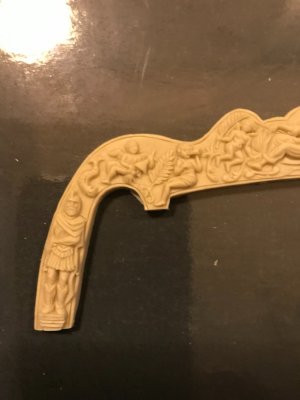
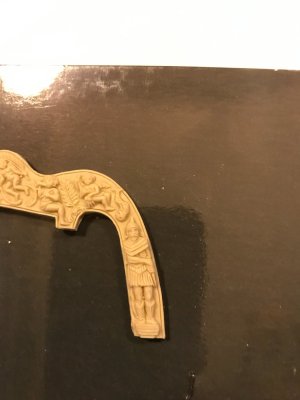
As the stern and side gallery's are next on the list, I started rummaging around in Vanguard's kit box for the relevant parts. In my rummaging, I came across two stern gallery decorations. One is in cast metal as per the parts list, however the other is, I think in resin. No mention of a resin casting in the parts list so I don't know if this is standard in all Vanguard kits (a late addition after instructions went to print?) or just mine. I definitely did not buy it as an after kit upgrade, but I am pretty happy that it found its way in there as it is far superior to the white metal casting and pretty darn good when you consider that this was printed with technology from 10-15 years ago.

sg1.jpg

sg3.jpg

sg4.jpg

sg5.jpg

sg6.jpg

sg7.jpg
 
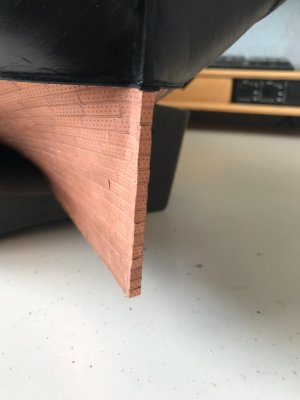
Finished the stem, stern and false keel coppering. I decided to lay the coppering horizontally on the stem and stern. Seen this done both vertically and horizontally, don't know which is correct (both?) but horizontal seem more logical to me? I also 'rolled' the edges of the copper plates on the bottom of the false keel with a small round metal bar (handle of your cutting knife will do) to soften and blend the edges in. This was a bit like 'whack a mole' as you inevitably popped a plate (or four) loose when rolling one edge or another.

Side Gallery preparation now underway.

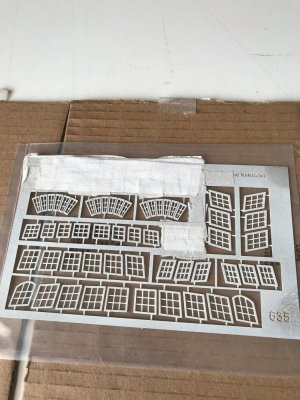
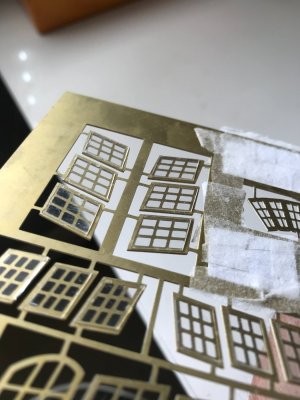
I started by washing the photo etched brass window frames in isopropanol, then rinsing in soapy warm water and leaving to dry on a paper towel. I used vinyl gloves to handle to brass thereafter to ensure no finger grease worked its way on there. Once dry, I sprayed everything in white metal primer and then flat white enamel paint. I purposely kept the coats as thin as possible which helps keep everything crisp and delicate (too thick paint makes the frames look chunky). I left overnight to cure properly then brushed the painted frames with a very, very small mount of matt varnish (almost dry brushing) to help preserve the paint when handling, as the heat from your fingers can re-activate the paint a little and make things look a bit messy when handling the parts.

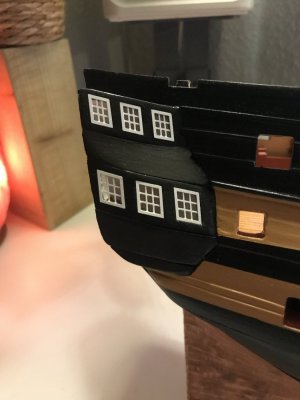
I also glazed the 12 side gallery windows with acetate that I cut out of some scrap packaging I had and carefully glued them into place with the tiniest spots of super glue to avoid fogging.

Whilst I was at it I decided to make an impromptu seat of ease for the quarter galleries which is unlikely to be visible but what the hell.

So next I need to get the side gallery windows glued in place then I can start the stern gallery.

sc1.jpg

sc2.jpg

sc3.jpg

sc4.jpg

sc5.jpg

sc6.jpg
 
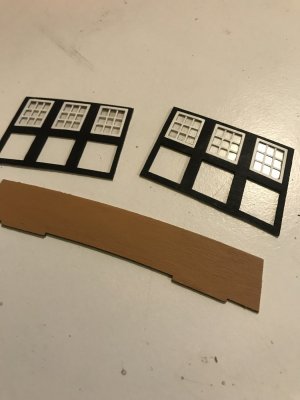
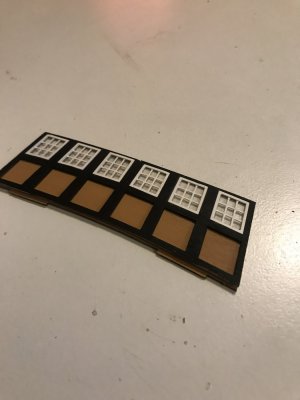
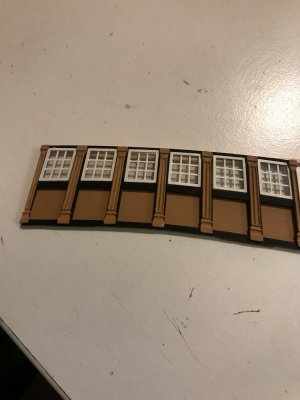
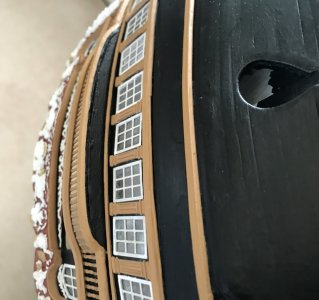
Installing the side gallery windows was a bit fiddly and the side gallery pattern frame openings required lots of tiny adjustments to get a reasonable fit.

w1.jpg

w2.jpg

Previously, I have only ever tacked stern galleries on much smaller vessels which are generally very simple and straightforward. Vanguard however, has a quite complex stern gallery, with multiple levels, balconies, decorations, external railings and quarter galleries.

I spent quite a bit of time examining the plans, instructions and thinking about how it should be tackled and what was crucial to get right.

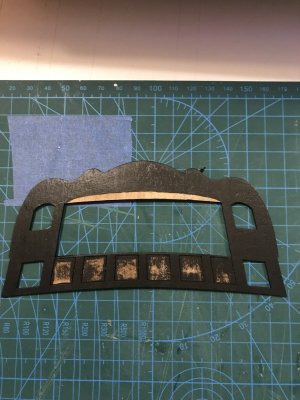
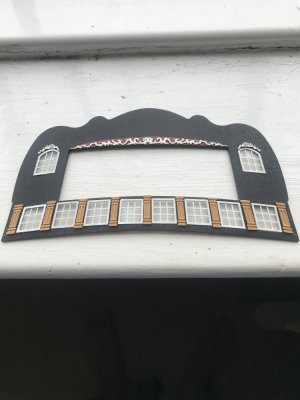
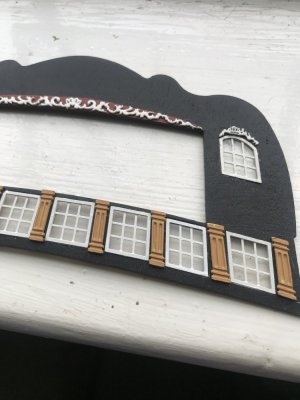
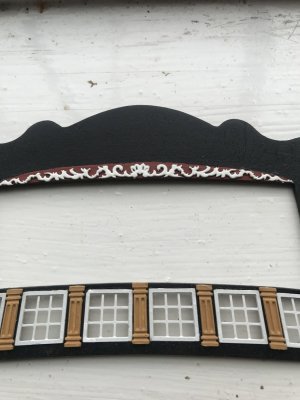
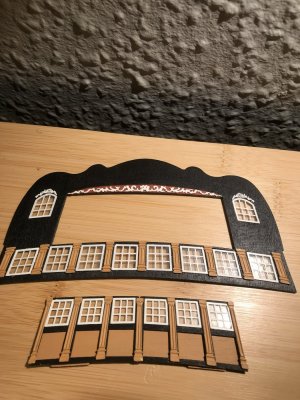
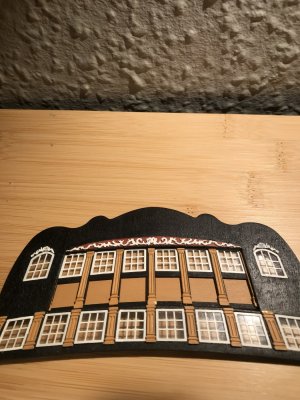
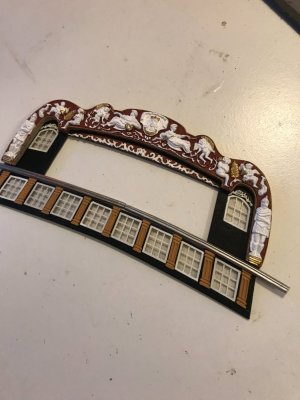
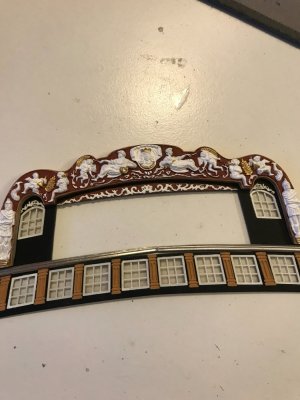
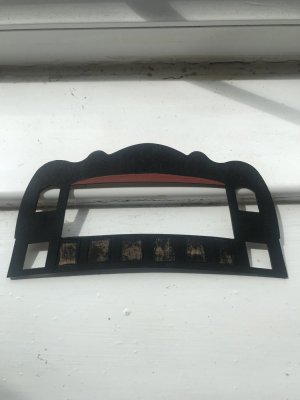
First up, I decided what should be pre-installed on the stern gallery facia pattern and what could be installed after I fixed it to the ship. I then painted the stern pattern facia black save for a small crescent where one of the decorations will be installed, which I painted red as per the instructions. I have seen models where bright red has been used, however, I have used red ochre for no good reason other than I like it better.

sgf3.jpg

sgf4.jpg

Once the windows had been fixed into the stern gallery facia pattern (which required a lot of time making tiny adjustments to the window pattern openings to get a reasonable fit) , I painted and fixed the window decorations into place. In this respect, I painted the decorations white (instructions say yellow ochre) as I noticed that the builder of the prototype on the box cover art had used white here and I really liked the 'clean' look.


sgf5.jpg

sgf6.jpg


sgf7.jpg

I also painted the 0.9mm brass etched (and really quite lovely) columns that will be fixed vertically between each window frame. I noticed that the columns must be placed quite carefully and they must rest on the cast metal decorative rail that frames the bottom of the stern gallery facia pattern. Concomitantly, I searched through the decorative rails to find several that matched well for size and casting profile/detail. I then cleaned them with 350 grade wet and dry sandpaper and re-emphasized their profiles with a small file. I then offered them up to the stern gallery facia and carefully bent them to adopt the same curvature and then traced around them onto the stern facia with a pencil line to determine the bottom of my columns. I did not, at this stage stick on the decorative rail as I want to get the best alignment I can with the side gallery decorative rail and this is best done when the stern gallery facia is in situ.

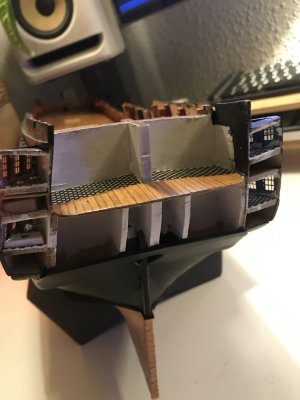
In addition to the main stern gallery facia, there is also an upper inner bulkhead (recessed from the balcony) to be constructed. When I offered the parts to the model to have a dry fit test, I found that the parts were too wide for the breadth of the ship at that point. Accordingly, I carefully cut off about 1.5mm from each side of the parts and hey, Houston we have touchdown. There is also a fragile laser cut paneled facia to the bulkhead construction and because of its height and profile, it will not fit in the space without snapping (despite being the correct width). I simply cut the facia exactly in half just like you would do for a tight deck and each piece slipped into place with ease (this cut line will be covered with a column).


sgf8.jpg


sgf9.jpg

sgf10.jpg

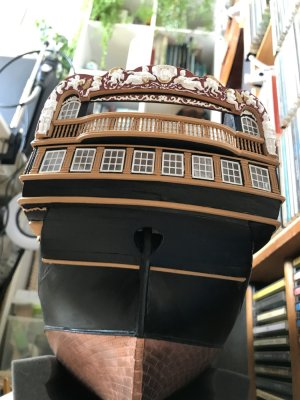
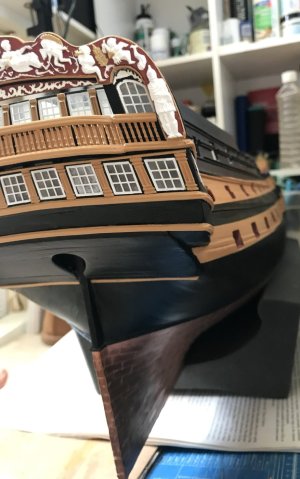
I was surprised at just how much work was involved at putting everything together. From the plans it seems quite simple but the reality is that there is lots of priming, painting, re-painting, filing, sanding, cutting, gluing measuring and aligning. Again because stern galleries attract so much attention, I tried to take as much care as possible.

Next will be to paint the main stern gallery decoration and then install everything onto the ship, plank the transom to finally seal the last hole in the hull and install the decorative rails.
sgf12.jpg
sgf13.jpg
 
Last edited:
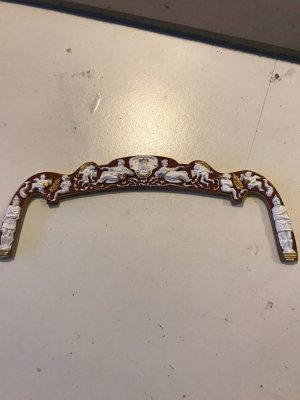
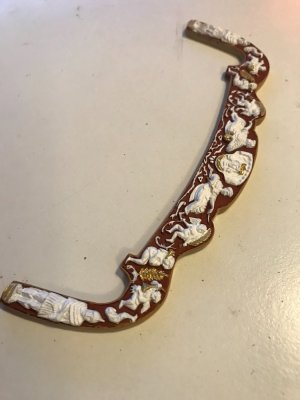
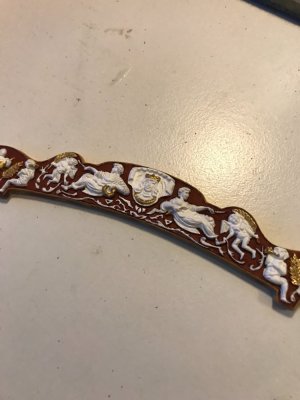
Spent a very enjoyable afternoon today painting the stern gallery main decoration.

Biggest issue was deciding on a paint scheme. There are few historical certainties when it comes to stern gallery paint schemes and as you all know, they were often dependant on (a) availability of paint (b) depth of a Captain's pockets. The instructions say paint the stern gallery main resin moulding background in red and the relief carvings in yellow ochre. I have also seen very colourful paint schemes on other completed models, all of which are wonderful.

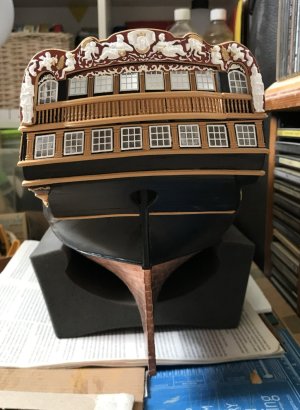
I am no naval historian but I seem to recall that most (not all) stern gallery paint schemes for Royal Navy Men 'O' War at this time tended to be pretty simple with carvings all being painted the same colour against a contrasting background. I liked the simplicity, particularly as Vanguard has plenty of 'bling' - so I elected to paint the relief carvings in white with just a few sparing gold highlights.

a1.jpg

a2.jpg

a3.jpg

a4.jpg

a5.jpg
 
Your work is looking great and your coppering turned out very nice. I saw where you posted that the temps were running 32c at night without A/C. That's awfully hot for the UK. I'm not sure how well I would make out.

Bill
 
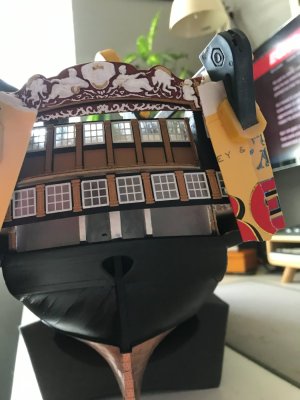
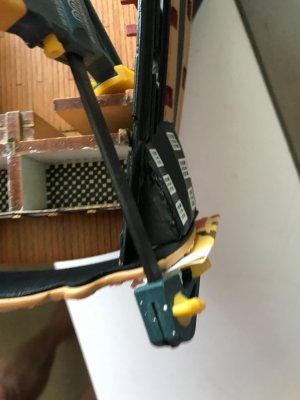
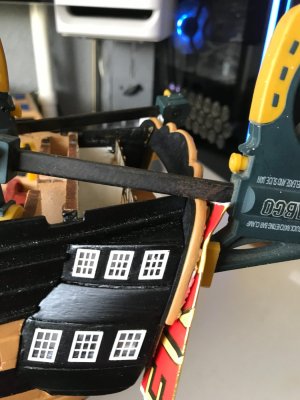
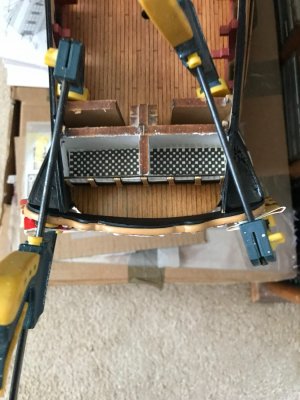
Because the stern of Vanguard has a noticeable curvature to it, I elected to glue the painted main decoration onto the rear facia pattern before fitting the pattern onto the ship. This let me get a really good bond right across the resin decoration (as I would need to bend it in due course) and better alignment without lots of mess and messing about. The downside of this is that the resin casting is about 4-5mm thick and once glued to the stern facia pattern it makes the whole thing as rigid as steel.

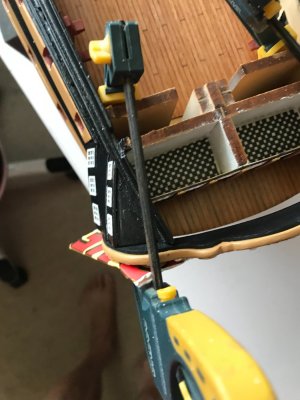
Thankfully resin responds well to secondary heat and I placed the stern gallery pattern onto a hot water bottle for 10 mins and now have clamped the whole thing to the hull - the resin bends easily now when clamping tight. I will leave it clamped for a few hours to see if it retains its curved shape or whether it will spring back straight. If the latter then I will have to repeat the hot water bottle trick when gluing (2 part epoxy glue for this as there are not many decent anchor points at the stern).

b1.jpg

b2.jpg

b3.jpg

b4.jpg

b5.jpg
 
Whilst I whittle away at Vanguard, I usually have a movie, documentary or whatever playing from YouTube in the background. Tonight I had an episode of 'Hornblower' playing and I looked up briefly from sanding and spotted this scene.

Could have been Vanguard (save for the third yellow ochre stripe)!

vg1.jpg
 
I was pondering what I enjoy so much about ship modelling.

I have a keen interest in the Georgian Navy; there is also the 'making things with your hands' thing also, as well as the alluring beauty of Men O' War.

That said, I think the struggle of doing things slightly above my craftmanship pay grade is also a big part of it. The satisfaction of constructing something that I found really quite hard and challenging to do is for me, deeply rewarding.

Anyway, beware you get what you wish for..............

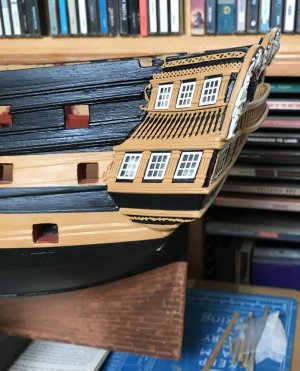
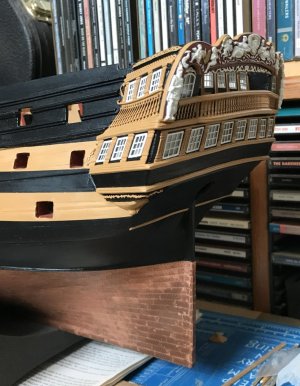
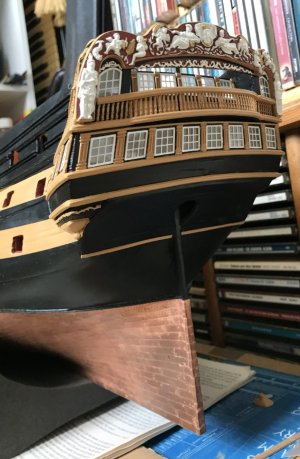
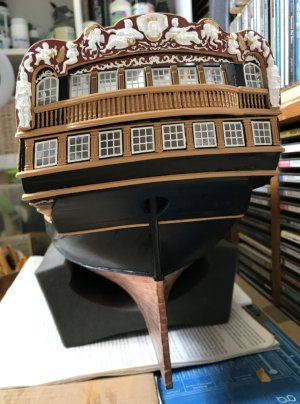
This is my first ever complex stern gallery and boy, did I find it difficult. Perhaps even as difficult as my first ever attempt at planking a hull!

It all began so well.......

There is a lovely diagram of the fully completed stern and side galleries with labelled part numbers; then there is a set of instructions which say "look at the diagram - stick the bits together - voila, completed stern and side galleries".

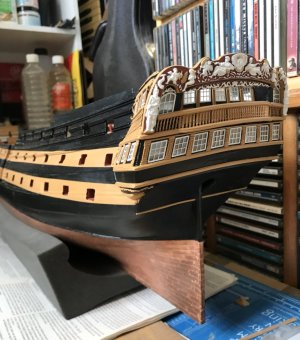
It will probably take me 4 or 5 days, I thought.................. So all in all, I have managed to get the stern and port side galleries more or less done and it has taken about 3 weeks and has been a steep learning curve.

So, for fellow novices like myself, here is a list of the bumps in the road that I encountered .............

First, is the EXTREME importance of putting everything together in the correct order (ask me how I know). So important, that the instructions did not mention the order of assembly and the plan only showed a completed or exploded view of the stern and side galleries.

Second is the fact that virtually every single element of the stern and side gallery decoration had to be 'significantly' finessed to fit.

Third is the fact that the soft white metal used for the decorative rails is a challenge to handle and use due to its malleability and readiness to deform. Paint only enhances every bump and bad curve. Bought a profile scraper the other day and will use wood in future.

Fourth is that the alignment of rails, railings, etc. across the stern and side galleries will have your inner autistic monkey ter-witching like a fiddlers elbow (possibly just me!).

Fifth is that it is really hard to keep every thing clean and tidy due to grubby fingers and lots of awkward handling - get ready to sand and re-paint (often) as required.

Sixth is side gallery decoration requires ALL the parts to be be dry fitted together to identify gaps and alignment issues. Putting them on one at a time without understanding how they all relate to each other will end in tears.

Seventh is the new depths of patience that you didn't know you had but will need to find and as Killick once said, " which it will be ready when it is ready".

Eighth is the fact that working at the back end of the ship is really quite awkward for non-yoga enthusiasts like myself (especially when painting and trying to get proper alignment of rails etc.) and often I had to contort myself and the hull to carry out a task. Wasn't sure whether it was the hull or me creaking half the time.

Ninth and perhaps, most importantly, you will need resilience to cope with setbacks (and yes, there will be setbacks) when it all goes horribly wrong and your galleries look like a Picasso painting. So keep calm and carry on....


Not quite Dante's 9 levels of hell, but the nine above certainly put me through the novice modeler's equivalent.

I did make the following changes partly based on the prototype photos on the box, and partly builder's preference;

  1. I added a lower decorative rail cross the stern (underneath VANGUARD letters) which is not in plans (I think omitted in error) but on prototype on box.
  2. I added an 'upper frame' with 1mm stock to the stern gallery lower main windows set (which I think frames the windows a little better). Not in plans.
  3. I created a 'shelf' rail for the side gallery upper windows (a little window ledge) on each side to add a very small architectural element to a fairly flat facade. Not in plans.
The above list of 'bumps' is mostly reflective of the fact that I had never done this before and had a few new things to figure out. All of it was fun and I have really enjoyed the challenge of the stern and side galleries so far. It constantly took me out of my comfort zone (but not too far) and it was really gratifying to figure out and put together. Given the overall complexity, I do marvel how model ship kit designers piece these things together at conception , it is quite an achievement.

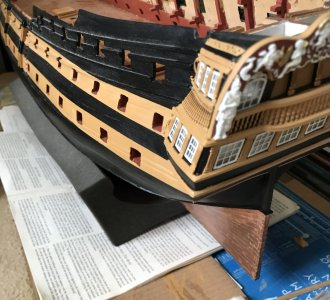
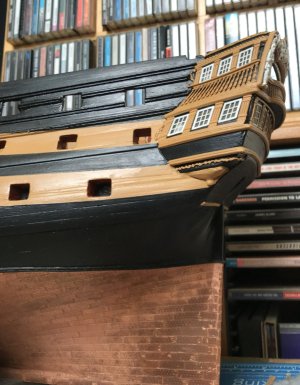
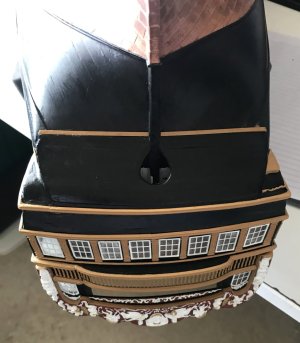
Here are a few pictures of the stern (nameplate required) and port side galleries.

Now to get on with the starboard gallery....

SGD 1.JPG

SGD 2.JPG

SGD 3.JPG

SGD 4.JPG

SGD 5.JPG

SGD 6.JPG

SGD 7.JPG

SGD 8.JPG

SGD 9.JPG

SGD 10.JPG

SGD 11.JPG

SGD 12.JPG
 
Back
Top