• SUBSCRIBE TO SHIPS IN SCALE TODAY!

    The beloved Ships in Scale Magazine is back and charting a new course for 2026!
    Discover new skills, new techniques, and new inspirations in every issue.

    NOTE THAT OUR NEXT ISSUE WILL BE July/August 2026
  • Win a Free Custom Engraved Brass Coin!!!
    As a way to introduce our brass coins to the community, we will raffle off a free coin during the month of August. Follow link ABOVE for instructions for entering.

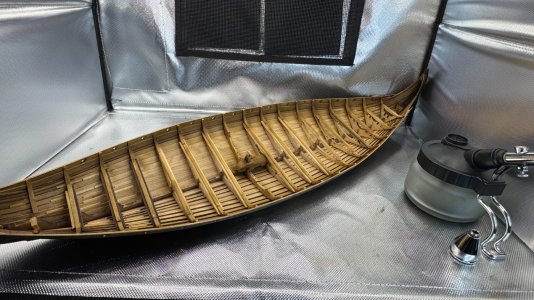
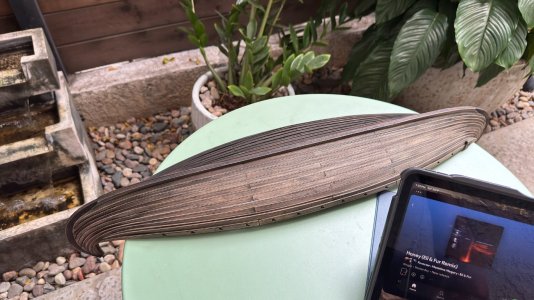
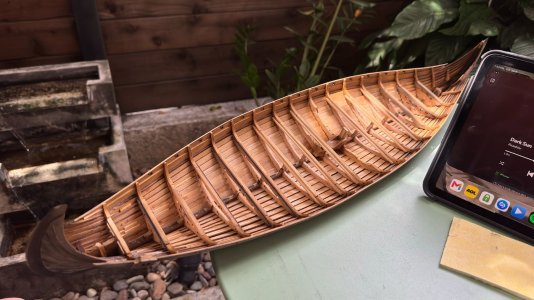
Oseberg 1/32nd from Pavel Nikitin - With hopefully also many added details.

PS: There has been some, indeed, very appropriate humor at another member’s log with a single posting about the same six identical Dremel’s that I have.
Yes obsessive -- but to set a record straight -- usually all those six tools have attached (at least) different size sanding drums. Not all the same size. ROTFROTF
ROTF ROTF ROTF You're a good sport, John.
 
Hi Mates,

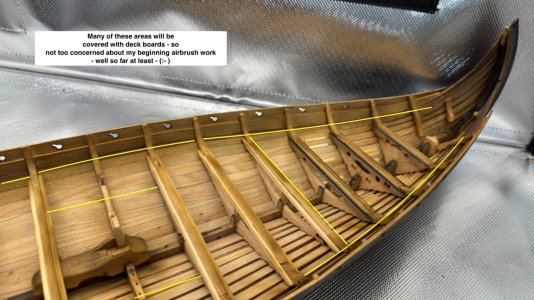
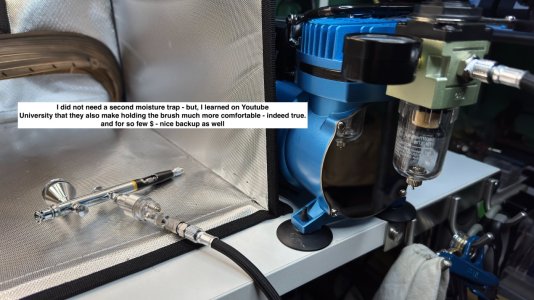
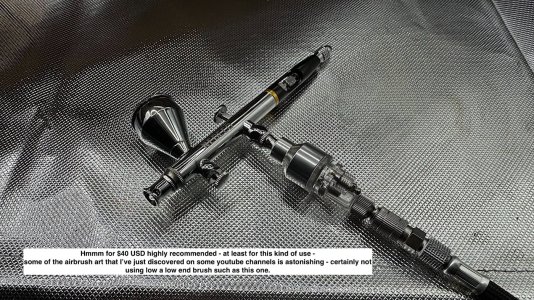
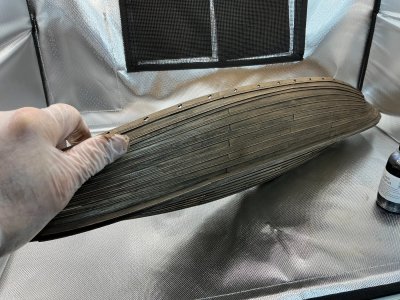
First attempt - much early learning as well. Still needing to actively think about after pushing in the airbrush joystick -- then also having to slide it backwards to allow paint to spray along with more or less output by adjusting the brush twisting knob or less joystick slider backwards . Getting there. Needle sizes are next on the list - used a .5mm first time out.

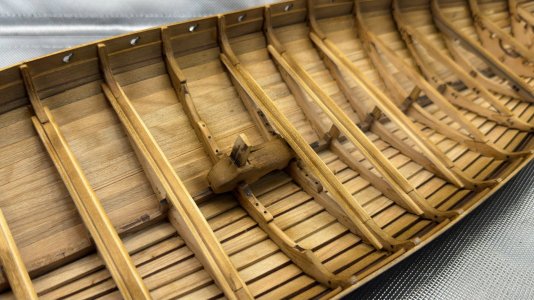
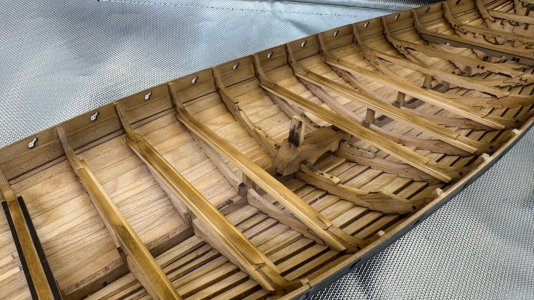
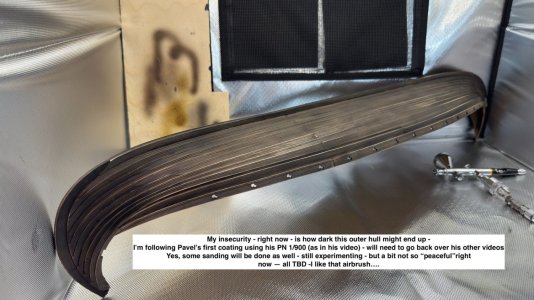
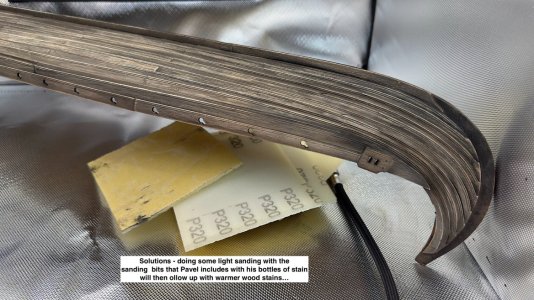
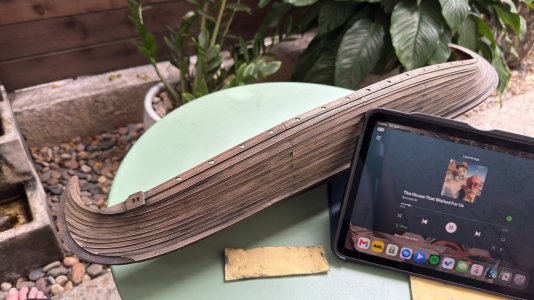
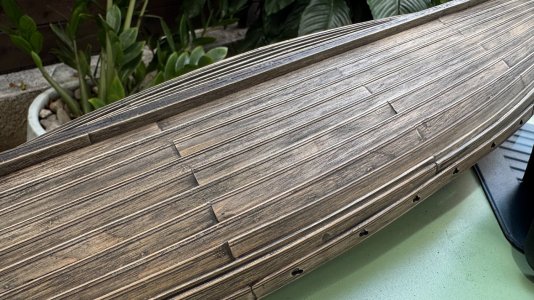
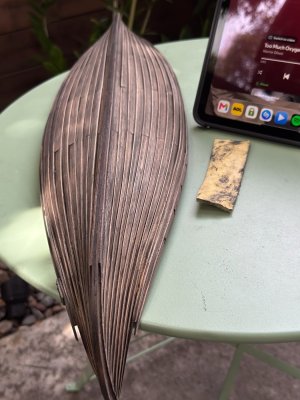
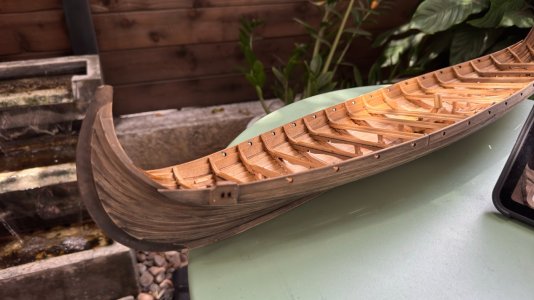
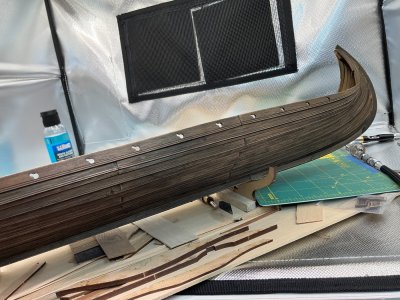
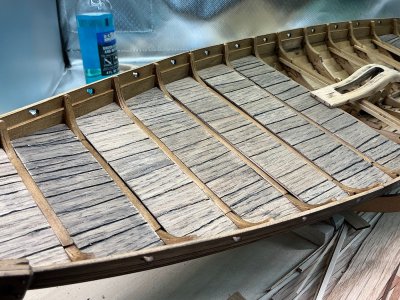
Pavel used his Patina for a first outer hull dusting - so making mistakes would have been difficult. OK, Then tried his Oak for a light dusting of the inner bulwarks. So far “so good” I think? Still very preliminary work. Lastly I learned about wearing a glove hahaha

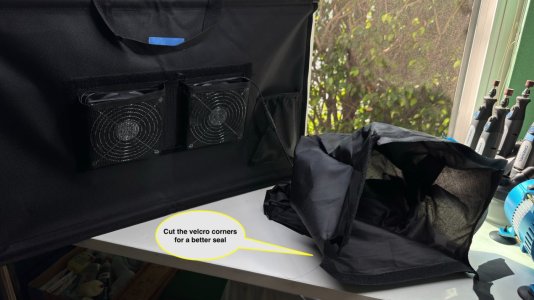
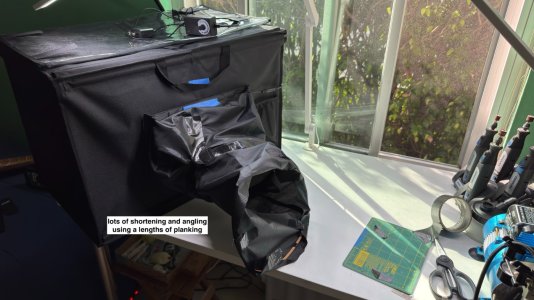
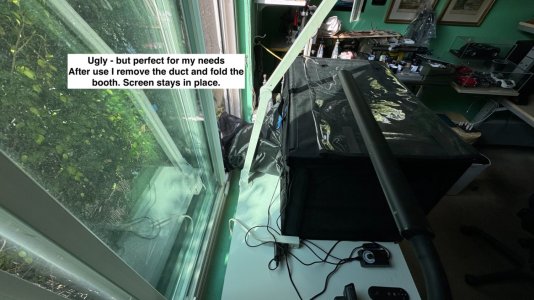
BTW airbrush booth - spot-on!!!

=========================

PS
: There has been some, indeed, very appropriate humor at another member’s log with a single posting about the same six identical Dremel’s that I have.
Yes obsessive -- but to set a record straight -- usually all those six tools have attached (at least) different size sanding drums. Not all the same size. ROTFROTF

PS2: I actually have eight rotary tools. Also a 1970s original #380 along with a spare set of motor brushes. A large and awkward corded Dremel. And of course, a Proxxon with its flexible cable (that tool is really useful) YIKES

All fun indeed. And yes, most are very unnecessary redundancies ..

Cheers,

View attachment 615663View attachment 615664View attachment 615665View attachment 615666View attachment 615667View attachment 615668View attachment 615679View attachment 615680View attachment 615681
Hi John. your AB finish looks great! Glad to hear the spray booth works. Just curious, did you vent the fans out your window or just into a filter in your room?
 
Hi John. your AB finish looks great! Glad to hear the spray booth works. Just curious, did you vent the fans out your window or just into a filter in your room?
Daniel,
Yes good question. The duct material is very long and a flat stitched cloth. I felt more comfortable, even though the booth was very close to an open window, to nonetheless try to fashion a type of use for the product's supplied vent piece. This worked our quite well. And the fan really inhaled the airbrush overspray.

Now will add a second dusting to the hull - spraying with the same color as before.

Regards,

1.jpeg2.jpeg3.jpeg
 
Wow John, personally I love the dark patina you achieved (before the light sanding), but that's just me.
Daniel,
Yikes -- a kind of wordy - post not usually my style. Thanks - yes, it does look as if it came out ok but, I’d become sort of - after seeing Pavel’s, and other images - set on also a darker brown warmer looking outer hull.

Copied and pasted;
To further protect the hull and add another layer of waterproofing, the Vikings coated their ships in heated pine tar. This sticky resin not only repelled seawater but also protected the wood from rot and shipworms

Heated (or kiln-burned) pine tar is very dark, naturally ranging from a rich, dark golden-brown to deep black. The dark color comes from the ultra-fine carbon particulates produced during the high-heat burning or cooking of the pine stumps -- SO will also dust some dark brown to blend with the Parina

I will do a bit more work on inner planks as well, but there will definitely a much lighter tint to the inner planking. I also intend on adding what they did to seal the planks from water.

Copied and pasted;

Vikings made their ships watertight by using a method of overlapping planks (called clinker or lapstrake construction) combined with natural caulking. They stuffed fibrous materials like animal hair, wool, or moss mixed with tar into the seams to block water. When the ship entered the water, the wood and fibers swelled, creating a watertight seal

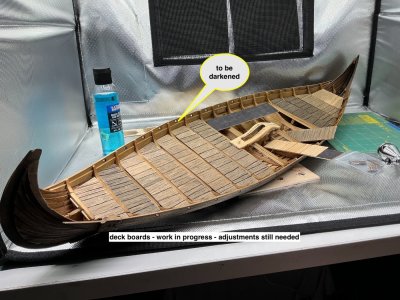
For areas where deck boards are moved away - I have a couple of ideas on how to “make that look”. Hmmm, I also hope that the airbrush might help as well TBD

Thank for your kind post. Some of yesterday's updated images;


1.jpeg2.jpeg3.jpeg4.jpeg5.jpeg6.jpeg
 
Jan and Daniel,

I hear you - yesterday, I made some airbrush color "adjustments" to the outer hull. Almost done will post a couple of images when done.
Then move this log forward..

Thanks for you opinions much appreciated!

PS: I now know why my Avatar flag sends me to S. Africa and then back to USA --- Sometimes I forget to unlink my VPN when
posting here... I use the VPN for almost all general web surfing using Chrome Incognito (or the Mullivad Browser) --99.99% of adds never pop-up
great having a subscription to that kind of service.


Cheers,
 
Last edited:
Bill,

Thanks so much for your such nice comment - so glad to have you following along.

I remember the other day seeing something about the Bluenose GOOD - now I know - going to visit your log -------
These amazing ships (boats?) are very rarely seen in logs - this will be great

Regards,
 
Bill,

Thanks so much for your such nice comment - so glad to have you following along.

I remember the other day seeing something about the Bluenose GOOD - now I know - going to visit your log -------
These amazing ships (boats?) are very rarely seen in logs - this will be great

Regards,
John, I agree, we need more viking ships. From past, very brief glances of these models on kit sites, they didn't appeal to me that much - "simple" construction was a thought - but as I look closer there is much to love, including plank on frame and what could be challenging planking on each end. And, relatively shorter build times to produce a beautiful model.

P.S. With respect to my humble BN build log, you're too kind...I feel like a true tadpole around so many talented folks. :p But thanks!
 
Daniel,
Yikes -- a kind of wordy - post not usually my style. Thanks - yes, it does look as if it came out ok but, I’d become sort of - after seeing Pavel’s, and other images - set on also a darker brown warmer looking outer hull.

Copied and pasted;
To further protect the hull and add another layer of waterproofing, the Vikings coated their ships in heated pine tar. This sticky resin not only repelled seawater but also protected the wood from rot and shipworms

Heated (or kiln-burned) pine tar is very dark, naturally ranging from a rich, dark golden-brown to deep black. The dark color comes from the ultra-fine carbon particulates produced during the high-heat burning or cooking of the pine stumps -- SO will also dust some dark brown to blend with the Parina

I will do a bit more work on inner planks as well, but there will definitely a much lighter tint to the inner planking. I also intend on adding what they did to seal the planks from water.

Copied and pasted;

Vikings made their ships watertight by using a method of overlapping planks (called clinker or lapstrake construction) combined with natural caulking. They stuffed fibrous materials like animal hair, wool, or moss mixed with tar into the seams to block water. When the ship entered the water, the wood and fibers swelled, creating a watertight seal

For areas where deck boards are moved away - I have a couple of ideas on how to “make that look”. Hmmm, I also hope that the airbrush might help as well TBD

Thank for your kind post. Some of yesterday's updated images;


View attachment 616942View attachment 616943View attachment 616944View attachment 616945View attachment 616946View attachment 616947

Now we are talking John.....
 
Now we are talking John.....
Grant, Thanks

Have decided that above the height of the deck planks the bulwarks need a darker dusting, along with the cross bracings. Will revisit work with the airbrush

I'm done with the outer hull. added some dustings of Mahogany, Rosewood, Dark Walnut, and then a final light dusting of again Patina.

Jan and Daniel thanks for your comments. Some updated images.

As always thanks for your comments. likes or just taking a look :)

Regards,

1.jpeg2.jpeg3.jpeg4.jpeg
 
Daniel,
I agreed with your previous post regarding the "blacker" tints....

======================

Hi mates,


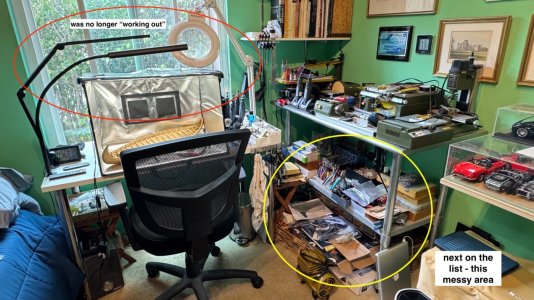
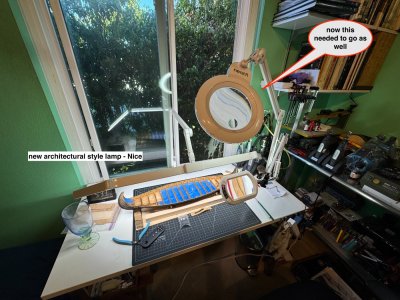
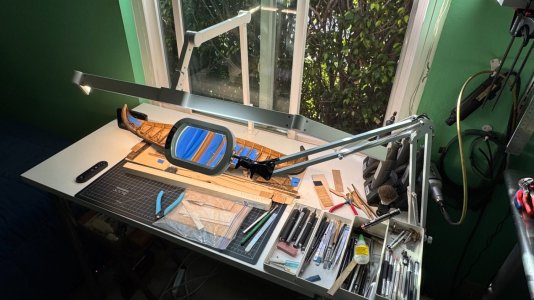
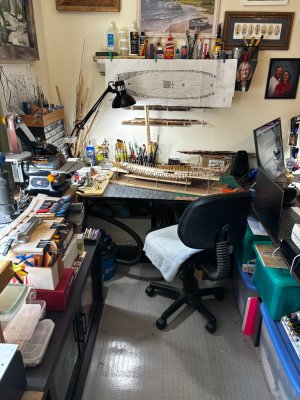
Sharing a personal work area improvement
- as is often said, “what a difference a day makes”. Hope that you don’t mind my brief indulgence….

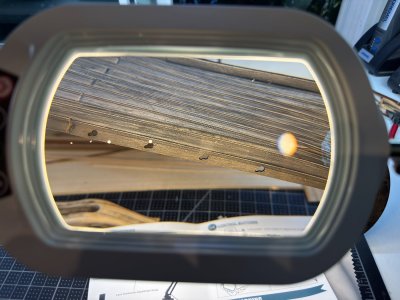
My cluttered work table was annoying - lighting(s), and the much needed magnifying lamp that was too heavy and bulky also needed an upgrade.

Amazon (as always) delivered. A delightful improvements!!

OK now time to get back to the airbrush

Regards,

1.jpeg3.jpeg5.jpeg
6.jpeg
 
Nice upgrades; my work area is so tight if I swing an elbow a little too far out, I either get cut on something or knock something over. You know I've always been curious about those swing around lighted magnifiers; I may just have to try one, although not sure where I'd put it (no room) :)

IMG_1878.jpeg
 
Back
Top