• LUCZORAMA SHIPWRECK SCAVENGER HUNT GIVEAWAY. 4 Weeks of Fun • 1 Legendary Prize ((OcCre’s Fram Ship)) • Global Crew Welcome!
    **VIEW THREAD HERE**

Oseberg V3 Build Log by Ashley

Hi Ashley, bummer on the glue. As Russ suggests a PVA glue such Titebond II is ideal. I'm not positive but a lot SOS builders use a white D2 type glue. I've purchased that from Koldestok when I built some of his kits.

Not to worry about the 2nd jig, it's purpose is to give one a working area while planking. If you're at that point in your build the the hull should be quite rigid and aligned.

Jan

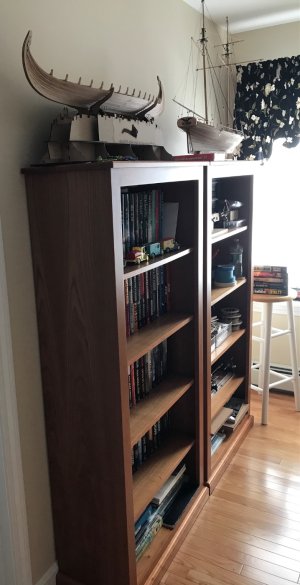
(BTW a little humor to make your day. I'm currently working on another ship build and to protect my Oseberg I placed it on top of a bookcase in my office. Unfortunately I had also paced its mast and yardarm on the top of the same bookcase. Not thinking when I pushed the Oseberg onto its safe place the mast and yardarm fell behind the bookcase. So when I get to that point in the build I'll be moving a few books (only 60 or so) and the bookcase to get those two pieces. :oops:)
 
Titebond 2 is Available

Portugal is a great country in many ways with some really crazy prices. Also, here we have big problems in finding what we need.

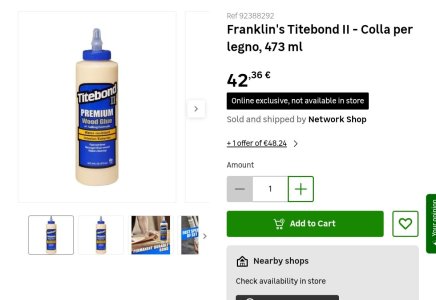
Screenshot_20250705_143242_Chrome.jpg

I originated in the UK and before Brexit, I would buy much through Amazon UK. That all changed since Brexit. Now I buy a lot from France, Germany and Spain through Amazon. Unfortunately, often, liquids will not be sent. The Titebond available here in Portugal from a big supplier as you see in the image, is only avalable online. 473 ml is about 16oz. Cost in US Dollars is about $50 plus delivery. Walmart appears to charge $6. . Just an example for fun. Perhaps, I just get all the prices wrong or I'm going crazy..

Go get yourself some Titebond II or similar, but make sure it actually says PVA.
 
Titebond 2 is Available

Portugal is a great country in many ways with some really crazy prices. Also, here we have big problems in finding what we need.

View attachment 530154

I originated in the UK and before Brexit, I would buy much through Amazon UK. That all changed since Brexit. Now I buy a lot from France, Germany and Spain through Amazon. Unfortunately, often, liquids will not be sent. The Titebond available here in Portugal from a big supplier as you see in the image, is only avalable online. 473 ml is about 16oz. Cost in US Dollars is about $50 plus delivery. Walmart appears to charge $6. . Just an example for fun. Perhaps, I just get all the prices wrong or I'm going crazy..

Wow! I used Titebond as an example, but really, any PVA will work. Go to the adhesive section of your local hardware store and look for carpenter's glue. It may be yellow or white, just make sure it says PVA (PolyVinylAcetate).
 
! I used Titebond as an example,
Hi Russ. I understood that. Over the time I've been reading on the forums I have seen so often Titebond mentioned. I suspect for the model boat builder it's ideal in consistency, drying time and more. As it appears we'll thought of, I attempted to buy it here in Portugal and was amazed that Leroy Merlin, a huge home decorating store here could ask such an inflated price and especially so when compared with Wallmart. It just seams unbelievable.

Watch the Videos Again

On another subject, I watched the video by Pavel again on the construction of the second jig. In it, I can see that even Pavel's build does not hold in the frame tight. As said by you Russ and Jan, it's just a support, which I understand anyway but failed to really take into account. I felt initially it may have been a tighter fit. In the case of additional supports at each end, I noticed Pavel also incorporates small supporting blocks to create a more rigid hold on the keel at each end. His wobbled also if watched at half speed. Nothing Pavel had done or myself forces alignment or creates stress. I should have watched that video again but at first, thought the whole process too simple to require seeing if again. Those additional supports are not displayed in the paper instructions, but I feel, necessary.

And for Jan

Jan. Thanks for the The Kolderstok link. I can get glue here no problem. Finding something most appropriate can be a little more problematic and that's why I tried on the recommendations. As for your link. That is very close to my wife's birth place in the Nederland.

I was also amused by the 60 or so books that now need moving. Hope your health has settled.
Appreciation

May I take this opportunity to thank for the comments and assistance in my build of the Oseberg.
 
I was also amused by the 60 or so books that now need moving. Hope your health has settled.
Yup, those books definitely have to move.

IMG_4822.jpeg
There only four shelves worth, the finished mast and yardarm are behind the first bookcase and there doesn't seem to be a way to fish them out So.....

I'm almost back up to speed after my surgery. Unfortunately I'm a "Lefty" and the recovery time has been a PTA.


Jan
 
Slipway Update

Following the problems I had over the construction of the slipway,  building frame or jig. I decided to really investigate what was causing the slight rock of the Oseberg, when in place.

A very close inspection revealed that if slight adjectment was made to the building support frame uprights, nothing was really wrong. Given this, I suspect a few little differences in alignment, is what caused the slight rock of the ship keel and frames. I was able to determine that four slightly raised seating points was preventing a better fit. I made adjustment to these points and the Oseberg was able to seat properly. Rotating the ship in the frame, did not result in an improper fit following this alteration. This tells me it was the frame with a slight problem and nothing more. The opposite end did not need the same treatment. Now I feel happier with the framework.


20250706_175808.jpg
Slight adjustment to the Frame seating Points.
 
Last edited:
Hi Ashley,

I'm glad you were able to get your jig adjusted, are you going to put the stem supports on? It's not in the instructions but Pavel did it in his video, Russ also goes into detail about installing them. I'm glad I put them on mine, it keeps the ship more stable in the jig.
I look forward to watching your build, I'm sure I'll learn from it.

Steve
 
, are you going to put the stem supports on?
Hi Steve, yes I have the supports in place. I'm doing a build log because I feel it is more fair to contribute a bit if possible. I've found the work of others often brilliant in many fields. The information on Russ's build log I would say is very valuable and a must read to anyone considering the Oseberg.

I have a little more progress than seen here. It's a matter of getting around to posting a bit more.

How far are you on your build?
 
Hi Ashley,

I'm looking forward to your updates. I'm not much ahead of you, I have the second strakes put on but that's it. I haven't worked on my model for a few months, too many things going on right now. Hopefully in a month or two I'll be able to get back to it, I'm happy with my results so far...this is a nice kit and have enjoyed it!

Steve
 
Before I Start

I was looking forward to this part of the build process because the Oseberg starts to take the form of a ship. I had waited a long time for delivery and now I was on my way.

Completion of the Frames

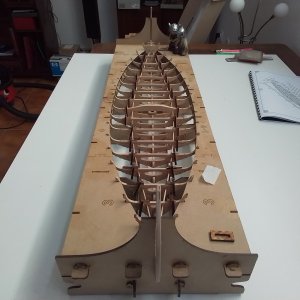
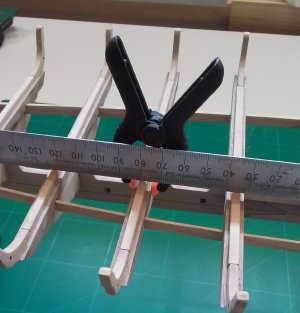
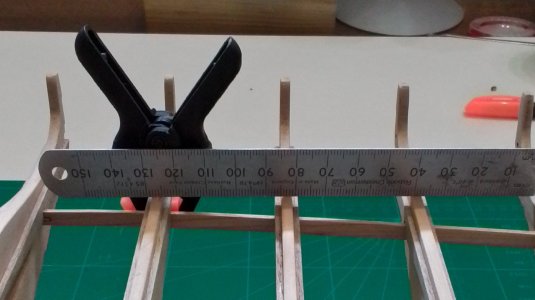
The next stage involved the insertion of the frames into the keel. In my initial trials, I noticed slight variation between the cross member levels. I checked this with a steel rule port-side, centre line and starboard. To correct, I removed a slight amount of material at the seating points.

Mast Base Support

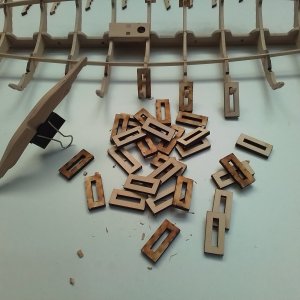
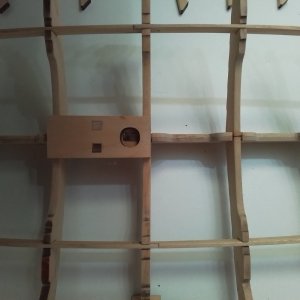
The mast base support consists of four parts. An upper and lower, plus two square joining dowels. The main oblong pieces, due to differences in size, crate a slight lip for the purpose of seating and support. If the alignment of the upper and lower parts is not checked carefully, the part become misaligned. The hole in the centre is also slightly elongated and not central. I feel the parts here are designed with a fault. The instruction manual and the video shows this part as not being glued into place. I saw no reason for this on checking further into the instructions and used adhesive.

20250628_160907.jpg

Central Cross Member

The central cross member along side the mast I was not looking forward to due to the shaping required. It is constructed of two pieces of wood to create one thicker piece glued together. The shaping is undertaken before the parts are joined.

Dremel Work

Shaping is undertaken in two stage. First the upright side and then the top. To aid this, a small template is supplied. The template is glued to the wood and the worked on to create the shape. I undertook this by clamping in a vice and using a Dremel on slow speed. I achieved this with relative ease. The part needed further shaping to allow the fitment of the mast at this point. To aid the Dremel placement and prevent skidding, I cut a slight groove in the piece and then filed with a triangle file to create a dip in the wood. This aided the work with the Dremel. The results were perfect where I considered it a challenge to sand down the mast hole to perhaps 1mm and keep the piece as a whole.

The next stage on the above part was to glue it to its mating part. Following this, more shaping was required with the Dremel. Again, this I undertook with relative ease. In the case of this piece when watched on a large screen television, it does appear larger and perhaps a more daunting task. In reality with care, it’s not so difficult.

20250628_161031.jpg

Putting the Frame into the Keel

Undertaking the proper attachment of the frames to the keel, I was looking forward to. This part, upon completion was to result in the Oseberg kit starting to look like a real ship.

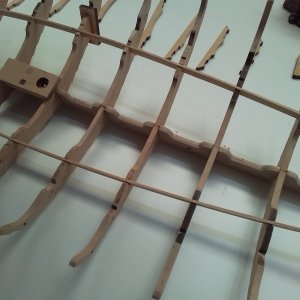
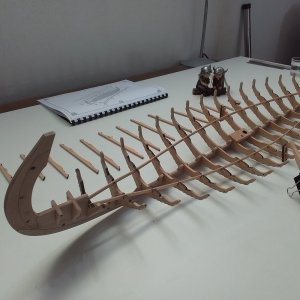
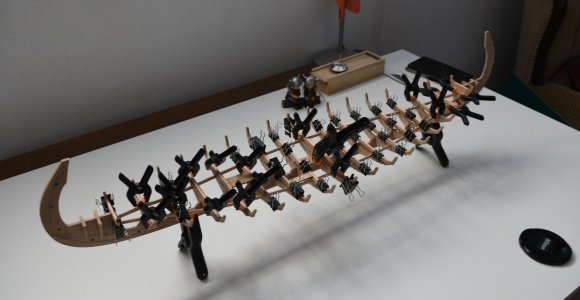
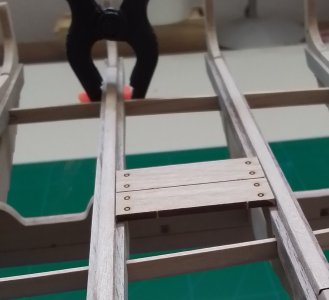
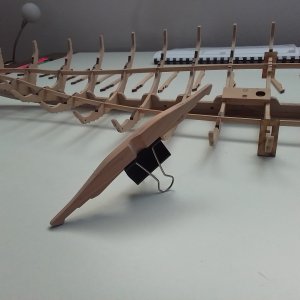
Throughout the build process I have dry fitted at ever stage. Here I placed each frame into its respective slot and then inserted the stringers to each side of the ship. I was again impressed with the kit quality as each stringers length was perfect. Following, I placed the cross members upon the frames and held them in place with masking tape. On completion, I was able to remove the skeleton of the Oseberg from it jig and it remained as a complete unit. Delicate mind you.

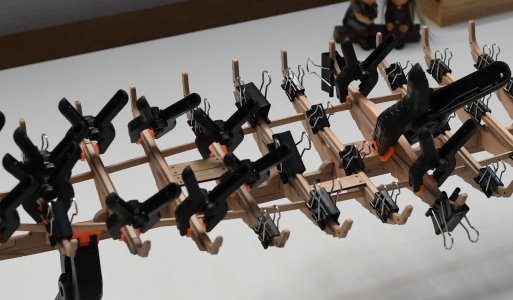
The frame was inserted back into its jig, where I dissembled it and attached the locking clamps as supplied by Pavel. This job was a little fiddly and many of then wanted to slip and slid. When all were in place, I inserted the stringers again and then glued the cross members in place and waited. After adequate time, I was able to remove the Oseberg skeleton and remove the locking clips on the frame and reveal the part finished Oseberg in all her glory.

20250628_161059.jpg

20250628_161046.jpg

20250628_161434.jpg

20250628_171807.jpg
Conclusion

There were a few time in the above processes where I was concerned that if I made a mistake, I could easily destroy something I was working on. I am nowhere near and expert in model ship building where this is the first, for about forty or so years. I remain delighted.
 
Splendid progress.on your part. Carefully alignment in your current build steps will aid you when you start the planking process.

Jan
 
Back
Top