Oseberg - Ver. 3 - Pavel Nikitin - 1:25

Joined
Sep 10, 2024
Messages
63
Points
78

Introduction

We live in a village in the Finger Lakes of New York (USA) with a large Danish heritage. Jensen, Christensen, Nielsen, Jorgensen and Sorensen make up a significant percentage of the population, including the Admiral, who was born here. (Fun fact - the Admiral's father was born and passed away in literally the exact same physical spot in the house we now live in.) Anyway, although not Danish myself, I am fascinated with Scandinavian history, so when I found out about Pavel's new 1:25 longboat model, the Oseberg, my interest was piqued. The fact that it is a model of an actual ship found in a burial mound in excellent condition only sweetens the deal. I had to have it.

The real Oseberg is 21.5 m (70.5 ft) long. At 1:25, the model is 860 mm (33.9 in), so, a good sized model! Now, I love to build things, and the Admiral loves Lego, so we have a bit of a problem - no more display space! So it's a good thing that our neighbor and good friend, also a Dane, has a nice, big (empty) mantle that this would look great on! This one's for you, Jack.

Towards the end of October, '24, I emailed Pavel to see if the kit was available anywhere in the US and if not, what the estimated shipping costs would be. He confirmed that it wasn't available yet and the shipping would be around $80 from Kiev. Yikes! Well, I wanted it, so placed the order with the justification that I was helping someone who is struggling in a war-torn country. I ordered the kit from the web site on 1 Nov 24. There is no payment capability on the web site, but I soon received an email with an address to send a PayPal payment to. Estimated shipment date was 30 Nov 24.

Around 5 Dec, having not yet received a shipment notification, I emailed Pavel to get an updated estimate. After 5 days and 3 more emails, I finally got a response. They were having supply chain issues and were waiting for one specific part so they wouldn't have to ship it separately. Also, they only get a half-days worth electricity every day. The kit did finally ship on the 13 Dec.

My Oseberg finally arrived on 26 Dec. Now to hear the Admiral talk, you would think I was as giddy as a teenage girl on prom night. Well, okay, maybe a little. :D
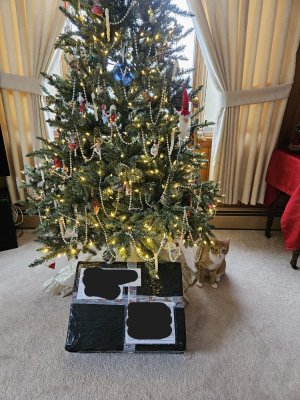
Arrival.jpg

The kit was very well packaged. The box was surrounded by about 12 mm (1/2 in) of styrofoam and then securely wrapped in black plastic. There was no damage to the box.

Pavel has a series of videos on Youtube showing the assembly of the kit. The first of these is the unboxing, so I won't go into detail - you can watch his video. The only difference with my unboxing was that once I got to the bottom, I realized that there was no assembly manual. Redface

I immediately emailed Pavel, but didn't hear from him until the 30th of Dec., when he emailed a copy in PDF format. To his credit, he offered to send an actual copy, but I insisted that the PDF would be fine. I can print my own (it's formatted for A4 paper, but letter size is close enough), plus I appreciate the PDF because I can zoom in to details that may be hard to see on paper. Besides, with shipping costs the way they are, sending that manual would probably eat up a significant portion of his profit on the kit. They need the money and support far more than I need a printed manual. I would suggest to Pavel that he post his assembly manuals in PDF on his web site for download. Without the full-sized drawings (4 sheets) and the kit parts, they are pretty useless, so I don't think he would have to worry about anyone building the ship with just them.

While I was waiting for Pavel's reply with the PDF manual, I was able to assemble the first building jig and start on the keel and ribs using just the videos. I also assembled the Lego Endurance that the Admiral got me for Christmas. What a great commanding officer!
 
Last edited:
The First Building Jig

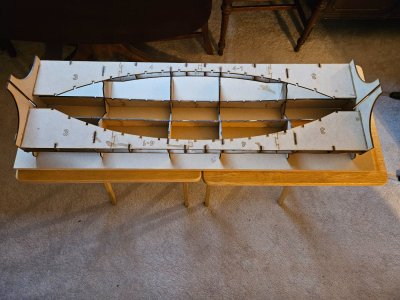
The first building jig was really pretty straightforward. I was able to assemble it using just the video. Most of the mating slots are pretty tight and require some sanding, but I would recommend keeping it snug as the parts are self-aligning. Once the layers are glued together, the rest of the assembly is built dry and glue is added to the joints afterwards. Pavel applies white glue with a toothpick. I chose to use super thin CA that penetrated right into the joints.

20241229_155706.jpg
 
The Keel

Still working from videos because the manual had not yet been sent, I started assembling the keel. This is where I made my first mistake of the new year. That's my quota, so no more allowed. ROTF

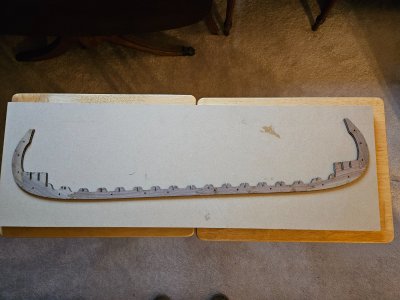
The keel is made in two layers, with each layer having 6 pieces. The idea (as shown on the video) is to assemble each layer, then laminate the two layers together. There are small square holes that line up between the two layers where you are to drive square pegs to align the layers and strengthen the assembly. On his video, Pavel assembles each layer freehand. The joints are designed where this is plausible, however he starts gluing without any apparent cleanup of the char from the laser cutting - he just puts glue on the mating surface and pushes the parts together.

Now, anyone who has ever assembled a model with laser-cut pieces, knows that the cut edges are slightly beveled due to the laser burning away more at the top surface of the sheet than at the bottom. The thicker the piece, the more noticeable the taper. The joint is in sort of a zig-zag pattern and when I placed the two parts together, there was a gap of nearly 1mm where the parts wouldn't mate due to the taper. Pavel simply pushed the parts together and filled in the gap with glue (granted, you can't see the actual gap, but you see him wipe glue into the crack). A glue joint in wood that is mostly glue will not hold, so I very lightly sanded the mating surfaces to square them up and make the joints fit.

Pavel then simply applies glue to one of the layers, paces the other on top and starts driving pegs. Easy-peazy!

Wellllllll, when I stacked the two layers up, one was noticeably longer than the other! :oops:

20241229_155804.jpg
20241229_155817.jpg20241229_155825.jpg

Now, there is NO WAY I sanded THAT MUCH MORE from one layer than the other! I barely touched the edges - just enough to get rid of the daylight showing in the joints.

Comparing the layers to the full sized drawing, I found that one of them was really close, less than 1mm off. It, fortunately, was the shorter of the two, so I left it as is. Comparing the square peg holes, I realized that they gradually diverged from one another along the length, so I would not be able to just make one cut to fix the problem. I ended up making 7 cuts along the length. I then glued each section to the good layer as I completed adjusting it - driving pegs as I went.

20250105_171240.jpg

IMPORTANT - laminating these two halves with white glue WILL CAUSE THEM TO CURL due to the moisture in the glue. Be sure to have LOTS of small clamps, or two boards and large clamps (or water bottles, as Pavel shows).

I would suggest building one layer over the plans and then fitting the second layer to the first as you assemble it.

I have the char cleaned up from the edges now and just need to sand the faces, tapering them as directed.
 
Last edited:
Frames

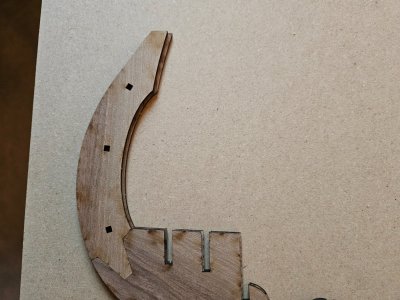
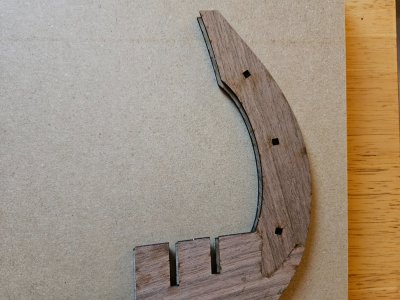
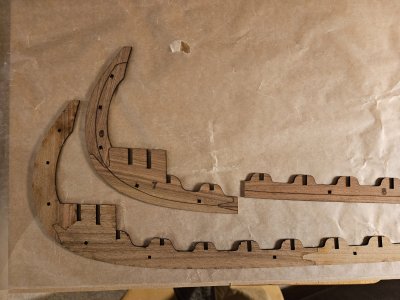
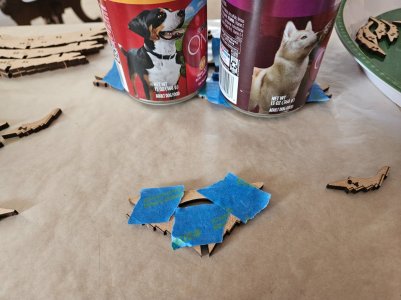
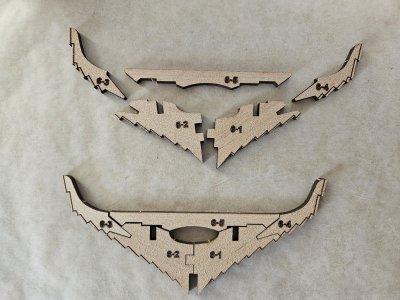
The keel is complete, so now on to the frames. I first glued the two lower frame halves together and when dry, went back and attached the upper "wings". Used masking tape to hold them together and a high-tech method to keep them flat on the building board while the glue dried. The upper cross pieces (thwarts?) were used to provide proper spacing, but not glued yet.20250111_144906.jpg

20250111_144445.jpg

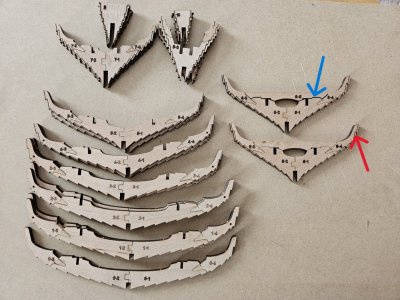
There was significant char-tapering, so the mating surfaces had to be lightly adjusted to fit. I can reverse the cross brace when I finally install it and the tapering will mate up perfectly. You can see the difference below where the blue arrow points to the large gap caused by the beveled edge. Just flipping it over as shown eliminates the gap. I couldn't do that with the upper wings because the guidelines used to bevel the frames for planking (red arrow) must all be on the same face of the frame.

Frame1.jpg

Next, as Pavel shows in his video, I will temporarily tape the cross brace to the frame and then clean up all the edges and file the bevels into the frames for planking. I'm sure there will be slight adjustments necessary when I start attaching the strakes, but better that then to try to put the entire bevel on each frame after it is attached to the keel.
 
Very interesting progress. Checking on Pavel's website the ship date for my order is at the end of the month.

Jan

I assume that means you have already received a tracking number - that's good. Mine didn't ship until 2 weeks after his original estimate. Nevertheless, we need to give them leeway due to everything they are having to endure.
 
I assume that means you have already received a tracking number - that's good. Mine didn't ship until 2 weeks after his original estimate. Nevertheless, we need to give them leeway due to everything they are having to endure.
Nope no tracking number just the "expected" ship date.
 
Nope no tracking number just the "expected" ship date.


Hmmm... must be because I never actually created an account there (I see a login prompt on his website), I can't find any reference to a ship date anywhere else. Mine came on the order confirmation email I received and that was all I had to go on.

Once they actually shipped the item on 12 Dec, they sent another email with a tracking number on the 13th. I watched it sit in the Kiev customs terminal for about 7 days, then 1 day to Germany, 1 day to New York City, and finally another 5 days to get to me, which is about 4-1/2 hours from NYC. :rolleyes: Gotta love the US Postal Service.
 
Hmmm... must be because I never actually created an account there (I see a login prompt on his website), I can't find any reference to a ship date anywhere else. Mine came on the order confirmation email I received and that was all I had to go on.
Yup, I had to go to my account to see the Date"

Jan
 
Introduction

We live in a village in the Finger Lakes of New York (USA) with a large Danish heritage. Jensen, Christensen, Nielsen, Jorgensen and Sorensen make up a significant percentage of the population, including the Admiral, who was born here. (Fun fact - the Admiral's father was born and passed away in literally the exact same physical spot in the house we now live in.) Anyway, although not Danish myself, I am fascinated with Scandinavian history, so when I found out about Pavel's new 1:25 longboat model, the Oseberg, my interest was piqued. The fact that it is a model of an actual ship found in a burial mound in excellent condition only sweetens the deal. I had to have it.

The real Oseberg is 21.5 m (70.5 ft) long. At 1:25, the model is 860 mm (33.9 in), so, a good sized model! Now, I love to build things, and the Admiral loves Lego, so we have a bit of a problem - no more display space! So it's a good thing that our neighbor and good friend, also a Dane, has a nice, big (empty) mantle that this would look great on! This one's for you, Jack.

Towards the end of October, '24, I emailed Pavel to see if the kit was available anywhere in the US and if not, what the estimated shipping costs would be. He confirmed that it wasn't available yet and the shipping would be around $80 from Kiev. Yikes! Well, I wanted it, so placed the order with the justification that I was helping someone who is struggling in a war-torn country. I ordered the kit from the web site on 1 Nov 24. There is no payment capability on the web site, but I soon received an email with an address to send a PayPal payment to. Estimated shipment date was 30 Nov 24.

Around 5 Dec, having not yet received a shipment notification, I emailed Pavel to get an updated estimate. After 5 days and 3 more emails, I finally got a response. They were having supply chain issues and were waiting for one specific part so they wouldn't have to ship it separately. Also, they only get a half-days worth electricity every day. The kit did finally ship on the 13 Dec.

My Oseberg finally arrived on 26 Dec. Now to hear the Admiral talk, you would think I was as giddy as a teenage girl on prom night. Well, okay, maybe a little. :D

View attachment 494433

The kit was very well packaged. The box was surrounded by about 12 mm (1/2 in) of styrofoam and then securely wrapped in black plastic. There was no damage to the box.

Pavel has a series of videos on Youtube showing the assembly of the kit. The first of these is the unboxing, so I won't go into detail - you can watch his video. The only difference with my unboxing was that once I got to the bottom, I realized that there was no assembly manual. Redface

I immediately emailed Pavel, but didn't hear from him until the 30th of Dec., when he emailed a copy in PDF format. To his credit, he offered to send an actual copy, but I insisted that the PDF would be fine. I can print my own (it's formatted for A4 paper, but letter size is close enough), plus I appreciate the PDF because I can zoom in to details that may be hard to see on paper. Besides, with shipping costs the way they are, sending that manual would probably eat up a significant portion of his profit on the kit. They need the money and support far more than I need a printed manual. I would suggest to Pavel that he post his assembly manuals in PDF on his web site for download. Without the full-sized drawings (4 sheets) and the kit parts, they are pretty useless, so I don't think he would have to worry about anyone building the ship with just them.

While I was waiting for Pavel's reply with the PDF manual, I was able to assemble the first building jig and start on the keel and ribs using just the videos. I also assembled the Lego Endurance that the Admiral got me for Christmas. What a great commanding officer!
I just came across your thread, I will be watching closely as you build it.
My order was shipped on Jan. 14, like you it was a couple of weeks late. Totally understandable with everything going on there!
I received my tracking number but I can't figure out how to translate it to English.
I can't wait to get my hands on this kit, I haven't been this excited about a model in years!
Steve.
Welcome to the Oseberg club! :D

I hope to post something more this weekend, but sanding and shaping the frames is slow - plus, I work full time.

I use the Chrome browser. If you use Edge or something else, I can't help, but I'm sure there is a similar method to translate. On Chrome, when you go to the tracking website, click on the three vertical dots at the far upper right of the window (as if you were going to Settings). On that menu, about 3/4s of the way down is a translate option. Once it arrives in the US, you can just paste that same number into the USPS tracking page.

Will you do a build log?
Thanks for your help with the tracking, it worked!
I may post a few pics from time to time, but I doubt I'll do a build log.
I'm looking forward to watching your progress, I'm sure I'll learn a lot from you.
Steve.
 
My Osberg has shipped. Pavel's videos and your build Log will be of great help. My shipyard is working at full capacity-finishing building (in order of completion) Le Coureur, HMS Alert, and HMS Enterprise.
There will be some confusion in the ranks when a Viking ship starts construction !
AR
 
My Osberg has shipped. Pavel's videos and your build Log will be of great help. My shipyard is working at full capacity-finishing building (in order of completion) Le Coureur, HMS Alert, and HMS Enterprise.
There will be some confusion in the ranks when a Viking ship starts construction !
AR
That must be quite a shipyard! I barely have room for one project at a time. :)

Congrats on the Oseberg and welcome to the "club".
 
Can we get together and do a group Build ? That way everybody's build would be easy to access. We need a minimum of 8 committed people and a moderator in order to start a group build. Russ could be the moderator since he has a head start an already a detailed build log. Pavel Nitikin could also join. ?
 
My shipyard is working at full capacity-finishing building (in order of completion) Le Coureur, HMS Alert, and HMS Enterprise.
There will be some confusion in the ranks when a Viking ship starts construction !
Ditto, I have a Chriscraft cabin cruiser to rebuild, Pavel's San Bartolome, Chaperon Sternwheeler and Kolderstok's Duyfken to finish. I guess I'll have to work faster.

Jan
 
Can we get together and do a group Build ? That way everybody's build would be easy to access. We need a minimum of 8 committed people and a moderator in order to start a group build. Russ could be the moderator since he has a head start an already a detailed build log. Pavel Nitikin could also join. ?
:oops: I don't know what that entails - I'd have to look at the forum guidelines if there are any about that. As you can probably already tell, I don't have a problem communicating or even leading a group. My biggest concern is the fact that I still work full time and most of my modelling time is in the winter. Once the weather (upstate NY) warms up, it's out to the lawn, tending the garden and going out on the boat. I would hate to commit to a group build and then disappoint people because I didn't have the time to invest. Before I answer, give me some time to look at some other group builds and see what it requires. Obviously, everyone can't progress at the same time, so I need to see how that works as well. I'll get back on that.
 
Back
Top