-

Win a Free Custom Engraved Brass Coin!!!
As a way to introduce our brass coins to the community, we will raffle off a free coin during the month of August. Follow link ABOVE for instructions for entering.
-

PRE-ORDER SHIPS IN SCALE TODAY!
The beloved Ships in Scale Magazine is back and charting a new course for 2026!
Discover new skills, new techniques, and new inspirations in every issue.
NOTE THAT OUR FIRST ISSUE WILL BE JAN/FEB 2026
You are using an out of date browser. It may not display this or other websites correctly.
You should upgrade or use an alternative browser.
You should upgrade or use an alternative browser.
The greenish tint makes me think it's poplar.
Last edited:
well done 2 more planks to go on mine
fast work. Looks good, I have just placed my 1st outer layer planking. You are way ahead of me
Thats progressing well Paul. 
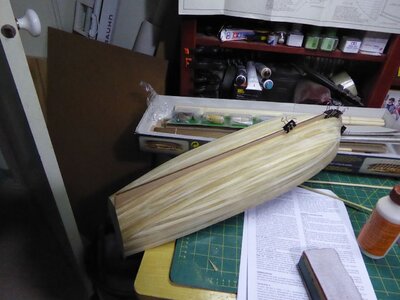
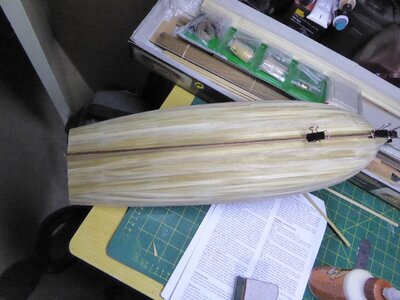
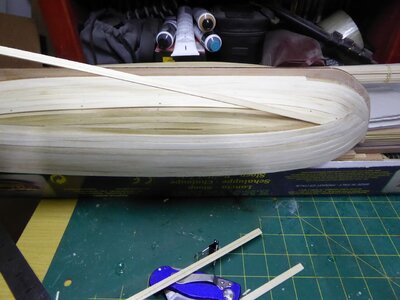
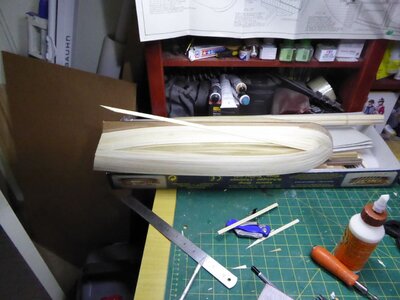
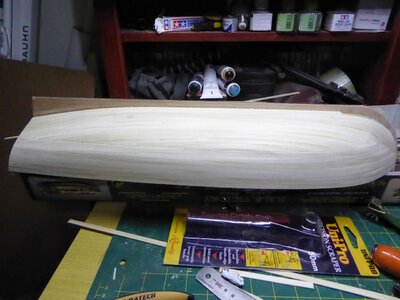
2nd outer planing now complete
Pls ignore all the orange marks as I only had ceader wood filler laying around at the time. This will all be painted over anyway.
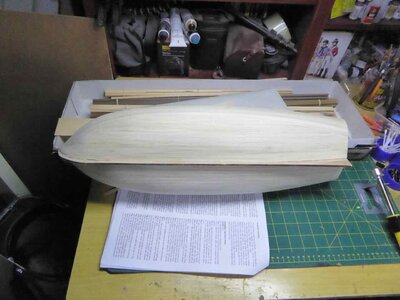
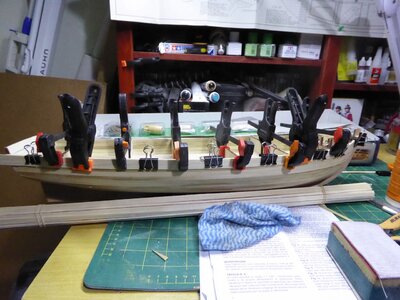
Next the kit calls for a .6mm veneer to be added to the exterior keel. The kit provides 3 pieces of veneer two long 1.5cm with and 1 5cm width piece. I only used the 5cm item as it was easy to cut out all the sections from that. There is no template as everyones hull shape wll be different after the 2nd planking. As per Keith Juliers recommendation, I cust small sections and applied them. ( Never to many clamps). Finally a 1st later 6mm plank is added to the base of the keel. ( IT bends nicely at the hull when dampened.
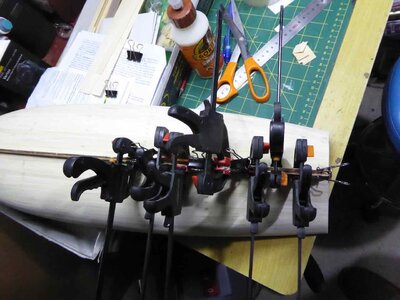
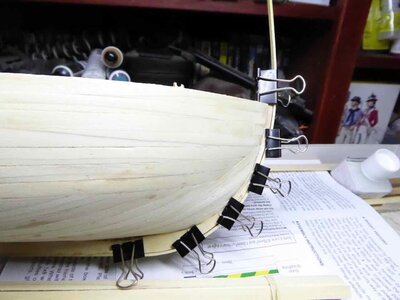
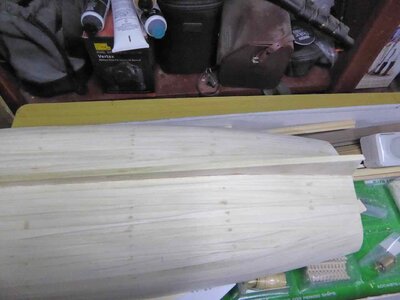
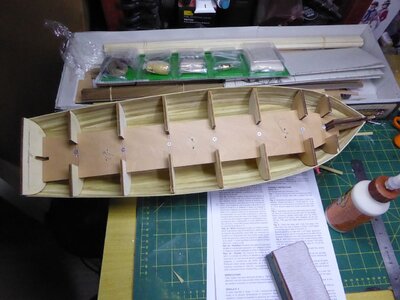
The interior bulkheads were then removed as was the false floor. These came out very easuliyt and could be used to build another model as the keel is on the plans at 1:1.
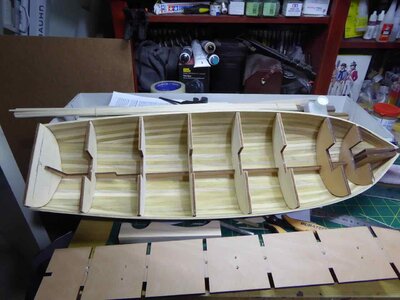
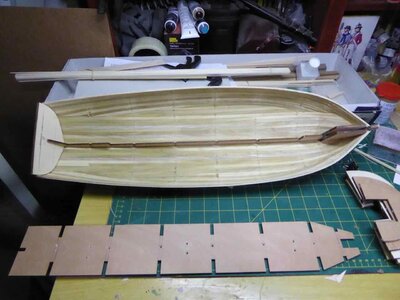
Now to sand out and clean up the interior.
I will not paint and finalize sanding/ spot filling of the exterior untill the core of the interior is fininshed as the wood is soft and marks easily.
Pls ignore all the orange marks as I only had ceader wood filler laying around at the time. This will all be painted over anyway.

Next the kit calls for a .6mm veneer to be added to the exterior keel. The kit provides 3 pieces of veneer two long 1.5cm with and 1 5cm width piece. I only used the 5cm item as it was easy to cut out all the sections from that. There is no template as everyones hull shape wll be different after the 2nd planking. As per Keith Juliers recommendation, I cust small sections and applied them. ( Never to many clamps). Finally a 1st later 6mm plank is added to the base of the keel. ( IT bends nicely at the hull when dampened.


The interior bulkheads were then removed as was the false floor. These came out very easuliyt and could be used to build another model as the keel is on the plans at 1:1.


Now to sand out and clean up the interior.
I will not paint and finalize sanding/ spot filling of the exterior untill the core of the interior is fininshed as the wood is soft and marks easily.
Well done, I have taken a little vacation from the build, so way behind. will get back to it sone.
After a little internal sanding the bumps ans excess glue was removed.
Next the smaller floor support bulkheads wer added and the rear transom planked with the same internal 1st layer planking.
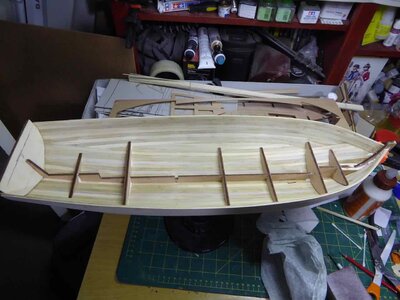
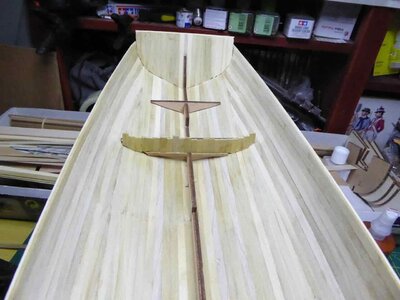
No issues all straight forward.
Net was the additon of the internal and external hand rails. Althouhg the wood was Mahogony 10 x 2 strips, it bent easily aound the hull without soaking.
This was then clamped and allowed to dry overnight.
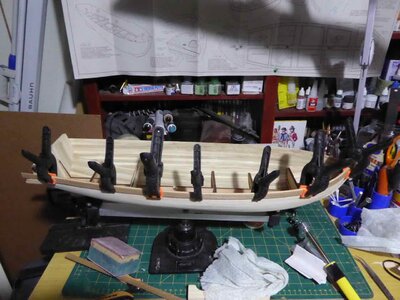
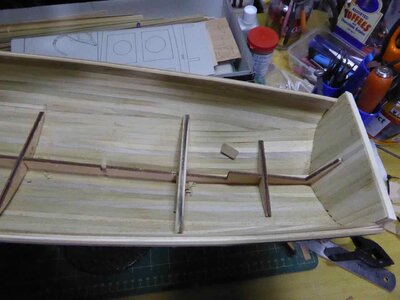
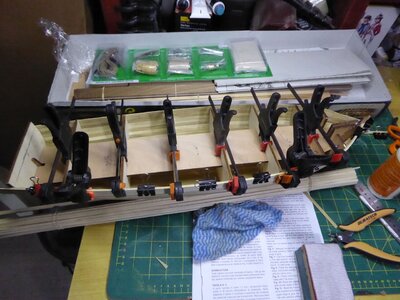
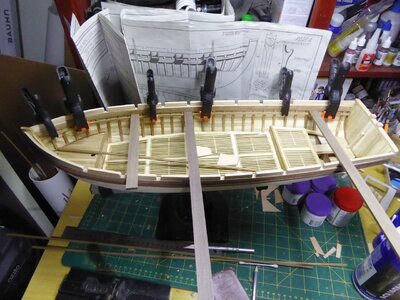
THis was then capped with 8 x .6mm capping. The pricess was to bend a single piece from stern to the last floorbulk head, and then cut the remaining length into sections and shape it to the bow. Be warned although quite straight forward, you only get 2 strips ( one for each side) and there is no allowance for error.
The measure twice cut once is a definite here.
Note the large volume of clamps ( 20) used to keep the strip shaped and flat to the top of the handrail.
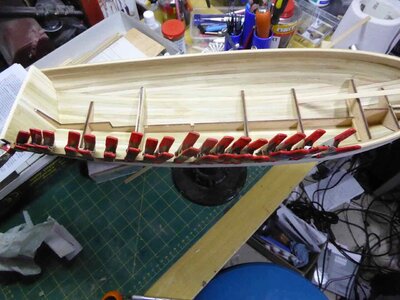
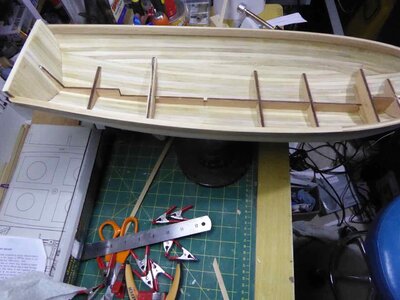
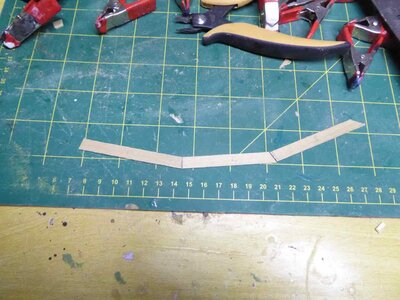
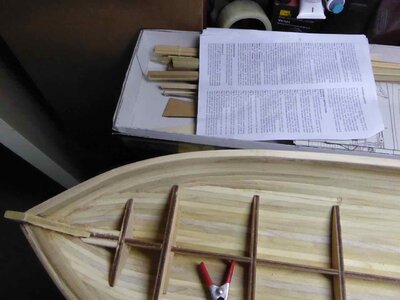
Once both of these were done the bow platform was added and planked with 1 x 6 walnut planking ( once again only just enough provided).
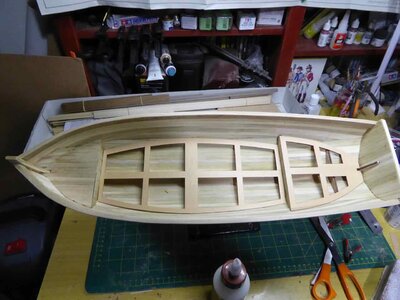
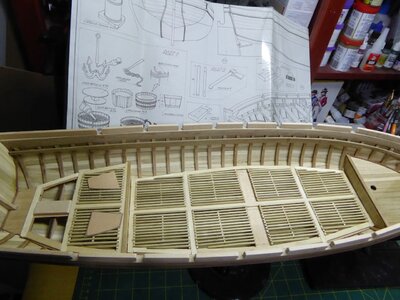
The remainder of the floor was then lain in place.
Next up will be the fit out and adding of all the detail features ( Plan sheet 2). It will all clean up as it goes. Its been a lot of fun so far, but care must be taken to read the plans closely as wood types change for similar plaking and can lead to wronf versions being laid.
Next the smaller floor support bulkheads wer added and the rear transom planked with the same internal 1st layer planking.


No issues all straight forward.
Net was the additon of the internal and external hand rails. Althouhg the wood was Mahogony 10 x 2 strips, it bent easily aound the hull without soaking.
This was then clamped and allowed to dry overnight.


THis was then capped with 8 x .6mm capping. The pricess was to bend a single piece from stern to the last floorbulk head, and then cut the remaining length into sections and shape it to the bow. Be warned although quite straight forward, you only get 2 strips ( one for each side) and there is no allowance for error.
The measure twice cut once is a definite here.
Note the large volume of clamps ( 20) used to keep the strip shaped and flat to the top of the handrail.


Once both of these were done the bow platform was added and planked with 1 x 6 walnut planking ( once again only just enough provided).

The remainder of the floor was then lain in place.
Next up will be the fit out and adding of all the detail features ( Plan sheet 2). It will all clean up as it goes. Its been a lot of fun so far, but care must be taken to read the plans closely as wood types change for similar plaking and can lead to wronf versions being laid.
Looking good I’am way behind know, but it is good your ahead
Nice work Paul. Need to meet up again soon. 
So after building the base Hull and test fitting the flooring there are NO more measurements for all the other components. Plan 2 contails some assembly instuctions for the anchors, buckets etc. The majority of this plan has 3 1:1 scale drawings of the completed boat. It sis now up to the modeller to built the components off plan ( use the images to size the parts & build them all by hand. There is very little precut items, most must be taken off plan.
As I was building bottom up, and did not want completed items laying around that could be lost. I worked on the core hull elements. ( Boat parts & flooring first)
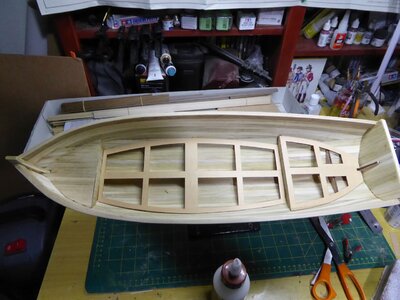 taking the hand rails & oar lock locations first, the parts & spacing were taken off plan, cut & glued. Working form strern to bow, the main handrails were added. This was just simply a matter of cutting then to size, spacign as per the plan and gluing on.
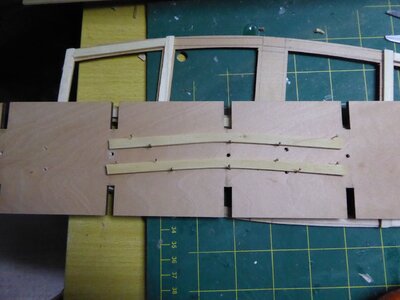
The only difficult part was shaping the 4 x 8 bow section. This was soaked and then held in shape in on the false flooring with pins till it dried. It was then placed in position.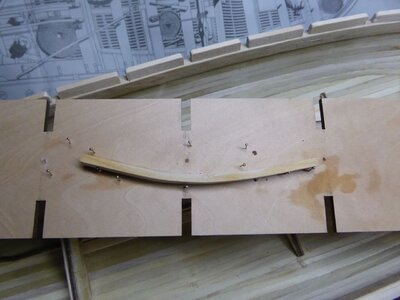
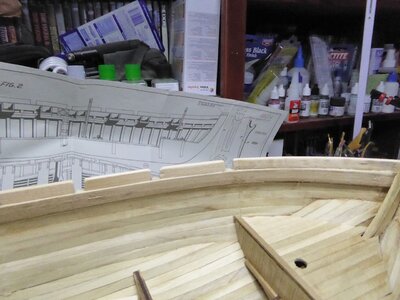
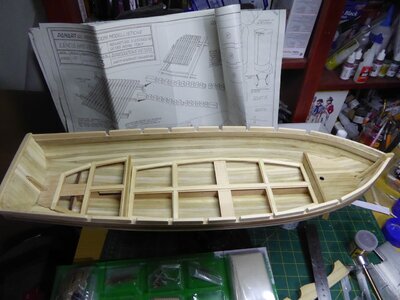
next the flooring had grate edging added, and once again the centre edging was bent to fit. The grates were then made by placing precut grate pieces verticallt at the edge of the grate areas and then cutting horizontal lengths of 2x2 and gluing & press fitting then in to the grate spacing.
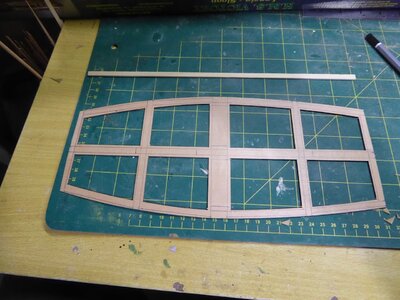
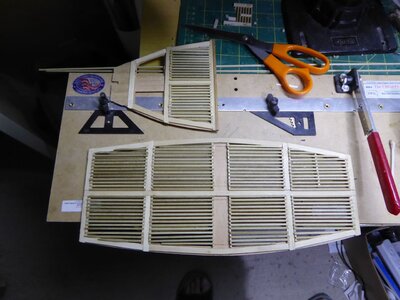
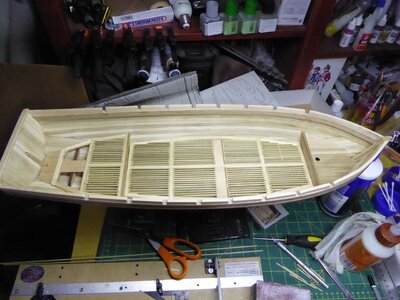
Next will come the components that need to be added to the flooring and then the ribs for the hull, as the floor is locked into place by the rib bases.
Whist I could have followed the order on the plans and made the 25 odd other items in plan ordere, to me it made sense to work on the core parts first, and the fancy bits as needed. The plans at this stage need to be closely examined, to find the size of the part sand to figure out what order to assemble then. Access to a photo copier and fret / scroll saw will be needed to cut the tiller parts.
See you in the next installment.
As I was building bottom up, and did not want completed items laying around that could be lost. I worked on the core hull elements. ( Boat parts & flooring first)
 taking the hand rails & oar lock locations first, the parts & spacing were taken off plan, cut & glued. Working form strern to bow, the main handrails were added. This was just simply a matter of cutting then to size, spacign as per the plan and gluing on.
The only difficult part was shaping the 4 x 8 bow section. This was soaked and then held in shape in on the false flooring with pins till it dried. It was then placed in position.


next the flooring had grate edging added, and once again the centre edging was bent to fit. The grates were then made by placing precut grate pieces verticallt at the edge of the grate areas and then cutting horizontal lengths of 2x2 and gluing & press fitting then in to the grate spacing.


Next will come the components that need to be added to the flooring and then the ribs for the hull, as the floor is locked into place by the rib bases.
Whist I could have followed the order on the plans and made the 25 odd other items in plan ordere, to me it made sense to work on the core parts first, and the fancy bits as needed. The plans at this stage need to be closely examined, to find the size of the part sand to figure out what order to assemble then. Access to a photo copier and fret / scroll saw will be needed to cut the tiller parts.
See you in the next installment.
Fun Fun Fun. The ribs & Seat suppots are the final core of the hull. After finding the section on the plans for the hull and reading both the printed english instructions and the Italian on the plan it became evident that not ony the translation was wrong but also completely different. The english instructions say " Do not bend or use a bending machine" ( and then they provide the bending machine part no). The plans say to use heat & steam to bend the ribs. So WTF. ( Hmm they did not say don't use a planking iron!)
Anyway the ribs consist of 2 x 4 walnut which is very easy to ( shape - not bend!) when wet with a plank shaper (bender).
First up I marked the position of the ribs which is after the first one from the stern are 20mm center to center to the bow
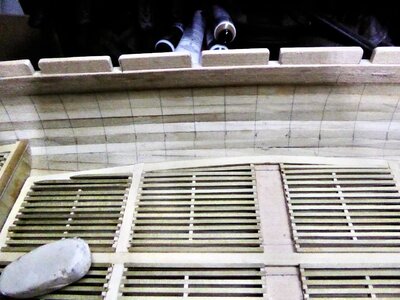
The ribs then fell on to this machine and shaped themselves to the hull!
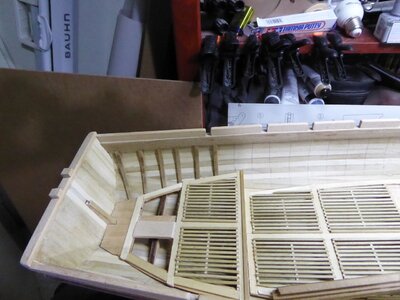
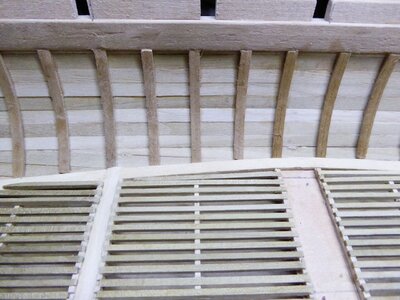
All ribs completed
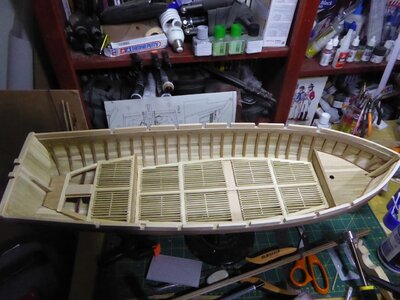
Next the seat supports were added. These were also 4 x 2 walnut and did not need soaking, they just shaped then selves into position with some assistance. space from upper inner railing to supports was the thickness of the seat wood.
Finally a second seat support was added below the first which terminated several ribs short to each side.
The interior of the hull is now complete from a core standpoint. Next we move on to all the boat furniture.
Anyway the ribs consist of 2 x 4 walnut which is very easy to ( shape - not bend!) when wet with a plank shaper (bender).
First up I marked the position of the ribs which is after the first one from the stern are 20mm center to center to the bow

The ribs then fell on to this machine and shaped themselves to the hull!


All ribs completed

Next the seat supports were added. These were also 4 x 2 walnut and did not need soaking, they just shaped then selves into position with some assistance. space from upper inner railing to supports was the thickness of the seat wood.

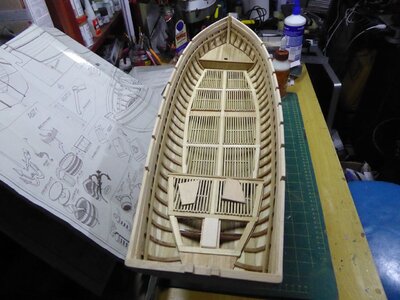
Finally a second seat support was added below the first which terminated several ribs short to each side.

The interior of the hull is now complete from a core standpoint. Next we move on to all the boat furniture.

Last edited:
Paul how are you planning to finish the model, paint, stain, clear Finnish. My hull is almost finished the second layer planking. I plan on painting and think I will do the hull inside and out before I put any of the core hull pieces in. What are your plans
Hi
I dont; know internally at this stage. I iwll see how it looks with the seating (Very dark wood). There is no consistancy on wood colour for the parts, so it could look crap or good with all the differing wood. I'll wait and see. There are so many small parts to add and if I want to glue them in place I cant seal / paint yet. Will wait now till all the bits are done. As for the outside that will be done just before final fitout internally. as there is parts to be cut out and added for the rudder assembly. At min it will be a white/ filler primer up to the rubbing strake.
Long way to go yet.
As to color scheme internally, that's a guess (Probably yellow occre / black..) To be honest have not thought about it yet.
Tks
Good points thanks
Happy belated Xmas & new year from down under.
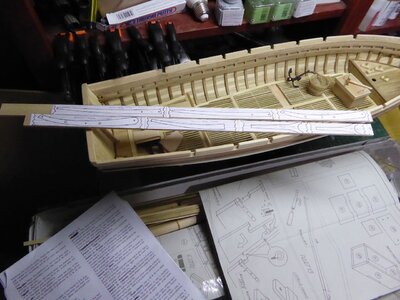
I have now completed all the individual parts ( minus oars & masts). The items all have to be completed form either wood strips or in the case of the rudder cut & filed to shape from a generic ply piece. The wood strips were phtotcopied plans white glued to strips ( The paper washes off in water after cutting & drilling where needed.0
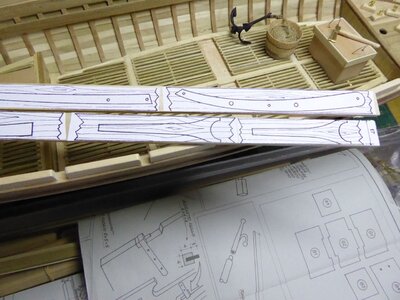
I completed each of the parts in random order ( personal preference / time needed to do). The only items that need to be done out of numeric order( but together) are the rudder & Hull modifications. ( there is another dependant on display status - will get to later).
None of the parts were difficult to assemble and the plans clearly show how they go together. ( The only hard part was identifying the wood used ( Not in english) , and some of the smaller brass pins.
The rudder consists of 9 parts (Rudder Template(ply), 2 brass pins, 2 brass eyelets, 4 x 4 & 5 x 5 wood blocks ( precut in bag), copper bands and ship hull .
The rudder needs to be shaped ( u bend) & pin placing cut out. The same cutout also needs to be done on hull . To position these correctly, lay the rudder on the 1:1 plan on plan sheet 2 & mark both positions on the rudder. The lower can then be transferred to the hull & cut. ( this is after you have nicely glued capping & veneer on to hull in previous instructions! All screw hoops / eyelets provided are NOT screw based in my kit but just normal kit brass eyelets( drill & glue)
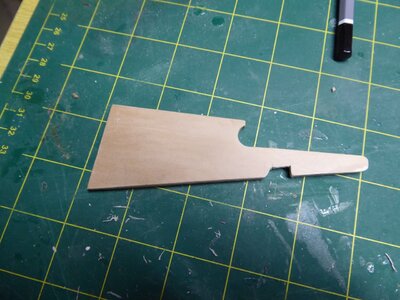
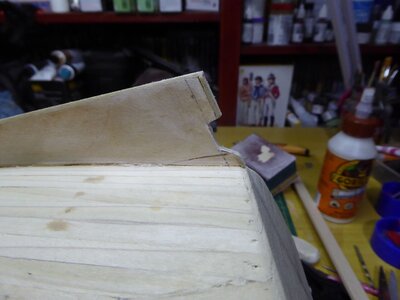
The furniture & other items do not all have to be done, It will be dependent on how you want to display the kit. Ie Oars no sail, oars & sail furled & masts laying on supports internally or Sail/Mast up, no oars. I've still not decided on the layout. As all those options including tiller are pinned & removeable it does not matter when you do them.
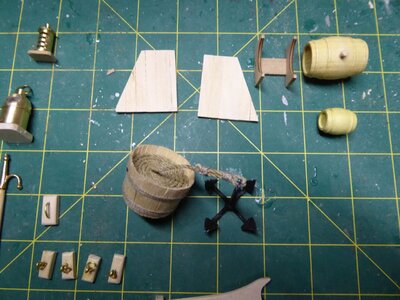
The ones I have completed ( Raw) are shown below. These are the Capstan ( cardved from one 10x10 Walnut strip), 4 Capstan handles ( ends yet to be shaped smooth, Axe ( brass head, handle shaped from 4mm dowel, polearm ( brass head pole from 4mm dowel). Chest/ lid & rope coil( not 14 coils of rope as per instrructions , but one cole with 14 winds) and rucksack.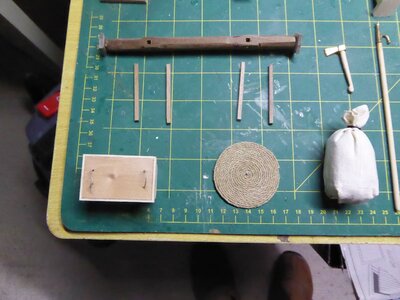
Brass lantern & brass compass on wood base. Floor access panels, Water barrel ( cork from 4mm dowel), Barrel stand , Launch & rope bucket, Rum Barrel internal ring & hook assemblies. ( Barrel rings to be painted & cork to be topped with blue
Rudder( With pin block & eyelet installed, Tiller & Ships anchor Davit assembly( Pins to be cut after final fitting to hull).
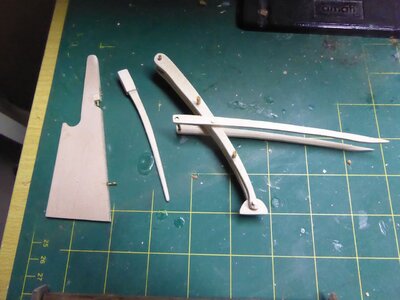
Last be not least the rope buckets & laying mast supports. The Rope bucket was fiddly but I used glued 6 staves per break instead of 3 per break as suggested. With 6 the break was a 'V' shape the width one stave at the top. In this way final staves were just staves cut diagonally such that one stave fitted 2 breaks and in the final completetion it was not obvious due due the external lashing. Internal ropes were all glued & soaked with 50/50 white PVA / Water. This dried clear and matt.
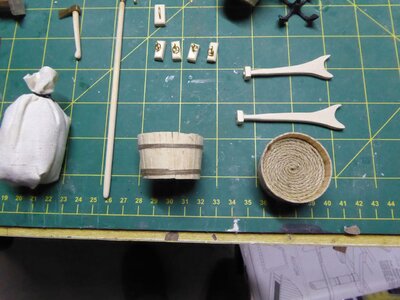
None of the fittings were overly difficult and can be done with no power tools ( except I cheated with scroll saw for plan cutouts).
Next will come the the fitting of seats and attachment of mast supports, Capstan and Ship anchor management ropes ( holes to be drilled into bottom of hull for same. ( Longboats were also used to lift / place ships anchors if needed). The hull will definitely need to be painted externally prior to rope fitting.
See you in the next installment.
I have now completed all the individual parts ( minus oars & masts). The items all have to be completed form either wood strips or in the case of the rudder cut & filed to shape from a generic ply piece. The wood strips were phtotcopied plans white glued to strips ( The paper washes off in water after cutting & drilling where needed.0


I completed each of the parts in random order ( personal preference / time needed to do). The only items that need to be done out of numeric order( but together) are the rudder & Hull modifications. ( there is another dependant on display status - will get to later).
None of the parts were difficult to assemble and the plans clearly show how they go together. ( The only hard part was identifying the wood used ( Not in english) , and some of the smaller brass pins.
The rudder consists of 9 parts (Rudder Template(ply), 2 brass pins, 2 brass eyelets, 4 x 4 & 5 x 5 wood blocks ( precut in bag), copper bands and ship hull .
The rudder needs to be shaped ( u bend) & pin placing cut out. The same cutout also needs to be done on hull . To position these correctly, lay the rudder on the 1:1 plan on plan sheet 2 & mark both positions on the rudder. The lower can then be transferred to the hull & cut. ( this is after you have nicely glued capping & veneer on to hull in previous instructions! All screw hoops / eyelets provided are NOT screw based in my kit but just normal kit brass eyelets( drill & glue)


The furniture & other items do not all have to be done, It will be dependent on how you want to display the kit. Ie Oars no sail, oars & sail furled & masts laying on supports internally or Sail/Mast up, no oars. I've still not decided on the layout. As all those options including tiller are pinned & removeable it does not matter when you do them.
The ones I have completed ( Raw) are shown below. These are the Capstan ( cardved from one 10x10 Walnut strip), 4 Capstan handles ( ends yet to be shaped smooth, Axe ( brass head, handle shaped from 4mm dowel, polearm ( brass head pole from 4mm dowel). Chest/ lid & rope coil( not 14 coils of rope as per instrructions , but one cole with 14 winds) and rucksack.

Brass lantern & brass compass on wood base. Floor access panels, Water barrel ( cork from 4mm dowel), Barrel stand , Launch
 & rope bucket, Rum Barrel internal ring & hook assemblies. ( Barrel rings to be painted & cork to be topped with blue
Rudder( With pin block & eyelet installed, Tiller & Ships anchor Davit assembly( Pins to be cut after final fitting to hull).

Last be not least the rope buckets & laying mast supports. The Rope bucket was fiddly but I used glued 6 staves per break instead of 3 per break as suggested. With 6 the break was a 'V' shape the width one stave at the top. In this way final staves were just staves cut diagonally such that one stave fitted 2 breaks and in the final completetion it was not obvious due due the external lashing. Internal ropes were all glued & soaked with 50/50 white PVA / Water. This dried clear and matt.

None of the fittings were overly difficult and can be done with no power tools ( except I cheated with scroll saw for plan cutouts).
Next will come the the fitting of seats and attachment of mast supports, Capstan and Ship anchor management ropes ( holes to be drilled into bottom of hull for same. ( Longboats were also used to lift / place ships anchors if needed). The hull will definitely need to be painted externally prior to rope fitting.
See you in the next installment.
Paul nice work, looking great. Just finished my second layer of planking
Well its been hot down under for the past 2 weeks, summer has really kicked in and model building has slowed due to the 30deg celcius plus days. Typical Aus Open weather!
In any case we are done!.
Her are the final steps.
The davit has been assembled as per the plan ( Looks complex but was reletively simple to install.)
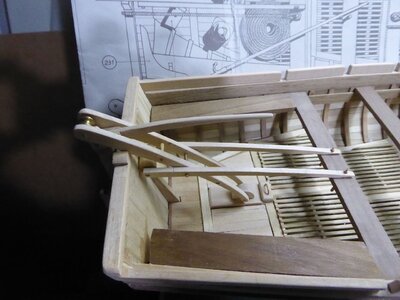
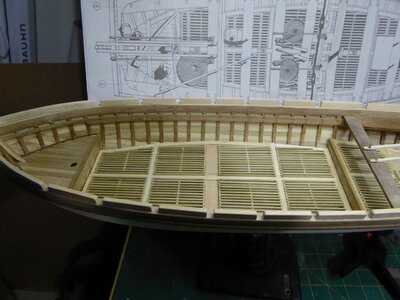
This required the rear seating to be installed as well as the final bench. The while asseble ws then pinned onto the rear support, floor support & last bench with the brass supplied ( there are long and short pins. The pins were then hammered on one end to make a flat stop.
The rest of the benched were then cit and laid in place as per the plan. These were not glued yet as there are modifications to be made for the DAVIT & Central Windlass
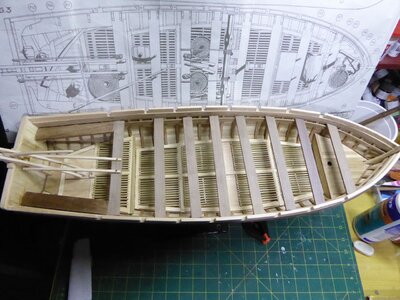
The benches were then removed, and the hull flipped for painting prior to the anchor rope / windlass holes & run to be fitted.
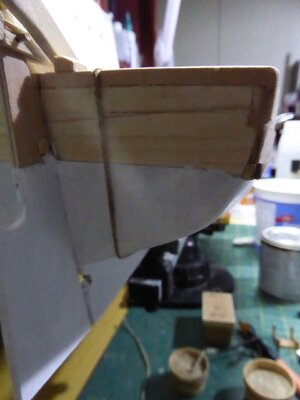
The hull was give 2 coats of Tamiya primer and 4 coats of Acrylic flat white.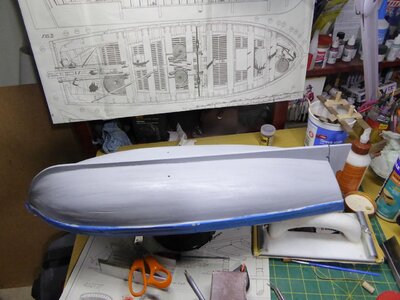
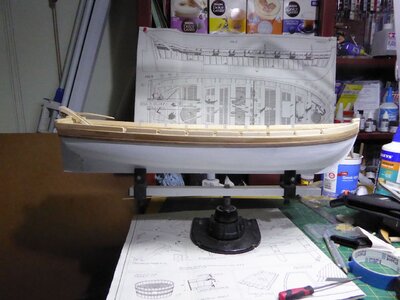
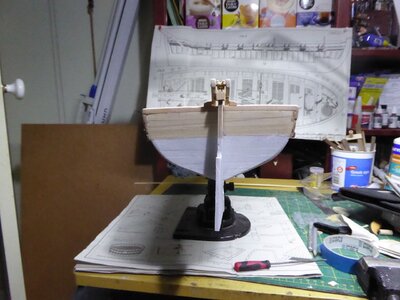
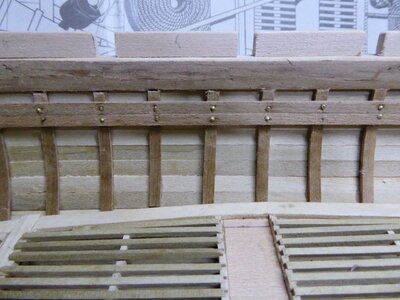
Next the side railing & bench supports were nailed
In any case we are done!.
Her are the final steps.
The
 davit has been assembled as per the plan ( Looks complex but was reletively simple to install.)
This required the rear seating to be installed as well as the final bench. The while asseble ws then pinned onto the rear support, floor support & last bench with the brass supplied ( there are long and short pins. The pins were then hammered on one end to make a flat stop.
The rest of the benched were then cit and laid in place as per the plan. These were not glued yet as there are modifications to be made for the DAVIT & Central Windlass

The benches were then removed, and the hull flipped for painting prior to the anchor rope / windlass holes & run to be fitted.
The hull was give 2 coats of Tamiya primer and 4 coats of Acrylic flat white.


Next the side railing & bench supports were nailed


Next the Middel banching and Windlass were added. The Middle benching consists of two benches joined by cross supports. These supports are mounted below the benches and consistof rope tunnels for the ship anchor management. To fit these a lower base is fitted to the hull, Rope holes are then drilled through these and the hull. Next two upright tubes are added to the cross supports and the Achor rope is passed through the hull and again through the piping & bench supports. This is done all prior to fitting & gluing the bench assembly.
Next the Other end of the rope is pulled along under the hull and up either side of the rear davit ,looped and tied off on the rear bench belaying pins.
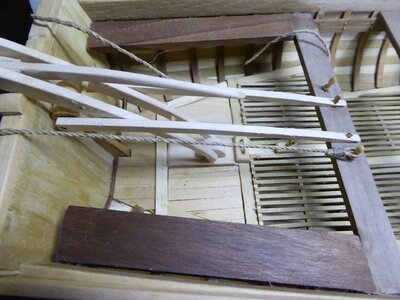
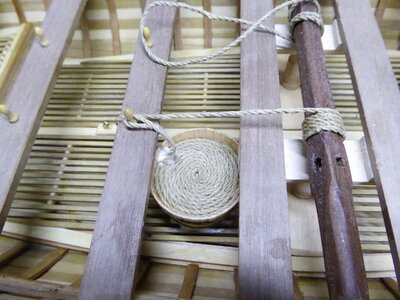
Finally the windlass is added and the anchor rope pulled back tight, looped around the windlass and tied off on the middle bench belaying pins.( leave some dangling under the bench
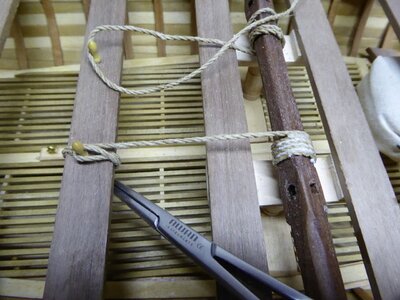
Lastly the midddle two rope buckets are glued in place and the dangling rope gets PVA'd to the rope in the buckets. This gives the impression of the rope cumming out of the buckets
The next assembly is the bow bench & mast assembly
The mast hole need to be cleaned out ( there is a false bulkhead under it which has to be cut way to allow the mast to sit. The mast base is then added. I then marked up the bow bench mast cutout and added the brass support strapping.
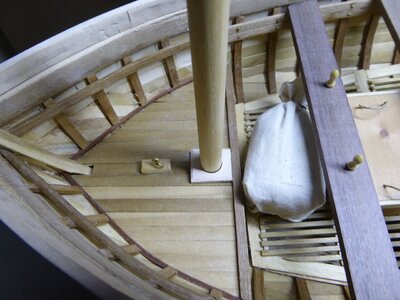
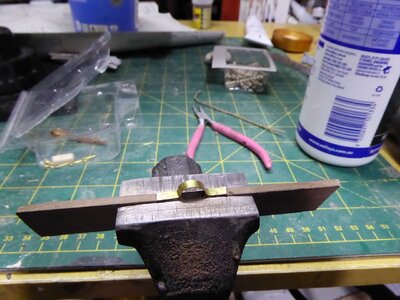
The mast, Yard and sail where then completed as per the plan. As the sloop can be displayed is several ways, I Assembled the mast, attached the sail & rigging lines and then folded away to be added as a stowed item.
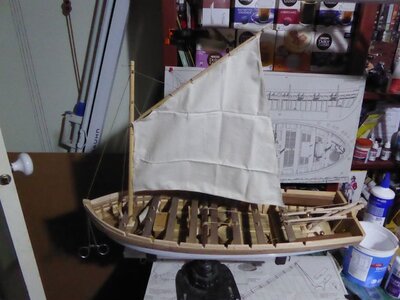
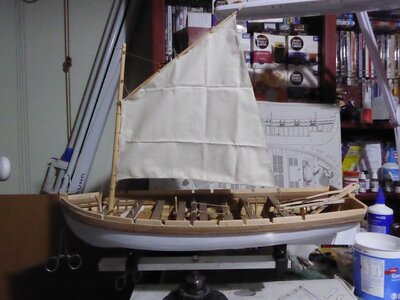
The final benches where then glued into place, the bench top supports cut and added ( Be warned the wood supplied is very brittle and breask easily when shaping. To assist I placed 6 supports in a vice and used the dremel to shape them. This way the 6 parts supported each other whist cutting).
Final all the firnature was added and glue din place.
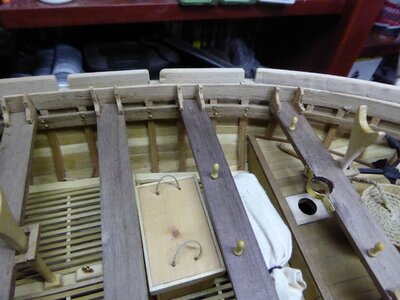
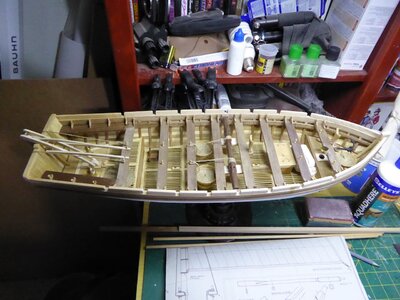
Next the Other end of the
 rope is pulled along under the hull and up either side of the rear davit ,looped and tied off on the rear bench belaying pins.

Finally the windlass is added and the anchor rope pulled back tight, looped around the windlass and tied off on the middle bench belaying pins.( leave some dangling under the bench

Lastly the midddle two rope buckets are glued in place and the dangling rope gets PVA'd to the rope in the buckets. This gives the impression of the rope cumming out of the buckets

The next assembly is the bow bench & mast assembly
The mast hole need to be cleaned out ( there is a false bulkhead under it which has to be cut way to allow the mast to sit. The mast base is then added. I then marked up the bow bench mast cutout and added the brass support strapping.


The mast, Yard and sail where then completed as per the plan. As the sloop can be displayed is several ways, I Assembled the mast, attached the sail & rigging lines and then folded away to be added as a stowed item.


The final benches where then glued into place, the bench top supports cut and added ( Be warned the wood supplied is very brittle and breask easily when shaping. To assist I placed 6 supports in a vice and used the dremel to shape them. This way the 6 parts supported each other whist cutting).
Final all the firnature was added and glue din place.


