• LUCZORAMA SHIPWRECK SCAVENGER HUNT GIVEAWAY. 4 Weeks of Fun • 1 Legendary Prize ((OcCre’s Fram Ship)) • Global Crew Welcome!
    **VIEW THREAD HERE**

Panart/Mantua 1/84 Amerigo Vespucci Build – RC Enabled

Joined
Mar 31, 2025
Messages
14
Points
48

And so it begins…

With what I expect to be a 2-year project, this Amerigo Vespucci build will deviate from what would have been a gorgeous static model, to hopefully a fully functional RC ship that remains true to its design. As there are so many threads that do a super job of detailing the AV build, I’ll focus primarily on my efforts to fabricate an RC version of this marvelous ship.

To that end, there are numerous new challenges that will need to be addressed….namely:

The balance between scale accuracy and the allowances required to account for RC functions, including:
  • Propulsion
  • Steering
  • Sail control
  • Maintenance access
  • Battery access
  • Ballast
  • Transportation (to the pond)

Then there’s the hull construction itself. The materials provided with the kit are not entirely suitable for a wet environment. So alternate materials and/or water-proofing will be an area of focus.

My intention is to proceed in three stages. The first will be to complete the hull with a functional propulsion system. Once waterproofing has been established, the appropriate motor, prop, steering gear, and ballast have been selected, I’ll focus on sail control.

Sail control presents major challenges. First, I need to learn how these ships sailed the seven seas . Do I need all sails to be functional? How much control do I really need? Do I need to automate the furling and unfurling functions? So much to consider.

Lastly, I’ll focus on scale details. I’m thinking of cladding the hull in copper to accurately reflect the actual ship. Not sure I can accomplish this detail yet still have a seaworthy hull.

I’m sure more challenges will pop up during the build…. So buckle up and stay tuned.

(I hope to update progress weekly)
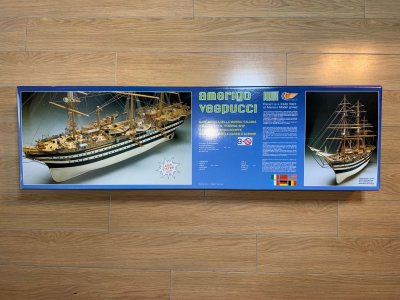
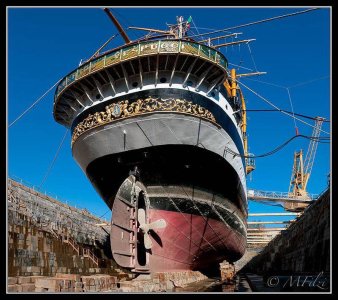
Vespucci.jpeg
 
Stage 1 – Propulsion


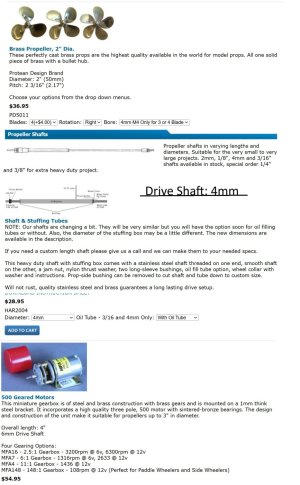
Before I even glue the first bulkhead into place, I need to determine the power I need to propel this ship on its propellor. Specifically, the prop diameter, drive shaft/stuffing tube size, motor size/power.

My research shows that the AV is fitted with a 3.4Meter Prop (Turning CW) that takes the ship to 10knots (18.5 km/h).

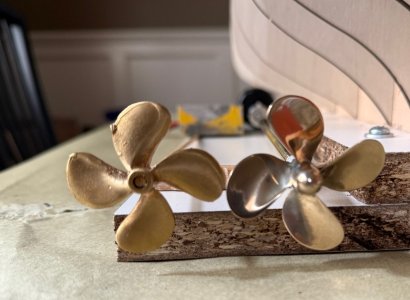
At 1/84 scale, that equates to 40.47mm. However, Panart shipped the kit with a rather nice 45mm prop. Why? Perhaps for cosmetics, or perhaps availability. In any case, to move this model with authority, especially in adverse conditions, I plan to upscale the prop to 50mm dia. The ship has sufficient draft that a 50mm prop remains fully submerged.

For displacement vessels hull speed equals 1.34 x square root of waterline length in feet, yielding speed in knots.

Based on the above, the AV theoretical hull speed is 20knots. At scale, the model has a hull speed of 2.21knots. (4Km/hr, or 2.48mph)…. A comfortable walking speed).

Typical max prop RPM for a ship of this type is 2000RPM. The following power system should yield the performance I’m looking for:

Prop: 50mm
Target RPM: 2000RPM at 12VDC
Battery: 3S-7000mah x 2 (wired in parallel)
Prop shaft: 4mm (limited by keel thickness of 6mm)
Stuffing tube: 7.8mm
Motor: 500 Size, MFA7 - 6:1 Gearbox – 2633RPM @ 12v (Can spin up to a 3inch prop)
Overall length: 4", 6mm Output Shaft
Speed Controller: Lipo to brushed motor – 60AMP

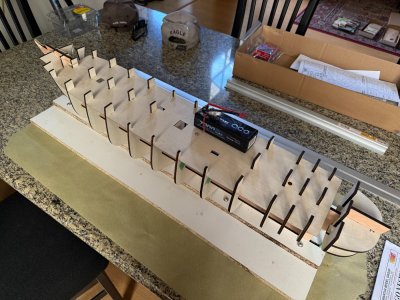
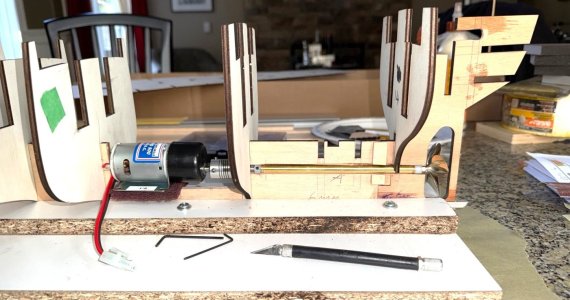
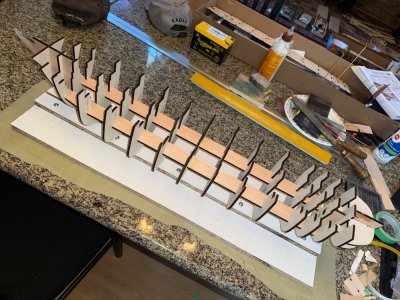
I plan to locate the motor, batteries and speed controller mid-ships at the 8-9-10 bulkhead locations. These bulkheads will need to be removed once planking is complete (tricky).

In addition, the keel will need to be modified to accommodate the motor mount, drive shaft and stuffing tube.

Before I start cutting, I need to place the order for the prop, motor and drive shaft.

Mockup.jpegStay tuned.
 
Last edited:
I am curious. With the cost of the model kit and electronics what is that ship going to cost you?
 
I am curious. With the cost of the model kit and electronics what is that ship going to cost you?

I estimate that the conversion will cost me an additional $500USD above the cost of the basic kit.

I realize some savings as I already have most of the radio gear.

If an individual had to purchase a programmable radio and associated electronics, I can see additional costs approaching $1000USD (plus the cost of the kit).
 
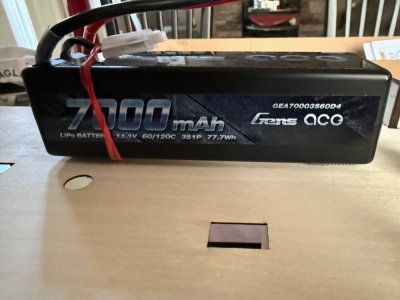
I'll be using two of these Lipo battery to run the prop. 14,000mAh of power (@12VDC) should provide hours of cruising.

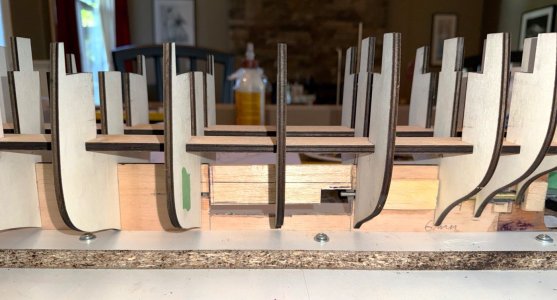
The main deck will need to be modified to facilitate access to the batteries and power system that will be located center ship, just aft of the mid-ship mast.

The two bulkheads (green tape), will be removed post-planking to accommodate the power system.

AV Battery1.jpegAV battery2.jpeg
 
This is an awesome project with many technical issues to overcome. The primary one that springs to mind is do you plan on fitting a removable fin with ballast bulb? As we know, water and wind do not scale so something is needed to prevent the model heeling over.
 
How will you get to the batteries with the masts and rigging in the way?

Fortunately, mid-ship (aft of the mid-mast) is free of rigging. Only a small structure in the area which I can mount with magnets if necessary. I will cut a removable section in the deck for access to the engine/battery room.

Mid Ships.jpeg
 
Last edited:
This is an awesome project with many technical issues to overcome. The primary one that springs to mind is do you plan on fitting a removable fin with ballast bulb? As we know, water and wind do not scale so something is needed to prevent the model heeling over.

I'm hoping I wont need to mount a removable fin/bulb.

My early rough calcs suggests that internal ballast should be satisfactory to right the ship.

The Vespucci has a displacement weight of 4,156t.

If the Panart model is scaled accurately, then the model displacement works out to:

(1/84)³ = .000001687

.000001687 x 4,156t = 14.023 lbs

Failing that, I have a spare bulb I cast from my IOM builds at the ready (as a last resort).

Bulb.jpeg
 
Last edited:
Stage 1 – Propulsion
Let me jump in here and help you 'overthink' things for a moment... :)

I'm wondering if the math, as you've worked it out, will actually be valid, in practice, with such a small scale, light weight model as this. The first argument that comes to mind involves drag and friction coefficients of a very large hull (the full-sized vessel) vs that of a very small hull (your model) both moving at significantly different speeds through a medium (water) that is of a standard density and doesn't care what size of a hull is trying to plow through it. The water density is a constant. The different hull sizes, full scale vs model, speeds, etc. are all huge variables. I'm thinking that if you simply 'scale' the propulsion requirements down to match the scale size of your model... you might be considerably 'over-powered'! Not that 'that's' a bad thing. It's always easier to throttle back than it is to find 'more' power if needed!

"I'll now return you to your regularly scheduled posting!"... Beer

I know for a fact I'll be over-powered... likely by a factor of 50%.....:cool:

Fortunately my radio is programmable and I can customize a throttle curve to produce scale-like acceleration and cruise speed.
 
Rudder

While I patiently await delivery of the powertrain components, it’s now a good time to focus on the rudder.

The plywood rudder supplied with the kit is inappropriate for use in wet environment. In addition, although it may be scale accurate, it lacks sufficient area to provide steerage with any authority.

I elected to fabricate a replacement brass rudder approximately 25% larger than the item supplied with the kit.

For this build, I used .064” (1.625mm) brass plate soldered to a 3mm brass rudder shaft.

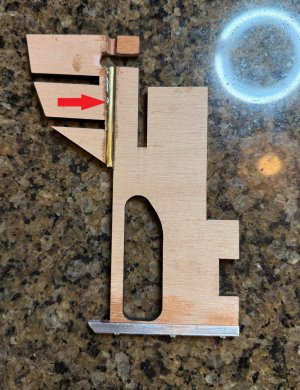
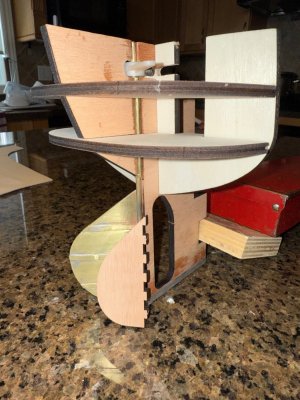
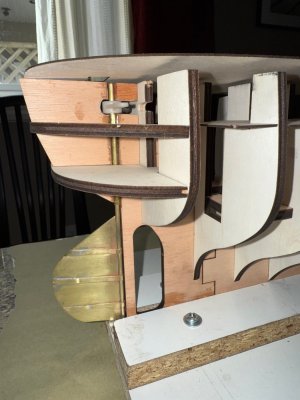
To make it functional, a channel was machined into the aft keel where a brass shaft guide was fixed. Provisions for the tiller was situated just below the aft upper deck where the control-servo will be positioned.

The bottom of the keel was trimmed to accommodate a removable rudder bottom pivot plate.

Three stiffeners were soldered into place to replicate the OEM rudder.

Later in the build, suitable access hatches will be needed in the aft upped-deck to access both the tiller and servo areas.

Rud1.jpgRud2.jpegRud4.jpegRud5.jpegRud6.jpg
 
Last edited:
Back
Top