partly open main deck AL Bounty Build

Joined
Aug 8, 2020
Messages
135
Points
88

Location
Casco WI USA
I bought an AL Bounty 1:48 model that was on sale due to torn cover for $300 on Ebay credit who had a deal of no paying full until 6 months. So I was able to get the model and start building it. It was designed with a partially open main deck that allows people to see state rooms and the hold. I wanted to open up one side of the boat and show the lower decks but I found that that idea was faulty because It would need me to rebuild the hull and frames from scratch. So I gave up on that idea and am going to build it as was designed.
I can not find my camera so until I do that there are no pics. And that is good because I only want comments that are meaningful instead of a bunch of meaning congratulations and posting inflation for stripes.

I bought a tube of Testors "Cement for wood models" and tried to use it but it clogs at the nozzle and creates balls of goo that can not be used wasting more than I am able to use. Total waste of money.

Gorilla wood glue works fine just have to hold it a little while.

All the frames came out with a lot of Exacto knife work and were filed to fit on the keel board. For the most part they all where a tight fit and had no slop in the fitting. I give AL a A for their cutting.

Glued the frames in with a fillet of Gorilla on all sides and set the main hold floor. The hull form was checked and there is some wiggle but
 
That is a nice kit... I have the same one. You got a great deal for $300.

Try Weldbond glue. It is a PVA that can be dissolved with rubbing alcohol in case you make a mistake. A real life saver. You can get it almost anywhere. You can also use nearly any type of Gel Super Glue (CA). Forget the old school Testors...

Good luck!!!
 
ok next installment of the log
They (Al) has lateral frame supports that are placed in the boat at the 7th step---It would be alot better to put them in along with glueing the frames on the keel because they help register the frames that way. Something to be aware of for other kit builders.

After observing the hull profile I found some discrepancy in the fair cutting of frames 5,7,9. They all are out of fair and will have to be shimmed above the water mark with the top maybe 1-1.5mm out of fair. Frame 8 needs shimming on the bottom of the frame. The tail frame was way out of square and had to be ground out and removed. Will work on the stern later.

The bow supports did not fit well and so I decided to free the two stem pieces from the walnut cutting to see how everything is going to fix but am having a hard time separating the pieces. 5mm of walnut is tough to cut with exacto knife and I wanted to save the surround so am having a hard time cutting them out.
 
Still have not found my camera but have problems with the boat station registration for fairing the ship. I cut some add on strips to pad the low areas on the frame members but I want to find my camera before I do anything else. That way I can show how I fix miss aligned or poor cut station bulkheads. One of these days I will find my camera and get back to work.
 
I bought an AL Bounty 1:48 model that was on sale due to torn cover for $300 on Ebay credit who had a deal of no paying full until 6 months. So I was able to get the model and start building it. It was designed with a partially open main deck that allows people to see state rooms and the hold. I wanted to open up one side of the boat and show the lower decks but I found that that idea was faulty because It would need me to rebuild the hull and frames from scratch. So I gave up on that idea and am going to build it as was designed.
I can not find my camera so until I do that there are no pics. And that is good because I only want comments that are meaningful instead of a bunch of meaning congratulations and posting inflation for stripes.

I bought a tube of Testors "Cement for wood models" and tried to use it but it clogs at the nozzle and creates balls of goo that can not be used wasting more than I am able to use. Total waste of money.

Gorilla wood glue works fine just have to hold it a little while.

All the frames came out with a lot of Exacto knife work and were filed to fit on the keel board. For the most part they all where a tight fit and had no slop in the fitting. I give AL a A for their cutting.

Glued the frames in with a fillet of Gorilla on all sides and set the main hold floor. The hull form was checked and there is some wiggle but
Hallo @Balac
we wish you all the BEST and a HAPPY BIRTHDAY
Birthday-Cake
 
Hello Balac

If it is the single planked hull with walnut planking then I think we are building the same kit at the moment
I have started a build log of it as I have not seen any other logs of it on any forum.
By all means have a look at it and I will be following yours with interest as well
 
I bought an AL Bounty 1:48 model that was on sale due to torn cover for $300 on Ebay credit who had a deal of no paying full until 6 months. So I was able to get the model and start building it. It was designed with a partially open main deck that allows people to see state rooms and the hold. I wanted to open up one side of the boat and show the lower decks but I found that that idea was faulty because It would need me to rebuild the hull and frames from scratch. So I gave up on that idea and am going to build it as was designed.
I can not find my camera so until I do that there are no pics. And that is good because I only want comments that are meaningful instead of a bunch of meaning congratulations and posting inflation for stripes.

I bought a tube of Testors "Cement for wood models" and tried to use it but it clogs at the nozzle and creates balls of goo that can not be used wasting more than I am able to use. Total waste of money.

Gorilla wood glue works fine just have to hold it a little while.

All the frames came out with a lot of Exacto knife work and were filed to fit on the keel board. For the most part they all where a tight fit and had no slop in the fitting. I give AL a A for their cutting.

Glued the frames in with a fillet of Gorilla on all sides and set the main hold floor. The hull form was checked and there is some wiggle but
Hallo @Balac
we wish you all the BEST and a HAPPY BIRTHDAY
Birthday-Cake
 
Hello Balach
The Lateral sections leave a bit to be desired but I fitted them and then sanded them back till they fitted the hull profile.
Be careful when doing the top section that is self supporting as it springs out and does not follow the hull profile. The first layer of walnut fitted OK and the next with the sapella but when removed the clamps it sprung out
I use a quick drying PVA glue on my boats and it has not sprung yet and I have one at home over 30 years old.
Check the angle of the transom section of the hull as when you start the top section of the hull you have to place 2 knees there in the angle. It also affects the cabin walls.
I have found a investment in a good wood cutter makes life a lot easier when doing these boats
 
Thanks for your up date Robert---and by the way I am Balac, no h. My ribs did not line up and I need to pad some of them and sand them but My glues have all gone bad so need some new ones. I have not used them for a long time. and my transom was so badly set I had to cut it out with a drumel and have not put it back yet, So I have not yet strated the deck---your get way head of me. been working on other projects.
 
Sorry about the typo

The angle of the back section is important I dry fit them and put the other pieces as I can to see they all fit well.
The back window section was very fragile and did not hold well when they were veneered with the timbers, so I removed the thin sections for the frames and will be putting in some timber later when I fit the windows. The bow section is a little tricky and I filled it with balsa so was easier to plank I also filled the bottom sections which helped holding the planking. The top section I glued each timber side only on the bottom and clamped it to the frames and pressed onto the lower timbers I left for a day and then did the next on and so on. You will find that the back section will be proud and will have to be shaped down to the hull so as to fit the back knees. check the pictures and you will see it. I have also lowered the cabin walls so the deck top actually fits flush with the top of the planking as per the pictures not the plan and it would look out of place a yellow section showing on the hull. Look at the drawing on my log from the plan and you will see it shows the deck actually over the top of the hull.
My planking is fine ,not perfect,as I will be coppering the hull so that will hide the imperfections.
As I said get a good set of cutters as it will make life easier to this boat as there are a lot of cutting on the cabin areas and a good sharp set will cut the older timber without splintering it. To bend the timbers I used a heated plank bender and water and that made it easier with the older walnut planks you can do the same with an old iron and water but just need to be careful.
 
We must have similar versions... except my version has the open side.
Pictures would help... Hopefully, you can get the camera working soon!
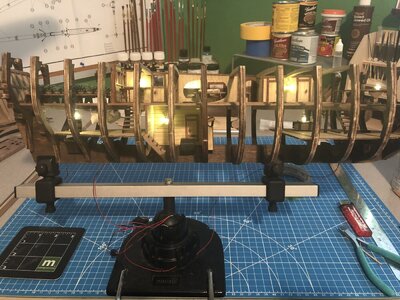
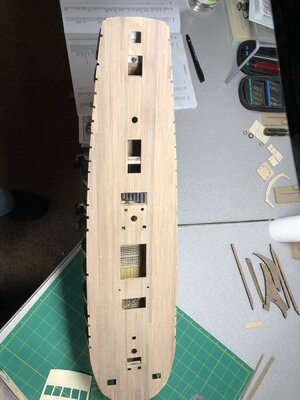
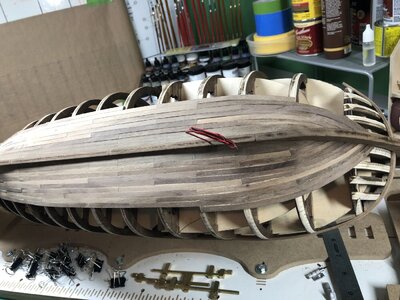
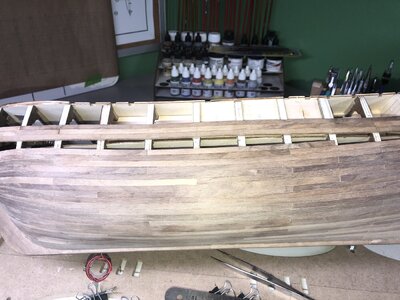
I've attached a couple from my current build.IMG_4537.JPEGIMG_4749.JPEGIMG_4984.JPEGIMG_5330.JPEG
 
Back
Top