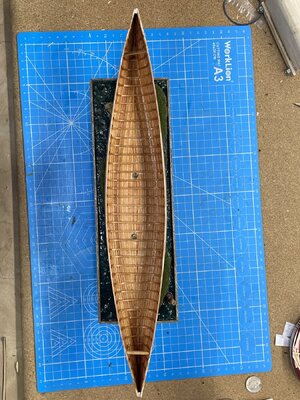
I din't know Windex was a solution. Can itI saw your problem with the planks rising off the forms . I fixed this building the whitehall boat. It is nerve wracking. I put tourniquets around the hull. Tightened them somewhat. Spray with windex tighten more. Repeat over and over. It’s amazing the stress it took
You are using an out of date browser. It may not display this or other websites correctly.
You should upgrade or use an alternative browser.
You should upgrade or use an alternative browser.
Windex? I didn't know it could be used to bend(?) planks.. Do you use it as well as steam or hot water for bending?
No, just windex, I think the ammonia in it helpsWindex? I didn't know it could be used to bend(?) planks.. Do you use it as well as steam or hot water for bending?
I haven’t made a lot of progress, but if I don’t keep the log up to date I’m likely to forget it
The ends of the canoe curve up. 3 small wedges are to be glue on and beveled to the stems. I decided to just glue 3 planks together. I found the curve by just moving the french curve around on the plan til I found it. Then I marked the french curve at both ends. Traced the line and cut it with my knife.
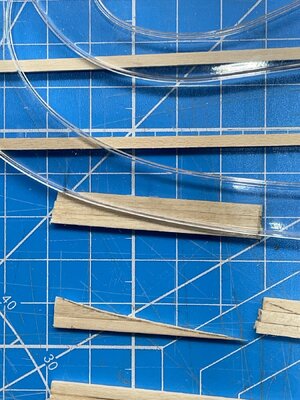
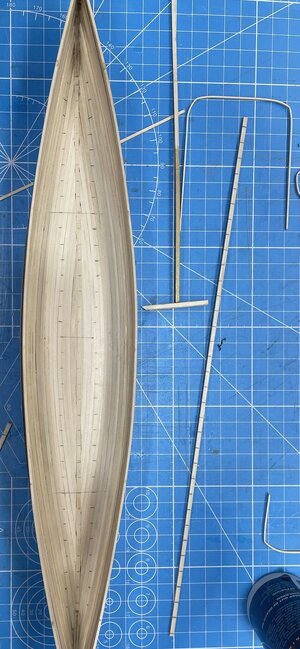
I haven’t glued this on but I did check that they fit. I sanded both inside and out of the hull. To keep the ribs spaced and as straight as possible I transferred from the plan a template on a leftover plank and marked the bottom on the hull. I made a spacer and covered it with packing tape. I usually make these kind of thing during the thinking time and not to doing time Most of time they are of little use and pile up on my work area.
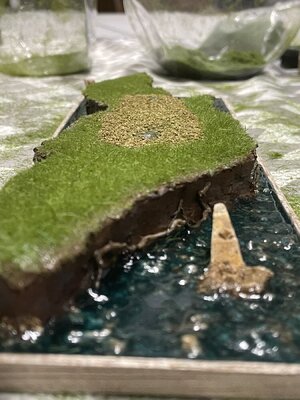
I’m planning on hiding two small magnets under the floor boards, hoping they will be strong enough just to hold the canoe kinda secure on the homemade base. I’m not sure everything is being done in the right order on this base. After a coat of paint I covered the stream bed with sand from the wet weather creek at the bottom of my drive. Then glued a few roots on the side and poured realistic water on it. That stuff is pretty messy. I think it’s still shrinking down between the sand.
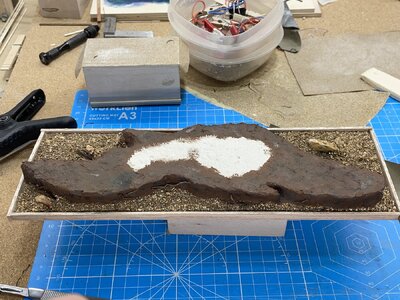
The unpainted spot is where I’ll put two more magnets to hold the canoe.
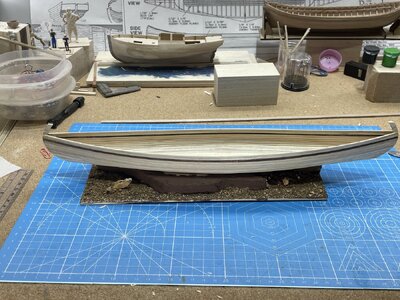
The ends of the canoe curve up. 3 small wedges are to be glue on and beveled to the stems. I decided to just glue 3 planks together. I found the curve by just moving the french curve around on the plan til I found it. Then I marked the french curve at both ends. Traced the line and cut it with my knife.

I haven’t glued this on but I did check that they fit. I sanded both inside and out of the hull. To keep the ribs spaced and as straight as possible I transferred from the plan a template on a leftover plank and marked the bottom on the hull. I made a spacer and covered it with packing tape. I usually make these kind of thing during the thinking time and not to doing time

I’m planning on hiding two small magnets under the floor boards, hoping they will be strong enough just to hold the canoe kinda secure on the homemade base. I’m not sure everything is being done in the right order on this base. After a coat of paint I covered the stream bed with sand from the wet weather creek at the bottom of my drive. Then glued a few roots on the side and poured realistic water on it. That stuff is pretty messy. I think it’s still shrinking down between the sand.

The unpainted spot is where I’ll put two more magnets to hold the canoe.

Last edited:
This is where I’m at on the canoe.
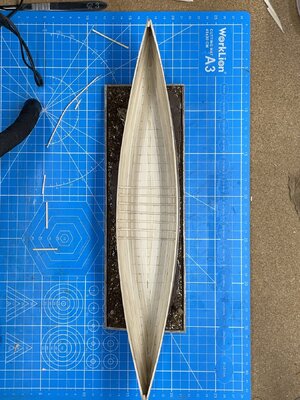
After I’m finished with the rib supports, I’m thinking I will need to finish the inside of the hull. The floor boards and thwarts are cherry and both decks will make it hard to get under them.
I’ve done a few test on scrap wood with products I had on hand. I would like the finish to be reddish, kinda like cedar. The first I tried, knowing it wasn’t going to work was a rusty walnut gun stock stain. Because I used CA I’m probably going to use something that covers and transparent, like shellac. Here’s the sample with stain.

If the CA isn’t sanded off, the stain wouldn’t take. I have amber shellac, but I’m not liking the yellow tone.

I’m looking at trying a dark garnet shellac. Any ideals or experiences you’ve had will be helpful and appreciated Now a little on the base. I used the water stuff you just pour on. I did two applications of clear, I had that on hand.
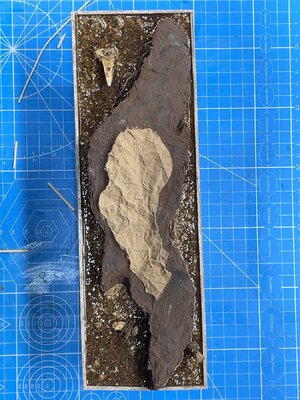
I went yesterday to a local craft store and saw a small bottle of blue water. There was still enough room for one more pour, so I did.
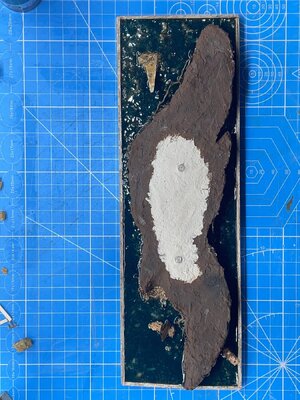
Not really liking the illusion of super deep water when it’s only supposed to be only inches deep:-/ But I did learn just gotta live with it. I cut around a knot hole in one corner. I’m going to extend it out to be a small tree.( maybe that will take my attention away from that deep water)
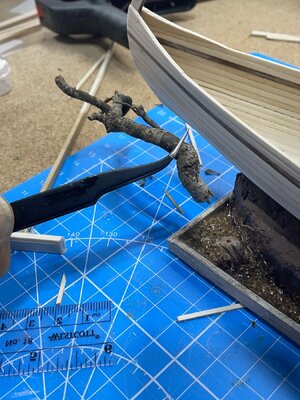
I’m working with another piece of wood, actually it’s a dead root I got from the bank of the creek when I got the sand.
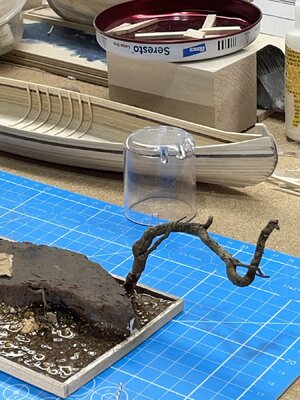

After I’m finished with the rib supports, I’m thinking I will need to finish the inside of the hull. The floor boards and thwarts are cherry and both decks will make it hard to get under them.
I’ve done a few test on scrap wood with products I had on hand. I would like the finish to be reddish, kinda like cedar. The first I tried, knowing it wasn’t going to work was a rusty walnut gun stock stain. Because I used CA I’m probably going to use something that covers and transparent, like shellac. Here’s the sample with stain.

If the CA isn’t sanded off, the stain wouldn’t take. I have amber shellac, but I’m not liking the yellow tone.

I’m looking at trying a dark garnet shellac. Any ideals or experiences you’ve had will be helpful and appreciated

I went yesterday to a local craft store and saw a small bottle of blue water. There was still enough room for one more pour, so I did.

Not really liking the illusion of super deep water when it’s only supposed to be only inches deep:-/ But I did learn

I’m working with another piece of wood, actually it’s a dead root I got from the bank of the creek when I got the sand.

Last edited:
To finish off everything I would look into the cherry or mahogany stains that minwax makes. I would also seal it with several coats of sanding sealer first if you are going to use any paint. So far your canoe looks fantastic!This is where I’m at on the canoe.
View attachment 441141
After I’m finished with the rib supports, I’m thinking I will need to finish the inside of the hull. The floor boards and thwarts are cherry and both decks will make it hard to get under them.
I’ve done a few test on scrap wood with products I had on hand. I would like the finish to be reddish, kinda like cedar. The first I tried, knowing it wasn’t going to work was a rusty walnut gun stock stain. Because I used CA I’m probably going to use something that covers and transparent, like shellac. Here’s the sample with stain.
View attachment 441135
If the CA isn’t sanded off, the stain would take. I have amber shellac, but I’m not liking the yellow tone.
View attachment 441133
I’m looking at trying a dark garnet shellac. Any ideals or experiences you’ve had will be helpful and appreciatedNow a little on the base. I used the water stuff you just pour on. I did two applications of clear, I had that on hand.
View attachment 441140
I went yesterday to a local craft store and saw a small bottle of blue water. There was still enough room for one more pour, so I did.
View attachment 441136
Not really liking the illusion of super deep water when it’s only supposed to be only inches deep:-/ But I did learnjust gotta live with it. I cut around a knot hole in one corner. I’m going to extend it out to be a small tree.( maybe that will take my attention away from that deep water)
View attachment 441137
I’m working with another piece of wood, actually it’s a dead root I got from the bank of the creek when I got the sand.
View attachment 441139
Good morning, I’m still pecking away at the remaining ribs. I’ve ordered ruby shellac flakes , hoping it’s a similar color to cedar.
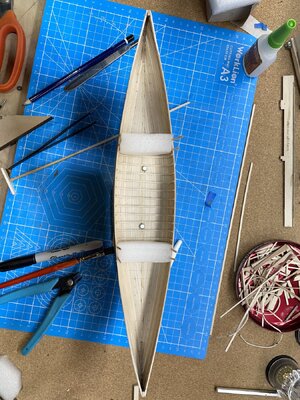
The shot above is where I have soaked the ribs and placed where they go so they can dry before I glue them down,
I’ve added both sets of magnets, they seem to be doing their job , as long as I don’t add to much stuff under the canoe. I’m trying my hand at static grass. And I’m just about use to the random static shock I get occasionally for some reason. I gathered some spring fallout from a huge sweet gum tree that is working good for the earth looking area under the canoe. As long as no one has bad allergies that get around it Apparently I’m not. I’ve been grinding it off the stems with my fingers and haven’t had any problems
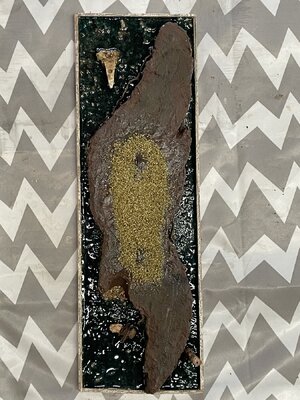
I still have more grass to get on around the edges of the canoe. I’d like it to be a little longer there. Here is where I left off.
After the ribs are done, l’ll work on the cherry floor boards. I’m going to try to build these outside the canoe and install them after the inside has been coated with shellac.

The shot above is where I have soaked the ribs and placed where they go so they can dry before I glue them down,
I’ve added both sets of magnets, they seem to be doing their job , as long as I don’t add to much stuff under the canoe. I’m trying my hand at static grass. And I’m just about use to the random static shock I get occasionally for some reason. I gathered some spring fallout from a huge sweet gum tree that is working good for the earth looking area under the canoe. As long as no one has bad allergies that get around it

I still have more grass to get on around the edges of the canoe. I’d like it to be a little longer there. Here is where I left off.

After the ribs are done, l’ll work on the cherry floor boards. I’m going to try to build these outside the canoe and install them after the inside has been coated with shellac.
Nice looking diorama base!
I’ve just about finished with the ribs.
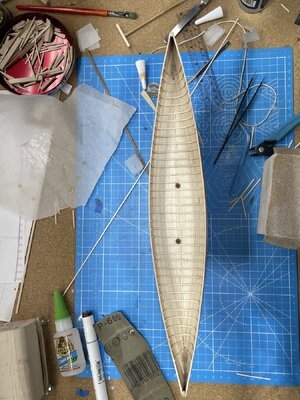
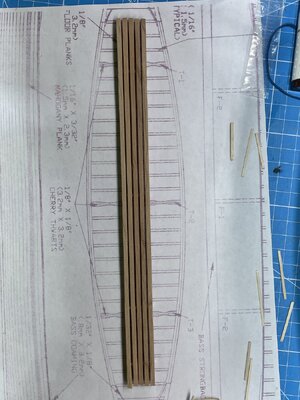
Next was the floorboards. I copied the scale plan and glued a few scraps of planking in hopefully calculated spots
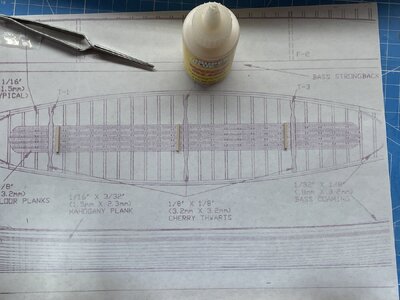
Then I glue the planks down one by one, lining them up with the plan.
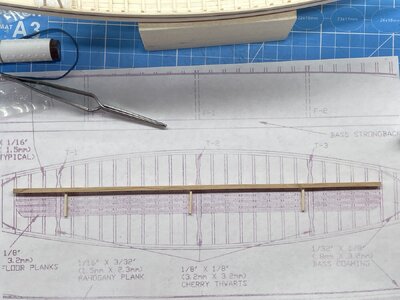
I used a 1/16” piece to space between them as I glued them to the wood brackets.
I found a nickel was just about the right size diameter for the ends.
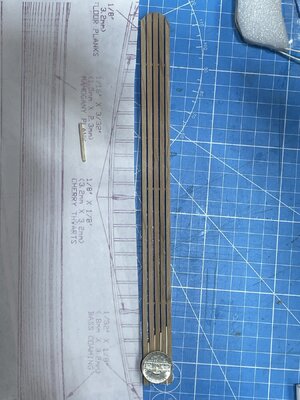
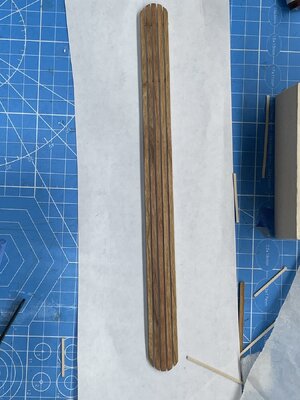
After it had dried I cut the paper off and finished it with Tru-Oil gun stock finish.
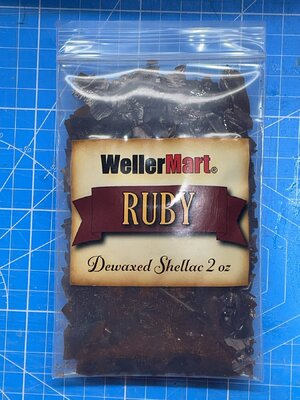
Next up, after finishing the few half ribs at the ends and maybe the deck support members, I will be finishing the inside of the hull. This is what I’ve decided to use.
On the base I added some 7mm and a little 12mm grass that will be on the outside of the canoe when it set on it.
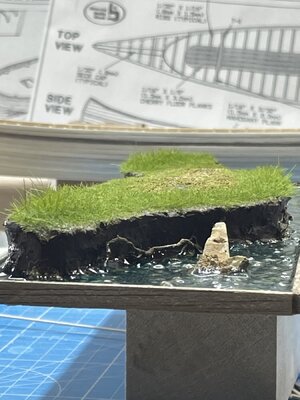
I can’t decide what the bush is going to look like. I’ve made 4 different ones. None of them have made the selection yet.

Next was the floorboards. I copied the scale plan and glued a few scraps of planking in hopefully calculated spots

Then I glue the planks down one by one, lining them up with the plan.

I used a 1/16” piece to space between them as I glued them to the wood brackets.

I found a nickel was just about the right size diameter for the ends.

After it had dried I cut the paper off and finished it with Tru-Oil gun stock finish.

Next up, after finishing the few half ribs at the ends and maybe the deck support members, I will be finishing the inside of the hull. This is what I’ve decided to use.

On the base I added some 7mm and a little 12mm grass that will be on the outside of the canoe when it set on it.

I can’t decide what the bush is going to look like. I’ve made 4 different ones. None of them have made the selection yet.
The interior and diorama base are really coming along!
That looks really good!!
Thank you! It has been a very enjoyable buildThat looks really good!!
Last edited:
After the four coats of shellac dried, I fitted and glued the decks and their caps, on both ends.
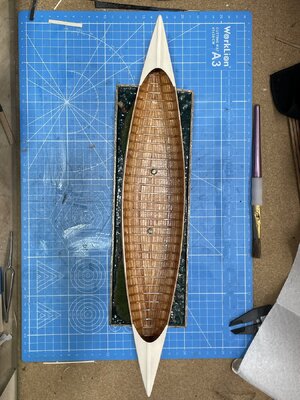
The false keel was 1cm longer than the plank supplied with the kit. The instructions said to use two planks. I had rather made it out of one, just because I knew I would be able to see where they joined
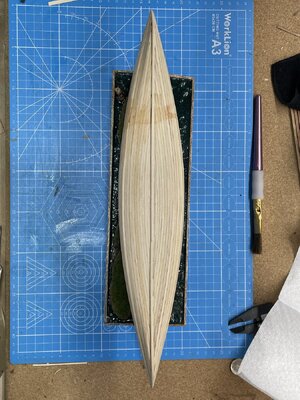
I’ve got the gunwales, coaming and thwarts before the outside hull gets its finish.
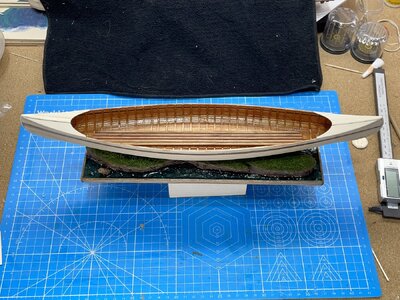

The false keel was 1cm longer than the plank supplied with the kit. The instructions said to use two planks. I had rather made it out of one, just because I knew I would be able to see where they joined

I’ve got the gunwales, coaming and thwarts before the outside hull gets its finish.

beautiful work!


