Me too. I spent quite a few years when a lot younger (1961-65) paddling wood canoes like these (not the fiberglass ones), but the real stuff - buggers to portage though! My wife's family is from Peterborough, so many trips there, plus summers at Stoney Lake.I'm watching with interest. I live just outside Peterborough, Ontario where these were made (along with a long closed Evinrude outboard motor plant where, coincidentally, a canoe museum is located; that museum is expanding and opening in a brand new building in May). I've considered building one of these as a "filler" project.View attachment 435275
You are using an out of date browser. It may not display this or other websites correctly.
You should upgrade or use an alternative browser.
You should upgrade or use an alternative browser.
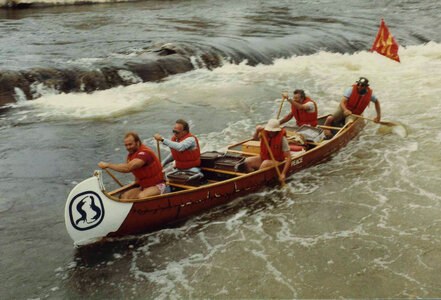
Even did a stint on one of these. (see photo). French River 1984.Me too. I spent quite a few years when a lot younger (1961-65) paddling wood canoes like these (not the fiberglass ones), but the real stuff - buggers to portage though! My wife's family is from Peterborough, so many trips there, plus summers at Stoney Lake.
- Joined
- Feb 18, 2019
- Messages
- 685
- Points
- 353

The strips are likely not following the station moulds because they are not bevelled enough to lay on the previously applied strip (not enough of an angle on the edge) and this may be coupounded with the fact that the strips are bevelled at each end instead of keeping them square and bevelling the stems at both ends like you would do if you were to build the real thing.I’ve only got a few more planks on since my last post. I’m still hopeful,trying I can get the planks turned flat.
View attachment 436940
Another suggestion would be to dry fit the strip after having bevelled the bottom edge to be installed and adjusting the bevel to make sure the strip lays flat onto the station molds. It would also helps to start dry fitting, glueing and clamping the strip in the center area of the canoe (ensuring it follow the rounded shape of the hull) and working to fasten the strip while moving toward the ends: that is why the stem should be bevelled as it makes it easier to glue the strips in place while following the shape of the canoe.
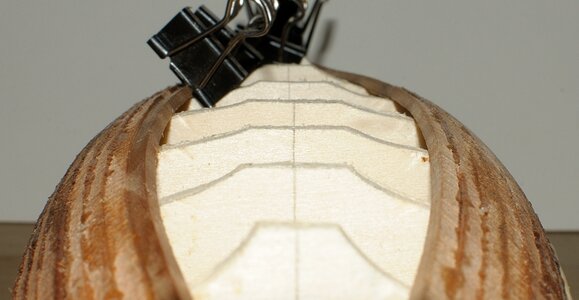
(Strips following the shape created by the station molds)
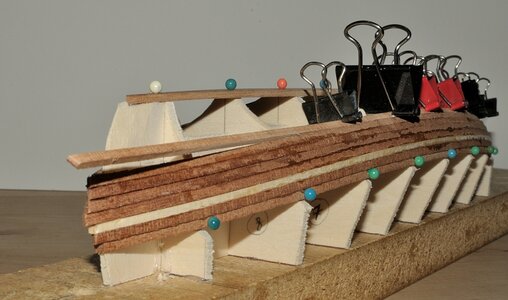
(fitting strips: starting in the center area working toward the ends)
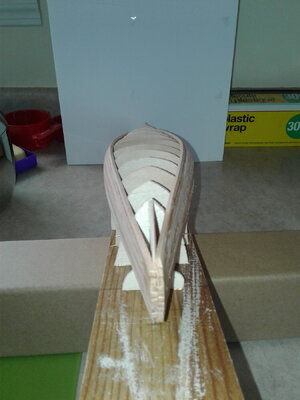
Of course, those would only some of my suggestions. The goal is for the strips to follow the shape of the mold as well as possible. If not, you will end up with a canoe but it will not quite look like the one you are supposed to get from the plans supplied in the kit. It will likely be much fatter in the bottom center area.
Kindest regards.
G.
Last edited:
Gillies, that is some very helpful adviceThe strips are likely not following the station moulds because they are not bevelled enough to lay on the previously applied strip (not enough of an angle on the edge) and this may be coupounded with the fact that the strips are bevelled at each end instead of keeping them square and bevelling the stems at both ends like you would do if you were to build the real thing.
Another suggestion would be to dry fit the strip after having bevelled the bottom edge to be installed and adjusting the bevel to make sure the strip lays flat onto the station molds. It would also helps to start dry fitting, glueing and clamping the strip in the center area of the canoe (ensuring it follow the rounded shape of the hull) and working to fasten the strip while moving toward the ends: that is why the stem should be bevelled as it makes it easier to glue the strips in place while following the shape of the canoe.
View attachment 437318
(Strips following the shape created by the station molds)
View attachment 437317
(fitting strips: starting in the center area working toward the ends)
Of course, those would only some of my suggestions. The goal is for the strips to follow the shape of the mold as well as possible. If not, you will end up with a canoe but it will not quite look like the one you are supposed to get from the plans supplied in the kit. It will likely be much fatter in the bottom center area.
Kindest regards.
G.
View attachment 437287
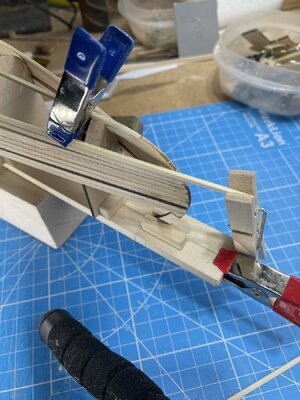
I wish I had attached all the planks in the center as you suggested. I’ve only done one this morning, but I can see how I could have done a better job if I never let it get away. As for the planks at the ends, I’m trying to dampen the end of the plank, and see if I can get it to stay without heating it up
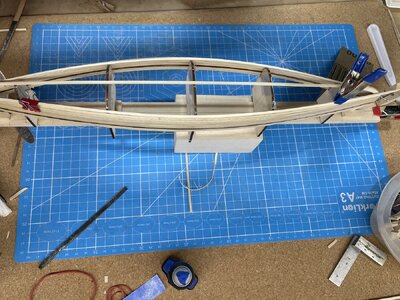
I’ve only got about a cm glued in the center. It’s going to make it flat
- Joined
- Feb 18, 2019
- Messages
- 685
- Points
- 353

Secure the paper clip you are using to the station mold and use one of its "lips" to hold the strip close to it (see photos I attached in my post) . Using the clip and the clamp like shown in you images will not do that; instead it will tend to pull it away from it. It is not enough to hold the strips together. You need to push them and hold them against the edge of the station mold.
FYI; use the clips that feel hard to press open, the softer ones will not hold the two parts together. You need to secure / hold the two opposing forces.
G.
FYI; use the clips that feel hard to press open, the softer ones will not hold the two parts together. You need to secure / hold the two opposing forces.
G.
All the planks that attach to the stems, are in place. The way that seems best for me, starts with edge bending the plank. I’ve been using a short plank that’s bent to check the taper on the previously installed plank. Then after laying the plank where it goes, I visually check the seam of the two planks. I check the underside also before using a drop of thick CA in the middle of the plank.
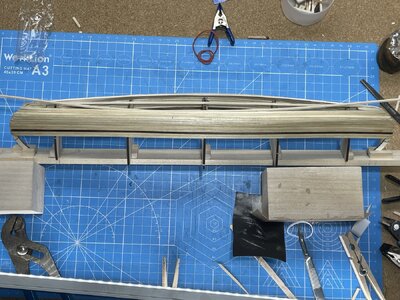
Working towards both ends I run a tiny bead of thin or medium CA, down the seam until the next frame. While that’s curing, I dampen both ends put a clamp at where I stopped the glue . And twist the ends to match the stem using clamps. I let these dry and they have been fitting nicely I think
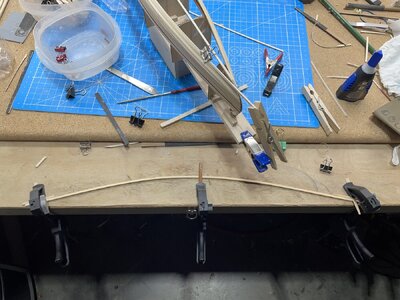
So here is a few shots of where she stands .
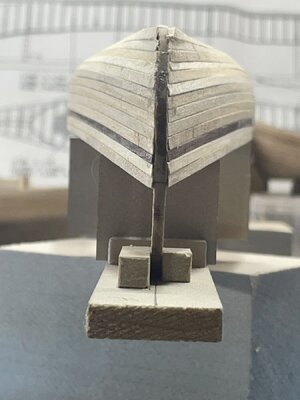
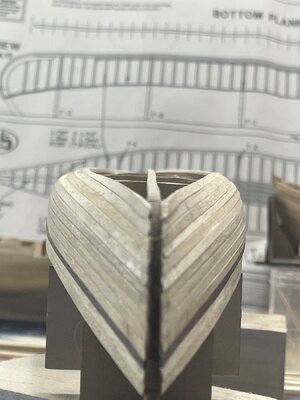
I’ve been thinking of how I’ll display it. I’m going to try to do a small diorama of an high spot in the stream, where it’s been dragged up on it. Here’s where I started and really haven’t figured out the whole plan, but I will
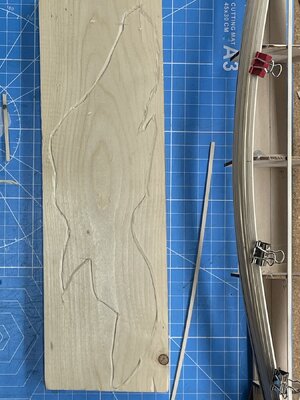
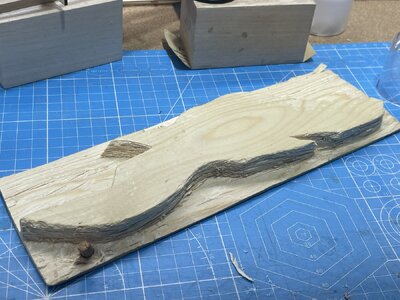
I hope I don’t offend anyone with my terrible grammar and punctuation. I didn’t want to bother my wife

Working towards both ends I run a tiny bead of thin or medium CA, down the seam until the next frame. While that’s curing, I dampen both ends put a clamp at where I stopped the glue . And twist the ends to match the stem using clamps. I let these dry and they have been fitting nicely

So here is a few shots of where she stands .


I’ve been thinking of how I’ll display it. I’m going to try to do a small diorama of an high spot in the stream, where it’s been dragged up on it. Here’s where I started and really haven’t figured out the whole plan, but I will


I hope I don’t offend anyone with my terrible grammar and punctuation. I didn’t want to bother my wife
The remainder of planks will attach to the keel. Hopefully lay close to flat. These planks I decided to do differently. After edge bending the plank I lay it where it fits.
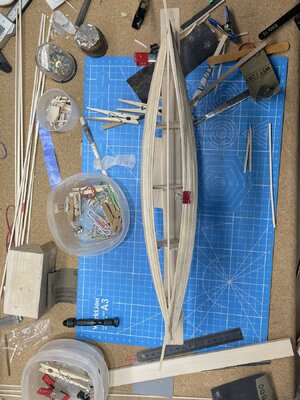
Then mark the point next to the last plank and the point where the keel stops touching the plank.
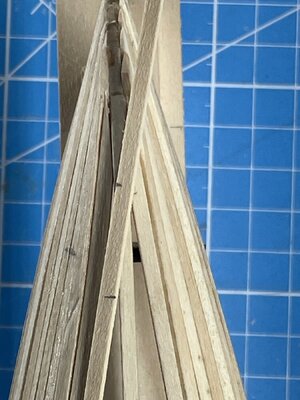
Next remove and cut between my marks.
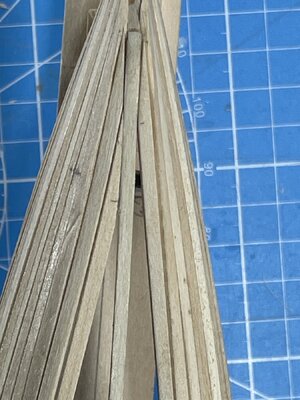
After dry fitting that end, I repeat the same at the other end.
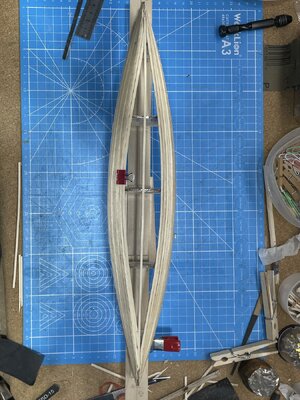
The plank before this one, I used Thick CA on both ends first, then moved to the middle and did a thin CA bead on the seam working towards both ends a short piece at a time.
I’m thinking on this one, I’m just going to start at one end and run thin CA to the other. The thick CA makes it harder to wedge in the fragile point of the plank. But I think it’s best to look at every step and make your on decision based on what you’re looking at . Sometimes the longer I look at it, brings up another option

Then mark the point next to the last plank and the point where the keel stops touching the plank.

Next remove and cut between my marks.

After dry fitting that end, I repeat the same at the other end.

The plank before this one, I used Thick CA on both ends first, then moved to the middle and did a thin CA bead on the seam working towards both ends a short piece at a time.
I’m thinking on this one, I’m just going to start at one end and run thin CA to the other. The thick CA makes it harder to wedge in the fragile point of the plank. But I think it’s best to look at every step and make your on decision based on what you’re looking at . Sometimes the longer I look at it, brings up another option
I am.It's looking good. A different kind of kit.
The Peterborough area is lovely. It's in the Kawartha Lakes area of Ontario - lots of lakes, rivers, canal waterways. We have spent many summers out that way. No surprise that it is the home of the canoe museum. By the way , who is tangopapa?
Good afternoon. Looking very good. Some serious bends on those little planks - great job. Cheers Grant
I’ve been able to spend more time modeling yesterday and this morning. Normally I would dampen a plank, bend it and let it dry on it’s on. The last planks I bent two at a time and applied heat to dry them.
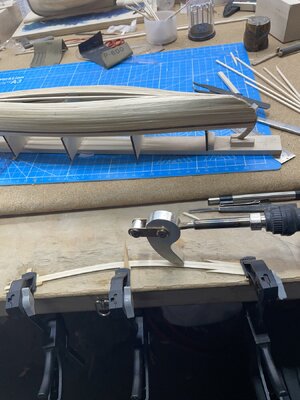
Clamps became useless as the gap narrowed. Now is where our individuality shows up, by coming up with all kinds of ideas that no one man can solve. To bad I’m not one of them I went simple this time.
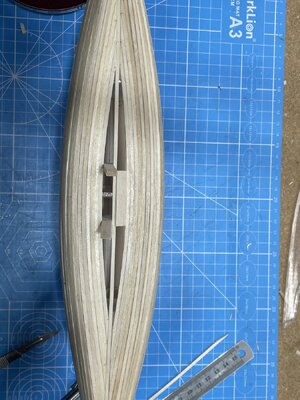
I tried to watch the keel, to make sure it stays as straight as it was after I broke the stem and had to glue it back together
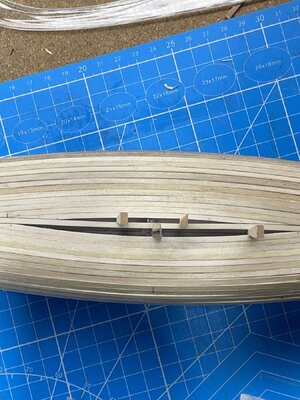
The last two planks were 1.4 mm and 1.5 mm
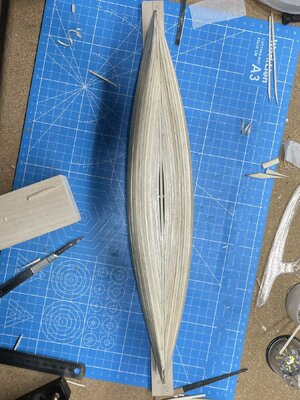
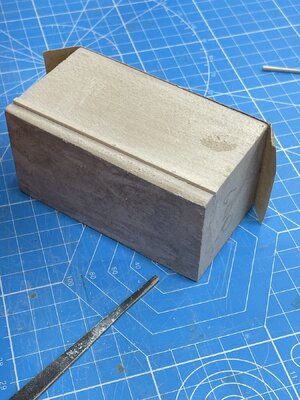
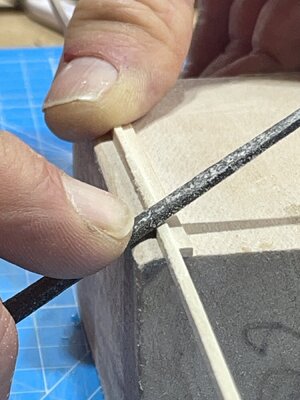
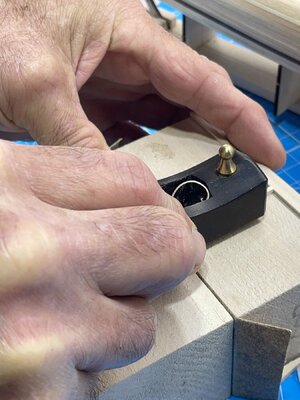
I used a scrap end that I cut the bevel off of. Using the tapered end as my reference on which side I would be working on. So I wouldn’t work on all the sides I used a small planer to get it close, and then sanded the rest of the way.
I did have to redo them several times.
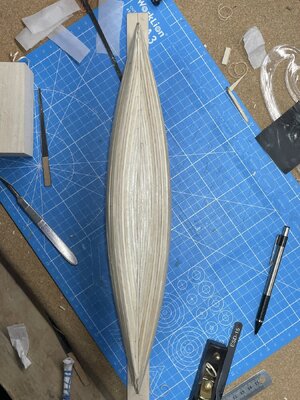
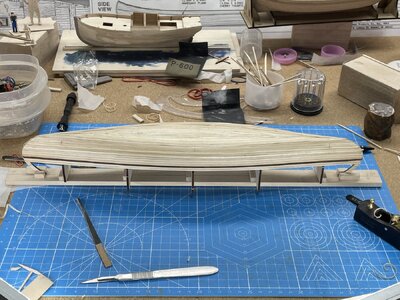
Time to to cut it off the strong back.
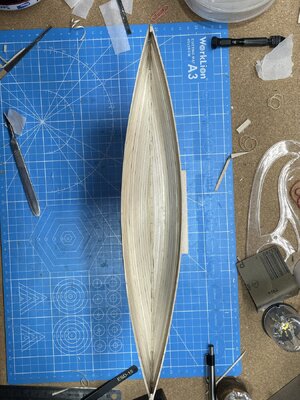
Next I will be planking up both ends and the dozens of support ribs. I also covered the island with a thin coat of homemade paper clay.
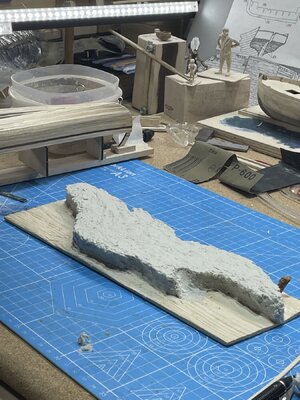
I may paint a base coat on it next so I can think of what I need to do next on it. Thanks for viewing and comments are welcome
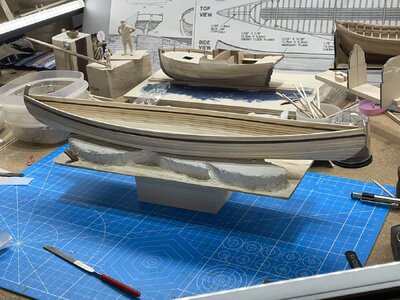

Clamps became useless as the gap narrowed. Now is where our individuality shows up, by coming up with all kinds of ideas that no one man can solve. To bad I’m not one of them

I tried to watch the keel, to make sure it stays as straight as it was after I broke the stem and had to glue it back together

The last two planks were 1.4 mm and 1.5 mm

I used a scrap end that I cut the bevel off of. Using the tapered end as my reference on which side I would be working on. So I wouldn’t work on all the sides

I did have to redo them several times.


Time to to cut it off the strong back.

Next I will be planking up both ends and the dozens of support ribs. I also covered the island with a thin coat of homemade paper clay.

I may paint a base coat on it next so I can think of what I need to do next on it. Thanks for viewing and comments are welcome

- Joined
- Feb 18, 2019
- Messages
- 685
- Points
- 353

Looking good...!
G.
G.
It's looking great!
Thanks CarlerooIt's looking great!
Good afternoon. Lovely planking - looking good. Cheers GrantI’ve been able to spend more time modeling yesterday and this morning. Normally I would dampen a plank, bend it and let it dry on it’s on. The last planks I bent two at a time and applied heat to dry them.
View attachment 440047
Clamps became useless as the gap narrowed. Now is where our individuality shows up, by coming up with all kinds of ideas that no one man can solve. To bad I’m not one of themI went simple this time.
View attachment 440049
I tried to watch the keel, to make sure it stays as straight as it was after I broke the stem and had to glue it back together
View attachment 440050
The last two planks were 1.4 mm and 1.5 mm
View attachment 440052
I used a scrap end that I cut the bevel off of. Using the tapered end as my reference on which side I would be working on. So I wouldn’t work on all the sidesI used a small planer to get it close, and then sanded the rest of the way.
View attachment 440051
I did have to redo them several times.
View attachment 440053
View attachment 440054
Time to to cut it off the strong back.
View attachment 440055
Next I will be planking up both ends and the dozens of support ribs. I also covered the island with a thin coat of homemade paper clay.
View attachment 440048
I may paint a base coat on it next so I can think of what I need to do next on it. Thanks for viewing and comments are welcome
View attachment 440056
Good morning! I was looking at the last shot I posted. I noticed those unsightly gaps on the inside. It’s where my taper was the wrong angle. I diluted PVA 50/50 and used a micro nozzle to dispense it inside the grooves. Then just rubbed sawdust until I felt that they were filled enough.
Here’s before and after.
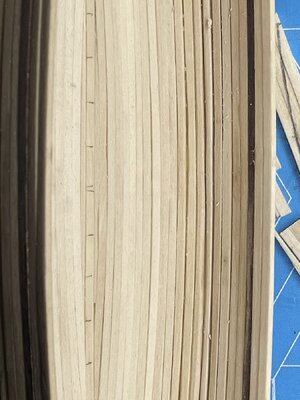
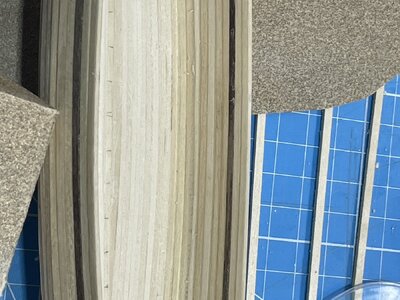
Here’s before and after.


Last edited:
I saw your problem with the planks rising off the forms . I fixed this building the whitehall boat. It is nerve wracking. I put tourniquets around the hull. Tightened them somewhat. Spray with windex tighten more. Repeat over and over. It’s amazing the stress it tookHello friends, I’ve recently retired and picked up this wonderful hobby about a year ago. I really like these small kits. Especially when I’m trying to gain as much knowledge of nautical terms along with skills for woodworkingI’ve had very little of either.
View attachment 434607
The build starts with the assembly of the strongback. I’ve marked the centerlines and the stem inside edges with dotted lines. I will cut some scrap pieces to brace the frames and help plumb the stems. Also I will cover frames with thin packing tape to prevent the planks from being permanently glued to the strong backAnother reason, is if I accumulate enough materials from other kits I will build another from this strongback.
View attachment 434608
Si SenorbobI saw your problem with the planks rising off the forms . I fixed this building the whitehall boat. It is nerve wracking. I put tourniquets around the hull. Tightened them somewhat. Spray with windex tighten more. Repeat over and over. It’s amazing the stress it took
I could hear creaking and popping, just kept spraying windex. The hull doesn’t seem to sufferedSi SenorbobWhen I did the Sea of Galilee boat. I did the exact same thing. It still didn’t fully recover


