• Win a Free Custom Engraved Brass Coin!!!
    As a way to introduce our brass coins to the community, we will raffle off a free coin during the month of August. Follow link ABOVE for instructions for entering.

POF Ribs/Beams Nails

Joined
Jul 11, 2023
Messages
219
Points
113

Greeting, thank you for your time addressing this simple question. I'm planning on adding brass nails (using brass wire half-hard) to the ribs of the bluenose POF. The ribs are 5mm thick, and the nails will be 0.6mm. Since it is the first time, I'm wondering the following,

My question: Do you usually drill holes all the way thru the ribs? or just couple mm on both side?
Basically, can the drill bits (carbine) easily handle the task all the way? or is it asking too much and should drill lightly.
 
You are going to want to drill at least 4-5mm deep, I tried doing them really shallow and the CA couldn't hold the wire in when you went to sand down the nub. Carbide bits are easily capable of this but they really don't like deflection, so a drill press is a must. But if you have a drill press and carbide bits, you can easily drill the frames through. I buy carbide bits for like 10 for $8 and it's guaranteed I'll break one or two in a few hours of drilling, and it is almost always due to poor handling on my part. If you don't have a drill press, you can still easily drill them though with most rotary tools, but you should expect to break the bits a little more often.
 
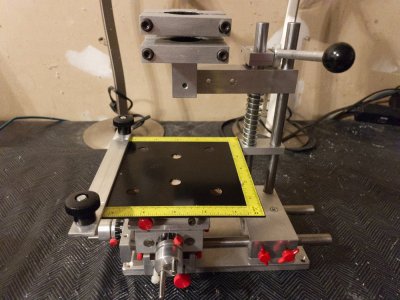
@rtwpsom2, a thousand thanks, greatly appreciated. Since I'm a little bit constrained by space, I got a multi-purpose stand that I can use with a foredom SR. I just set up the drill press configuration, which I hope will provide the stability for the small bits. This is the first time I will use it for that purpose... I will test this weekend. In the meantime, I bookmarked a 10x pack of 0.6mm bits for a future order. ;_)

IMG_3398.jpeg
 
Out of curiosity more than anything else, may I ask for what purpose are you using these metal fasteners? I presume it would be to secure the planking to the frames? If so, I think that's really a hard row to hoe because you can't sand the hull planking with "nails" in it and, in any event, the metal plank fasteners on the real ship would all always be countersunk and plugged with the same species of wood as the planks, so they would be invisible at scale viewing distances regardless of whether you finished the hull bright or painted it. If your planks are properly spiled and bent, they should lay perfectly fair on the frames and PVA glue would be more than adequate to hold the planking in place.
 
Last edited:
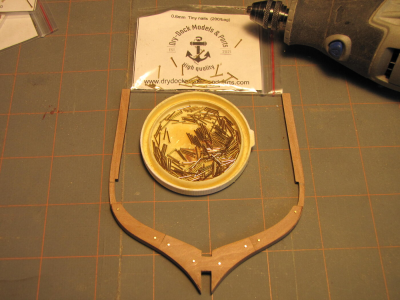
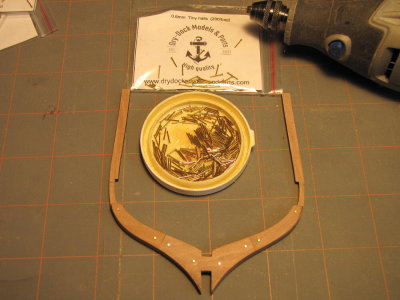
@Bob Cleek, greeting. I planning to use the nails for something like this (only for the look). I realized that treenails should be mostly wood plug... but I just want to have the ribs nails stand out a little since they will be seen at a sharp angle only. I copy a picture from @Canoe21 (without his permission, hopefully he doesn't mind) as illustration below for clarification. Finally, I don't think I will go thru the effort later with treenails on the hulls or the deck planks (too small at scale of ~0.3mm or less) ... but it is far down the road, I may change my mind. If so, indeed toothpick would be better to allow sanding.
1758253941407.png
 
Last edited:
@rtwpsom2, a thousand thanks, greatly appreciated. Since I'm a little bit constrained by space, I got a multi-purpose stand that I can use with a foredom SR. I just set up the drill press configuration, which I hope will provide the stability for the small bits. This is the first time I will use it for that purpose... I will test this weekend. In the meantime, I bookmarked a 10x pack of 0.6mm bits for a future order. ;_)
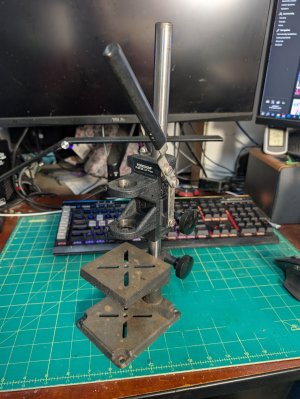
A fellow Foredom user. This is mine, I got it when I got my SR. I would prefer it be more traditionally pinion geared like most drill presses and mills, but it is what it is. The throw only drops the chuck 1", which is fine for PCB drills, but with normal bits you kind of have to jockey it around to find the sweet spot in the drilling range. I kinda want one of those Chinese drills everyone has been talking about lately.
PXL_20250919_045350529.jpg
 
I like classic tools... please keep using it. I believe it will add an "oouf" to the build.
 
Are you going to leave the metal brass colored or black like iron? If the latter, copper is an good alternative choice as it can be blackened with diluted liver of sulfur using a small paint brush after the "bolts" are inserted and filed flat. Just be sure to wipe the surface with a wet paper towel to remove filings as they will also blacken. :)

A 200 foot spool of 0.6mm wire is less than $10 and will make about 5000 pieces 12mm long.

Allan
 
@AllanKP69, greeting Allan. In fact, maybe both... let me explain. For the Ribs as above mostly because I like the look (a bad reason but hey!). However, for the internals, mostly on the heel and few other parts I indeed like black (maybe even for planking). For those, I was thinking of using "Monster Blade" super nylon that I have in 0.5, 0.32 and 0.23mm. Would you happen to have any experience or heard of it? It is designed primarily as fishing line. How relevant is that for a fishing model boat... Hehe. I read about it here a while ago (few years back in Uwek's coureur, I think)

Note: getting ready to start a log in the Group builds section very shortly.... so, we can all chat more about the build.
 
Last edited:
... I planning to use the nails for something like this (only for the look). I realized that treenails should be mostly wood plug... but I just want to have the ribs nails stand out a little since they will be seen at a sharp angle only. I copy a picture ... as illustration below for clarification. ...
1758314933778.png

While the photo depicts some visually attractive woodworking, the depicted frame fastenings do not look anything at all like the actual practice in full-size shipbuilding. Metal fasteners would not have been used at all for such purposes in period shipbuilding. Such connections would have been done with trunnels wedged at each end. Neither would there ever have been a single fastener on each side of a butt. In smaller craft, there would have been two and in larger ships as many as four or five on each side of the butts. This is one of the more frequent errors modelers who are not familiar with full-size wooden boat and ship building make when they go about "detailing" fasteners on their models. For example, no plank butt would ever have had only a single fastener on each side of a butt. A minimum of two are required. Neither are such fasteners located in straight lines. They are always staggered to minimize the weakening effect of the fastener holes, particularly along lengths of grain which are prone to splitting. Folks can build their models however they wish, but if they wish to build good models, they must pay attention to accuracy in details such as these. A good ship model depicts the full-size prototype as it actually was, not the builder's erroneous fantasies. If I were you, I'd forget about depicting any sort of fastener at all. It's your model, though, so you can do whatever you want.
 
I don't feel like every one of us is making models with the expectations of getting them into a museum. I pay a lot for my models, at the end of the day I want them to make me happy. I don't agree that there is a right or wrong way to make models, I think you should do them to the best of your abilities, but I'll how you make them up to you. If you like how the nails look, then I 100% back you up. In fact, I prefer them, but I prefer they be pre-drilled or laser cut to help with locating during glue up. This was how the longboat I am working on was done and it yielded amazing results. Destroyed my sandpaper, but oh well.
 
@Bob Cleek, thanks a lot for the input. As mid-level ship builder those are considerations I just completely overlook. I will read more about it, this is interesting. However, I agree with @rtwpsom2 too. At the end, I may still go ahead solely from a personal preference and what appeal to me the most. I must say that I avoid the issue in the past mostly from being a little uncertain on the direction I want to go, i.e. accuracy in actual representation or a more liberal/artistic perspective. I'm not quite there... this is indeed food for thought. Both ways are good to me. ;_)
 
@Bob Cleek, please forgive me for asking but I'm quite curious. What you are describing, i.e. double nails at plank-ends and staggered layout along the length, is indeed something I have seen frequently in people's log (I'm learning mostly, this way) for hull and/or deck planking. Would you have an example or reference in regard to Ribs and internal beams? I would love to learn more about this. I will try to research this on my side too.

My assumption (well just a guess) was that in those area fasteners/bolts were likely to be visible. Why build a ship and hide bolts with treenails (wood plug) in area not visible to anyone. Second, those were likely to be much larger bolts to fasten beams would the layout necessary the same. Please excuse my ignorance here.
 
Last edited:
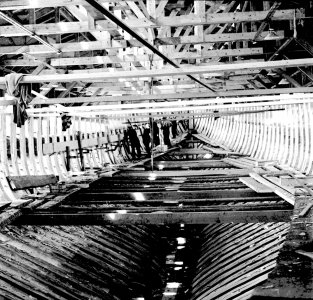
Bluenose construction pictures are somewhat hard to find. I came across this with google. It both show that the bolts are indeed quite large. The layout of the bolts (difficult to see completely - look at the bottom left side) seen simple as illustrated above...

At the junction of two beams forming the ribs: a single bolt on both side of the frame beam. Furthermore, they seen to be fastened in diagonal of each other's, rather than in front. I don't know if they really bothered to hide those bolts. If fact they seen to be protruding by a fair amount. Food for thought.

On the other end, the internal beams seen to be bolted using the staggered approach along the bean. I can't see the junction.

Picture from the construction of the Bluenose II
Bluenose Ribs2.jpg
 
Last edited:
My assumption (well just a guess) was that in those area fasteners/bolts were likely to be visible. Why build a ship and hide bolts with treenails (wood plug) in area not visible to anyone. Second, those were likely to be much larger bolts to fasten beams would the layout necessary the same. Please excuse my ignorance here.
Trunnels ("treenails") and plugs are two entirely different things. A trunnel is a fastener made of a wooden dowel with the grain running lengthwise which is driven into a tight fitting hole, sometimes with wedges drivent into the ends and sometimes not. A plug is a short length of wood with the grain running horizontally which is placed in a counterbore on top of a metal fastening and faired flush with the surface.

In later times, iron bolts run through futtocks to form frames may have been used and the bolt heads, washers, and nuts would have stood proud on the side of the frame. These would have been wrought iron and modernly galvanized iron. In such instances the joints would generally have at least two bolts to a joint to provide the most secure fastening. The practice on a particular vessel would depend upon the period, the area of construction, and, where used, the construction details and specifications.

All of this sort of information can be found in the books written on these subjects over the years. A serious modeler will over time acquire a library of such reference works relevant to the period and types of vessels he wishes to model.
 
Which Bluenose are you building? The original was built in the 1920’s, a time when there were International fishing boat races between the USA and Canada. The rules stated that the race was limited to actual boats used by commercial fishermen but by the time that she was built boats to be entered in the race were designed with competition in mind.

The other Bluenose aka Bluenose II was built in the 1960’s or 1970’s as a replica to serve as a Good Will Ambassador for Canada.

I believe that the photo that you posted above shows the construction of Bluenose II.

Roger
 
@Roger Pellett, yes you are right. I could not find much in term of pictures by just doing a google search. I have Jenson's book on it way, will see there. Note: let me edit my post to specify it is the bluenose II. Thanks!
 
This turning into another fascinating discussion.

Going back to first principles, in the days when axe and adze were ruling, what do you do when you want to build a bigger curvier frame than any lump of wood in your yard or growing in your forest? You have to joint it from smaller stock. Now you have the difficulty that you have no glue capable of securing wood together. Like your shore based medieval carpenter then, you need to cut a joint which will resist the stresses on it, and you have no salt resisting metals. You already know about the rot that iron induces in oak, your preferred strong timber.
No glue, no iron - make oak nails. You can make flat bits to produce the holes, and your nails will swell to make them watertight. If you make your frames from overlapping layers and trenail them together you have your solution. An added benefit is that the material is ‘solid oak’ all the way through, so no problem if you need to adze away a bit later, but the added difficulty is that to give enough strength to your trenail you need a big hole - big enough to weaken the parts, so you have to be careful about placement, and you need to avoid lines of holes, so stagger the positions wherever possible.
You most definitely do not want metal fixings wherever you cannot monitor them for rot - either of themselves or the surrounding timber.

Move on a couple of centuries, and metallurgy makes progress enough to produce bronze screws and bolts, and gluetech produces casein’s and epoxies that don’t fall apart in the ocean. Now you can produce boats entirely differently. Diagonal planking! A new thing! Laminated frames - that stay together until the timber fibres themselves rot away.

Going back to the plot though, as others have said - your model, your look. Harold Underhill talks of producing dowels in sizes down to number 80 (0.343mm) to secure deck fixings. He had a ‘thing’ about never relying on glue alone though. If you make up a dowel plate you too can produce your own trenails to scale sizes. Bamboo is useful at those scales, though you may find that boxwood gives a better appearance.

Personally,, I like the appearance of brass against timber, but it demands that you use solid backed abrasives, so have to make up slips by gluing metal grade abrasive (emery) to backing boards to prevent hollows forming. Over time, too, brass will oxidise, and it is impossible to polish up in some places. Still, Boulle work has had this problem for 300 years, and we have excellent lacquers nowadays, so as long as care is taken in pre finishing and assembly all will be well.

Summary:-

Do it your way.


J
 
I don't know if they really bothered to hide those bolts.

Most likely not, since I expect the ceiling would enclose them completely. (Ceiling is the planking hung on the inboard side of the frames.) All of these questions should be answered by further research on Bluenose. She's a relatively modern and well-documented vessel.
 
Would you have an example or reference in regard to Ribs and internal beams? I would love to learn more about this. I will try to research this on my side too.

In the photo you've posted above, at the extreme center left, between the staging and the line of the clamp that's being installed, there appear to be bolts (black dots) on the sides of the frames holding the two halves of each frame together. Bluenose had steamed frames, each frame being steamed in two longitudinal halves, bolted together to form a single frame with what appears to be black tar or pitch on the faying surfaces. (Between the two halves.) The two halves of each frame have what appear to be bolts equally spaced every so often over the length of the frame. This is how the actual vessel is built. I doubt that whatever Bluenose kit you are building will follow this same construction plan nor that any of this detail will ever be visible in a model unless it is a fully-framed model which is unplanked below the waterline.
 
Back
Top