Good day to all
In reference to my introductory message, I have now prepared an official build log for my kit.
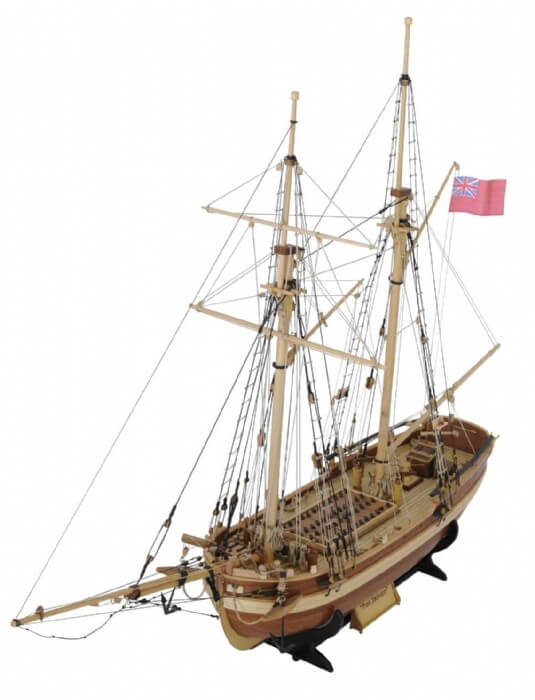
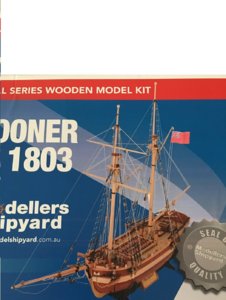
Kit details can be found here.
 www.modelerscentral.com
Please keep in mind that I’m completely new to the trade and not particularly gifted in crafting in general. Actually the reason I got into this is twofold: my love for history and naval lore in addition to wanting to develop my manual crafting capabilities!
I might lack some of the vocabulary or jargon used in this circle and also might not know or understand things that are usually taken for granted. That said I’m willing to learn and listen and push myself to accomplish this feat.
Also I’m unsure if these logs are supposed to follow a specific template as I’m just presenting things as I would in any normal post.
This kit was purchased a couple of years back and I did some initial work on it before shelving it due to life constraints and generally lacking free time. However, I now find myself with more ample time to spare and would really like to finish what I have started.
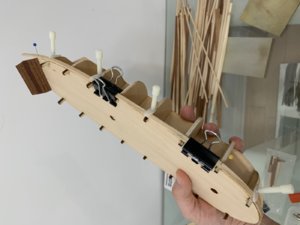
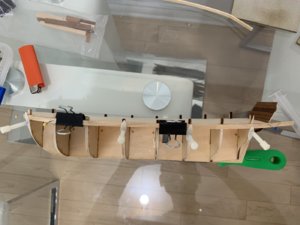
I’m going to start by throwing in some photos of were I am at for a lack of a better introduction since I believe most of you will quickly notice which stage of development I have reached.
The instruction material that I have at my disposal are the following:
⁃ the model manual that shipped with the kit
⁃ A introductory pdf file about wooden ship model building
⁃ A series of videos by an experienced crafter
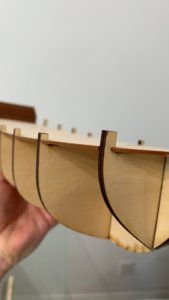
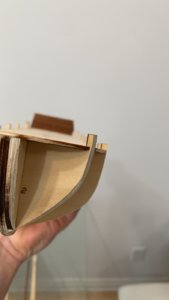
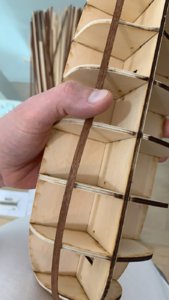
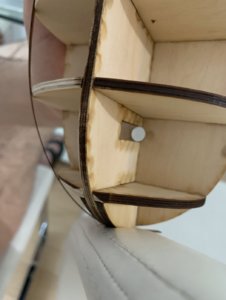
Please note that both the pdf file and the videos refer to a slightly different model than the one I have.
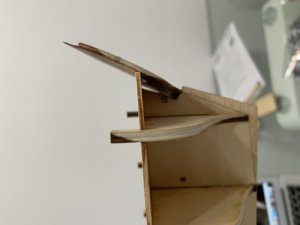
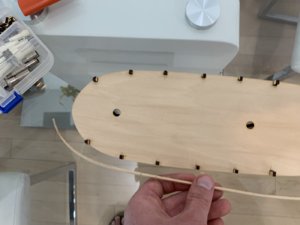
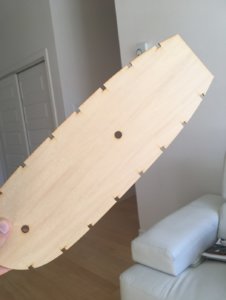
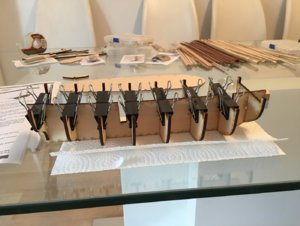
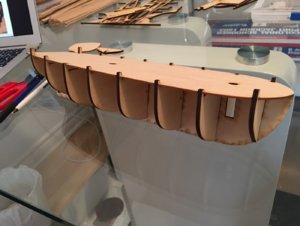
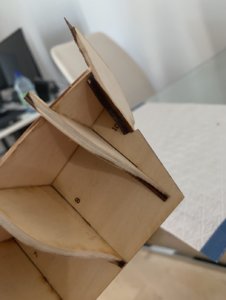
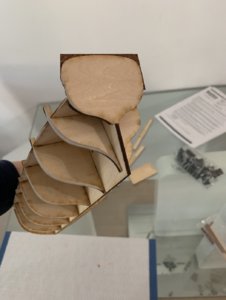
As you can see from the photos, I’ve already glued in the bulkheads and the false deck. I ensured the bulkheads are perpendicular to the keel using clamps and that the false deck is centered. These weren’t that complicated to complete. Now I have recently started “fairing the frames” (only one side as you can see in the photos) as mentioned in my instruction material as to make sure the planks lay on the entire surface of each bulkhead for maximum adherence later on during the planking phase.
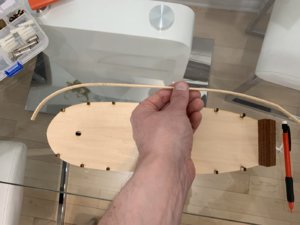
It’s difficult to really photograph the correctness of this step so I have used one of the second layer softer planks to curve it around and snap a photo.
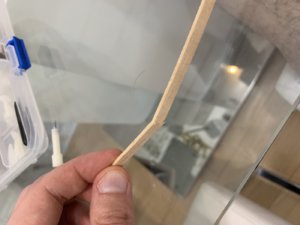
One of the things that puzzles me is that some of the plank will naturally curve either upwards or downwards once taken to the length of the keel and will actually overlap with other planks, but I believe this is a problem for later (planking phase).
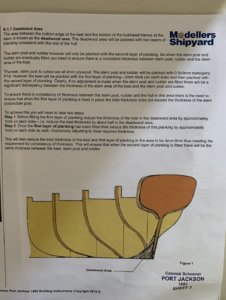
My immediate concern is what to do at the stern. I’ve already attached the transom as per the instructions but I’m unsure whether I need to continue “fairing” into the sternpost with my file tool and make it in a sort it’s aligned with the last bulkhead, I have left it intact for the moment out of fear of doing irreversible damage to it. The manual refers to deadwood area and says that this area will be double planked but that the sternpost and rudder will be single plank which added to my confusion.
I will add photos of this section along with the relevant part in the manual.
The following section of the manual tackles planking so I have read it as I’m taking things one step at a time.
I would appreciate any comments and suggestions or advice that might help me and some guidance as to what to do at the stern.
Thanks,
Bringo
In reference to my introductory message, I have now prepared an official build log for my kit.
Kit details can be found here.

1803 Port Jackson Schooner | Beginner Model Ship Pack
The 1803 Port Jackson Schooner Starters Pack Available From Modelers Central - The Home Of Wooden Model Ship Kits. Order Online For Fast Delivery.
 www.modelerscentral.com
Please keep in mind that I’m completely new to the trade and not particularly gifted in crafting in general. Actually the reason I got into this is twofold: my love for history and naval lore in addition to wanting to develop my manual crafting capabilities!
I might lack some of the vocabulary or jargon used in this circle and also might not know or understand things that are usually taken for granted. That said I’m willing to learn and listen and push myself to accomplish this feat.
Also I’m unsure if these logs are supposed to follow a specific template as I’m just presenting things as I would in any normal post.
This kit was purchased a couple of years back and I did some initial work on it before shelving it due to life constraints and generally lacking free time. However, I now find myself with more ample time to spare and would really like to finish what I have started.
I’m going to start by throwing in some photos of were I am at for a lack of a better introduction since I believe most of you will quickly notice which stage of development I have reached.
The instruction material that I have at my disposal are the following:
⁃ the model manual that shipped with the kit
⁃ A introductory pdf file about wooden ship model building
⁃ A series of videos by an experienced crafter


Please note that both the pdf file and the videos refer to a slightly different model than the one I have.
As you can see from the photos, I’ve already glued in the bulkheads and the false deck. I ensured the bulkheads are perpendicular to the keel using clamps and that the false deck is centered. These weren’t that complicated to complete. Now I have recently started “fairing the frames” (only one side as you can see in the photos) as mentioned in my instruction material as to make sure the planks lay on the entire surface of each bulkhead for maximum adherence later on during the planking phase.
It’s difficult to really photograph the correctness of this step so I have used one of the second layer softer planks to curve it around and snap a photo.
One of the things that puzzles me is that some of the plank will naturally curve either upwards or downwards once taken to the length of the keel and will actually overlap with other planks, but I believe this is a problem for later (planking phase).
My immediate concern is what to do at the stern. I’ve already attached the transom as per the instructions but I’m unsure whether I need to continue “fairing” into the sternpost with my file tool and make it in a sort it’s aligned with the last bulkhead, I have left it intact for the moment out of fear of doing irreversible damage to it. The manual refers to deadwood area and says that this area will be double planked but that the sternpost and rudder will be single plank which added to my confusion.
I will add photos of this section along with the relevant part in the manual.
The following section of the manual tackles planking so I have read it as I’m taking things one step at a time.
I would appreciate any comments and suggestions or advice that might help me and some guidance as to what to do at the stern.
Thanks,
Bringo


