Purchased shortly ago / sthg new in your workshop -> present it here

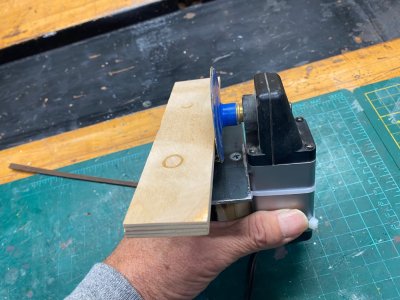
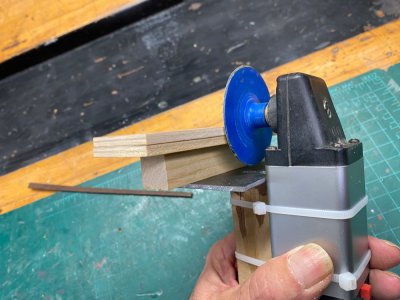
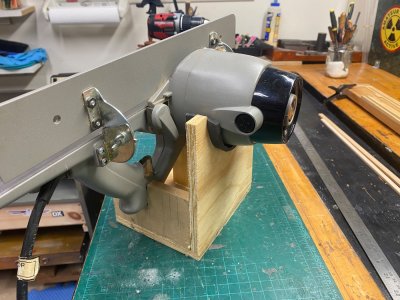
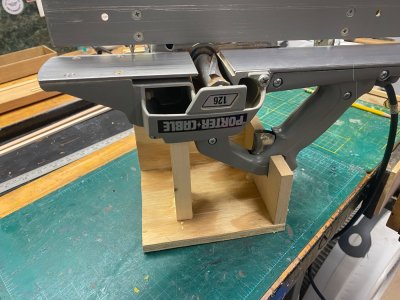
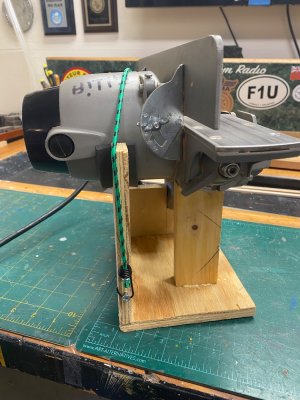
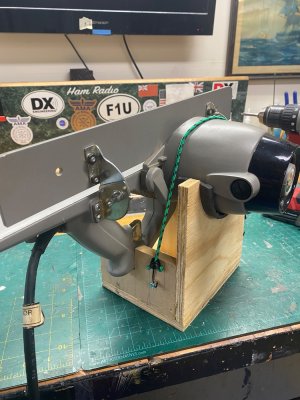
With many thanks and a few apologies to Steef66. I copied his thickness sander - https://shipsofscale.com/sosforums/threads/drum-sander-thickness-sander-diy-with-plans.10325/ - because I felt that at some stage I may need one should I ever decide to do some serious modeling. However, Steef66's model was a little to large for my limited work space and garden shed so I down scaled to a third his measurement size. These didn't quite work out so improvisation took over. Sadly the only drop saw available didn't or could not be adjusted to cut true 90 degree angles which resulted in much hair pulling and lessons in new languages. Over-all the end result is okay but I will remake the sanding drum, eventually. Finally, the construction was finished. So, apologies to 'Grand Master Steef66' for drawings and Uncle Alli links complete with apologies for not achieving the same high standard of workmanship he presented. But at least I tried. (the piece of timber trialed is New Zealand Totara, an off cut from a tree currenting being carved into a Māori Waka ay Corbans Art centre)

View attachment 482341

View attachment 482342

View attachment 482343

View attachment 482344
I like your machine, it's a simple design and the only thing you have to look at is that the drum is parallel to the bed. When that's okay, the machine will do the job. Well done my friend.
 
I like your machine, it's a simple design and the only thing you have to look at is that the drum is parallel to the bed. When that's okay, the machine will do the job. Well done my friend.
Thank you Steef66 for the compliment, very much appreciated. I would never have made this had it not been for your post and links. - I CA'd a piece of 80grit sand paper onto a thin flat piece of ply and pushed it through until the space between the black glass and the roller was exact (exact as possible that is) the reason the roller needs to be remade is because it's not completely on centre. Other than that I'm very happy (apart from the dust issue) to have reduced the Totara wood piece from 6.52mm to 0.50 - Cheers and good health to you.
 
Thank you Steef66 for the compliment, very much appreciated. I would never have made this had it not been for your post and links. - I CA'd a piece of 80grit sand paper onto a thin flat piece of ply and pushed it through until the space between the black glass and the roller was exact (exact as possible that is) the reason the roller needs to be remade is because it's not completely on centre. Other than that I'm very happy (apart from the dust issue) to have reduced the Totara wood piece from 6.52mm to 0.50 - Cheers and good health to you.
If you have a lathe, use that to make the roller round.
And I like it that you make yours smaller then mine. Mine is way to big. I need a more powerful motor for mine. A smaller drum sander would be better for the motor I use
 
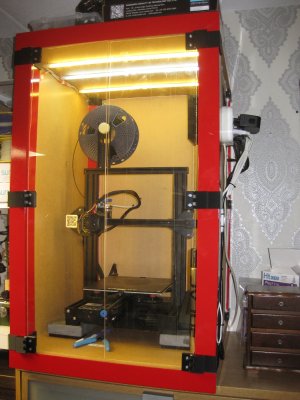
I already talked about it on another spot here on the forum. But I got a new toy in my workshop. A must have if you make your tools like I do.
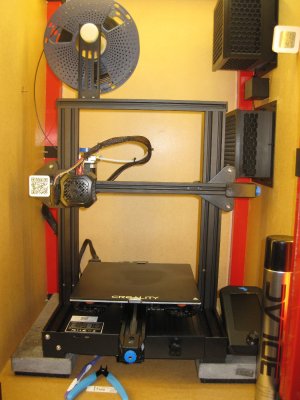
Creality Ender 3 V2 with a lot of upgrades. And I build an enclosure to keep the noise and fumes inside and the dust outside.
IMG_4810.JPGIMG_4811.JPG
 
I picked up a like new Penpal pen lathe..I'm using it to make cannon barrels,casks, etc.. best wood I've found for this task is rock maple that I repurposed from a miter box. Fun to experiment..
 
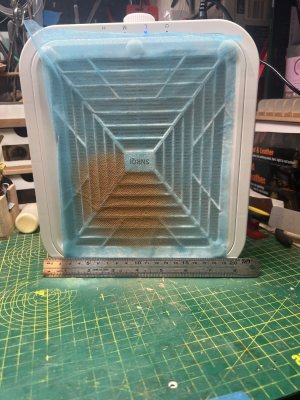
I’m building Hayling hoy. You know that one everybody already built . I shape the ribs using rotary tool and producing a lot of saw dust . To fight the dustiness I bought this:
IMG_4307.jpeg
In here: https://tyrellmodels.co.uk/product/modellers-bench-extractor/
It is very powerful yet workbench size nail dust extractor. So next time you have yours acrylic nails done look what they using and buy one .
 
I’m building Hayling hoy. You know that one everybody already built . I shape the ribs using rotary tool and producing a lot of saw dust . To fight the dustiness I bought this:
View attachment 485598
In here: https://tyrellmodels.co.uk/product/modellers-bench-extractor/
It is very powerful yet workbench size nail dust extractor. So next time you have yours acrylic nails done look what they using and buy one .

I noticed that the guy demonstrating this on YouTube had to shout to be heard over the fan even on the low setting. :confused:
 
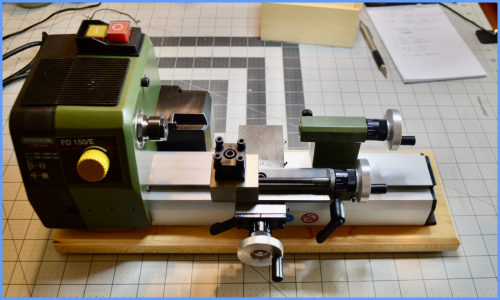
Purchased a new 'toy' for my workroom. I wanted something small to have in my workroom to 'whittle' on small parts without going out to my shop where my larger machine tools are located. I thought this Proxxon FD 150/D would fill the bill. So far I'm not disappointed.

FD 150 D Lathe.png

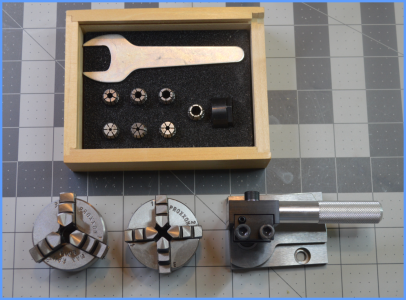
Some of the accessories. Still waiting on others to arrive :(
ER 11 collets. 2mm-7mm
3 Jaw and 4 Jaw chucks
Radius cutter will cut both concave & convex
Lathe Accessories.png

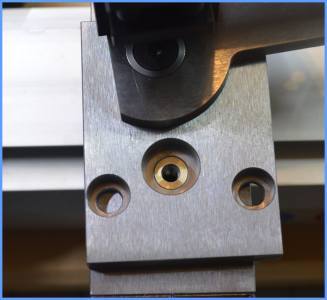
The radius cutter fits several of their machines that's the reason for the three mounting holes. I wasn't too keen regarding the mounting hole for my machine as it was a very sloppy fit so I machined a brass bushing to tighten up the tolerance. The brass bushing is shown in the image below.
Mounting hole Bushing.png


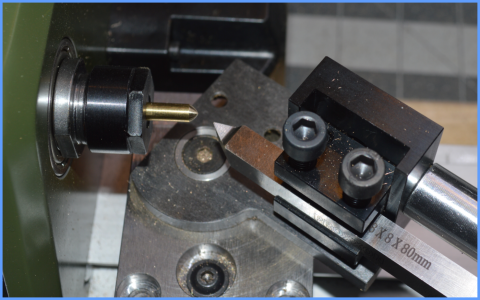
Also, I found I couldn't cut a radius on a small piece without having the piece protrude too far from the chuck. Can you say "Chatter" :eek:
The problem was I couldn't get the cross slide close enough because it would contact the motor. What I did is drill & tap another mounting hole in the cross slide one inch from the existing hole which now allows me to cut a convex radius closer to the chuck on small diameter pieces.
Radius Cutting.png

I ran some tests on the chucks to see how accurate they are:
The 3 Jaw was .003" TIR
The collet was .0005" TIR

You can see it in the image of the lathe that it has a rather unique longitude feed mechanism. The lathe doesn't have a traditional feed screw mounted in front and below the carriage. Instead it has a feed screw (Manual feed only) mounted on the cross feed carriage. This allows for about a two inch travel without relocating the whole carriage. I rally don't feel this as a problem as it's a relatively small machine and if I'm working with anything longer I'll use my larger machine with power feed. :) The downside to this is if you want to cut an angle you pivot the tool post using the protractor engraved on the base. Gettin it back to zero for cutting longitudinal is somewhat of a chore when using the protractor zero as a reference. If it's not perfectly set on zero then you will be turning your piece with a slight taper. What I plan to do is indicate the travel to zero and then drill and insert a small taper pin which will lock it to zero after I move it when cutting an angle on something.

Overall I'm happy with the lathe. It's not big and bulky and when not in use fits nicely on a shelf and doesn't need to be taking up space on my table.
Oh yes, It has a two step pulley assembly for spindle speed with variable speeds being: 800-2800 rpm and 1500-5000 rpm.
 
Purchased a new 'toy' for my workroom. I wanted something small to have in my workroom to 'whittle' on small parts without going out to my shop where my larger machine tools are located. I thought this Proxxon FD 150/D would fill the bill. So far I'm not disappointed.

View attachment 486382

Some of the accessories. Still waiting on others to arrive :(
ER 11 collets. 2mm-7mm
3 Jaw and 4 Jaw chucks
Radius cutter will cut both concave & convex
View attachment 486383

The radius cutter fits several of their machines that's the reason for the three mounting holes. I wasn't too keen regarding the mounting hole for my machine as it was a very sloppy fit so I machined a brass bushing to tighten up the tolerance. The brass bushing is shown in the image below.
View attachment 486384


Also, I found I couldn't cut a radius on a small piece without having the piece protrude too far from the chuck. Can you say "Chatter" :eek:
The problem was I couldn't get the cross slide close enough because it would contact the motor. What I did is drill & tap another mounting hole in the cross slide one inch from the existing hole which now allows me to cut a convex radius closer to the chuck on small diameter pieces.
View attachment 486385

I ran some tests on the chucks to see how accurate they are:
The 3 Jaw was .003" TIR
The collet was .0005" TIR

You can see it in the image of the lathe that it has a rather unique longitude feed mechanism. The lathe doesn't have a traditional feed screw mounted in front and below the carriage. Instead it has a feed screw (Manual feed only) mounted on the cross feed carriage. This allows for about a two inch travel without relocating the whole carriage. I rally don't feel this as a problem as it's a relatively small machine and if I'm working with anything longer I'll use my larger machine with power feed. :) The downside to this is if you want to cut an angle you pivot the tool post using the protractor engraved on the base. Gettin it back to zero for cutting longitudinal is somewhat of a chore when using the protractor zero as a reference. If it's not perfectly set on zero then you will be turning your piece with a slight taper. What I plan to do is indicate the travel to zero and then drill and insert a small taper pin which will lock it to zero after I move it when cutting an angle on something.

Overall I'm happy with the lathe. It's not big and bulky and when not in use fits nicely on a shelf and doesn't need to be taking up space on my table.
Oh yes, It has a two step pulley assembly for spindle speed with variable speeds being: 800-2800 rpm and 1500-5000 rpm.
It is very nice, living in a dream to have my lathe...
 
Hello, i got something naval related from my step dad for my birthday, it's a uboot kit and now I'm a bit tempted do it as captured by the british:
1444510-41967-55-pristine.jpg

I also got a bunch of other kits: eduard 3 Bf 109 gustav boxes, a ICM leopard, bayraktar from BPK and cheap kits from my club: ICM T35, tamiya sturmtiger and flakpanzer IV and a italeri crusader.
 
Not sure if this has been advised previously or if it's of any use to members especially those effected/badly affected by CA glue etc.
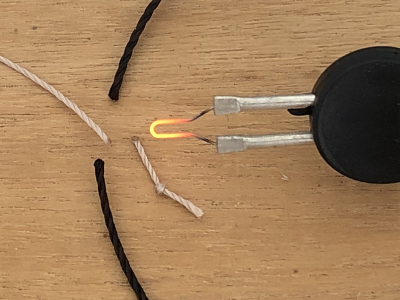
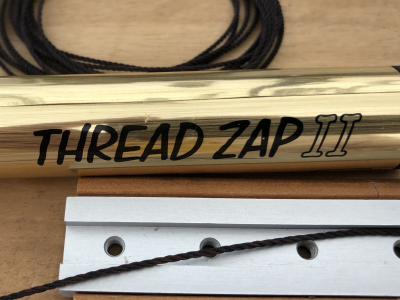
From uncle 'Ali" I purchased a 'Thread Zapper Thread Burner Battery Operated Trim Burn and Melt Thread for Finishing Bead Weaving and Stringing Projects' price NZD6.85 plus NZD7.01 postage. uses 1 x AA battery. Tried it out a few times on some redundant ropes (dark .8mm sand colour .5mm) worked quite well although I'm a long way off from doing any rigging because I'm still in the process of murdering planking a hull.
Anyway, hope this may help those like me with lung/eyes/ CA issues. Apologies for the not so great photos.

Image 01.png

Image2.png
 
Not sure if this has been advised previously or if it's of any use to members especially those effected/badly affected by CA glue etc.
From uncle 'Ali" I purchased a 'Thread Zapper Thread Burner Battery Operated Trim Burn and Melt Thread for Finishing Bead Weaving and Stringing Projects' price NZD6.85 plus NZD7.01 postage. uses 1 x AA battery. Tried it out a few times on some redundant ropes (dark .8mm sand colour .5mm) worked quite well although I'm a long way off from doing any rigging because I'm still in the process of murdering planking a hull.
Anyway, hope this may help those like me with lung/eyes/ CA issues. Apologies for the not so great photos.

View attachment 489592

View attachment 489593
I like this one, I use mostly a lighter for that, but you have to be quick with a lighter. But this one give you more controll
 
Back
Top