Revell Black Pearl

Following the channels was to get the front all done.
20180429_185936.jpg
I do apologize however, I forgot to take a picture of the figure 8 knot holding down the bow spit. However that knot was very easy due to how the model molded the plastic. The plastuc deck in the front had two holes molded to allow the string to wrape through.
As for the decrotive detail it was very easy and very beautiful to glue on. I have to say on a personal note, I was really excited once I glued the front on due to my childhood memories.
 
Last edited:
The mast however were next and they were a little bit of a headache. Also I did end up painting the mast a light grey color knowing it would contrast well with the dark grey deck and black sails and rope.
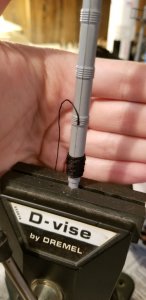
20180425_181927.jpg
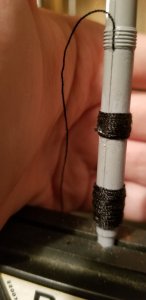
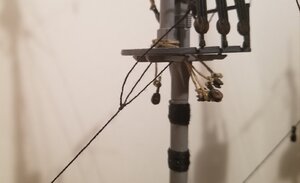
I did add some of my own details such as the ropes that go around the mast. What I did was glue the end of the string vertical on the mast so it gave me a starting point to start wrapping around. I did however have to buy my own string at hobby lobby due to the model string being so thin. This wasn't hard at all and it gave a nice realism touch to the ship.
20180425_190405.jpg

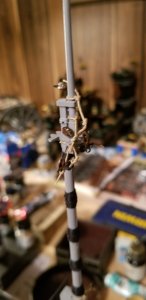
The next step was to tie all the little ropes to the mast, which the running rigging will be attaching too later on in the model.
20180429_190309.jpg
I have to admit, these were tedious but it worked out really well. I just have to touch up some of the brown paint.
 
I feel like the further I get into this model the more I fall in love with it. As I am now working on the gun hatches which is a real challenge lets go back 1 week ago when I worked and finished the back of the Pearl.
View attachment 36951
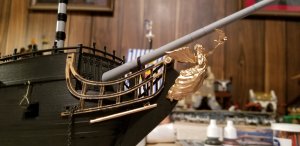
Starting the back one of the first steps was getting all the beautiful golden angels glued on to act as supports for the cabin itself. Surprisingly it was very easy to get these all glued in!
View attachment 36952
The biggest struggle with these angels is how the the back side piece didn't match up with the other hull piece. Because of the not lining up the angel didn't have a full surface to glue on. So I came back to my good old friend Mr.Putty. Sadly you can also see where I messed up. I was sanding up the windows due to their excessive length and didn't know I was sanding the sides of the back window section. Even though its no issue putty can't fix it made me quite upset with myself. View attachment 36953
This time compared to the past I used some green putty hoping glue and paint would hold easier then the white putty. You can also tell I filled in the crack on the back window section with the same putty.
View attachment 36954
Looking at the back all done I am really quite impressed by the look of it. I was worried there would be too much gold and be too shinny but I think it turned out beautifully! The only thing left on the back is to glue the lanterns on but probally won't do that until last due to the lack of need to. But as you can tell in this picture the putty worked perfect. The glue I applied to it is holding the angel in place and the paint sticked flawlessly.
View attachment 36955
Before I glued the last side window piece on I thought I would take a picture. A really cool picture in my opinion!
 
With work and college, this summer has been a rough one to gind time and work on this beauty. But I have gotten some stuff done over the past 2 months!
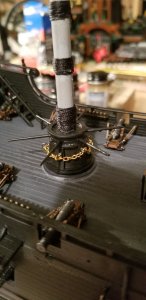
20180429_185909.jpg
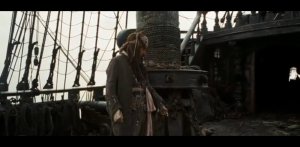
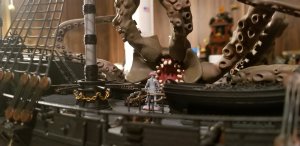
To replicate that famous scene from Dead Man's Chest (my favorite movie in the franchise) I decided to add some of my own details. The base model only includes the capstan and post but does not include a chain that goes around. To be fair I have no idea what this chain could have been for on a real ship, if anyone has ideas let me know. But I just went to Walmart and picked up a a chain with small links and some pins to hold it in. So after a $5 purchase I drilled some holes into the capstan to get such an iconic scene replicated.
Screenshot_20180723-195613_YouTube.jpg
Now realistically an Iron colored chain would have looked more accurate but I didn't want it to be hidden in the black paint so I decided to go with brass.
 
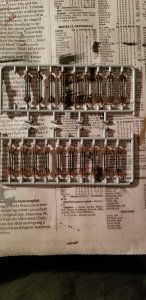
The next step was getting the ratlines all built up and painted, even though I won't be gluing them on until I finish the standing rigging.
20180429_125841.jpg
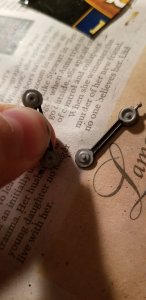
On the sprue you get these parts that go on the bottom that you have to glue to the ratline
20180429_141920.jpg
You will end up attaching these to each side of the ratline to give it plenty of movement.
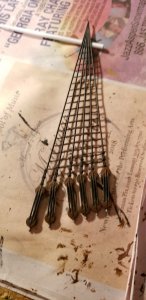
20180429_141950.jpg
As you can see in this image it shows you the ratline for the middle mast. I painted it solid line solid black and then painted the bottom parts with the smoke method which I used on the cannon carriages
 
Its still incredible for how far I have gotten in just one year however. I bought the model just one year ago and all I have left is
1. Standing rigging
2. Gluing the ratlines
3. Sails
4. Running rigging
5. The lanterns on the back of the ship
6. And then the very detailed row boat
20180430_002415.jpg
So this is where I am, I know I haven't shown a full picture but I hope it gives you an idea for how amazing this model is! I can't wait to finish this ship and trust me I will but I thought I would give you guys a yearly update.
20180723_201228.jpg
Kraken not included ;)
 
Funny having the Kraken krappen the Kaptain.

Have a question about the rigging. Does not the pulley tackle gear supposed to be in line with the ratline?
 
Hello everyone! I'm new to this forum but I love models so I thought this would be the place for my interest! So Revell recently came out with the beautiful remastered version of the Zvezda Black Pearl ship model or a slightly different version of the Black Swan ship model. Well I recently bought this model on Amazon and I can't find anything about what paints to use for the hull, sails, cannons, deck, and etc not even from the Zvezda model. So I was wondering if anyone on this forum knows for which colors of paints to use, also should I use Humbrol or Acrylic? I have lot's of questions but I would really appreciate if anyone will be able to answer them for me. P.S if I put this discussion in the wrong place please let me know, Thank You!
Hallo @azog ,
we wish you all the BEST and a HAPPY BIRTHDAY
Birthday-Cake
After finishing the Black Pearl - are you working on another project? - maybe the flying dutchman
 
Hallo @azog ,
we wish you all the BEST and a HAPPY BIRTHDAY
Birthday-Cake
After finishing the Black Pearl - are you working on another project? - maybe the flying dutchman

Thank you so much! I will like to report that I had a good birthday even with all the bad in the world right now! I'm glad we all share this beautiful hobby that can all relax us and keep us busy during any circumstance! I would love to build a Flying Dutchman that would counter the mighty Pearl, however I have the Heller HMS Victory as my next model, and I am very excited to make that in the future!

I wish I had more time to work on this model but due to a "crazy" young adult life I have not had the amount of free time that I was hoping for. Good news though, due to quarantine I had plenty of time to continue planning and finishing the later stages of this beautiful model! I hope there is still interest after two very fast years of no progress! If you all are still interested, continue reading and enjoy some mediocre pictures :)
 
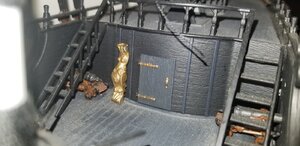
This first image is more of a stand in and a question! What do you guys think of this added detail? In the movie the captains cabin door was very extravagant with loads of detail; Compared to this model which lacks any detail. This figurehead design is found on the base and I was wondering if I should paint it black and glue it to the wall instead of unnecessary decoration found on the base?

20200717_154905.jpg

This is the image of the actual Black Pearl to show what I mean:

door.jpg
 
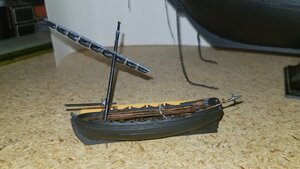
Now showing actual progress with the model, the detail to finish is the row boat:

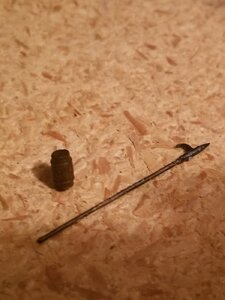
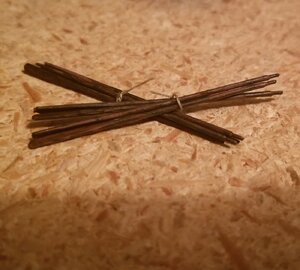
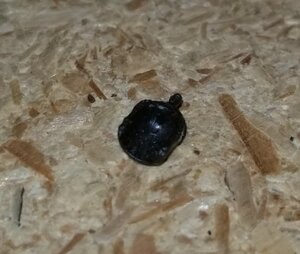
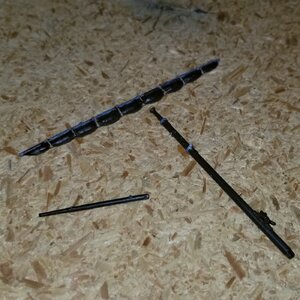
I really love the detail with the row boat in this kit! We have a ton of very small details that add so much to the overall look! Such as a spear, wooden barrel (probably rum), pieces to assemble the mast, 8 oars, and a iron scoop.

I painted all the wooden details with mahogany brown paint and a smoke finish to give it a darker and more realistic look. Similar to the wood, I painted all the iron details with black paint and a gunmetal finish (the same technique I used for my cannons.

20200717_161149.jpg

20200717_161103.jpg

20200717_161423.jpg

With the mast I painted the mast itself with engine black paint and the sails with black paint. Some dark tan and grey elements were painted to separate the two blacks:

20200717_161118.jpg

I really love how you can actually take all the parts you painted and assemble a full functioning row boat! Such a simple addition that adds so much to this already near perfect model!

20200717_161227.jpg

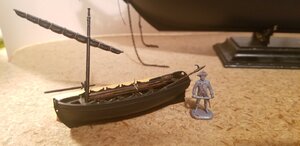
This next image is just to give scale with the 1:72 scaled figure not included in the model. (Reminder, the model is supposed to be 1:72 scale)

20200717_160140.jpg

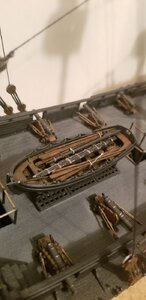
This last image is just a picture to show you how all the accesories fit into the row boat on the ship! It's definitely a tight fit!

20200717_154945.jpg
 
The rest of these images in this last post is just a jumbled mess of everything else that I have accomplished so far!

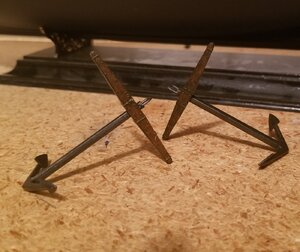
I finished painting my anchors where I used the same technique as I did on all the other brown and iron accessories. Overall they turned out very well and I can't wait to attach them to the ship later on:

20200717_161335.jpg

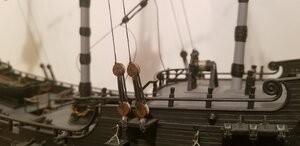
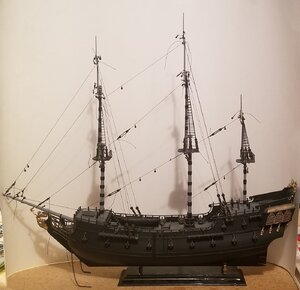
Definitely the most exciting thing I finished was the standing rigging! That's right after two long years I finally finished the standing rigging to this glorious vessel!

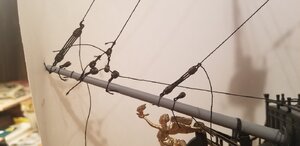
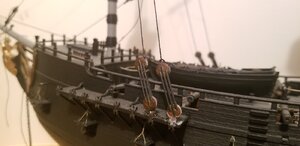
Here is some of the more interesting parts of the rigging that I wanted to share close ups for! If you have any other questions about other lines I will gladly answer them!

20200717_160323.jpg

This is a note for anyone who builds this model! Use tons of glue where these blocks attach! They fall off very easy and can break with even pulling the sting too tight! So don't look at the lack of paint in these or any area yet, I haven't gotten to touch-ups quite yet.

20200717_160347.jpg

20200717_160355.jpg

I still have to figure out how to fake a seizing where it looks accurate! This model is just too small to do an accurate seizing.

20200717_161320.jpg

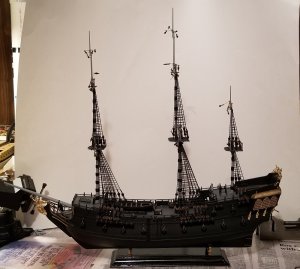
Then this is the current form for this beautiful model with all of the standing rigging tied and in tact!

20200717_161256.jpg

Don't judge me on all the extra strings still dangling from the knots! I plan on cutting all of those after I krazy glue the knot itself! My next step which definitely won't be finished this summer is to figure out how to make sails! I don't want to use the plastic one's included with the model! If anyone has any suggestions for what cloth to use for sails I would very much appreciate it! Remember though, they have to come in black! ;)
 
Last edited:
The rest of these images in this last post is just a jumbled mess of everything else that I have accomplished so far!

I finished painting my anchors where I used the same technique as I did on all the other brown and iron accessories. Overall they turned out very well and I can't wait to attach them to the ship later on:

View attachment 165252

Definitely the most exciting thing I finished was the standing rigging! That's right after two long years I finally finished the standing rigging to this glorious vessel!

Here is some of the more interesting parts of the rigging that I wanted to share close ups for! If you have any other questions about other lines I will gladly answer them!

View attachment 165257

This is a note for anyone who builds this model! Use tons of glue where these blocks attach! They fall off very easy and can break with even pulling the sting too tight! So don't look at the lack of paint in these or any area yet, I haven't gotten to touch-ups quite yet.

View attachment 165256

View attachment 165255

I still have to figure out how to fake a seizing where it looks accurate! This model is just too small to do an accurate seizing.

View attachment 165258

Then this is the current form for this beautiful model with all of the standing rigging tied and in tact!

View attachment 165253

Don't judge me on all the extra strings still dangling from the knots! I plan on cutting all of those after I krazy glue the knot itself! My next step which definitely won't be finished this summer is to figure out how to make sails! I don't want to use the plastic one's included with the model! If anyone has any suggestions for what cloth to use for sails I would very much appreciate it! Remember though, they have to come in black! ;)
very beautiful job that achieves the most impressive achievements Ship-1 :)
 
Hello everyone! I'm new to this forum but I love models so I thought this would be the place for my interest! So Revell recently came out with the beautiful remastered version of the Zvezda Black Pearl ship model or a slightly different version of the Black Swan ship model. Well I recently bought this model on Amazon and I can't find anything about what paints to use for the hull, sails, cannons, deck, and etc not even from the Zvezda model. So I was wondering if anyone on this forum knows for which colors of paints to use, also should I use Humbrol or Acrylic? I have lot's of questions but I would really appreciate if anyone will be able to answer them for me. P.S if I put this discussion in the wrong place please let me know, Thank You!
Hallo @azog
we wish you all the BEST and a HAPPY BIRTHDAY
Birthday-Cake
 
Back
Top