• SUBSCRIBE TO SHIPS IN SCALE TODAY!

    The beloved Ships in Scale Magazine is back and charting a new course for 2026!
    Discover new skills, new techniques, and new inspirations in every issue.

    NOTE THAT OUR NEXT ISSUE WILL BE July/August 2026
  • Win a Free Custom Engraved Brass Coin!!!
    As a way to introduce our brass coins to the community, we will raffle off a free coin during the month of August. Follow link ABOVE for instructions for entering.

RMS Titanic minicraft 1:350 Scale

Joined
Mar 20, 2026
Messages
39
Points
48

Good Morning,

I am an intermediate level modeler and wanted to build a highly accurate 1:350 scale Titanic kit to improve my modelling skills and for the pure joy of it!

The mystique of the Titanic and its subsequent disaster has always intrigued me from a very young age. I remember first reading Walter Lord's "A Night to Remember" at 12 yoa and have been hooked ever since. I have modeled off and on for 45 years but have yet to achieve that "Museum" quality advance level as of yet. I have built a couple of verisions of Titanic as a kid and in different forms (Metal Earth Models), However, it was never to an exacting standard (Though I am not a Rivet Counter type of person). I want to challenge myself and make the best representation of the Titanic that I can to represent this magificent ship.

I researched which kits were best for my build and decided on the Minicraft 1:350 scale Deluxe Titanic (#11320) was most accruate for the money.
I will be using China 3d printed accessories and a combination of Tom's Model Works, Gold Medal Models (where I can get them), and Edwards photo etch parts.
I have gone with ArtWox wooden decks (Scaledecks is currently unavailable at the time of beginning of this build), though it looks like there is no docking bridge deck included :(

For hull painting I decided on enamels (Testors and Tamyia) for the hull and superstructure. Using the Tamyia Flat Black as base (XF-1), Tamyia Flat White for superstructures (XF-2) and Testors Flat Yellow Zinc Chromate (Sunflower B-1191TT) for the sheer line. I will be modulating tones and hues and very slight weathering to accentuate the details of the hull (even a few days at sea will bring some sea salt weathering and porthole rain drainage streaks from Southhampton to Queenstown). I do know about the re-freshening painting that occurred on the portside prior to accepting passengers.

I will be adding layers of acrylics from Squadron Scale Colors Titanic Set for the ease of air brushing and detail work (Such as the dadoe lines Dark Mast and funnel White Buff color).
More on paint later

For references I am using many, many different sources. It is suprising the lack of concrete information that is available. I know that Harland and Wolff offices were bombed during World War II, but I would have thought that they would have a lot more photgraphic catelog of the Titanic before its maiden voyage???

References:
Rivet Counter
Titanic-cad-plans and articles by Bob Read
Information sources, materials, and research by Bruce Beveridge
RMS Titanic - 3D illustrations by Vasilije Ristovic
Artwork resources and illustrations by Ken Marschall
Maritime Models Instructions from Woody's Model Shop (has many tips on color and placement of deck/hull details)
Youtube Titanic Build logs (The Midewest Model Shop, The ModelBoat Guy, OK Modeler, and many more).
Titanic at Cherbourg by Art Braunschweiger
Titanic: An illustrated History by Don Lynch and Ken Marschal
Titanic: The Ship magnificent volumes 1 and 2
The Web and AI (verifying all facts if possible)
Ship of Scale Forums and Build Logs

I will be attempting to photograph the build as I go for those who wish to follow along and will be adding them very soon

1st step Workbench planning and building an enclosure to protect the model through the build (not very interesting but critical phase to begin).

Wish me luck and Happy Modelling - Pete
 
Last edited:
Hello! I am excited to hear that you are also a Titanic nerd. I love the idea of this kind of project. Although I have never dealt with this scale, I can kind of get a sense of it's size through my 1:150 "Gorch Fock" model (which sadly has been destroyed), and I highly recommend going forward with this. If your looking for references I have 2 places you can look. If you search up "Jabor666" on YouTube, you can get a really nice 1:100 and 1:72 scale Titanic build montage videos that hopefully will supply your need visually. If you are looking for a funnel buff that would work, Tamiya has a pale almost skin colored orange, hence the name "Tamiya Flat Flesh (XF-15)." I hope this helped, and if you need anything else just holler (:
 
Oh, I forgot to write earlier but... do you think that you are going to make this vessel an RC? All you really need are some motors, a protectant for your ships hull and paint job, some ballast for the ship to sit low enough in the water, maybe some tiny smoke machines, and a remote control (an X-Box controller ha ha!) (:
 
Sounds like this is going to be a really nice build to watch. Looking forward to seeing your work
 
Hello! I am excited to hear that you are also a Titanic nerd. I love the idea of this kind of project. Although I have never dealt with this scale, I can kind of get a sense of it's size through my 1:150 "Gorch Fock" model (which sadly has been destroyed), and I highly recommend going forward with this. If your looking for references I have 2 places you can look. If you search up "Jabor666" on YouTube, you can get a really nice 1:100 and 1:72 scale Titanic build montage videos that hopefully will supply your need visually. If you are looking for a funnel buff that would work, Tamiya has a pale almost skin colored orange, hence the name "Tamiya Flat Flesh (XF-15)." I hope this helped, and if you need anything else just holler (:
Thanks so much

I am a big nerd altogether but on the Titanic, its like an obession.

Thanks for the tip on the Flat Flesh, I have not done a funnel paint test yet but it will be on my list to check

Happy Modeling
 
Last edited:
Oh, I forgot to write earlier but... do you think that you are going to make this vessel an RC? All you really need are some motors, a protectant for your ships hull and paint job, some ballast for the ship to sit low enough in the water, maybe some tiny smoke machines, and a remote control (an X-Box controller ha ha!) (:
Actually I was planning just a presentation model. I was thinking to donate my project if it comes out to our local library. We are a moderate city and dont have a real museum for history so I just want to bring something to the younger generation.

Maybe spark that obession in a new generation :)
 
Have a look at Midwest hobby shop on YouTube. He has some aftermarket parts for that particular kit you are building.
Thanks Bryian
I just ordered the benches from Ben at The Midwest Hobby Shop.
I like that they have a replacement for the minicraft aft promenade windows on B Beck.
 
Good Morning,

I am an intermediate level modeler and wanted to build a highly accurate 1:350 scale Titanic kit to improve my modelling skills and for the pure joy of it!

The mystique of the Titanic and its subsequent disaster has always intrigued me from a very young age. I remember first reading Walter Lord's "A Night to Remember" at 12 yoa and have been hooked ever since. I have modeled off and on for 45 years but have yet to achieve that "Museum" quality advance level as of yet. I have built a couple of verisions of Titanic as a kid and in different forms (Metal Earth Models), However, it was never to an exacting standard (Though I am not a Rivet Counter type of person). I want to challenge myself and make the best representation of the Titanic that I can to represent this magificent ship.

I researched which kits were best for my build and decided on the Minicraft 1:350 scale Deluxe Titanic (#11320) was most accruate for the money.
I will be using China 3d printed accessories and a combination of Tom's Model Works, Gold Medal Models (where I can get them), and Edwards photo etch parts.
I have gone with ArtWox wooden decks (Scaledecks is currently unavailable at the time of beginning of this build), though it looks like there is no docking bridge deck included :(

For hull painting I decided on enamels (Testors and Tamyia) for the hull and superstructure. Using the Tamyia Flat Black as base (XF-1), Tamyia Flat White for superstructures (XF-2) and Testors Flat Yellow Zinc Chromate (Sunflower B-1191TT) for the sheer line. I will be modulating tones and hues and very slight weathering to accentuate the details of the hull (even a few days at sea will bring some sea salt weathering and porthole rain drainage streaks from Southhampton to Queenstown). I do know about the re-freshening painting that occurred on the portside prior to accepting passengers.

I will be adding layers of acrylics from Squadron Scale Colors Titanic Set for the ease of air brushing and detail work (Such as the dadoe lines Dark Mast and funnel White Buff color).
More on paint later

For references I am using many, many different sources. It is suprising the lack of concrete information that is available. I know that Harland and Wolff offices were bombed during World War II, but I would have thought that they would have a lot more photgraphic catelog of the Titanic before its maiden voyage???

References:
Rivet Counter
Titanic-cad-plans and articles by Bob Read
Information sources, materials, and research by Bruce Beveridge
RMS Titanic - 3D illustrations by Vasilije Ristovic
Artwork resources and illustrations by Ken Marschall
Maritime Models Instructions from Woody's Model Shop (has many tips on color and placement of deck/hull details)
Youtube Titanic Build logs (The Midewest Model Shop, The ModelBoat Guy, OK Modeler, and many more).
Titanic at Cherbourg by Art Braunschweiger
Titanic: An illustrated History by Don Lynch and Ken Marschal
Titanic: The Ship magnificent volumes 1 and 2
The Web and AI (verifying all facts if possible)
Ship of Scale Forums and Build Logs

I will be attempting to photograph the build as I go for those who wish to follow along and will be adding them very soon

1st step Workbench planning and building an enclosure to protect the model through the build (not very interesting but critical phase to begin).

Wish me luck and Happy Modelling - Pete
Hi Pete,
A warm welcome to our community.
Wishing you the best of luck with your project!
Greetz, Peter
 
Hello Everybody

Thank you so much for all the great comments already!

Now to be fair, I have already started working on the kit since April 2026 (a lot of reference searching and hull prep work).

It was a buddy who suggested this website for references and that I should start a build log. When I visited the site, I was so impressed and a little intimidated by the beautiful models everyone was producing. But my wife convinced me to start a log here because Facebook isnt really set up for these kind of builds. Long story short, the next couple of installments will come fast until I catch up to where I am presently (Getting ready to paint the hull).

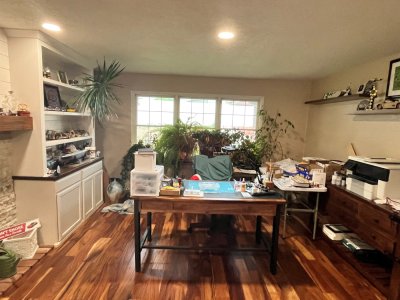
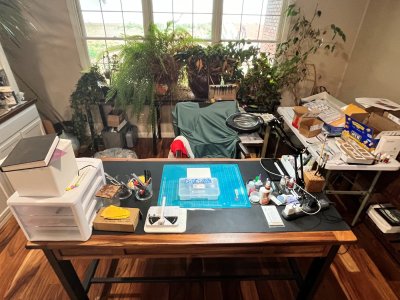
This is my day to day modeling bench (taken out of time sequence) I have plent of room, climate control, ventilation, and lighting. The more industrial tools and equipment is either in the garage or I can move to a pretty big patio table (for painting) depending on weather. I also have a complete basement, however, our family room and guest rooms are down there and I tend to do more dirty, noisy projects in the garage. I will post more about specific tools and procedures as I move forward.

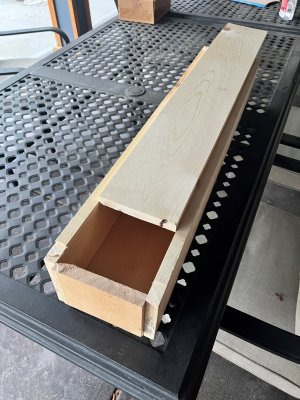
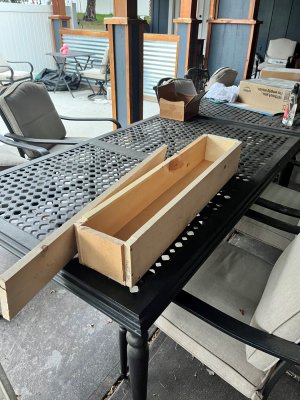
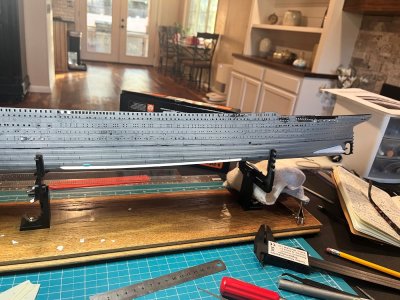
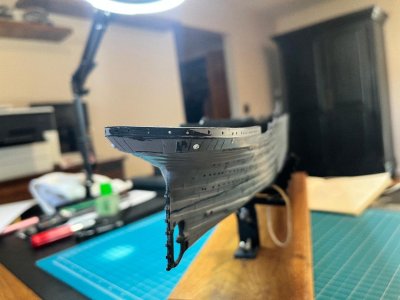
One of the first things I had to consider was how to work on the model without damaging the progress I have already made? I read through Art Braunschweiger's Titanic at Cherbourg website and liked his idea for enclosing the model for protection and using the lid as a rest. I made this enclosure out of 2x6 planks cut to 33 inches length by 6 inches width by 6 inches height. I know when everything is completed the model will stand ~ 9 inches tall but by then I should not need the lid anymore (fingers crossed). I plan to use braces/support blocks to prop up the model hull higher in the case as I work from the bottom up. I will remove those supports as the model gets higher. Besides the varnish coating to protect the hull from nicks, scratchs, and fingerprints, I plan to use raw gift wrapping and bubble wrap around the hull (but out of my way :P).

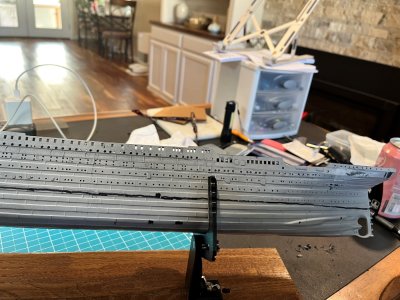
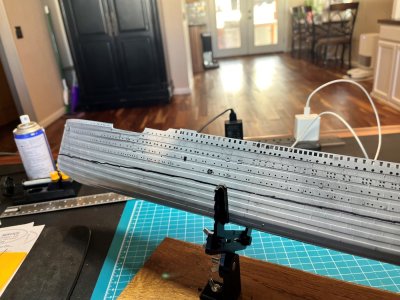
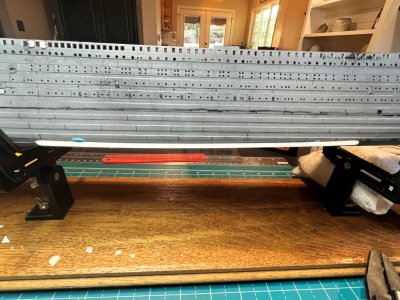
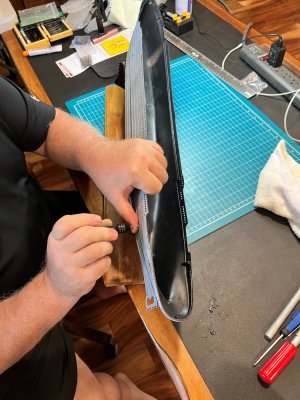
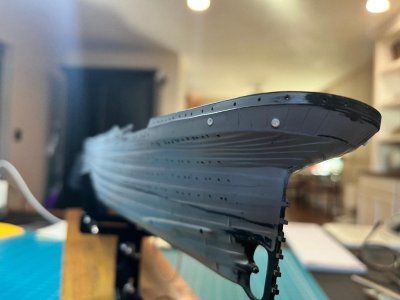
I have purchase a inexpensive 3D print movable Ship Jig but found out that the product was too small for the scale of the ship (even though is said it could support up to 1:200 scale)? The pieces holding the hull worked as advertised, but Its base was too narrow and short and I felt it was unstable to use as a work station on the hull! So I modified it by taking scrap wood plank, drilling the hull clamps in a far better and stable position, and ditching the too small base (You get what you pay for right!).

As you can see I started the hull but more on that later

Have fun and Happy Modeling - Pete

Workbench 1.jpg

Hull Enclosure 2.jpg

Hull Enclosure.jpg

Workbench 2.jpg

Hull with Modified Base 1.jpg

Hull with Modified Base 2.jpg

Hull with Modified Base 3.jpg

Hull with Modified Base close up.jpg
 
Good Day Everyone

I started working on the hull on the problems that have been documented by numerous other builders on the Minicraft kit.

First up thoughts on illumination! Yes I am lighting up the project :)
It was in my original thoughts to use fiber optics in the hull portholes for illumination of the kit that others like Ben from The Midwest Model Shop did so wonderfully. However, I found that the benefit versus the amount of work for the whole model was cost prohibitive for my return of investiment. I might use fiber optics in certain areas that normal lighting may not reach?

So, that leaves LED strips for lights. I also plan to make an acrylic casing for the model after completion, so illuminating the kit means wireless and remote controls. I initially was going to use a switch battery powered product, but found that "hiding" the wiring and access to the batteries was going to be an issue if I mount the ship with the traditional pedestals. This just looked bad for a quality product. Therefore, the mount will be a "dry dock" style so I can add a hidden vault at the center of the ship for the battery pack and remote control receptor. So I found on Amazon a soft light (incandescent like as the lighting was in 1912) remote wireless LED Strip at a good price.

Now that means enhancing the refective factor of the light to reach all/ most of the major structures. I plan to paint gloss white on the interior, non-visible areas of the hull and decks of the reflection factor. In Addition, I will use HVAC aluminum tape strategically that addeds its reflective surface to the illumination of the kit (more later). That means making modifications to the hull and decks to get the most light out as possible (I will post my lighting scheme diagram at a different post).

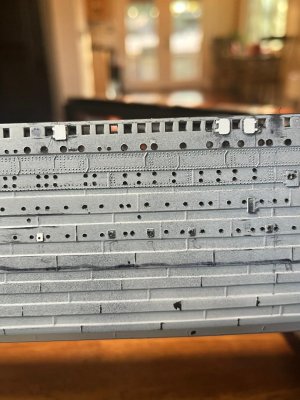
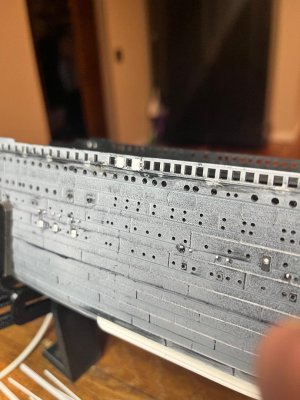
Now for the tedious task of drilling the portholes out on the hull for the future illumination process. I primed the hull for a better visibility and started with a cordless minitool to drill the holes, but found that it was just as easy to use a hand pin vise drill with drill bits at 0.68 mm diameter for the smaller holes and 0.78 mm diameter for the larger holes. I did make a couple of mistakes with that electric hand drill and had to use a piece of plastic rod cut to plug those errors to re-drill the holes (no such thing occured with the pin vise).

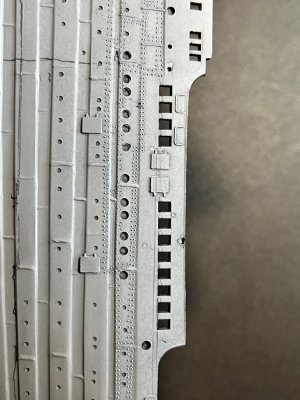
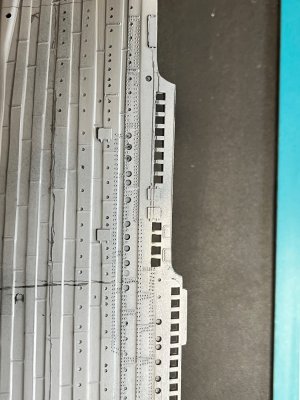
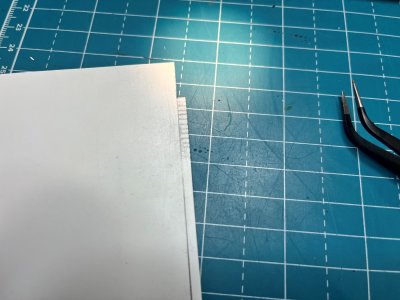
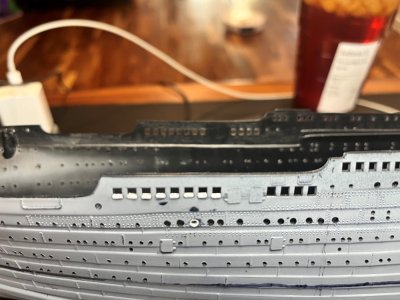
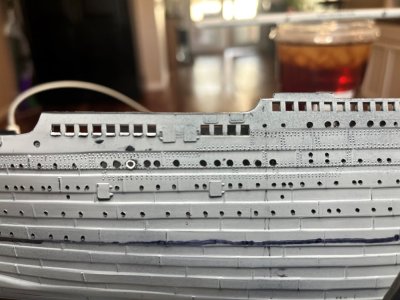
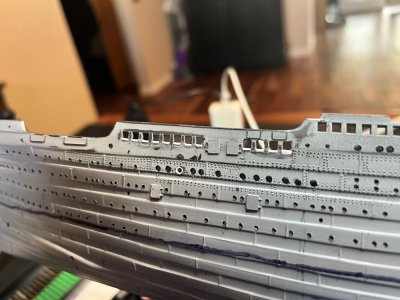
Then it was time to tackle the major modification on the B deck 2nd class aft promenade windows. As you can see and with great documentation, the B deck 2nd Class aft promenade windows were off and dipped to the natural Yellow stripe Sheer line path by 0.5 mm. So I need to move the sheer line at that point below the windows or to modify the windows to their correct positioning. I have seen several different solutions but choose to modify the individual windows (This happened prior to me finding out about the 3D printed hull correction in 1/350 scale by Ben at the Midwest Model Shop). The windows dimensions are 2 mm width by 3 mm height and with a digital caliber. Therefore, if I added a 2mm by 0.5 mm piece of styrene at the bottom of each of the windows to raise the height. Then with a fine flat file tool, I filed the window tops by 0.5 mm to keep the original 2 mm by 3 mm dimensions at the correct position. I know this throws off the spacing to the bulkhead rail cap above the windows, but the results would be less noticable that a "straight" sheer line take a unnatural dip at the windows. Or a major hull modification that might come out perfectly.

I liked the end results and sanded smooth the edges of the additions to match the hull surfaces and not grind off any of the fantastic hull details like the rivets and stake plates. Then I re-primed the hull and filled in any defects with putty and smoothed the surface to increasing grades of sanding sticks.

Next post is to add the missing doors and remove any "extra" doors on the kit

Happy Modeling - Pete

Working on the hull Drilling.jpg

Working on the hull B Deck 2 CL Prom Port 4.jpg

Working on the hull B Deck 2 CL Prom Starboard 3.jpg

Styrene for Window Corrections.jpg

Working on the hull B Deck 2 CL Prom Port 6.jpg

Working on the hull B Deck 2 CL Prom Starboard 5.jpg

Working on the hull B Deck 2 CL Prom Starboard Completed.jpg
 

Attachments

Last edited:
Great progress, PeteG! This model looks like it is "steaming" along nicely, and I love the idea of repositioning the 2nd Class B deck windows; I probably wouldn't notice that imperfection, and even If I had, I probably wouldn't fix it. I appreciate the photos!
 
Great progress, PeteG! This model looks like it is "steaming" along nicely, and I love the idea of repositioning the 2nd Class B deck windows; I probably wouldn't notice that imperfection, and even If I had, I probably wouldn't fix it. I appreciate the photos!
Thanks Titanicnerd it’s a good start at a head of steam
 
Be cautious with the color of LED lights. Lighting then was not bluish or bright white. More of a yellow hue from the LEDs would be more authentic. Also the funnels were not lit.
Good luck!
 
Be cautious with the color of LED lights. Lighting then was not bluish or bright white. More of a yellow hue from the LEDs would be more authentic. Also the funnels were not lit.
Good luck!
Yes I had to do some extensive searching to find the right type of light that was appropriate for the timeframe

Thanks for the tip on the funnels
 
Good Day Everybody !

I learned how to insert images so that they make more sense in this guide.

Moving on with the hull I started with the doors (mostly adding but some removal as per Rivet Counter guide) and windows and adding the missing portholes. I used Titanic-Cad-Plans, Ken Marshall paintings, Rivet Counter windows and doors, and the Ship Magnificent to try to get an accurate count of the doors, portholes and windows.

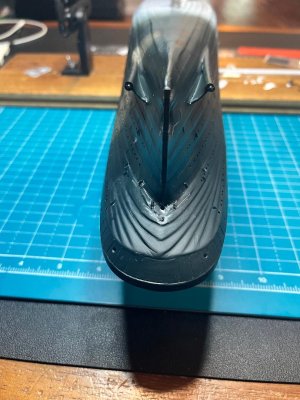
First was to add the missing portholes on the stern using the placement measurements as described in Rivet Counter. There are several other websites and youtube videos that discuss these portholes but I found that making a paper template/ stencil taped to the stern and a very sharp awl to create pilot holes for drilling was a better method for me. Then I drilled the stern hawse holes but made a mistake on the diameter and had to correct with tube styrene and re-drilled the holes to the correct size.

I also started etching stern transom plates. This required some time and patience to get the look just right and at the correct positions and spacing. Using the stern plating instructions from The Midwest Model Shop that was at 1:200 scale, I made another paper template with the correct dimensions by using a scale calculator website that converted the 1:200 scale to 1:350 scale. I liked the illusion of the details that the etching created for a more accurate representation of the stern.

Should be noted that I decided not to try and recreate the hull plating patterns in its entirety. I felt like going down that rabbit hole was not worth the ROI and time it would take. Making “representations” that creates an illusion to trick the minds eye to fill in the gaps was time and cost effective.

Transom 1.jpgTransom 2.jpg

I also added the stern Pad Eyes for the propellers and rudder I just received from China 3D prints, using the same instructions of the stern plating that included the pad eye positions on the hull (Verified by some period photographs of both the Titanic and the Olympic on the stern).

Transom Pad Eyes.jpg


Moving on to the doors required adding B-deck private promenade door on the starboard side and the B-Deck 1st class entrance doors both sides of the hull. You can see I added the hinges to the doors where necessary. These door additions included the coaling doors or coal bunker doors on F-Deck (18 on port and 17 on starboard). I also added the 2 pad eyes just under the E-Deck hull plate stakes for each coal bunker door by just cutting bits from a 0.25 mm rod and installing them 2 each as a set above each door with a 2 mm spacing on each set.

I added etching in the well deck cargo hatches, making the wash ports/ scuppers on those doors, (open on the fore well and closed covers on the aft well cargo hatches). I had to cross reference the Titanic Cad Plans, the bulwarks on the well deck (their openings and hawse holes for the bollards), and other photographic evidence I could find on the correct placements of the cargo doors and scuppers. So many different parts interact with each other and it was really fun to figure out all the issues to incorporate accurate details to my hull and the well deck interior bulwarks. I can draw a bit and found that mapping out all the openings and details on the hull in my build logbook was immensely helpful. This allowed me to wrap my head around all the different factors and make a scaled template for my use.

I also added enhance etching to the B-Deck half hatches on both the forward and aft B-Deck promenades and the associated scuppers (fore rectangular and aft round)

Hull Doors 2.jpgHull Doors 3.jpg

Also, the kit D-Deck 1st class entrance doors had a single "porthole" and not the side by side windows seen on all reference materials. I enlarged and squared the opening to the correct dimensions and added a crafted piece of photo etch brass to make the middle window frame.

Note: There was a lot of plastic residue and burrs from drilling out the portholes. I was using descending grades of sanding paper with sanding sticks and an electronic cordless hand sander to smooth out the portholes and windows (I found that the windows on the hull were out of shape and dimensions and I needed to file each one square) to preserve the molded hull details. In the interior of the hull I used an electronic drill to countersink each hole and remove its burrs to enhance their illumination factors.

You can see where I also started on the bilge keel and the port and starboard propeller wings but more on those issues on another post

Happy modeling - Pete
 
Last edited:
Back
Top