Royal William, Euromodel, a retro log

Ken

Joined
Dec 16, 2016
Messages
1,088
Points
493

Good morning from UK. I have just finished my build and log of Antio and I have no immediate plans to start another build at the moment. Earlier this year I did a short retro build log of my Wappen Von Hamburg, I was surprised at the interest shown for a brief account of an old build. I mentioned that I may do a similar retro log of my Royal William build and I think that now would probably be a good time to start. I didn’t do a log on the forum at the time but I did take lots of pictures of every stage ( hundreds ) and made copious notes so if you can forget that this model has already been built you may find it interesting to follow.

As with most of you I read Keith Juliers account of building a Euromodel kit of the Royal William, a very elaborate model and I thought Wow! but way above my grade, but we can all dream. About eight years ago one came up on Ebay at a cheap price, I thought why not, I put my bid on and to my surprise won it, so the journey began.

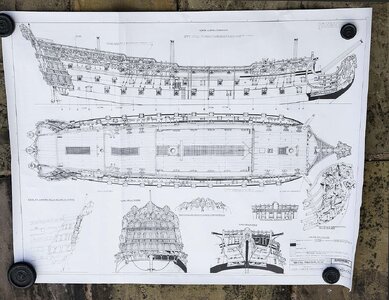
When I got the kit I realised that I was initially out of my depth, it wasn’t like other kits that I’d built but more like a semi scratch build, the wood was supplied as well as superb castings, there were no instructions but most importantly there were twenty 1:1 sheets of the most detailed plans that I had ever seen. I honestly didn’t think that I could successfully build it but having nothing to lose I set about giving it my best shot and along the way learned a great deal about ship modelling, you don’t know what you can achieve until you try.

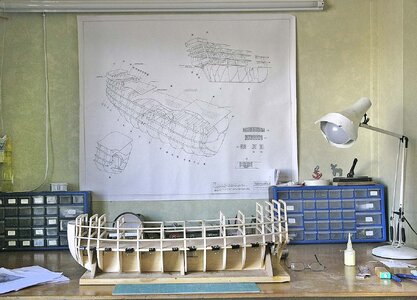
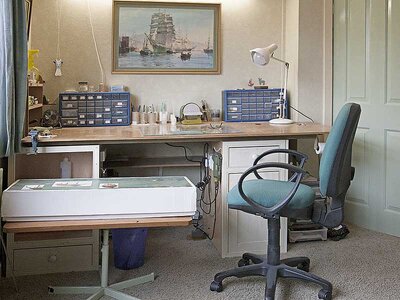
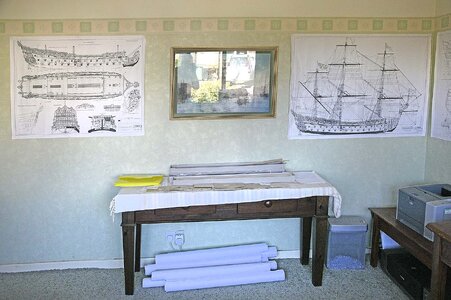
I’m showing you my work area so that you’ll realise that for this build I really didn’t have the space needed for this type of build, I used up most of my wall space to display the plans and I made a sort of side working surface using an old office swivel chair topped with some MDF. This has been a great asset as I can raise, lower and swivel it, especially useful for rigging and at no cost.

I’ll start the build in my next post, if you are interested you can see the result in the completed models section, this log will be how I got there.
009.jpg

001.jpg

015.jpg

_M0W3418.JPG

_M0W3411.JPG
 
Dear Ken
good luck with your new project :) ThumbsupI will join to the friends in the front row seat with a great curiosity
 
Good morning from UK. I have just finished my build and log of Antio and I have no immediate plans to start another build at the moment. Earlier this year I did a short retro build log of my Wappen Von Hamburg, I was surprised at the interest shown for a brief account of an old build. I mentioned that I may do a similar retro log of my Royal William build and I think that now would probably be a good time to start. I didn’t do a log on the forum at the time but I did take lots of pictures of every stage ( hundreds ) and made copious notes so if you can forget that this model has already been built you may find it interesting to follow.

As with most of you I read Keith Juliers account of building a Euromodel kit of the Royal William, a very elaborate model and I thought Wow! but way above my grade, but we can all dream. About eight years ago one came up on Ebay at a cheap price, I thought why not, I put my bid on and to my surprise won it, so the journey began.

When I got the kit I realised that I was initially out of my depth, it wasn’t like other kits that I’d built but more like a semi scratch build, the wood was supplied as well as superb castings, there were no instructions but most importantly there were twenty 1:1 sheets of the most detailed plans that I had ever seen. I honestly didn’t think that I could successfully build it but having nothing to lose I set about giving it my best shot and along the way learned a great deal about ship modelling, you don’t know what you can achieve until you try.

I’m showing you my work area so that you’ll realise that for this build I really didn’t have the space needed for this type of build, I used up most of my wall space to display the plans and I made a sort of side working surface using an old office swivel chair topped with some MDF. This has been a great asset as I can raise, lower and swivel it, especially useful for rigging and at no cost.

I’ll start the build in my next post, if you are interested you can see the result in the completed models section, this log will be how I got there.
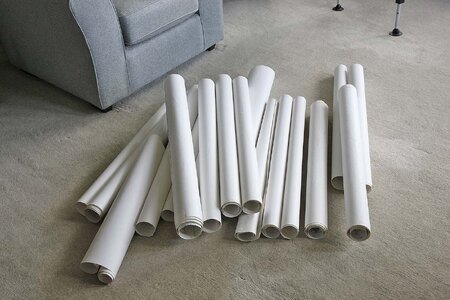

View attachment 450697

View attachment 450698

View attachment 450699

View attachment 450700

View attachment 450701

Dear Ken
good luck with your new project :) ThumbsupI will join to the friends in the front row seat with a great curiosity
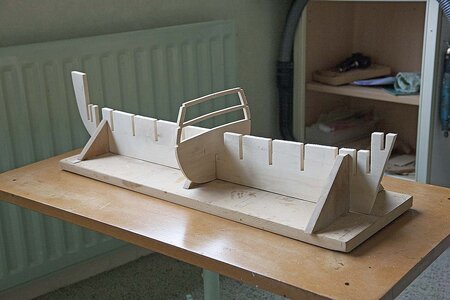
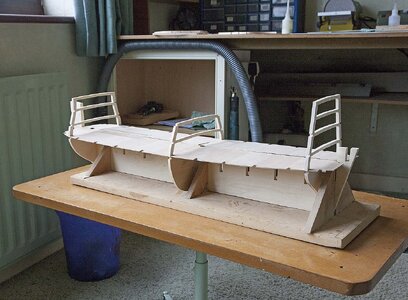
Hi Shota, You are most welcome on this journey, you can join me on the quarterdeck
 
Hello and thank you all for showing an interest in my build. I think we now have enough followers to make up a crew so we can now leave harbour to start the voyage.

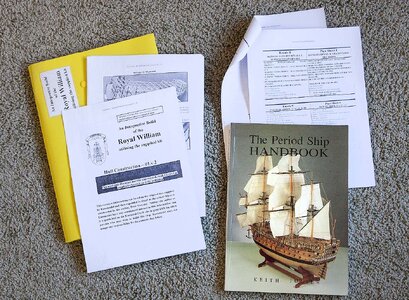
I already had Keith Julliers book which gave a basic guide to the build, that’s what initiated my interest in this model. To get as much material as I could I went to Euromodels site and found a great deal of helpful information, it was in the form of what they called An Interpretive Build, this was comprised of notes, sketches and some photos made by a retired teacher who had spent ten years building this model. It wasn’t a build manual but a guide to how he had interpreted the rather daunting plans to help others get a better understanding. During my build I had quite a bit of helpful contact with him, ( Peter ), and he has since added many of my ideas and photos to this very extensive guide.

Now to the build. I Thought that for the asking price of these kits other than the excellent castings it was rather basic, except for the hull and prow parts nothing was pre cut or shaped just lots of wood to make things yourself and excellent but rather complicated plans. The plans had been drawn by a draughtsman, not by a computer program for the model to be scratch built, Euromodel had just provided the material to do it.

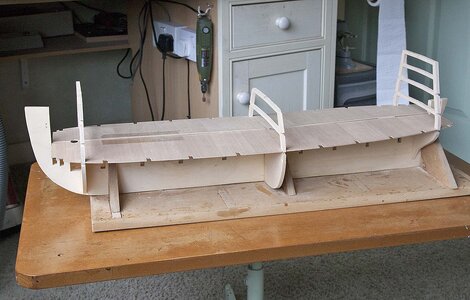
I started by making up a pretty basic 90 deg keel support from scrap MDF, not pretty but substantial. I cleaned up the bulkheads and the very substantial keel, 10mm thick ply, which was quite true. Here I found the first difference from normal kits, I had to identify the parts from the plans as nothing is numbered, I quite liked that simple difference as I now even at this early stage felt more engaged with the build. The keel and bulkheads had been hand cut with a scroll saw, no laser or CNC cutting here and needed finishing to perfectly match the plans. I think that this is a bit like a small output cottage type industry a bit stuck in time.

I dry fitted the bulkheads and found that they were a very loose fit, the keel slots were about 1.5mm too large and needed packing, the bulkhead slots were a good fit, just a little tight needing a light sand to allow for glue in the joint but I could find no issues at this stage. I tapered the rear of the keel by about 5mm but there is still plenty of wood left.

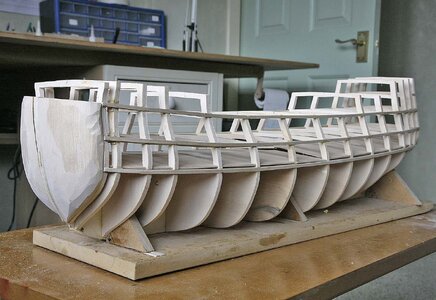
I decided to go about gluing and aligning the bulkheads in a sequence that was slightly different from what others seem to do, it worked out extremely well and is the method that I now successfully use on all my builds, I'll add pictures but what I did was to take Peters advice from his "Interpretive Build" and carefully mark the centre of each bulkhead at the top, I then glued bulkhead 1 which is the central one into place, I made particular effort to get this first one perfectly square and true then let it cure overnight. In the morning I did the same with the front and the rear bulkheads using the centre marks to line them up and making sure that the lower gun deck fitted. After the glue had grabbed but not cured I then did the in-between bulkheads, other than quickly checking that they were square it proved very easy just looking down the centre line to align them perfectly, the eye quickly picked up even a 1mm difference. When the glue had grabbed I slotted the four pieces of the lower gun deck into place and found that they went in perfectly with only a little encouragement, before the glue completely set again by eye I made the final adjustments much easier and truer than I had been expecting.

I took the pictures quite soon after and on looking at them I noticed that one of the bulkheads was slightly out of true and needed adjusting and that the second one from the front was sitting too high, this seemed strange as it was fully home in the keel, I adjusted it lower and hoped that there wasn't a reason that I hadn’t spotted for it being higher. Well the first cut had well truly been made, no going back.


004.jpg

005.jpg

006.jpg

007.jpg

This was taken prior to the final lining up

008.jpg
 
Last edited:
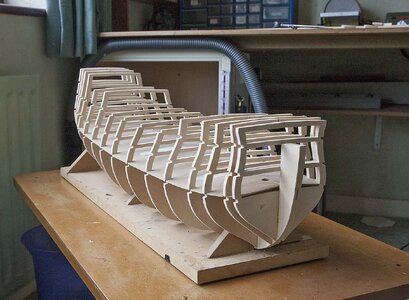
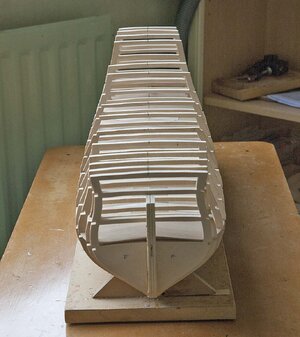
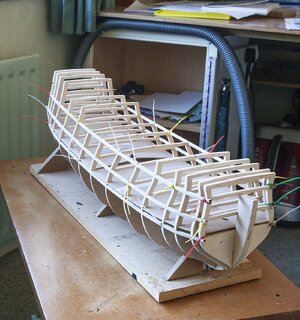
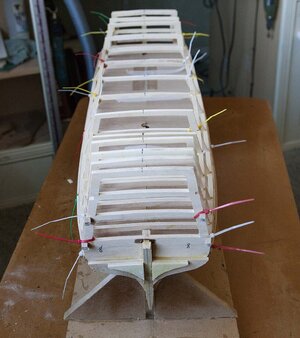
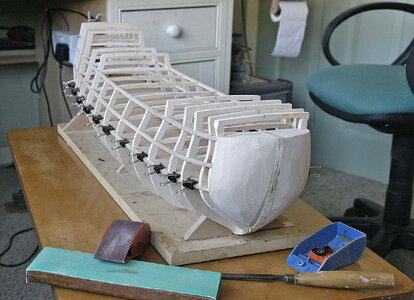
The build continues. After the successful start I put in the six stringers and the blocks on the rear bulkhead. The stringers are 4mm x 6mm, they needed to be bent on the 6mm width and the bend at the bow was such that I didn't think that it would be easy. I soaked the front 6" in boiling water for a few hours but the first one that I tried split, fortunately there was plenty left in the length. I had read somewhere that ammonia softens the resins in wood, we had some in the house so I soaked the ends in it for about an hour after which they were quite pliable and bent easily.

The next problem was how to hold them firmly in place whilst the glue dried. I thought that the way the deck supports had been made lent the use of small cable ties to be used. I attached the first at the bow and when I attached and tightened the others they pulled the stringers into there respective slots and formed the necessary curve. The stringers went readily into there slots with only the slightest of adjustments, looking along the line of them they appear to run nicely with only one about 1mm out, I think that I've been lucky so far. I put some filler blocks at the stern these caused a bit of confusion at first as to the correct placement but I eventually managed to figure them out. I then glued into place and roughly shaped some bow blocks, the wood for these had been supplied with the kit. So far all had gone well and I then left things to fully set overnight.

I got my first "Yellow Card" from my wife! She objected to the house smelling like the toilets of a pub on a Saturday night, so in future no ammonia in the house.


010.jpg

011.jpg

012.jpg

013.jpg

014.jpg
 
Last edited:
Back
Top