Royal William, Euromodel, a retro log

After finishing the initial planking, of the upper, I turned my attention to starting from the keel upwards. Initially this caused me problems. The false keel is 10mm, nice and sturdy but the walnut keel to be added later is only 7mm, the bulkheads are set flat and even with the bottom of the false keel except for where they arrive at a steep angle at the bow and the stern. It's difficult to describe in words the problem in getting the transition from planks laying flat at the bottom then over what is a shoulder of the wider false keel and lie flat against the side. To overcome this I added a 7mm planking strip along the bottom of the 10mm false keel, and used this to butt my planks up to. It means that I have planked the bottom of the keel as well but it made it easier to get a good flow of the planks and when complete I thought that I could always sand it back to near its original dimension. I think you’ll understand better when you see the pictures.

I split the area to be planked in half, worked upwards and downwards letting the planks have as natural a run as I could let them.

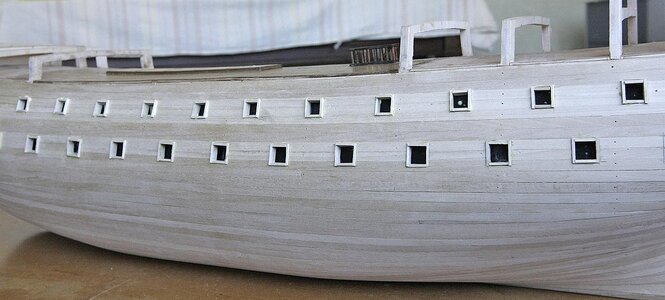
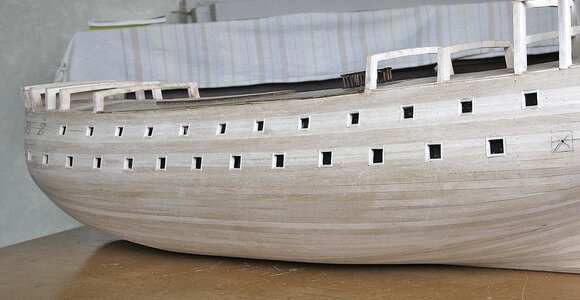
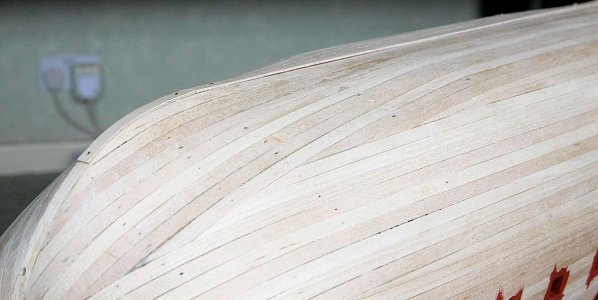
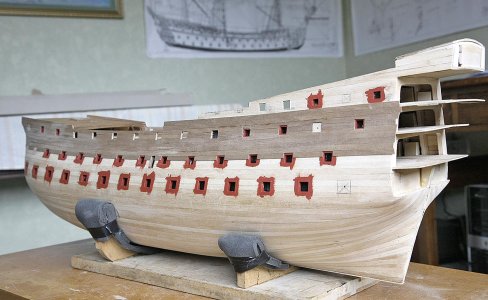
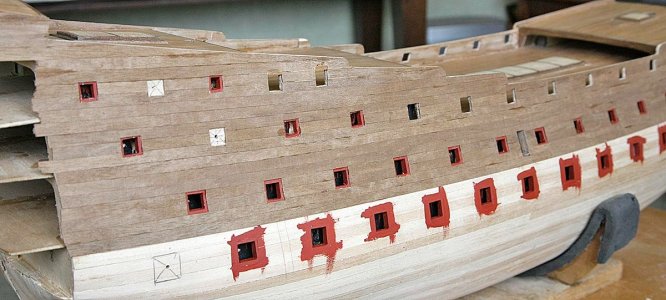
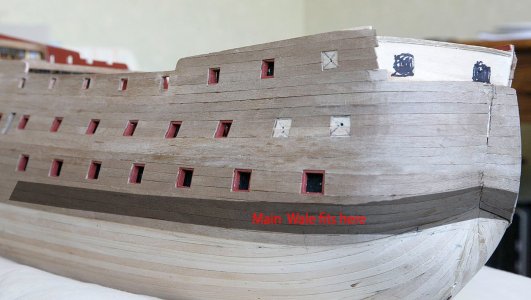
I had to take a short break from planking as the repetitive gripping of the many hundreds of small nails was causing cramps in my hand, I knew it wasn't going to be easy but that part of it was now nearly complete. I'd planked to below the lower gun deck, I was happy with the way that the planks were lying with a nice true run. I checked and rechecked the gun port positions from as many reference points as possible and all seemed to be ok.

Looking over the planking that I had done I could see that a slight hollow was forming around the second frame and that where the bow filler blocks joined the frame the curve had a slight bulge. I thought that the hollow relates to the earlier problem of the height of the bulkheads which I'd corrected, I've added strips to the edges of the 2nd, 3rd, 4th frames and re-profiled them so that should now be ok. I realised that the bulge was because I hadn't been aggressive enough shaping the edge of the bow blocks, I took more off the remaining part and hoped that I'd done enough to get a good profile. I hadn’t yet managed to complete any hull without the use of filler and I was hoping that this would be my first. This wasn’t really important but is just a matter of satisfaction.


View attachment 453456

View attachment 453457

View attachment 453458

View attachment 453459

View attachment 453460

View attachment 453461


View attachment 453463

View attachment 453464

View attachment 453465

View attachment 453466
Ken,

That is great planking! The deck looks fabulous as well. Given that I am 70, I may never reach your quality of workmanship and craftsmanship!

Bill
 
I have checked the various sites that sell ship models in the U.S. for the HMS Royal William, all without success. I was finally inspired to try the Euro Model website in Italy. Lo and behold! It is there. It is listed as available. I ordered one today! Finally, I am thoroughly enjoying watching your build of this magnificent ship!

Bill
Just checked out the Euromodel web page for current pricing. This model is $1,600 U.S dollars plus shipping and taxes.
Think I will pass on that .
Hi Bryian, Yes an eye watering price, I got mine for under £300 on EBay, a bargain not to be missed, even though I thought it a bit advanced for me, at that price it was worth taking on.
 
Hello, welcome back and thanks for your continued interest and likes.

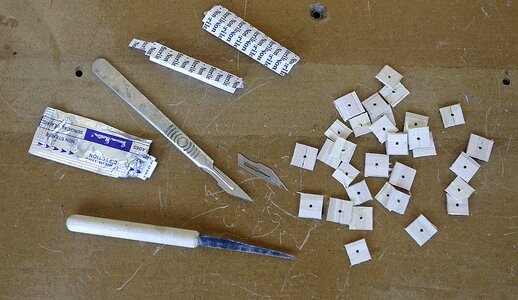
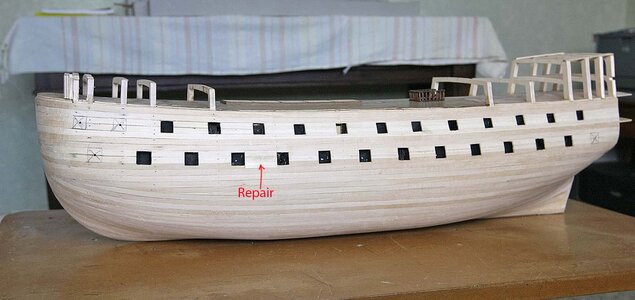
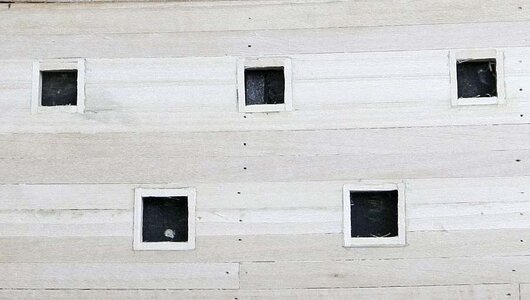
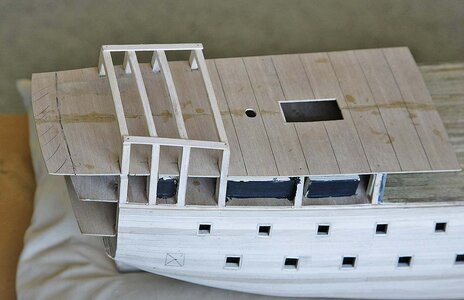
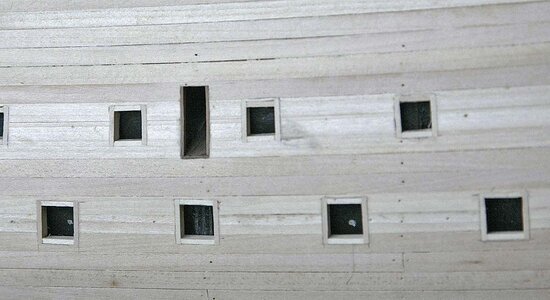
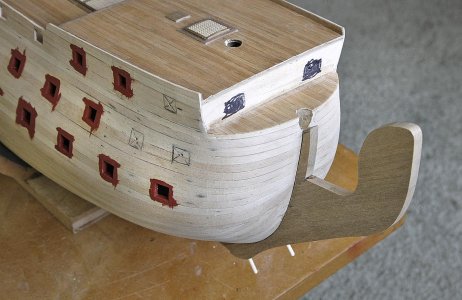
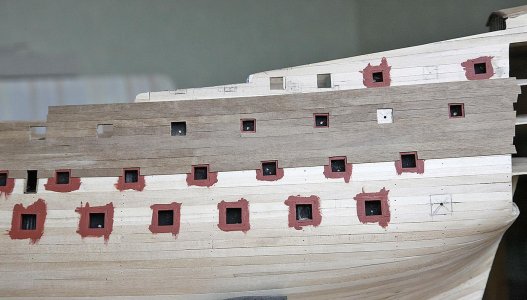
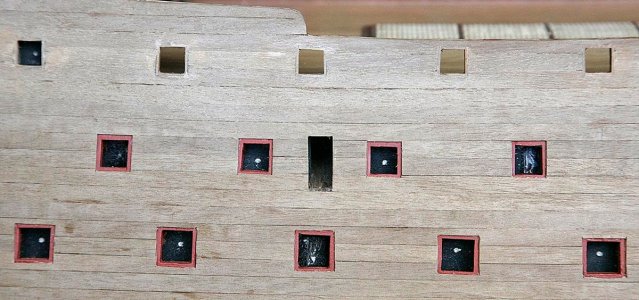
Now it was time to cut out the gun ports, for cutting I used a scalpel, I find them much sharper than a Xacto knife and give a perfect cut with ease. I didn't drill any pilot holes, I found that with a fresh blade it wasn’t necessary. Cutting the 1.5mm planks is just one pass with the grain and four passes across the grain and the plug comes away cleanly, no need for sanding to size. You can see in the pictures how cleanly the plugs came away intact. I used a fresh blade for each side.
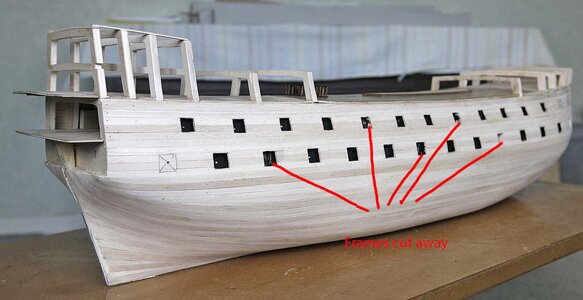
At first I was going to leave the ports which coincided with the frames as closed ones but as things were going so well I decided to cut away the frames and have a continuous line of open ports. Rather than just hack away I made a small saw from a junior hacksaw blade, I had thinned the blade quite a bit so as it had no strength and would bend so I fixed it into the dowel handle so that it would cut on the pull stroke, this is also shown in the picture. The whole procedure went very well and I was surprised at how quickly it was done, I had one clumsy moment when I put my thumb through some unsupported planks, thus needing a small repair.
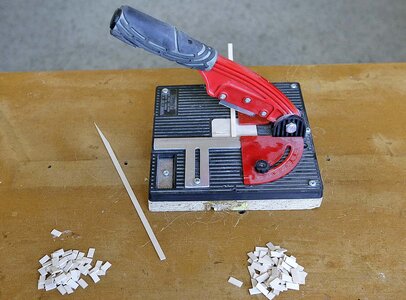
For the linings I used the off cuts from the first planking strips. I cut the linings using my very useful guillotine to get them uniform. I fitted them, they were a good tight fit and after a good drying time I trimmed and sanded them, all went well and was pleased with the result. When I fix the second planking I will leave the appropriate gap around the ports.


074.jpg

078.jpg

079.jpg

082.jpg

085.jpg

087.jpg

088.jpg
 
Hello, This is the next episode, thanks for looking.

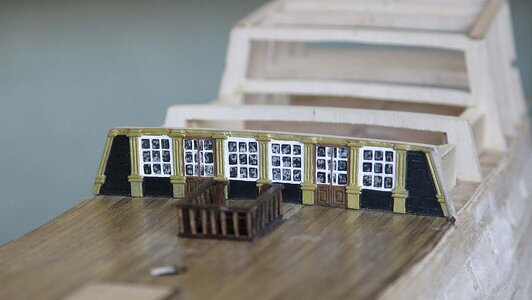
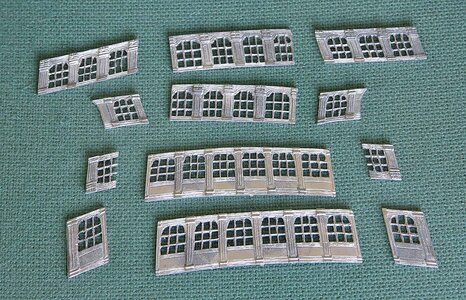
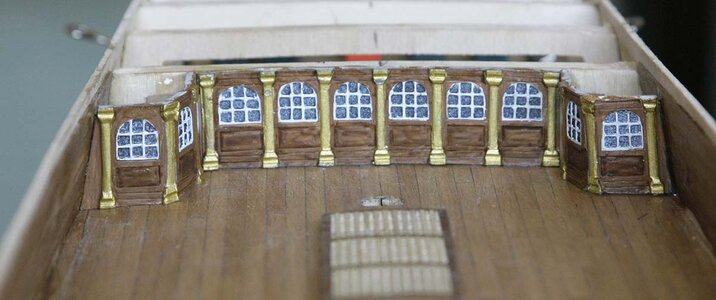
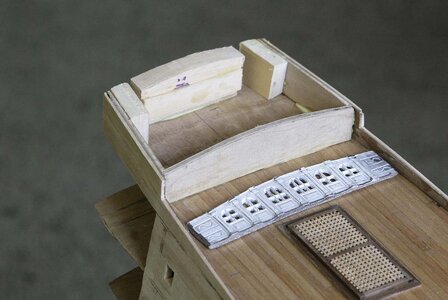
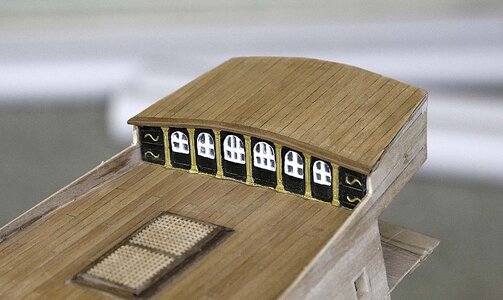
Next on the list was the cast facia under the quarter deck. I could play around with this as when it's in place it wouldn't be seen. The castings were real meaty items with plenty of depth and a fair amount of detail, better in my opinion than the thin but crisp photo etch, there is more character in them. That is except for the window framing, I couldn't initially see a way of making these windows look good but I set out to see what I could do. First I cleaned the casting up, primed then painted the frames white. I then dripped a black wash into the glazed area, this found its level in the castings leaving the white frames untouched which meant that I didn't have the almost impossible task of painting the frames neatly. I then painted the remaining facia. When the black wash dried it did so in a blotchy way and on the model looked like a normal window reflection, better I think than a solid colour.

I couldn't stop thinking that with a bit of effort I could do better. I'd seen the results that others have achieved by opening glazed areas up. I knew that if I didn't try I would find myself in a couple of years kicking myself knowing in my heart that I should have done it but by then it would be too late, every time I looked at the model I would feel regret.

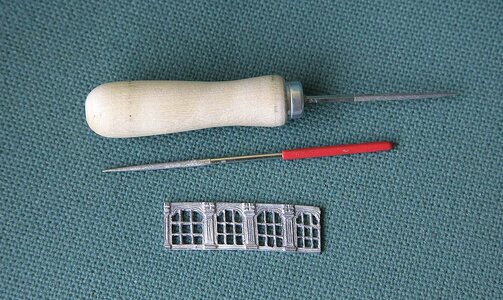
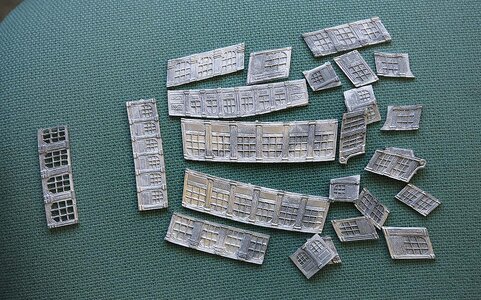
I selected another casting and started. I drilled a pilot hole, fitted a large handle to my needle file so that I could hold it and began filling. It wasn't a very difficult task but it took a long time, the four pane panel shown took me one and a half hours and it was so mind numbing it felt much longer, but it could be done. I decided to set aside half an hour each day of my building time to the task, I didn’t look forward to it but bit by bit they got done. I felt like someone had given me a can of red paint and a brush and told me to paint the Golden Gate Bridge and I don't like painting. This was defiantly not in my brief, I hadn’t intended to get involved in extra detailing but having considered it, it had to be done. In the picture when the pile on the left got bigger than the pile in the right I'd be happier and feel that I was making progress.

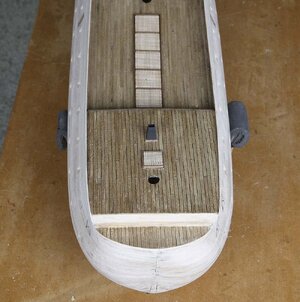
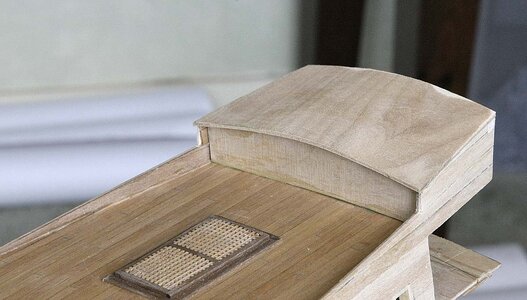
I cut out and lined the side entrances, I then fitted the forecastle and the quarter deck, the latter was about an inch too long and needed cutting down but I thought that it was better than it being too short. I then continued upwards with the first planking.

I'm trying to match up the build description with the pictures that I took, as there was so much going on some of the sequences may be a little out, some of the time I've re done things and the pictures don't reflect this so you'll occasionally need to use your imagination.


089.jpg

090.jpg

091.jpg

092.jpg

093.jpg

104.jpg
 
Hello and again thanks for those likes.

First I'm showing you the result of many weeks filing away at the gallery castings, it was a result but to date it is my most disliked episode in modelling, even worse than char removal.

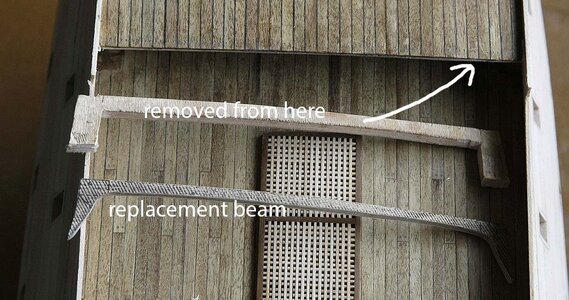
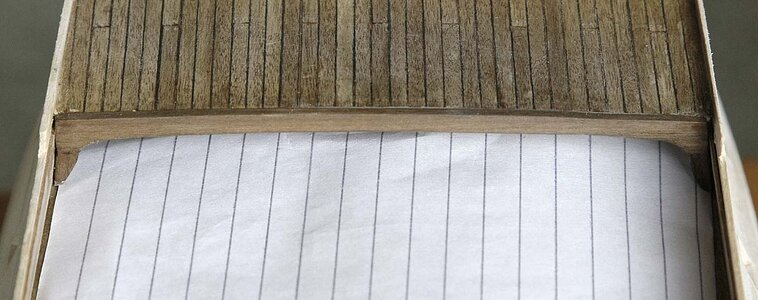
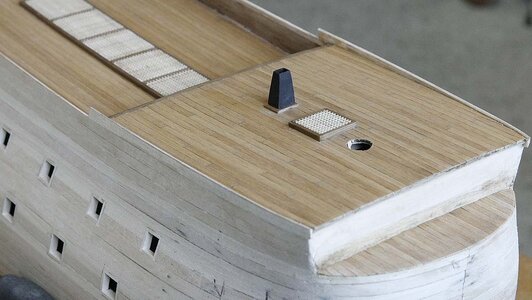
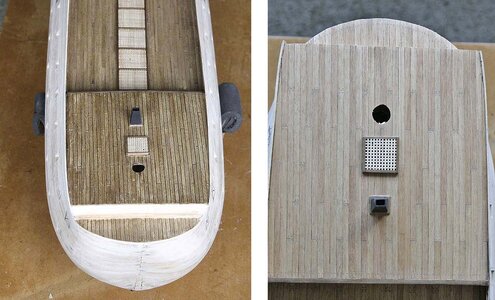
I installed the rest of the dummy gun carriages under the quarter deck and finished planking that area. I cut away a bulkhead and deck beam from the forecastle and made up my own correctly shaped beam from the plan using ply faced with walnut strip leaving a rebate for the planks to butt into, this looked much better than the kit version. After a little more work I lined the inner wall with 1mm walnut planks which then gave a bit of extra strength. I made up the grating for the forecastle and a chimney for the stove, ( sorry no stove ).

I remember being very pleased with my progress but it was about to go very pear shaped.

When I bleached the walnut for the main deck planks I didn't do all the planks in one go, only enough for that deck, I did the others much later, big mistake. They looked as if they had taken on a slightly different shade than previous planks but as I was going to dye them light oak once they were on I thought nothing of it. To compound this the marker pen that I'd used had dried out so I bought another but from a different manufacturer, second mistake. I cut the planks to length and edged them with the new marker, this marker seemed a little more moist than the first, it leached into the wood more than the original but I never noticed. When I'd finished the planking, including the small deck at the bow I tree nailed them, stained them but when I put on the varnish these small differences became much amplified. To my dismay the deck looked darker with a more uneven colour and the black caulking showed up far too strongly and way out of proportion, I was not a happy bunny.

I went to bed and tried to pretend it hadn't happened and it would all be okay in the morning, it was too awful to think about, it looked bad, I couldn't leave it like that. If the boat fairies didn't visit it overnight and fix it I would have to strip and re-plank both decks as I didn’t think that I could replicate the main deck planks.

In the morning it looked just as bad, so as with the cast windows, if I had left the decks the way they were I would on seeing them every day regret it. I took it on the chin and learned from it.

I ended up striping the decks of their planks, cutting away part of the quarter deck to give me access and even removing the stairs, I cleaned everything up, got some more wood and started the decks again, once committed I felt much better.

Next post will be about a happy outcome.

114.jpg

100.jpg

101.jpg

102.jpg

Unhappy with this deck planking

106.jpg

Removed staircase, gratings etc and started to strip planking

107.jpg
 
Last edited:
Hello and again thanks for those likes.

First I'm showing you the result of many weeks filing away at the gallery castings, it was a result but to date it is my most disliked episode in modelling, even worse than char removal.

I installed the rest of the dummy gun carriages under the quarter deck and finished planking that area. I cut away a bulkhead and deck beam from the forecastle and made up my own correctly shaped beam from the plan using ply faced with walnut strip leaving a rebate for the planks to butt into, this looked much better than the kit version. After a little more work I lined the inner wall with 1mm walnut planks which then gave a bit of extra strength. I made up the grating for the forecastle and a chimney for the stove, ( sorry no stove ).

I remember being very pleased with my progress but it was about to go very pear shaped.

When I bleached the walnut for the main deck planks I didn't do all the planks in one go, only enough for that deck, I did the others much later, big mistake. They looked as if they had taken on a slightly different shade than previous planks but as I was going to dye them light oak once they were on I thought nothing of it. To compound this the marker pen that I'd used had dried out so I bought another but from a different manufacturer, second mistake. I cut the planks to length and edged them with the new marker, this marker seemed a little more moist than the first, it leached into the wood more than the original but I never noticed. When I'd finished the planking, including the small deck at the bow I tree nailed them, stained them but when I put on the varnish these small differences became much amplified. To my dismay the deck looked darker with a more uneven colour and the black caulking showed up far too strongly and way out of proportion, I was not a happy bunny.

I went to bed and tried to pretend it hadn't happened and it would all be okay in the morning, it was too awful to think about, it looked bad, I couldn't leave it like that. If the boat fairies didn't visit it overnight and fix it I would have to strip and re-plank both decks as I didn’t think that I could replicate the main deck planks.

In the morning it looked just as bad, so as with the cast windows, if I had left the decks the way they were I would on seeing them every day regret it. I took it on the chin and learned from it.

I ended up striping the decks of their planks, cutting away part of the quarter deck to give me access and even removing the stairs, I cleaned everything up, got some more wood and started the decks again, once committed I felt much better.

Next post will be about a happy outcome.

View attachment 456186

View attachment 456190

View attachment 456191

View attachment 456192

Unhappy with this deck planking

View attachment 456193

Removed staircase, gratings etc and started to strip planking

View attachment 456194
You made a brave decision, Ken. But a good one. When the ‘overnight view’ is not right, then it’s time for time re-do.
The outcome of the filing of the windows looks very nice. Only a repair for 2 little bars.
Regards, Peter
 
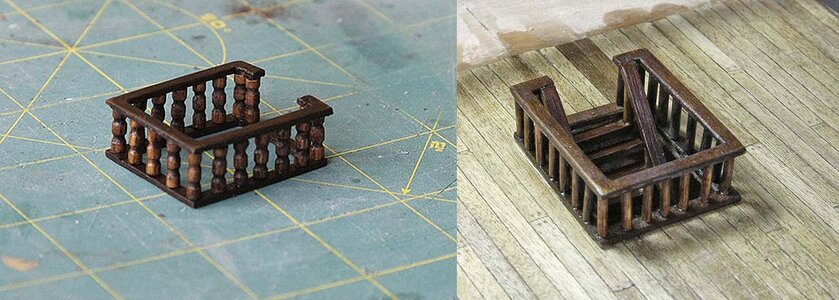
As the deck was striped bare and the staircase rails removed I took the opportunity to try and improve them. I was pleased with the first ones but as the build developed I increasingly wanted things to be the best that I could make them, so even though they won't be seen I was glad of the second chance.

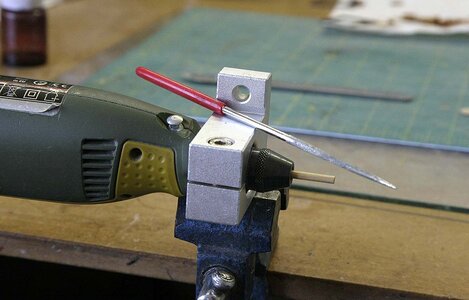
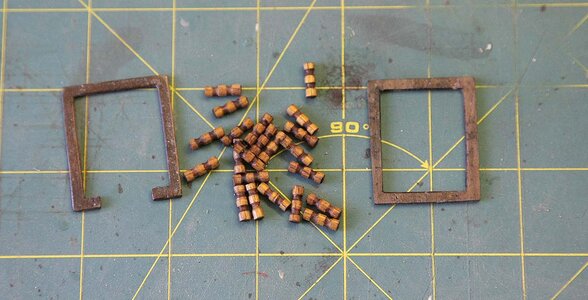
I used the original hand rails but tried to make them look better by using columns instead of straight dowels for the uprights. I used 3mm dowel, I marked what the size would be and mounted my drill in a clamp. I used a round needle file to put two grooves into each dowel, when cut to length they looked quite good and I think you'll agree that the finished rail was much improved.

The big question, was it worth the extra work involved? The answer is an emphatic yes, worth every minute spent on doing it and I think that when you look at the pictures you'll agree with me.

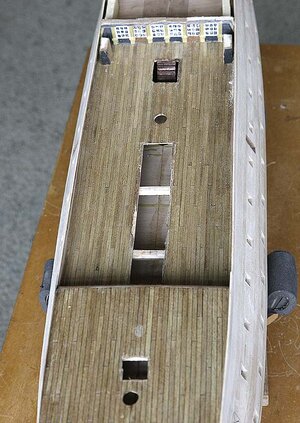
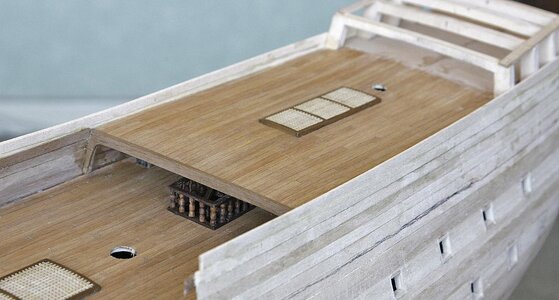
I got some Tanganyika for the planking as this is what I normally get in kits and I'm familiar with it. I used an electric sander and took the old planks back as much as I could, rather than rip them off and leave a rough surface. I used a soft pencil on the edge instead of a marker pen which gave excellent results, I tree nailed in the same way using a drilled hole and filler and I finished the surface with a light sanding and coated it with a matt poly. This was my best planking yet and one that I very pleased with, very much worth the effort. All part of Kens learning curve. I finished off by making up walnut beams for those that were visible at the edge of each deck instead of the kit ply ones.

Don't you wish life itself was like this, you screw up but you can put it all behind you and start again.


108.jpg

109.jpg

New and Old

110.jpg

111.jpg

112.jpg

Old versus New

115.jpg

119.jpg

121.jpg
 
Last edited:
As the deck was striped bare and the staircase rails removed I took the opportunity to try and improve them. I was pleased with the first ones but as the build developed I increasingly wanted things to be the best that I could make them, so even though they won't be seen I was glad of the second chance.

I used the original hand rails but tried to make them look better by using columns instead of straight dowels for the uprights. I used 3mm dowel, I marked what the size would be and mounted my drill in a clamp. I used a round needle file to put two grooves into each dowel, when cut to length they looked quite good and I think you'll agree that the finished rail was much improved.

The big question, was it worth the extra work involved? The answer is an emphatic yes, worth every minute spent on doing it and I think that when you look at the pictures you'll agree with me.

I got some Tanganyika for the planking as this is what I normally get in kits and I'm familiar with it. I used an electric sander and took the old planks back as much as I could, rather than rip them off and leave a rough surface. I used a soft pencil on the edge instead of a marker pen which gave excellent results, I tree nailed in the same way using a drilled hole and filler and I finished the surface with a light sanding and coated it with a matt poly. This was my best planking yet and one that I very pleased with, very much worth the effort. All part of Kens learning curve. I finished off by making up walnut beams for those that were visible at the edge of each deck instead of the kit ply ones.

Don't you wish life itself was like this, you screw up but you can put it all behind you and start again.


View attachment 456549

View attachment 456550

New and Old

View attachment 456551

View attachment 456552

View attachment 456553

Old versus New

View attachment 456554

View attachment 456555

View attachment 456556
Good morning Ken. Well done, that is a massive accomplishment with the re working of the deck. Makes a big difference. Cheers Grant
 
Hello, Thanks for looking in.

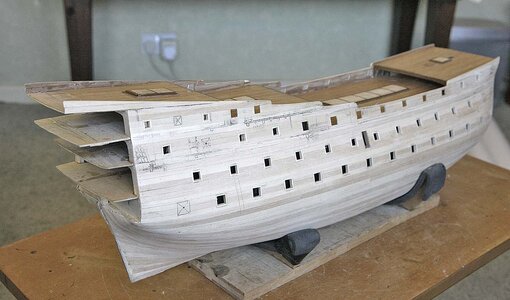
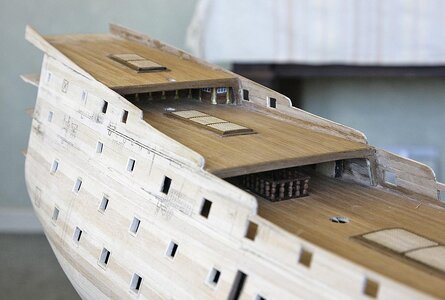
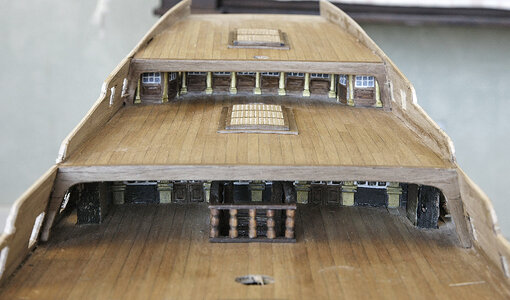
I fitted the quarter deck, planked and tree nailed it. I made up the deck beam as I had earlier and fitted that. I fitted all the dummy gun carriages and continued upwards with the first planking. I made and fitted the quarter deck gratings. I had been finding difficulties filing out all the windows so for the panel screens on the quarter deck I just painted them, they would hardly be seen so I accepted the compromise there. After I'd planked high enough I roughly shaped the profile for the top edge but having done it I found that I had taken away too much, so annoyed with myself I had to re-do a fair bit of the upper planking. I fitted the upper quarter deck, planked and nailed it. I decided to mark the gun port positions next.

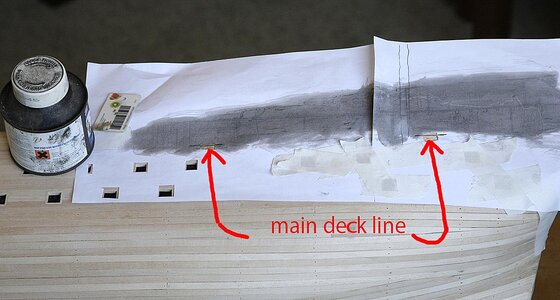
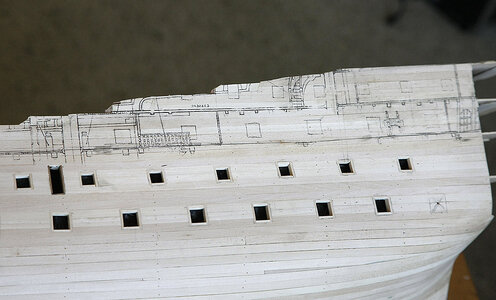
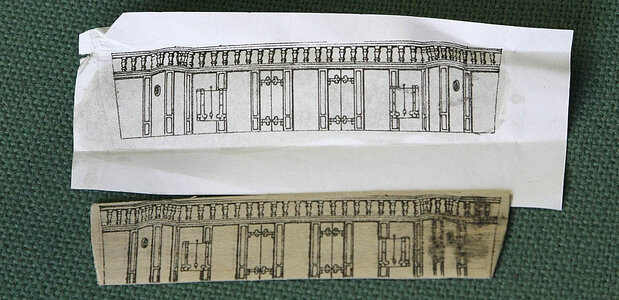
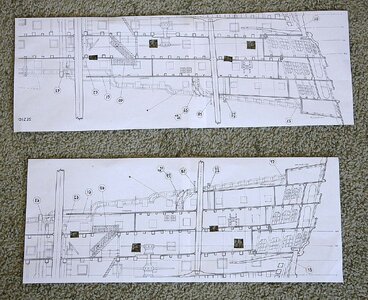
Up until about twenty years ago I built and flew model aircraft and from that I learned how to transfer the image from plans onto the surface of wood so I tried that method and it worked well, see what you think.

To transfer the image you need to copy the plan and print it using a Laser printer, it won't work with an inkjet! You need to get something with Xylene in it. Looking through my shed I found that I had some thinners that was for Hammerite metal paint so I use that, I believe it is also in ink eraser pens, and other products, just check the label. Place the printed side to the wood, I taped mine down so that it didn’t move, dampen the back with xylene then with a hard edge, I use an old plastic card, scrape it over the print, this transfers the laser ink onto the wood every bit as sharp and clear as the original, works like magic every time.

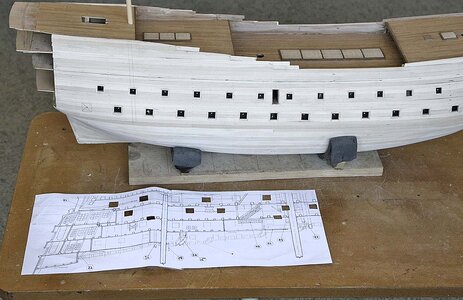
After marking out the ports I cut them out and lined them. The ones without lids I would line with 1mm walnut after the 2nd planking and sand them flush. I left the ports in the waist not at their finished height, there wouldn’t have been much strength at the top so I'd size them after the second planking. I cut the sides to size and sanded them to shape. I planked the upper quarter deck, made and fitted the gratings. I was disappointed with the amount of grating material, There was nowhere near enough, I had to use some that I had left from other kits and there are still gratings left to make.

Using Xylene
122.jpg
Resulting image
123.jpg

124.jpg

125.jpg

126.jpg

127.jpg

128.jpg

129.jpg

130.jpg

131.jpg
 
Hello, Thanks for looking in.

I fitted the quarter deck, planked and tree nailed it. I made up the deck beam as I had earlier and fitted that. I fitted all the dummy gun carriages and continued upwards with the first planking. I made and fitted the quarter deck gratings. I had been finding difficulties filing out all the windows so for the panel screens on the quarter deck I just painted them, they would hardly be seen so I accepted the compromise there. After I'd planked high enough I roughly shaped the profile for the top edge but having done it I found that I had taken away too much, so annoyed with myself I had to re-do a fair bit of the upper planking. I fitted the upper quarter deck, planked and nailed it. I decided to mark the gun port positions next.

Up until about twenty years ago I built and flew model aircraft and from that I learned how to transfer the image from plans onto the surface of wood so I tried that method and it worked well, see what you think.

To transfer the image you need to copy the plan and print it using a Laser printer, it won't work with an inkjet! You need to get something with Xylene in it. Looking through my shed I found that I had some thinners that was for Hammerite metal paint so I use that, I believe it is also in ink eraser pens, and other products, just check the label. Place the printed side to the wood, I taped mine down so that it didn’t move, dampen the back with xylene then with a hard edge, I use an old plastic card, scrape it over the print, this transfers the laser ink onto the wood every bit as sharp and clear as the original, works like magic every time.

After marking out the ports I cut them out and lined them. The ones without lids I would line with 1mm walnut after the 2nd planking and sand them flush. I left the ports in the waist not at their finished height, there wouldn’t have been much strength at the top so I'd size them after the second planking. I cut the sides to size and sanded them to shape. I planked the upper quarter deck, made and fitted the gratings. I was disappointed with the amount of grating material, There was nowhere near enough, I had to use some that I had left from other kits and there are still gratings left to make.

Using Xylene
View attachment 457214
Resulting image
View attachment 457215

View attachment 457216

View attachment 457217

View attachment 457218

View attachment 457219

View attachment 457220

View attachment 457221

View attachment 457222

View attachment 457223
Good morning Ken.Wow a lot of work and Looking very good. That is some clever “trickery “ you used. I probably would get the alignment of the transfer all wrongROTF. Cheers Grant
 
Hello, Thanks for looking in.

I fitted the quarter deck, planked and tree nailed it. I made up the deck beam as I had earlier and fitted that. I fitted all the dummy gun carriages and continued upwards with the first planking. I made and fitted the quarter deck gratings. I had been finding difficulties filing out all the windows so for the panel screens on the quarter deck I just painted them, they would hardly be seen so I accepted the compromise there. After I'd planked high enough I roughly shaped the profile for the top edge but having done it I found that I had taken away too much, so annoyed with myself I had to re-do a fair bit of the upper planking. I fitted the upper quarter deck, planked and nailed it. I decided to mark the gun port positions next.

Up until about twenty years ago I built and flew model aircraft and from that I learned how to transfer the image from plans onto the surface of wood so I tried that method and it worked well, see what you think.

To transfer the image you need to copy the plan and print it using a Laser printer, it won't work with an inkjet! You need to get something with Xylene in it. Looking through my shed I found that I had some thinners that was for Hammerite metal paint so I use that, I believe it is also in ink eraser pens, and other products, just check the label. Place the printed side to the wood, I taped mine down so that it didn’t move, dampen the back with xylene then with a hard edge, I use an old plastic card, scrape it over the print, this transfers the laser ink onto the wood every bit as sharp and clear as the original, works like magic every time.

After marking out the ports I cut them out and lined them. The ones without lids I would line with 1mm walnut after the 2nd planking and sand them flush. I left the ports in the waist not at their finished height, there wouldn’t have been much strength at the top so I'd size them after the second planking. I cut the sides to size and sanded them to shape. I planked the upper quarter deck, made and fitted the gratings. I was disappointed with the amount of grating material, There was nowhere near enough, I had to use some that I had left from other kits and there are still gratings left to make.

Using Xylene
View attachment 457214
Resulting image
View attachment 457215

View attachment 457216

View attachment 457217

View attachment 457218

View attachment 457219

View attachment 457220

View attachment 457221

View attachment 457222

View attachment 457223
You made some nice steps in the build, Ken. The inside walls with the windows and pillars give her ‘some face’.
The transfer of the drawings is a good idea to keep in mind.
Regards, Peter
 
  • Like
Reactions: Ken
Hello again, and thanks for looking in.

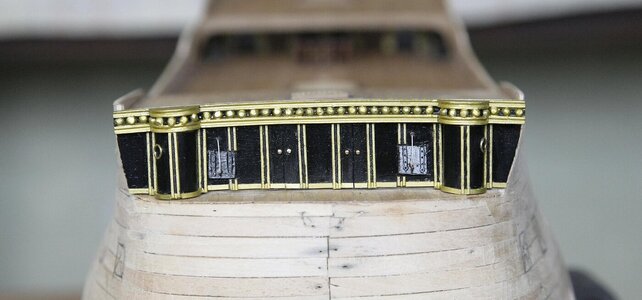
Next I decided to make up the forward facia, as there was nothing included in the kit to make this up or any suggestions as how to do it I needed to get creative and scratch build it.

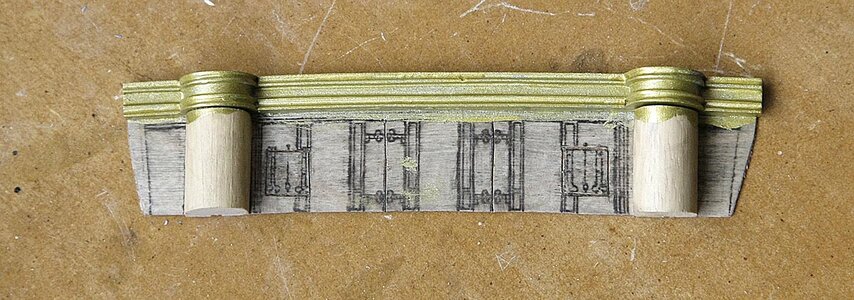
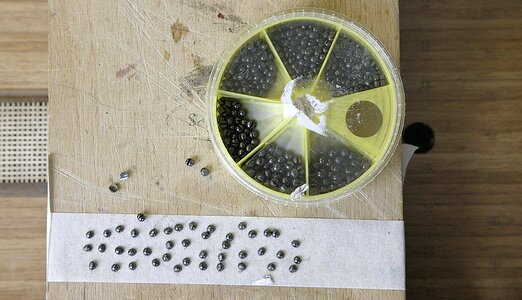
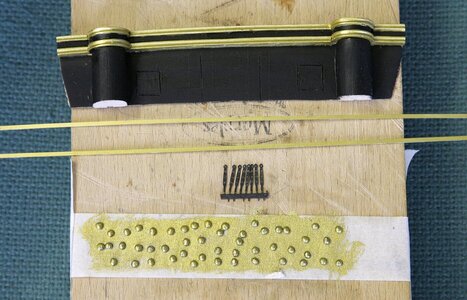
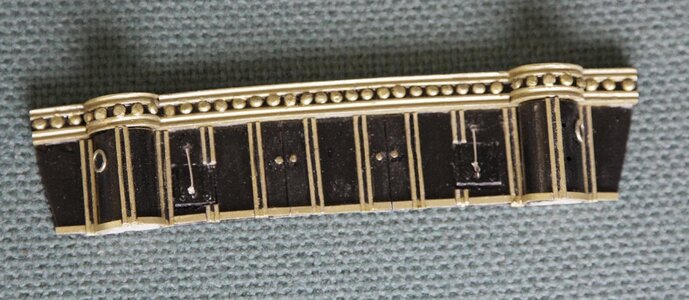
First I copied the plan onto 0.5 ply then cut it to shape, I intended to build it off the model and add it later. I cut a length if 12mm dowel and halved it to be used for the roundhouses, I glued them into place along with the top casting and painted them. I wasn't going to use turned columns for the decor but I didn't want to leave the casting as plain as it was so I decided to bead across the top. I had a selection of shot weights used for fishing, I got these for canon balls on a previous build, they were ideal as they came in many different sizes, they are split for attaching to fishing line so were easily halved. I painted them gold and glued them into place, I thought that they worked quite well. The upright pillars were made from 2x3mm walnut strip with the centre groove filed out, they were painted and fitted into place. I just glued on leftover deck planking to simulate the doors and used brass nails for the handles, I thought adding hinges would crowd the space so omitted them.

I cut into the ply to make the gunports and prised them open a little to give them more definition before adding some hinges and rope. I painted some plastic strips and added them to the bottom of the facia to give it a finished look. After a bit of finishing off I thought that it turned out quite acceptable.

I'm afraid the updates may become a little infrequent, my wife is undergoing chemo at the moment, my priorities have changed and my mind isn't on modelling.


133.jpg

134.jpg

135.jpg

136.jpg

137.jpg

138.jpg
 
Hello again, and thanks for looking in.

Next I decided to make up the forward facia, as there was nothing included in the kit to make this up or any suggestions as how to do it I needed to get creative and scratch build it.

First I copied the plan onto 0.5 ply then cut it to shape, I intended to build it off the model and add it later. I cut a length if 12mm dowel and halved it to be used for the roundhouses, I glued them into place along with the top casting and painted them. I wasn't going to use turned columns for the decor but I didn't want to leave the casting as plain as it was so I decided to bead across the top. I had a selection of shot weights used for fishing, I got these for canon balls on a previous build, they were ideal as they came in many different sizes, they are split for attaching to fishing line so were easily halved. I painted them gold and glued them into place, I thought that they worked quite well. The upright pillars were made from 2x3mm walnut strip with the centre groove filed out, they were painted and fitted into place. I just glued on leftover deck planking to simulate the doors and used brass nails for the handles, I thought adding hinges would crowd the space so omitted them.

I cut into the ply to make the gunports and prised them open a little to give them more definition before adding some hinges and rope. I painted some plastic strips and added them to the bottom of the facia to give it a finished look. After a bit of finishing off I thought that it turned out quite acceptable.

I'm afraid the updates may become a little infrequent, my wife is undergoing chemo at the moment, my priorities have changed and my mind isn't on modelling.


View attachment 460491

View attachment 460492

View attachment 460493

View attachment 460494

View attachment 460495

View attachment 460496
Nice to see your up-date, Ken. I sincerely hope that your wife's treatment is successful. Lots of strength to you too during this period.
Regards, Peter
 
  • Like
Reactions: Ken
Hello again, and thanks for looking in.

Next I decided to make up the forward facia, as there was nothing included in the kit to make this up or any suggestions as how to do it I needed to get creative and scratch build it.

First I copied the plan onto 0.5 ply then cut it to shape, I intended to build it off the model and add it later. I cut a length if 12mm dowel and halved it to be used for the roundhouses, I glued them into place along with the top casting and painted them. I wasn't going to use turned columns for the decor but I didn't want to leave the casting as plain as it was so I decided to bead across the top. I had a selection of shot weights used for fishing, I got these for canon balls on a previous build, they were ideal as they came in many different sizes, they are split for attaching to fishing line so were easily halved. I painted them gold and glued them into place, I thought that they worked quite well. The upright pillars were made from 2x3mm walnut strip with the centre groove filed out, they were painted and fitted into place. I just glued on leftover deck planking to simulate the doors and used brass nails for the handles, I thought adding hinges would crowd the space so omitted them.

I cut into the ply to make the gunports and prised them open a little to give them more definition before adding some hinges and rope. I painted some plastic strips and added them to the bottom of the facia to give it a finished look. After a bit of finishing off I thought that it turned out quite acceptable.

I'm afraid the updates may become a little infrequent, my wife is undergoing chemo at the moment, my priorities have changed and my mind isn't on modelling.


View attachment 460491

View attachment 460492

View attachment 460493

View attachment 460494

View attachment 460495

View attachment 460496
Good afternoon Ken. Very good progress as always. I’m sorry to hear about your wife…tough times. My prayers are with you guys- stay strong. Cheers Grant
 
Back
Top