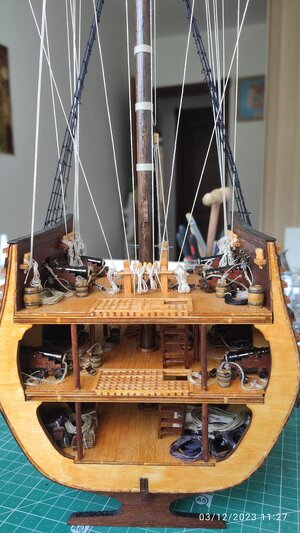
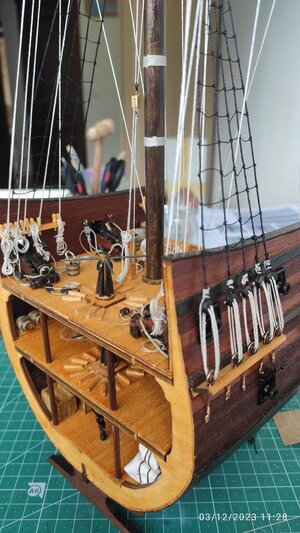
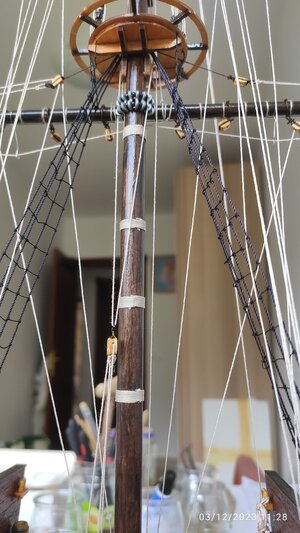
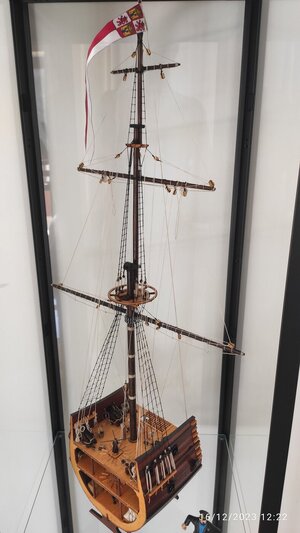
San Francisco cross section, by Adry

well done - it is looking very good and accurate made
I am wondering only about this small hand pump in the hold - although it is original shown and included in the Artesania kit - technically it is very questionable, if there was any pump at this location, this type.....
 
well done - it is looking very good and accurate made
I am wondering only about this small hand pump in the hold - although it is original shown and included in the Artesania kit - technically it is very questionable, if there was any pump at this location, this type.....
Indeed, I think it is too modern (very similar to the "Wild West" era) for the time and also might not be well placed and not to scale.
In the information that I have in relation to the Manila galleons I do not find much information about bilge pumps. I think they should be located on the second deck (above the waterline) and the pipes would reach the bilges.
 
Hi guys.
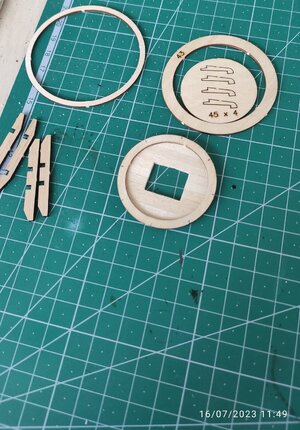
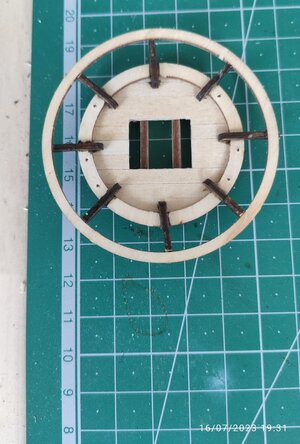
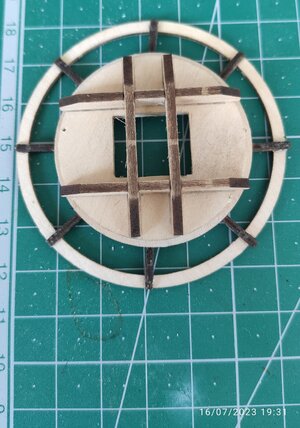
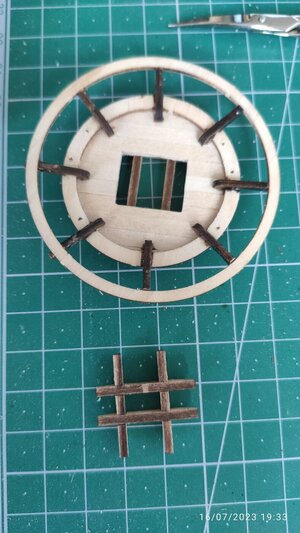
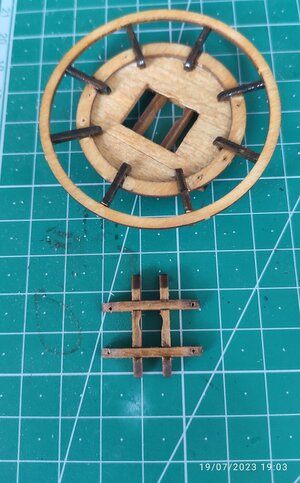
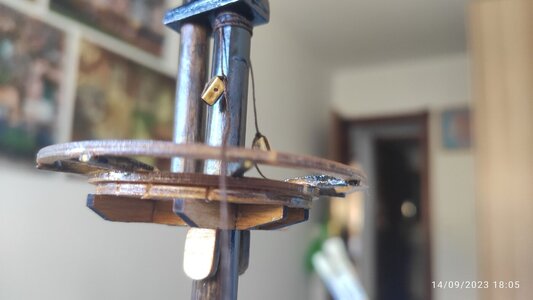
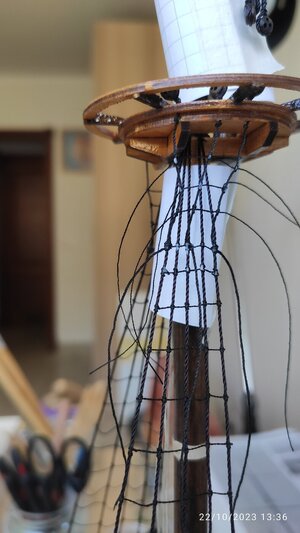
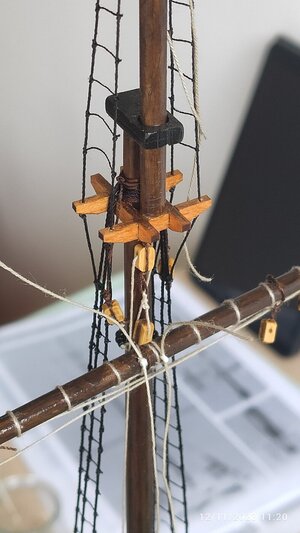
Here you are the top (crow’s nest) and the crosstrees, they are not difficult to build, doing it well, on the other hand, is.
To the top I have added, outside the instructions, planks.
As you can see, instead of previously painting the joints to the outer ring, I did it after gluing them, so the result is not very satisfactory.
I also see that one of the holes in the crosstrees has remained somewhat deviated. I'm still learning.
Thanks for being there.
Cheers.
IMG_20230716_114959 b.jpgIMG_20230716_193142 b.jpgIMG_20230716_193149 b.jpgIMG_20230716_193344.jpgIMG_20230719_190338 b.jpg
 
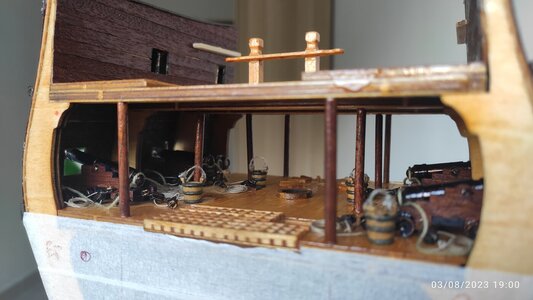
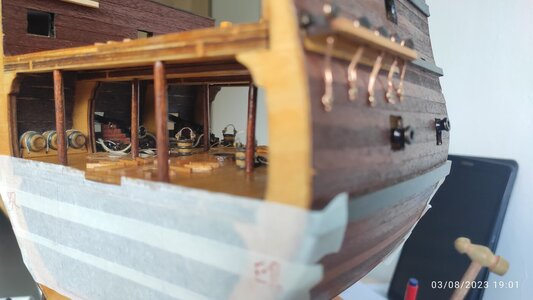
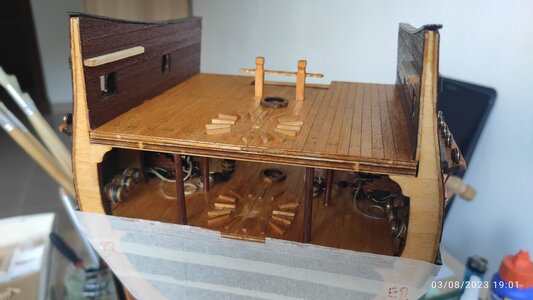
Continuing with my little construction, a few days ago, I found a way to introduce the guns and their rigging on the second deck of the ship without breaking anything.

It occurred to me to make a slightly smaller replica of the gun's broadside and its ports than the one where the gun would be housed. I glue the cannon rigging to that replica and carefully insert all of it into place. The replica of the side is glued to the original side.

I repeated this 4 times, once for each gun.

The result, once the cannons and their rigging have been introduced, seems correct to me, although I would have preferred to do it like Jeff T.

Have a nice day.
IMG_20230803_190054.jpgIMG_20230803_190147.jpg
IMG_20230803_190042.jpgIMG_20230803_190156.jpg
 
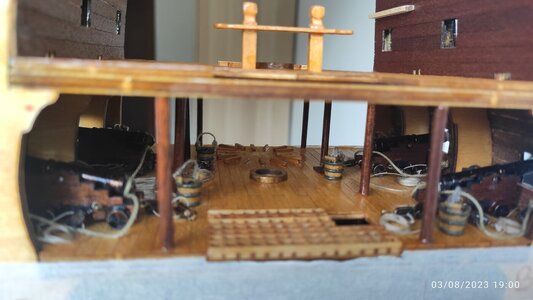
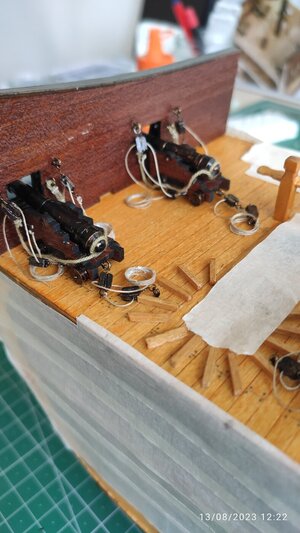
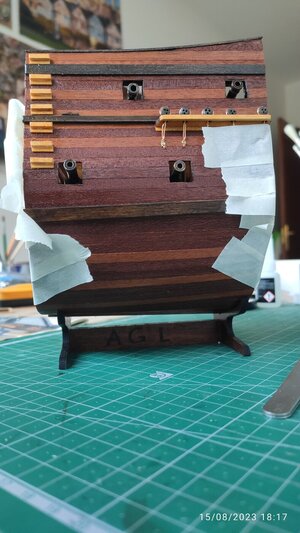
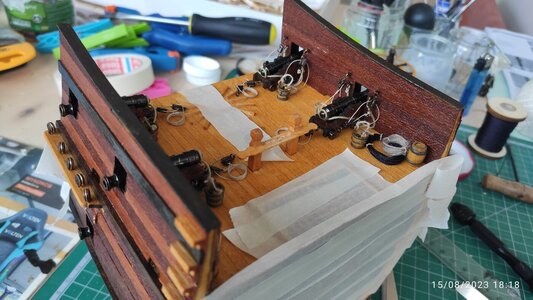
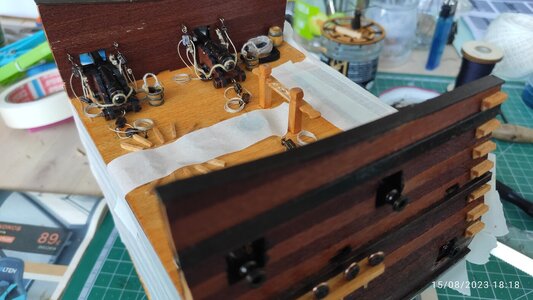
I have practically finished installing the elements of the deck, there would only be a few tweaks left in the blocks ends of the cannons, some double block of the working rigging and the gangways. I leave you some image. Although I am not very happy with the result, I am learning every day.

Could you tell me how I can make the ropes (they are not cotton) of the blocks with (or not) becket hang naturally and not as they can be seen now? Thank you!
Greetings

Adrian
IMG_20230813_122209.jpgIMG_20230815_181756.jpgIMG_20230815_181817.jpgIMG_20230815_181827.jpg
 
Could you tell me how I can make the ropes (they are not cotton) of the blocks with (or not) becket hang naturally and not as they can be seen now? Thank you!
Honestly with this rope material it will be extremely hard to get a better result - I would recommend to buy somewhere from the aftermarket some better rope material
 
Honestly with this rope material it will be extremely hard to get a better result - I would recommend to buy somewhere from the aftermarket some better rope material
It's true what you say, but that thread is better than the other one that came with the kit. At this moment it is difficult to undo what has been done. In any case, I will continue thinking about redoing all the cannon rigs... which will greatly delay the completion of the kit.
Thank you very much for your answer.
 
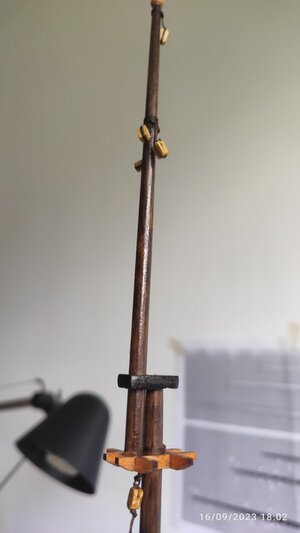
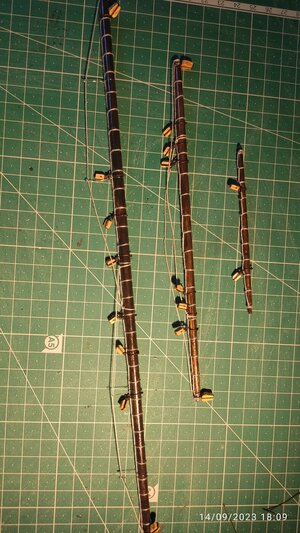
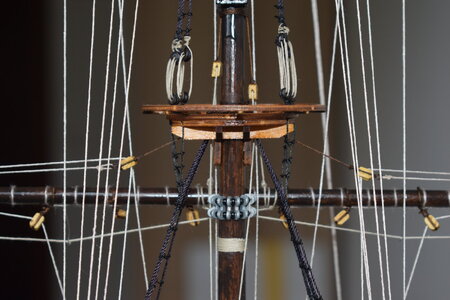
Hello. I am currently working on the construction of the mast and yards, although I have little time to dedicate to the boat, since a work trip has kept me away from home for a few days, I continue with the project in my little free time.
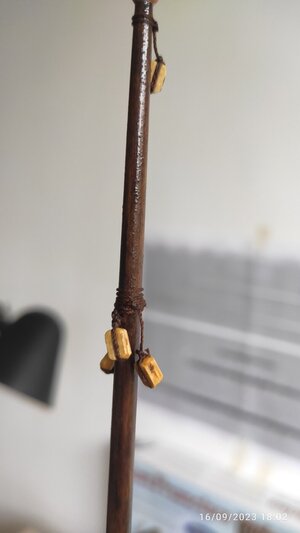
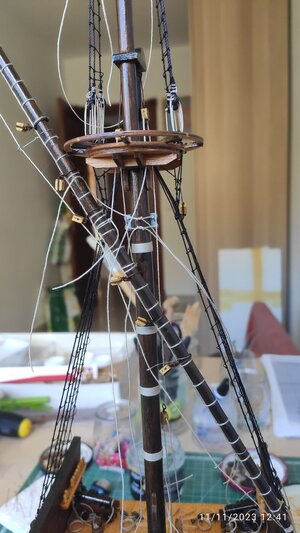
The first thing I did was taper the three parts of the mast. To the masthead I have added the topmast and above it the topmast with the drum that the kit includes. I don't like this drum very much because it is made of metal and looks unreal, at least that's my feeling. On the topmast I have attached the topgallant, supporting the latter on the spreader. I made the corresponding mastcap (top-mastcap), I didn't like the one provided by the manufacturer at all.
Then I made the mast-yard joining system, after asking for information on this forum. Once the latter has been completed, I have tapered the yards and placed the blocks, ropes and so on.
I have stained and varnished all the blocks in oak color and the mast and yards in walnut color.
To be continue.
IMG_20230916_180255.jpgIMG_20230914_180941.jpgIMG_20230916_180216.jpgIMG_20230914_180539.jpg
 
Hello
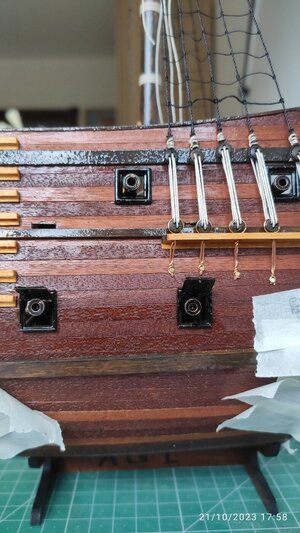
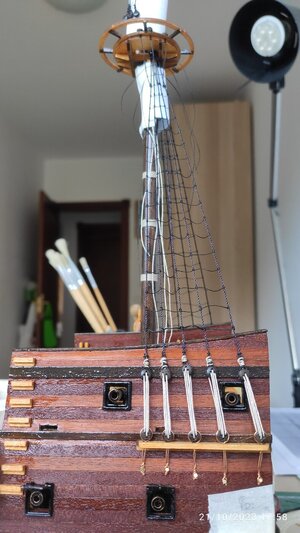
Once the installation of the upper deck cannons has been completed, these are not glued, since I still must assess whether I modify the ropes of the maneuvering rigging that do not take the appropriate shape. I have made mistakes so many times with the ropes in this kit that I frankly feel discouraged from improving them. Finally, I just touched them up a little. I can't do much more.
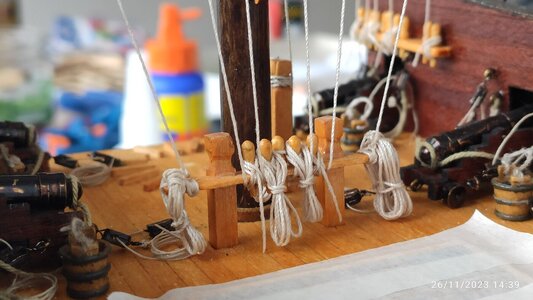
I have made the belaying pin rails as proposed in the instructions but increasing the diameter of the holes for the belaying pins and lightening them so that they fit correctly.
Next, I placed the mast in its place, the shrouds and their deadeyes with their lanyards. And the ratlines. The standing rigging completed. Then the running rigging with some small modifications regarding the instructions that seemed to me somewhat inaccurate.
The next pictures show what I did.
I want to apologize for leaving this log aside for so long, but my model is not up to par with most of the ones on SOS and I was a bit hesitant to show it.
Thank you for watching, thank you for your comments (all of them), likes if I deserve, thank you for your teachings.
Cheers
Adry

IMG_20231021_175816.jpgDSC_0531.JPGIMG_20231021_175823.jpgIMG_20231022_133656.jpgIMG_20231111_124132.jpgIMG_20231112_112056.jpgIMG_20231126_143911.jpgIMG_20231203_112740.jpgIMG_20231203_112816.jpgIMG_20231203_112841.jpg
IMG_20231216_122242.jpg
 
Hi Adry, just looking through your thread here and your model looks great. I also read where you are not too happy with some of your results and I have to tell you that you will improve as you go along. Don't be comparing your model with one built by someone who has been building ships for fifty years. It doesn't work like that at all. Do your best every time and you'll get where you want to be in no time. Never mind this "up to par" stuff. That doesn't count. That's apples and oranges so throw it out. Just keep striving for 'better' and it will happen. Mean time this model is perfect in every way. There were never any two ships rigged alike and the kits today are made different from the original ships for economy and build-ability. Maybe that's a new word but the same ships by the same manufacturer can and often are, very different from each other. The Captain determines how his ship is rigged and that's final. So just keep doing what you are doing and if the damned bilge pump looks better on the second deck them put it there if you want. If you don't then don't. It's your choice and NOBODY knows the truth of the matter anyway. Just keep up the great work you're doing now and you will be fine. Mainly have fun. Norgale
 
Hi Adry, just looking through your thread here and your model looks great. I also read where you are not too happy with some of your results and I have to tell you that you will improve as you go along. Don't be comparing your model with one built by someone who has been building ships for fifty years. It doesn't work like that at all. Do your best every time and you'll get where you want to be in no time. Never mind this "up to par" stuff. That doesn't count. That's apples and oranges so throw it out. Just keep striving for 'better' and it will happen. Mean time this model is perfect in every way. There were never any two ships rigged alike and the kits today are made different from the original ships for economy and build-ability. Maybe that's a new word but the same ships by the same manufacturer can and often are, very different from each other. The Captain determines how his ship is rigged and that's final. So just keep doing what you are doing and if the damned bilge pump looks better on the second deck them put it there if you want. If you don't then don't. It's your choice and NOBODY knows the truth of the matter anyway. Just keep up the great work you're doing now and you will be fine. Mainly have fun. Norgale
Amen!
 
Hi Adry, just looking through your thread here and your model looks great. I also read where you are not too happy with some of your results and I have to tell you that you will improve as you go along. Don't be comparing your model with one built by someone who has been building ships for fifty years. It doesn't work like that at all. Do your best every time and you'll get where you want to be in no time. Never mind this "up to par" stuff. That doesn't count. That's apples and oranges so throw it out. Just keep striving for 'better' and it will happen. Mean time this model is perfect in every way. There were never any two ships rigged alike and the kits today are made different from the original ships for economy and build-ability. Maybe that's a new word but the same ships by the same manufacturer can and often are, very different from each other. The Captain determines how his ship is rigged and that's final. So just keep doing what you are doing and if the damned bilge pump looks better on the second deck them put it there if you want. If you don't then don't. It's your choice and NOBODY knows the truth of the matter anyway. Just keep up the great work you're doing now and you will be fine. Mainly have fun. Norgale
Thank you for your kind words.
The pump is out of scale, the tipe is not for this period of time on board of a spanish galleon.... I will try to learn more of these ships and about old-period-pumps.
Cheers
Adry
 
Last edited:
Hello partners
In January of this year, they gave me the KIT of the cross section of the San Francisco galleon from Artesanía Latina. In February I started working with him and, given the doubts that arose, I began to investigate how to do it, looking at some work on social networks, until I finally found this wonderful forum "Ships of scale". Specifically, the "post" by Jeff T, in June.
Although it was already too late to undo what he had advanced: the hull was complete, but the guns, the winch and the stores had not been brought inside. Who would command me to follow the instructions in scrupulous order?
Luckily I detected some errors in the assembly instructions in time, such as the measurements of the gun embrasures on the second deck. I am telling you this so that, if a newbie like me happens to be entertained with this model, be careful, there are certain errors that once made are difficult to solve.
I found several videos on Ytbe of the building of the model. A very good one is that of Olha Batchvarov although the model is called San Giovanni Batista, but it is the same. In any case, I am following both, Olha Batchbarov and the didactic work of Jeff T in the forum and the comments of others.
Soon I will upload some photos of how I have been doing it so that you can give me ideas or criticize it, if you think it is appropriate. Here you are my beginnings.
The truth is that this construction is entertaining me a lot and, although I am short of free time, I always get to work with enthusiasm.
Thanks for being there..
View attachment 388256View attachment 388257
View attachment 388258View attachment 388261
Hallo @Adry
we wish you all the BEST and a HAPPY BIRTHDAY
Birthday-Cake
 
Back
Top