Santisima Trinidad OcCre kit #15800 build from 2004 to 2012

For the painting I have use Carlos Parrilla representation of the ST at the battle of Trafalgar 18-1
First the black 18-2, 18-3
Follow by the red 18-4 to 18-6
For the white first the inside of the Rubbing strake 18-7 then the masking tape to do the outside line 18-8
After some touch up the result 18-9 to 18-13
1a.jpg1b.JPG1c.JPG1d.JPG1e.JPG
 
Building the rudder
At this time I jump a few step and build and install the rudder now 19-1 to 19-4 complete with the coppering
19-5, 19-6 show where I have to open the structure to let the beam true
At this point I decide to modified 1a.JPG1b.JPG1c.JPGthe model again to be constant with the Madrid model and add the 4 chase gun port at the stern 19-7
The ruder in place and the gun port paint and complete I have use 4 gun port frame that was supplied with the kit 19-8,19-9
 
At step 44 we are suppose to build the wall that cut the deck and where the officer cabin situated under the quarter deck 2 door will complete the structure picture 20-1 and 20-2
1a.JPG1b.JPG1c.JPG1d.JPG1e.JPGDuring my research on the ship I found a drawing at the Madrid naval museum P-20-3 and from the start in my mind was to look for the possibility of modifying lightly that section of the stern.
P20-4 show the space of the deck to the stern of the ship I first took measurement to see the space available to me under the quarter deck and notice that if I want to be able to see something I was in the impossibility to use the beam that was to be the support to the deck as you can see with P20-5 and P20-6
So I decide to not use beam and build a frame P20-7 that will be use as support for the deck 20-8 and 20-9 show that it will work so I went ahead with the modification. And build the cabin P20-10 you will notice the red arrow in P20-10 originally the gun that was suppose to be there where only stub on that deck there are a mix of 8pounder and sea howitzer the 8 pounder will be to be constant with the scale of the ship 20mm barrel and if I use the stub supplied with the kit for the 6 that are to be install there again I will have a difference of muzzle so I decide to extend the cabin to include the last 2 gun that was suppose to be in the grand room.
Now the red arrow as you can see in P20-10 the gun arrive flush to the support so I just groove enough wood to be able to fit the gun there P20-11 P20-12
 
20b
complete at this point I close it and it look not bad at all P20-13 to 20-15
I got the approval from my supervisor Chloe P20-16 I completely rig 2 more gun that will be install under the deck and the stair I did them now as it will be impossible to do them later P20-17 to P20-19
Next to complete that modification was to open the window at the stern again the instruction to build that part are sketchy at the best only 2 pictures and the instruction are really vague P20-20 P20-21 so I just use my judgement and did it the best I could P20-22 and P20-23 I now have a view from the stern up to the main deck P20-24
1a.JPG1b.JPG1c.JPG1d.JPG20-13 the section
 
20c
During my information search I notice that the ship got pillar to support the main P20-25deck and in the kit they did not install that made no sense as the weight of the gun on the 4th deck need support so I turn some on my lat and I got another add on to the kit P20-26 and P20-27
The last 2 pictures P20-27 and P20-28 show the last part of the structure complete quarter deck plank and now the ship is ready for the deck furniture
1a.jpg1b.JPG1c.JPG
 
At this point I build the fender and put them in place P22-1 and 22-2
This is follow by pose of front of the quarter deck and the coamings P22-3 and 22-4
First P22-6 is the drilling of the opening for the anchor and that is follow by the pose of the limber board and the fitting of the Samson posts P22-6
First I install the ladder rug 22-7 complete
1a.JPG1b.JPG1c.JPG
 
After completing the bow I decide to build the stern all the part are cast
Very hard parts that are not flexible at all and break easily if try to bent
Now the section that was worried me the most the Stern
Most of that section is suppose to be gold so I spray paint the metal part gold 23-1, 23-2
That is follow by building the wood frame 23-3, 23-4 and paint the wood blue
Now the window of the side gallery in position and the fake banister install 23-5, 23-6
23-8 Is the brass photo etch of the window 23-9 show how the window do not fit properly on the frame 23-9 so I was in the obligation to cut them 23-10 look better 23-11
Completing side by replacing some metal part that was the curve was wrong and break went I try to bent them by wood 23-12 23-13
Giving the proper curve to the stern decoration was not easy but after some work 23-14
Decoration now finish 23-14, 23-15, 23-16
I have to said that the instruction was real poor
Some photo and very little instruction and the finish result is just nice not great
1a.JPG1b.JPG1c.JPG1d.JPG1e.JPG1f.JPG
 
According to my researches 24-1 the 8pd of the forth deck where 2.13m or 24mm at 1:90 scale
I did buy from Blue Jacket 20mm gun F0540 and F0617 Photo 24-1 the gun barrel where ok for the size but the look of the carriage did not fit my need, I went to my hobby store and found 18 gun / carriage that was perfect they are the one use inside the cabin so I have a continuity. Compare 24-3
Using a drawing from Madrid museum 24-4 I did all the pulley and cable 24-5, 24-6
Gun in position 24-7, 24-8
1a.JPG1b.JPG1c.JPG1d.jpg1e.JPG1f.JPG
 
The one originally use on the section were Not available at the time I did the ship
I found something Carronade from Blue Jacket
Fo0635 gun
Fo0756 carriage
Compare 24a-1
The carriage was suppose to be open it the rear to allow some space to allow the elevation as they are sea howitzer not carronade as the model used by the British or the American so I open the rear 24a-2, 24a-3
The muzzle of the gun as to be fixt by sanding the end and drill a hole 24a-4, 24a-5
To have the proper elevation one option will be to use a small piece of wood I went to the easy way not the accurate way
As I have to drill and install a hook for the pulley cable I did not cut the excess just bent it to have the proper alignment 24a-6, 24a-7
Gun in place and pulley cable done fixt 24a-8, 24a-9
24a-10 the gun in place
1a.JPG1b.JPG1c.JPG1d.JPG1e.JPG
 
Small add to show how I do somme accessory
2.5 hook used for the rigging of the gun
25-1 using lead wire that I twist around a small nail
25-2 second twist to have the hook cut and press to have a cold welding
25-3 the result
Now for the rope coil
2 theory
First as admiral inspection 25-a neat coil that have 3 time the quantity of rope necessary
Second method that I have choice is appreciatively the amount of rope necessary for manoeuvring the gun
25-4 in this case a 3mm dril bit
25-5 turn the rope a few time around the bit
25-6 somme glue to seize it
25-7 using a plier I remove the coil
25-8 the result and 25-9 all the coil necessary for all the gun
1b.JPG1c.JPG1d.JPG1e.JPGFirst how I do the
 

Attachments

  • 1a.JPG
    1a.JPG
    71.6 KB · Views: 8
Making the gun door port
What is supplied with the kit is what came with lots of kit
27-1 what I did on the section 27-9 and 27-2 what I have see on a few model an inside lid
I found a better picture later of the ST at the Madrid museum 27-3 and 27-10 if you look carefully at the yellow line and blue square no inside lid27-
Green arrow 27-10 and 27-4 on the HMS Victory no inside lid
27-5 all the gun port already cut I did them in the same time as the section
I was lucky that I did only 9 with the lid so did not have to build new one
27-6 shows the entire step to do 1 door (120 of them)
A) The door 20x20mm build with pop sickle stick see how I did them on the section log
B) Paint each one oxide red
C) Trace and prepare the positioning of the hinge and the ring for the 2 rope (27-10 blue arrow Madrid museum 2 rope) for the hinge I have use Amati #4130 as parts
D) Install the hinge paint using Tamiya X10 gun metal drill the 2 holes that will received the hook for the rope
E) Making 240 small hooks and the rope I use wood glue to stiff the rope to make it easier on the installation
F) The ring/rope install the excess of the ring cut and touch up of paint
G) door finish
27-7, 27-8 all the door complete
Back to 27-10 Madrid museum model yellow arrow you have a gold drip guard that I add.
For this I used #35260 from Mantua 27-11 close up 2712 all install
27-13 first door install and 27-14 all of them done
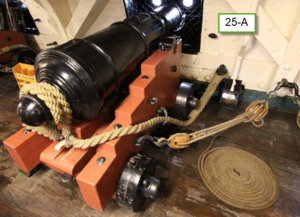
27-15, 27-16 painting the gun stub first a grey primer follow by Tamiya X10 gun metal
27-17, 27-18 gun port now complete
1a.JPG1a1.jpg1a2.jpg1b.JPG1c.JPG1d.JPG
 
Making of the channel, the deadeyes and the chain block.
When I was doing the section I saw that the chain block where not correct and I did not like the channel supplied.
Time to see what is possible to do about it
Channel
The kit supply a long tin plywood that as to be cut 28-1, 28-2
I replace them by strip of oak glue together and trim for size 28-3, 28-4
Made the hole to received the chain block I put nail to strength the mounting 28-5, 28-6
28-7 in place I also glue the pin rail 28-8
Deadeyes and the chain block.
The deadeyes supply in the kit are probably accurate it is just that it is literal CHAIN mail
28-9, 28-10 and they where not use CHAIN it was steel bar on the section I scratch made something but I was not really happy with the result the constancy was not there.
So after many H of researches I found exactly what I was looking for 28-11, and 28-11
I found those at Blue Jacket part #F0550 and #F0548 that fit perfectly it is a soft metal that bent easily
Test fitting on the rail 28-13 spray paint flat black primer 28-14
28-15 ready to be install 28-16 done
28-17, 28-18 and 28-19 hull complete next step mast but only after my inspector 28-20 receive all the wheedle that is require by her status of master of the house
1a.JPG1b.JPG1c.JPG1d.JPG1e.JPG
 
The making of the sail.
Here step by step of the making of my sail
First I trace the contour of the sail follow by 2 more line 2mm inside and 2 mm outside
for the making of my sail I use the same glue that I use to glue the second planking on my ships a non toxic water-based rubber contact cement that cure in around 20 minute and stay flexible when dry. So using that kind of glue I fill the 4mm that make the edge of the sail and wait around 10 minutes to let it dry a bit then cut the sail to size
I then fold the edge to have a nice finish using the handle of a pair of pliers I press the edge to equalize the border. both sail prepare
Show the line that I trace to represent the sheet of canvas that are made the sail
Is the sewing of the rope that made the edge that is follow by the vertical line themselves The sail complete and the sail sew to the yard.
It look as a complicated process but in fact it is not.
In fact it do not need any sewing skill it just need patience.
Sail was made simultaneity for the section and the ship
1a.jpg1b.jpg1c.jpg1d.jpg
 
Ok I have to apologizes as I did not properly documented
The reasons are (not an excuse but circumstance) was doing log on a site Dry Dock Model that close approximately at that time and did not see the point to do it anymore
Also was cut will increase work load at the office so that it
All the mast where turn when I did the section as the 3 fighting platform
All the sail where hand sewn at the same time as the section
The only problem to made it was the height, the mail royal and main skysail as I have to put the ship on a small stool to be comfortable to do them
1a.JPG1b.JPG1c.jpg1d.JPG1e.JPG
 
Here picture of the complete ship
Now an evaluation of the kit
It is a level 4 kit if you do strait from the box it will go easily
I know a modeler (Andrea) that did the (DeAgostini) version without all the paint and the tit bit I did, and is version is just fantastic way better then mine.
My son is very happy with is boat and that is what is important
Took me 7y from the time I got the kit and the finish did a lots of other thing during that time but I have learn a lot from it.
1a.JPG1b.JPG1c.JPG1d.JPG1e.JPG1f.JPG2a.JPG2b.JPG2c.JPG2d.JPG2e.JPG2f.JPG3b.JPG3c.JPG3d.JPG3e.JPG3f.JPG4a.JPG4b.JPG
 
Back
Top