Saucy Jack - Barking Well Smack - Vanguard Models

Thanks Vic! I didn't get anything done yesterday because my workshop/assembly point is upstairs, and I wasn't able to get up there . My right knee collapsed rather painfully on me (long long story) so I spent the night in my chair and I'll try later today. If I manage it there should be a further update later .
F/S
Sorry to hear that F/S.
Hopefully it will be strong enough soon so that you can continue with your build.
 
Thanks Vic! I didn't get anything done yesterday because my workshop/assembly point is upstairs, and I wasn't able to get up there . My right knee collapsed rather painfully on me (long long story) so I spent the night in my chair and I'll try later today. If I manage it there should be a further update later .
F/S
I know that feeling. My shipyard is upstairs and the knee and hip give me a sudden hitch in the git-along occasionally.
 
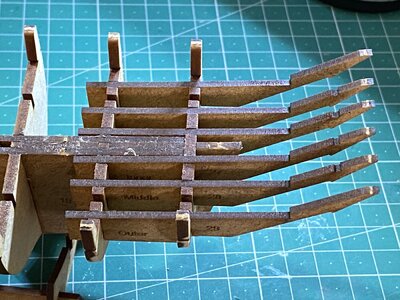
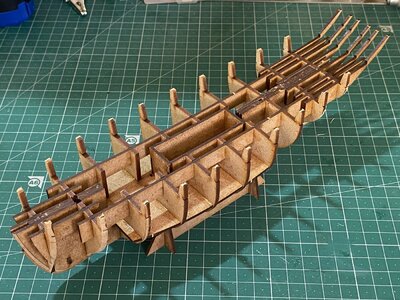
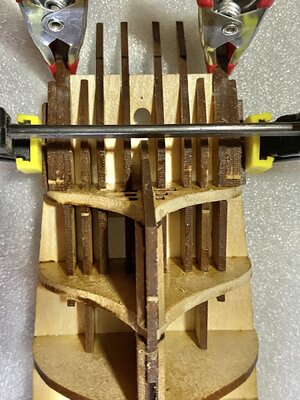
Well, I was able to move on a couple more stages. The biggest job was painting glue around all the joints, this took a lot longer than I'd envisaged. The biggest problem was getting in between small gaps. If I was to make this again I'd consider checking for fit and then gluing all the stern members as I went. The problem though with doing that is that you really would need to wait then for the glue to dry before proceeding. But although my gluing up doesn't look very pretty, none of it will be seen when the hull is planked.

0BCC5146-B84D-49F6-BFDE-ADD8C3DEDE62.jpeg
6E8639AF-101B-4B14-8020-8DEA20B1A4AB.jpeg
 
Looks like a nice starter kit, any questions you are in the right place for info, guidance and motivation.

my mentor told me a very valuable tidbit of information that I myself have past on to others.

” a whiskey bottle empties a drink at a time, take your time and don’t over do it “

please keep us in the loop as your build progresses
” a whiskey bottle empties a drink at a time, take your time and don’t over do it “ - Love it! - I'll drink to that :)
 
Well, I was able to move on a couple more stages. The biggest job was painting glue around all the joints, this took a lot longer than I'd envisaged. The biggest problem was getting in between small gaps. If I was to make this again I'd consider checking for fit and then gluing all the stern members as I went. The problem though with doing that is that you really would need to wait then for the glue to dry before proceeding. But although my gluing up doesn't look very pretty, none of it will be seen when the hull is planked.

View attachment 337021
View attachment 337022
The stern part looks like it could break easily. You're getting it done.
 
Hi all
Yes, the stern section as it is at present does require careful handling, in fact the whole framework does until the longitudinal members are in place. in fact even though I've got small hands, there have been a couple of scary moments when pushing the bulkheads into place. Everything is a tight fit, almost too good at times, which is why the instructions tell you to make sure everything is seated properly. To answer Bryians question, no it's not chipboard, it's MDF the stuff that's taken over from hard board in most places. The material has it's advantages and disadvantages, being like most things a compromise.
F/S
 
Hi folks!

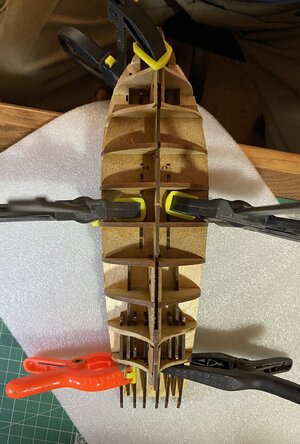
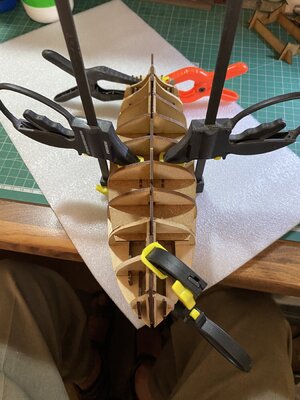
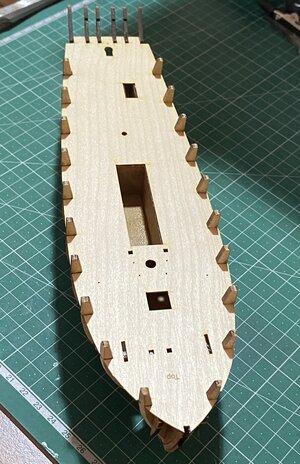
Today I fitted the sub-deck. Having made sure there were no little nibs or such i as quickly as I could brushed some PVA over the upper structures then the slightly nervous bit of springing in the deck. I did a dry run on one side before I started the fixing but it was still a slightly worrying operation. Once it was in and I'd checked proper seating all round, I again quickly brushed PVA along as many points as I could easily get to. Then a few cramps to help matters and now rest until tomorrow.
F/S
C8FCFEEC-57CF-409B-8827-DD9E4BA00427.jpeg

9CF49327-755A-4149-B875-982F48BCB6B3.jpeg
 
Hi all
Yes, the stern section as it is at present does require careful handling, in fact the whole framework does until the longitudinal members are in place. in fact even though I've got small hands, there have been a couple of scary moments when pushing the bulkheads into place. Everything is a tight fit, almost too good at times, which is why the instructions tell you to make sure everything is seated properly. To answer Bryians question, no it's not chipboard, it's MDF the stuff that's taken over from hard board in most places. The material has it's advantages and disadvantages, being like most things a compromise.
F/S
Let us know your thoughts on the MDF for use in hull construction, I have heard both good and bad about MDF.
 
Let us know your thoughts on the MDF for use in hull construction, I have heard both good and bad about MDF.
Hi Kurt
I really am not qualified to answer that question, but I'll give an opinion. In terms of laser cut kits like this, once a framework is in place stability is more than adequate, but care is required. I think dislike of the material will rear it's ugly head when sanding it, as the dust is fairly unpleasant. My own lungs have had it anyway because I've got emphysema, but I would highly recommend using good quality filtered masks to anyone when working it in this way.
 
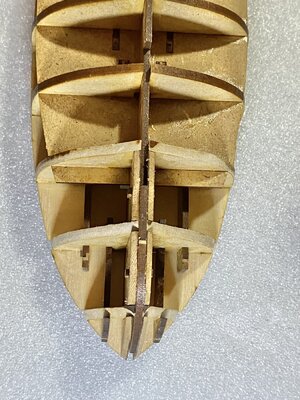
Nearly a year later and I've just looked to see if anyone else had built this kit, it appears not. I'm hoping to get back to it this winter, but I'm not looking forward to the next stage. I followed accurately the instructions and pared back the forward bulkheads to the lines marked, it turns out this was a huge error. Although it wouldn't have been so straightforward, it would have produced a far better result to fair it by eye once assembled. To put it simply, the lines are wrong! There's no possibility now that the planking will be in contact with the bulkhead edges. This made me so mad when I discovered it that I stopped building. It wasn't a cheap kit and I expected better. The only solution I can see is to build up the over pared bulkheads with plastic wood and then fair by eye. If anybody has any other ideas please let me know.
F/S
 
Last edited:
Nearly a year later and I've just looked to see if anyone else had built this kit, it appears not. I'm hoping to get back to it this winter, but I'm not looking forward to the next stage. I followed accurately the instructions and pared back the forward bulkheads to the lines marked, it turns out this was a huge error. Although it wouldn't have been so straightforward, it would have produced a far better result to fair it by eye once assembled. To put it simply, the lines are wrong! There's no possibility now that the planking will be in contact with the bulkhead edges. This made me so mad when I discovered it that I stopped building. It wasn't a cheap kit and I expected better. The only solution I can see is to build up the over pared bulkheads with plastic wood and then fair by eye. If anybody has any other ideas please let me know.
F/S
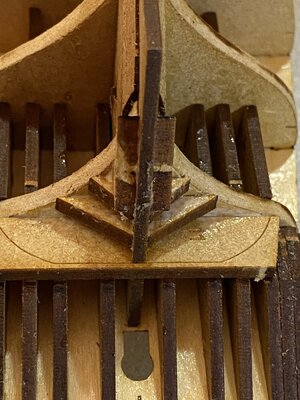
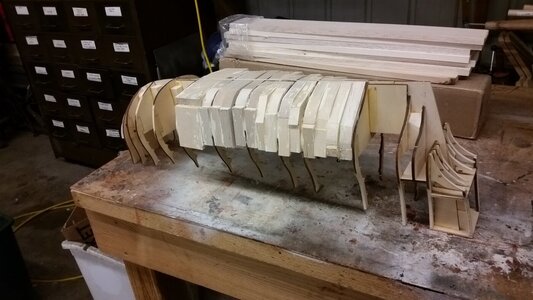
There are still some rough corner edges that need to be faired in a bit on the tiny frame parts near the sternpost, but they won't offer much in the way of purchase for planking to stick to. That's why many modelers use balsa filling blocks between frames at the bow and stern to guarantee smooth planking curves in the hull form. Balsa is cheap and easy to shape. Using filler and multiple sanding sessions to get the hull shape proper is expensive in time spent. Lay the foundation well, and the rest takes care of itself. I hate cleaning up hard bends and flat spots (depressions) in the hull after planking.

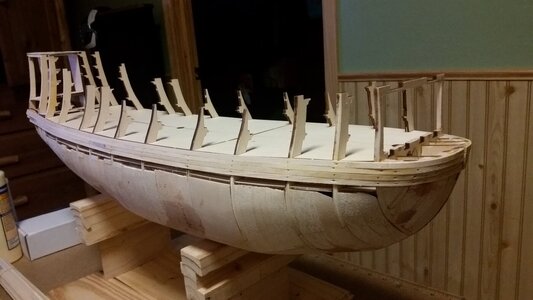
The amount of cleanup tells you that the framing support was insufficient, which typically occurs in most kits. There will always be some filler and sanding required, the amount depends on how the hull shape ends up after the first planking layer. If you go all the way with 100% balsa support of the planking, you do spend a great amount of time filling in custom cut balsa block and sanding the hull before laying planks, but you get a near perfect hull shape after the first planking layer.

Example of full balsa fill:

053 Begin Filling Hull With Balsa Blocks.jpg

146 Four Strakes of Planking Thus Far.jpg

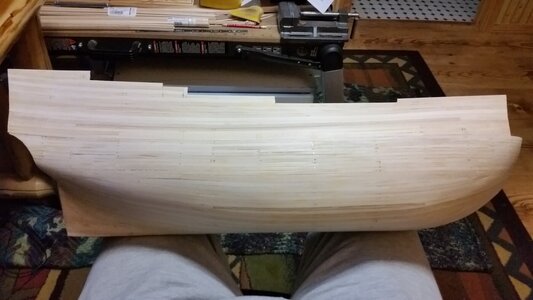
Sexy curves:
193 Sanding Complete, 120 Grit.jpg
 
Last edited:
There are still some rough corner edges that need to be faired in a bit on the tiny frame parts near the sternpost, but they won't offer much in the way of purchase for planking to stick to. That's why many modelers use balsa filling blocks between frames at the bow and stern to guarantee smooth planking curves in the hull form. Balsa is cheap and easy to shape. Using filler and multiple sanding sessions to get the hull shape proper is expensive in time spent. Lay the foundation well, and the rest takes care of itself. I hate cleaning up hard bends and flat spots (depressions) in the hull after planking.

The amount of cleanup tells you that the framing support was insufficient, which typically occurs in most kits. There will always be some filler and sanding required, the amount depends on how the hull shape ends up after the first planking layer. If you go all the way with 100% balsa support of the planking, you do spend a great amount of time filling in custom cut balsa block and sanding the hull before laying planks, but you get a near perfect hull shape after the first planking layer.

Example of full balsa fill:

View attachment 393593

View attachment 393592

Sexy curves:
View attachment 393591
Hi Kurt
Many thanks for your input. I must admit that I hadn't thought of that, even though I have used balsa blocks before to ensure the bulkheads stay square in addition to strengthening them. Old age must be affecting my thinking . I may well take your advice here, thank you
F/S
 
If I might offer a way through your current challenge...I would sister a strip of wood on the side of the bulkheads that you think are over-shaped...and then just fair the hull normally. If the bulkheads are in the wrong place it won't matter as long as you keep the corrected bits below the level of the deck (the bulkheads extend above the deck on this model - though I have a simple solution for that as well if needed).

Let's give it a new go! In my limited experience I've learned that ship modeling is just as much about trouble shooting as it is about putting the pieces together according to the instructions. You've got this F/S!
 
It is a lot of work, though. The sanding took a bit of time for me, even with balsa.
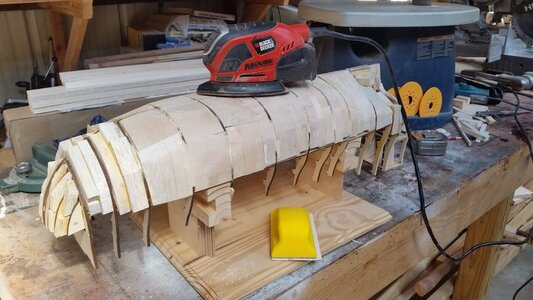
Rough work is done with a benchtop belt sander to get the large corners rounded off, then using mouse sander with 60 grit paper to get close to the final shape. The final passes are done with sanding blocks, both flat and curved. Rough sanding takes about 2 hours. Using a rough grit really moves material fast, so watch what you're doing, and don't sand flat spots in the edges of the frames.

083 Begin Rough Sanding of Hull.jpg
 
Back
Top