HI I AM ONE OF THE FORTUNATE ONES WH CAN NOT ACCES MSW BUT I DO LIKE THIS ONE MUCH, IS THERE A JIG FOR THE FRAMES AND IS THERE A SOS LOG ON THIS IF SO IS THERE A LINK. GOD BLESS STAY SAFE ALL DON
-

Win a Free Custom Engraved Brass Coin!!!
As a way to introduce our brass coins to the community, we will raffle off a free coin during the month of August. Follow link ABOVE for instructions for entering.
-

PRE-ORDER SHIPS IN SCALE TODAY!
The beloved Ships in Scale Magazine is back and charting a new course for 2026!
Discover new skills, new techniques, and new inspirations in every issue.
NOTE THAT OUR FIRST ISSUE WILL BE JAN/FEB 2026
You are using an out of date browser. It may not display this or other websites correctly.
You should upgrade or use an alternative browser.
You should upgrade or use an alternative browser.
Donfarr,
As soon as I finish working today for
Model Expo (answering requests and building questions), I will start posting a building log for the Galilee boat.
My model is not finished but at least the guys could see what the kit is all about.
As soon as I finish working today for
Model Expo (answering requests and building questions), I will start posting a building log for the Galilee boat.
My model is not finished but at least the guys could see what the kit is all about.
Not sure why you cannot get on MSW's forums... They are open to the public!
I tried to copy and paste my build log but it came back with a "too long" error after pasting everything into the message box and 45 minutes of work.
I won't be doing that again!
I tried to copy and paste my build log but it came back with a "too long" error after pasting everything into the message box and 45 minutes of work.
I won't be doing that again!
LIKE MANY, MANY OTHERS INCLUDING ADMINISTRATORS MODERATORS JUST PLAIN SOS MEMBERS HAVE BEEN BANNED FROM MSW THANKS TO CP/NRG ETC FOR THAT PRIVLAGE. GOD BLESS STAY SAFE ALL DON
That is something I can’t understand.
So much hate and so much rivalry when it’s just all related to models.
It seems that humans of all races are affected or driven by a spirit of hate and rivalry.
A great king from a long time ago once said:
“And I have seen how much effort and skillful work spring rivalry between people; this too is futility, a chasing after the wind”.
I can understand when someone is disrespectful and has a lack of courtesy by posting something rude and act insolently on a forum, but I feel sad about anybody getting banned from any “MODEL MAKING WEBSITE” to the point that he can’t even retract his own work so it could be shared with other fellow modelers on another forum.
It is an absurdity that deserves our derision.
Last edited:
SO WELL SAID BLUEBEARD, BRAVO TO YOU. GOD BLESS STAY SAFE ALL DON
Frankly, I'm shocked.
For the same reasons Bluebeard mentioned... There is absolutely no reason for that kind of insolence.
I had no idea it was occurring. I've been a member of MSW and NRG for quite some time and just recently found this forum. I think having multiple sources of help and information is fantastic and am happy to contribute to it!
Having said that and the fact that it happening, I'll work on transferring my build log for this model over to this thread tonight.
It irritated me that I did a bunch of work and then was told it was "too long"! I'll be more patient tonight!
Thanks for clarifying, Don.
Let's try this again...
My build log from MSW's forum:
I ran across this kit totally by accident when I purchased some books from Scott Miller. He has some history with MSW.
His version of the boat discovered in 1986 intrigued me from the first time I saw it and I just had to build one!
It has a history that is both mysterious and timeless with implications of biblical references (after all, it was found in the Sea of Galilee!).
This will be a birthday present for my dad. He turns 86 in mid-August.
So, my time is limited and it may be impractical of me to try and build it in two months... We'll see!
I'm also reading the book of the same name written by Shelley Wachsmann. I just started it but it has some good background on the discovery and recovery of this boat. I enjoy learning the history of each vessel I build.

The kit is scheduled to arrive tomorrow.
The unveiling will happen next!
Lyle
"The only thing that stays the same is the constant state of change"
Sounds like a great project. Looking forward to seeing your progress on this one.
Steven
Posted June 9
I think you will have it completed before his birthday.
It was due yesterday and now the tracking says "It's arriving late" but no date...!
...control the things you can and don't worry about the other things, right?
I'll update the log as soon as it arrive.
Lyle
"The only thing that stays the same is the constant state of change"
Posted June 9
I am looking forward to this build. Louie, pass the popcorn.

Chuck Seiler
San Diego Ship Modelers Guild
Nautical Research Guild
Posted June 11
Good news... The tracking number shows the kit will be delivered today...
Bad news... I'm gone for most of the weekend!
Hoping it will arrive before I leave. Knowing USPS, it's nearly a foregone conclusion that it won't!
Lyle
"The only thing that stays the same is the constant state of change"
Posted June 11 (edited)
Weekend plans cancelled... bad weather!
The kit did arrive today!
It was packed fairly well in a USPS priority mail tube (triangular shaped):
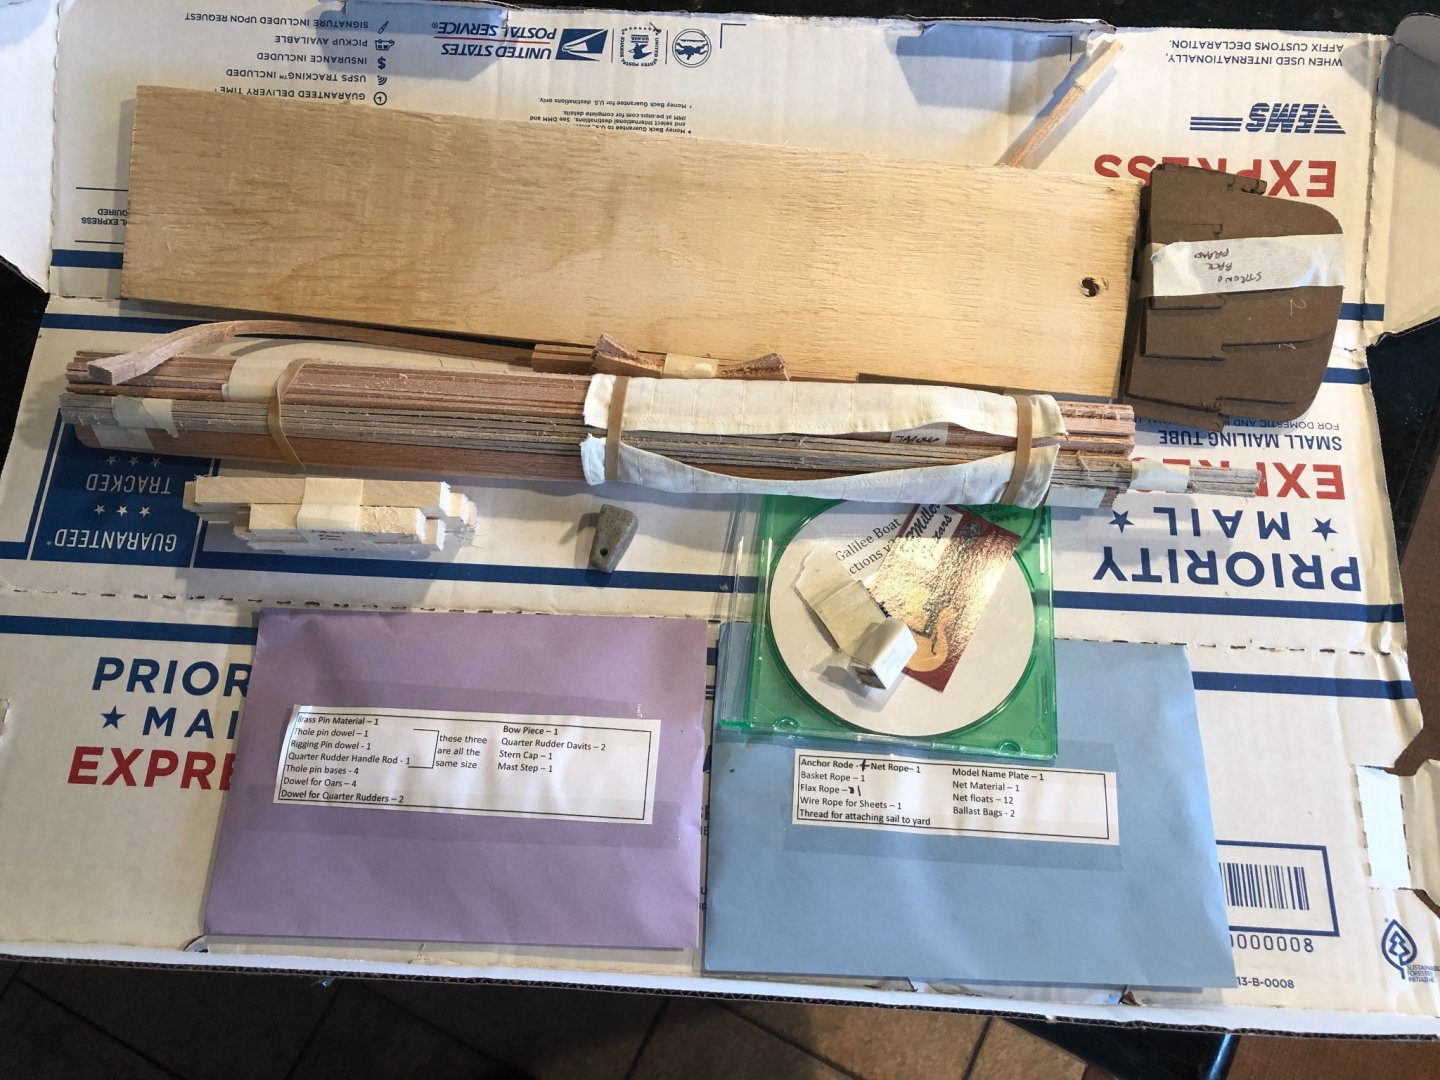
Everything is divided into taped together bunches... all marked with writing on a piece of tape:
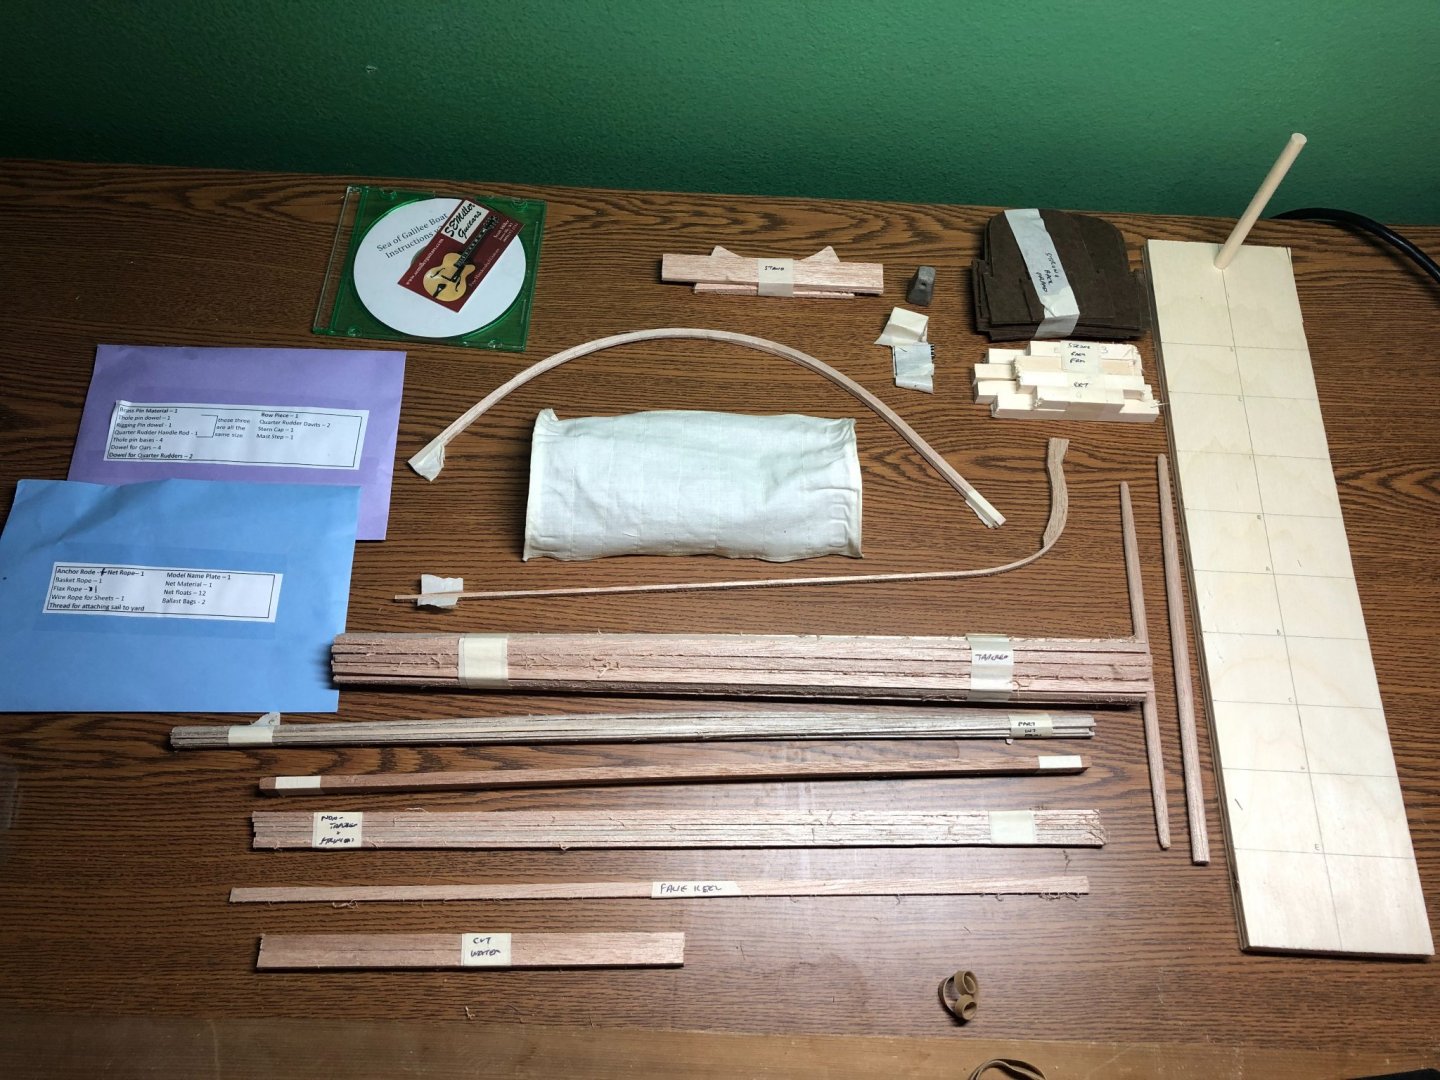
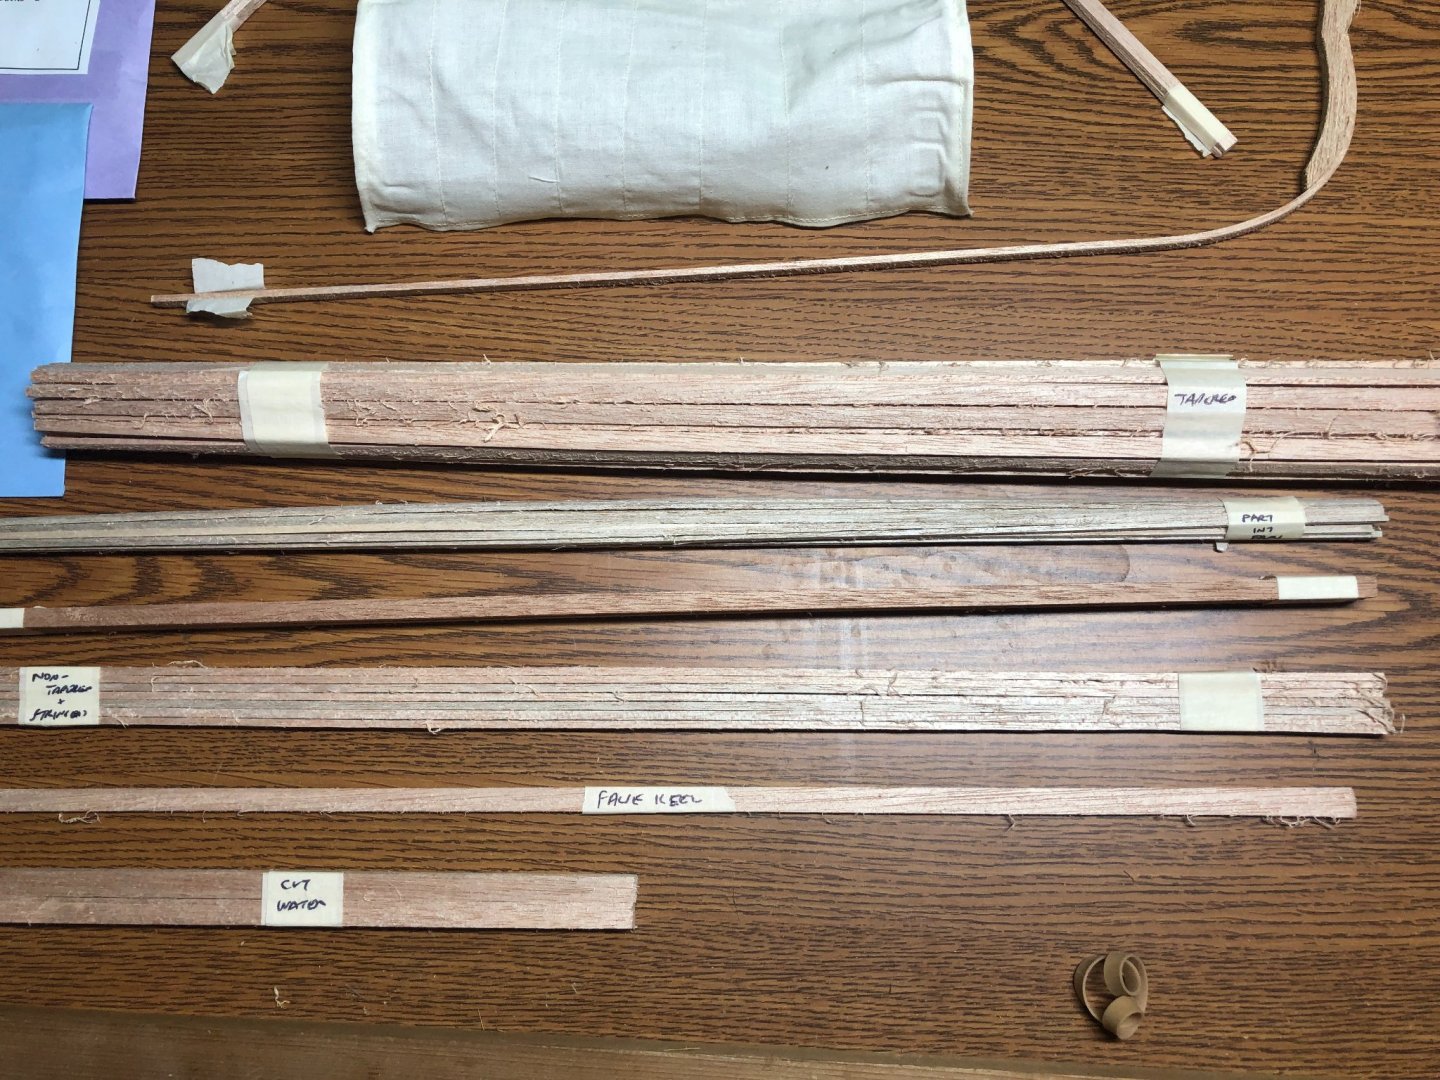
The CD has the instructions... 54 pages with lots of pictures and pretty concise directions. I've read them all the way to the rigging section and found it to be easy to follow with the exception of a couple places that will probably be clearer when I get to it!
The first real noticeable thing is that the wood is all rough cut! It is a soft wood and will sand very easily... So, not a big deal for me.
The wood is a light Mahogany and Boxwood.
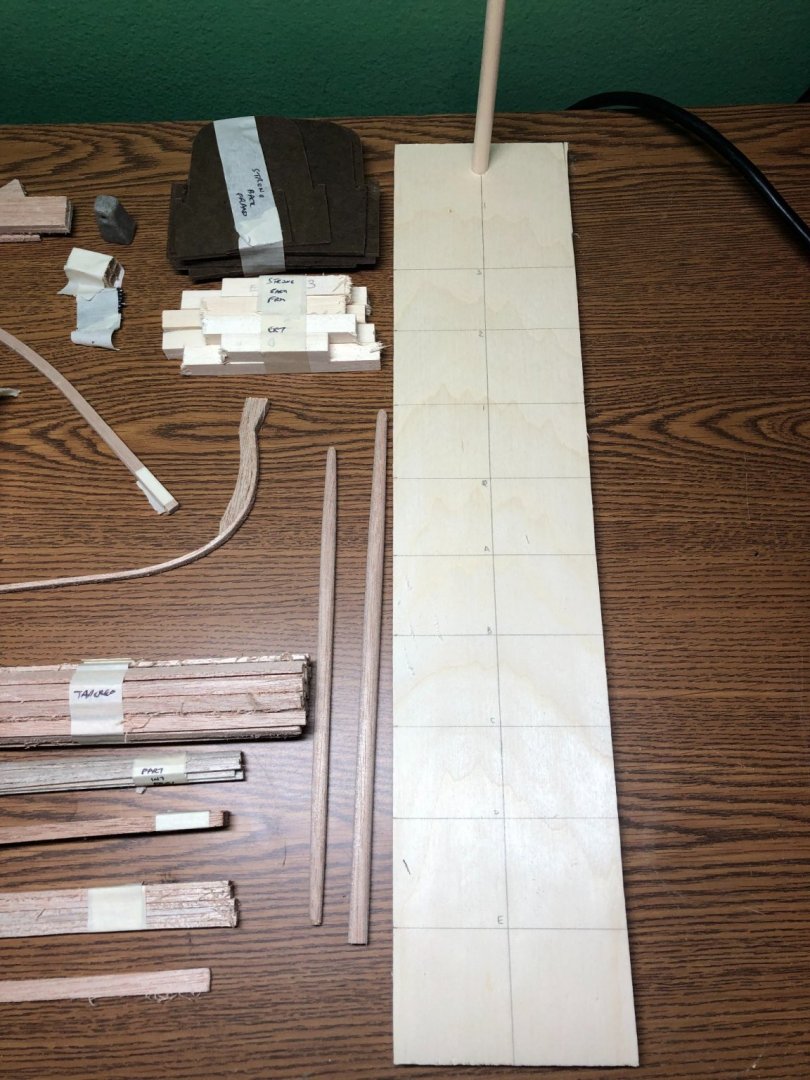
The strongback pieces are clearly marked and the positions of the forms are already marked on the base board:
The envelopes have various pieces for the finish work... rope, fish net, oars, anchor, etc.:
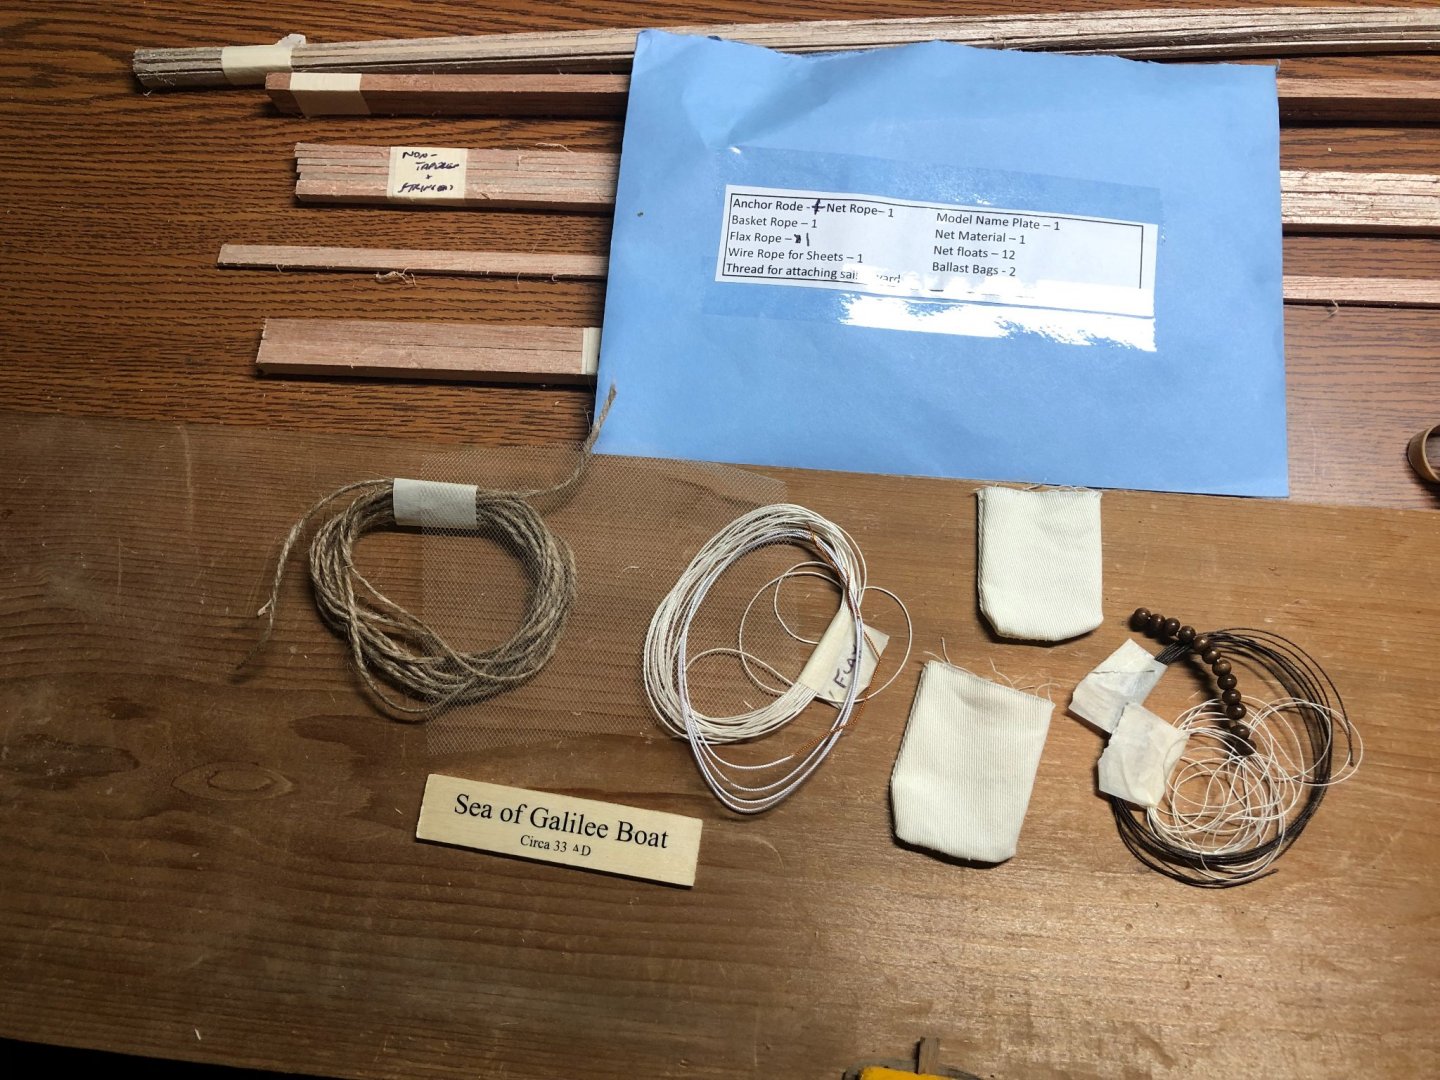
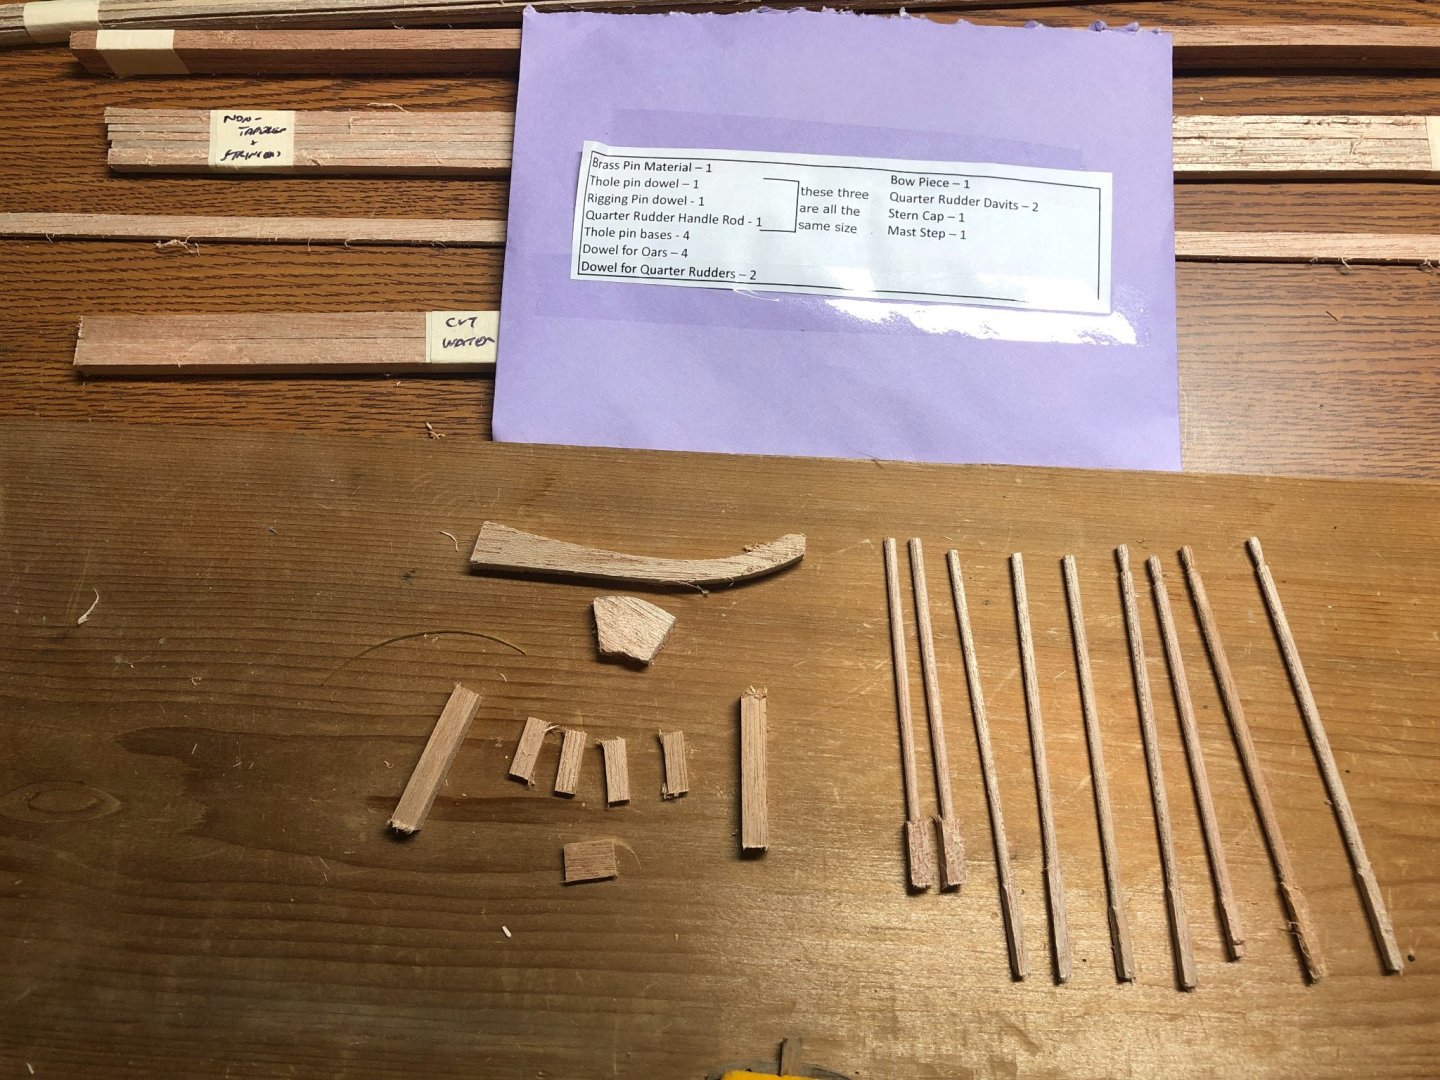
Tomorrow I'll do a proper inventory and get the strongback assembled. Hopefully a few planks too!
I have a pretty decent supply of wood and will more than likely replace some pieces to embellish the model just a bit.
I've never done this style of build and am looking forward to it... more in a day or two!
Lyle
"The only thing that stays the same is the constant state of change"
Posted June 13
I've made some decent progress!
The first steps were to build the strongback. Straightforward and pretty simple: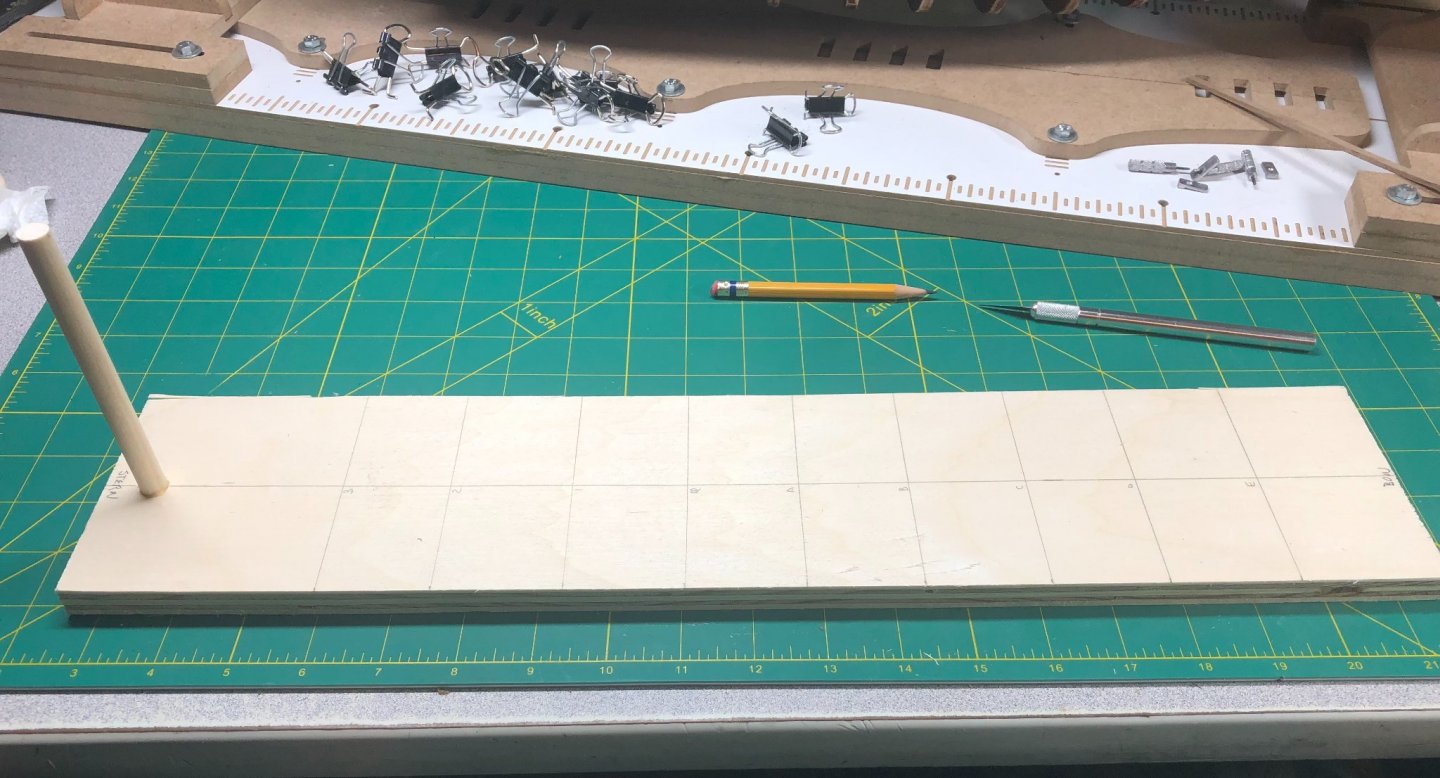
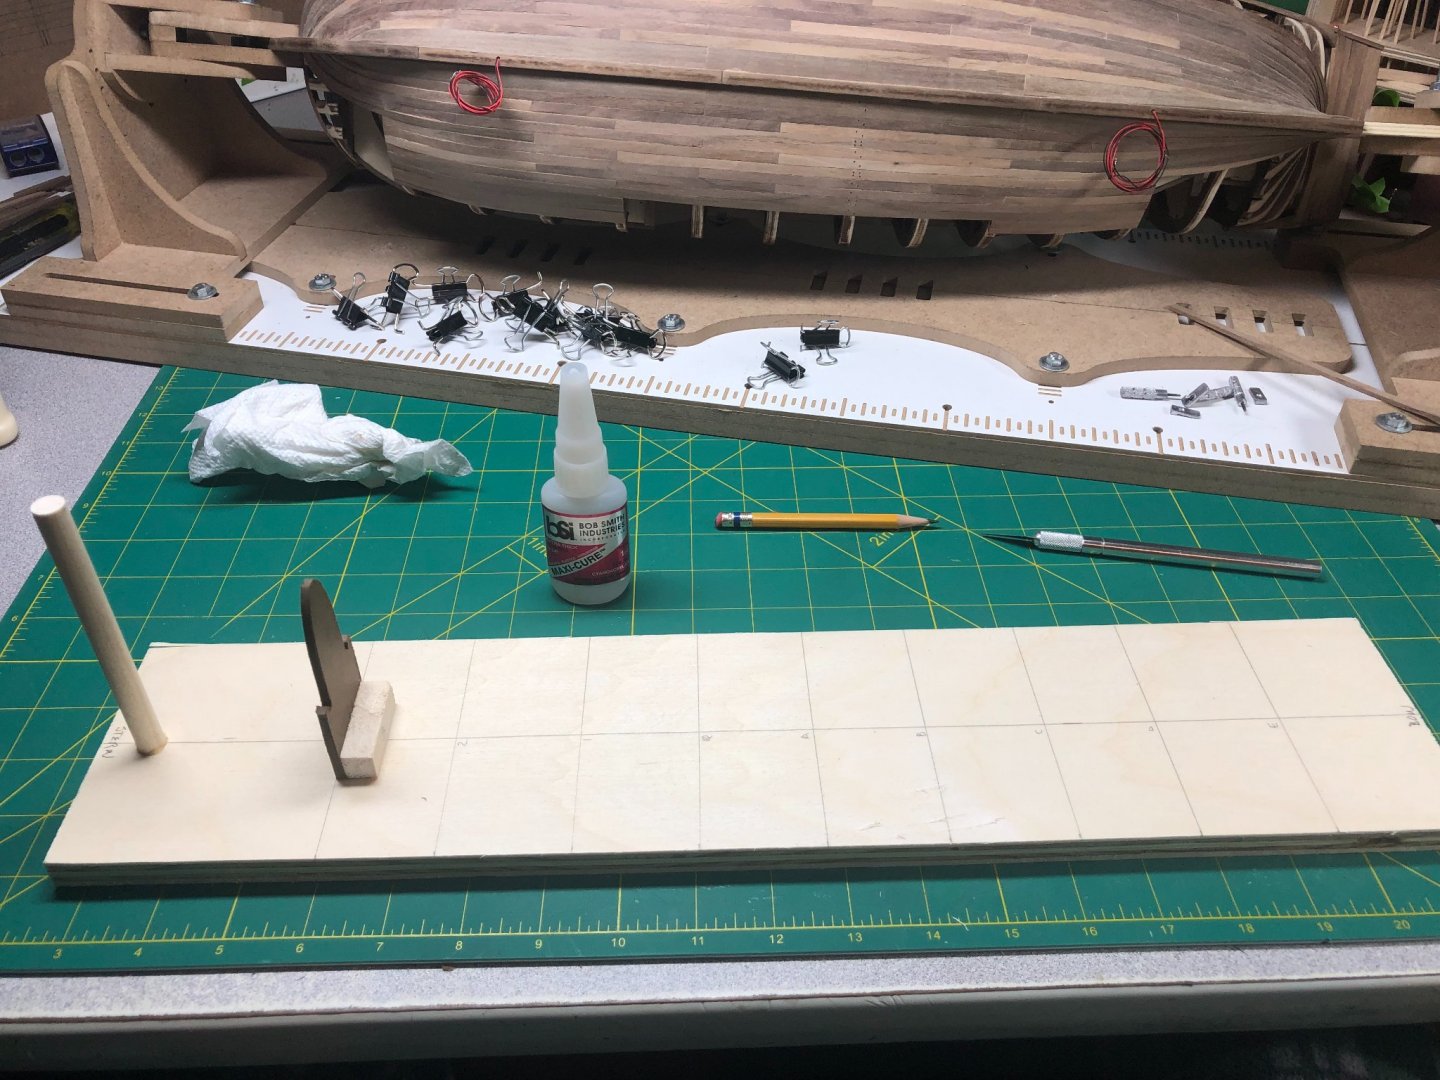
The board came pre-marked with a centerline and locations for each of the forms. The post at the stern is not part of the boat but comes in real handy later
I glued the marked form pieces together. Again, very easy and straightforward:
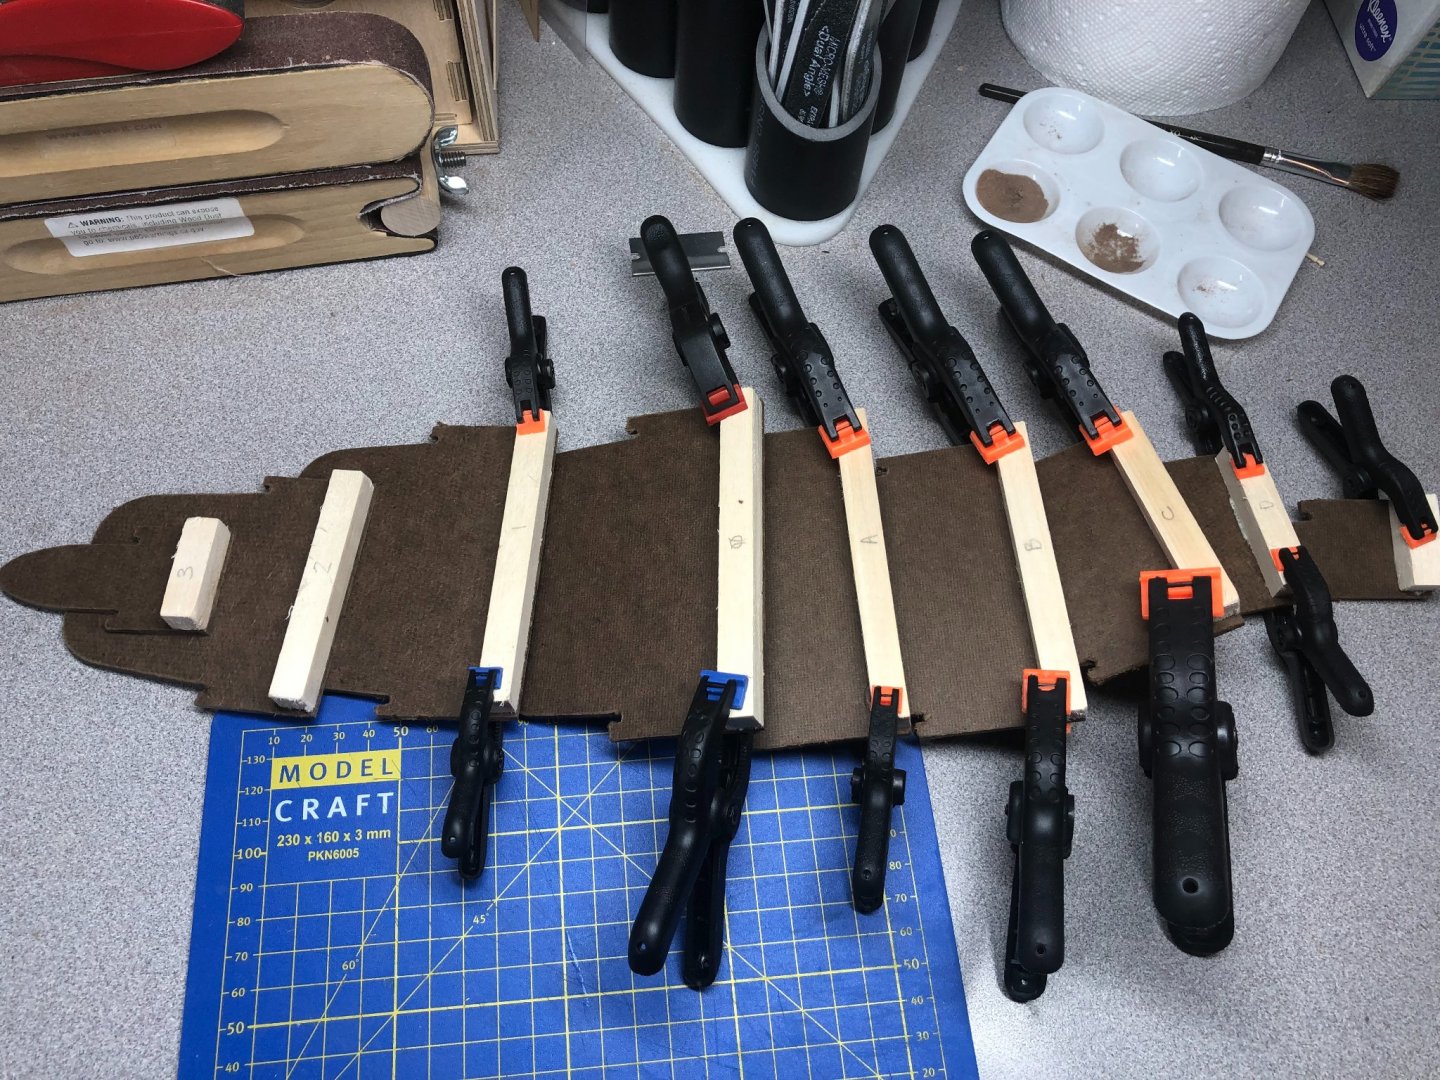
The only real issues was making sure the pieces were flush at the base. I used regular wood glue for this portion of the job to ensure I had the ability to adjust the pieces, if needed.
Next, I glued the forms down on the board per the instructions:
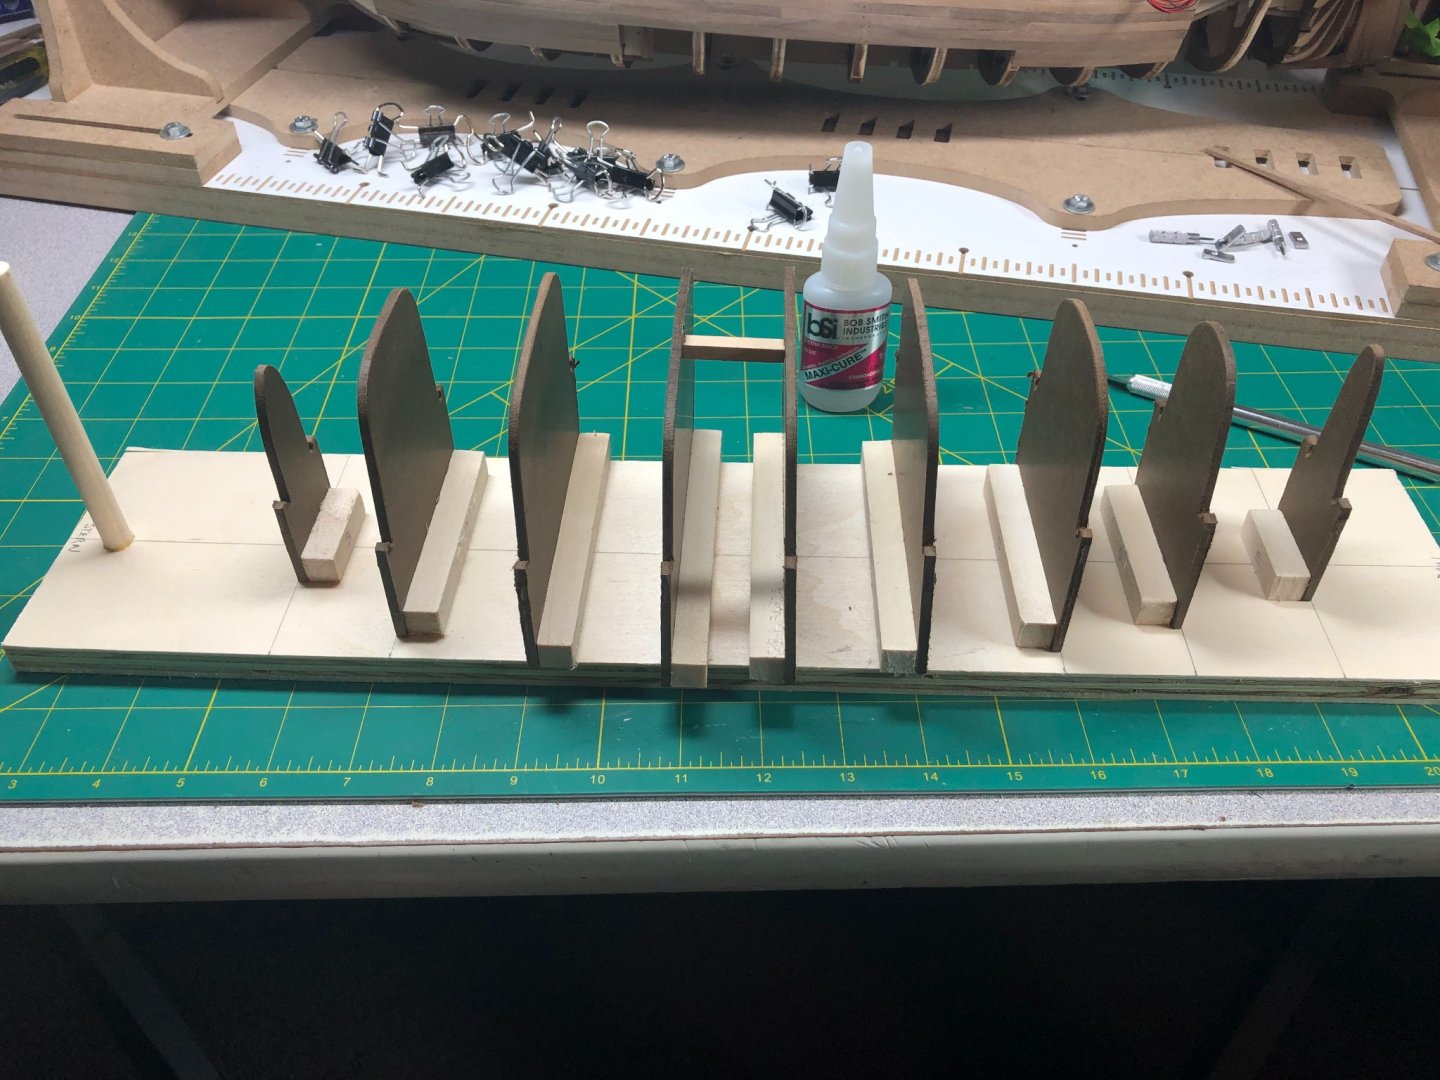
I used the thick CA glue for this process. The center two forms were not perpendicular and I added a brace to fix that problem.
The keel and stern post came pre-assembled. I still had to shorten the post a bout 1/4" and heat and bend the keel section near the stern as it was not curved correctly... an easy fix. Once satisfied I glued it down per the instructions:
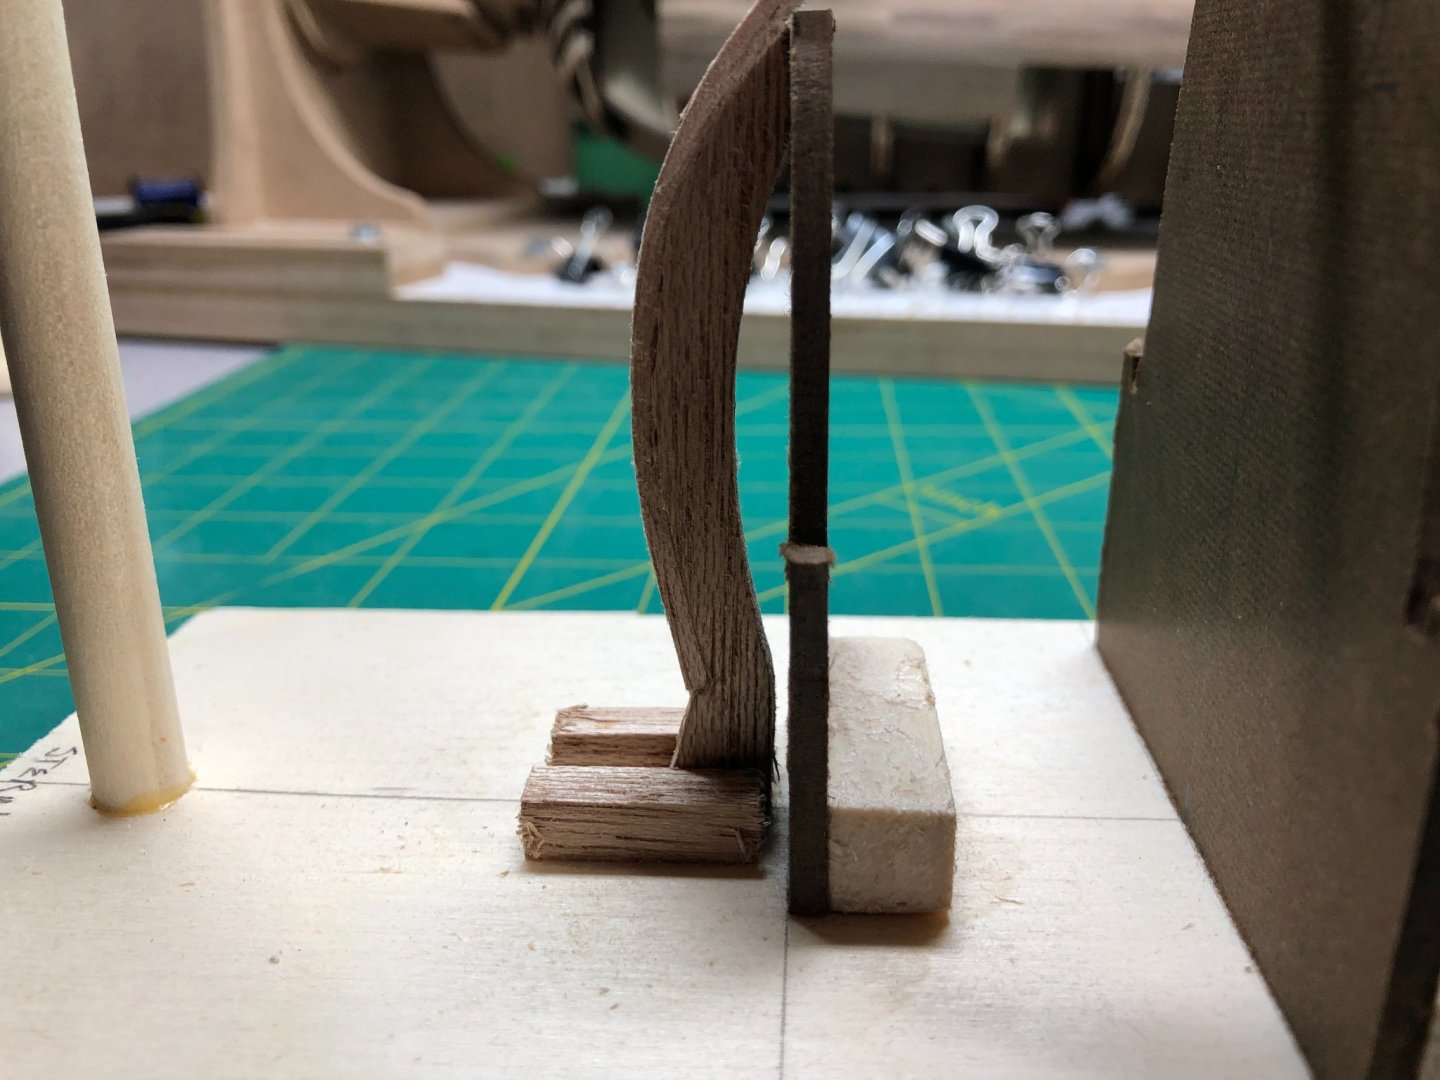
The sternpost is glued to the board and the scrap blocks are glued to the post and the board. When it is time to remove the boat from the strongback, I'll simply cut the post even with the blocks (per the instructions).
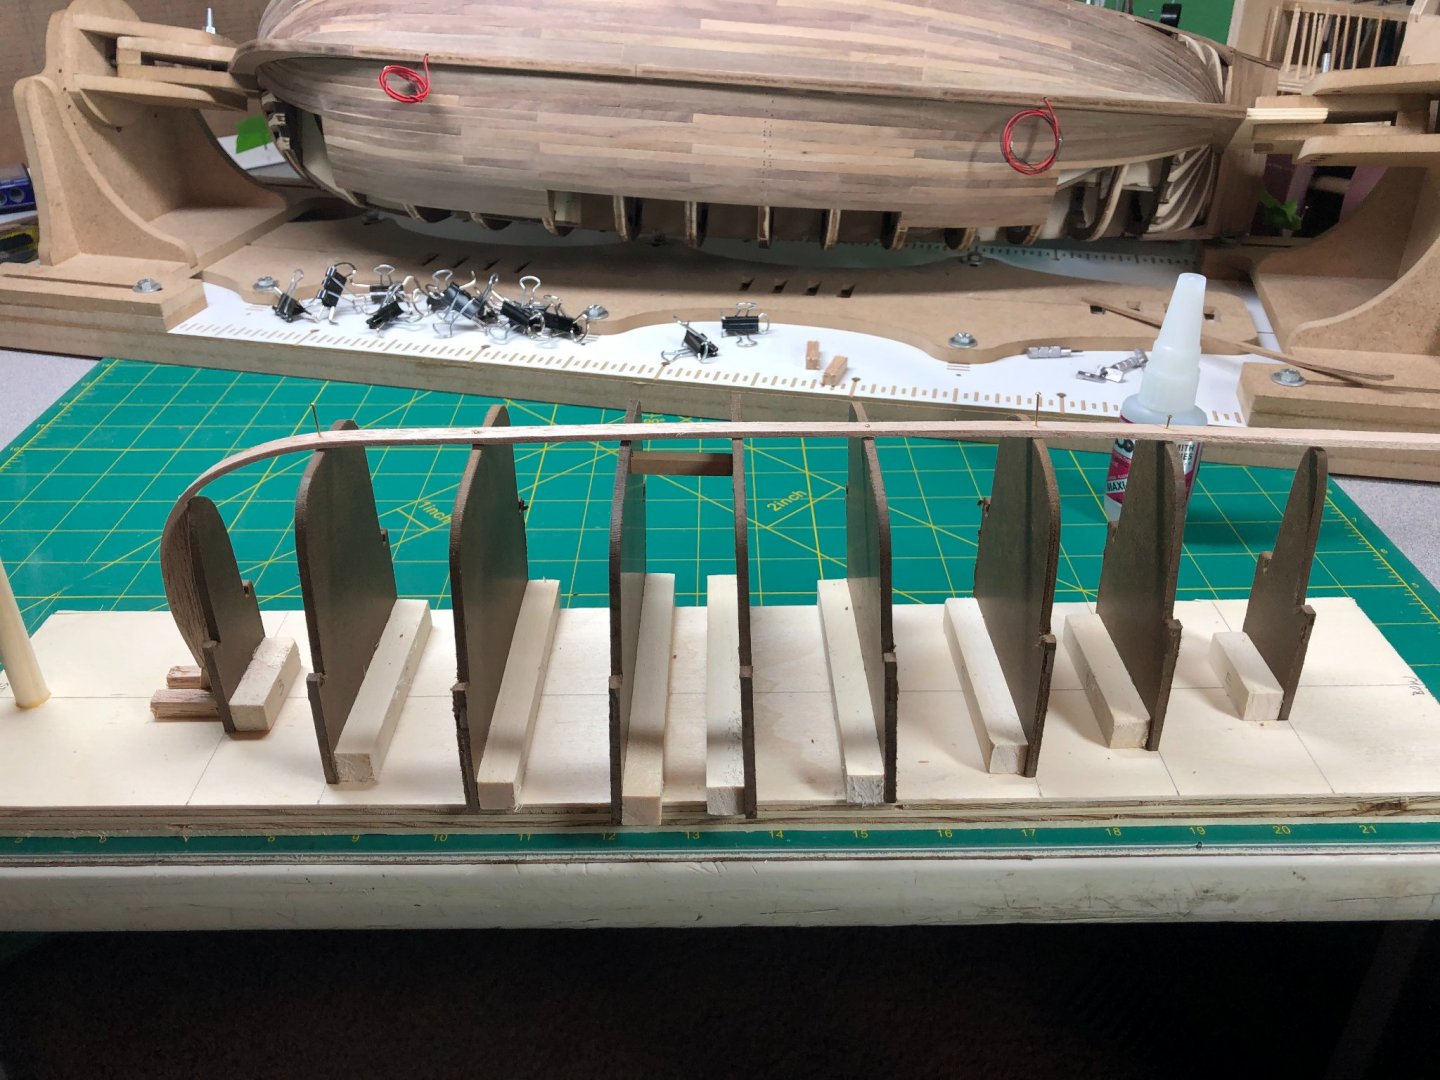
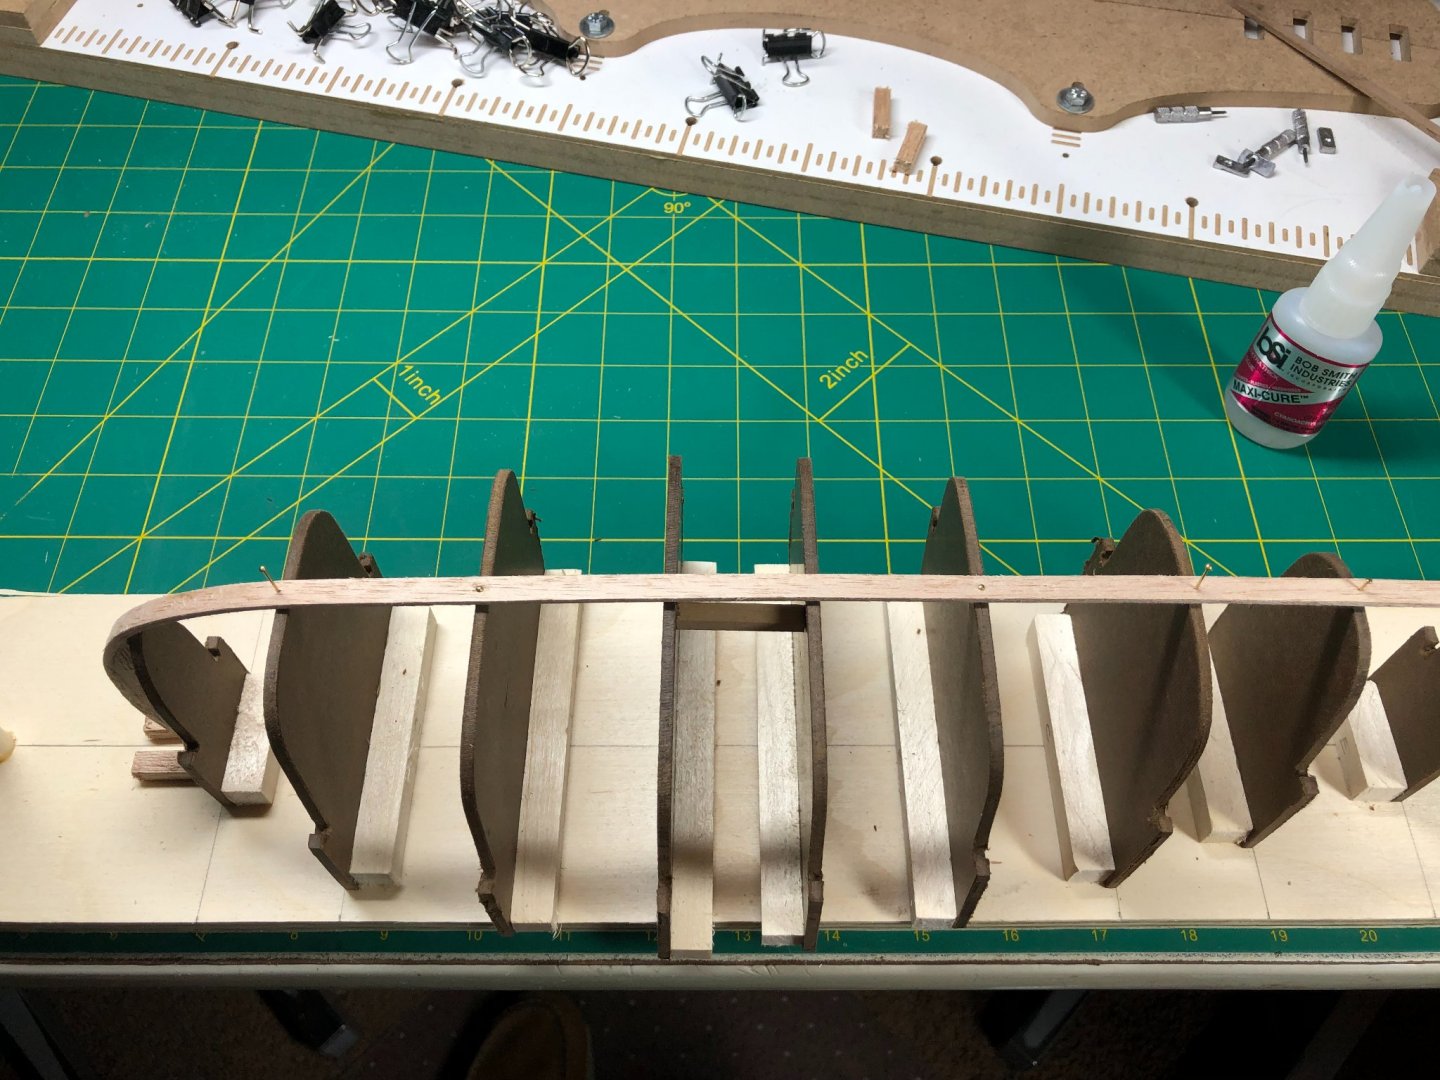
I used a few nails to ensure the keel ran straight over the centerlines of the forms.
And then added the bow section using the same method as the stern:
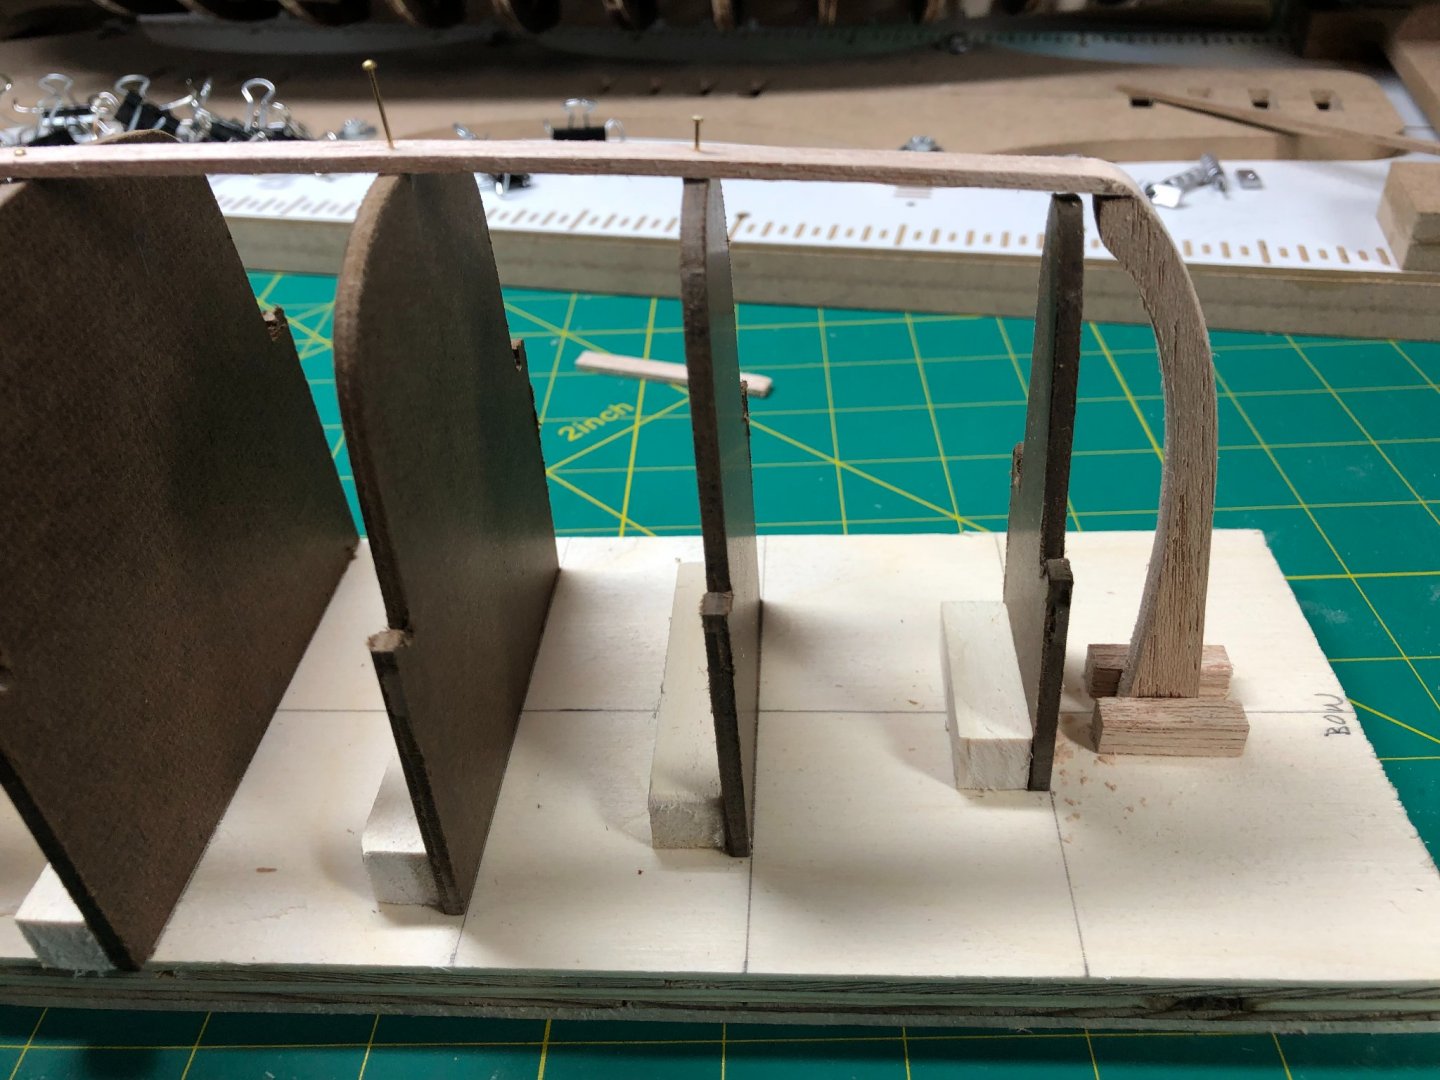
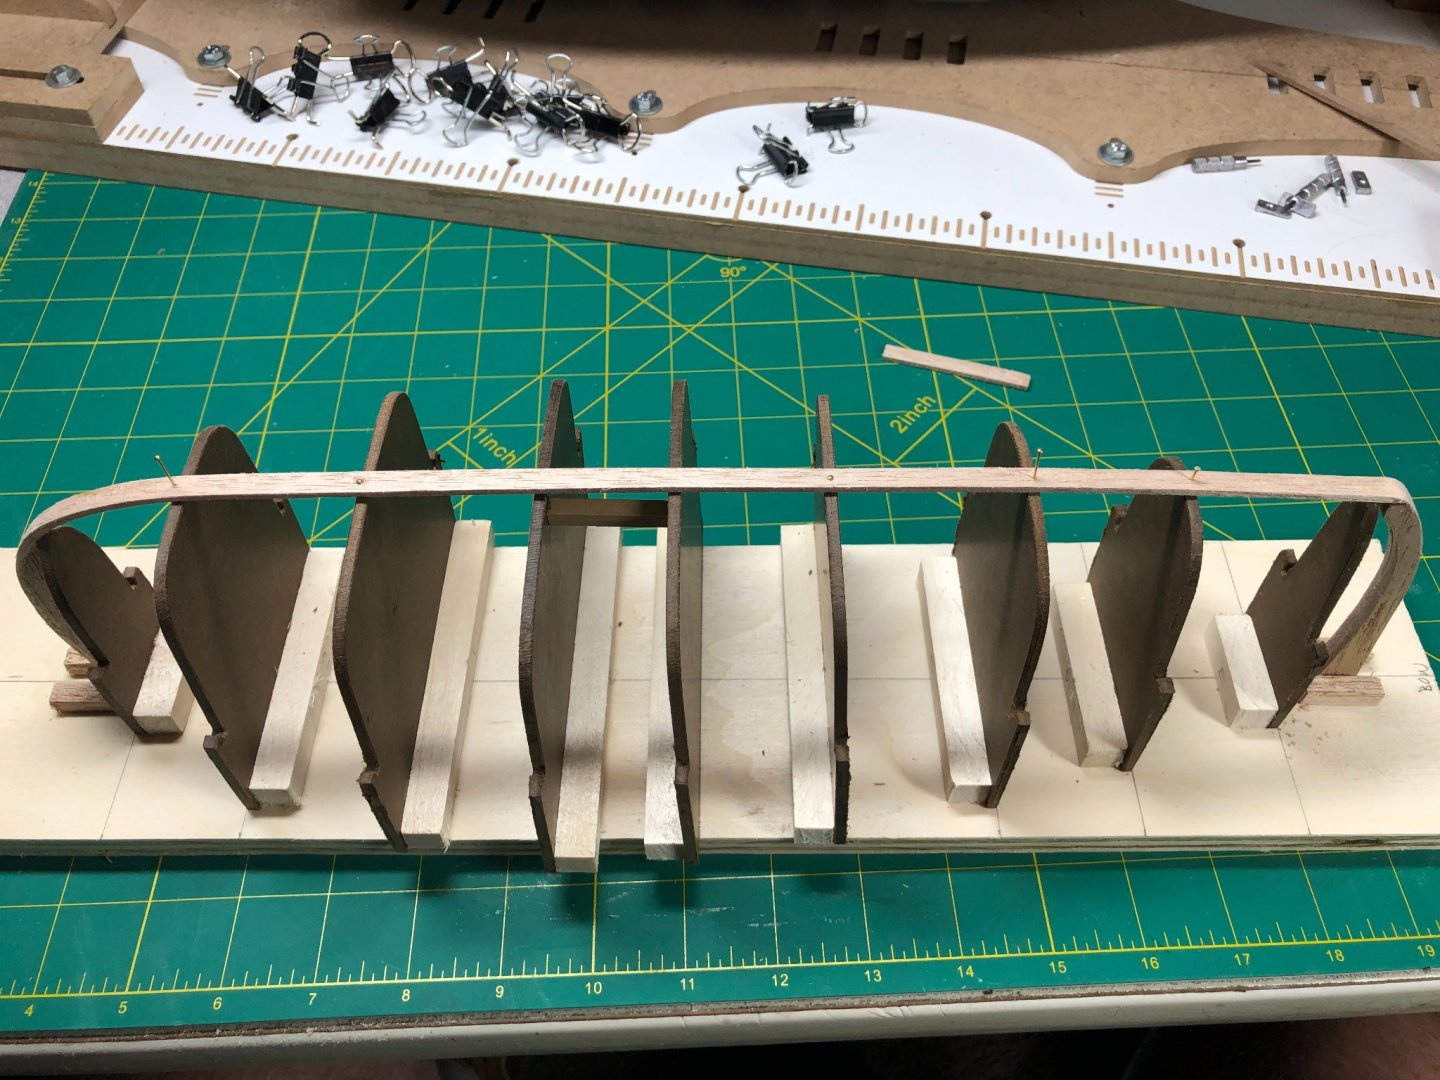
So far, so good!
Next I'll be laying the first planks.
Lyle
"The only thing that stays the same is the constant state of change"
Posted June 13
Lyle,
The Excavations of an Ancient Boat from the Sea of Galilee by Shelly Wachsmann (hereafter known as Wachsmann-Excavations) shows the planks have diagonal butt joints. Will you be modeling that into your build...or leave well enough alone?
Chuck Seiler
San Diego Ship Modelers Guild
Nautical Research Guild
My build log from MSW's forum:
I ran across this kit totally by accident when I purchased some books from Scott Miller. He has some history with MSW.
His version of the boat discovered in 1986 intrigued me from the first time I saw it and I just had to build one!
It has a history that is both mysterious and timeless with implications of biblical references (after all, it was found in the Sea of Galilee!).
This will be a birthday present for my dad. He turns 86 in mid-August.
So, my time is limited and it may be impractical of me to try and build it in two months... We'll see!
I'm also reading the book of the same name written by Shelley Wachsmann. I just started it but it has some good background on the discovery and recovery of this boat. I enjoy learning the history of each vessel I build.

The kit is scheduled to arrive tomorrow.
The unveiling will happen next!
Lyle
"The only thing that stays the same is the constant state of change"
Posted June 8 (edited)Sounds like a great project. Looking forward to seeing your progress on this one.
Steven
Posted June 9
I think you will have it completed before his birthday.
Posted June 9Maybe... if USPS can actually deliver it!
It was due yesterday and now the tracking says "It's arriving late" but no date...!
...control the things you can and don't worry about the other things, right?
I'll update the log as soon as it arrive.
Lyle
"The only thing that stays the same is the constant state of change"
Posted June 9
I am looking forward to this build. Louie, pass the popcorn.
Chuck Seiler
San Diego Ship Modelers Guild
Nautical Research Guild
Posted June 11
Good news... The tracking number shows the kit will be delivered today...
Bad news... I'm gone for most of the weekend!
Hoping it will arrive before I leave. Knowing USPS, it's nearly a foregone conclusion that it won't!
Lyle
"The only thing that stays the same is the constant state of change"
Posted June 11 (edited)
Weekend plans cancelled... bad weather!
The kit did arrive today!
It was packed fairly well in a USPS priority mail tube (triangular shaped):
Everything is divided into taped together bunches... all marked with writing on a piece of tape:
The CD has the instructions... 54 pages with lots of pictures and pretty concise directions. I've read them all the way to the rigging section and found it to be easy to follow with the exception of a couple places that will probably be clearer when I get to it!
The first real noticeable thing is that the wood is all rough cut! It is a soft wood and will sand very easily... So, not a big deal for me.
The wood is a light Mahogany and Boxwood.
The strongback pieces are clearly marked and the positions of the forms are already marked on the base board:
The envelopes have various pieces for the finish work... rope, fish net, oars, anchor, etc.:
Tomorrow I'll do a proper inventory and get the strongback assembled. Hopefully a few planks too!
I have a pretty decent supply of wood and will more than likely replace some pieces to embellish the model just a bit.
I've never done this style of build and am looking forward to it... more in a day or two!
Lyle
"The only thing that stays the same is the constant state of change"
Posted June 13
I've made some decent progress!
The first steps were to build the strongback. Straightforward and pretty simple:
The board came pre-marked with a centerline and locations for each of the forms. The post at the stern is not part of the boat but comes in real handy later
I glued the marked form pieces together. Again, very easy and straightforward:
The only real issues was making sure the pieces were flush at the base. I used regular wood glue for this portion of the job to ensure I had the ability to adjust the pieces, if needed.
Next, I glued the forms down on the board per the instructions:
I used the thick CA glue for this process. The center two forms were not perpendicular and I added a brace to fix that problem.
The keel and stern post came pre-assembled. I still had to shorten the post a bout 1/4" and heat and bend the keel section near the stern as it was not curved correctly... an easy fix. Once satisfied I glued it down per the instructions:
The sternpost is glued to the board and the scrap blocks are glued to the post and the board. When it is time to remove the boat from the strongback, I'll simply cut the post even with the blocks (per the instructions).
I used a few nails to ensure the keel ran straight over the centerlines of the forms.
And then added the bow section using the same method as the stern:
So far, so good!
Next I'll be laying the first planks.
Lyle
"The only thing that stays the same is the constant state of change"
Posted June 13
Lyle,
The Excavations of an Ancient Boat from the Sea of Galilee by Shelly Wachsmann (hereafter known as Wachsmann-Excavations) shows the planks have diagonal butt joints. Will you be modeling that into your build...or leave well enough alone?
Chuck Seiler
San Diego Ship Modelers Guild
Nautical Research Guild
POST #2
The first two planks on each side are full sized planks (width). The first fits into the notches cut into each form. I had to modify the form closest to the stern to accept the plank at the right angle. The stern end needed to be sanded to the proper angle to meet the sternpost. Once achieved it was glued into place using a medium thick CA (I'm using that for all the plank ends, per the instructions). The remaining plank is fitted into the notches, cut at the bow and sanded slightly to match the bow piece.
The first plank:
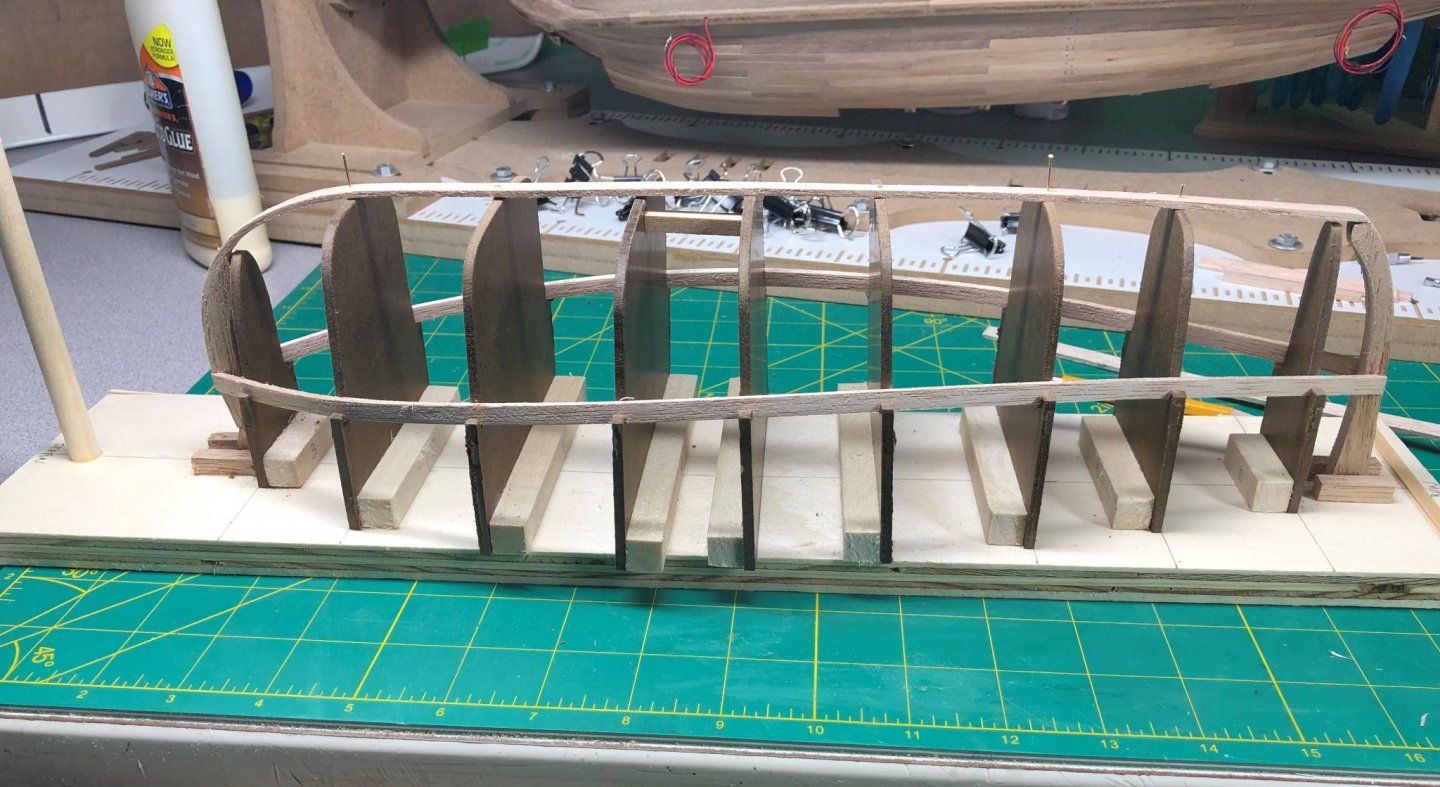
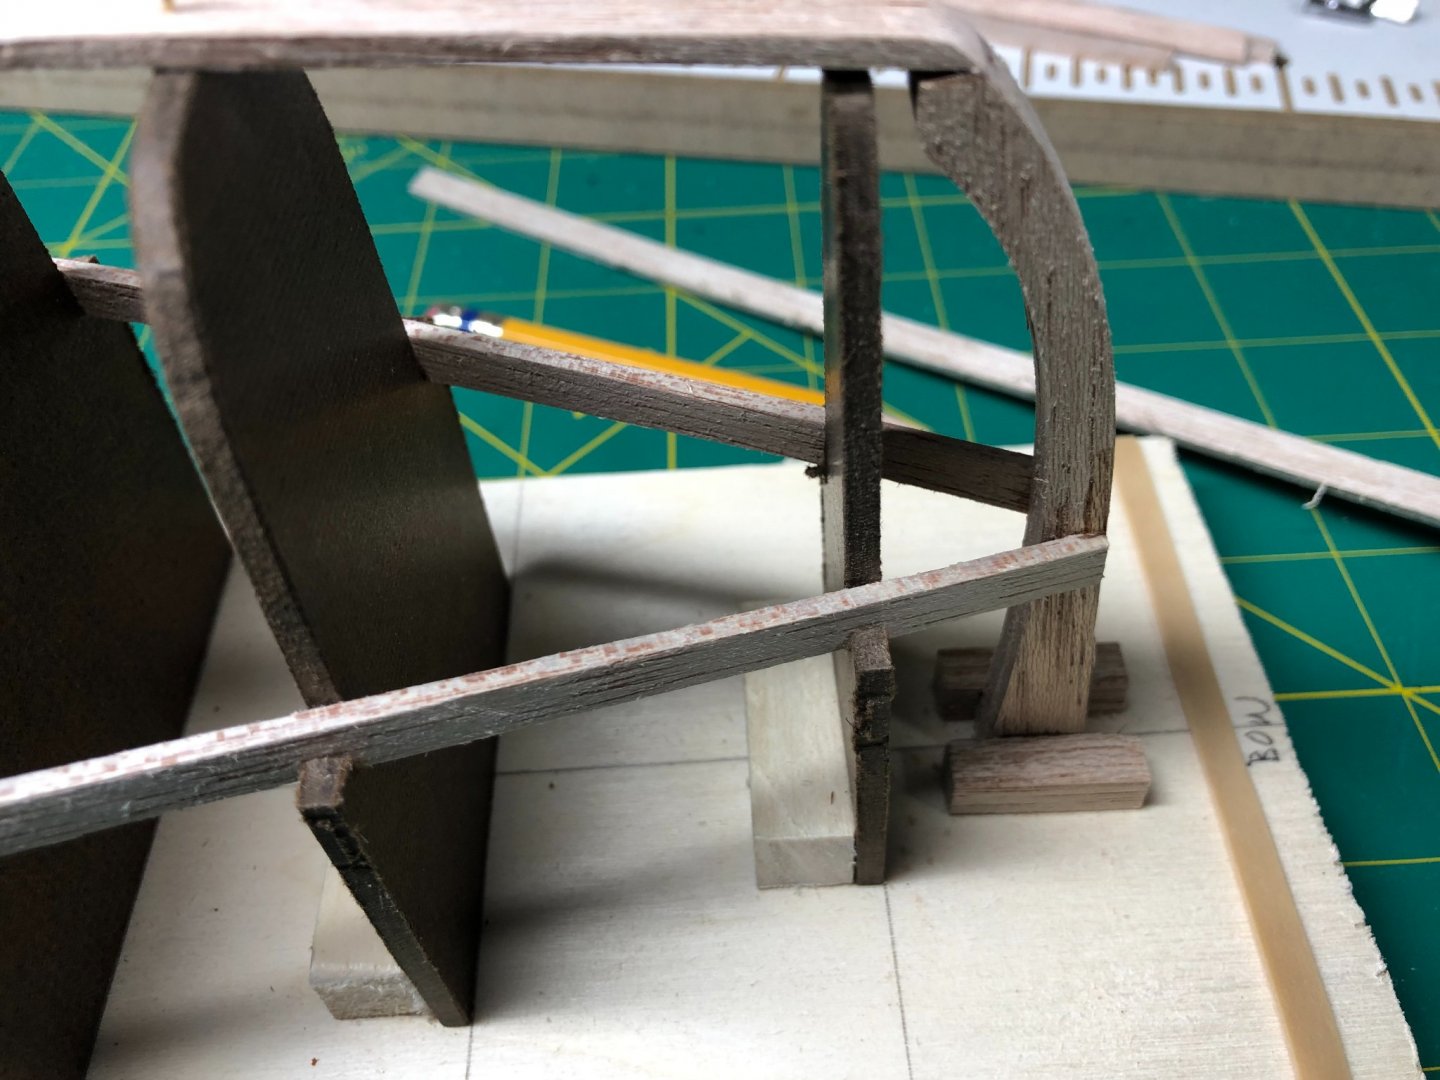
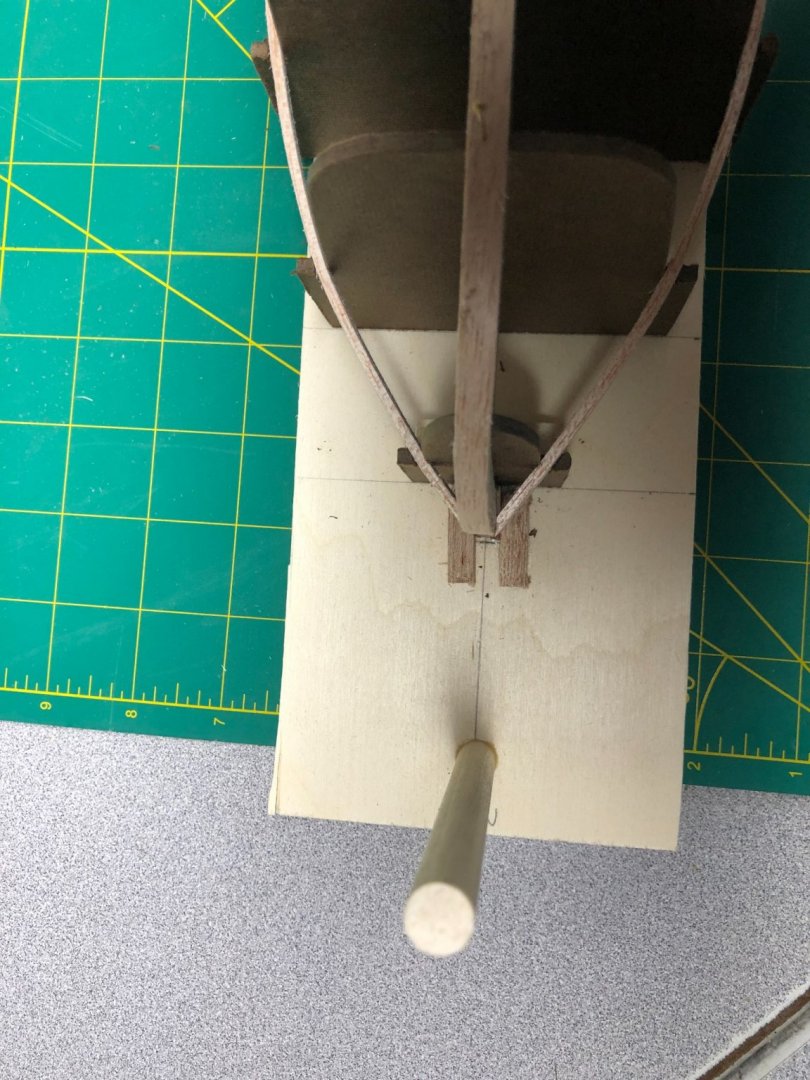
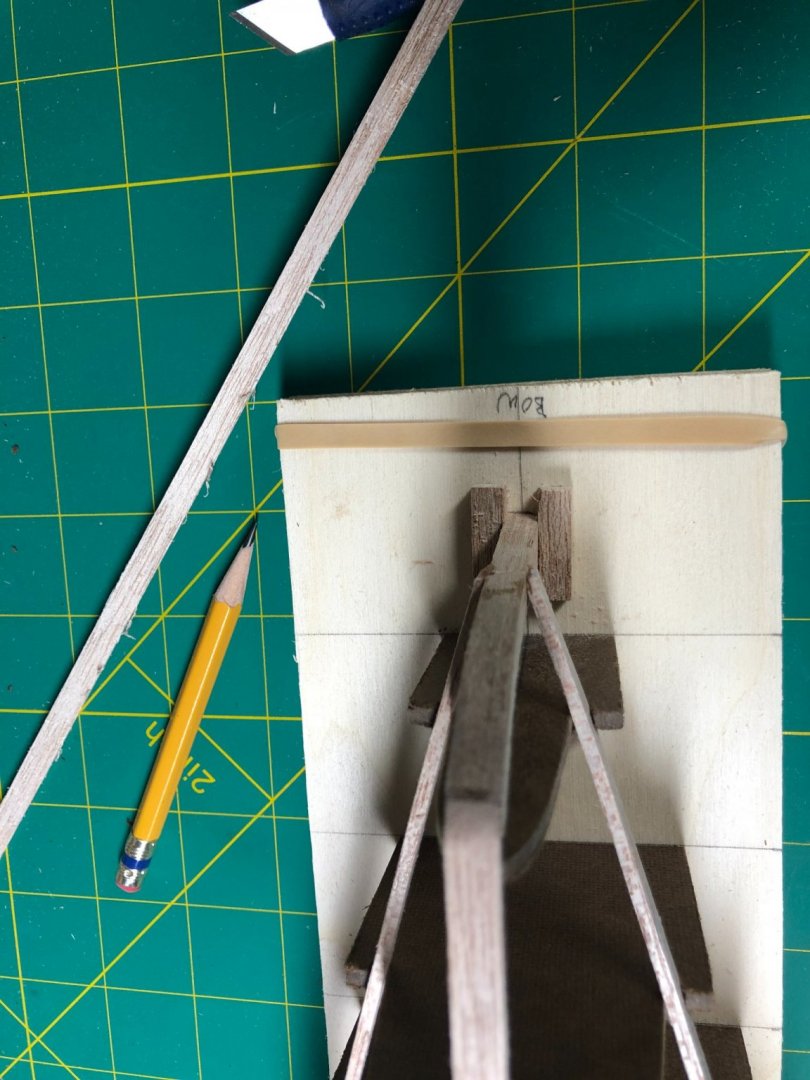
The second plank was done the exact same way:
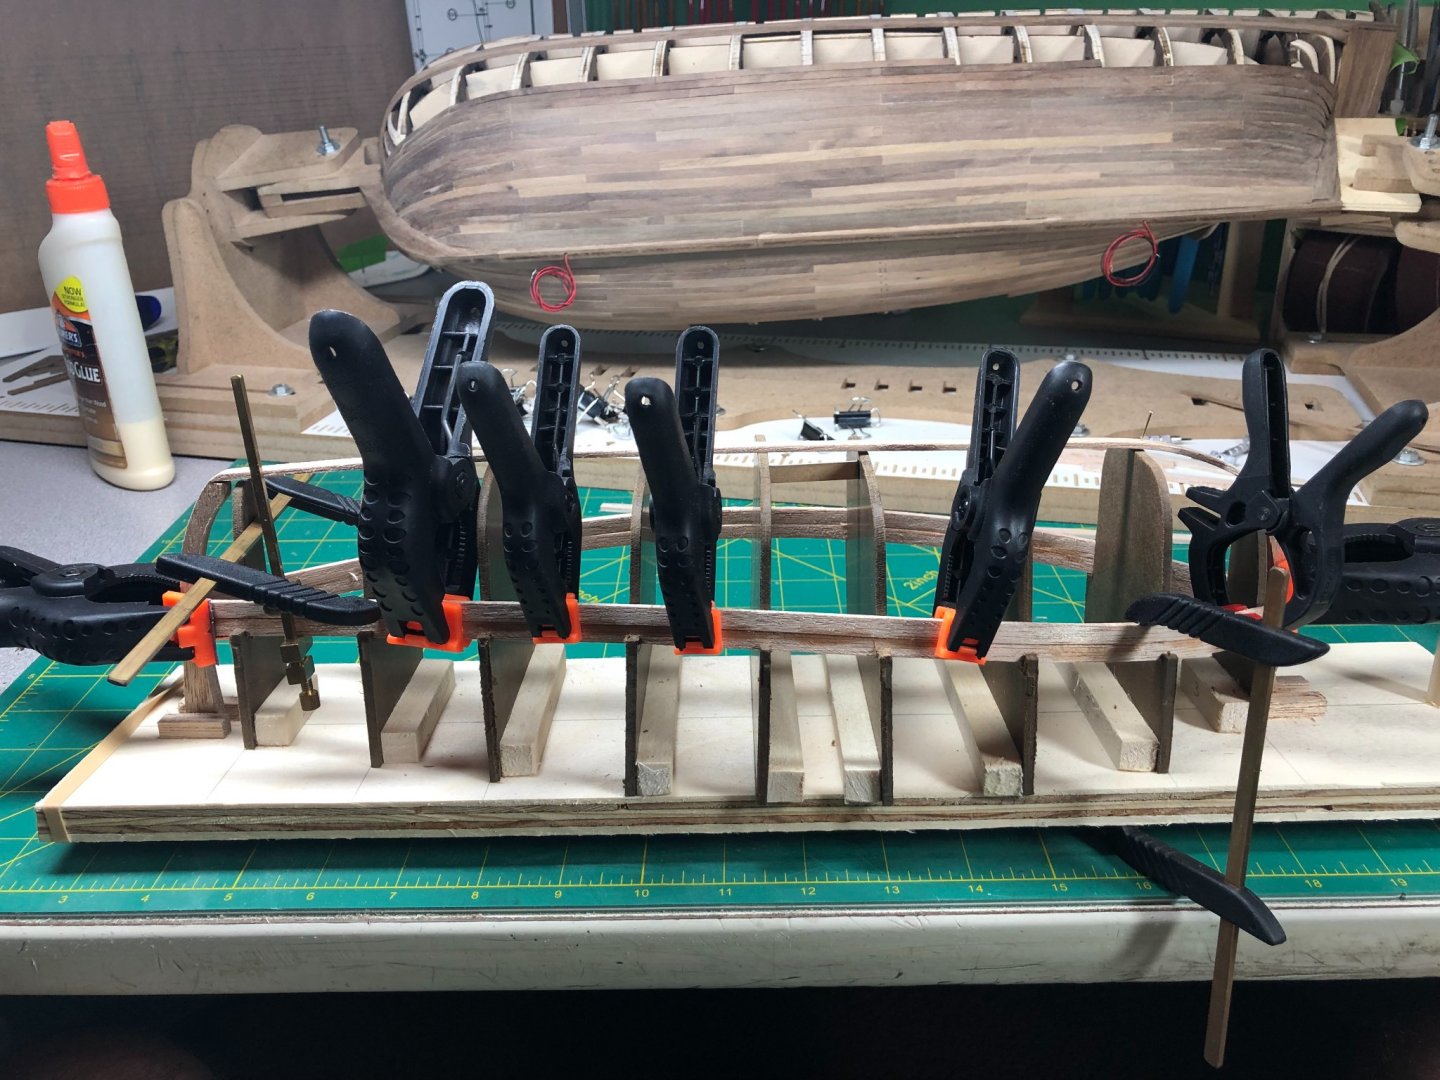
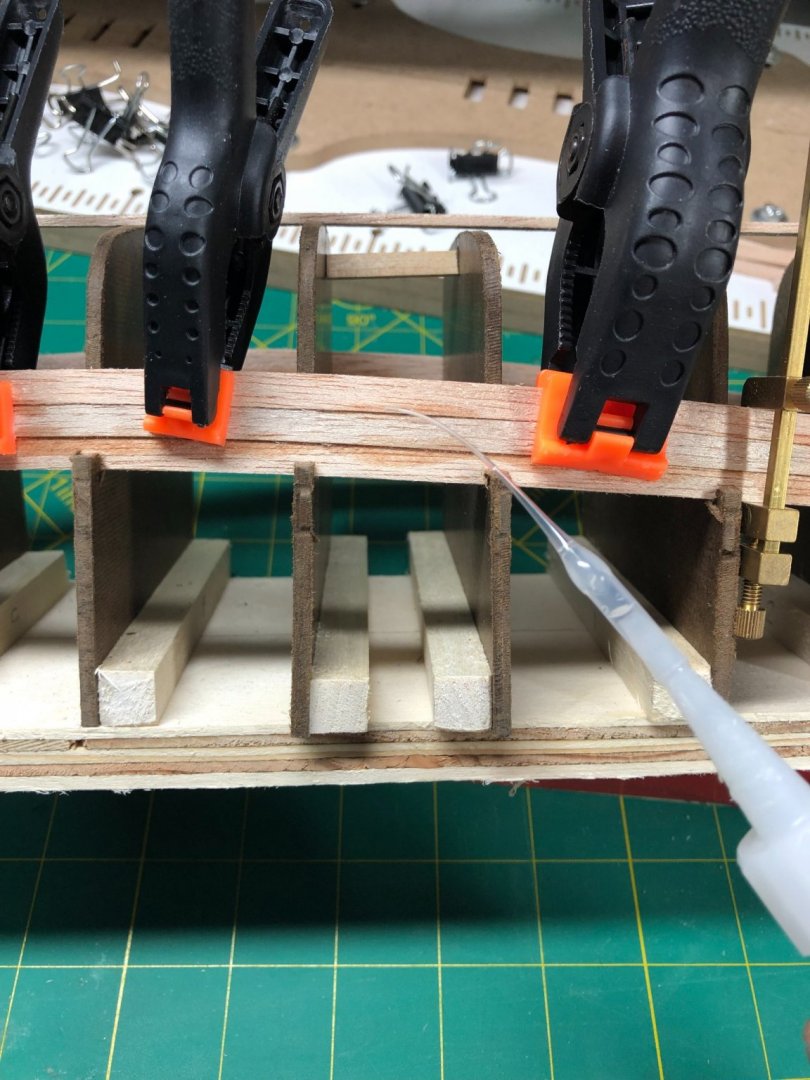
I tried various clamps to get the fit as perfect as possible, using some to keep the "clinker" effect to a minimum and the others to hold the seams between planks nice and tight. Once everything is fitted, I used a thin CA to "weld" the joints between the planks being as careful as possible not to get any of the glue on the forms... not sure how successful I was and I'm sure I'll find out later!
The next several planks are tapered and I received the kit with the tapering already done.
The process to prepare a plank is as follows.
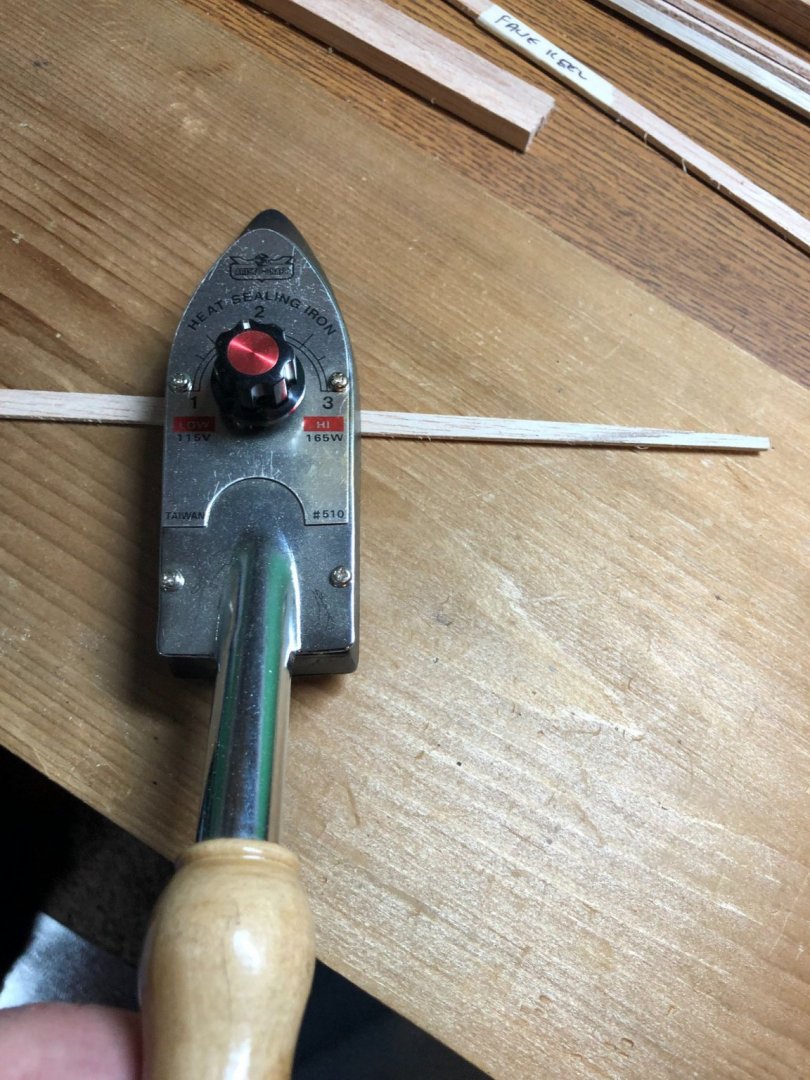
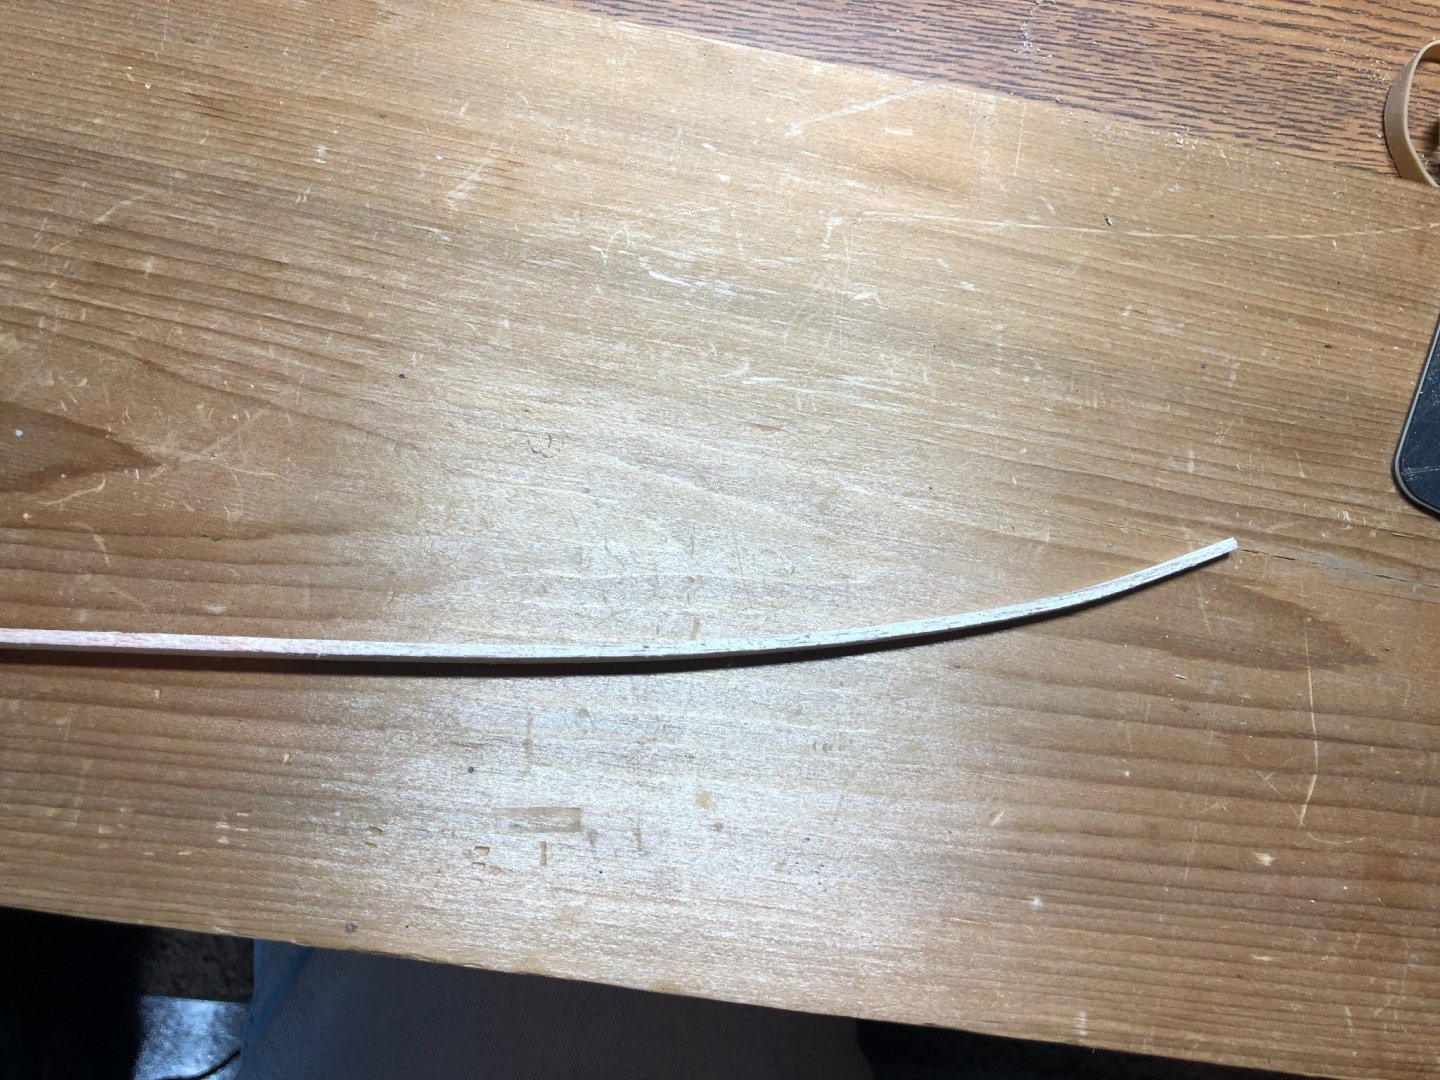
I heated and bent the plank just to help ensure they don't break.
Some light sanding and forming at both ends: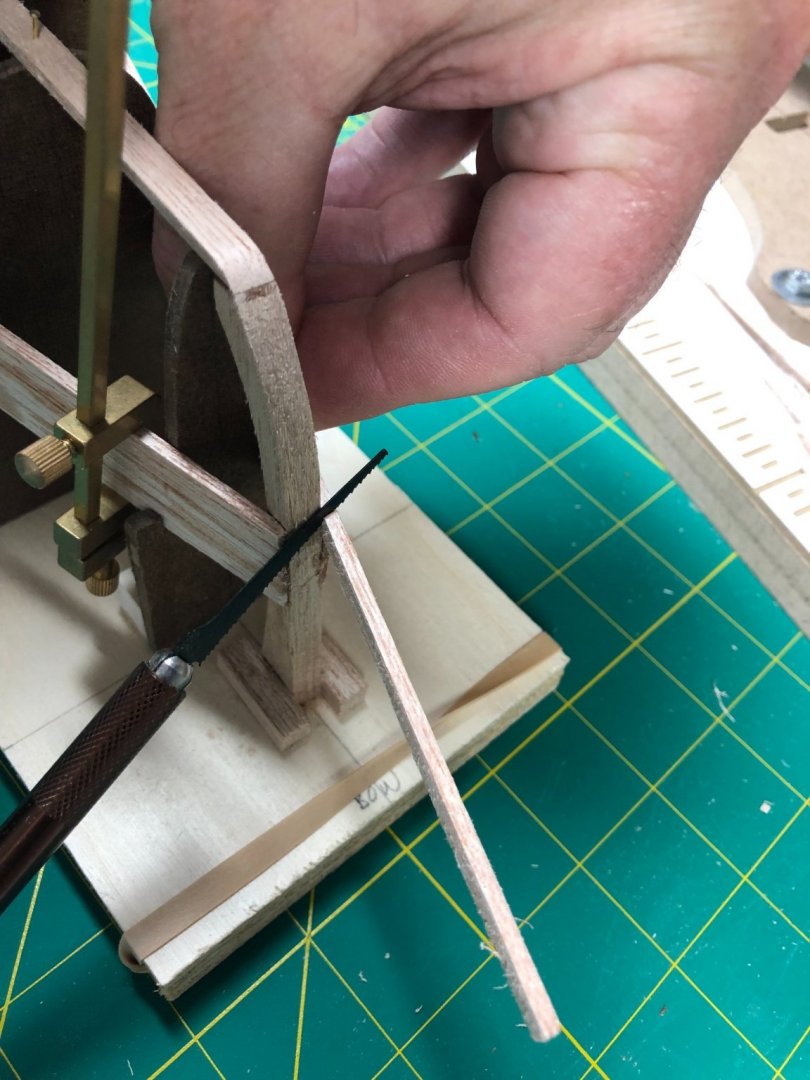
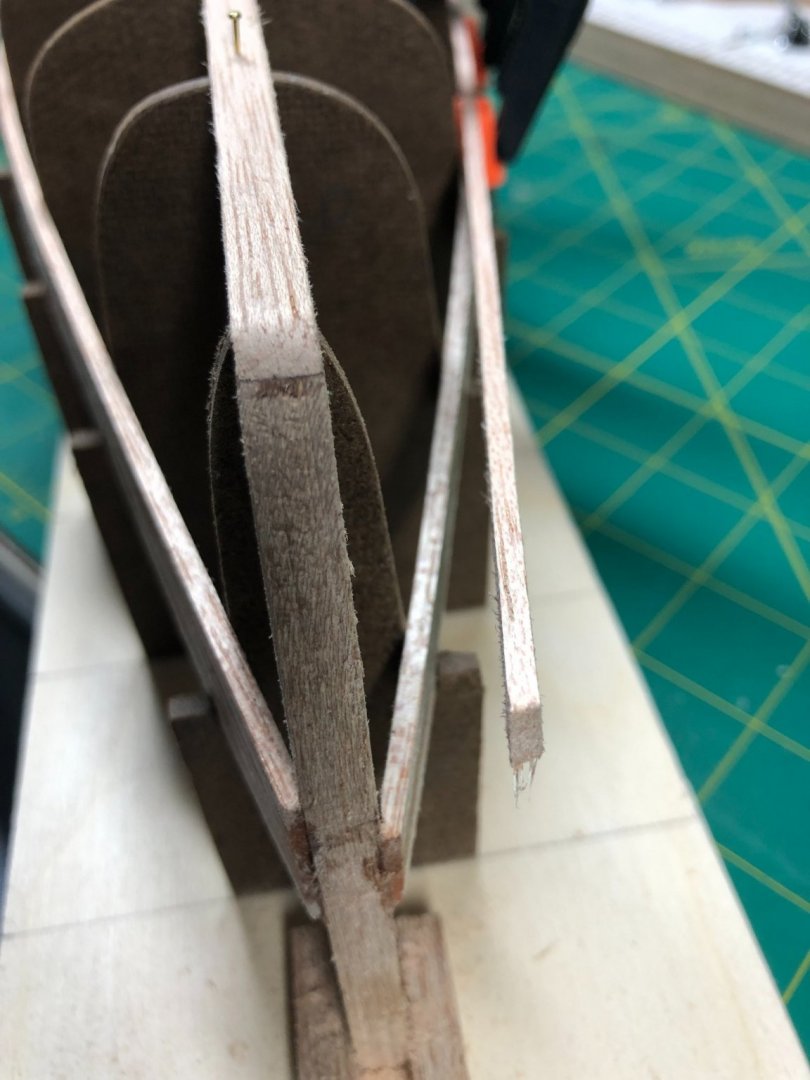
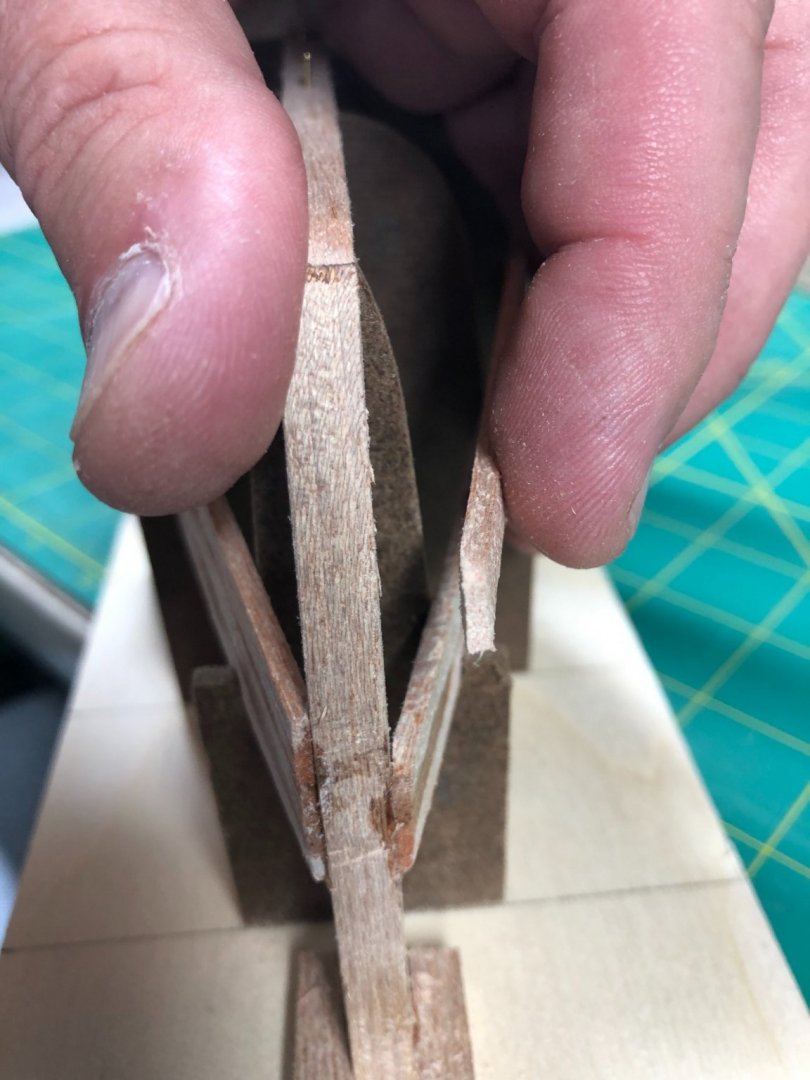
And then gluing into place just like the first two planks.
Clamps hold the planks against the forms and against each other. At the stern, the previously mentioned (and shown) post comes into play to keep the clamps from sliding off:
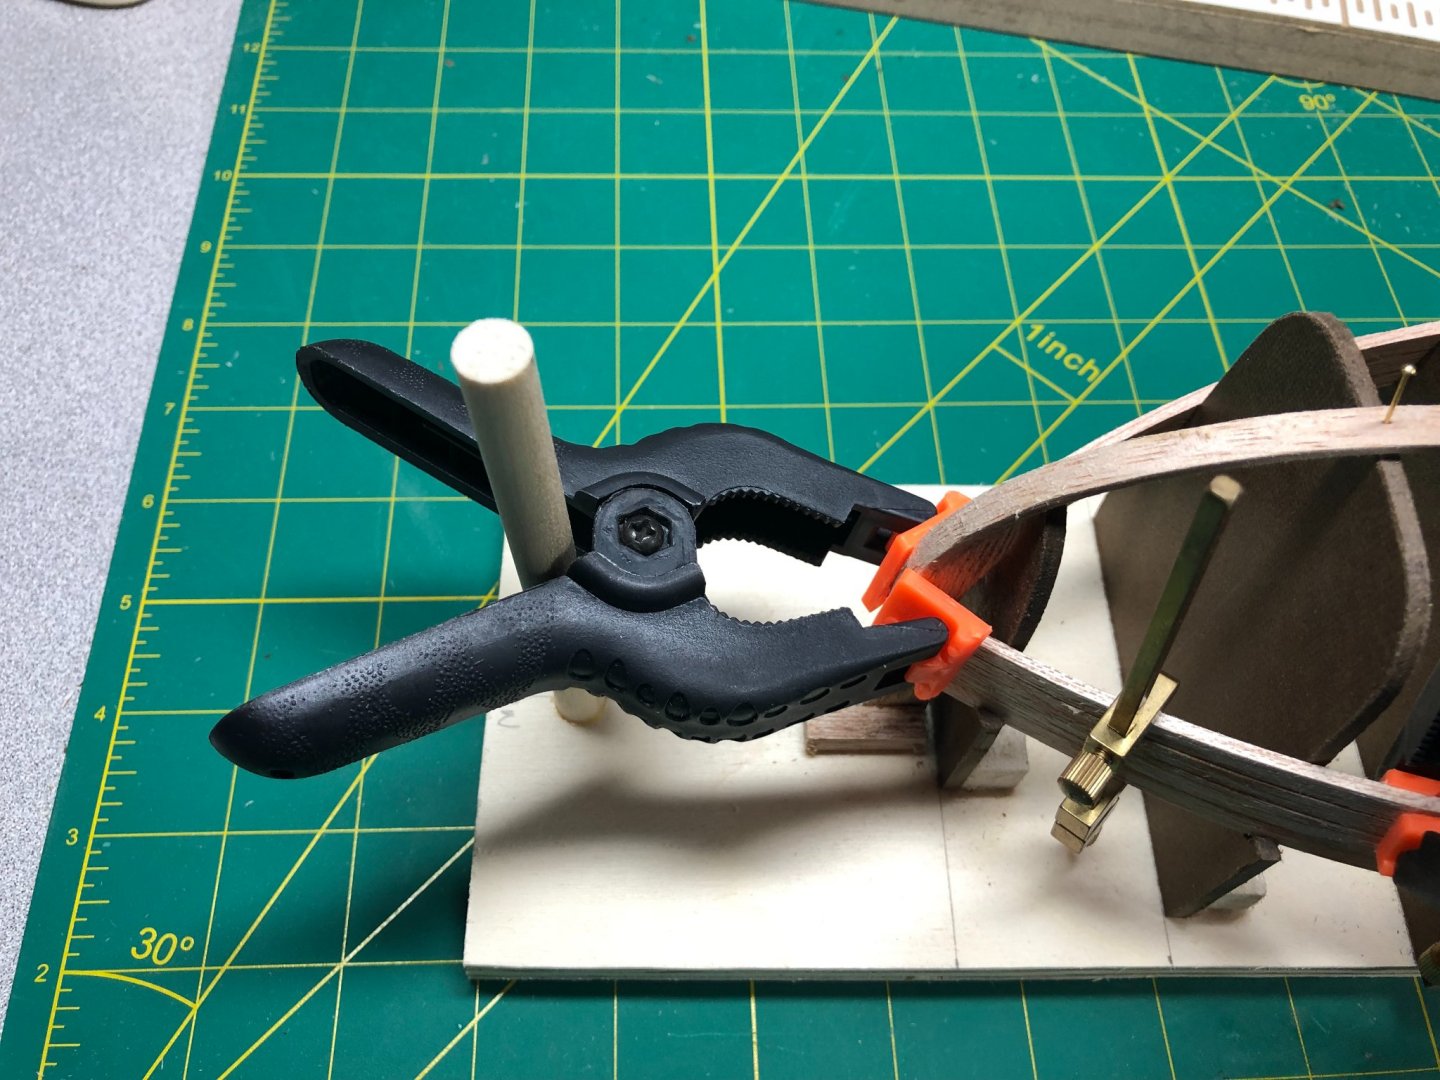
And at the bow, I've modified a clamp by gluing sandpaper to the clamp surfaces to keep it from sliding off:
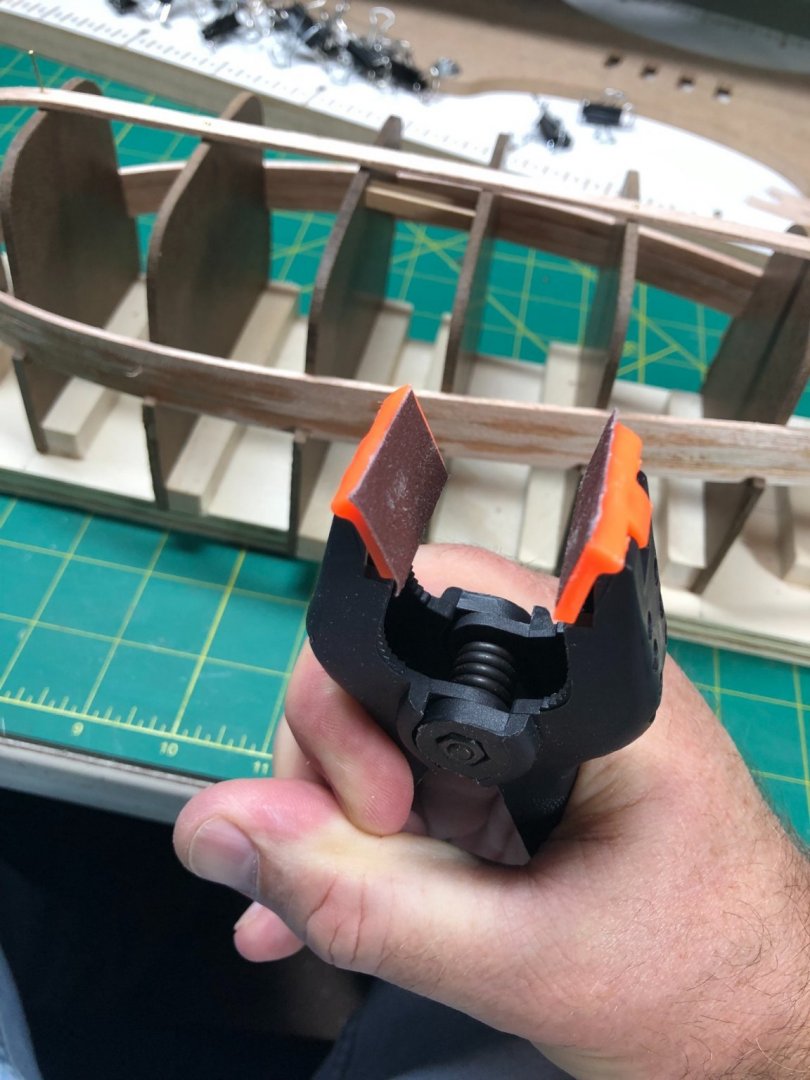
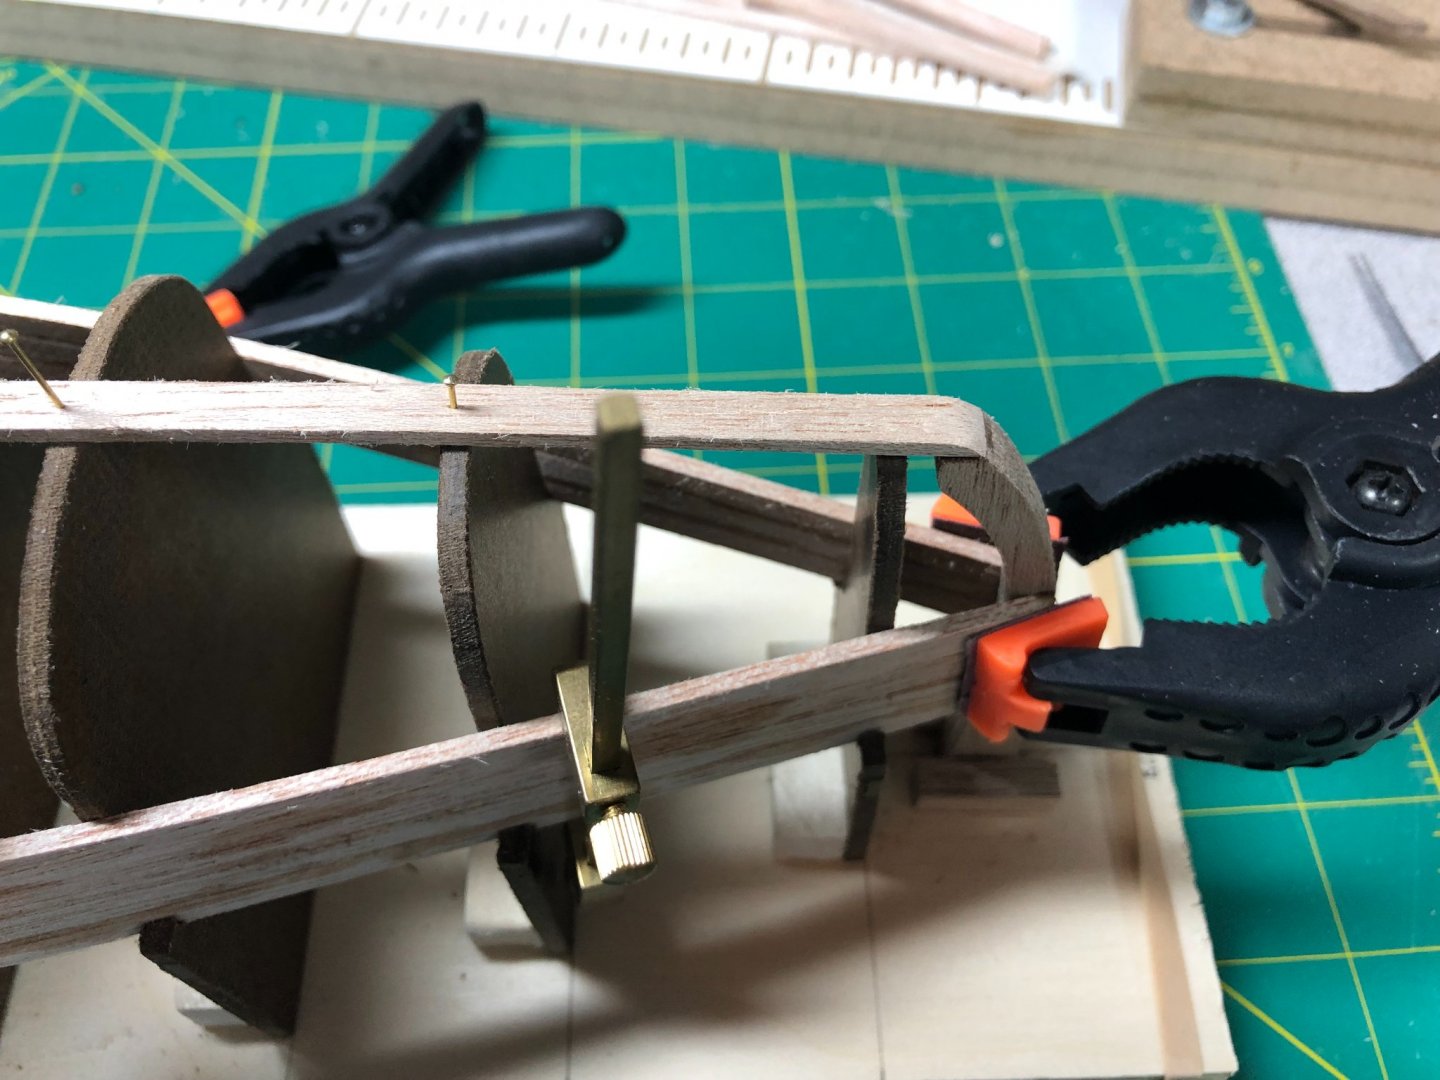
It works really good!
Clamps are installed:
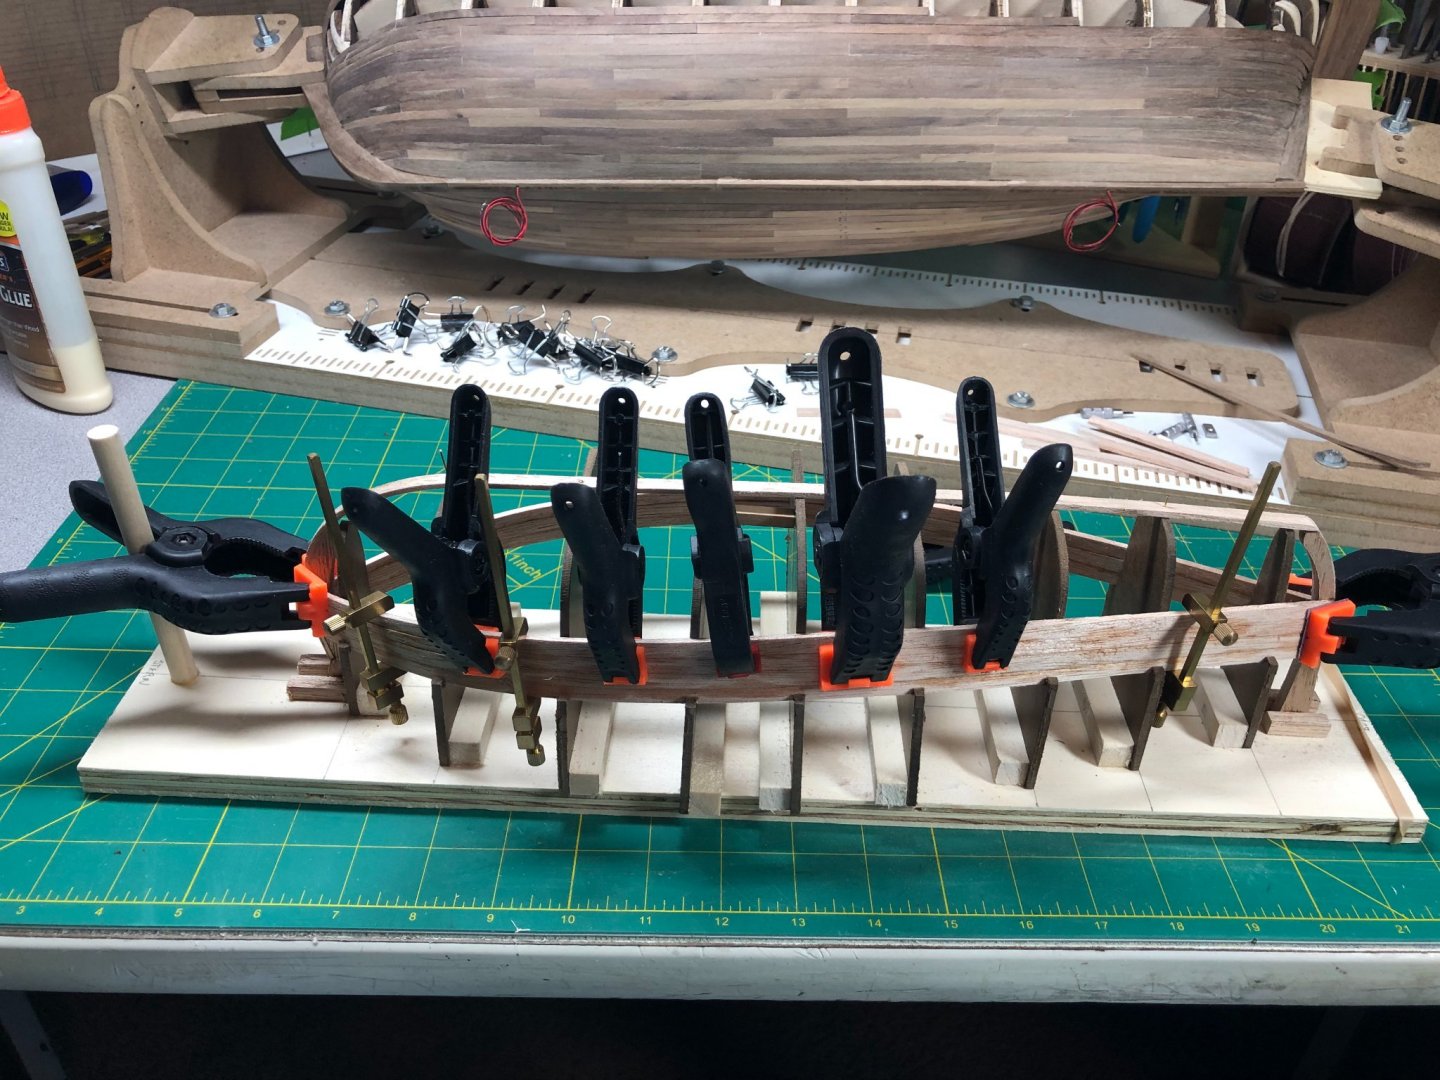
And thin CA to "weld the joints:
I've completed five planks on each side, alternating as I go to keep thing from getting out of whack.
Here is where I stopped for today:
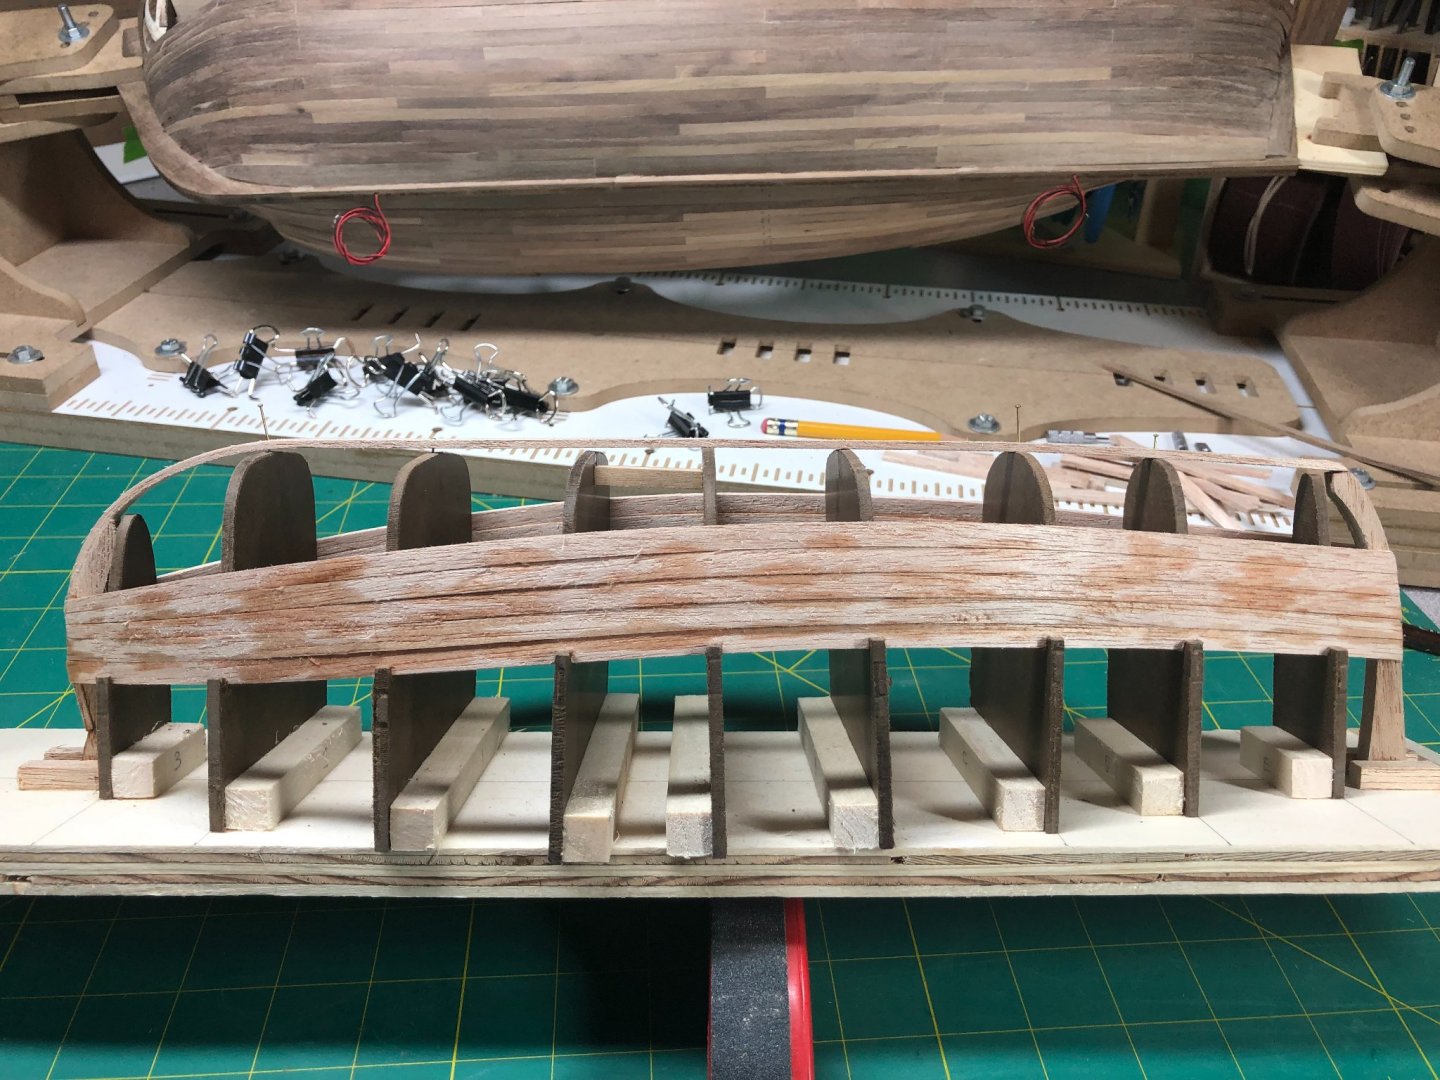
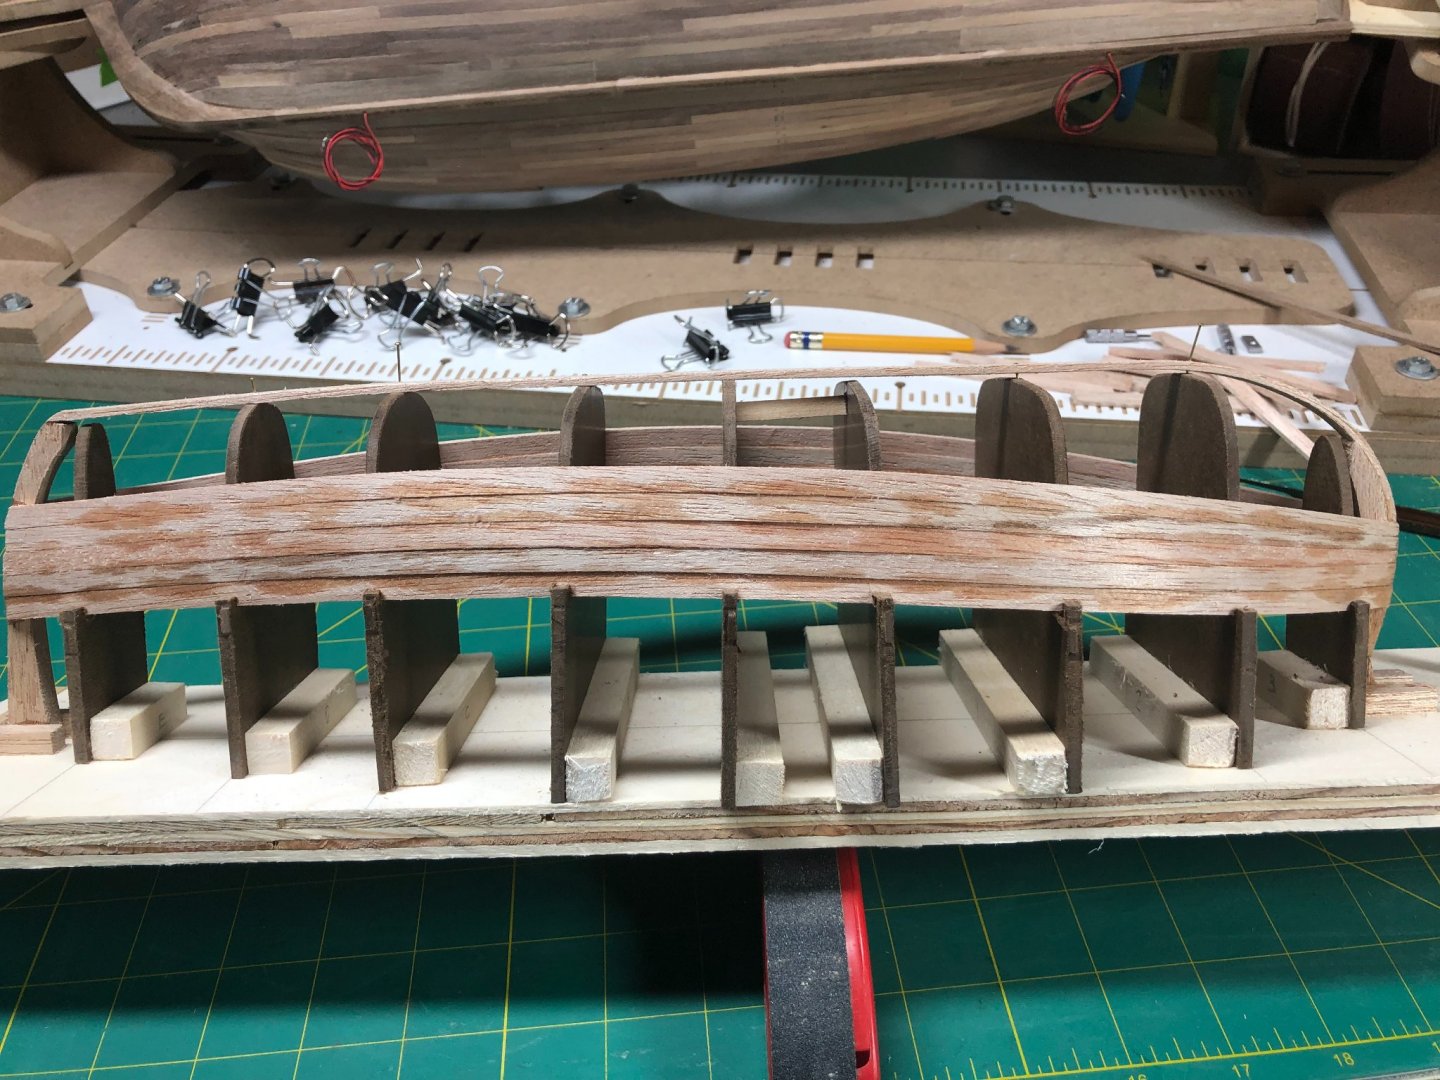
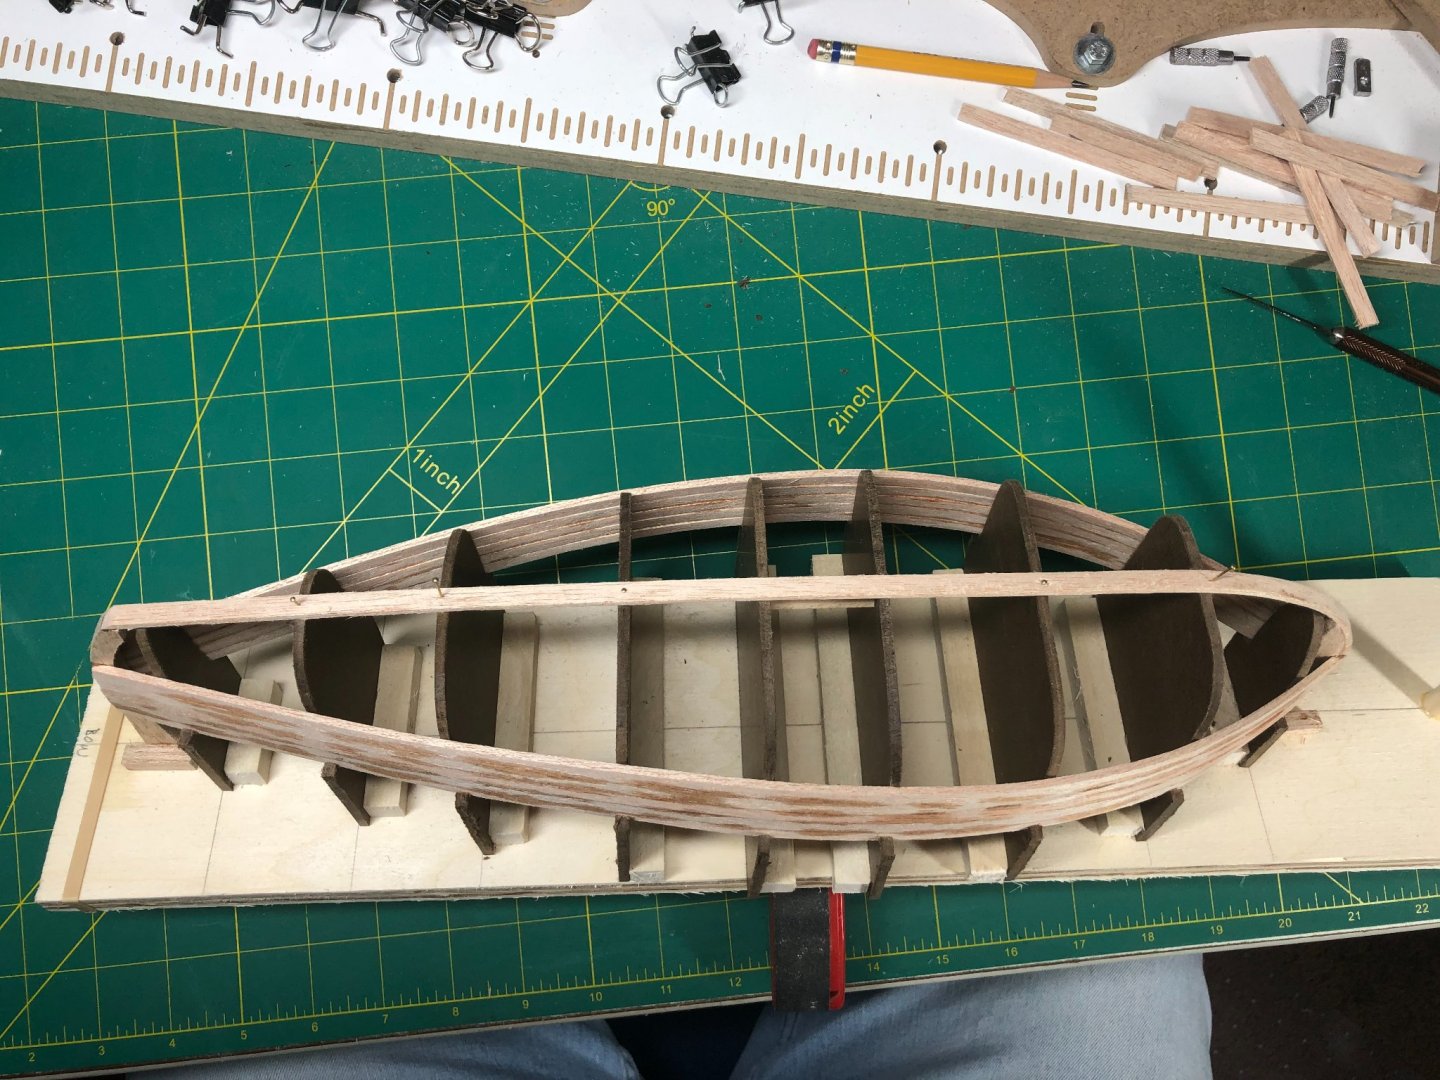
One or two more planks and I'll be to the curve in the hull and things will get a bit tougher but nothing like working with walnut as is being used on the Bounty in the background!!
More in a few days.
Lyle
"The only thing that stays the same is the constant state of change"
The first two planks on each side are full sized planks (width). The first fits into the notches cut into each form. I had to modify the form closest to the stern to accept the plank at the right angle. The stern end needed to be sanded to the proper angle to meet the sternpost. Once achieved it was glued into place using a medium thick CA (I'm using that for all the plank ends, per the instructions). The remaining plank is fitted into the notches, cut at the bow and sanded slightly to match the bow piece.
The first plank:
The second plank was done the exact same way:
I tried various clamps to get the fit as perfect as possible, using some to keep the "clinker" effect to a minimum and the others to hold the seams between planks nice and tight. Once everything is fitted, I used a thin CA to "weld" the joints between the planks being as careful as possible not to get any of the glue on the forms... not sure how successful I was and I'm sure I'll find out later!
The next several planks are tapered and I received the kit with the tapering already done.
The process to prepare a plank is as follows.
I heated and bent the plank just to help ensure they don't break.
Some light sanding and forming at both ends:
And then gluing into place just like the first two planks.
Clamps hold the planks against the forms and against each other. At the stern, the previously mentioned (and shown) post comes into play to keep the clamps from sliding off:
And at the bow, I've modified a clamp by gluing sandpaper to the clamp surfaces to keep it from sliding off:
It works really good!
Clamps are installed:
And thin CA to "weld the joints:
I've completed five planks on each side, alternating as I go to keep thing from getting out of whack.
Here is where I stopped for today:
One or two more planks and I'll be to the curve in the hull and things will get a bit tougher but nothing like working with walnut as is being used on the Bounty in the background!!
More in a few days.
Lyle
"The only thing that stays the same is the constant state of change"
POST #3
Posted June 13
But not on this scale.
Lyle
"The only thing that stays the same is the constant state of change"
Posted June 13
You are making great progress.
Uhhgggg! No, not the actual mortise/tenon joints themselves. That would be some chore. I was thinking more the line of the actual joint.
Chuck Seiler
San Diego Ship Modelers Guild
Nautical Research Guild
Posted June 13
If so, they are quite tight right now but that changes after the next plank or two... I'll need to cut the bevel into about three rows of planks. Shouldn't be too tough.
Lyle
"The only thing that stays the same is the constant state of change"
No, I am talking about the joints plank-to-plank along the same strake. Attached is an example, but with far too many joints. Figure 5.12 and Foldout 1 of Waschmann show these, but hard to see.

Chuck Seiler
San Diego Ship Modelers Guild
Nautical Research Guild
Posted June 14
Interesting… I had not seen or read that in the book. Maybe I’m not far enough into it… over halfway but no mention of it.
At any rate, as you’ve seen, the planks are a single run on the model.
Lyle
"The only thing that stays the same is the constant state of change"
Posted June 15
I've managed to get one side planked to the seventh row and the other side to the sixth.
Pretty easy....... well, that changed with those two rows as the curve of the hull is in play now. I've had some difficulty with the planks wanting to pull away from the frame:
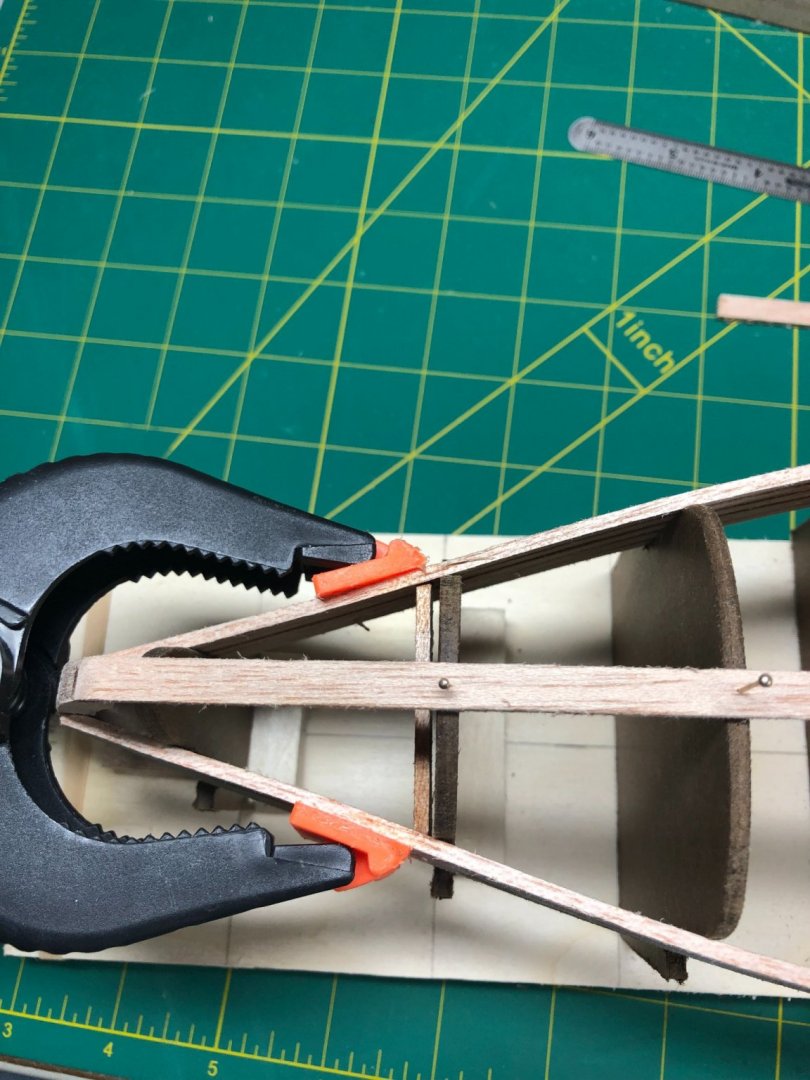
I used a piece of scrap to pull the frame together and glued into place. It held for the two planks but popped loose when I was fiddling with the clamps!
On to the next idea:
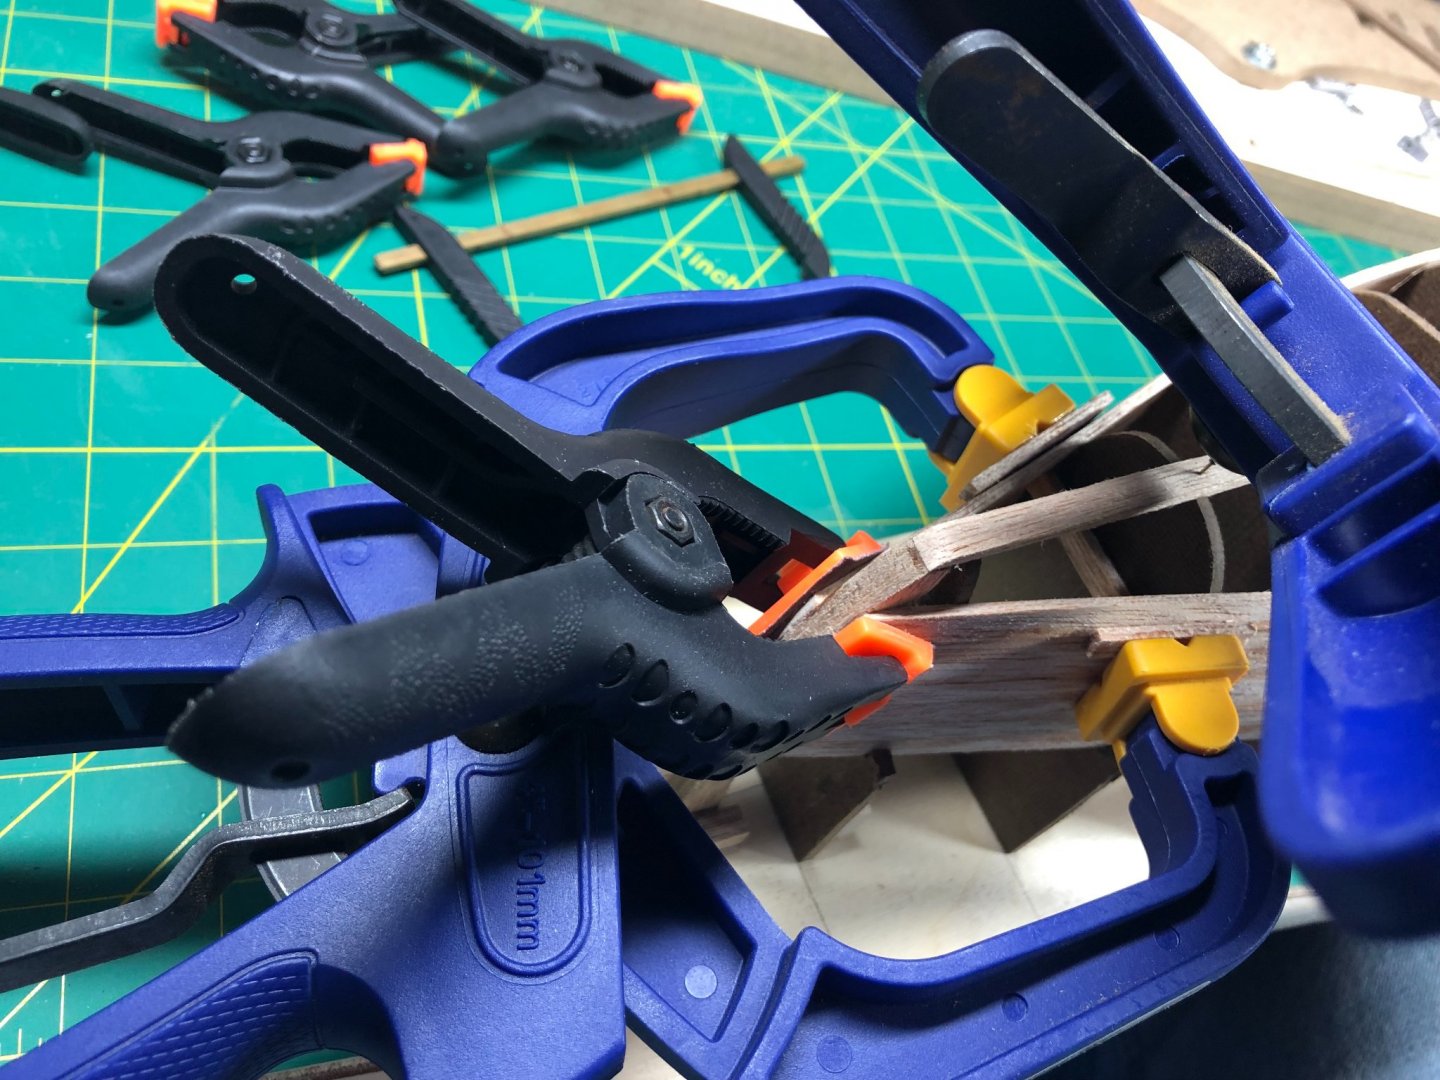
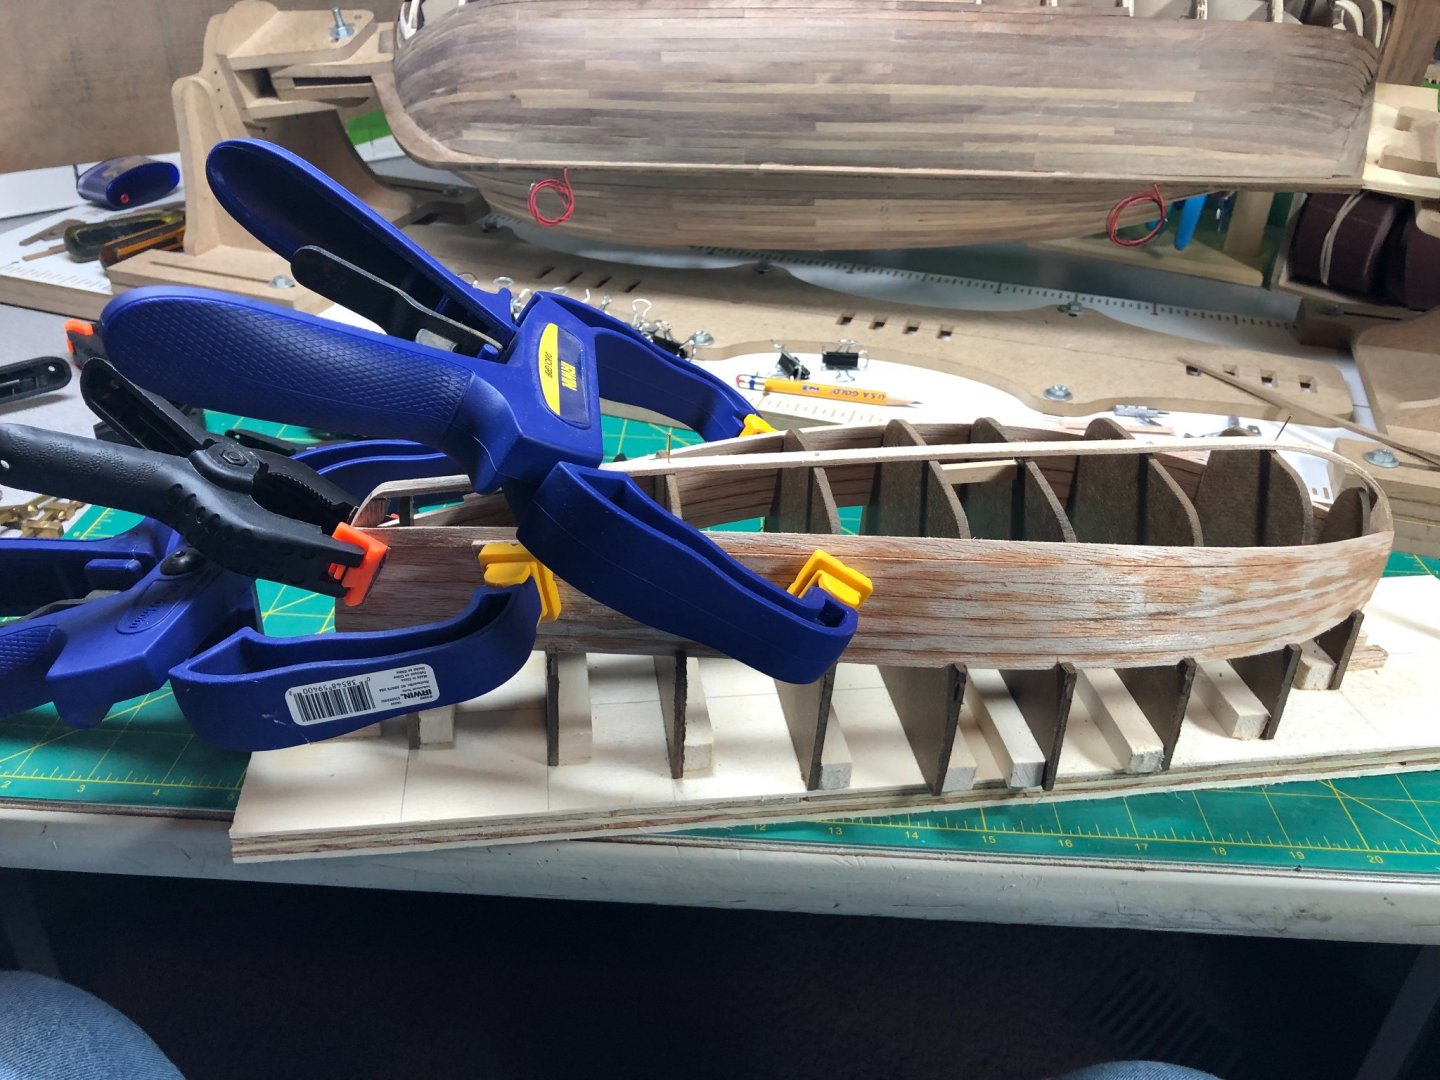
I read on another build log that he tried soaking and clamping the plank to pre-shape it. I've done it many times with harder woods but I think I'll try it tomorrow. It might relieve some of the stress of making so many bends on a single plank!
"The only thing that stays the same is the constant state of change"
Posted June 17
The next several planks need to be carefully bent/twisted and sanded to meet the very sharp curve of the hull.
As I mentioned above, this wood is much softer than what I'm working with on the Bounty (Walnut). It's very easy to shape. Especially, if you soak it a few minutes. I used my hands to make the bends and twists. Once the shape is close, I beveled the edge butting into the next plank by sanding. Also, I'd clamp the plank to the forms to let it completely dry while clamped in place.
Here's a few pictures of the progress:
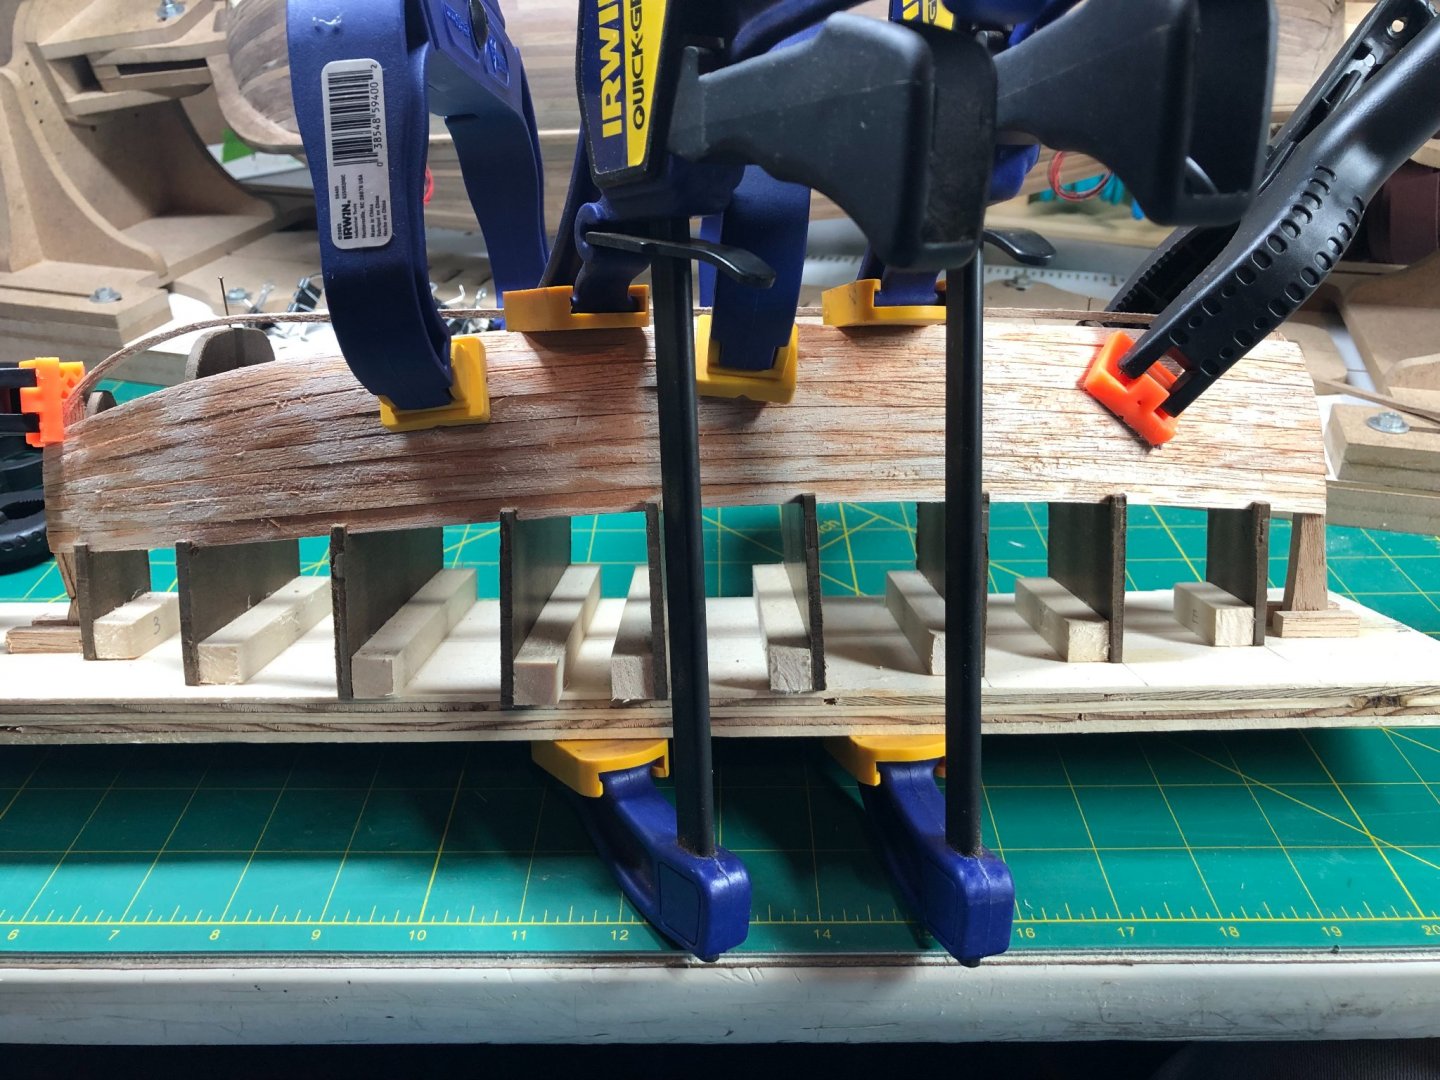
It has taken a lot of clamps to hold the shape while the glue dries. Making the turn to bottom of the hull is quite sharp.
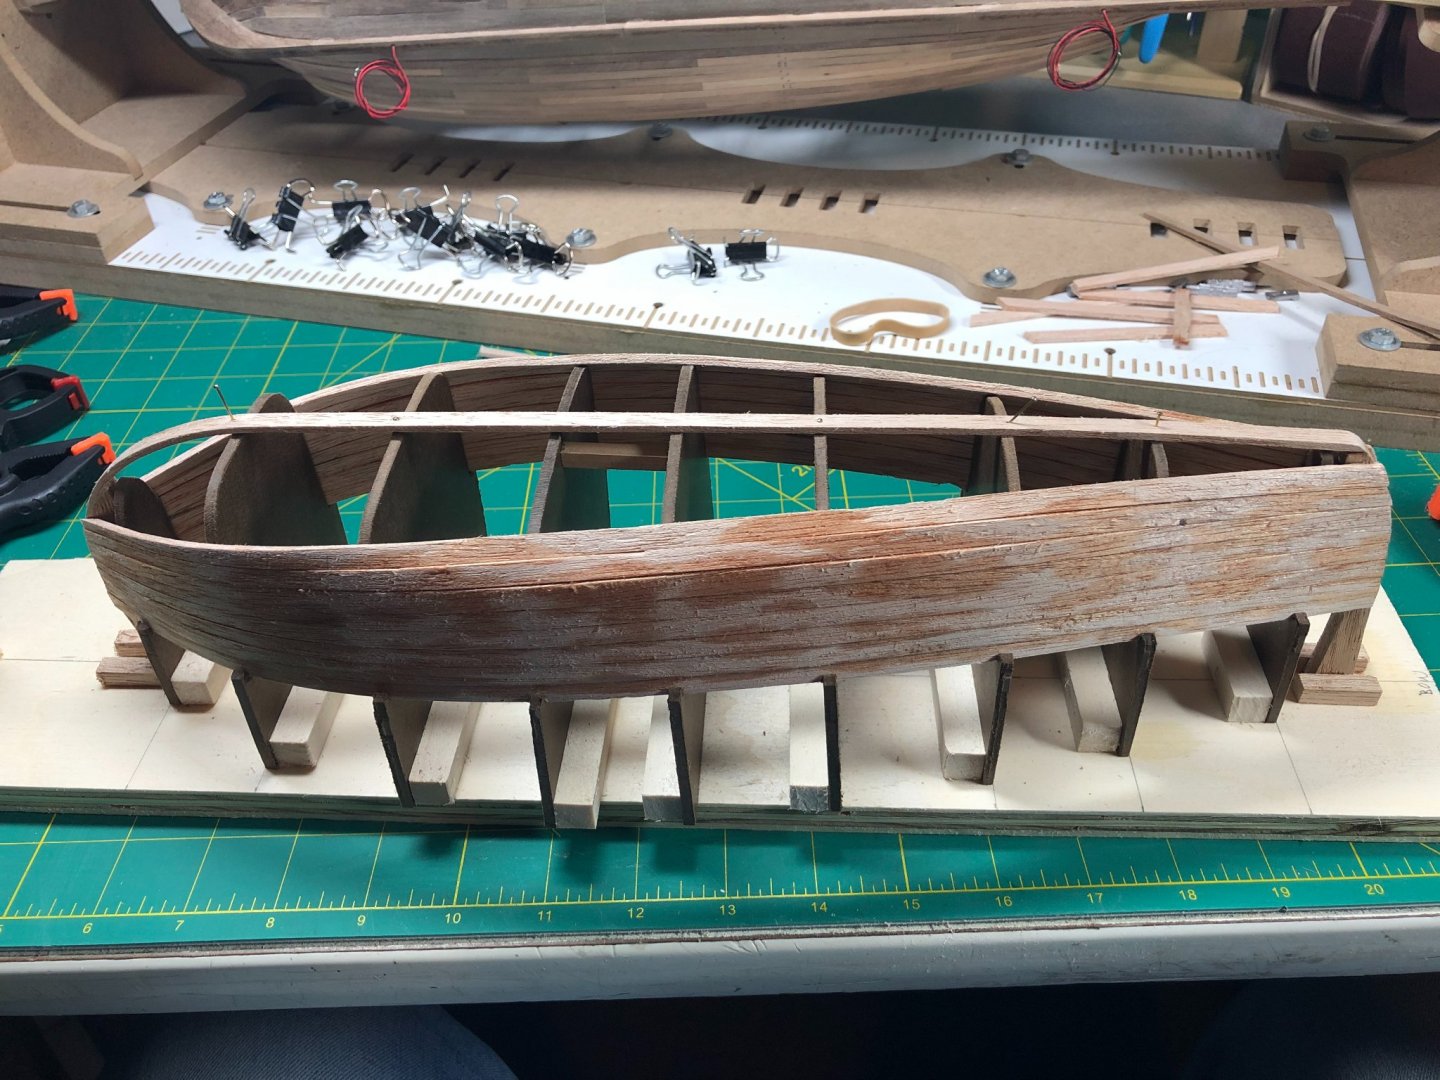
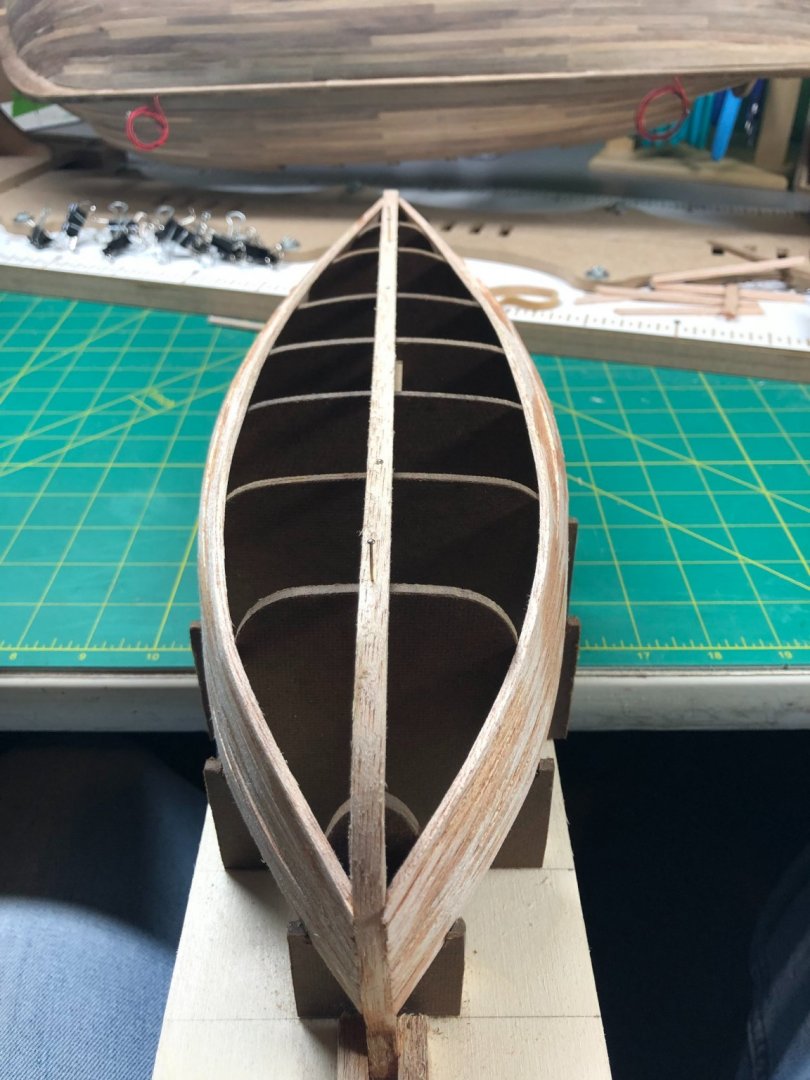
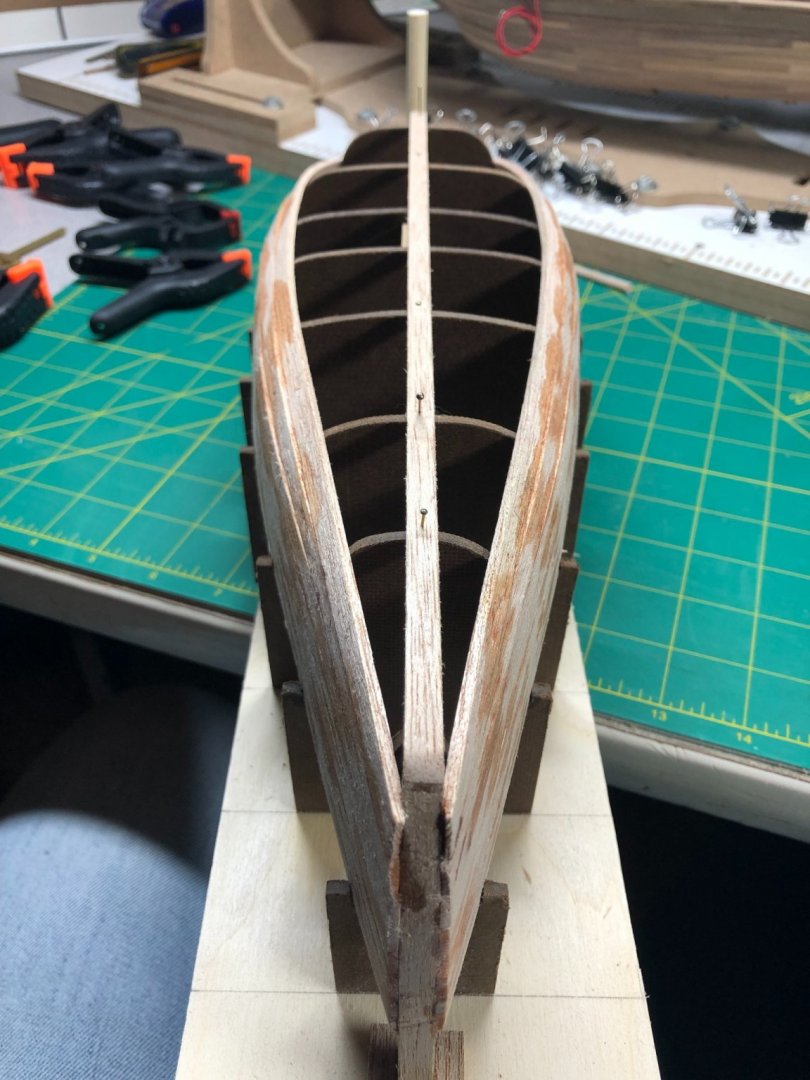
Gonna try to get out on the big boat this weekend!
So, I'll get back to this next week.
BTW, I just finished reading the book mentioned in the first post of this log.
If you're interested about the possible histories of this boat and the region in general, it's worth the read. I enjoyed it and gained a lot of insight on the history too.
Lyle
"The only thing that stays the same is the constant state of change"
Working on rounding the hull from side to the bottom:
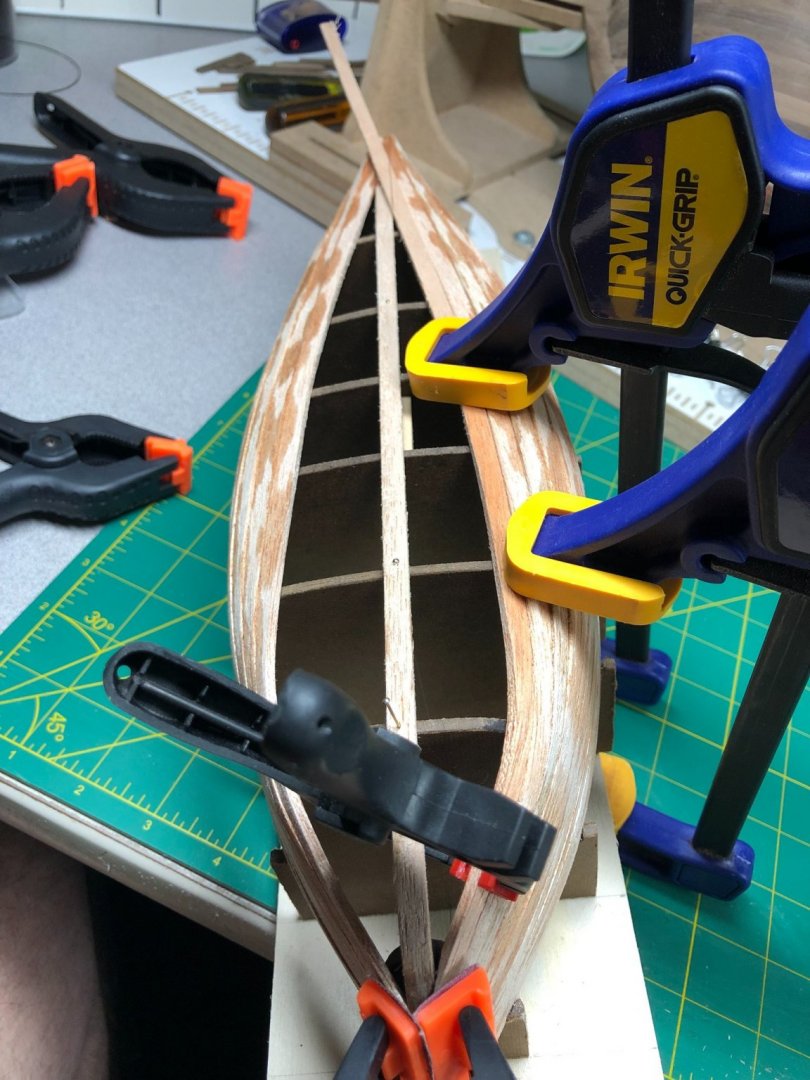
The bend required between the two clamps is a difficult one. I broke three planks before I finally got it!
Some shaping and sanding to do before gluing it down:
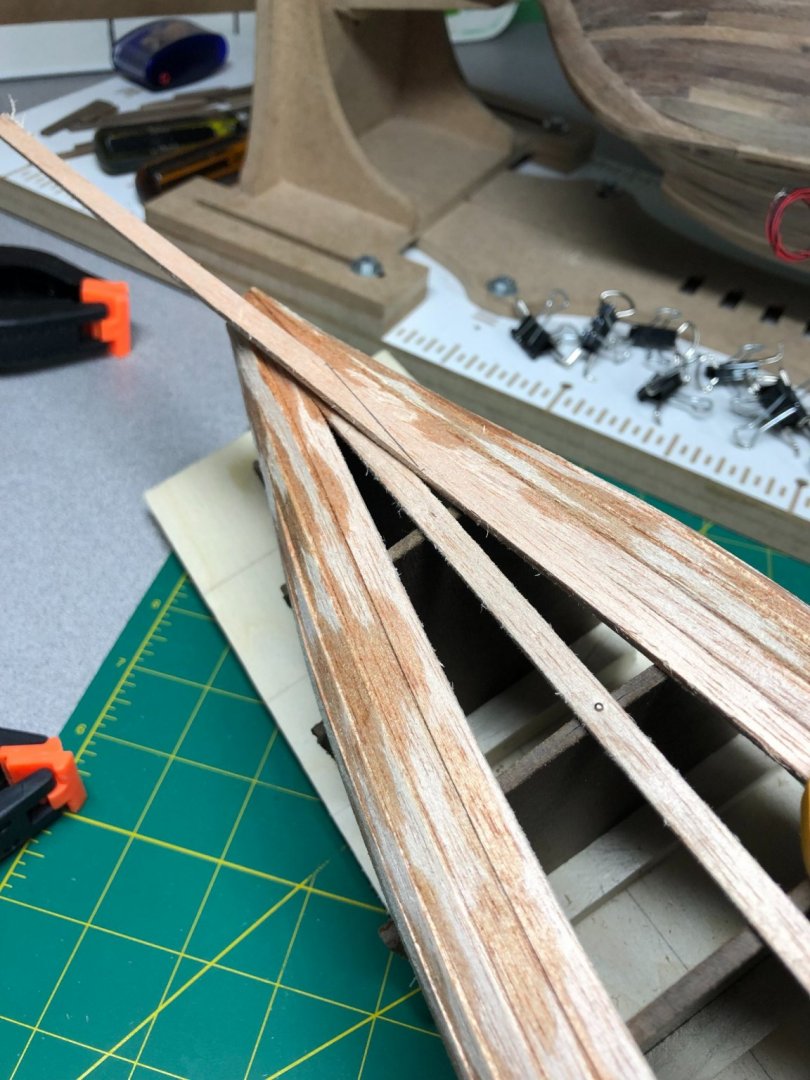
I hope to have the hull done by next weekend... maybe a bit optimistic! These planks are quite difficult to shape. It takes multiple steps and some soaking!
Lyle
"The only thing that stays the same is the constant state of change"
Posted June 20
How long are you soaking your planks?
Chuck Seiler
San Diego Ship Modelers Guild
Nautical Research Guild
Additionally, I bent it a portion of the way using heat and then re-soaked it for another 20-30 minutes before making the final adjustments.
As you can see, it is clamped in place with just the cut and sanding left. It should drop right into place now!
Lyle
"The only thing that stays the same is the constant state of change"
Posted June 22
Coming together nicely, Lyle.
Steven
Elen sila lumenn' omentielvo - "A star shines on the hour of our meeting"
I read an article on the 'Jesus boat' recovered in Galiliee ... is this the same boat as the one in this thread? The boat in the article in Biblical Archeology Review showed the the strakes were composed of many oddly shaped planks (some of them short) that were fastened together with lashings passed through severely made holes in the plank edges where they abut. The whole thing looked like a big 'jigsaw puzzle'. The article suggested that valuable wood resourced back them was used with a minimum of waste ... it reminded me of some Inca stonework where all the oddly shaped blocks were fit together so as to remove a minimum amount of material, yet be snug against each other. Johnny
Posted June 13
I read that as well, but no, at this scale it hard to follow the exact method. The Mortise and tenon joints would be interesting to build in a bigger version.On 6/13/2021 at 6:03 PM, Chuck Seiler said:
Lyle,
The Excavations of an Ancient Boat from the Sea of Galilee by Shelly Wachsmann (hereafter known as Wachsmann-Excavations) shows the planks have diagonal butt joints. Will you be modeling that into your build...or leave well enough alone?
But not on this scale.
Lyle
"The only thing that stays the same is the constant state of change"
Posted June 13
You are making great progress.
Uhhgggg! No, not the actual mortise/tenon joints themselves. That would be some chore. I was thinking more the line of the actual joint.
Chuck Seiler
San Diego Ship Modelers Guild
Nautical Research Guild
Posted June 13
Are you thinking plank to plank seam?On 6/13/2021 at 7:10 PM, Chuck Seiler said:
You are making great progress.
Uhhgggg! No, not the actual mortise/tenon joints themselves. That would be some chore. I was thinking more the line of the actual joint.
If so, they are quite tight right now but that changes after the next plank or two... I'll need to cut the bevel into about three rows of planks. Shouldn't be too tough.
Lyle
"The only thing that stays the same is the constant state of change"
Posted June 13No, I am talking about the joints plank-to-plank along the same strake. Attached is an example, but with far too many joints. Figure 5.12 and Foldout 1 of Waschmann show these, but hard to see.

Chuck Seiler
San Diego Ship Modelers Guild
Nautical Research Guild
Posted June 14
Gotcha!On 6/13/2021 at 9:39 PM, Chuck Seiler said:
No, I am talking about the joints plank-to-plank along the same strake. Attached is an example, but with far too many joints. Figure 5.12 and Foldout 1 of Waschmann show these, but hard to see.

Interesting… I had not seen or read that in the book. Maybe I’m not far enough into it… over halfway but no mention of it.
At any rate, as you’ve seen, the planks are a single run on the model.
Lyle
"The only thing that stays the same is the constant state of change"
Posted June 15
I've managed to get one side planked to the seventh row and the other side to the sixth.
Pretty easy....... well, that changed with those two rows as the curve of the hull is in play now. I've had some difficulty with the planks wanting to pull away from the frame:
I used a piece of scrap to pull the frame together and glued into place. It held for the two planks but popped loose when I was fiddling with the clamps!
On to the next idea:
I read on another build log that he tried soaking and clamping the plank to pre-shape it. I've done it many times with harder woods but I think I'll try it tomorrow. It might relieve some of the stress of making so many bends on a single plank!
"The only thing that stays the same is the constant state of change"
Posted June 17
The next several planks need to be carefully bent/twisted and sanded to meet the very sharp curve of the hull.
As I mentioned above, this wood is much softer than what I'm working with on the Bounty (Walnut). It's very easy to shape. Especially, if you soak it a few minutes. I used my hands to make the bends and twists. Once the shape is close, I beveled the edge butting into the next plank by sanding. Also, I'd clamp the plank to the forms to let it completely dry while clamped in place.
Here's a few pictures of the progress:
It has taken a lot of clamps to hold the shape while the glue dries. Making the turn to bottom of the hull is quite sharp.
Gonna try to get out on the big boat this weekend!
So, I'll get back to this next week.
BTW, I just finished reading the book mentioned in the first post of this log.
If you're interested about the possible histories of this boat and the region in general, it's worth the read. I enjoyed it and gained a lot of insight on the history too.
Lyle
"The only thing that stays the same is the constant state of change"
Posted June 20 (edited)Working on rounding the hull from side to the bottom:
The bend required between the two clamps is a difficult one. I broke three planks before I finally got it!
Some shaping and sanding to do before gluing it down:
I hope to have the hull done by next weekend... maybe a bit optimistic! These planks are quite difficult to shape. It takes multiple steps and some soaking!
Lyle
"The only thing that stays the same is the constant state of change"
Posted June 20
How long are you soaking your planks?
Chuck Seiler
San Diego Ship Modelers Guild
Nautical Research Guild
Posted June 21I started at 10-15 minutes... and on the last plank it was closer to an hour.
Additionally, I bent it a portion of the way using heat and then re-soaked it for another 20-30 minutes before making the final adjustments.
As you can see, it is clamped in place with just the cut and sanding left. It should drop right into place now!
Lyle
"The only thing that stays the same is the constant state of change"
Posted June 22
Coming together nicely, Lyle.
Steven
Elen sila lumenn' omentielvo - "A star shines on the hour of our meeting"
Posted June 22I read an article on the 'Jesus boat' recovered in Galiliee ... is this the same boat as the one in this thread? The boat in the article in Biblical Archeology Review showed the the strakes were composed of many oddly shaped planks (some of them short) that were fastened together with lashings passed through severely made holes in the plank edges where they abut. The whole thing looked like a big 'jigsaw puzzle'. The article suggested that valuable wood resourced back them was used with a minimum of waste ... it reminded me of some Inca stonework where all the oddly shaped blocks were fit together so as to remove a minimum amount of material, yet be snug against each other. Johnny
POST #4
Posted June 22
This is the same boat. It had 12 different varieties of wood in the boats construction.
It was speculated that some was by necessity due to a short supply of wood but also repairs performed during its lifetime were done with whatever was available.
It would’ve been impractical to attempt to use short pieces for the build since it is built using a strongback.
The book mentioned in my first post was written by the man the managed and performed the excavation.
Studies of the boat continue to this day.
Lyle
"The only thing that stays the same is the constant state of change"
Posted June 27 (edited)
Although I haven't posted in a few days, work has continued!
I finished the hull this afternoon!
The below sequence shows the progress through to the 15th plank:
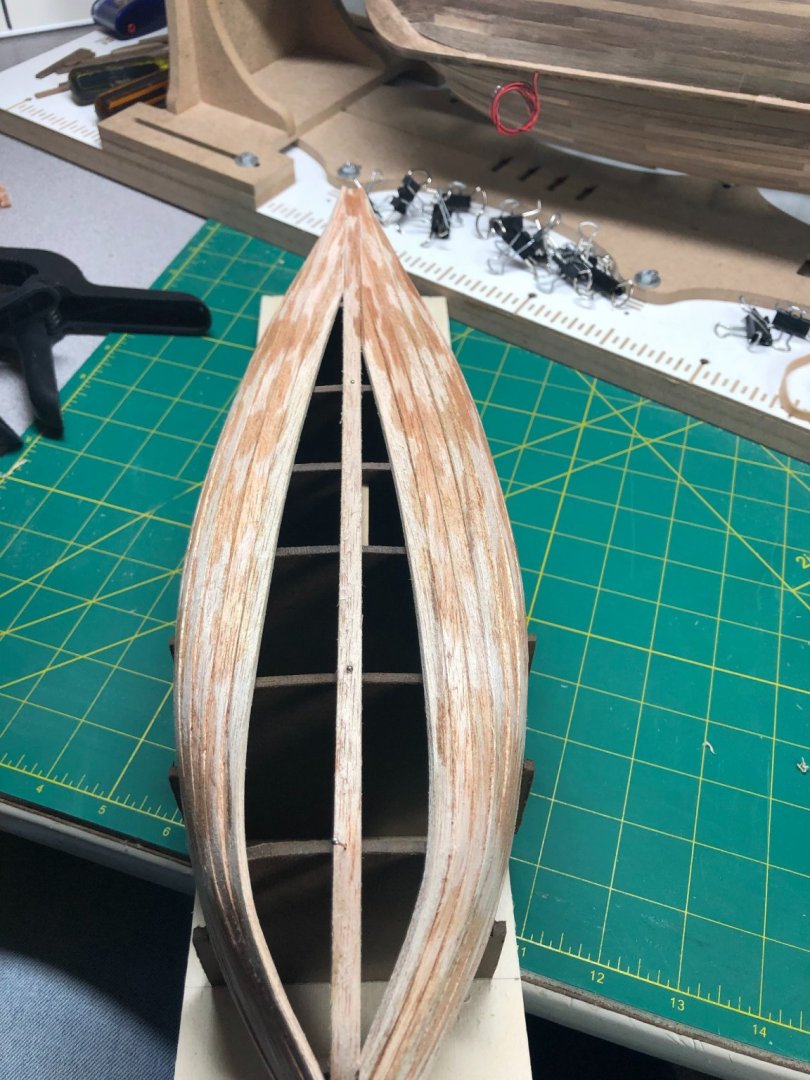
As I mentioned in the previous post, the last 5-6 planks were by far, the most difficult and I, literally, had to do one at a time before moving on. The required bend/twists needed to shape the hull made it very difficult, more than I had imagined!
I ended up breaking 6-8 planks to achieve a finished hull. That's even after soaking and heating and bending incrementally to get the right shape at the stern:
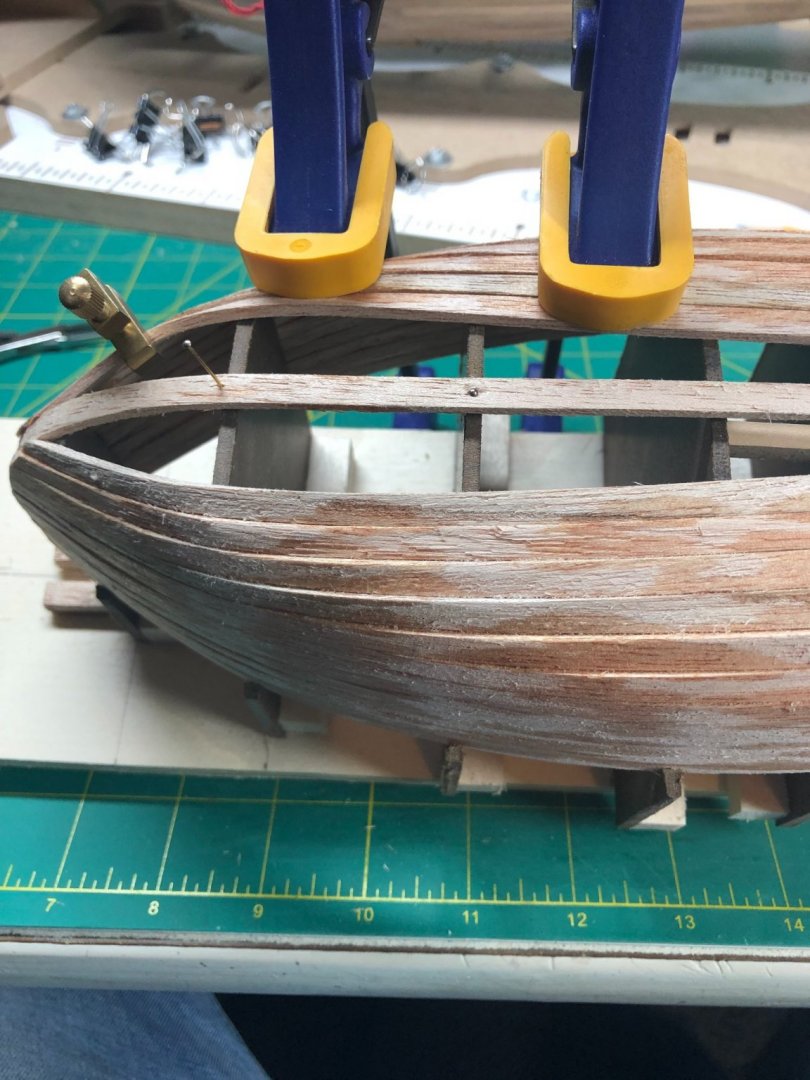
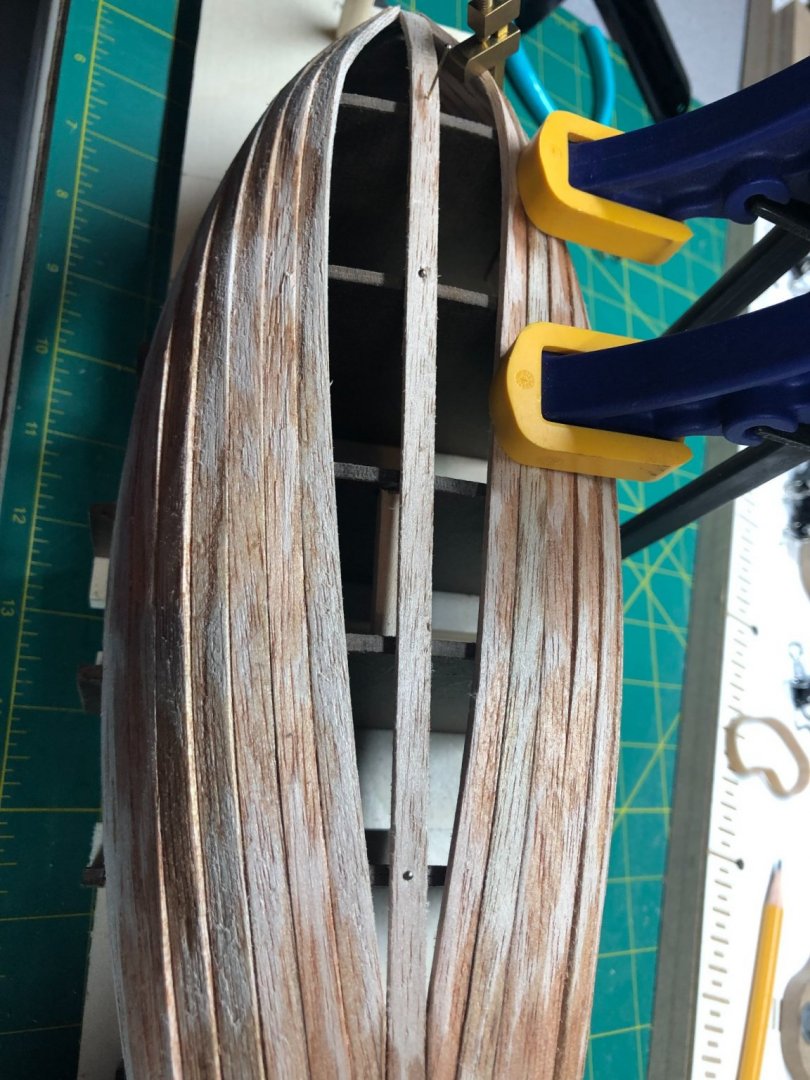
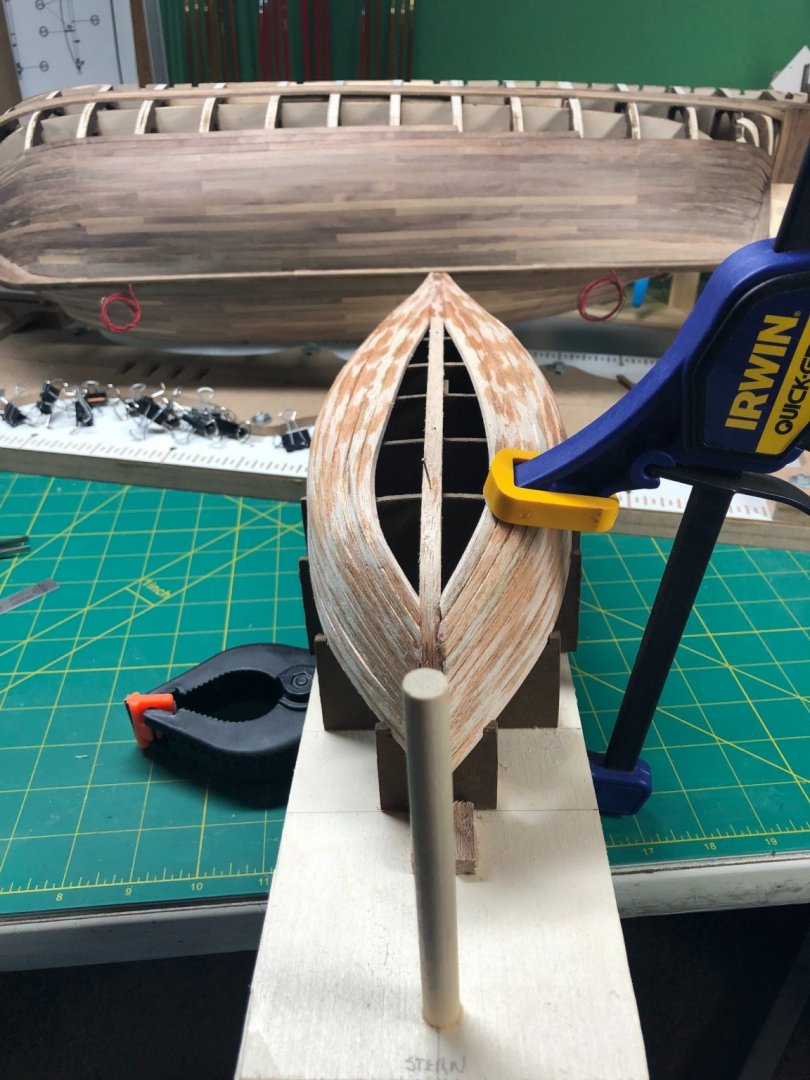
Symmetrically, the hull shape looks great! I had to use a various amount of clamps, some not designed for model work but were necessary to push the planks into place. Tools were substituted for wedges as needed too:
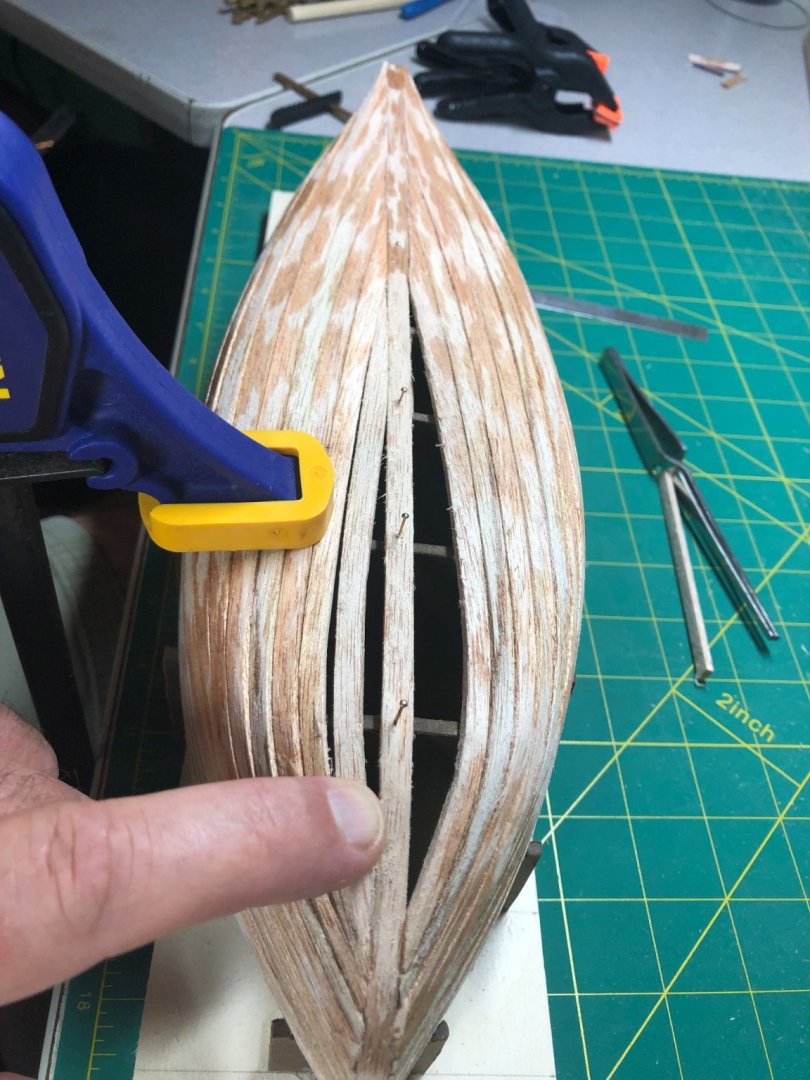
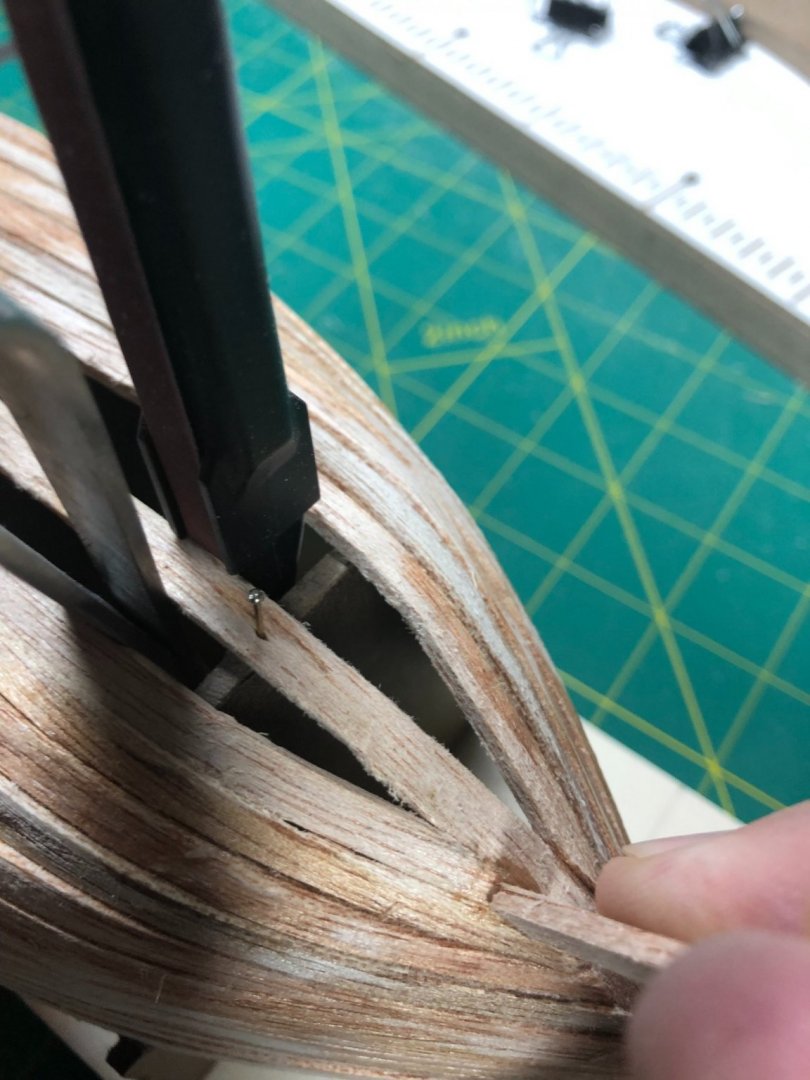
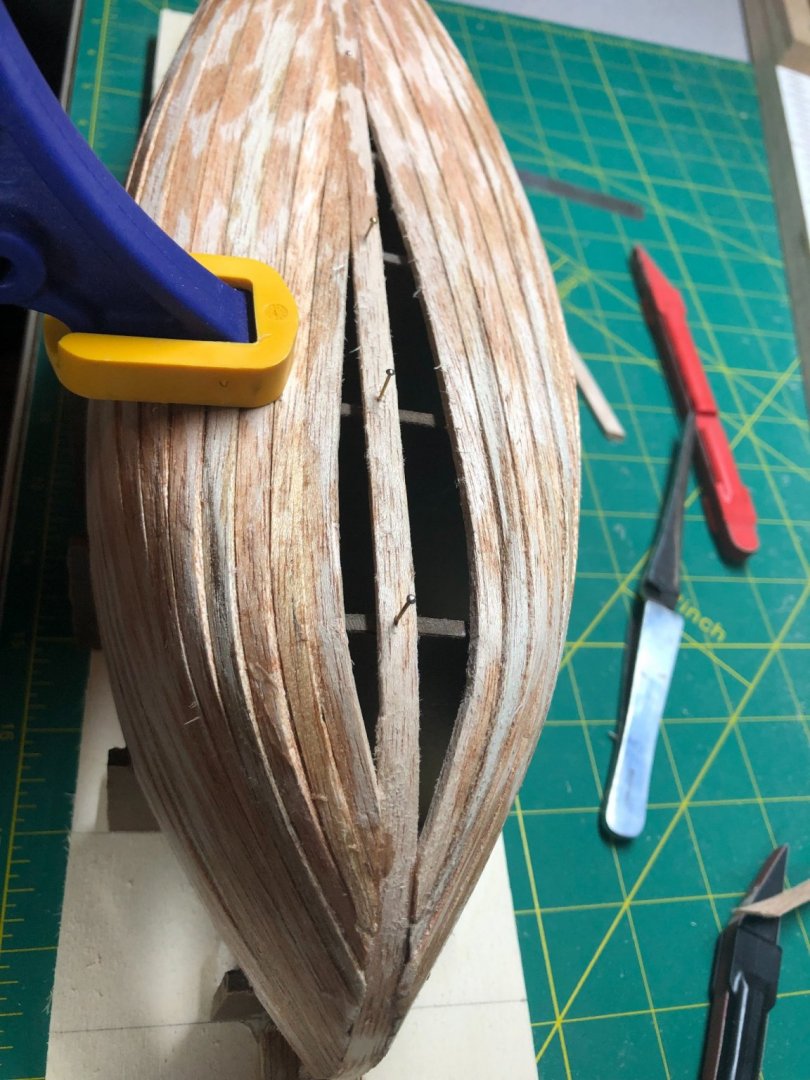
And finally, the 15th planks on each side had to be shaped carefully to fill the remaining gaps:
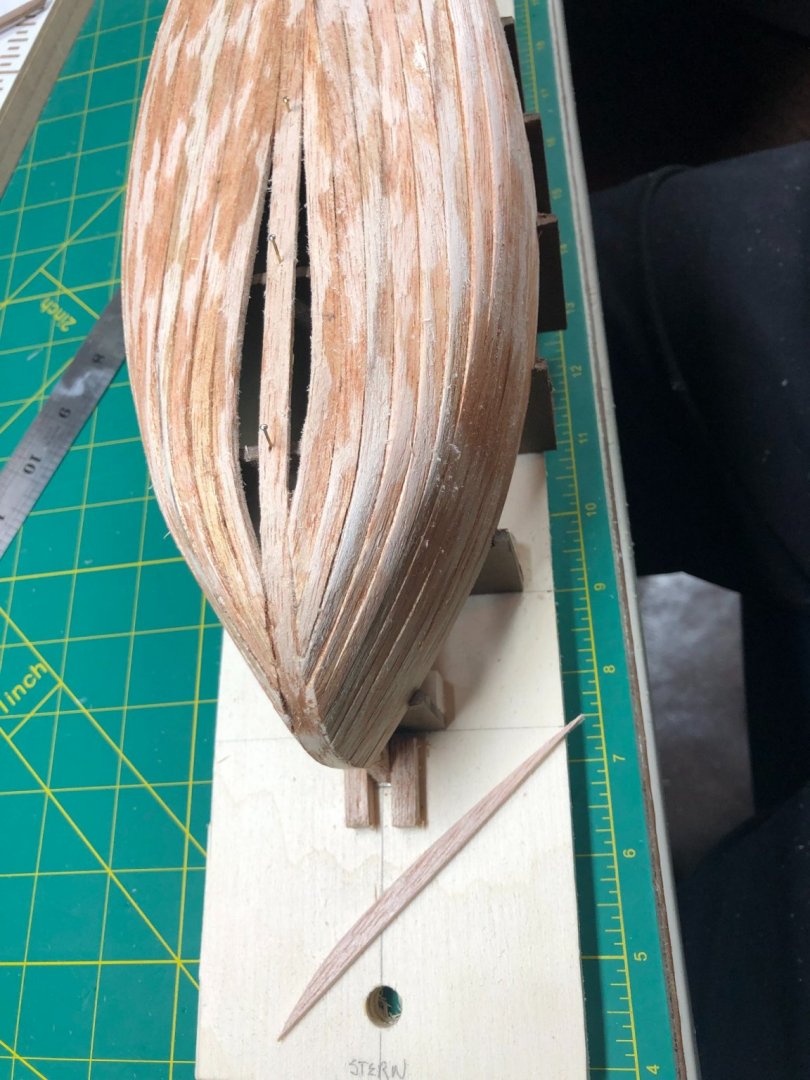
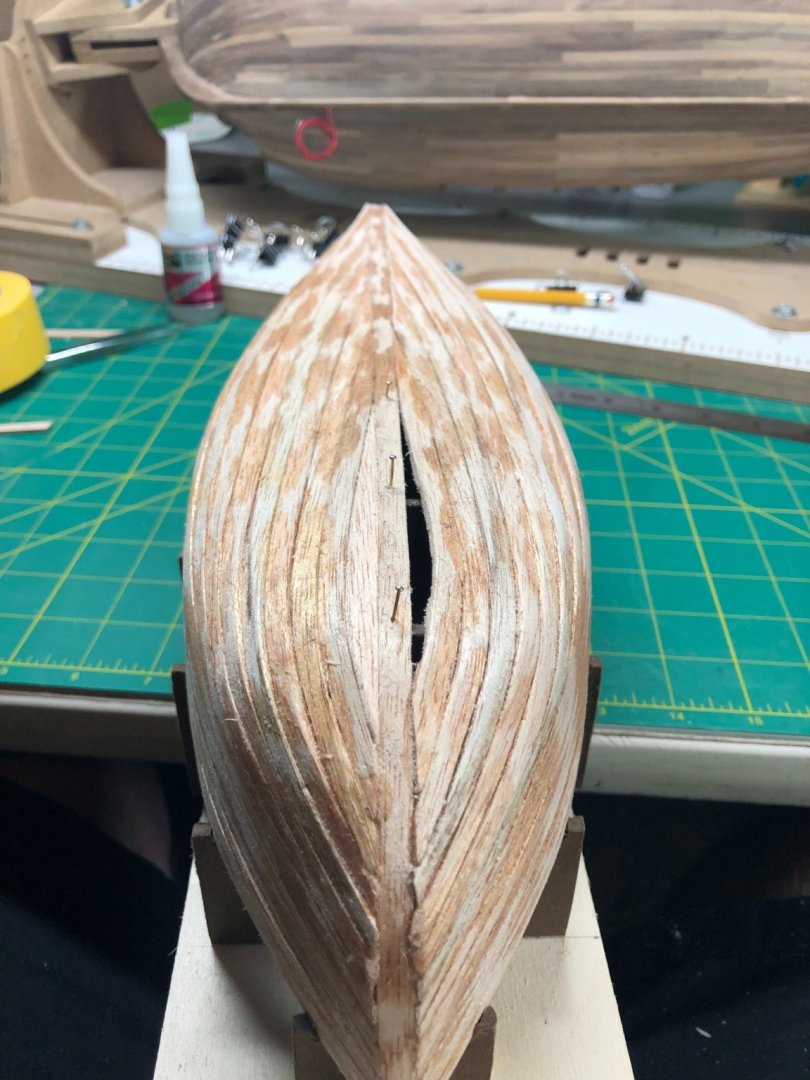
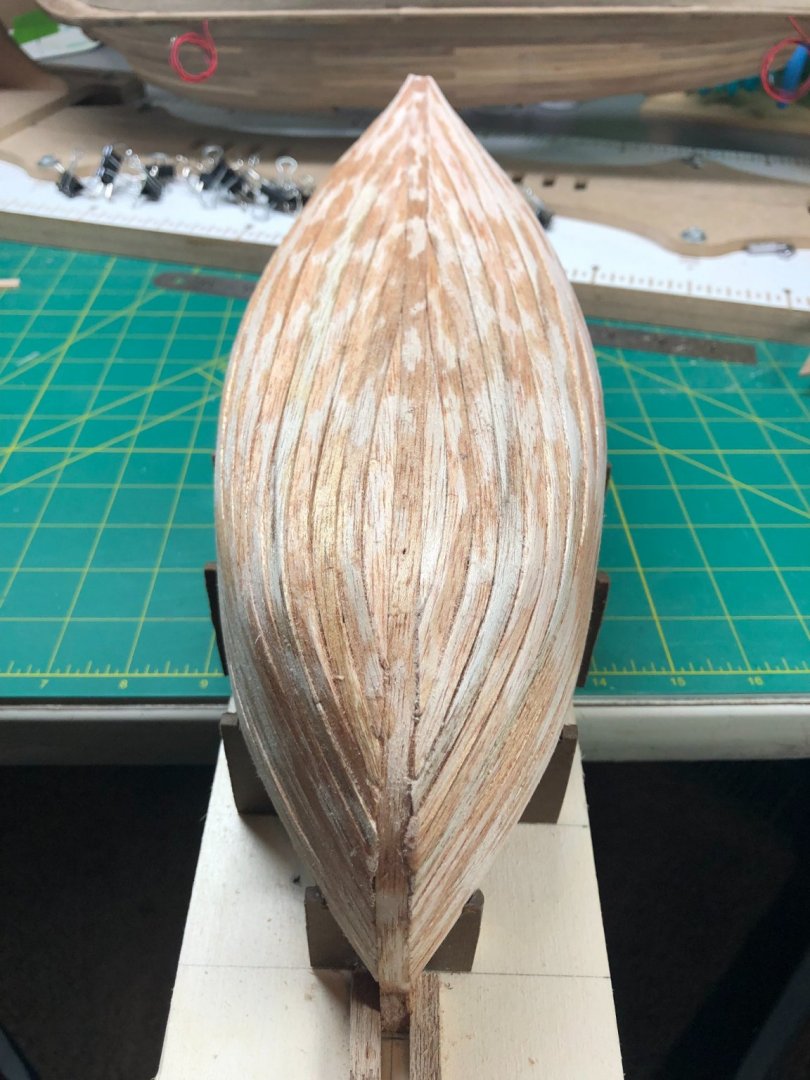
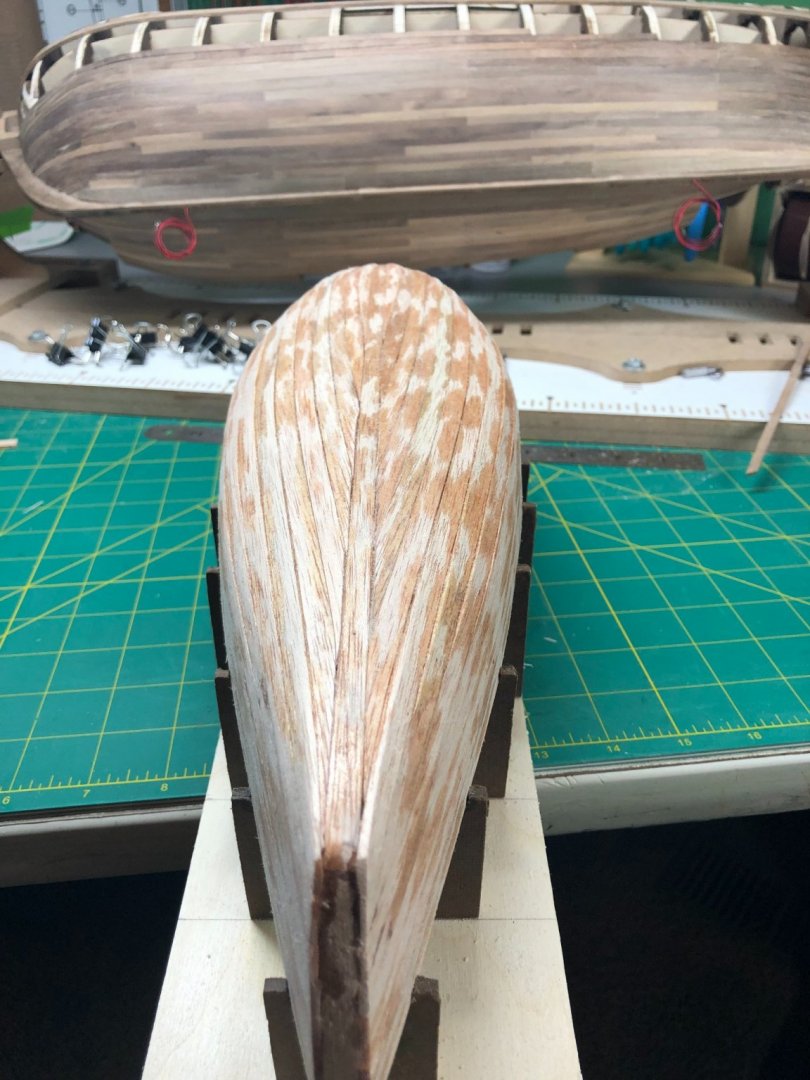
I did some initial sanding while the boat was still on the strongback... I got to thinking, what if I sand it a little thin in places and it's accidently glued to the strongback!!
I'm glad I stopped:
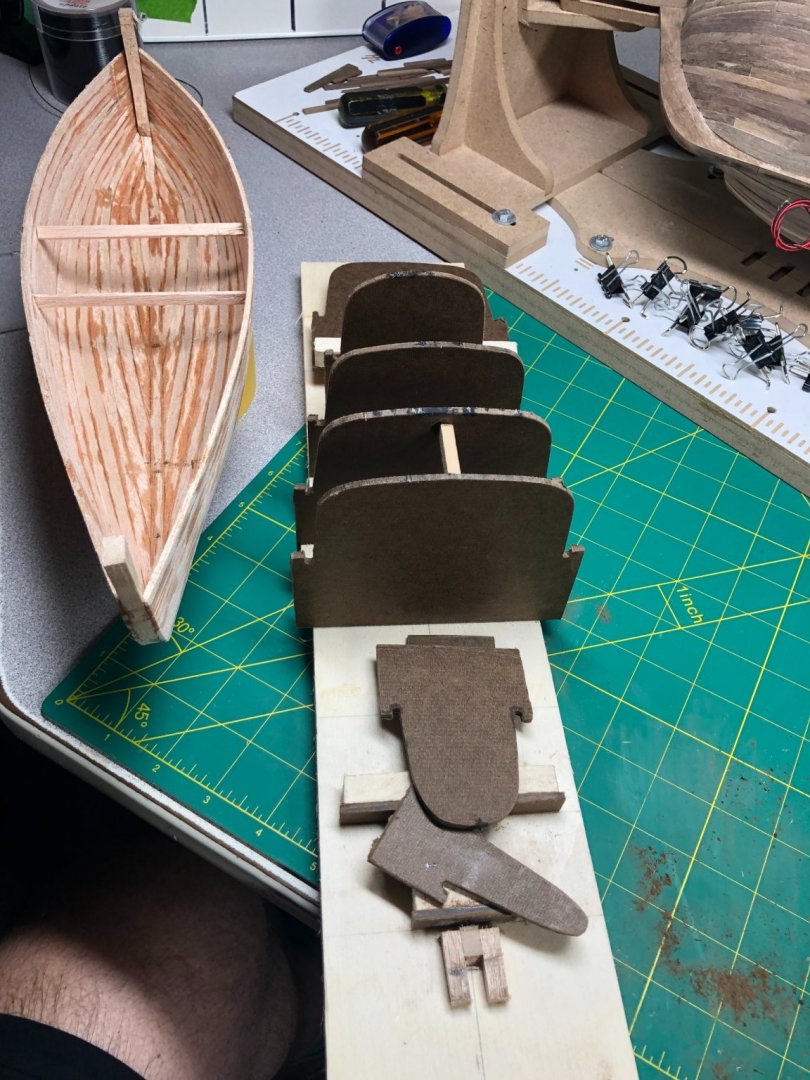
I ended up having to cut several of the forms as I had indeed glued the planks to the forms in several spots!
It wasn't difficult to remove, I just cut a few of the forms, a little wiggle and they popped right out. Once I was able to get my fingers inside, I used them to push the forms slightly and they popped loose too:
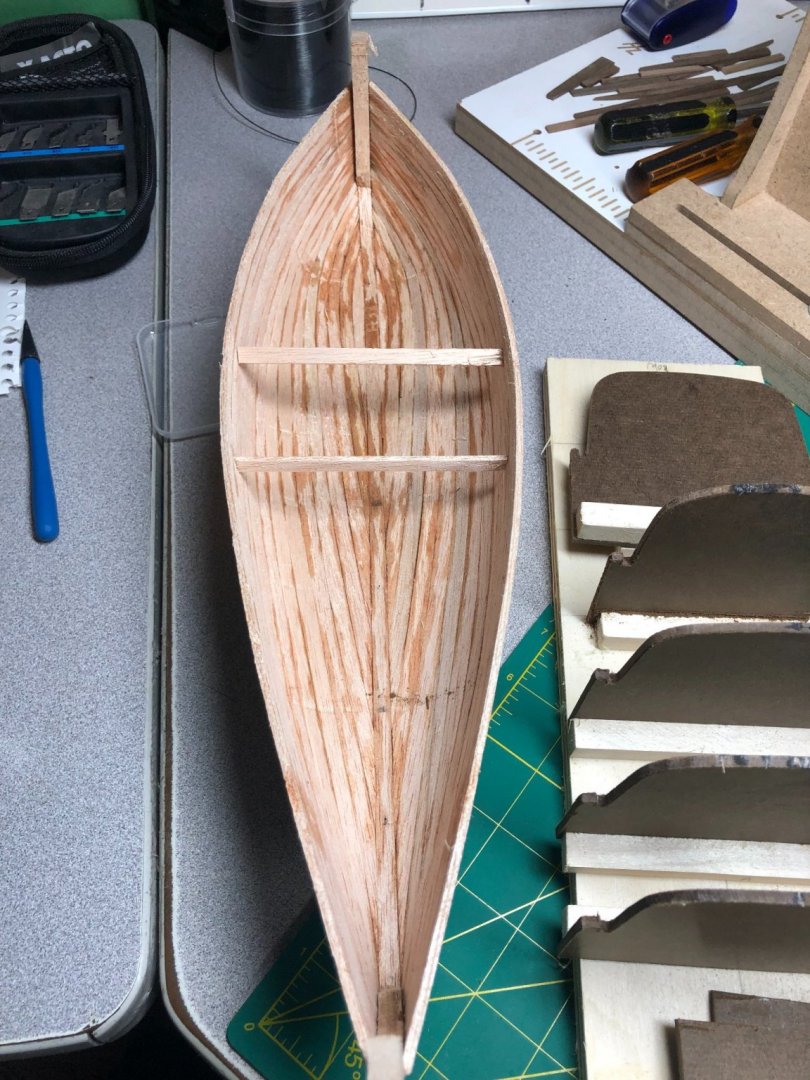
If you look closely, you can see the remnants of a couple of the forms. Also, there is some denting on the interior of the planks from me being a little too rough getting the planks to shape properly.
I used water on my fingertips and rubbed it into the dents and most of them came out easily. The worst ones at the stern will be covered and not visible.
So here is the hull before extensive sanding!
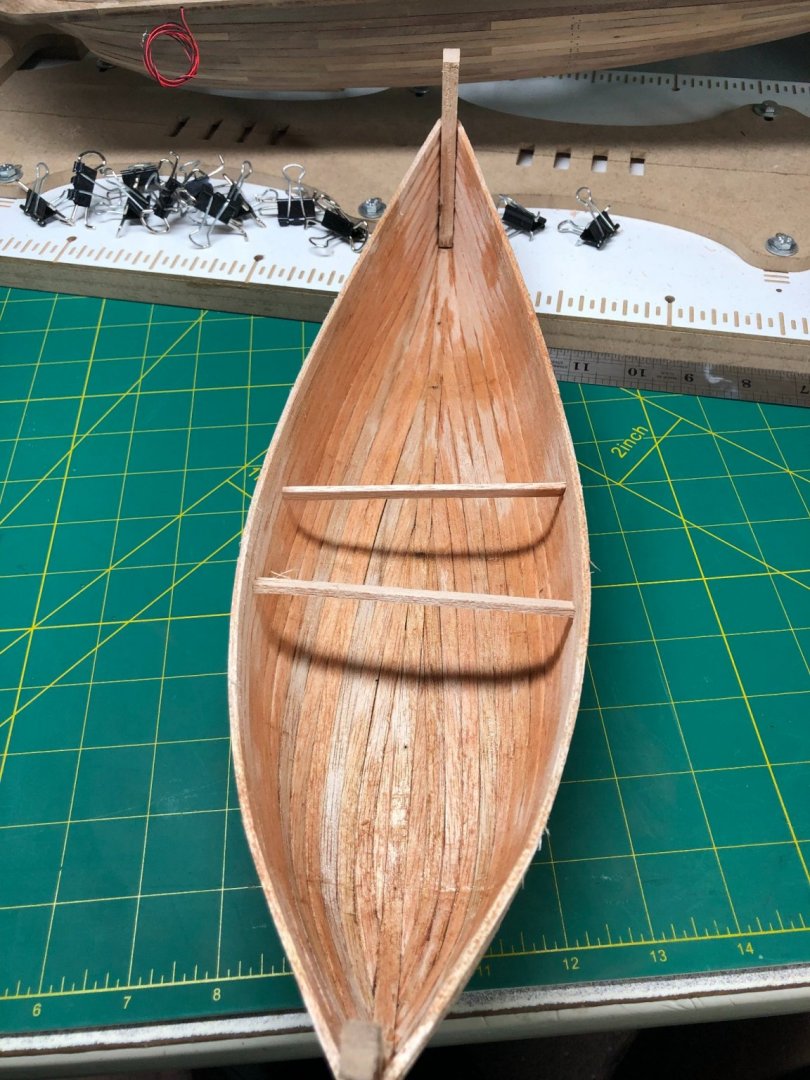
The bracing is just temporary to keep the boats shape.
On to sanding!
Lyle
"The only thing that stays the same is the constant state of change"
Posted June 28
There's a real sense of achievement in finishing the planking - particularly when it's this difficult. Well done, sir!
I look forward to seeing it when the sanding is done. It can make a huge difference to the look of the model.
Steven
Elen sila lumenn' omentielvo - "A star shines on the hour of our meeting"
I think your right on target, as far as having the model done for your father's birthday.
Posted June 28
Now I can see how the planking was done ... so whatever goes inside rib-wise or thwart-wise is an installation process - plus whatever else in the way of oars, mast, rigging, etc. Very nice! I'd like to 'improve' (bust?) the ship's boats of the Endurance (actually I'll build them first as practice), since we have exact measurements on three of them (the fourth was the same as Schakleton's lifeboat) and many photographs. There was a recent post on improving ship's boats for HMS Victory, where the assembly ribs were removed and replaced by more scale-like boat ribs - along with thin footlings, scale gunwale (with grain going in the right direction) and a variety of accouterments on hand in such boats. Each boat also has a graceful upward curve to the stem and stern (not sure of the correct term) - and that might be done best by installing the plank below the gunwale first to establish the curve - them go on planking downward (tapering planks as needed). Taking the time to do a better job on details such as these will greatly add to the appearance of the model as a whole. Johnny
Posted June 28
They run vertically along the entire length of the boat.
Meticulous work but should look great.
Interesting info, thanks!
Lyle
"The only thing that stays the same is the constant state of change"
Posted June 28
Lyle,
How structurally sound is that? Will the frames beef it up or re they just for show...and it requires the thwarts for solidity (is that a word?)
Chuck Seiler
San Diego Ship Modelers Guild
Nautical Research Guild
Posted June 28
/səˈlidədē/
Learn to pronounce
noun
Lyle
"The only thing that stays the same is the constant state of change"
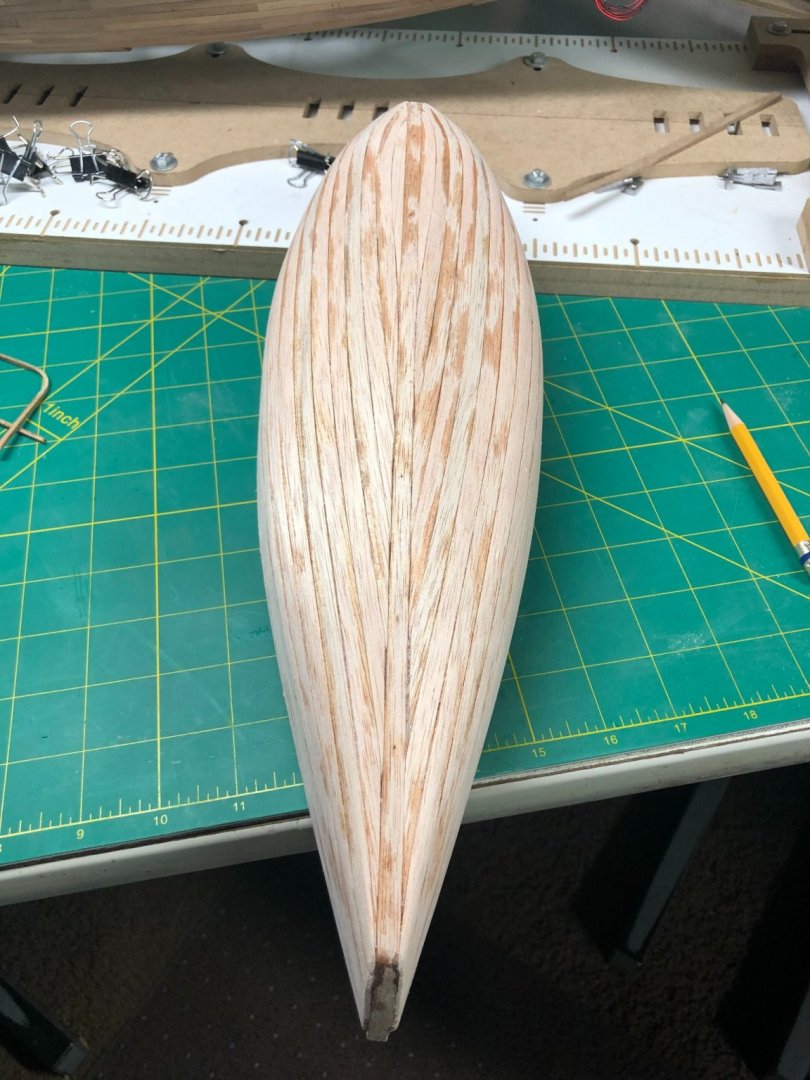
Sanding mostly done... Interior is done and coated with CA to reinforce the seams. Sanded smooth and ready for ribs!
I struggled with doing the CA coating but it made a nice hard shell. This model is amazingly light and feels fragile but this step certainly made it feel stronger.
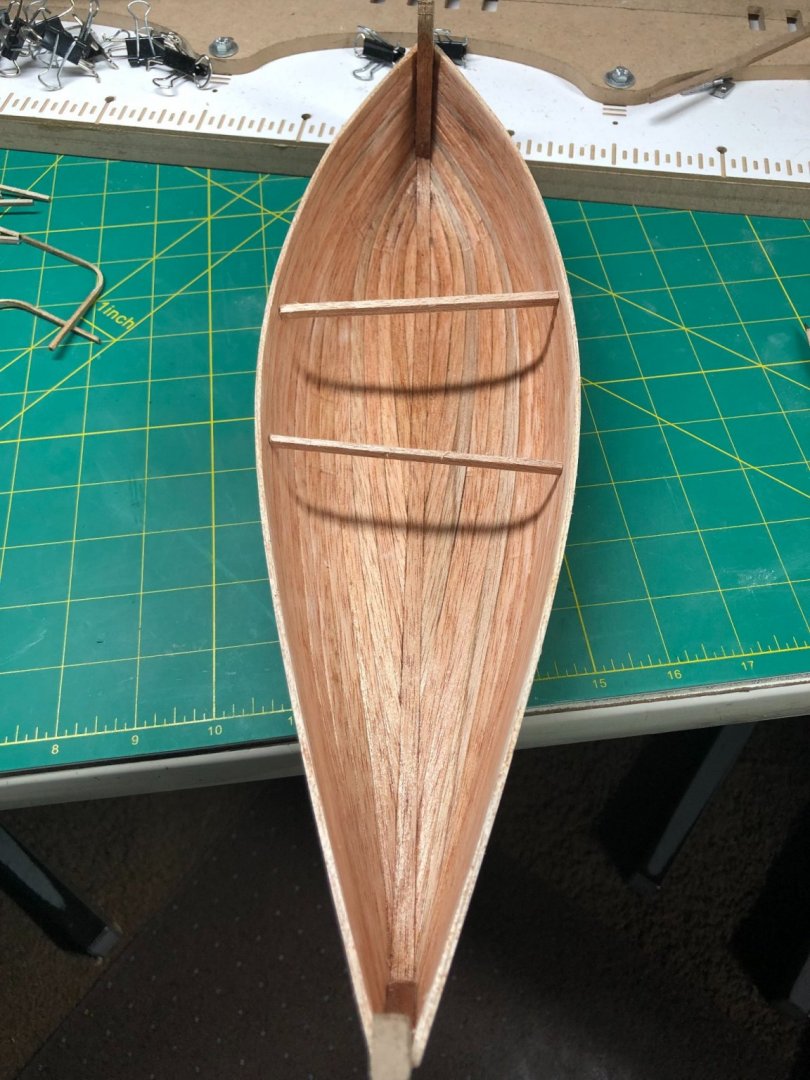
Sanding on the exterior is basically done... I'll do some touch up in places but overall, it is done:
I starting making ribs... no BBQ sauce!
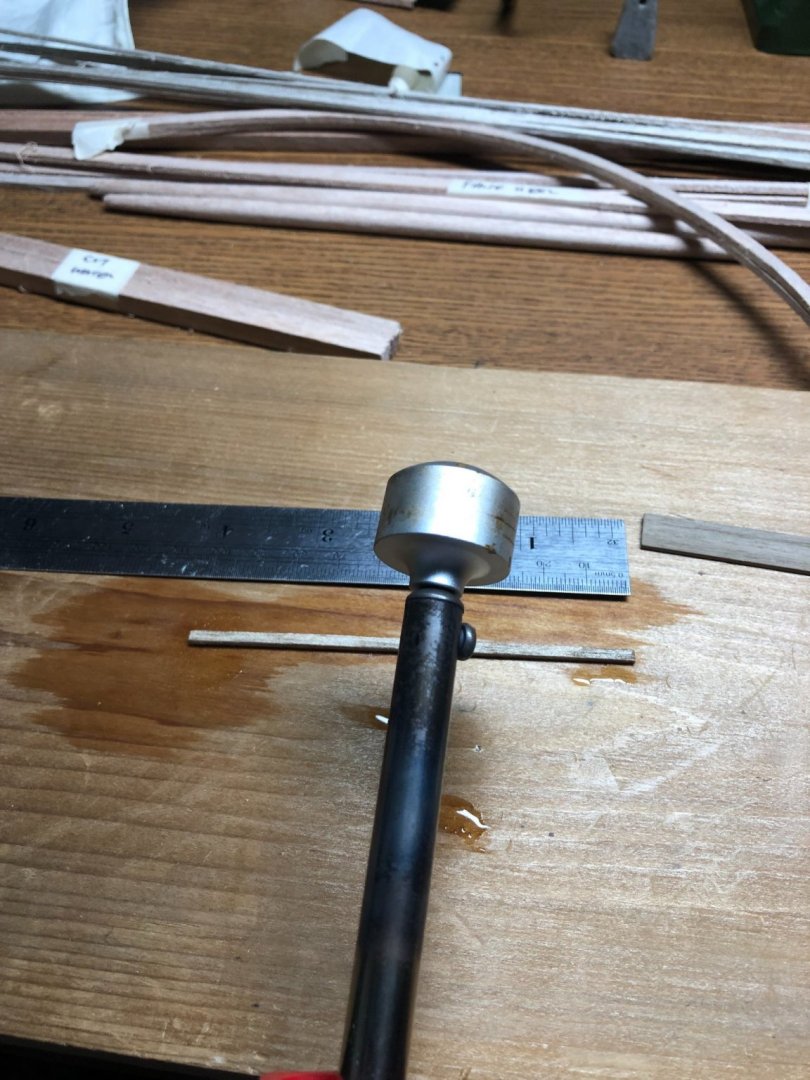
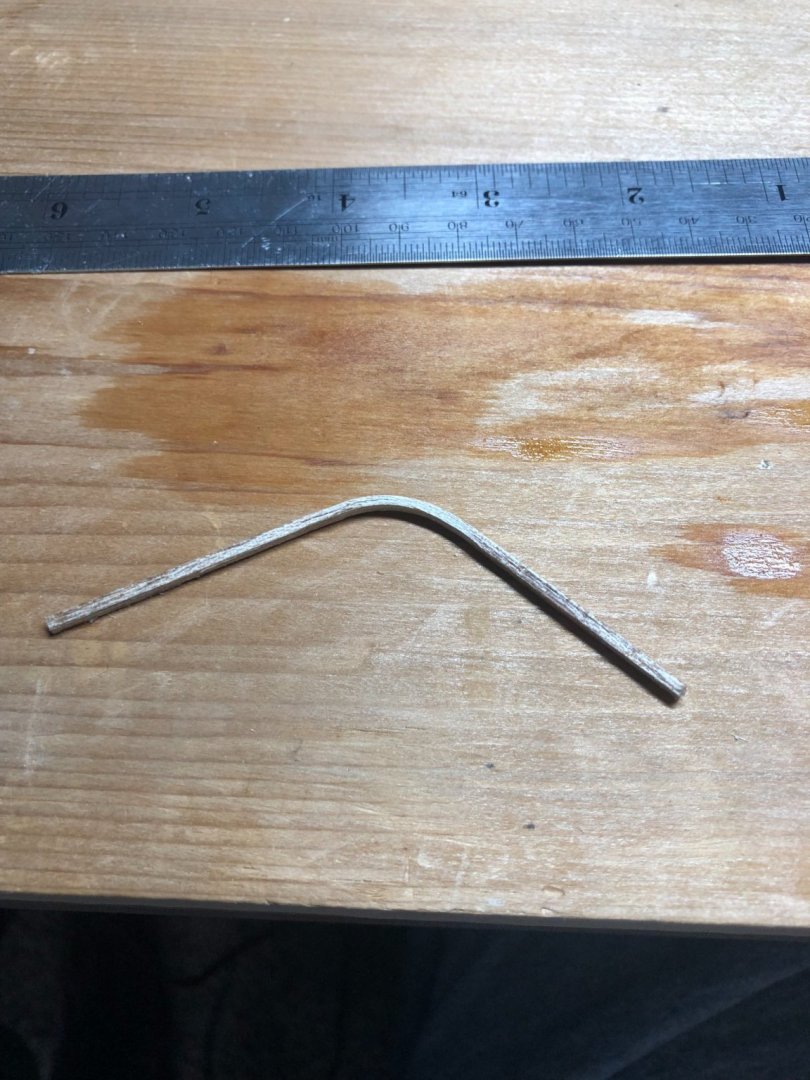
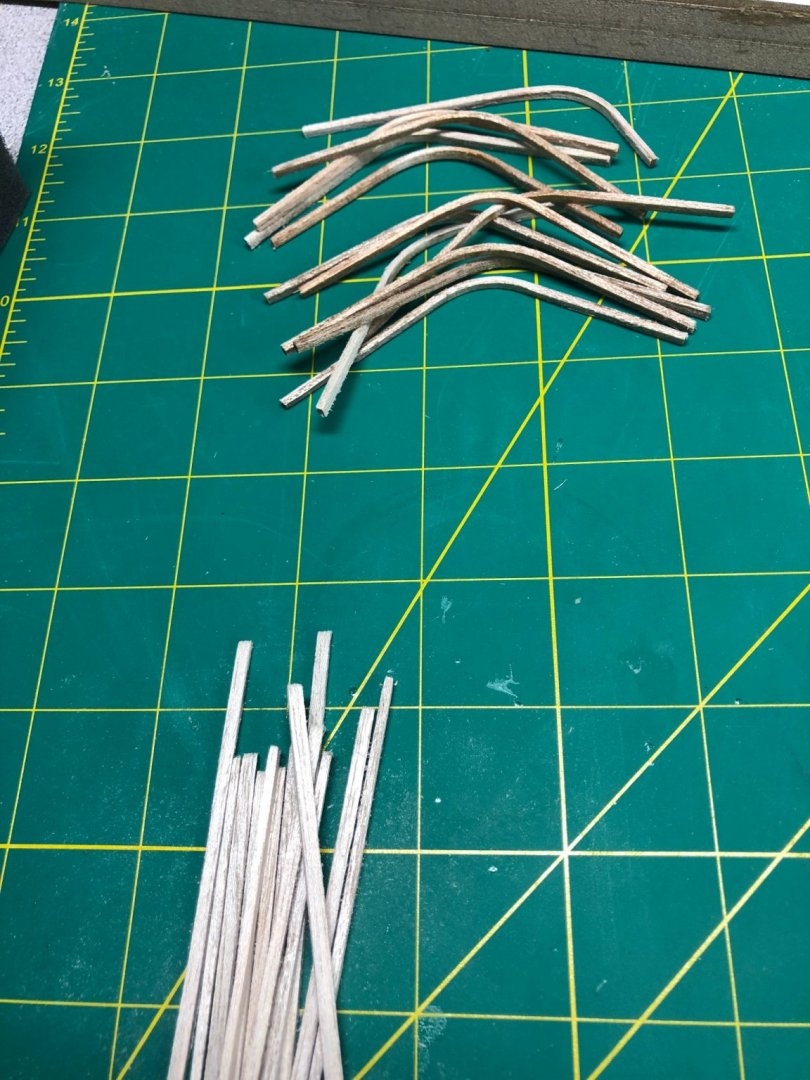
I haven't used the old soldering iron plank bender in a while. Its radius is almost perfect for the bends needed. I soaked the planks for about 15 minutes and after a couple of missteps, I was able make the rest fairly easily. I've got about 25% of the required amount cut and bent.
More in a few days. Hoping to get out on the boat for a few days...
An update when I return after the holiday.
Lyle
"The only thing that stays the same is the constant state of change"
Just a quick update... I was gone for the long weekend.
Managed to get about a quarter of the ribs in place:
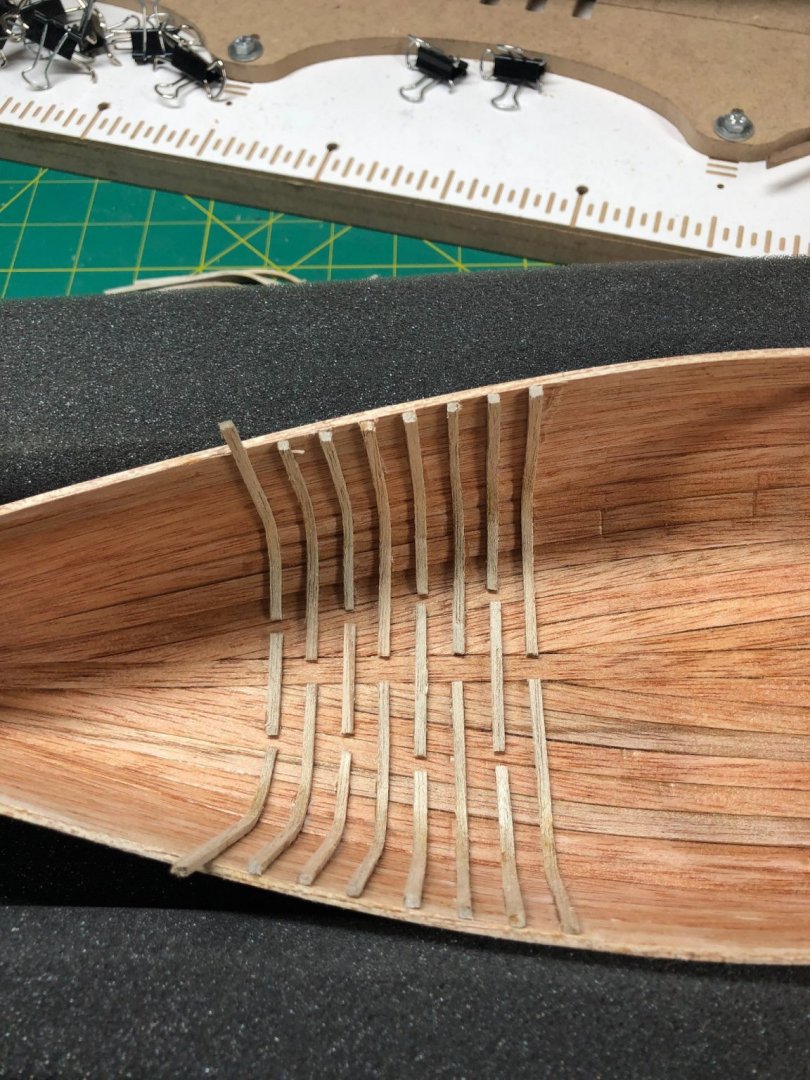
Spacing is accomplished using a couple pieces of the planking material... worked great except when I glued it in place with the rib! Fortunately, I was able to get it back out with no damage!
I'll post again soon.
Lyle
"The only thing that stays the same is the constant state of change"
Elen sila lumenn' omentielvo - "A star shines on the hour of our meeting"
Posted July 7
Use a peice of saran wrap on your spacer....... glue won't stick.
I'll give it a try!
Lyle
"The only thing that stays the same is the constant state of change"
Posted July 7
The pattern shown is followed throughout the hull. Based on the original, that appears to be the correct pattern. I am considering adding floor boards with some small spacing which will cover the bottom of the hull... haven't decided yet.
Lyle
"The only thing that stays the same is the constant state of change"
Posted July 7
Bill
Posted July 7
Bill, do you have any pics of these depictions? I've never seen anything prior to the above with anything resembling a lateen.
Yep.
That's fair enough - it appears that the frames do overlap each other after all - every frame overlaps the ones either side of it, so there's no "zone of weakness" where the joins are. The Byzantine ships found at Yenikapi have a similar layout, but the overlap between adjacent pairs of frames is more pronounced.
Steven
Elen sila lumenn' omentielvo - "A star shines on the hour of our meeting"
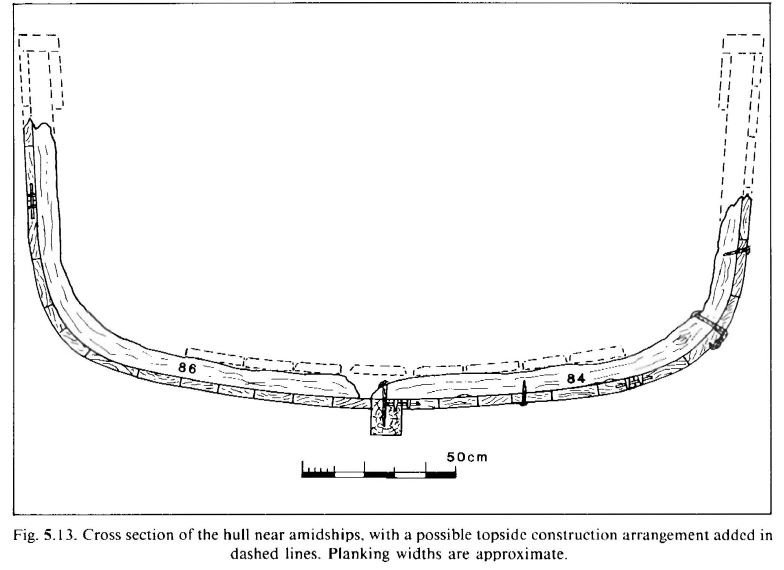
The pattern Lyle used is from the excavation. (see attached).
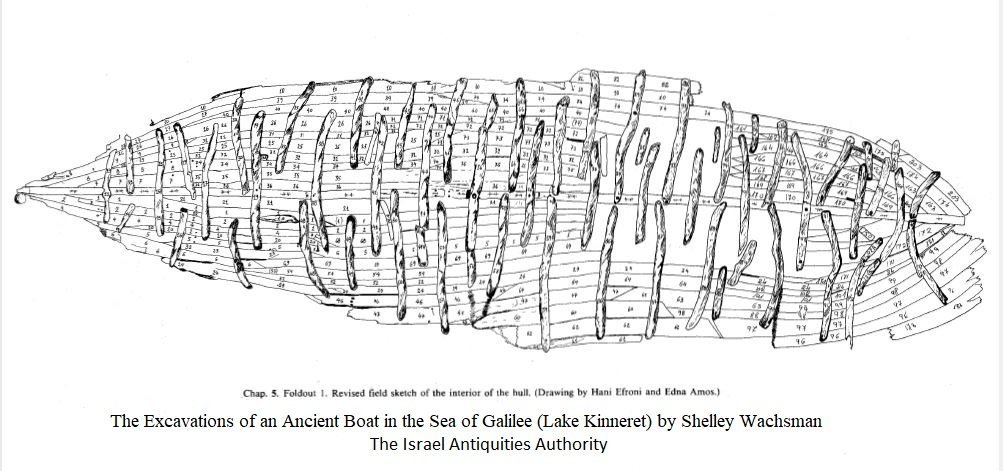
The book refers to the individual pieces as "floor timbers", "futtocks" and "half frames". As Lyle's model shows, the frames alternate floor timer, half frame, FT, HF, etc. Many of the floor timbers have "futtocks" which extends the frame to the gunn'l, but not all. The book notes that some locations where frames are missing you can see nails, other locations there are no nails.
I have seen models where floor timber/futtock arrangement goes the full length of the boat and some where that arrangement is used only for about the center 1/3 while floor timber-only is used for forward and aft 1/3s. Who knows for sure.
Chuck Seiler
San Diego Ship Modelers Guild
Nautical Research Guild
Posted July 8
Posted July 8
"I have seen models where floor timber/futtock arrangement goes the full length of the boat and some where that arrangement is used only for about the center 1/3 while floor timber-only is used for forward and aft 1/3s. Who knows for sure."
Exactly!
The pattern is debatable but I think the pattern chosen is appropriate for the time period and type of build. As shown in Chuck's post, the pattern is not even the same throughout which I find unlikely but more of a product of the age and condition of the boat when it was excavated.
Frankly, I'm not a huge fan of CA but can see the reasoning for using it on this build.
Posted June 22
They used a technique called mortise and tenon to join the planks.On 6/22/2021 at 6:16 AM, Snug Harbor Johnny said:
I read an article on the 'Jesus boat' recovered in Galiliee ... is this the same boat as the one in this thread? The boat in the article in Biblical Archeology Review showed the the strakes were composed of many oddly shaped planks (some of them short) that were fastened together with lashings passed through severely made holes in the plank edges where they abut. The whole thing looked like a big 'jigsaw puzzle'. The article suggested that valuable wood resourced back them was used with a minimum of waste ... it reminded me of some Inca stonework where all the oddly shaped blocks were fit together so as to remove a minimum amount of material, yet be snug against each other. Johnny
This is the same boat. It had 12 different varieties of wood in the boats construction.
It was speculated that some was by necessity due to a short supply of wood but also repairs performed during its lifetime were done with whatever was available.
It would’ve been impractical to attempt to use short pieces for the build since it is built using a strongback.
The book mentioned in my first post was written by the man the managed and performed the excavation.
Studies of the boat continue to this day.
Lyle
"The only thing that stays the same is the constant state of change"
Posted June 27 (edited)
Although I haven't posted in a few days, work has continued!
I finished the hull this afternoon!
The below sequence shows the progress through to the 15th plank:
As I mentioned in the previous post, the last 5-6 planks were by far, the most difficult and I, literally, had to do one at a time before moving on. The required bend/twists needed to shape the hull made it very difficult, more than I had imagined!
I ended up breaking 6-8 planks to achieve a finished hull. That's even after soaking and heating and bending incrementally to get the right shape at the stern:
Symmetrically, the hull shape looks great! I had to use a various amount of clamps, some not designed for model work but were necessary to push the planks into place. Tools were substituted for wedges as needed too:
And finally, the 15th planks on each side had to be shaped carefully to fill the remaining gaps:
I did some initial sanding while the boat was still on the strongback... I got to thinking, what if I sand it a little thin in places and it's accidently glued to the strongback!!
I'm glad I stopped:
I ended up having to cut several of the forms as I had indeed glued the planks to the forms in several spots!
It wasn't difficult to remove, I just cut a few of the forms, a little wiggle and they popped right out. Once I was able to get my fingers inside, I used them to push the forms slightly and they popped loose too:
If you look closely, you can see the remnants of a couple of the forms. Also, there is some denting on the interior of the planks from me being a little too rough getting the planks to shape properly.
I used water on my fingertips and rubbed it into the dents and most of them came out easily. The worst ones at the stern will be covered and not visible.
So here is the hull before extensive sanding!
The bracing is just temporary to keep the boats shape.
On to sanding!
Lyle
"The only thing that stays the same is the constant state of change"
Posted June 28
There's a real sense of achievement in finishing the planking - particularly when it's this difficult. Well done, sir!
I look forward to seeing it when the sanding is done. It can make a huge difference to the look of the model.
Steven
Elen sila lumenn' omentielvo - "A star shines on the hour of our meeting"
Posted June 28I think your right on target, as far as having the model done for your father's birthday.
Posted June 28
Now I can see how the planking was done ... so whatever goes inside rib-wise or thwart-wise is an installation process - plus whatever else in the way of oars, mast, rigging, etc. Very nice! I'd like to 'improve' (bust?) the ship's boats of the Endurance (actually I'll build them first as practice), since we have exact measurements on three of them (the fourth was the same as Schakleton's lifeboat) and many photographs. There was a recent post on improving ship's boats for HMS Victory, where the assembly ribs were removed and replaced by more scale-like boat ribs - along with thin footlings, scale gunwale (with grain going in the right direction) and a variety of accouterments on hand in such boats. Each boat also has a graceful upward curve to the stem and stern (not sure of the correct term) - and that might be done best by installing the plank below the gunwale first to establish the curve - them go on planking downward (tapering planks as needed). Taking the time to do a better job on details such as these will greatly add to the appearance of the model as a whole. Johnny
Posted June 28
The “ribs” are the next step after some sanding.On 6/28/2021 at 8:18 AM, Snug Harbor Johnny said:
Now I can see how the planking was done ... so whatever goes inside rib-wise or thwart-wise is an installation process - plus whatever else in the way of oars, mast, rigging, etc. Very nice! I'd like to 'improve' (bust?) the ship's boats of the Endurance (actually I'll build them first as practice), since we have exact measurements on three of them (the fourth was the same as Schakleton's lifeboat) and many photographs. There was a recent post on improving ship's boats for HMS Victory, where the assembly ribs were removed and replaced by more scale-like boat ribs - along with thin footlings, scale gunwale (with grain going in the right direction) and a variety of accouterments on hand in such boats. Each boat also has a graceful upward curve to the stem and stern (not sure of the correct term) - and that might be done best by installing the plank below the gunwale first to establish the curve - them go on planking downward (tapering planks as needed). Taking the time to do a better job on details such as these will greatly add to the appearance of the model as a whole. Johnny
Expand
They run vertically along the entire length of the boat.
Meticulous work but should look great.
Interesting info, thanks!
Lyle
"The only thing that stays the same is the constant state of change"
Posted June 28
Lyle,
How structurally sound is that? Will the frames beef it up or re they just for show...and it requires the thwarts for solidity (is that a word?)
Chuck Seiler
San Diego Ship Modelers Guild
Nautical Research Guild
Posted June 28
so·lid·i·tyOn 6/28/2021 at 11:17 AM, Chuck Seiler said:
Lyle,
How structurally sound is that? Will the frames beef it up or re they just for show...and it requires the thwarts for solidity (is that a word?)
/səˈlidədē/
Learn to pronounce
noun
- the quality or state of being firm or strong in structure.
Well done, Chuck! Not a new word but used in proper context! I honestly didn't know but had to check!
The steps to remove thwarts are many! But eventually, they will come out. The bow and stern get a small "deck", plus the are inner wales that will retain the shape.
Lyle
"The only thing that stays the same is the constant state of change"
Posted June 28Sanding mostly done... Interior is done and coated with CA to reinforce the seams. Sanded smooth and ready for ribs!
I struggled with doing the CA coating but it made a nice hard shell. This model is amazingly light and feels fragile but this step certainly made it feel stronger.
Sanding on the exterior is basically done... I'll do some touch up in places but overall, it is done:
I starting making ribs... no BBQ sauce!
I haven't used the old soldering iron plank bender in a while. Its radius is almost perfect for the bends needed. I soaked the planks for about 15 minutes and after a couple of missteps, I was able make the rest fairly easily. I've got about 25% of the required amount cut and bent.
More in a few days. Hoping to get out on the boat for a few days...
An update when I return after the holiday.
Lyle
"The only thing that stays the same is the constant state of change"
Posted July 6Just a quick update... I was gone for the long weekend.
Managed to get about a quarter of the ribs in place:
Spacing is accomplished using a couple pieces of the planking material... worked great except when I glued it in place with the rib! Fortunately, I was able to get it back out with no damage!
I'll post again soon.
Lyle
"The only thing that stays the same is the constant state of change"
Elen sila lumenn' omentielvo - "A star shines on the hour of our meeting"
Posted July 7
Use a peice of saran wrap on your spacer....... glue won't stick.
Posted July 7Hmmmm... even CA glue?On 7/7/2021 at 11:11 AM, TOM G said:
Use a peice of saran wrap on your spacer....... glue won't stick.
I'll give it a try!
Lyle
"The only thing that stays the same is the constant state of change"
Posted July 7
I presume you are referring to the ribs?On 7/7/2021 at 2:46 AM, Louie da fly said:
Nice. Are you intending to double up the frames so they overlap each other?
The pattern shown is followed throughout the hull. Based on the original, that appears to be the correct pattern. I am considering adding floor boards with some small spacing which will cover the bottom of the hull... haven't decided yet.
Lyle
"The only thing that stays the same is the constant state of change"
Posted July 7
On 6/11/2021 at 4:56 AM, Louie da fly said:
Though the lateen is now known to have been developed earlier than previously thought - as evidenced by this tombstone, dated to the second century AD
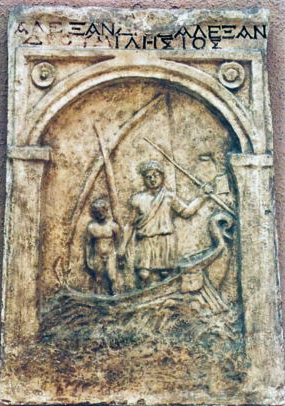
this is the only evidence for such prior to the 5th century; all other contemporary representations I'm aware of show square sails. So a square sail is far more likely for the Sea of Galilee ship, which is dated to the first century AD. Indeed, i have seen both typrs depicted on both Egyptian and Phoenician boats of the general era.
Expand
It stands to reason that there existed both lateen and square sails in the Meditteranean Sea at the time. Indeed, I have seen dipictians of both Egyptian and Phoenician boats.
Bill
Posted July 7
Bill, do you have any pics of these depictions? I've never seen anything prior to the above with anything resembling a lateen.
Yep.
On 7/7/2021 at 11:25 AM, LyleK1 said:
The pattern shown is followed throughout the hull. Based on the original, that appears to be the correct pattern.
That's fair enough - it appears that the frames do overlap each other after all - every frame overlaps the ones either side of it, so there's no "zone of weakness" where the joins are. The Byzantine ships found at Yenikapi have a similar layout, but the overlap between adjacent pairs of frames is more pronounced.
Steven
Elen sila lumenn' omentielvo - "A star shines on the hour of our meeting"
Posted July 7The pattern Lyle used is from the excavation. (see attached).
The book refers to the individual pieces as "floor timbers", "futtocks" and "half frames". As Lyle's model shows, the frames alternate floor timer, half frame, FT, HF, etc. Many of the floor timbers have "futtocks" which extends the frame to the gunn'l, but not all. The book notes that some locations where frames are missing you can see nails, other locations there are no nails.
I have seen models where floor timber/futtock arrangement goes the full length of the boat and some where that arrangement is used only for about the center 1/3 while floor timber-only is used for forward and aft 1/3s. Who knows for sure.
Chuck Seiler
San Diego Ship Modelers Guild
Nautical Research Guild
Posted July 8
I don't know about ca glue....... I use WELD BOND...... I have had bad results with ca glue....... comes apart in time........ Maybe it was the brand of glue I used ?
Posted July 8
"I have seen models where floor timber/futtock arrangement goes the full length of the boat and some where that arrangement is used only for about the center 1/3 while floor timber-only is used for forward and aft 1/3s. Who knows for sure."
Exactly!
The pattern is debatable but I think the pattern chosen is appropriate for the time period and type of build. As shown in Chuck's post, the pattern is not even the same throughout which I find unlikely but more of a product of the age and condition of the boat when it was excavated.
Posted July 8I use Bob Smith Industries... works well and we'll see about the longevity.On 7/8/2021 at 7:58 AM, TOM G said:
I don't know about ca glue....... I use WELD BOND...... I have had bad results with ca glue....... comes apart in time........ Maybe it was the brand of glue I used ?
Frankly, I'm not a huge fan of CA but can see the reasoning for using it on this build.
POST 5#
Posted July 12
Half the ribs done:
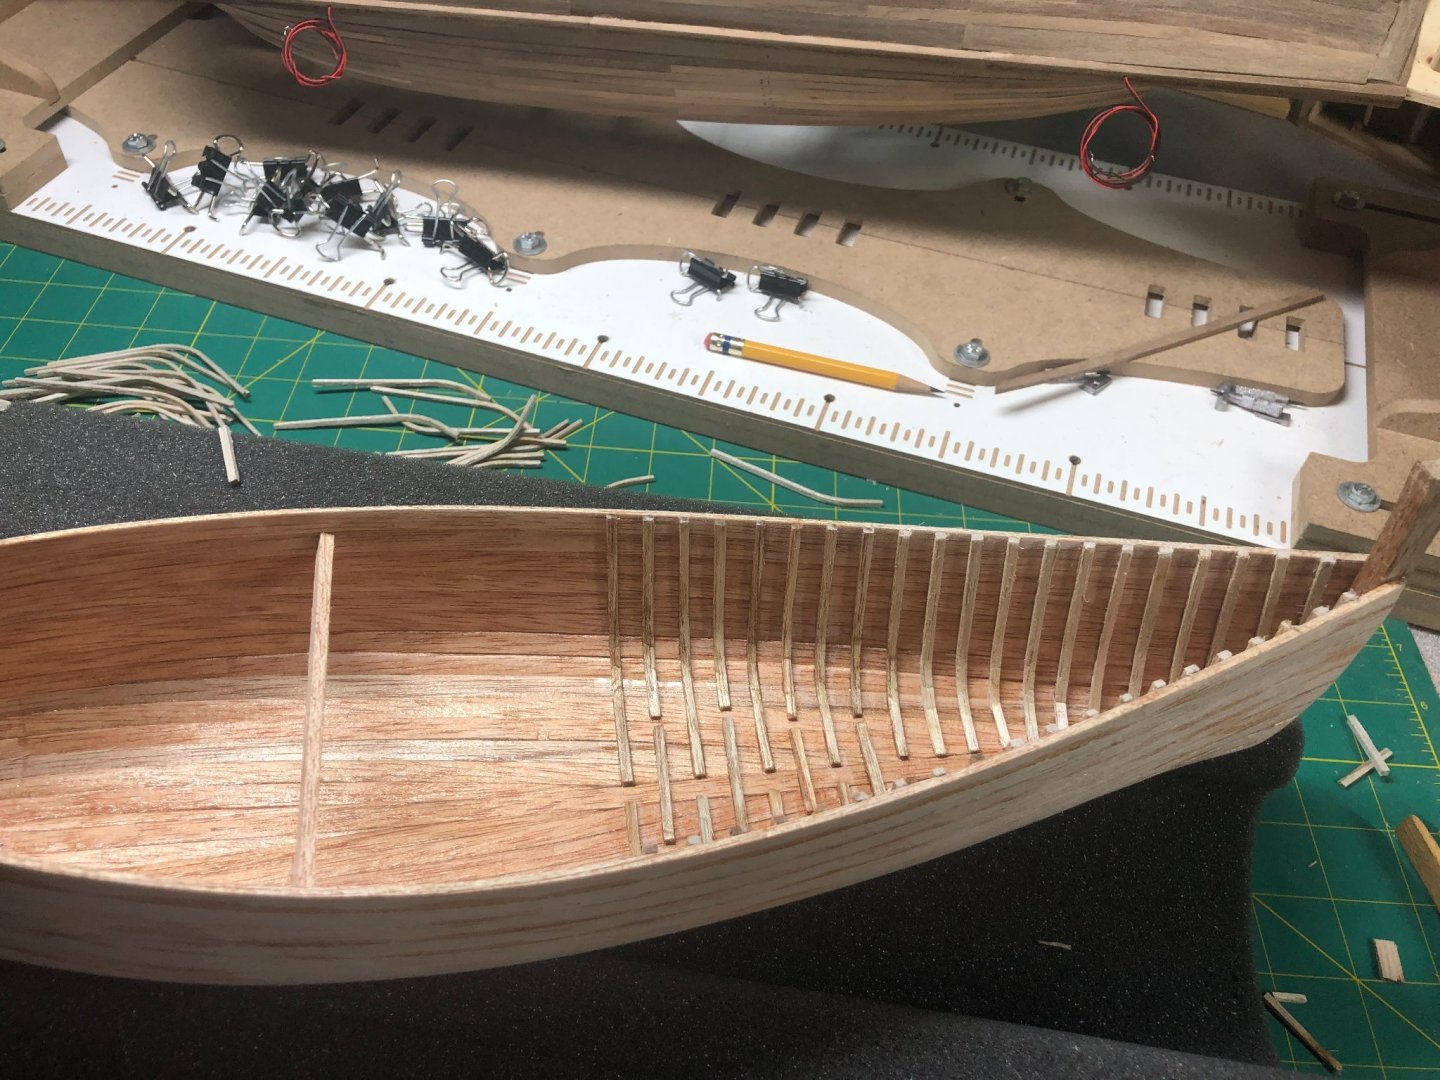
A month and five days until dad's birthday! Gotta get busy!
Summer makes it harder to work... boating, gardening, etc!
Still think I can make it without having to rush.
Lyle
"The only thing that stays the same is the constant state of change"
Lots accomplished over the last few days...
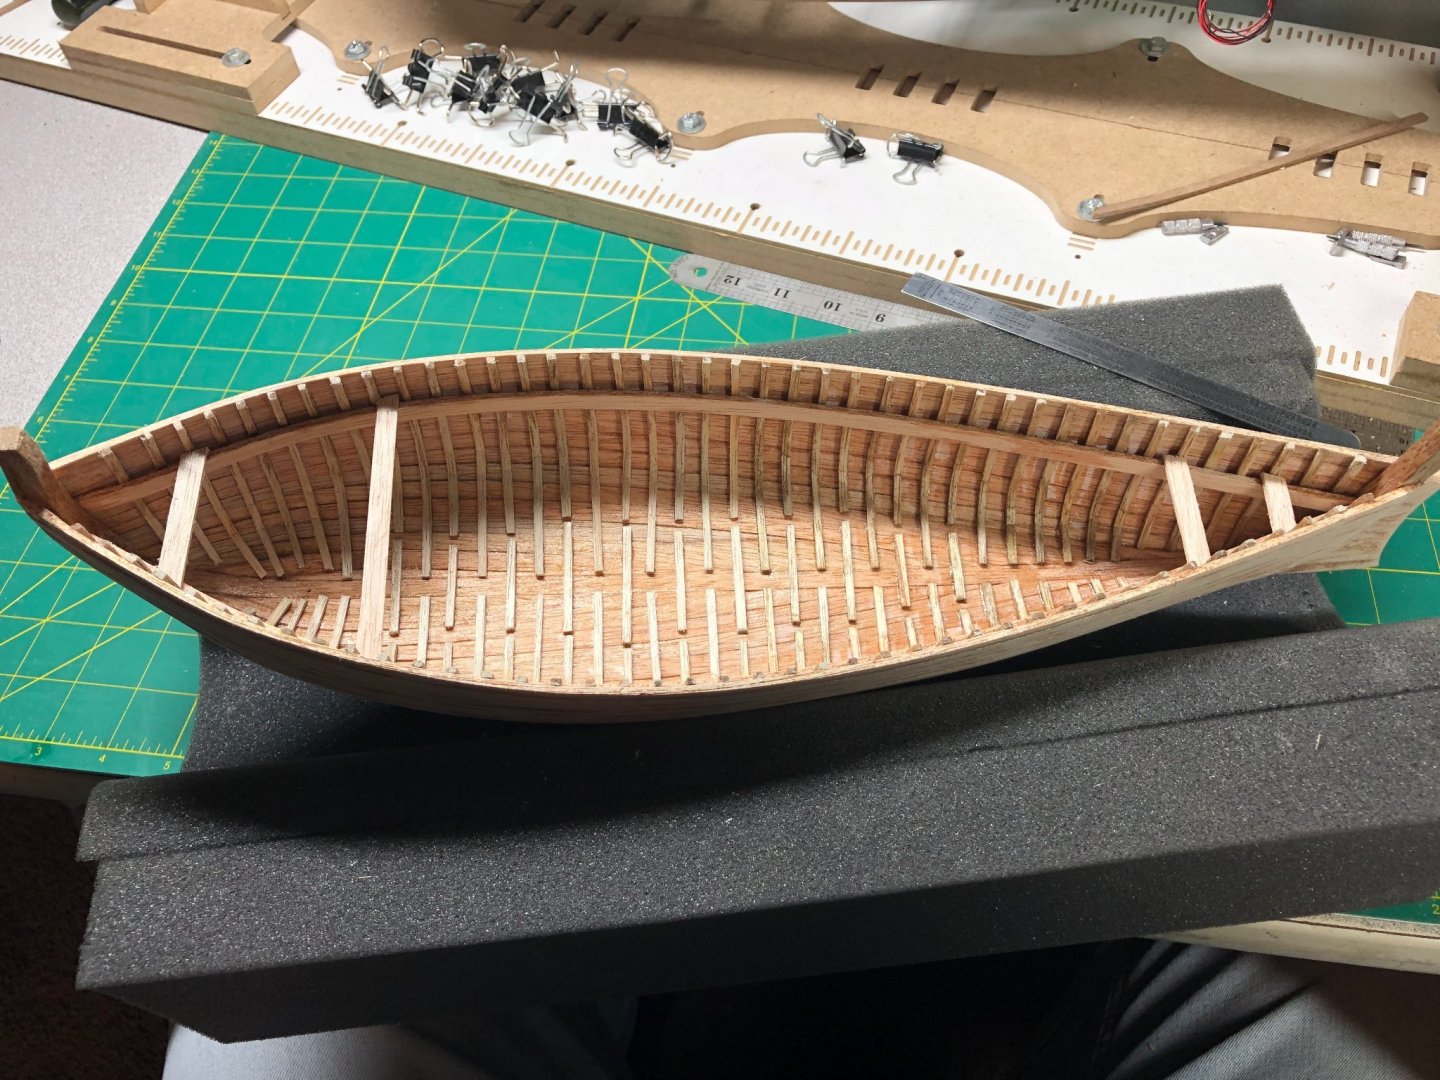
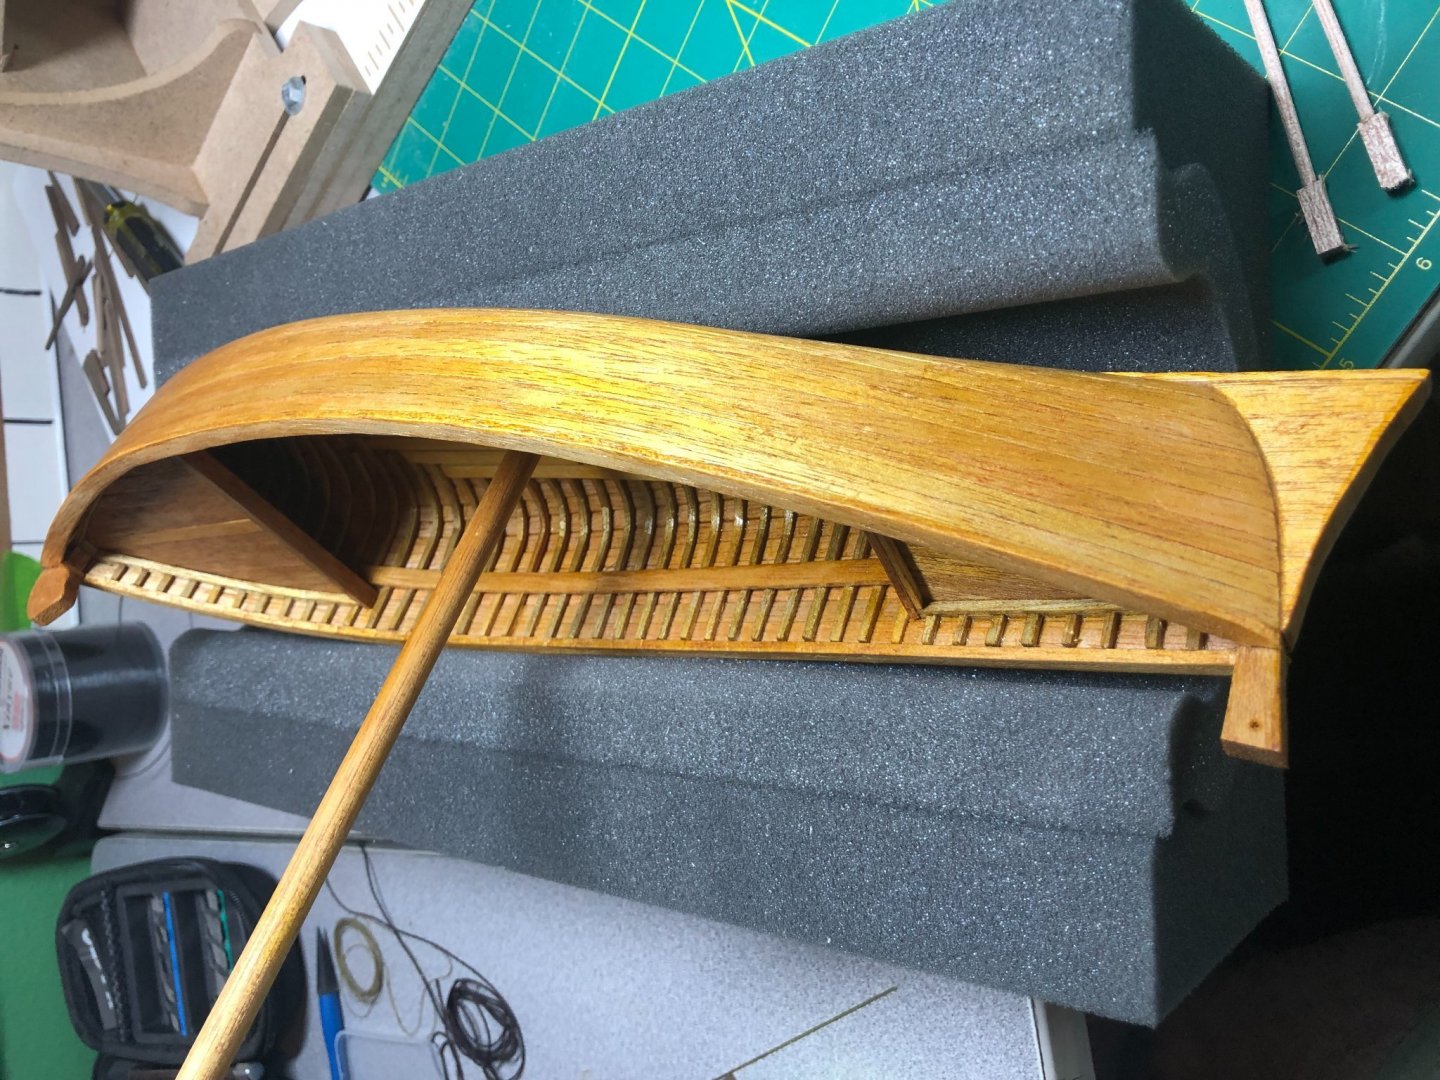
I finished the ribs. I found it to be very difficult to bend some of the ribs in the sharper corners near the bow and stern. Since they will be covered by the decks, I gave them less worry below the deck line. Overall, a tedious task working with 1/8 x1/8 wood:
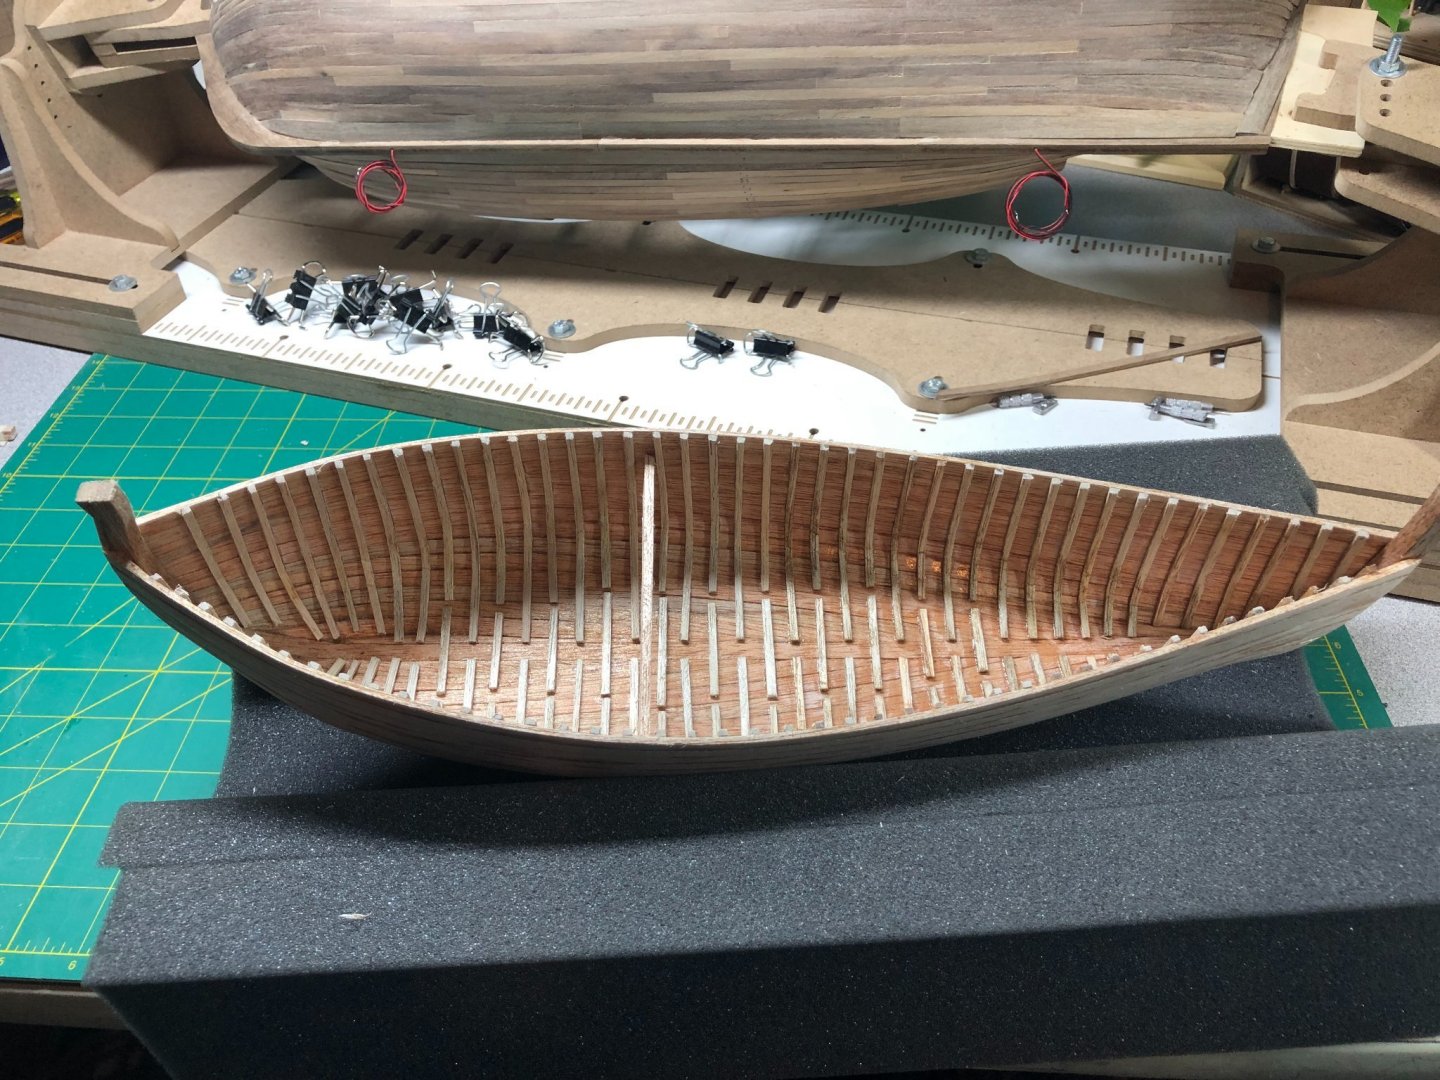
The inner wales were next. I let the pieces soak in hot water for about an hour before bending them by hand... no heat. The bend was not sharp and actually shaped easily. I used clamps and made sure the wales were in the right position along the entire length of the hull. Once the inner wales were in place and still wet, I clamped them down ensuring that they touched each rib at the top and bottom. Once dried, I used the the thin CA glue and glued them in place while still clamped, resulting:
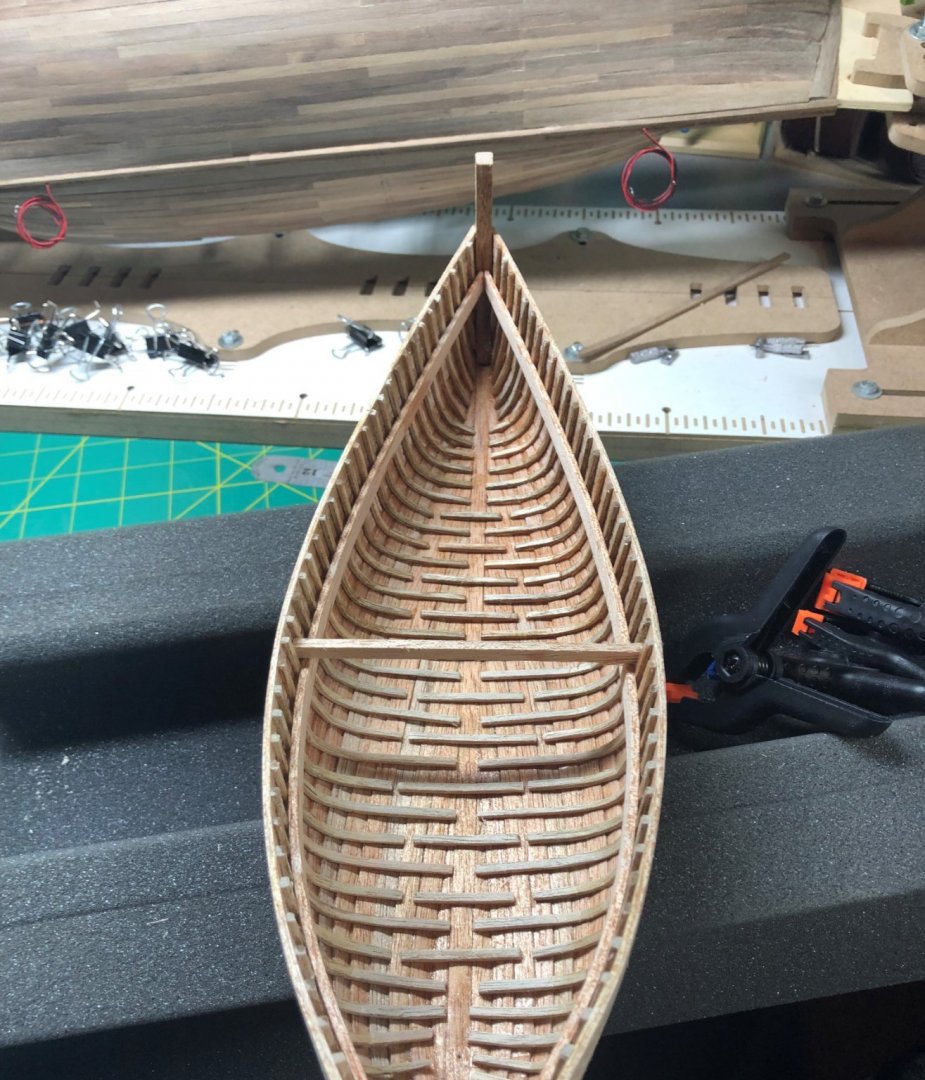
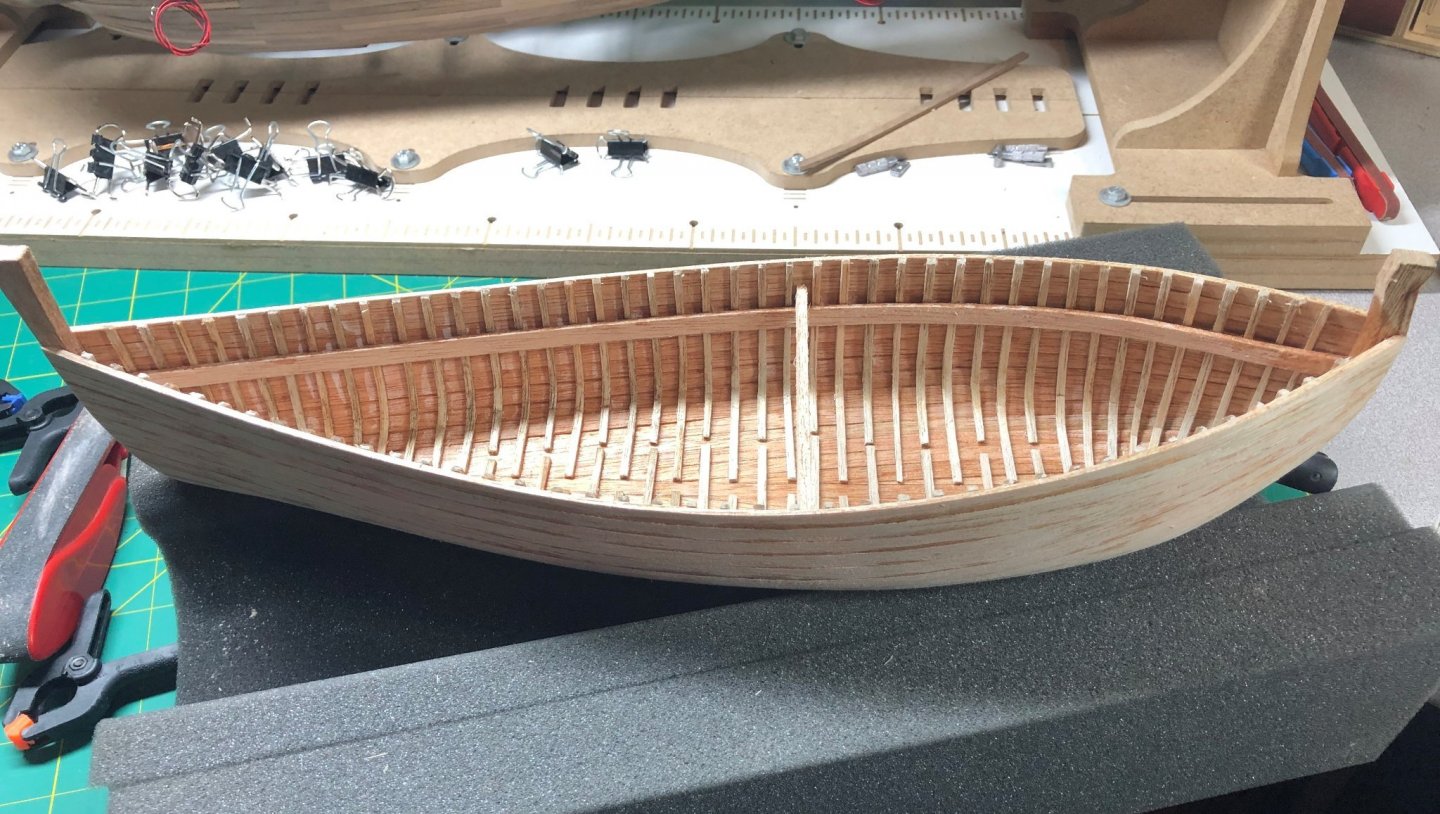
The cutwater was a bit of a conundrum for me. There are no real instructions that were helpful on this part of the build. Fortunately, I found a couple of pictures and build logs that gave me a good view and idea of what I needed to make. It started with several 1/4 x 1/4 wood pieces glued together:
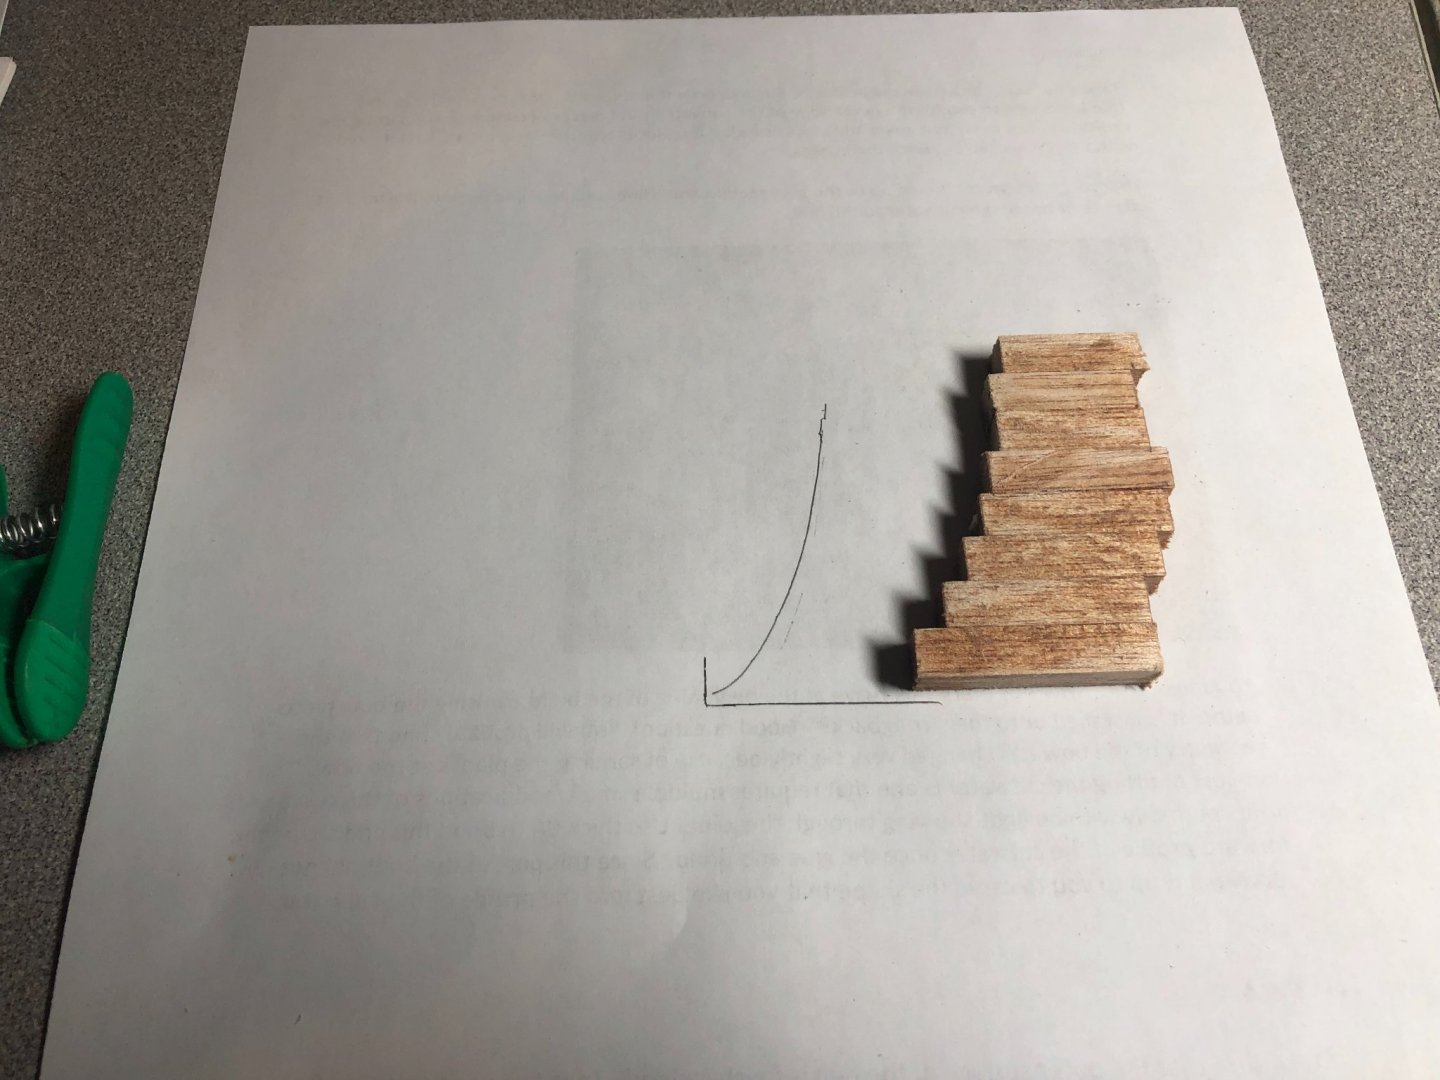
I laid the bow down and used my pencil to trace the curvature of the bow. The pieces were glued together to match the curve. I used my scroll saw and cut the shape out and then cut the leading edge. Finally, I sanded and glued it onto the bow:
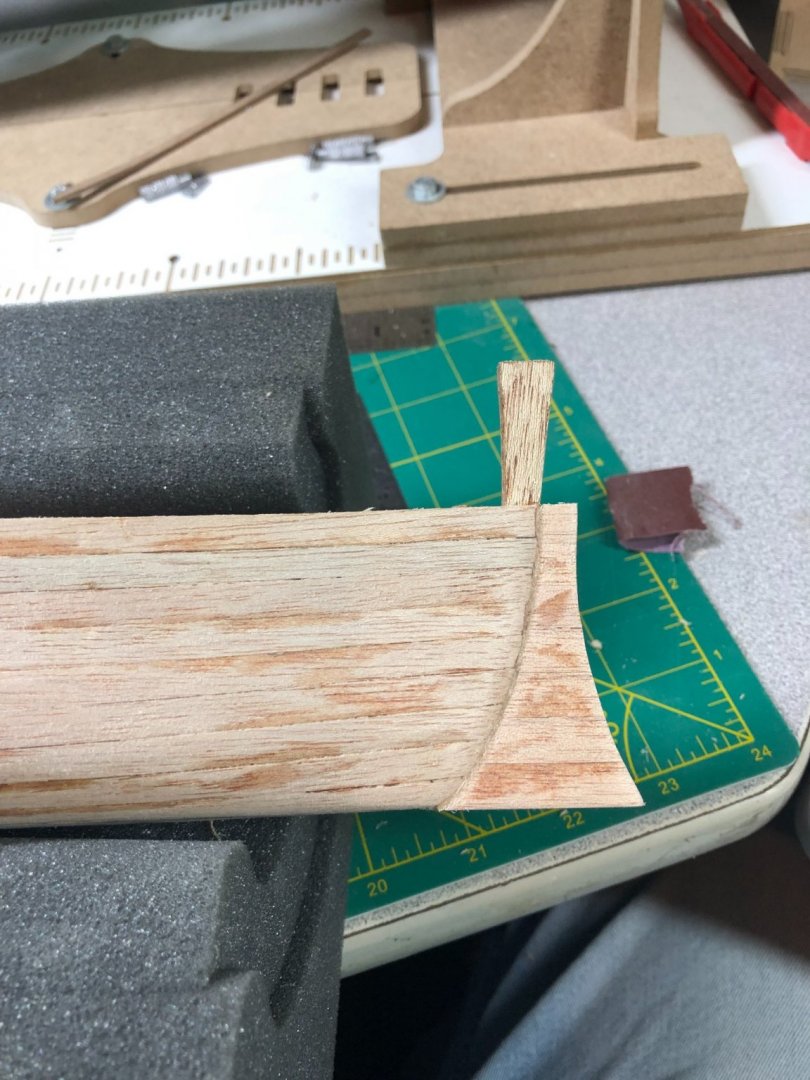
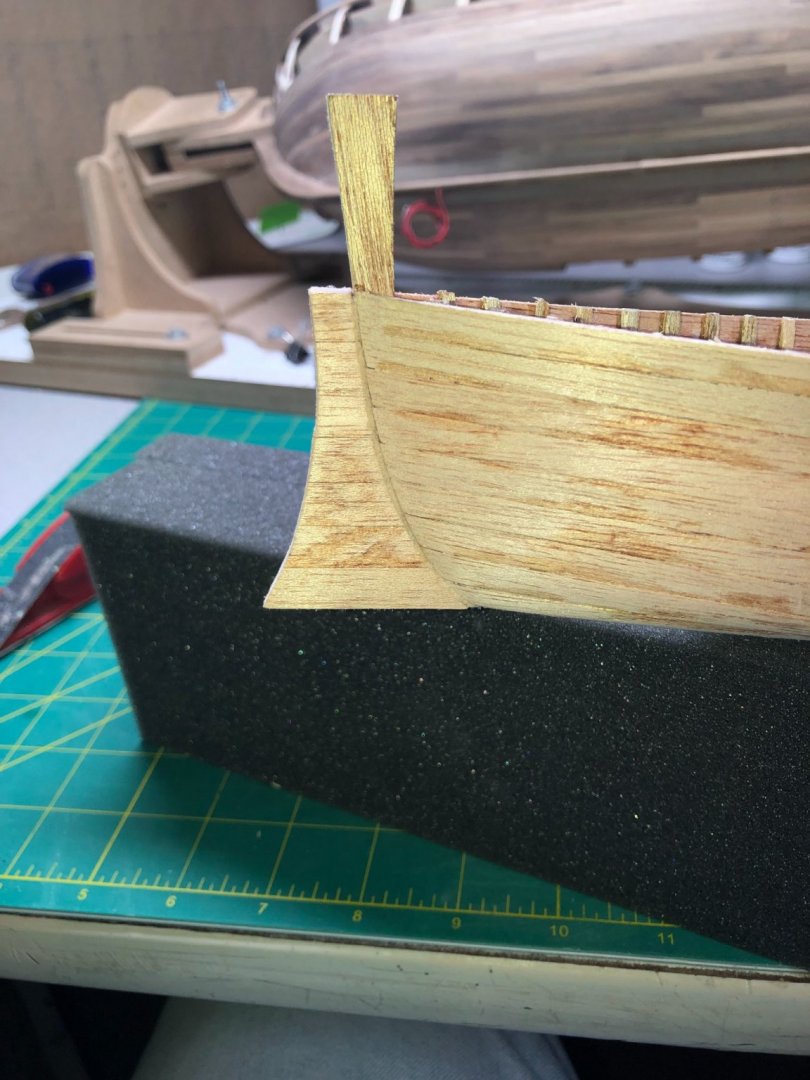
Still need to sand the cutwater at the keel flat to properly receive the false keel but I am really pleased with the outcome!
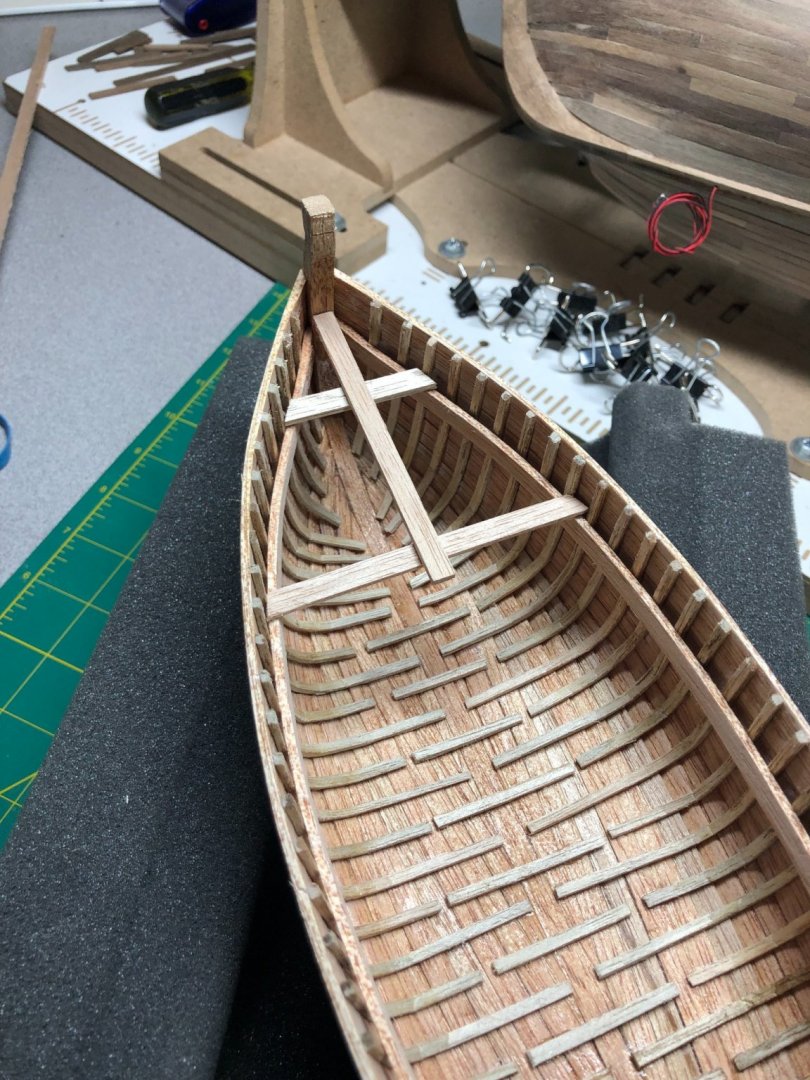
Next, deck beams were installed at the bow and stern: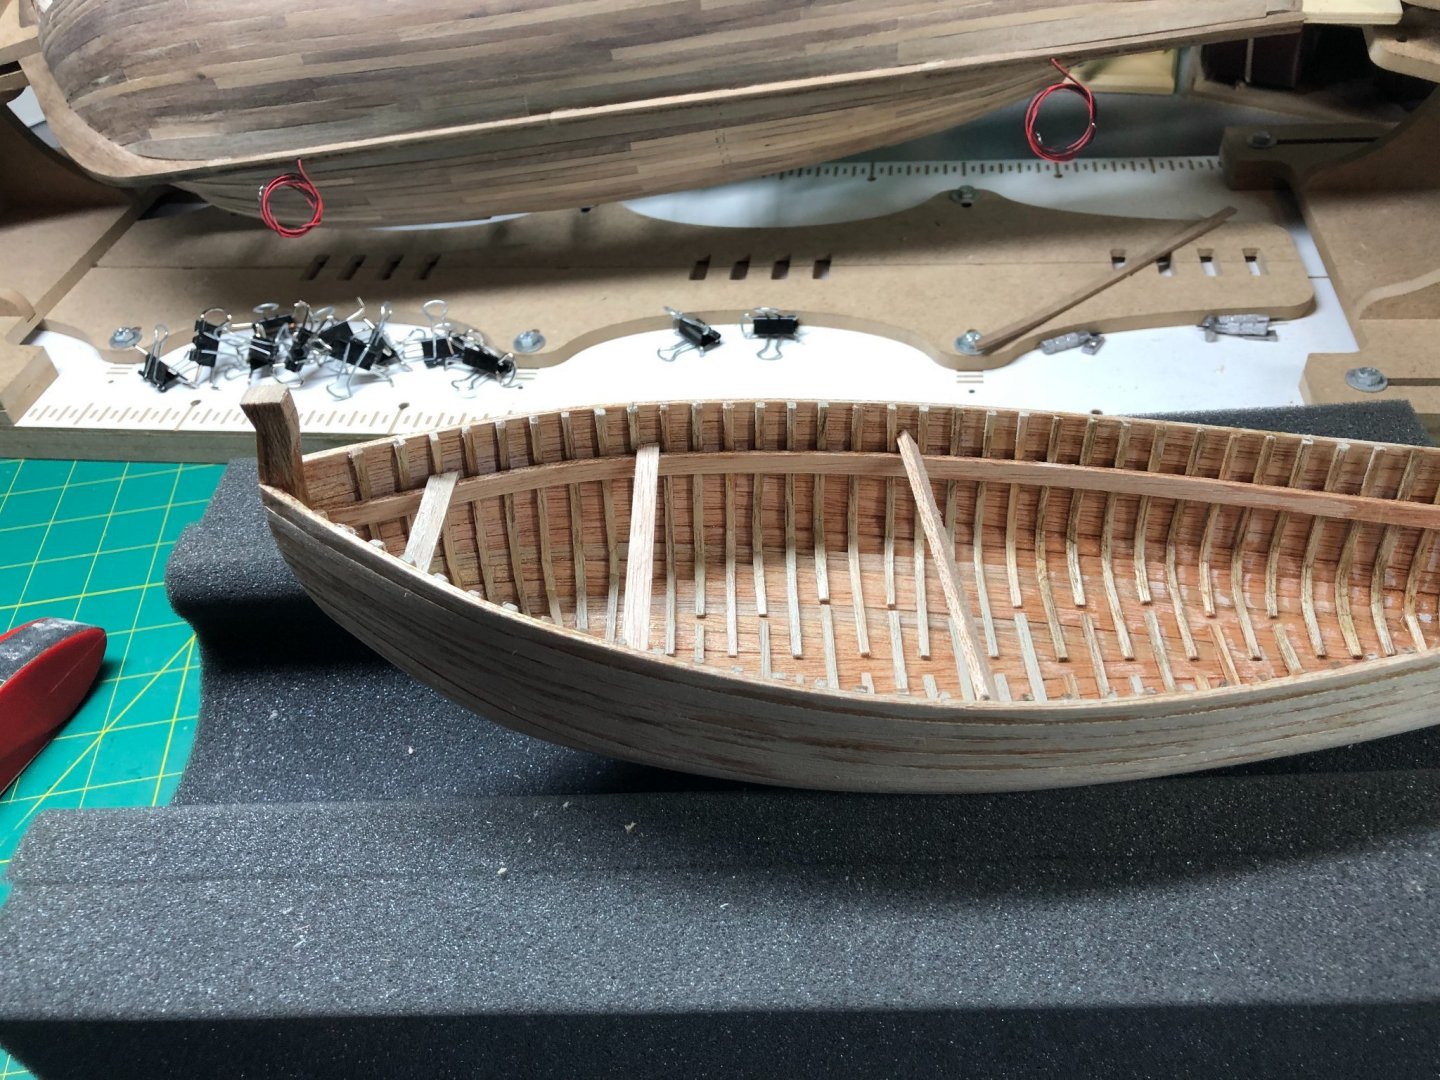
And the decking begins... simple but a little work to cut around the ribs:
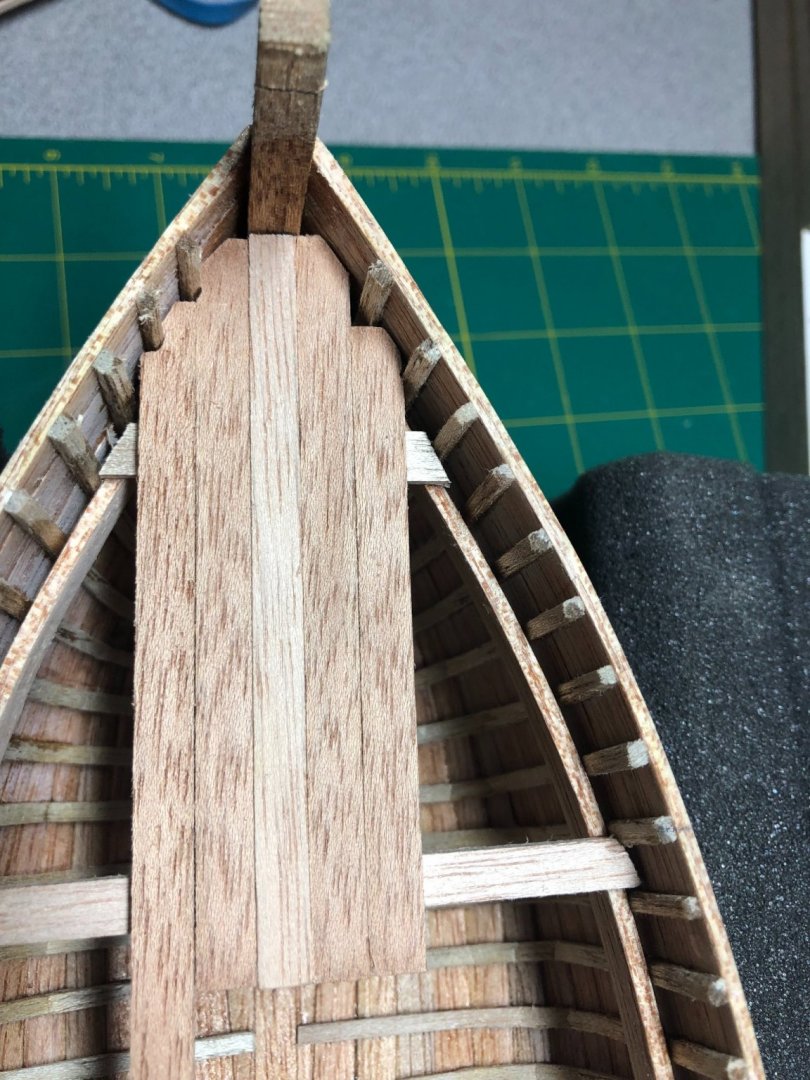
Finally:
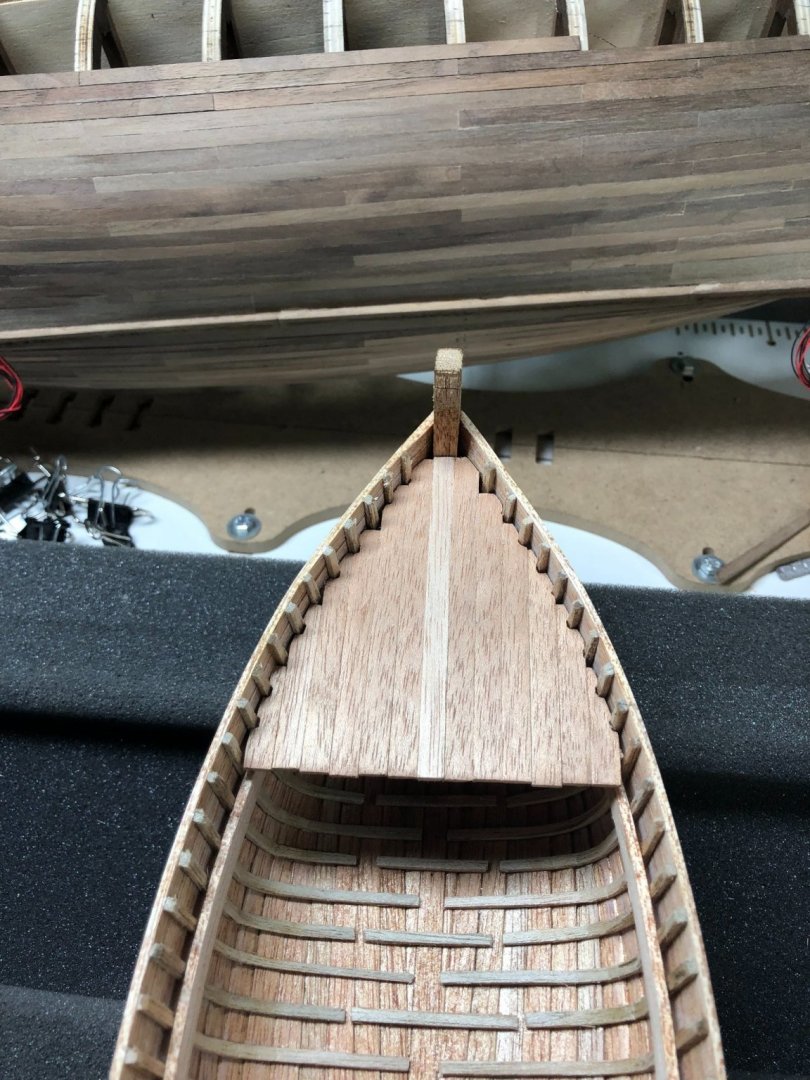
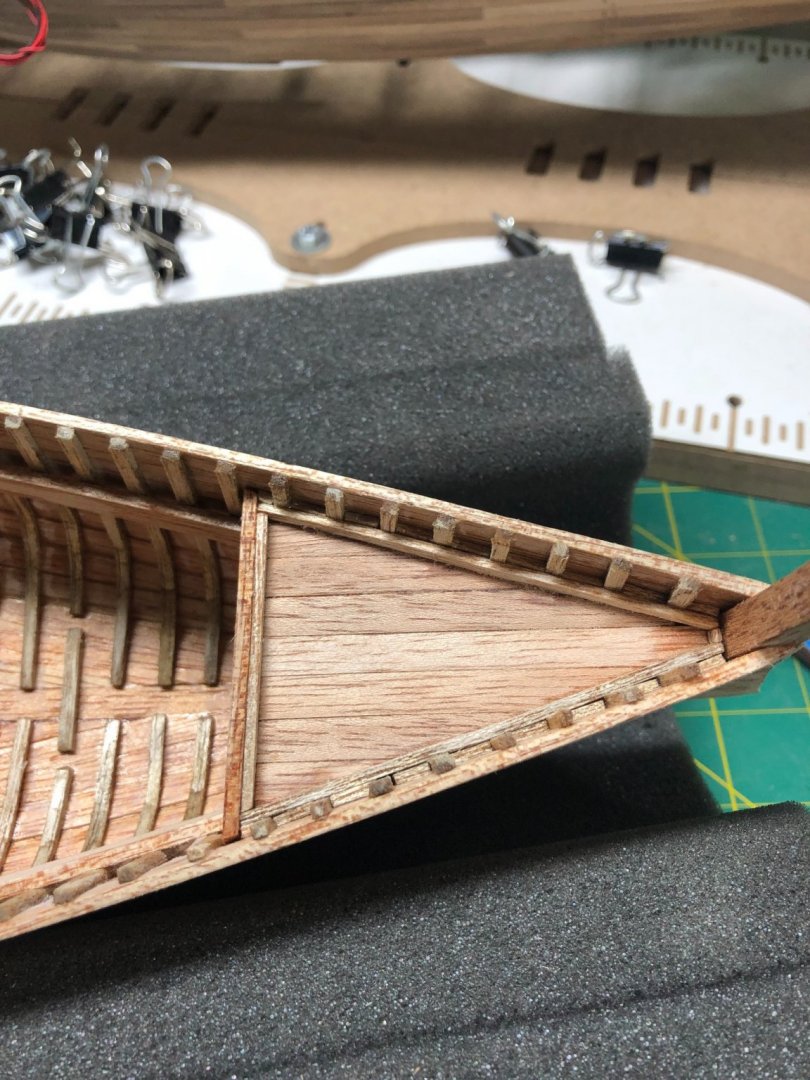
Some sanding on the end to even up the deck ends... I decided that I wanted a more finished look. So, I cut pieces to put between the ribs and then placed a piece of trim around the hull. Also added an end cap to the deck:
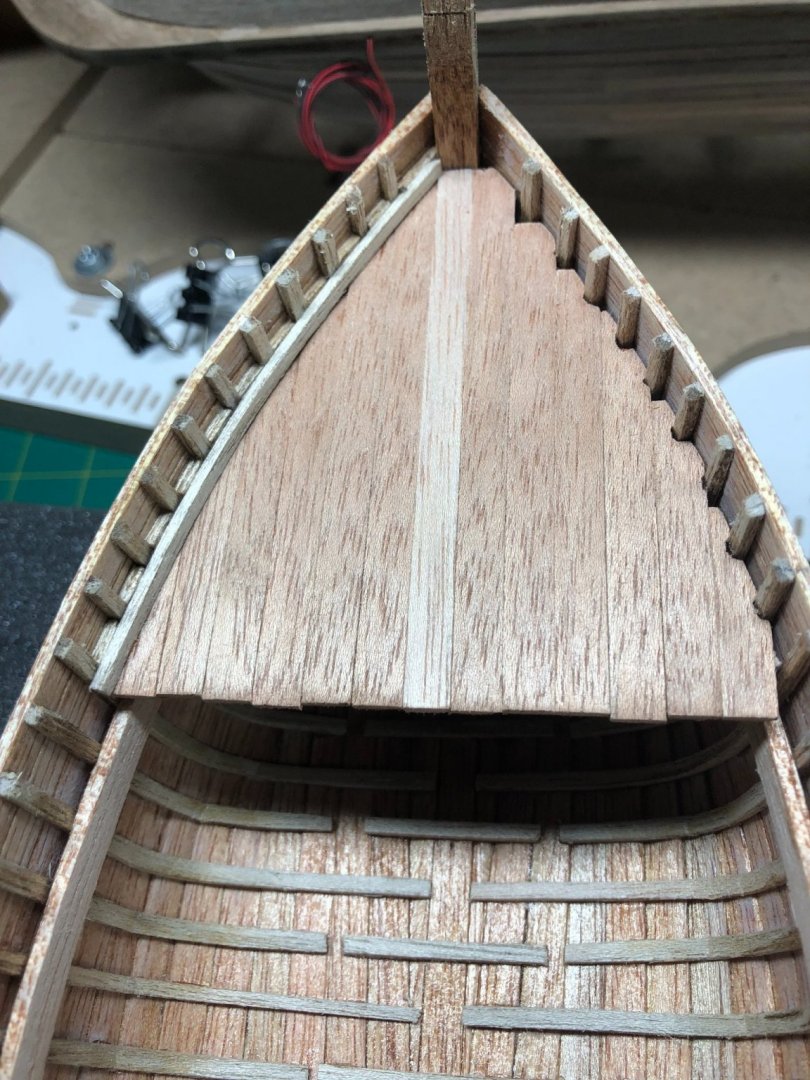
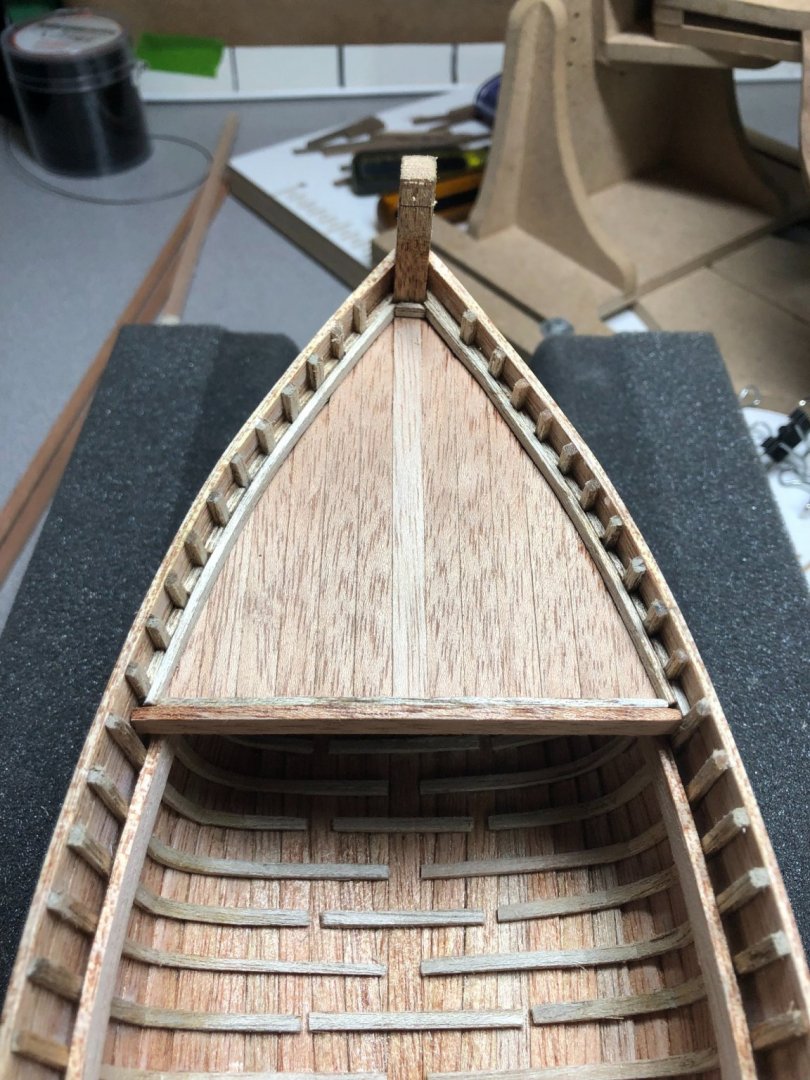
A better look to me... what do they call it........ artistic freedoms! Hopefully, not too far off base!
The fore deck, cap rails and the false keel are next!
Lyle
"The only thing that stays the same is the constant state of change"
Beautiful work, mate!

Steven
Elen sila lumenn' omentielvo - "A star shines on the hour of our meeting"
Wow! Significant progress. Looking good. I find the cutwater very interesting. It seems quite large for such a small boat. I guess you might need it to ram rival fishermen.
Between your progress and Louie d F's start on the NEF, I am embarrassed at my lack of productivity. I have been dawdling with the Jesus Boat, some movement, but I need to get in gear and go public. Build log by Saturday.
Chuck Seiler
San Diego Ship Modelers Guild
Nautical Research Guild
Looking good...Moab
Looks better now!
More progress today…
I’ll post another log later or tomorrow.
Lyle
"The only thing that stays the same is the constant state of change"
Posted July 18
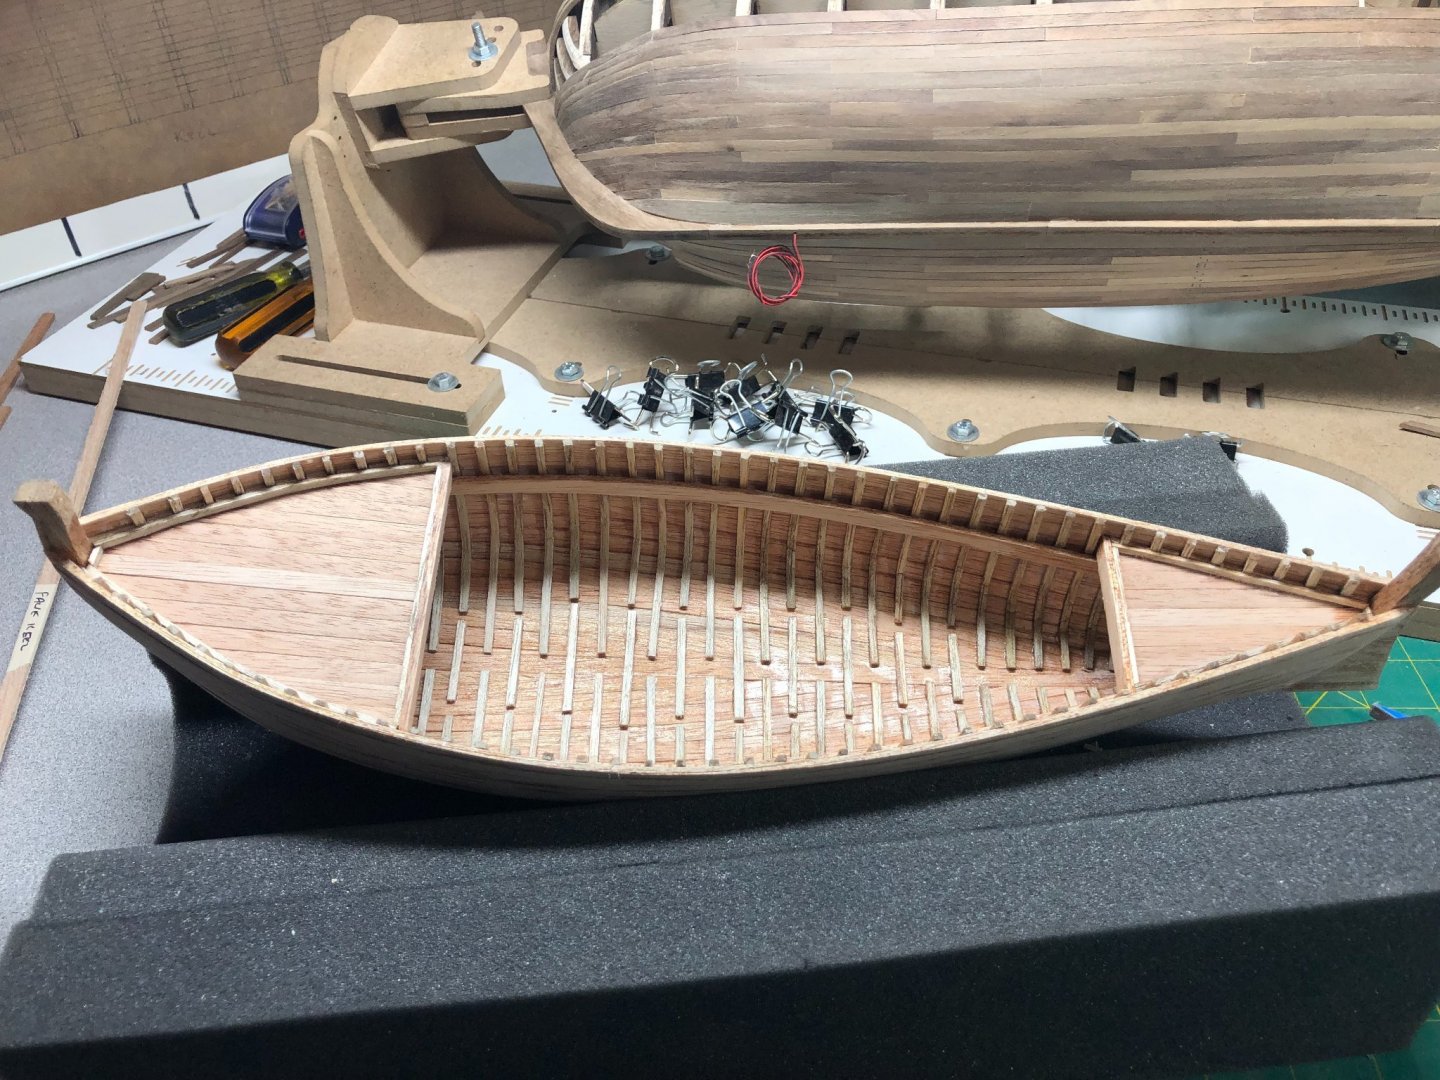
Fore deck work was next on the agenda... built similar to the aft deck:
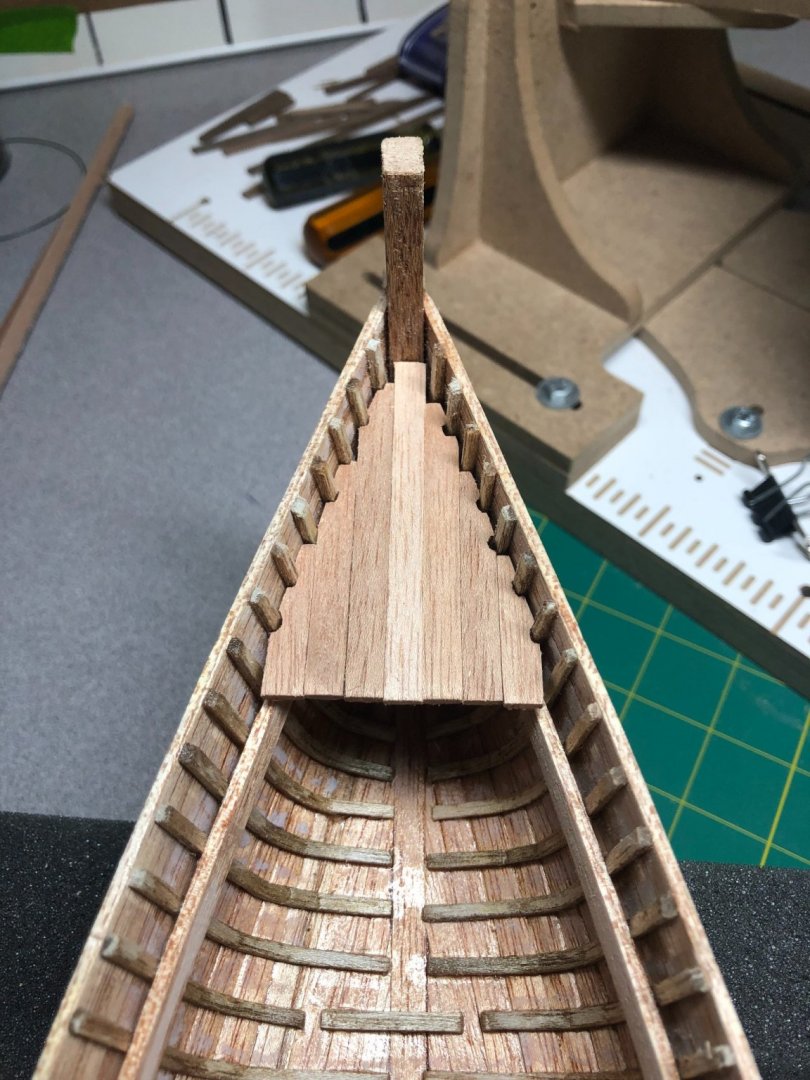
And then trimmed up just like the aft deck:
Decks are done!
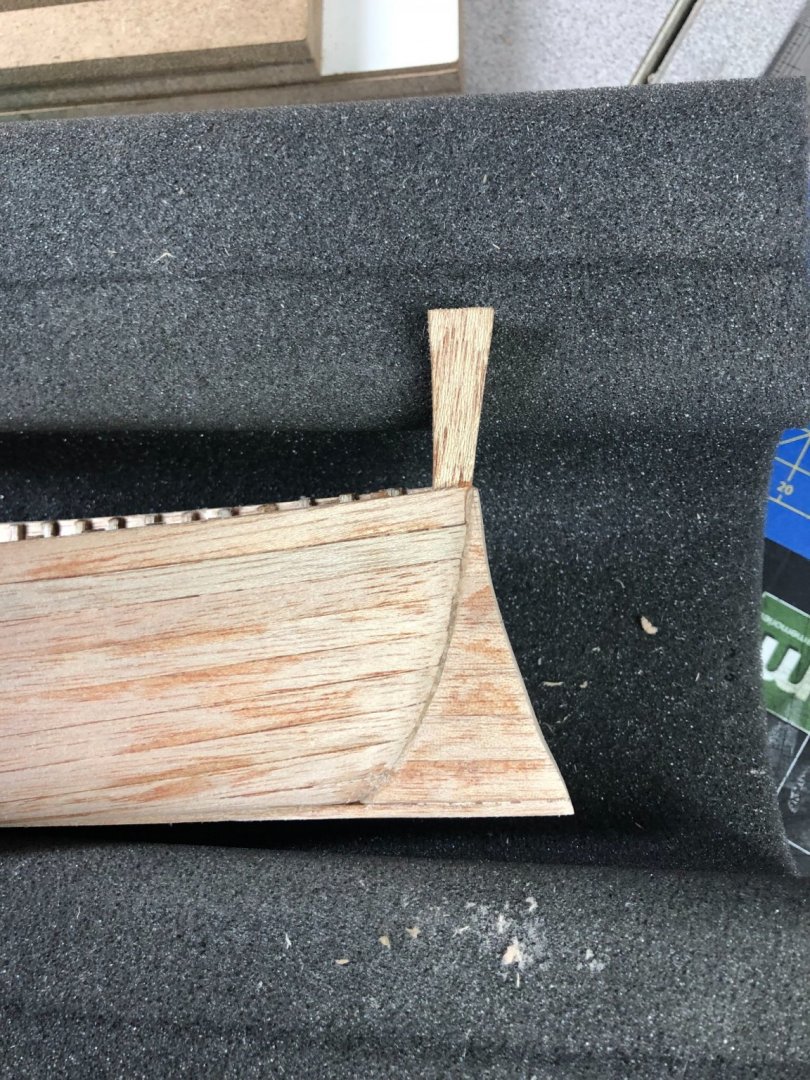
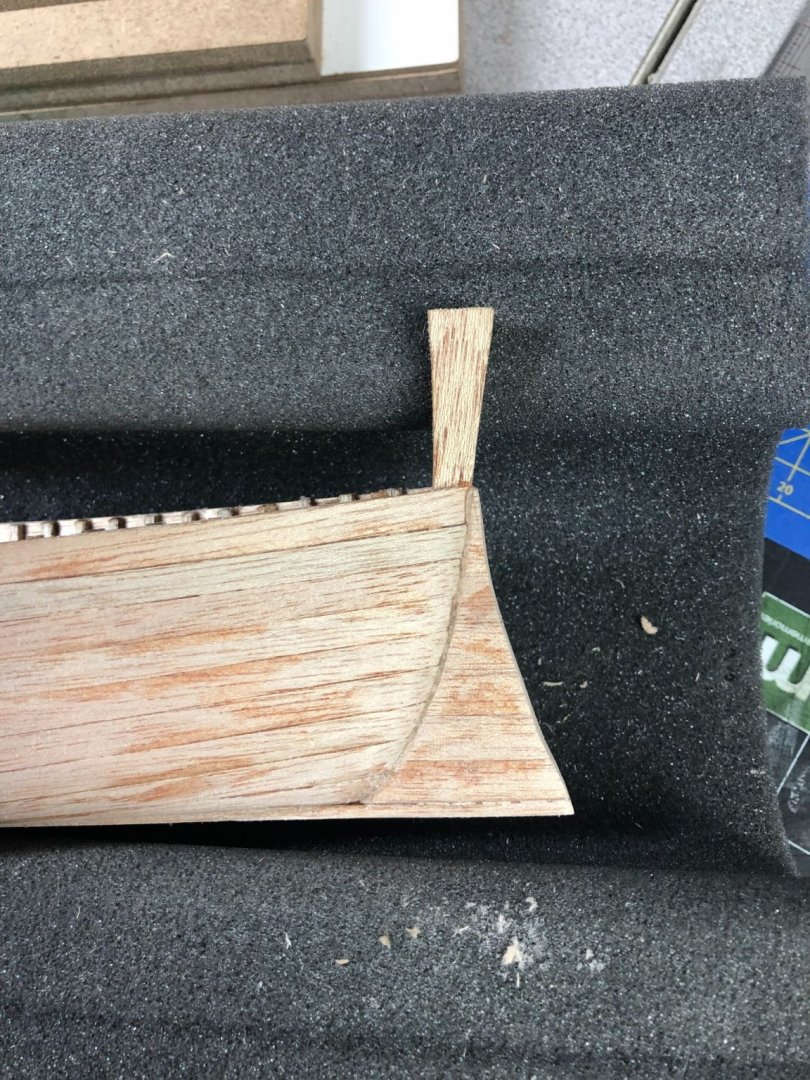
I really didn't like the look of the cutwater... a little reshaping and it looks much better:
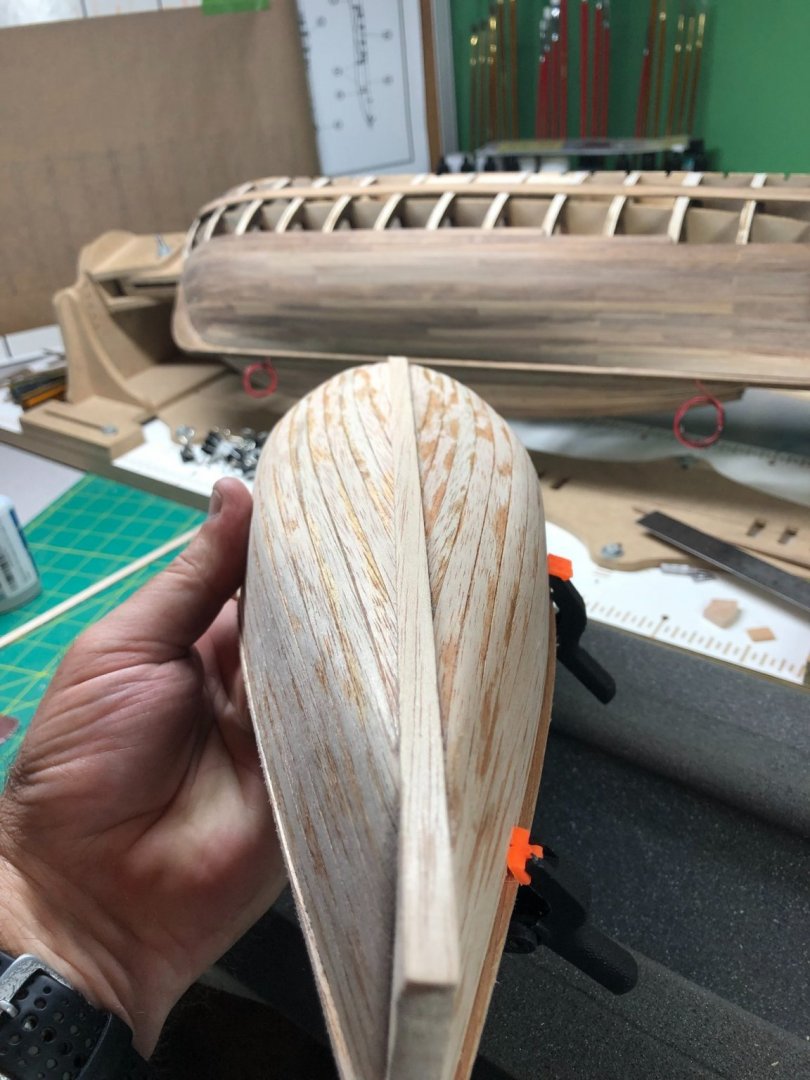
The false keel piece had to be soaked and bent several times until I got the shape right without breaking it!
Once glued into place. I beveled it at the bow to match up with the planks:
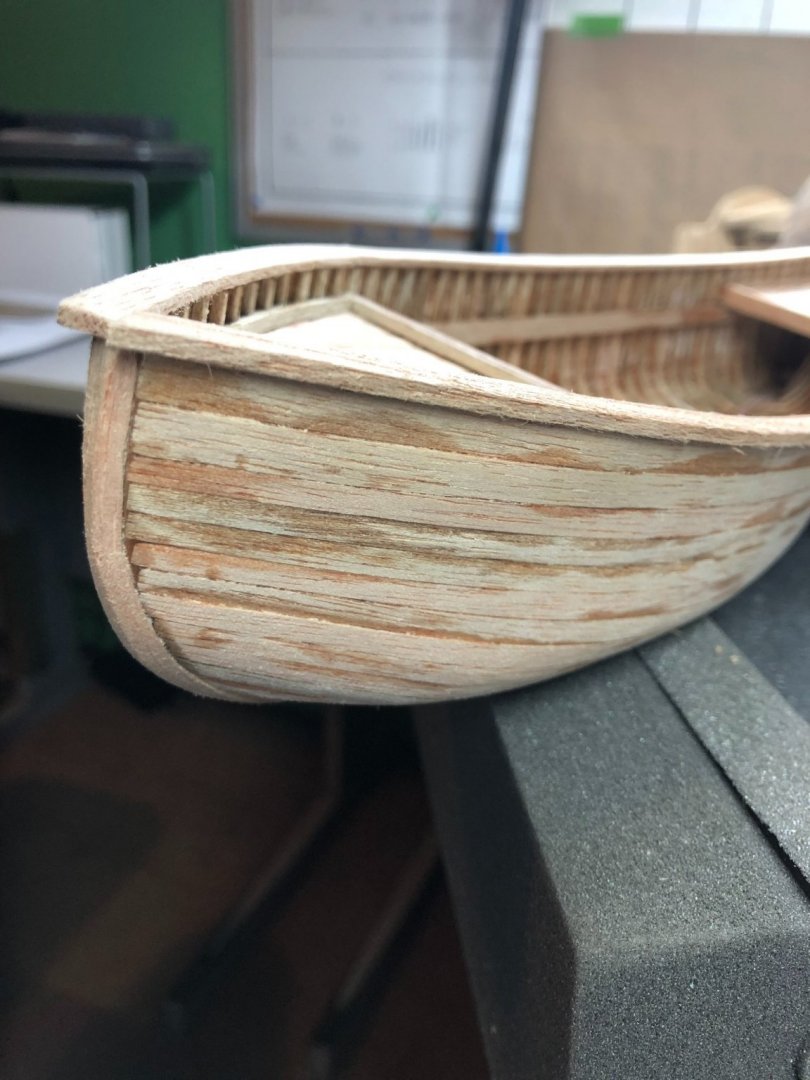
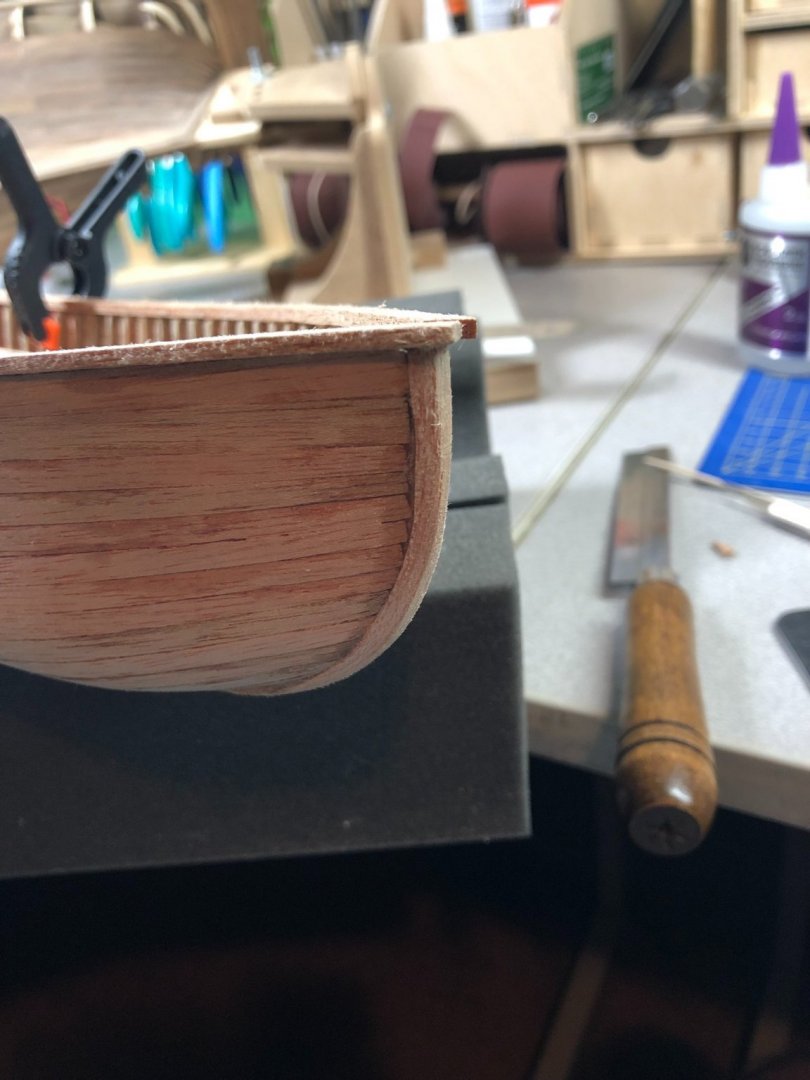
And the false keel is glued and sanded:
Cap rails present another challenge. One of the two that came in the kit was split and unusable and the other was way over bent. So, I soaked a spare plank and the remaining cap rail. The rail that started out as a straight plank was soaked for about an hour in hot water, wrapped in paper towels and micowaved for about 30 seconds. It was fairly easy to bend from there:
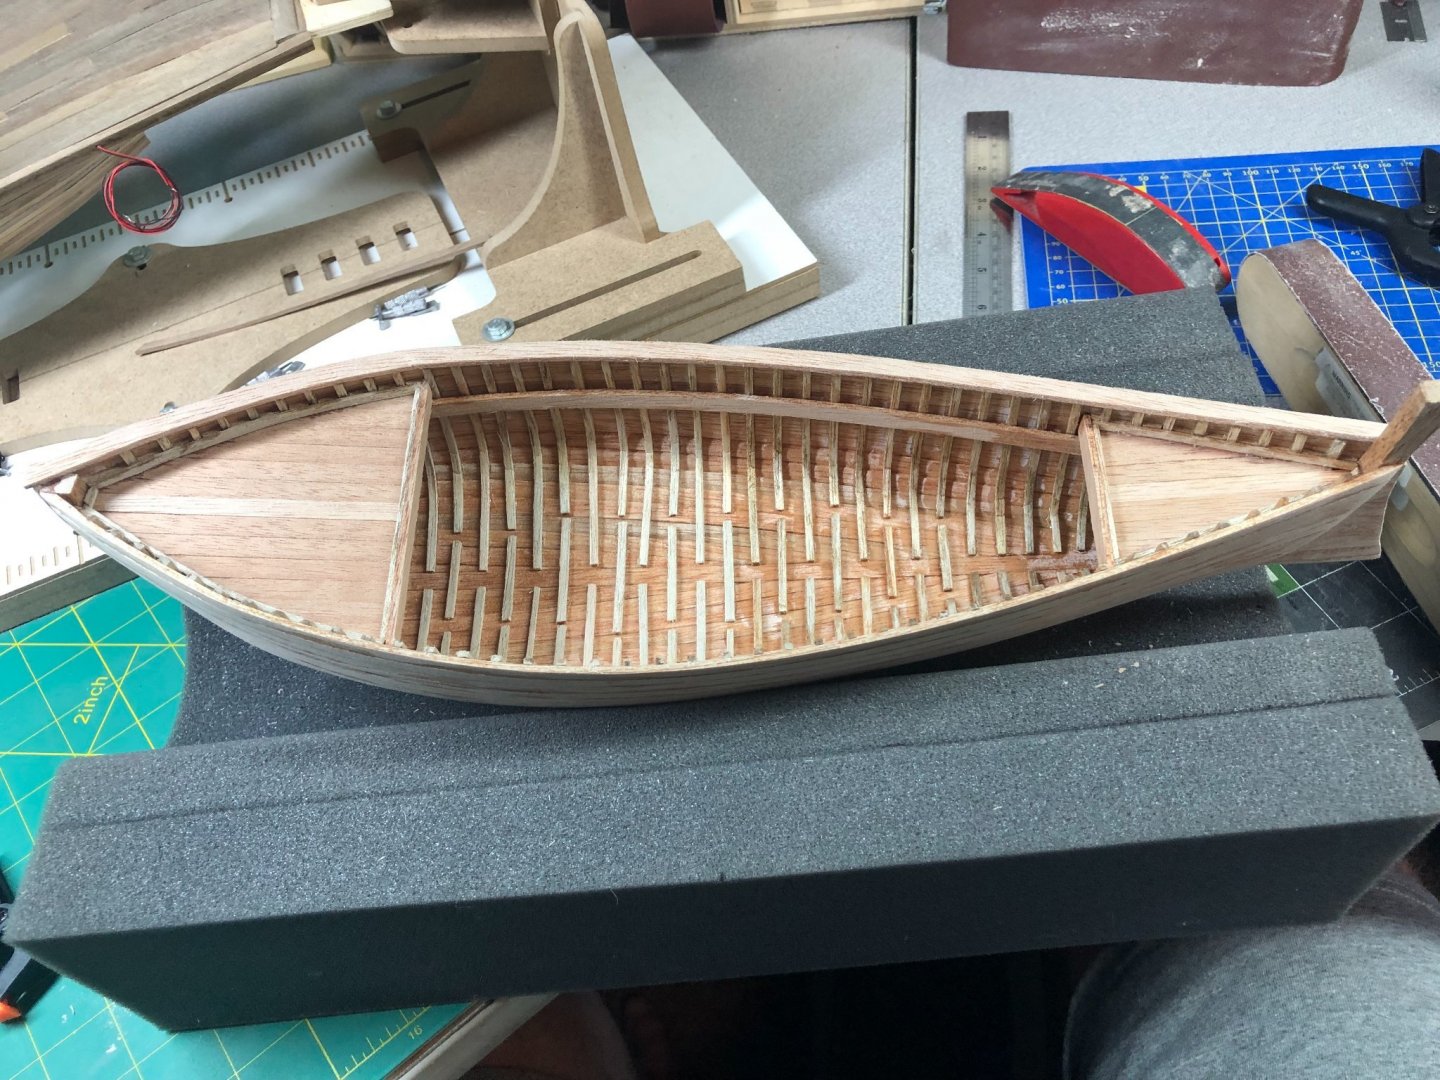
The other rail had to be straighten... again I soaked for about an hour and then slowly straightened out to the proper shape. I tack glued the stern part in place and now am letting it dry before gluing it down:
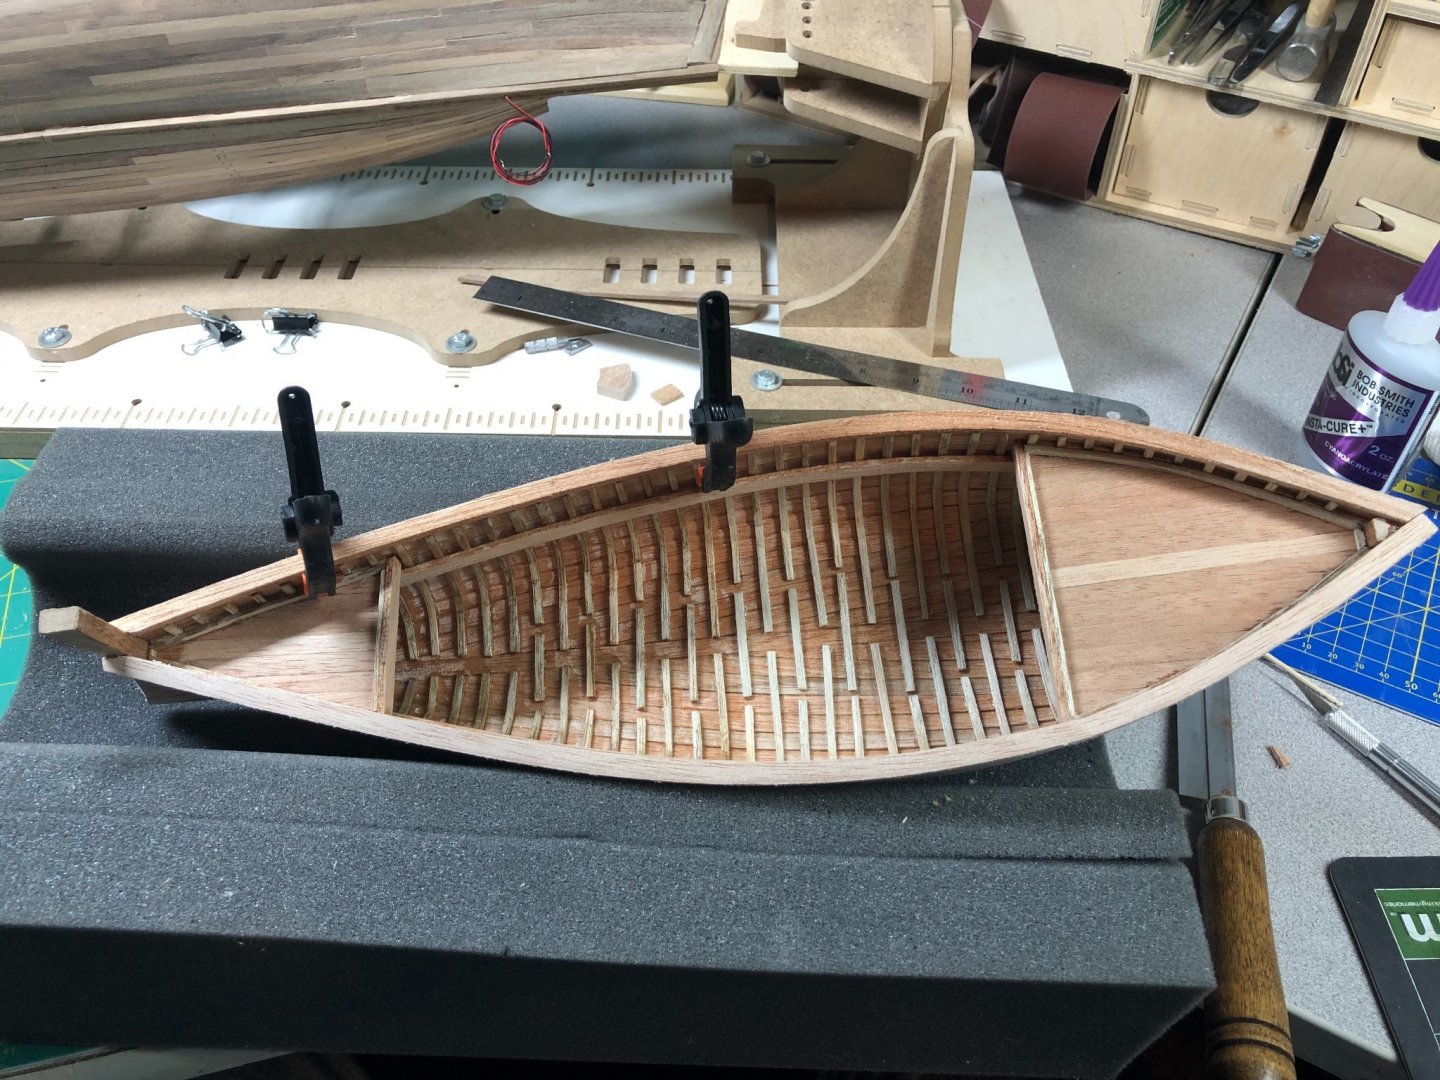
Once in place, a little sanding and trimming and the cap rails will be done!
I think I'll be using Amber Shellac for the finish... some light sanding on the hull and possibly some steel wool to finish off the sanding and then I'll finish it, inside and out. I do plan to add some floor decking and the mast step... need to determine if I should do those item first or finish it first... Comments??
And then on to some decking and the mast!
Lyle
"The only thing that stays the same is the constant state of change"
Looking very good, mate. Real progress!
Steven
Elen sila lumenn' omentielvo - "A star shines on the hour of our meeting"
Lyle,
That is really looking good. You are well on track to be done on time. I hope mine ends up looking as good as yours.
Chuck Seiler
San Diego Ship Modelers Guild
Nautical Research Guild
Posted July 12
Half the ribs done:
A month and five days until dad's birthday! Gotta get busy!
Summer makes it harder to work... boating, gardening, etc!
Still think I can make it without having to rush.
Lyle
"The only thing that stays the same is the constant state of change"
Lots accomplished over the last few days...
I finished the ribs. I found it to be very difficult to bend some of the ribs in the sharper corners near the bow and stern. Since they will be covered by the decks, I gave them less worry below the deck line. Overall, a tedious task working with 1/8 x1/8 wood:
The inner wales were next. I let the pieces soak in hot water for about an hour before bending them by hand... no heat. The bend was not sharp and actually shaped easily. I used clamps and made sure the wales were in the right position along the entire length of the hull. Once the inner wales were in place and still wet, I clamped them down ensuring that they touched each rib at the top and bottom. Once dried, I used the the thin CA glue and glued them in place while still clamped, resulting:
The cutwater was a bit of a conundrum for me. There are no real instructions that were helpful on this part of the build. Fortunately, I found a couple of pictures and build logs that gave me a good view and idea of what I needed to make. It started with several 1/4 x 1/4 wood pieces glued together:
I laid the bow down and used my pencil to trace the curvature of the bow. The pieces were glued together to match the curve. I used my scroll saw and cut the shape out and then cut the leading edge. Finally, I sanded and glued it onto the bow:
Still need to sand the cutwater at the keel flat to properly receive the false keel but I am really pleased with the outcome!
Next, deck beams were installed at the bow and stern:
And the decking begins... simple but a little work to cut around the ribs:
Finally:
Some sanding on the end to even up the deck ends... I decided that I wanted a more finished look. So, I cut pieces to put between the ribs and then placed a piece of trim around the hull. Also added an end cap to the deck:
A better look to me... what do they call it........ artistic freedoms! Hopefully, not too far off base!
The fore deck, cap rails and the false keel are next!
Lyle
"The only thing that stays the same is the constant state of change"
Posted July 18Beautiful work, mate!
Steven
Elen sila lumenn' omentielvo - "A star shines on the hour of our meeting"
Posted July 18Wow! Significant progress. Looking good. I find the cutwater very interesting. It seems quite large for such a small boat. I guess you might need it to ram rival fishermen.
Between your progress and Louie d F's start on the NEF, I am embarrassed at my lack of productivity. I have been dawdling with the Jesus Boat, some movement, but I need to get in gear and go public. Build log by Saturday.
Chuck Seiler
San Diego Ship Modelers Guild
Nautical Research Guild
Posted July 18Looking good...Moab
Posted July 18Yeah… I wasn’t liking the look of it either and I have altered it:On 7/18/2021 at 4:13 PM, Chuck Seiler said:
Wow! Significant progress. Looking good. I find the cutwater very interesting. It seems quite large for such a small boat. I guess you might need it to ram rival fishermen.

Looks better now!
More progress today…
I’ll post another log later or tomorrow.
Lyle
"The only thing that stays the same is the constant state of change"
Posted July 18
Fore deck work was next on the agenda... built similar to the aft deck:
And then trimmed up just like the aft deck:
Decks are done!
I really didn't like the look of the cutwater... a little reshaping and it looks much better:
The false keel piece had to be soaked and bent several times until I got the shape right without breaking it!
Once glued into place. I beveled it at the bow to match up with the planks:
And the false keel is glued and sanded:
Cap rails present another challenge. One of the two that came in the kit was split and unusable and the other was way over bent. So, I soaked a spare plank and the remaining cap rail. The rail that started out as a straight plank was soaked for about an hour in hot water, wrapped in paper towels and micowaved for about 30 seconds. It was fairly easy to bend from there:
The other rail had to be straighten... again I soaked for about an hour and then slowly straightened out to the proper shape. I tack glued the stern part in place and now am letting it dry before gluing it down:
Once in place, a little sanding and trimming and the cap rails will be done!
I think I'll be using Amber Shellac for the finish... some light sanding on the hull and possibly some steel wool to finish off the sanding and then I'll finish it, inside and out. I do plan to add some floor decking and the mast step... need to determine if I should do those item first or finish it first... Comments??
And then on to some decking and the mast!
Lyle
"The only thing that stays the same is the constant state of change"
Posted July 18Looking very good, mate. Real progress!
Steven
Elen sila lumenn' omentielvo - "A star shines on the hour of our meeting"
Lyle,
That is really looking good. You are well on track to be done on time. I hope mine ends up looking as good as yours.
Chuck Seiler
San Diego Ship Modelers Guild
Nautical Research Guild
POST #6
Posted July 18
I’m sure yours will be beautiful!
I just finished the cap rail… done for the night:
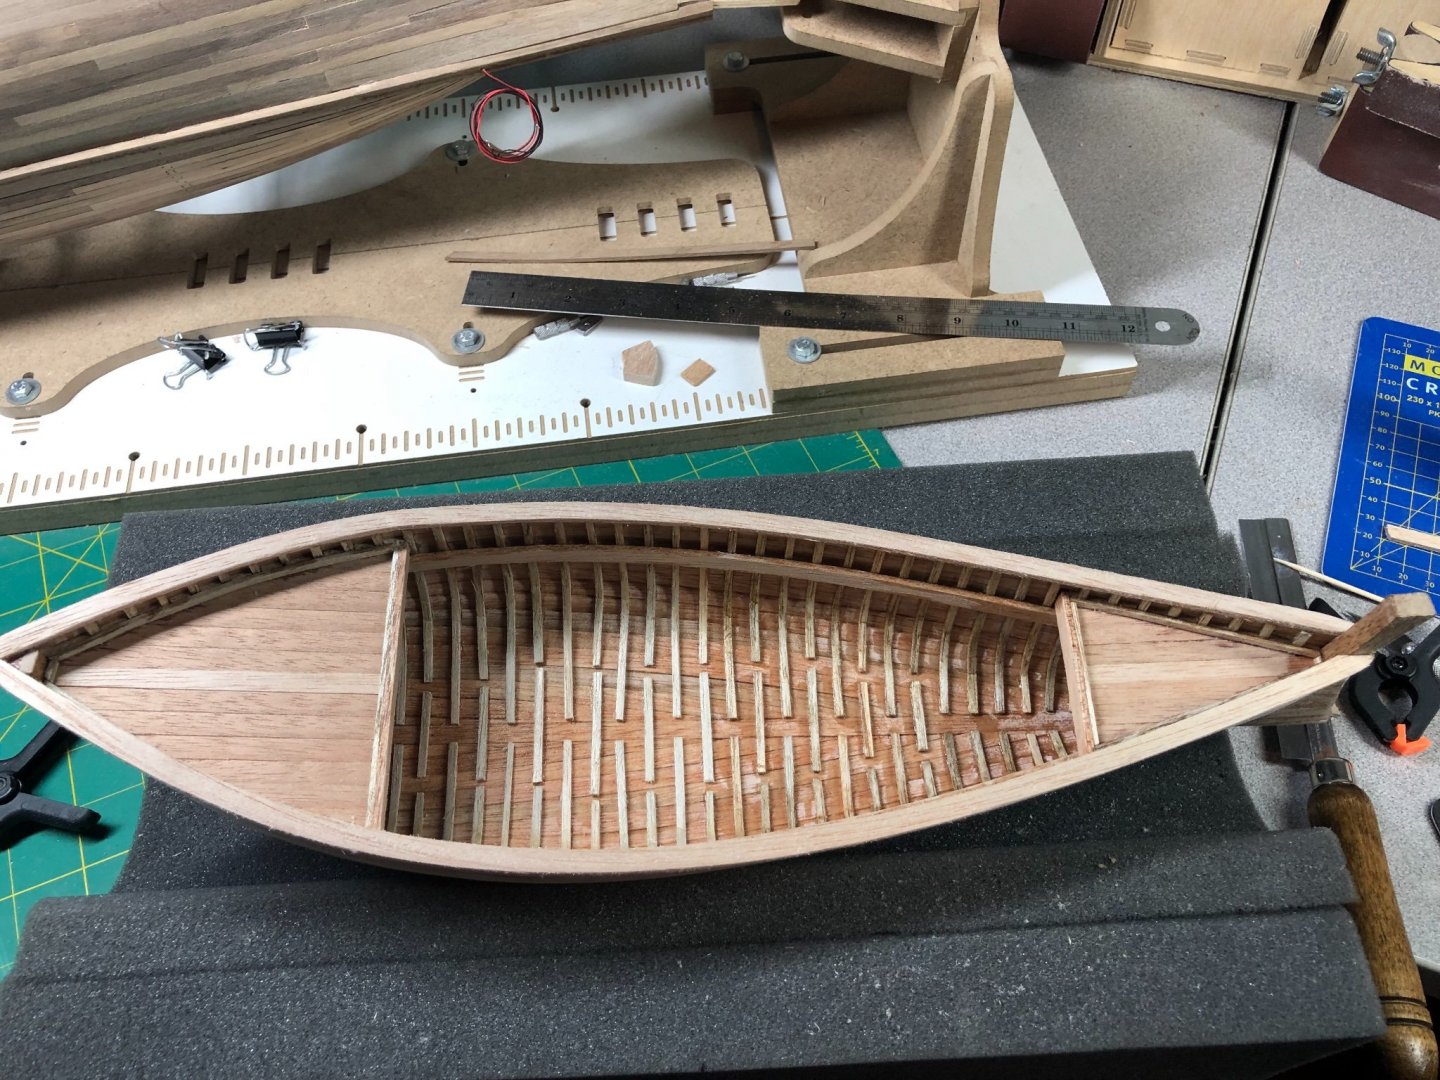
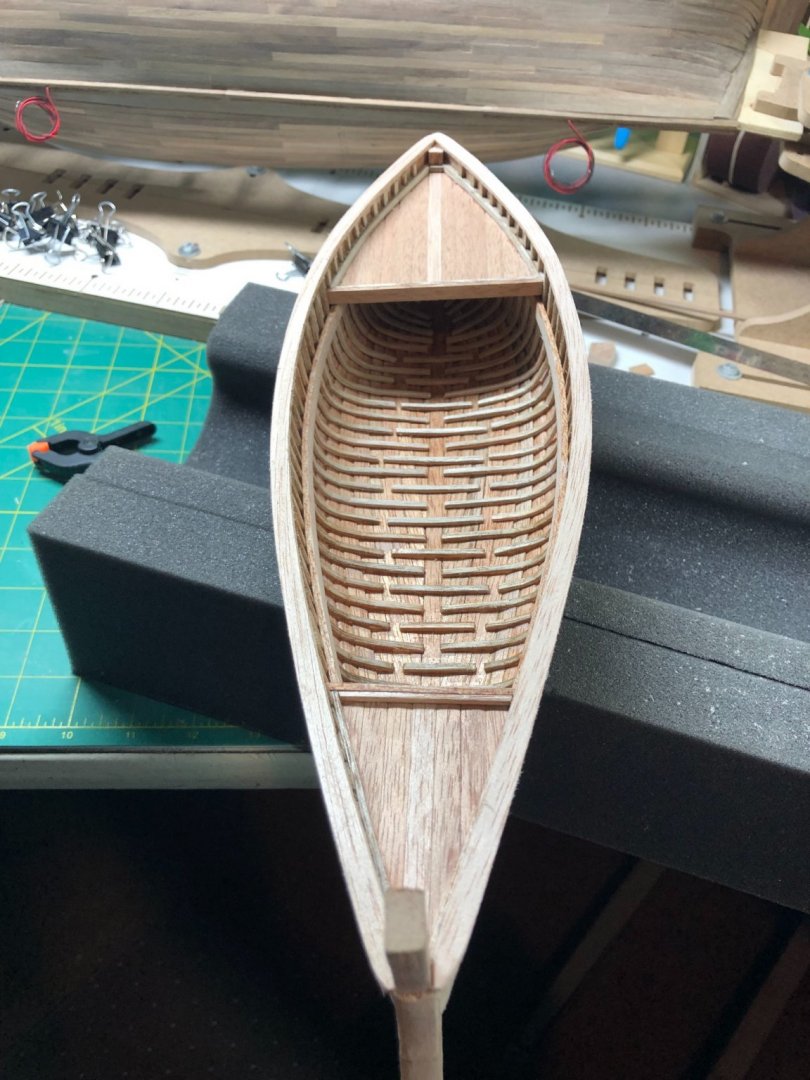
Posted July 18
Appreciate you checking in!
Lyle
"The only thing that stays the same is the constant state of change"
Appreciate you stopping in.
Lyle
"The only thing that stays the same is the constant state of change"
Posted July 22
Getting down to the nitty-gritty!
Stern cap installed:
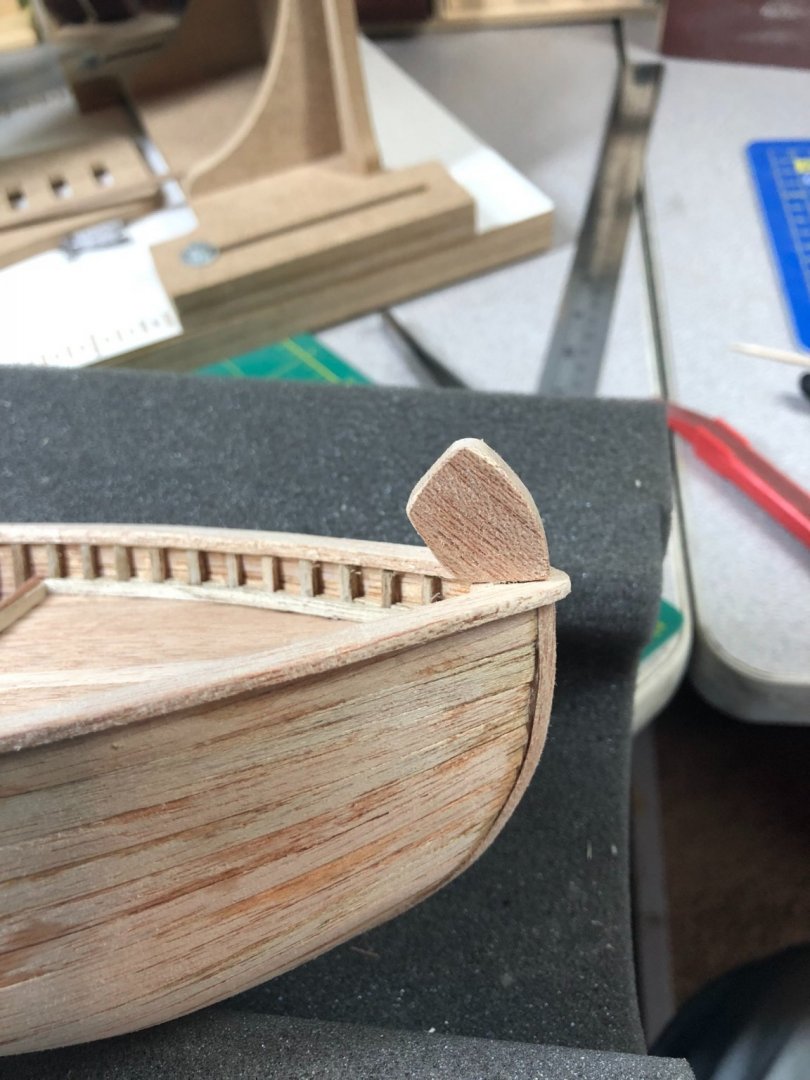
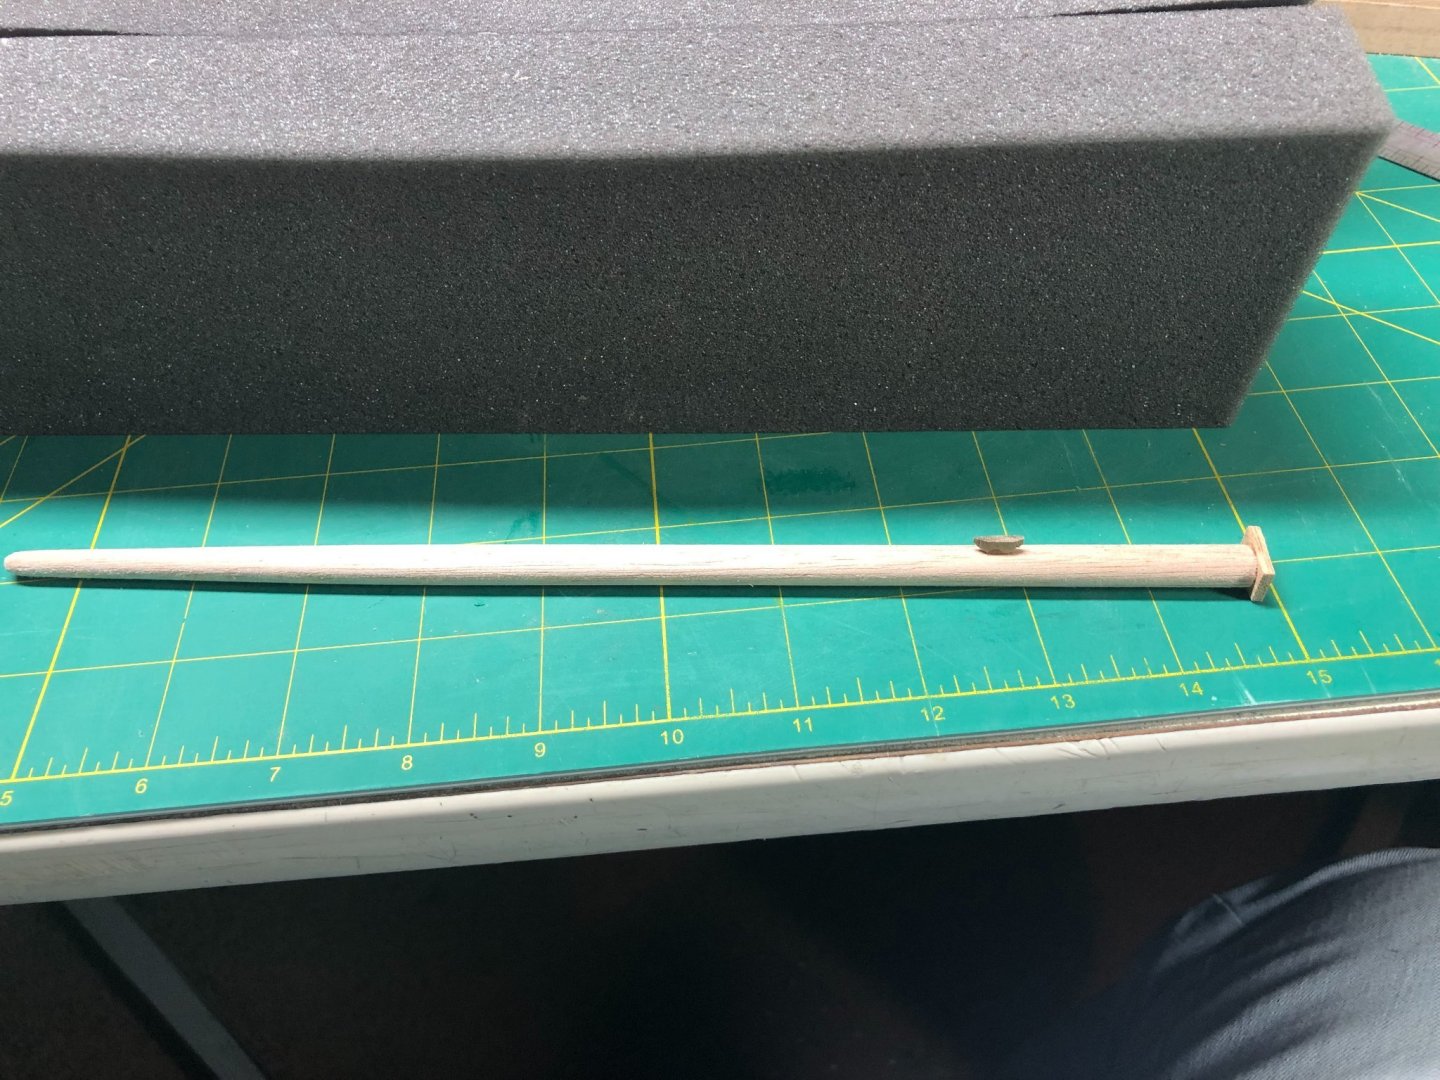
Mast work is pretty simple on this build. The mast was preformed and required nothing except sanding and a couple of holes drilled near the top to handle the rigging later on. I added a halyard cleat to the aft side of the mast. I made it out of walnut because every time I tried making it with the stock wood, it would split! After the fourth one... I switched wood!
I also added the mast step and used a piece of brass rod to ensure a solid joint:
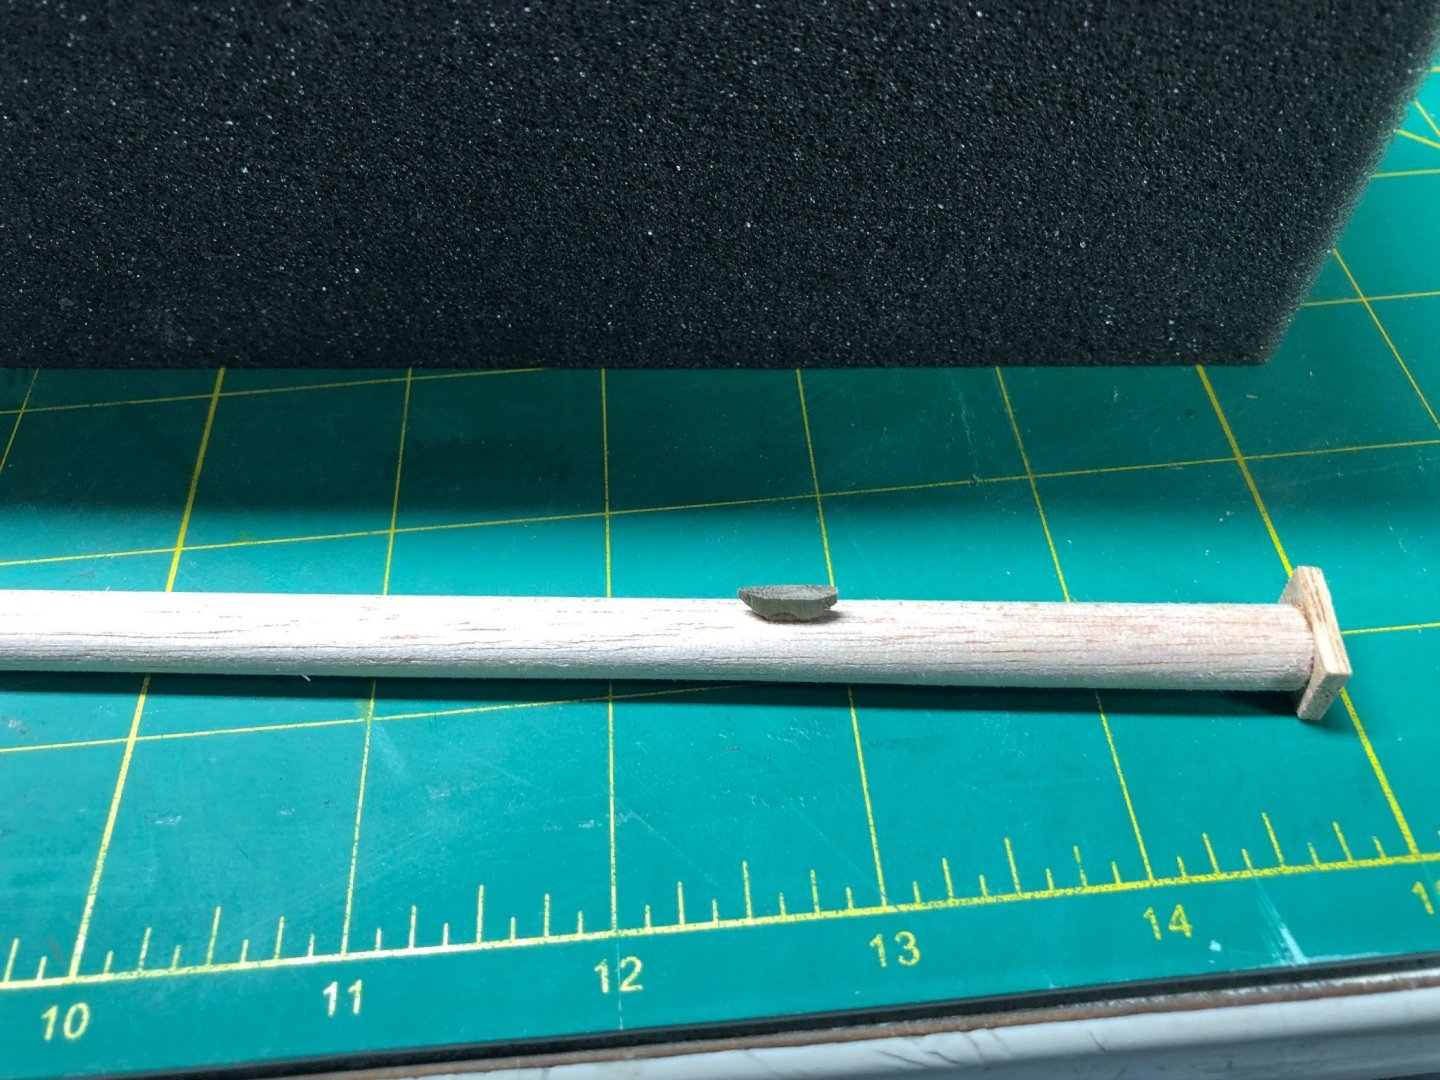
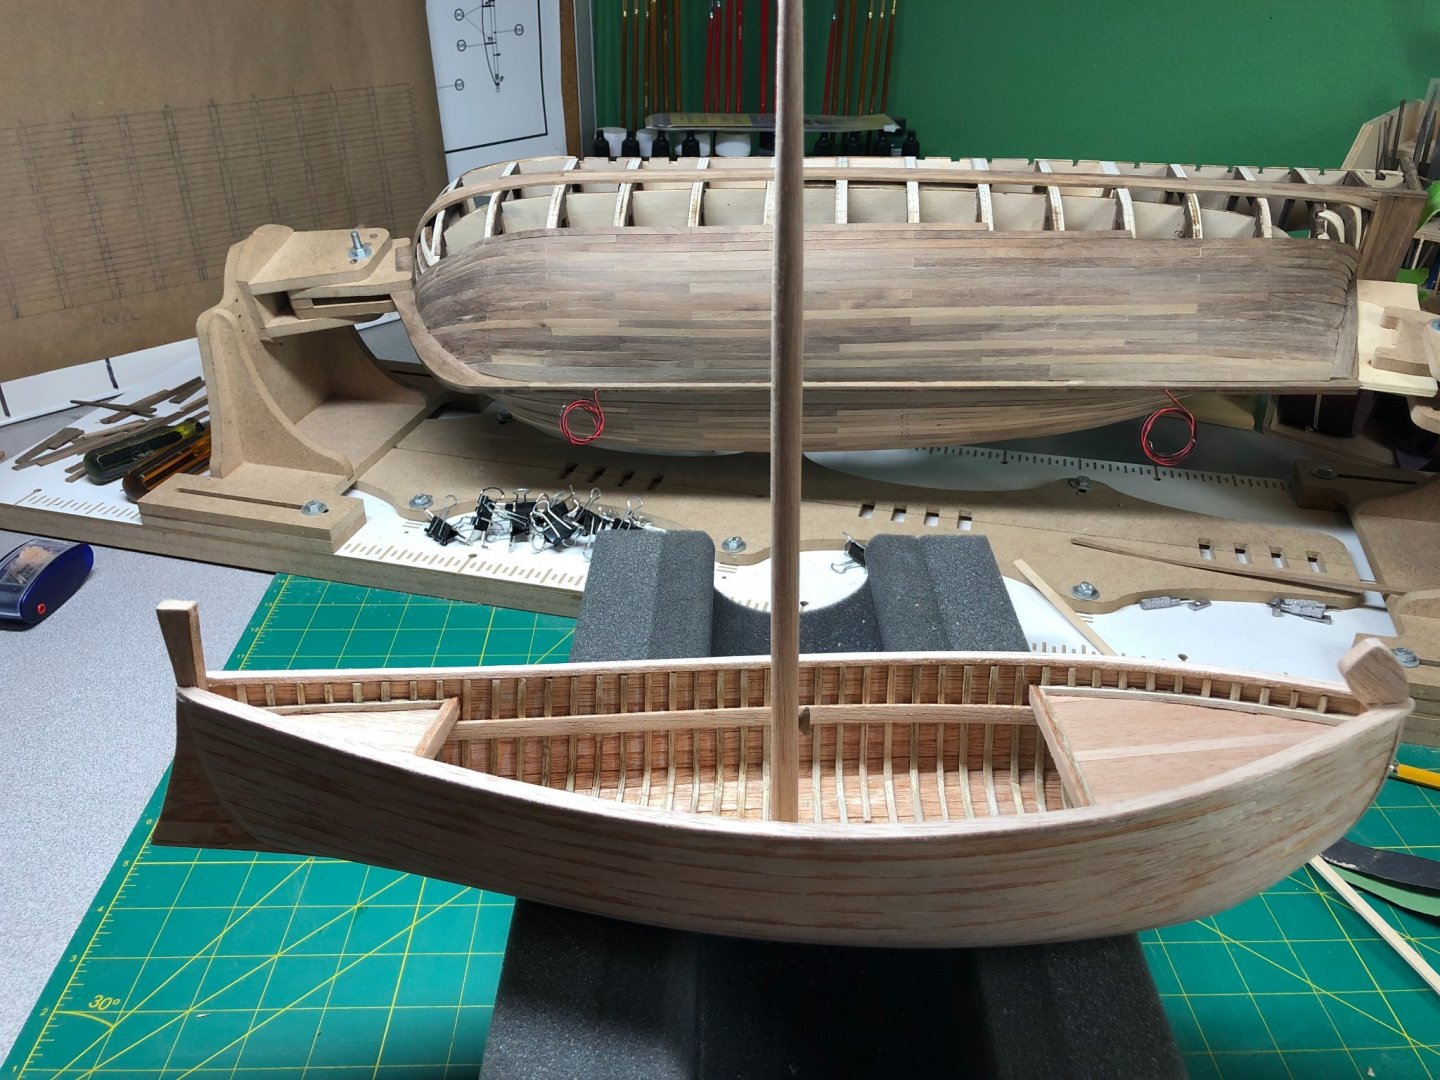
And then glued it into place. On my build, I measured forward 7.5 inches from the stern and cut away some of the partial ribs to make room for the mast step and mast. Double-checked the alignment on both axis:
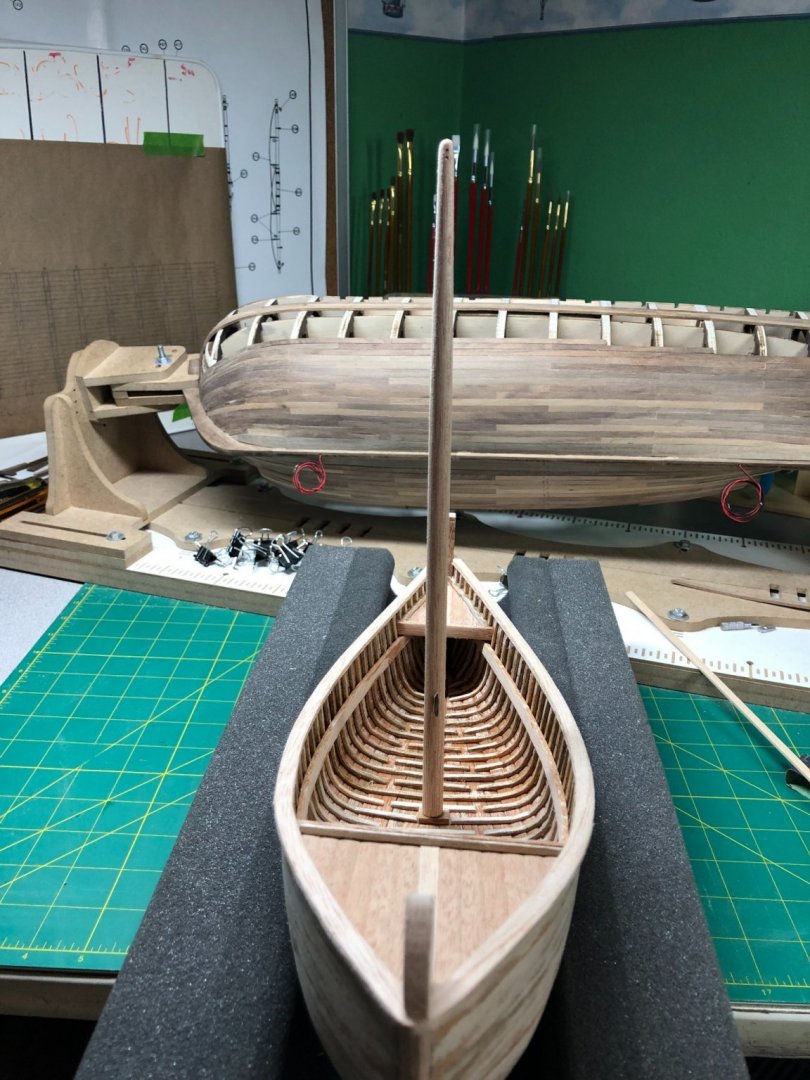
Any minor adjustments can be done with the rigging. But actually it's pretty well aligned.
Mast done!
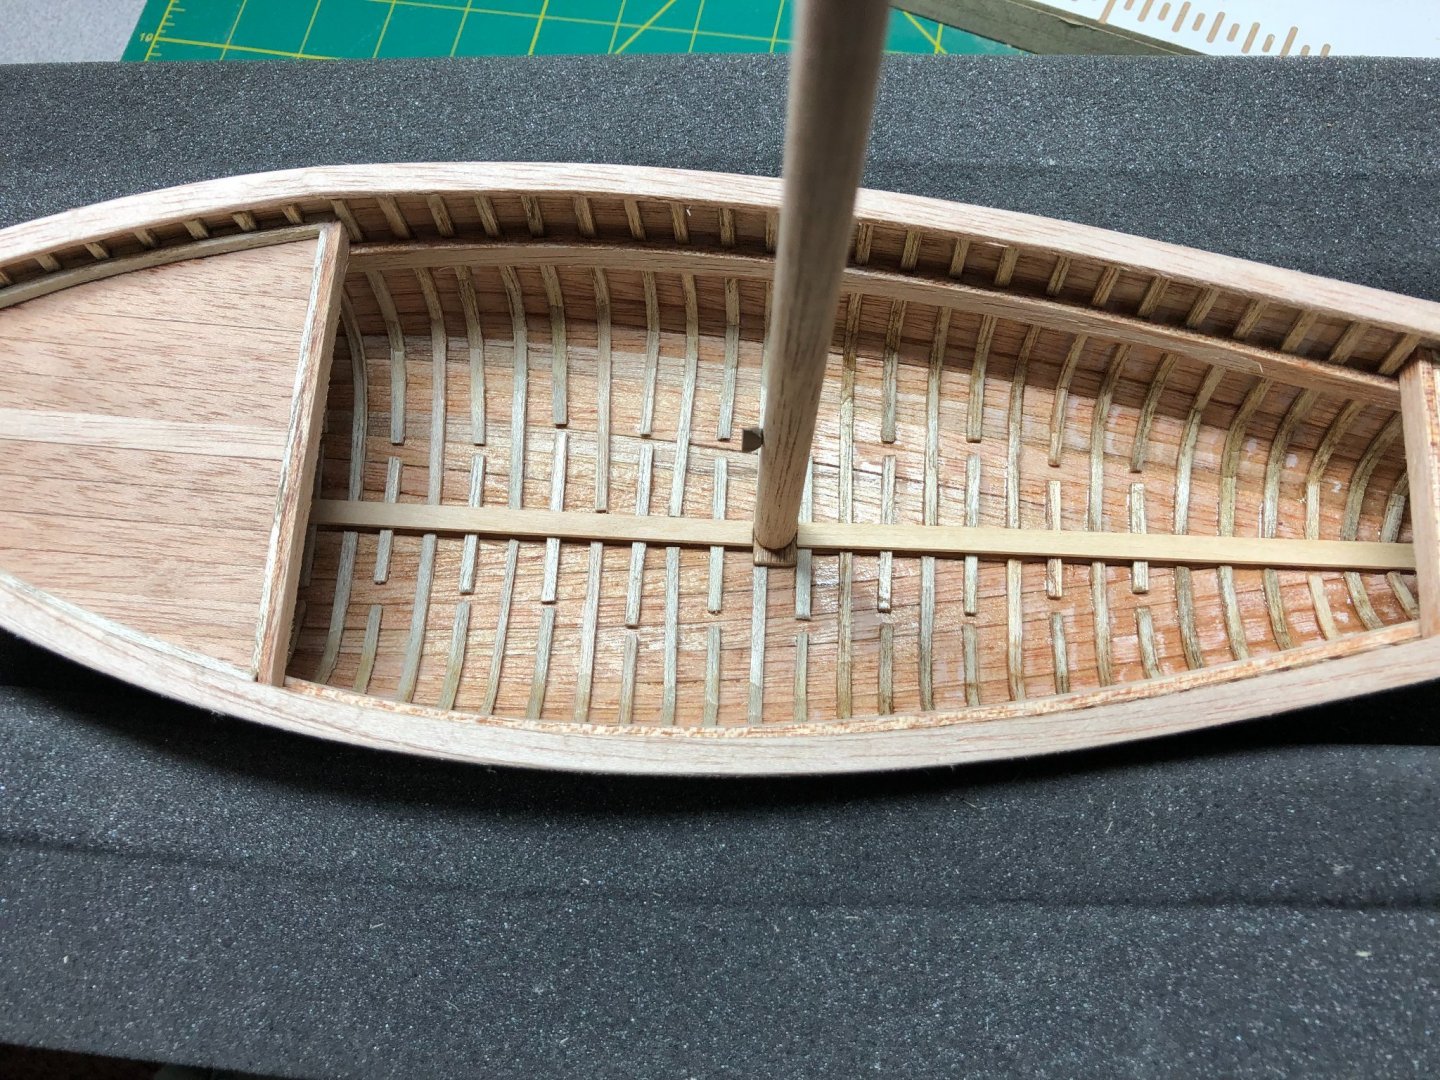
Looking at another build log awhile back, I saw some deck boards that I think would have been appropriate for the time period and the boat. I decided to use a similar pattern but maybe a bit more primitive than his work. If I can find it again, I'll give credit.
Used some Basswood just for a bit of change for the deck:
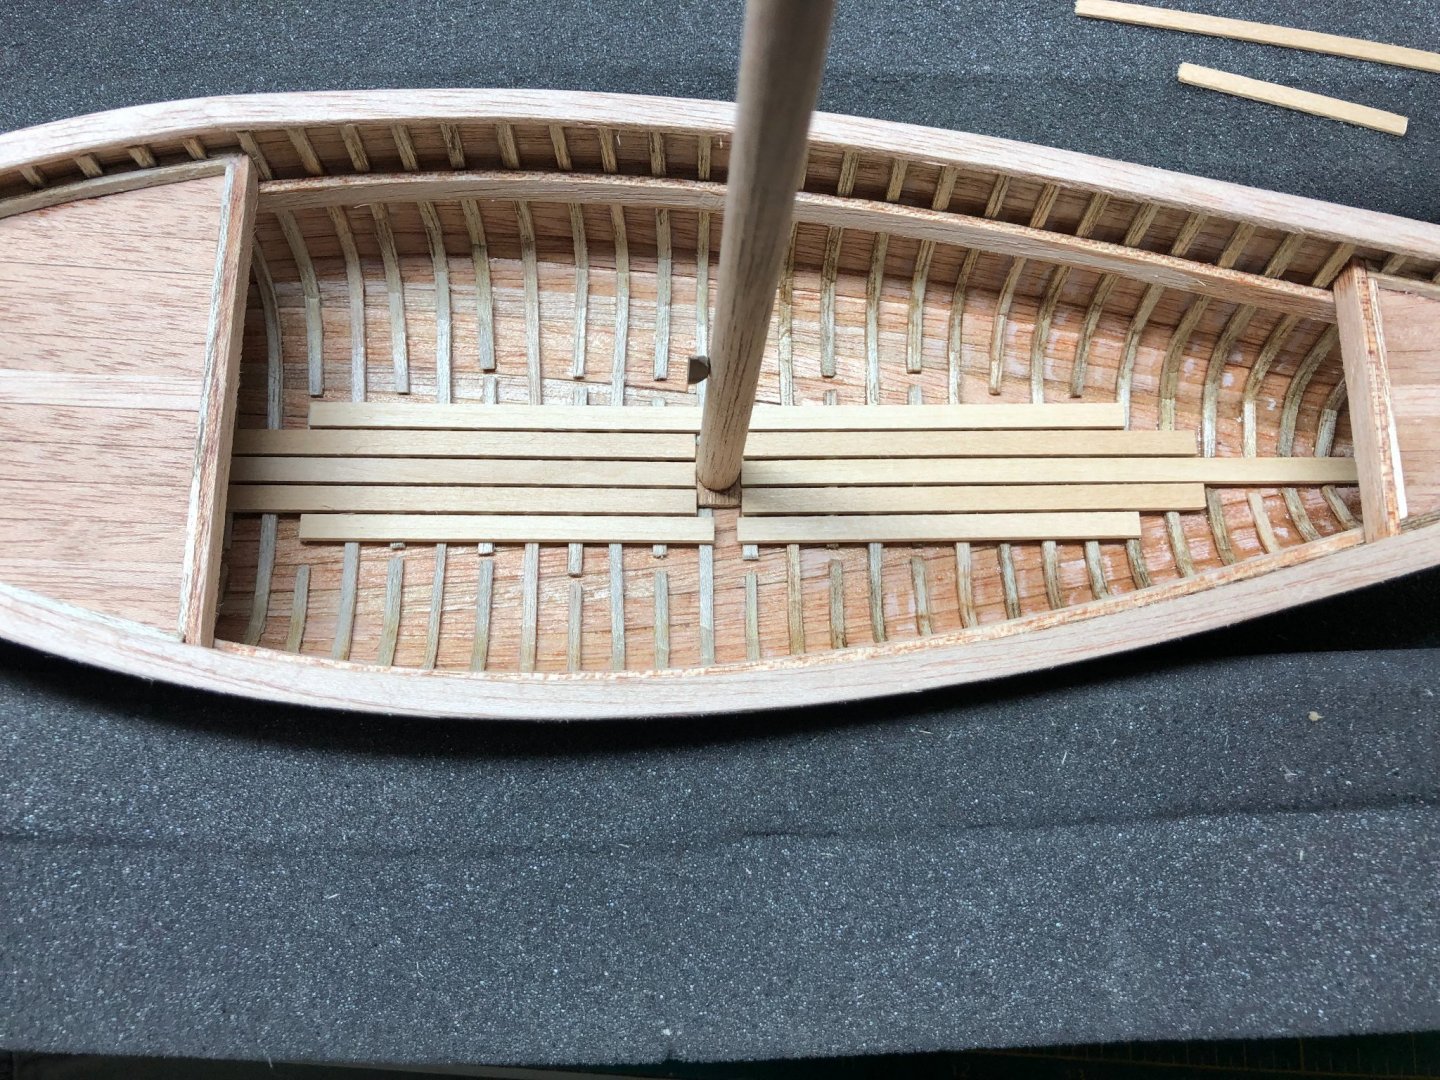
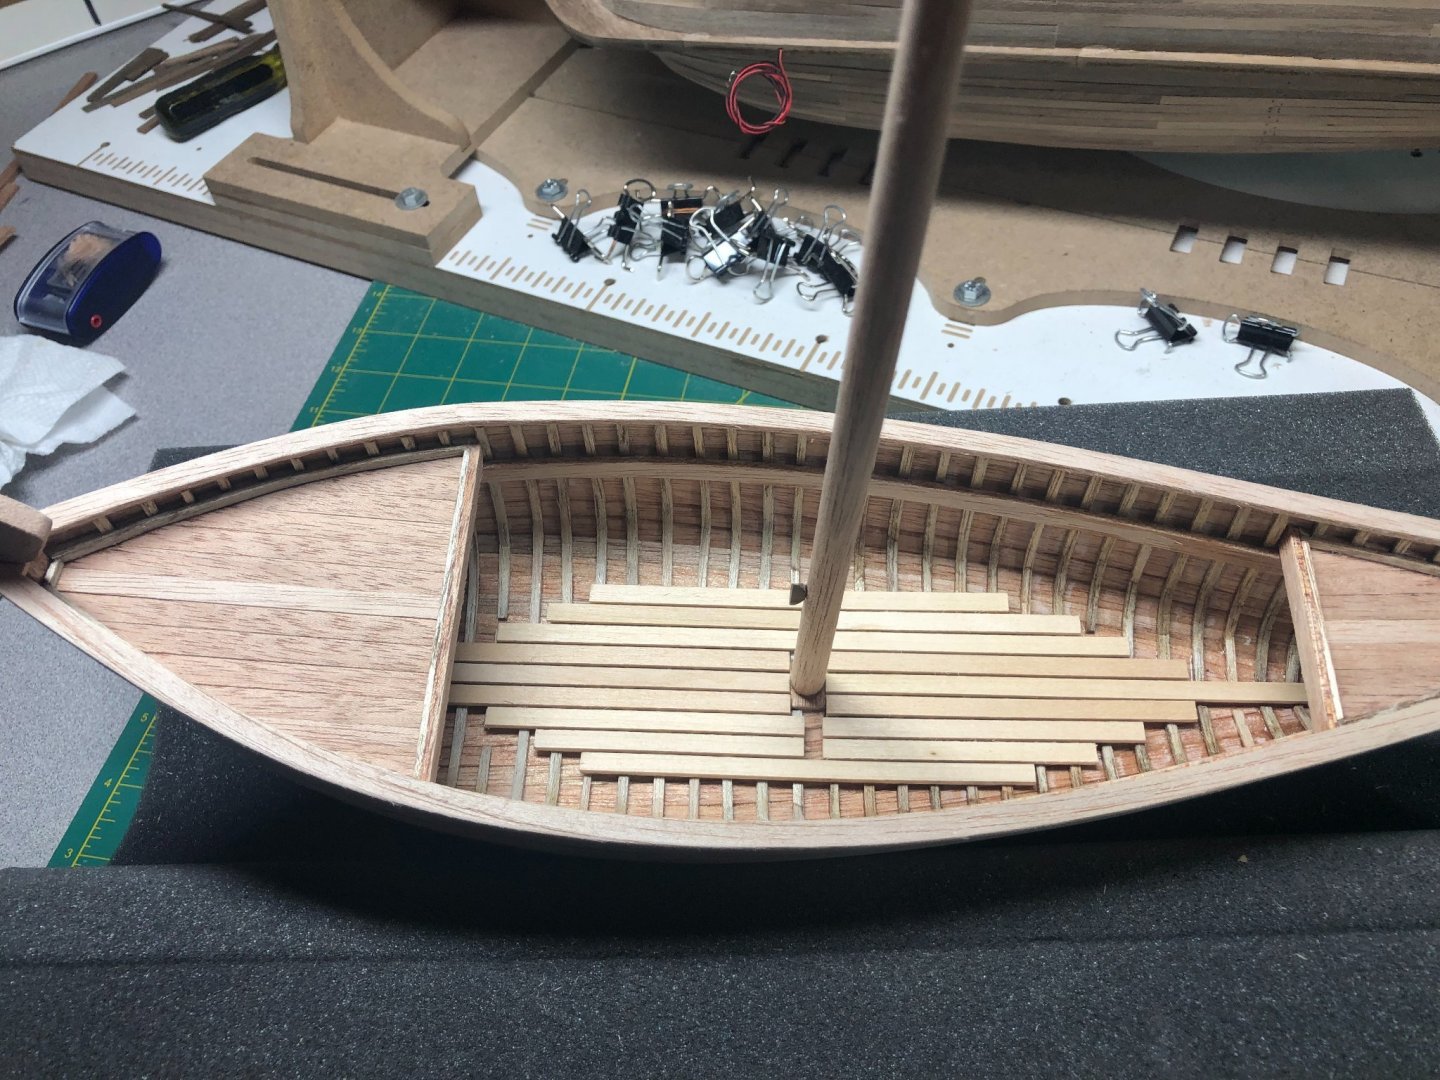
Time for a coating of the finish. I followed the advise of the kit designer and used Amber Shellac. I've never worked with it but found it to be really easy to use:
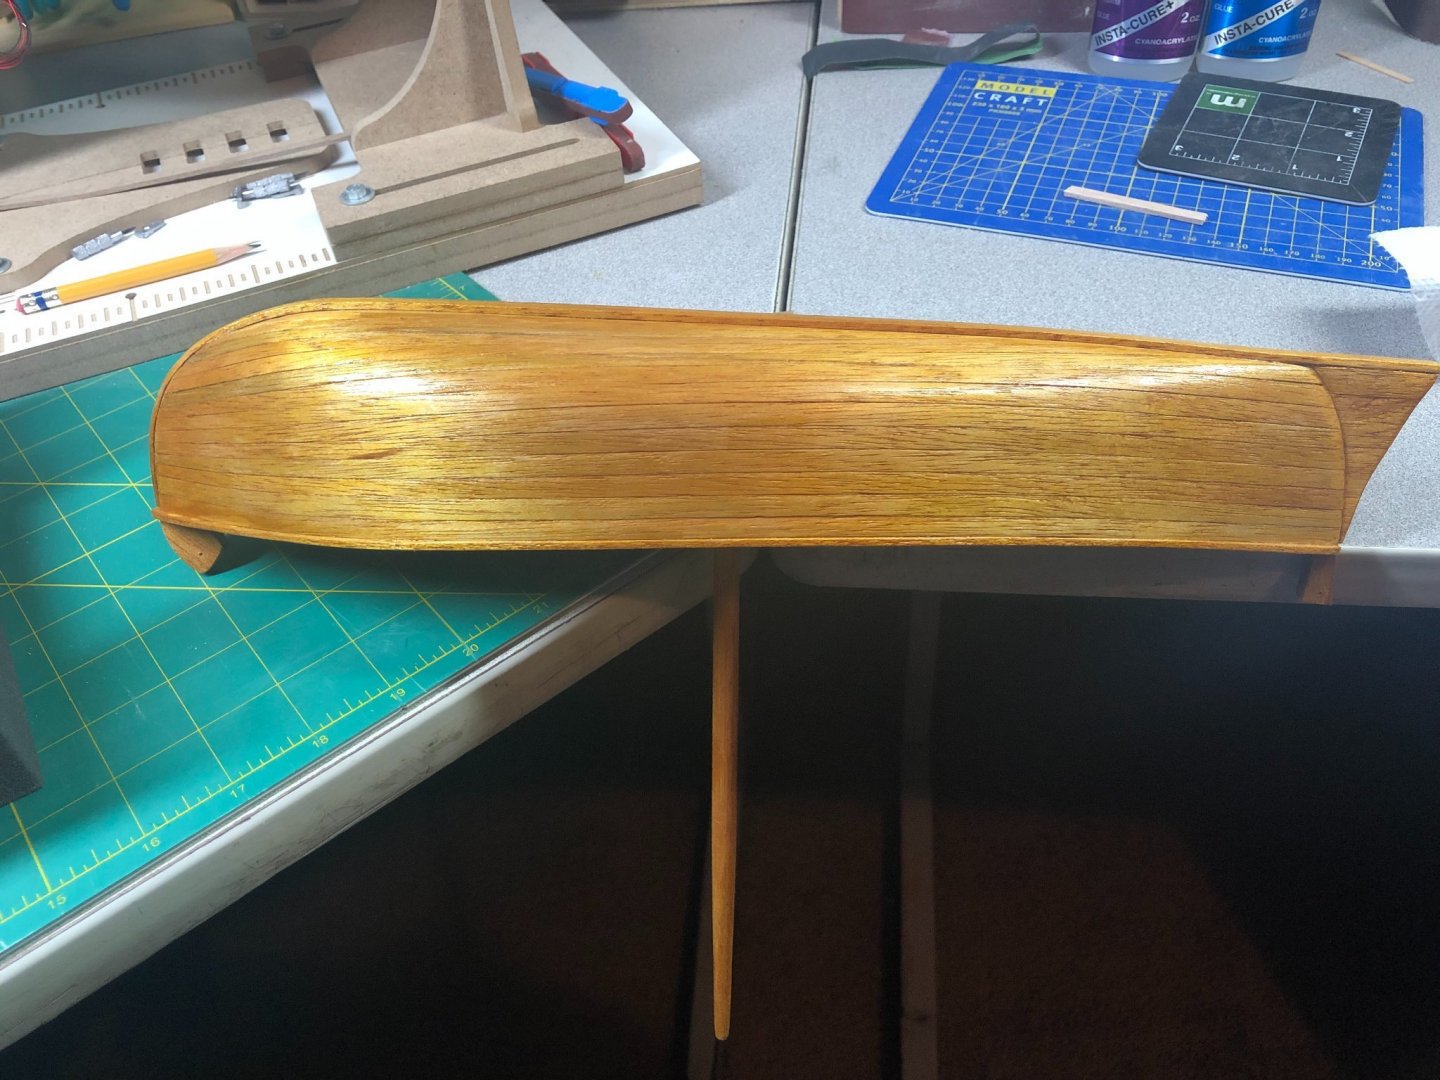
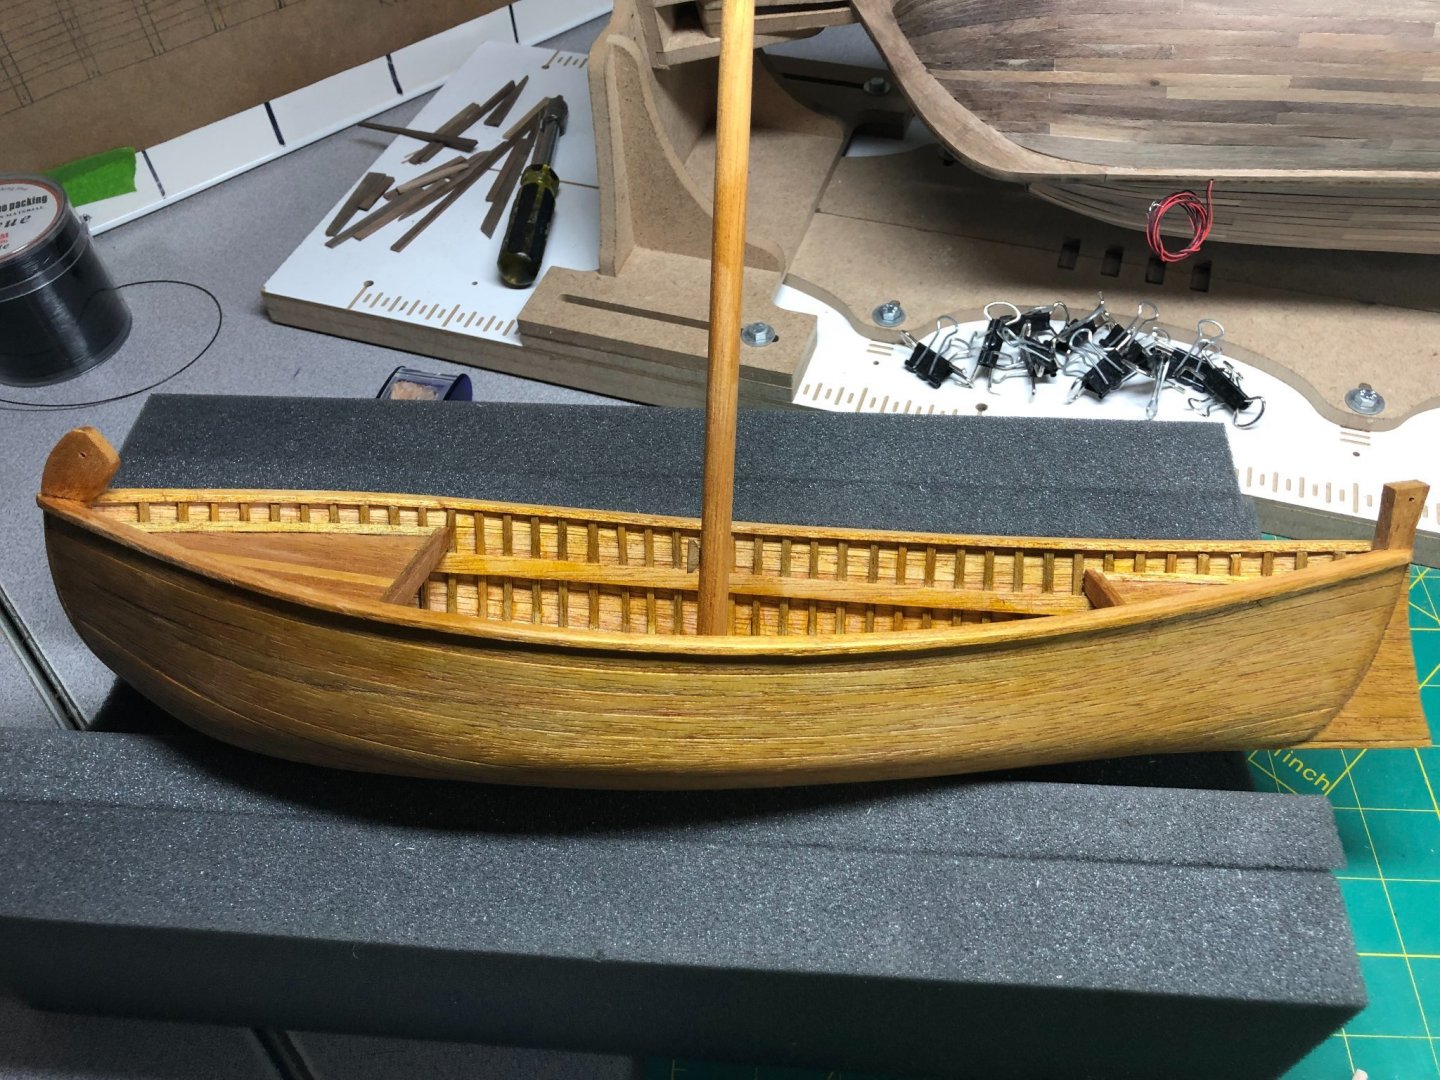
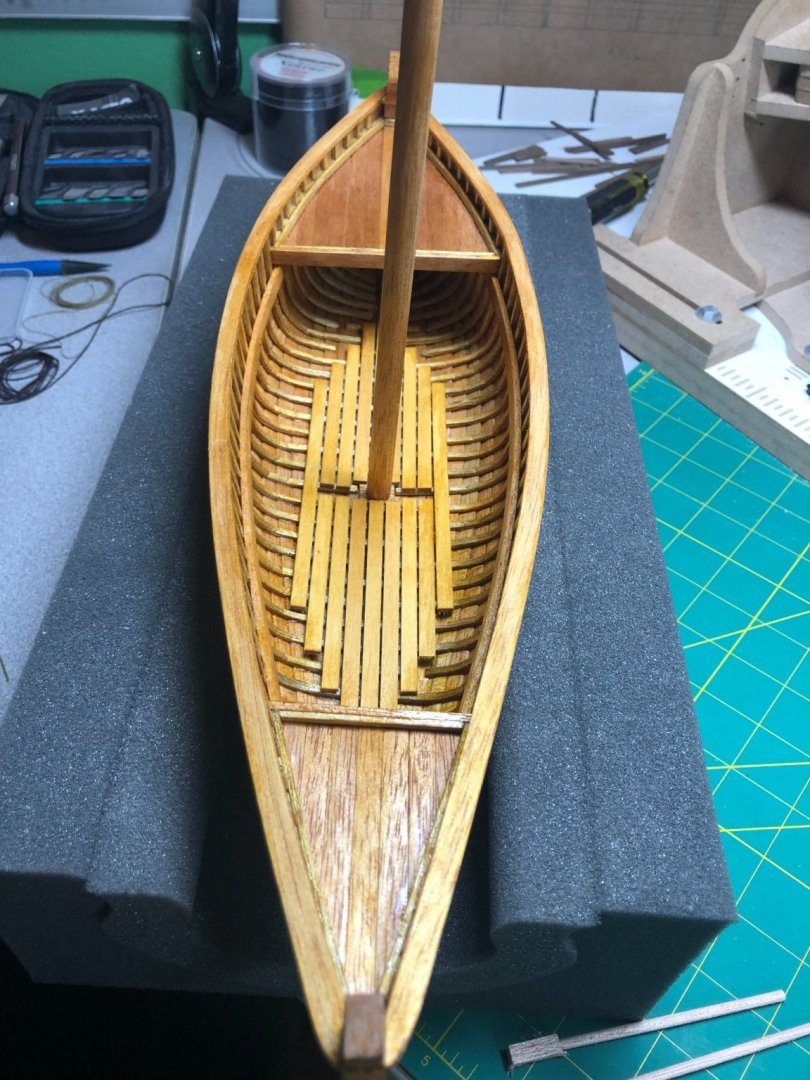
I like the look and after some rubbing with steel wool, I like it even more!
Now that the main structure is done, it's time to get busy on the bits and pieces:
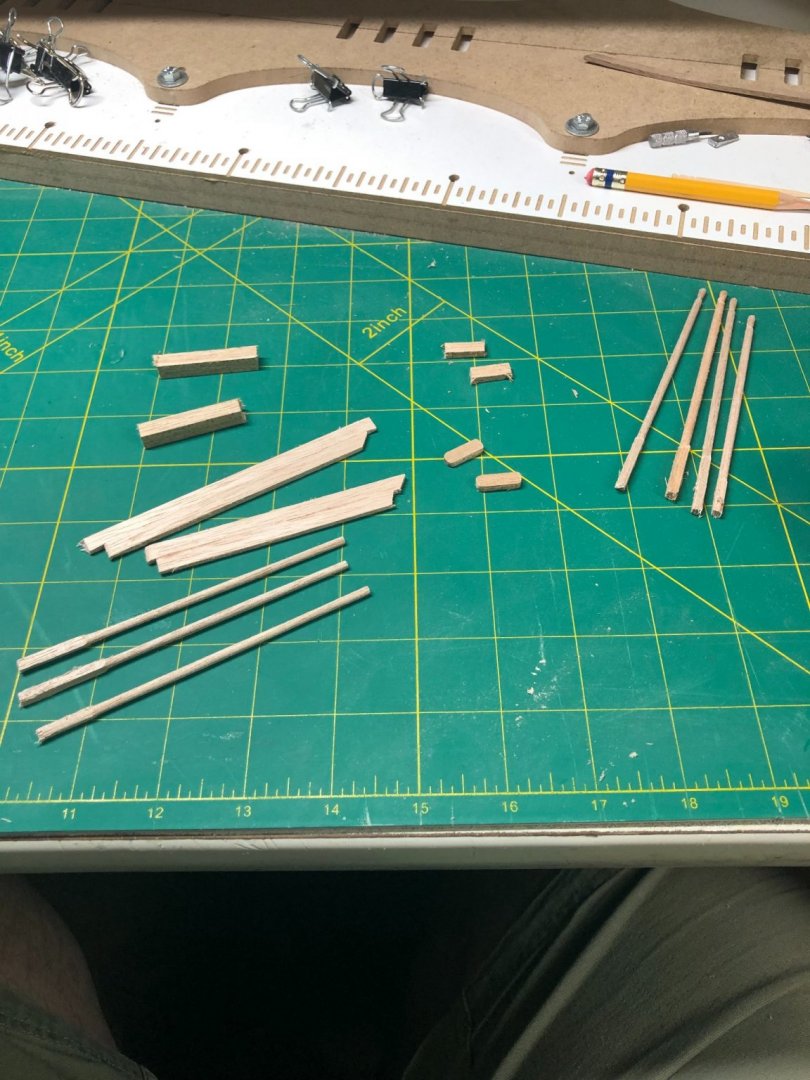
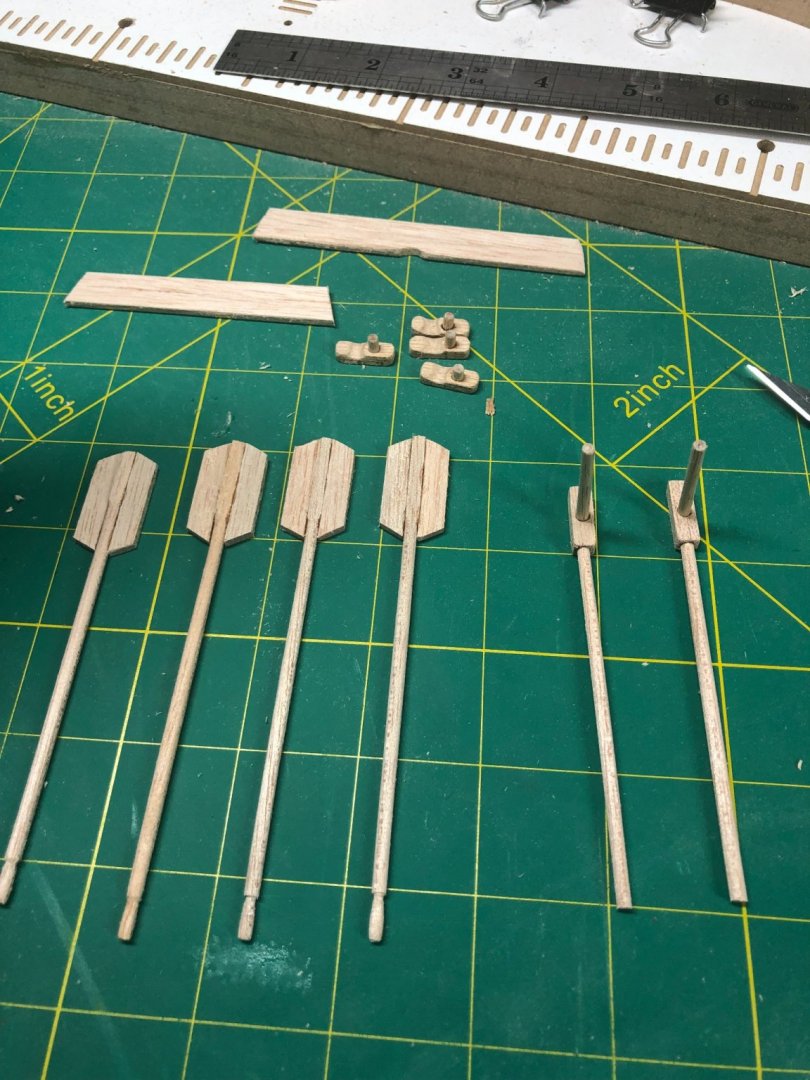
Pictured above are the oars, rudders, seats, oar locks and davit pieces. I started by sanding all the pieces and then went on to assembly the 4 oar locks:
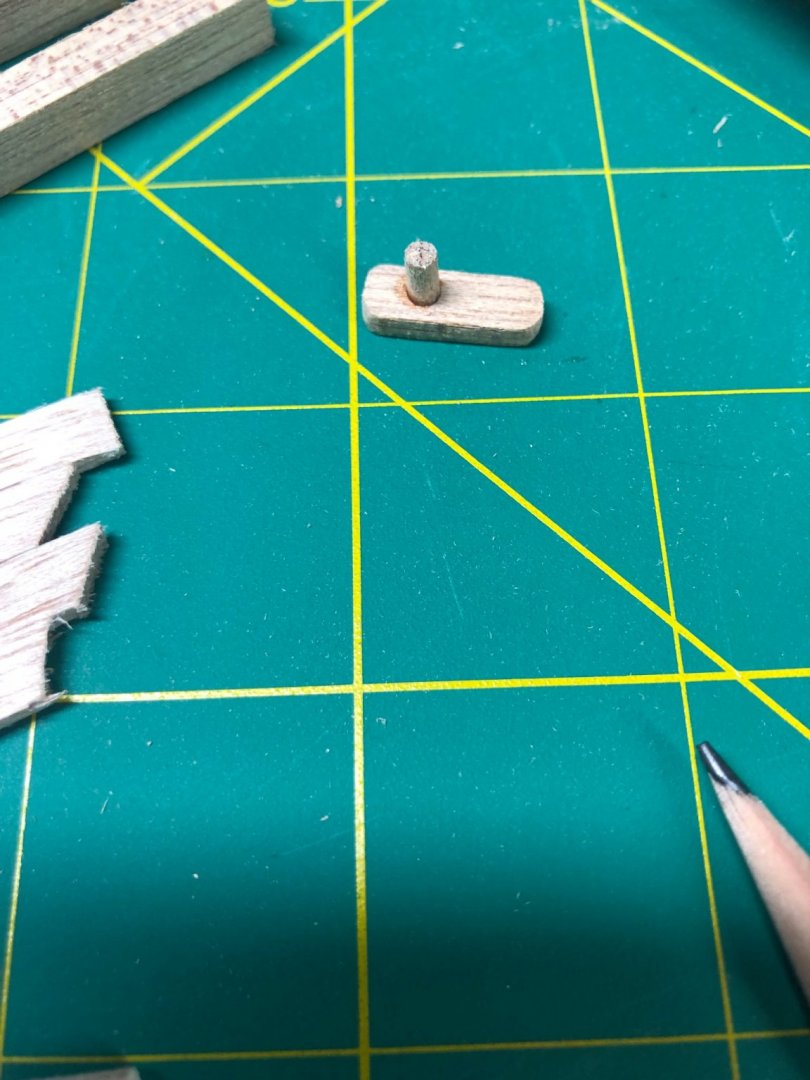
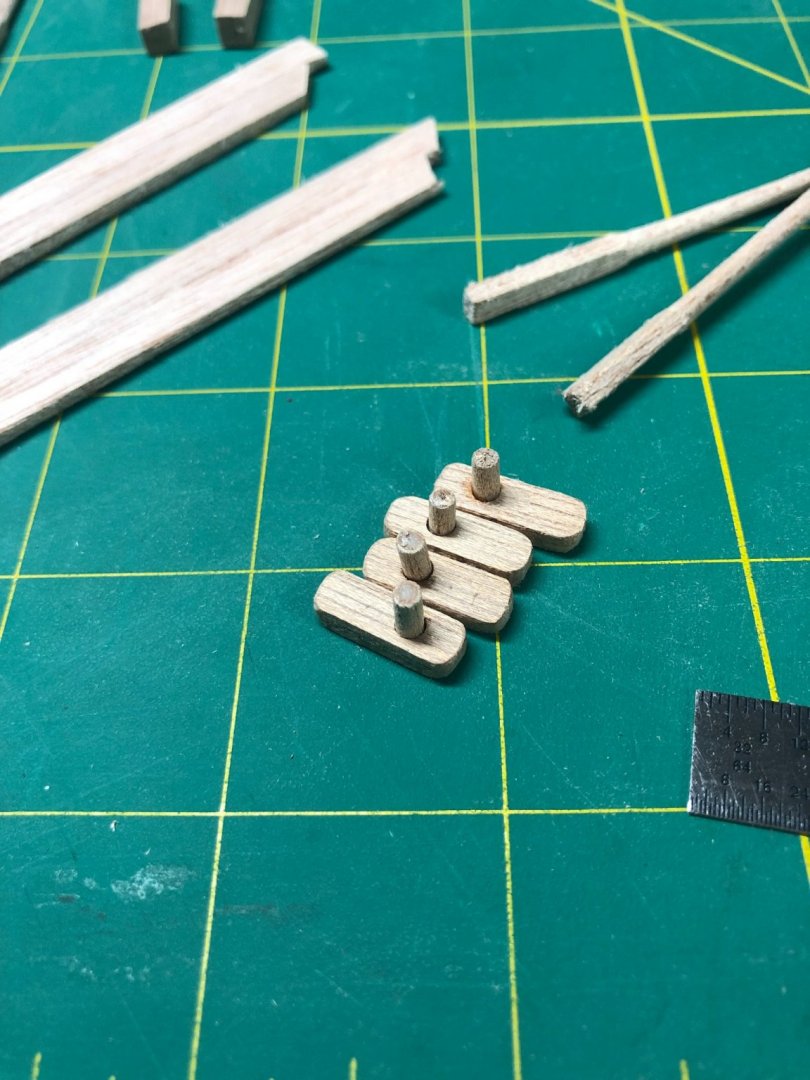
Some shaping with a round file and these will be ready for a little touch-up sanding and shellac and then be ready to install.
Work continues tomorrow and through the weekend!
Lyle
"The only thing that stays the same is the constant state of change"
Posted July 23
Looking ship shape.
Posted July 24
Lyle,
Looking good. I like the finish.
The excavation report indicates that there may have been floor boards/deck boards as you have modeled. Floor boards were not found with the wreck, but this is easily explained since they would have been salvaged before the boat was abandoned.
Chuck Seiler
San Diego Ship Modelers Guild
Nautical Research Guild
Posted July 24
There must have been an updated version of the book several years after the original was written.
I know the work to save the boat took several years.
Lyle
"The only thing that stays the same is the constant state of change"
As I mentioned in my log, there were 2 documents-the book and the report. The report can be downloaded from the net. From a quick glance, 75-90% of the material is the same, but each has some stuff the other does not.
Both the book and report were based on early findings. I wonder if anything has been published as a follow-up.
Chuck Seiler
San Diego Ship Modelers Guild
Nautical Research Guild
Posted July 24
Beautiful work, Lyle.
Steven
Elen sila lumenn' omentielvo - "A star shines on the hour of our meeting"
Posted July 18
Thanks Chuck! I’m pleased with look of the model.On 7/18/2021 at 8:10 PM, Chuck Seiler said:
Lyle,
That is really looking good. You are well on track to be done on time. I hope mine ends up looking as good as yours.
I’m sure yours will be beautiful!
I just finished the cap rail… done for the night:


Posted July 18
Thanks Steven.
Appreciate you checking in!
Lyle
"The only thing that stays the same is the constant state of change"
Posted July 18Thanks Moab!
Appreciate you stopping in.
Lyle
"The only thing that stays the same is the constant state of change"
Posted July 22
Getting down to the nitty-gritty!
Stern cap installed:
Mast work is pretty simple on this build. The mast was preformed and required nothing except sanding and a couple of holes drilled near the top to handle the rigging later on. I added a halyard cleat to the aft side of the mast. I made it out of walnut because every time I tried making it with the stock wood, it would split! After the fourth one... I switched wood!
I also added the mast step and used a piece of brass rod to ensure a solid joint:
And then glued it into place. On my build, I measured forward 7.5 inches from the stern and cut away some of the partial ribs to make room for the mast step and mast. Double-checked the alignment on both axis:
Any minor adjustments can be done with the rigging. But actually it's pretty well aligned.
Mast done!
Looking at another build log awhile back, I saw some deck boards that I think would have been appropriate for the time period and the boat. I decided to use a similar pattern but maybe a bit more primitive than his work. If I can find it again, I'll give credit.
Used some Basswood just for a bit of change for the deck:
Time for a coating of the finish. I followed the advise of the kit designer and used Amber Shellac. I've never worked with it but found it to be really easy to use:
I like the look and after some rubbing with steel wool, I like it even more!
Now that the main structure is done, it's time to get busy on the bits and pieces:
Pictured above are the oars, rudders, seats, oar locks and davit pieces. I started by sanding all the pieces and then went on to assembly the 4 oar locks:
Some shaping with a round file and these will be ready for a little touch-up sanding and shellac and then be ready to install.
Work continues tomorrow and through the weekend!
Lyle
"The only thing that stays the same is the constant state of change"
Posted July 23
Looking ship shape.
Posted July 24
Lyle,
Looking good. I like the finish.
The excavation report indicates that there may have been floor boards/deck boards as you have modeled. Floor boards were not found with the wreck, but this is easily explained since they would have been salvaged before the boat was abandoned.
Chuck Seiler
San Diego Ship Modelers Guild
Nautical Research Guild
Posted July 24
Interesting that the book I read did not mention floor boards.On 7/24/2021 at 9:49 AM, Chuck Seiler said:
Lyle,
Looking good. I like the finish.
The excavation report indicates that there may have been floor boards/deck boards as you have modeled. Floor boards were not found with the wreck, but this is easily explained since they would have been salvaged before the boat was abandoned.
Expand
There must have been an updated version of the book several years after the original was written.
I know the work to save the boat took several years.
Lyle
"The only thing that stays the same is the constant state of change"
Posted July 24As I mentioned in my log, there were 2 documents-the book and the report. The report can be downloaded from the net. From a quick glance, 75-90% of the material is the same, but each has some stuff the other does not.
Both the book and report were based on early findings. I wonder if anything has been published as a follow-up.
Chuck Seiler
San Diego Ship Modelers Guild
Nautical Research Guild
Posted July 24
Beautiful work, Lyle.
Steven
Elen sila lumenn' omentielvo - "A star shines on the hour of our meeting"
POST #7 - LAST ONE!!!
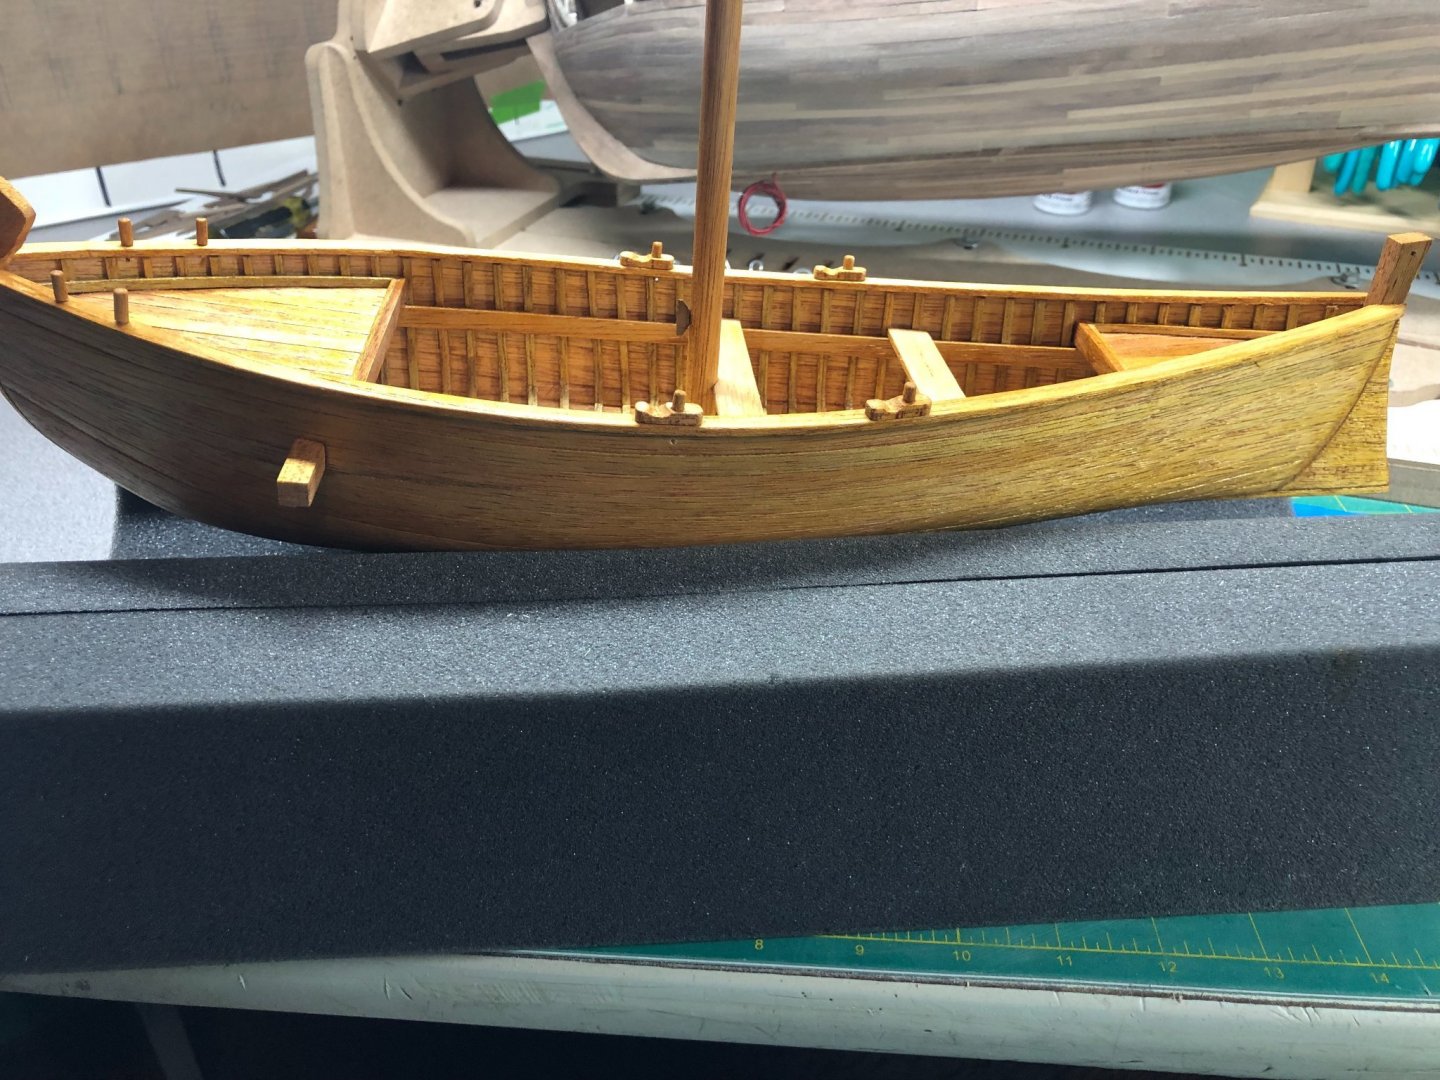
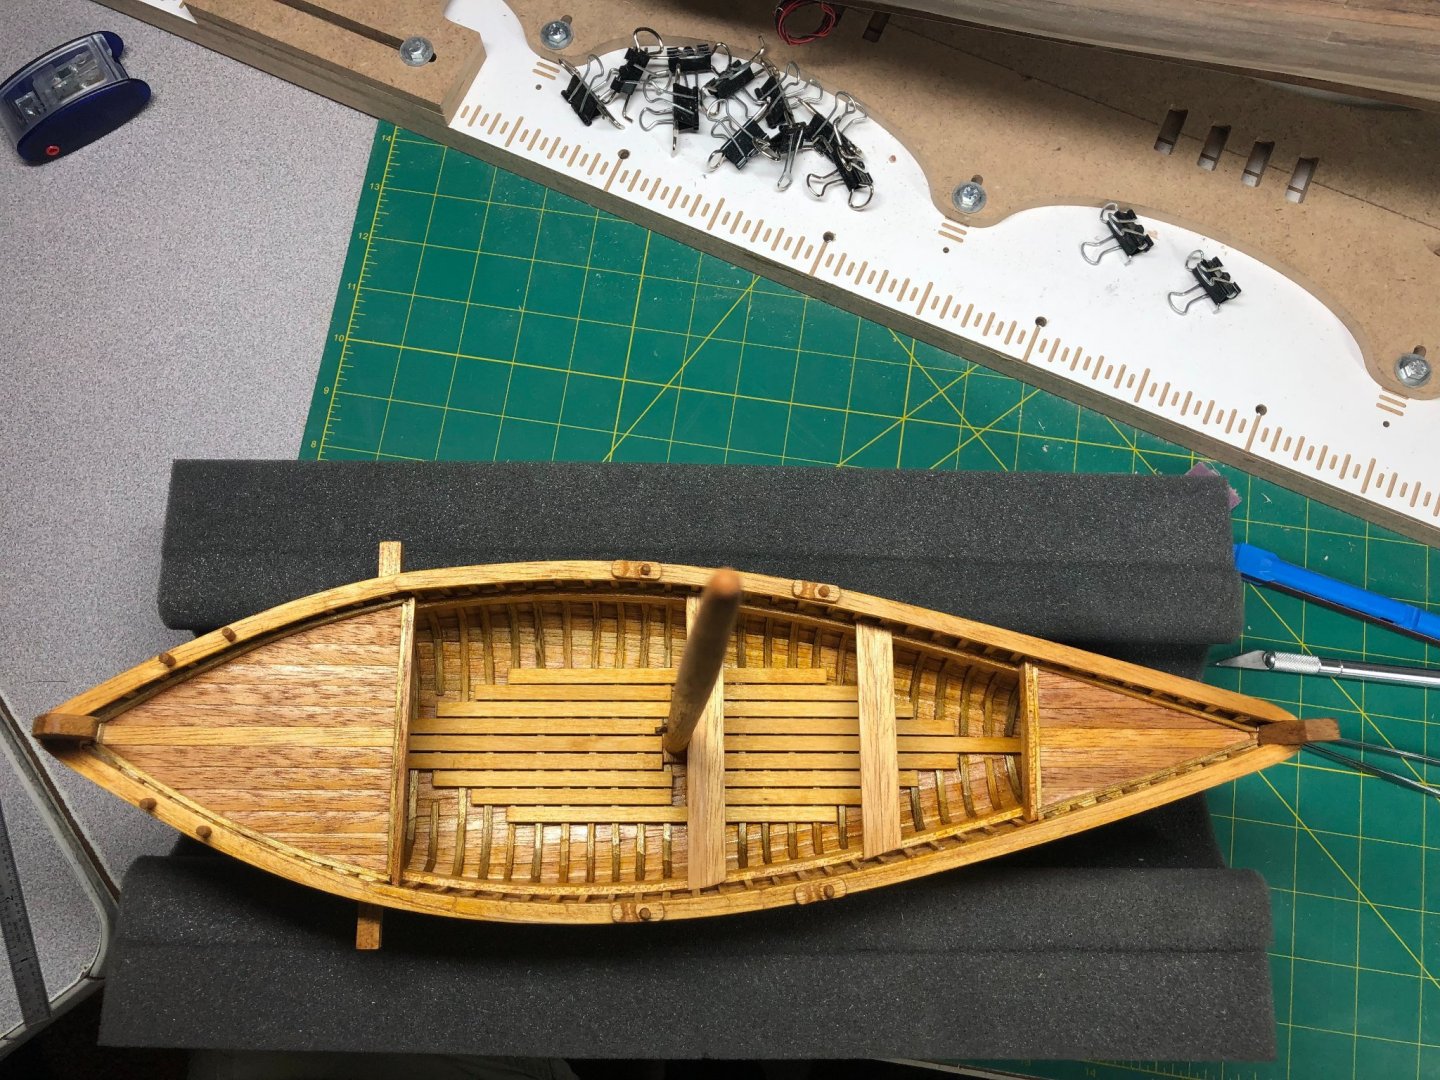
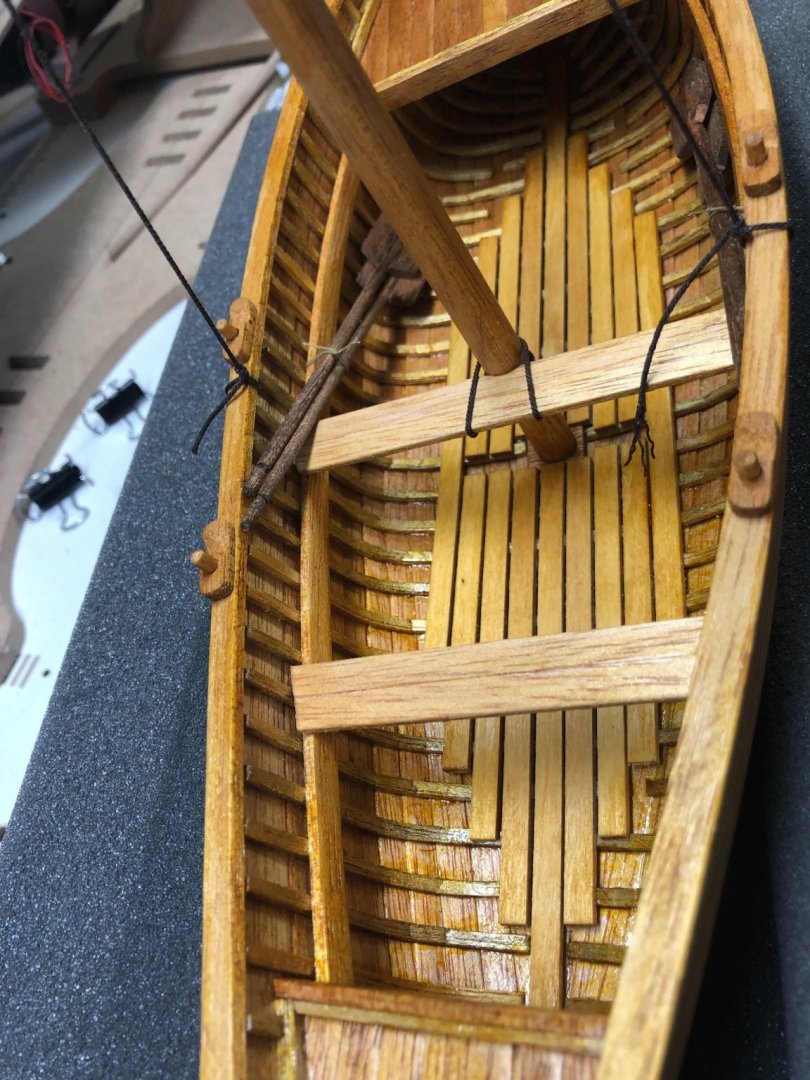
Oar locks, Oars, seats and rudders are assembled:
... and installed along with the rigging pins and rudder davits:
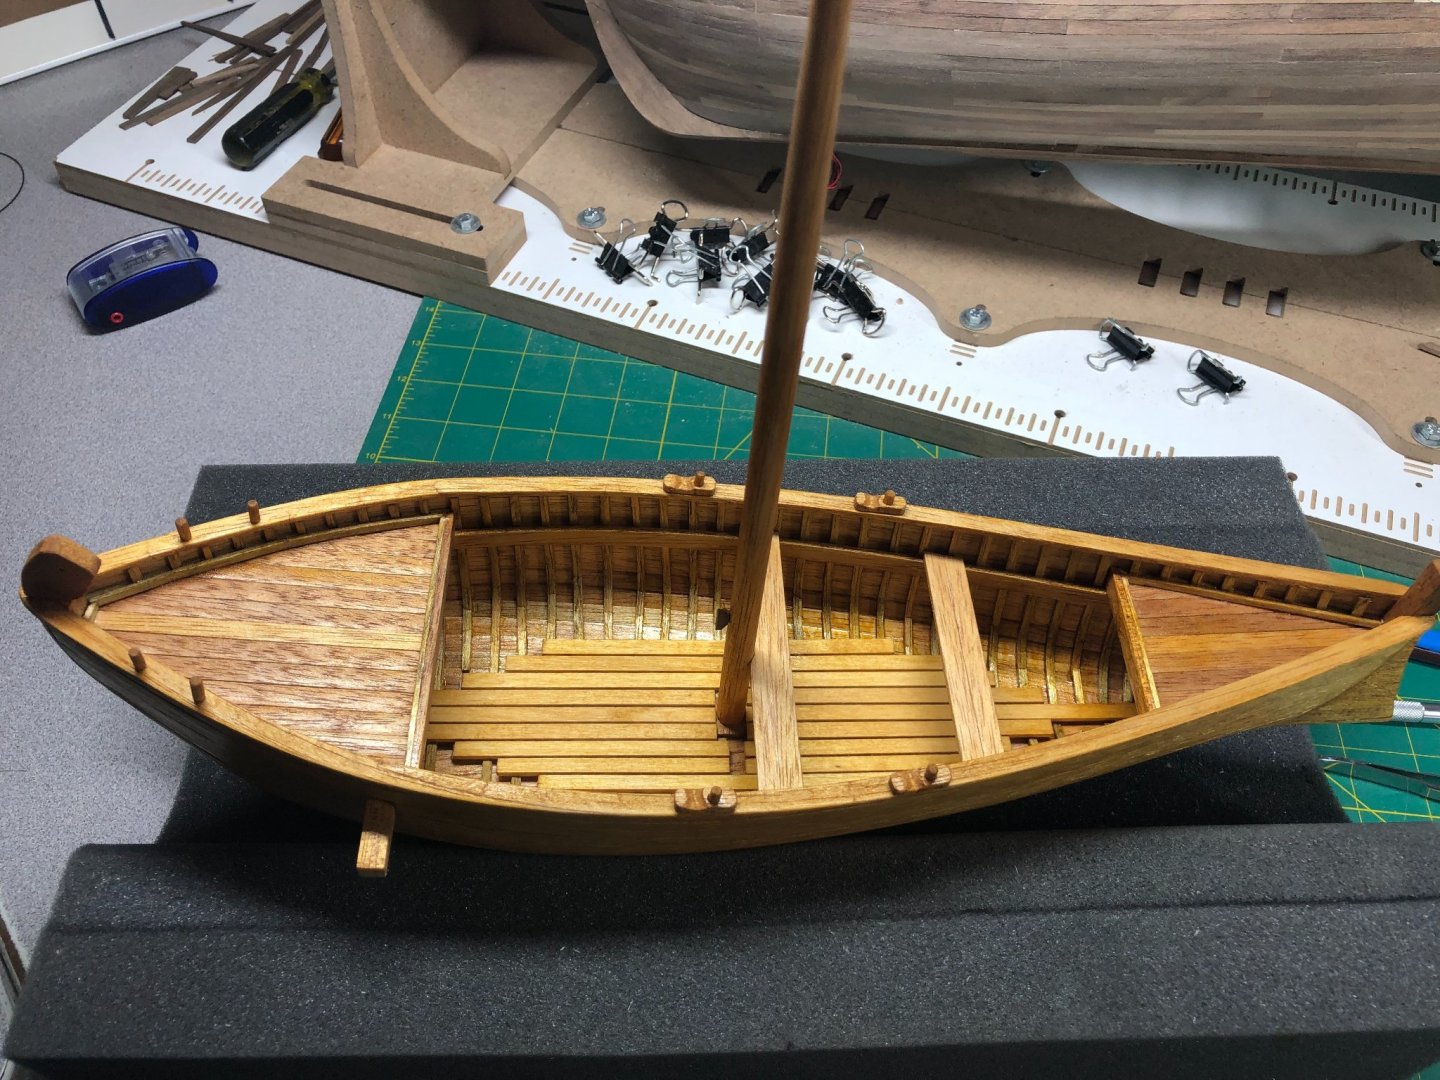
The rigging is so much simpler than the usual work! No complaints!
Standing rigging including the seat to mast and the oars. I decided to stain the oars and rudders in a contrasting color:
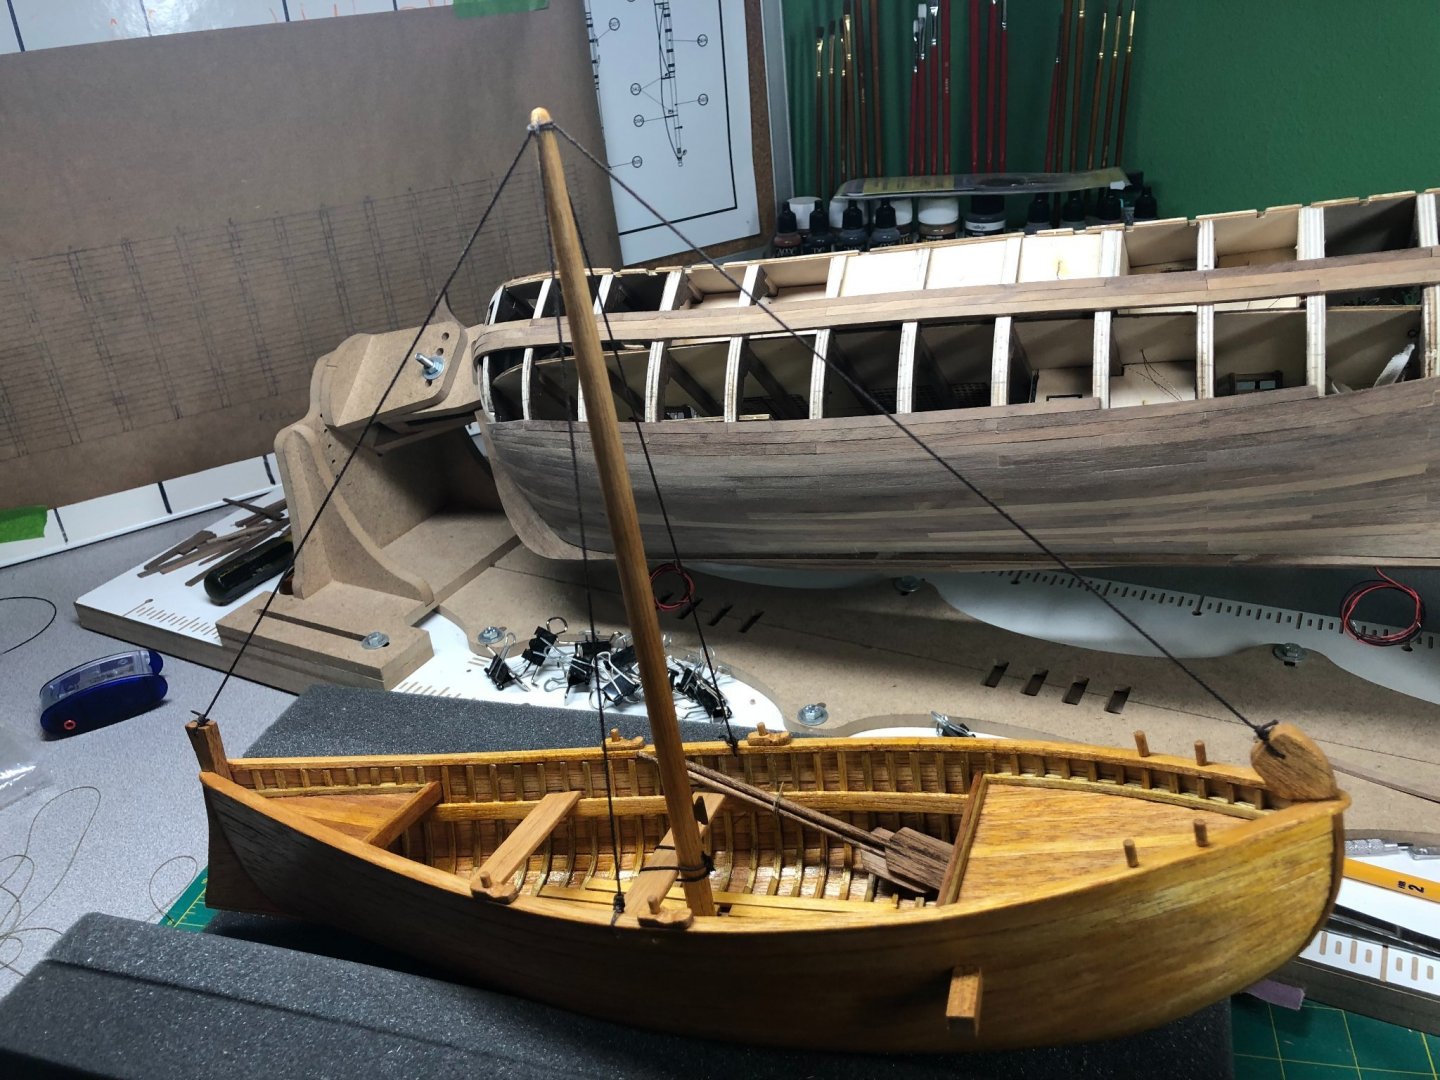
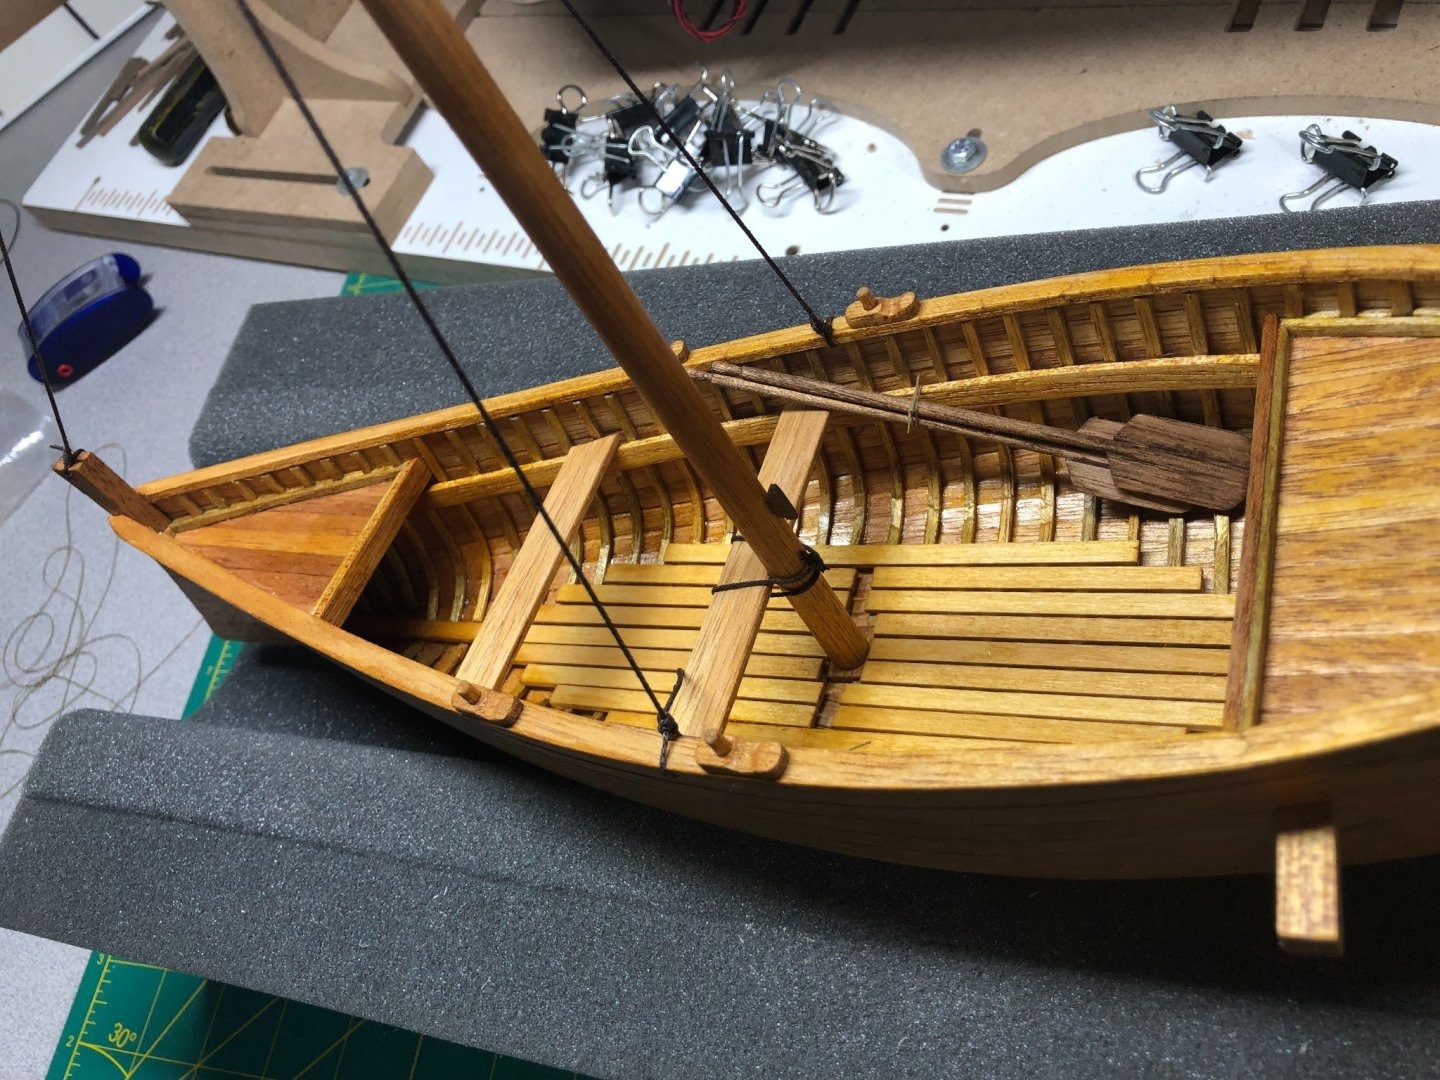
Bending the sail to the yard was a simple stitch: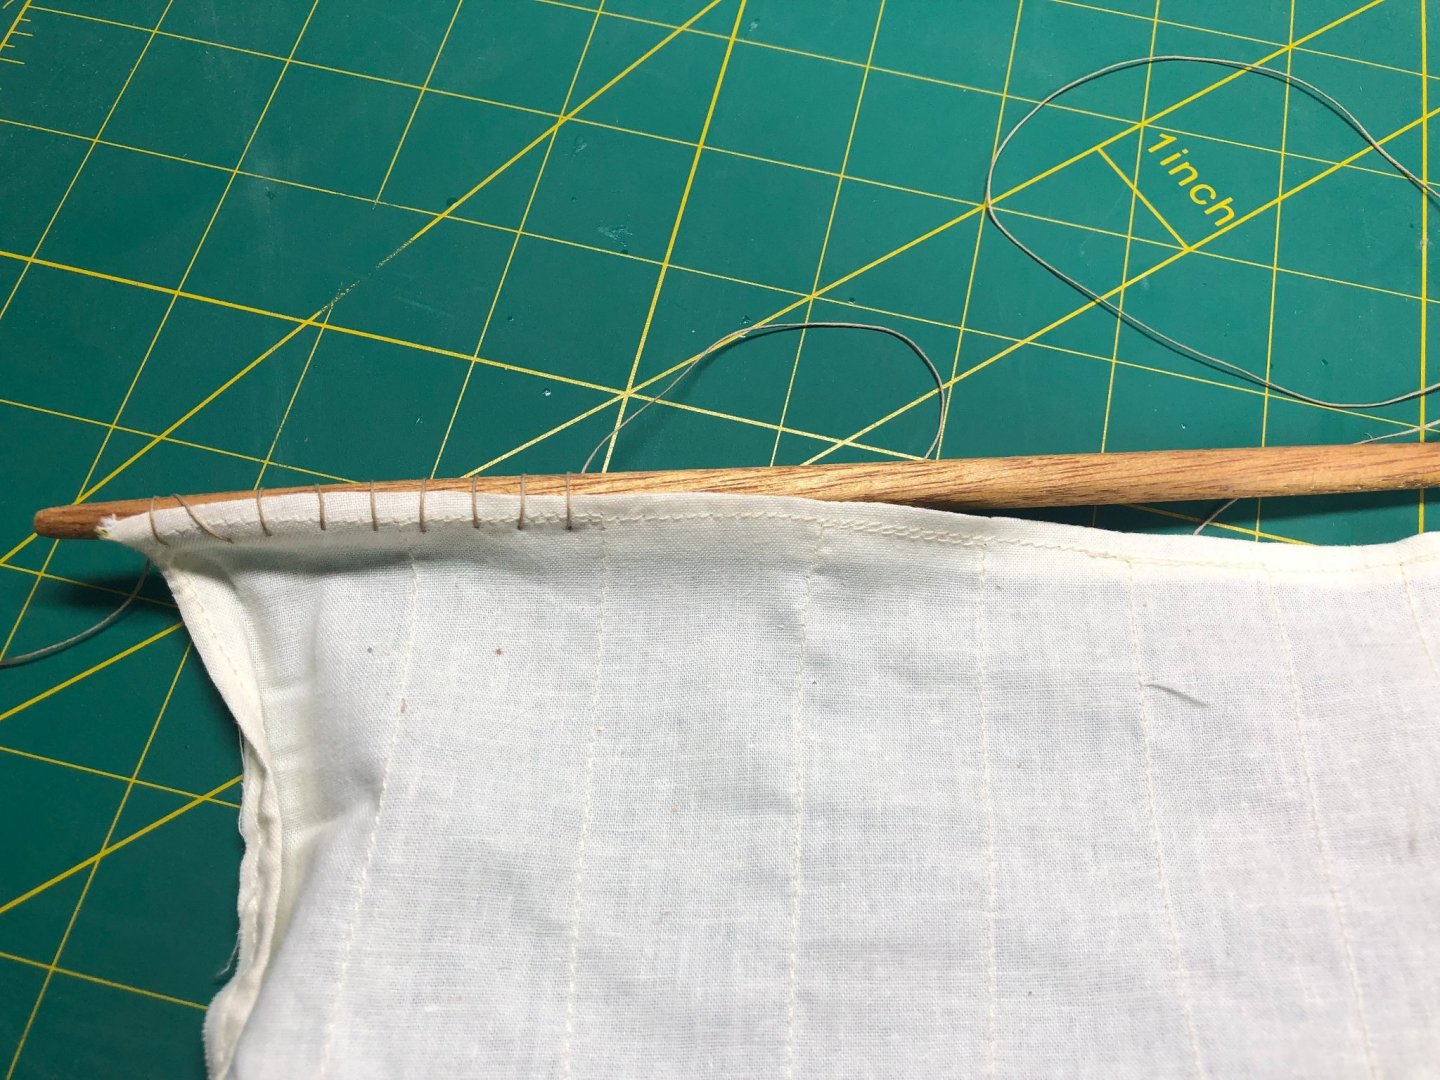
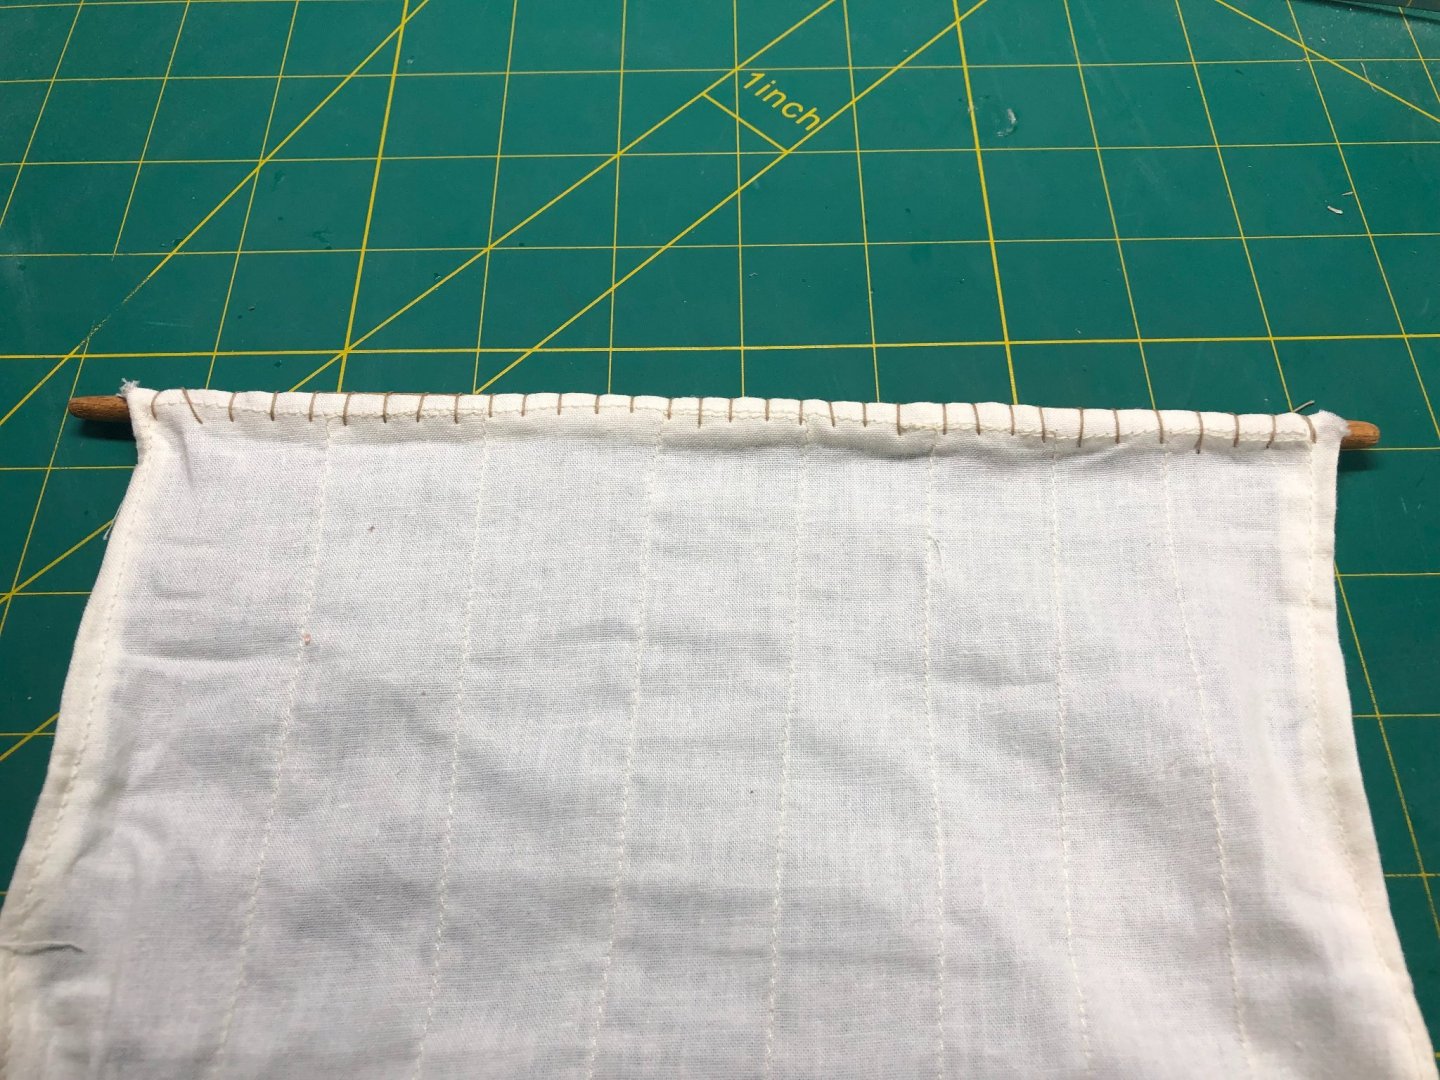
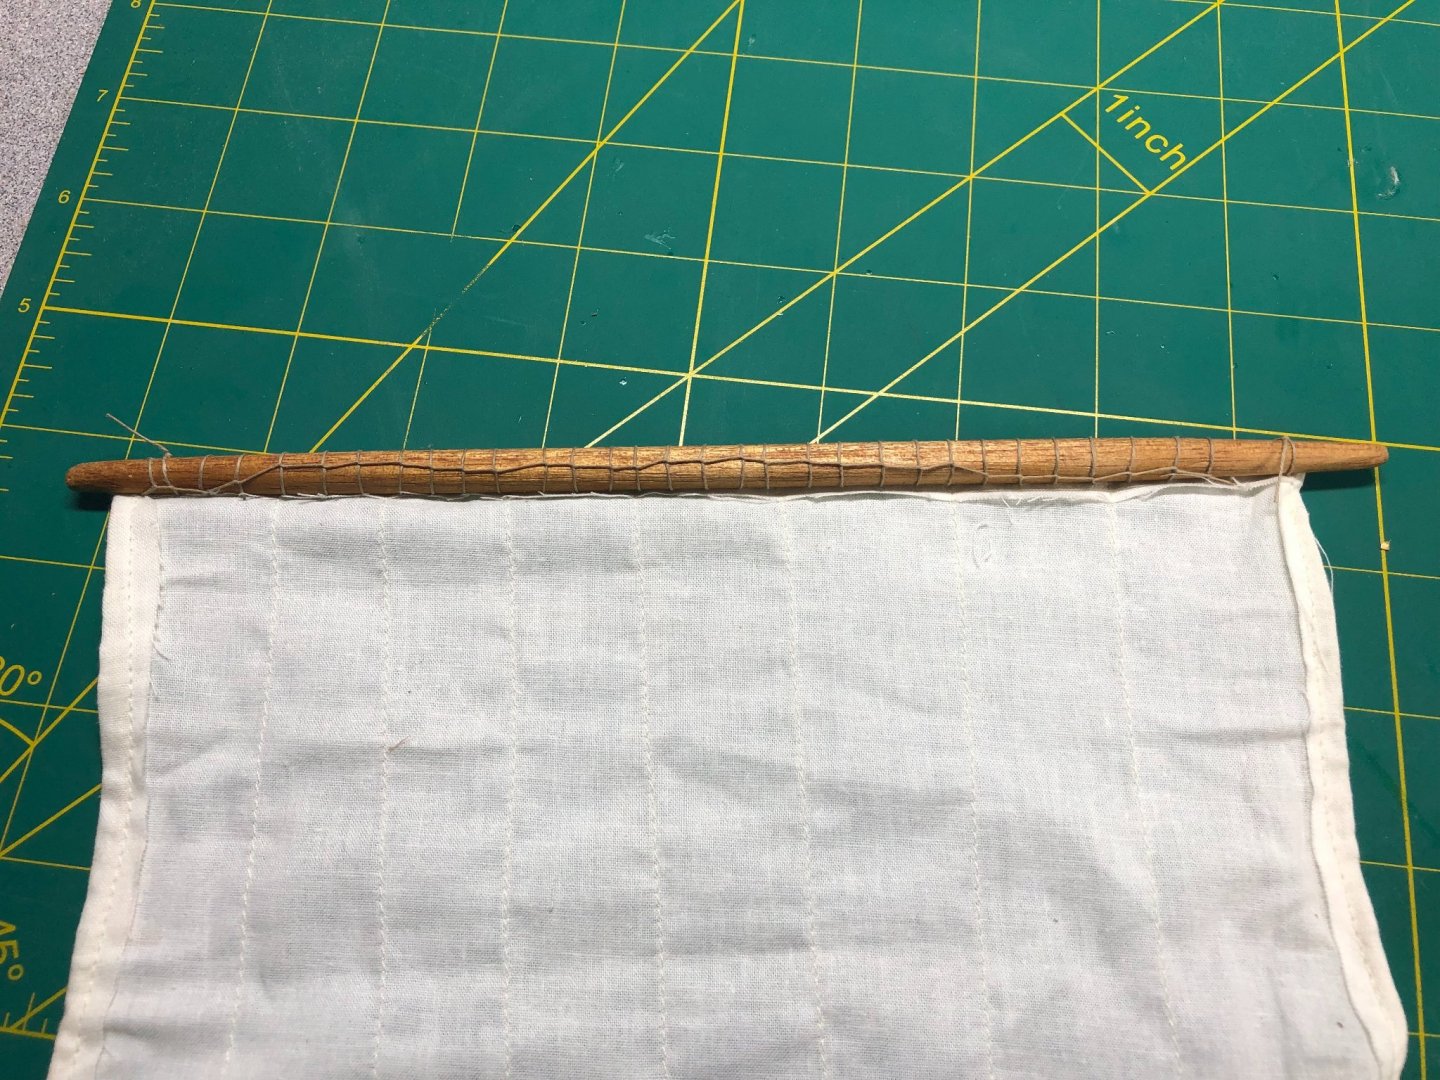
My one regret is that I should have ironed the sail before bending it to the yard and hanging it on the mast... oh well! I have a few ideas to remove some of the wrinkles. I'll get to that last. Also, need to straighten out the stitching a little bit!
I began working on the remaining rigging. Again, very simple. As you may have noticed in the above (and below) pictures, I chose not to use the the supplied rigging lines and used the lines that I made with my rope making machine. The yard was bound to the mast and the line to raise and lower the yard were completed:
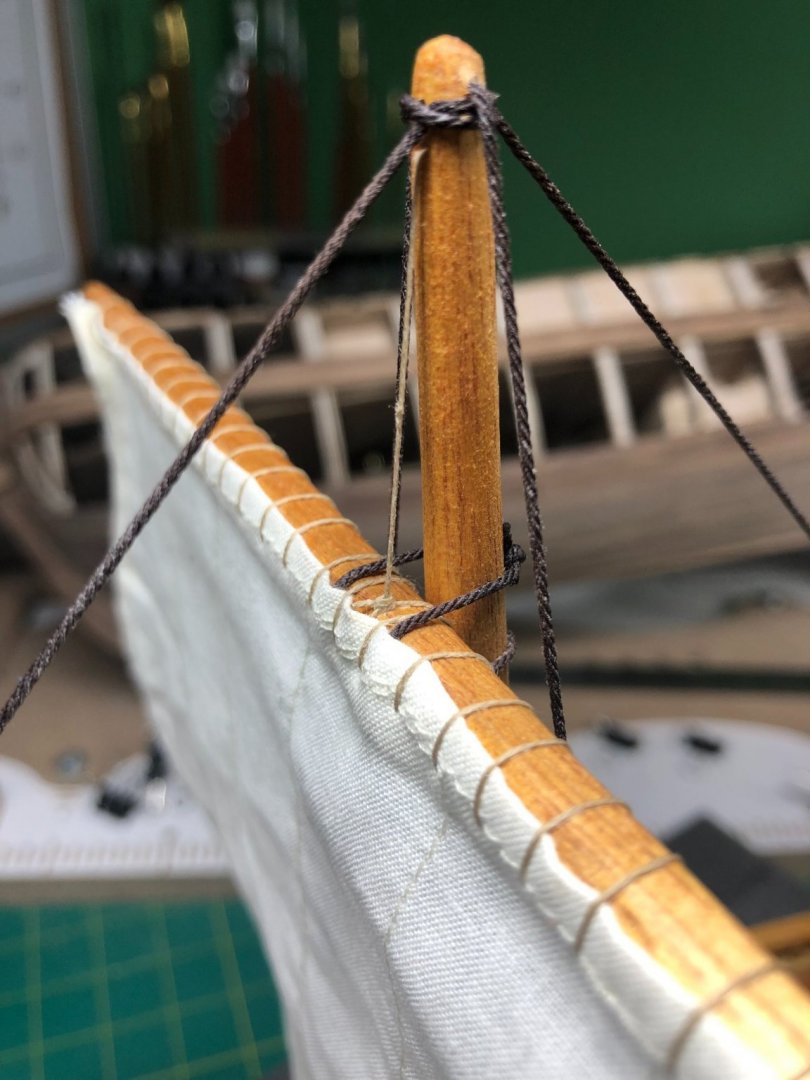
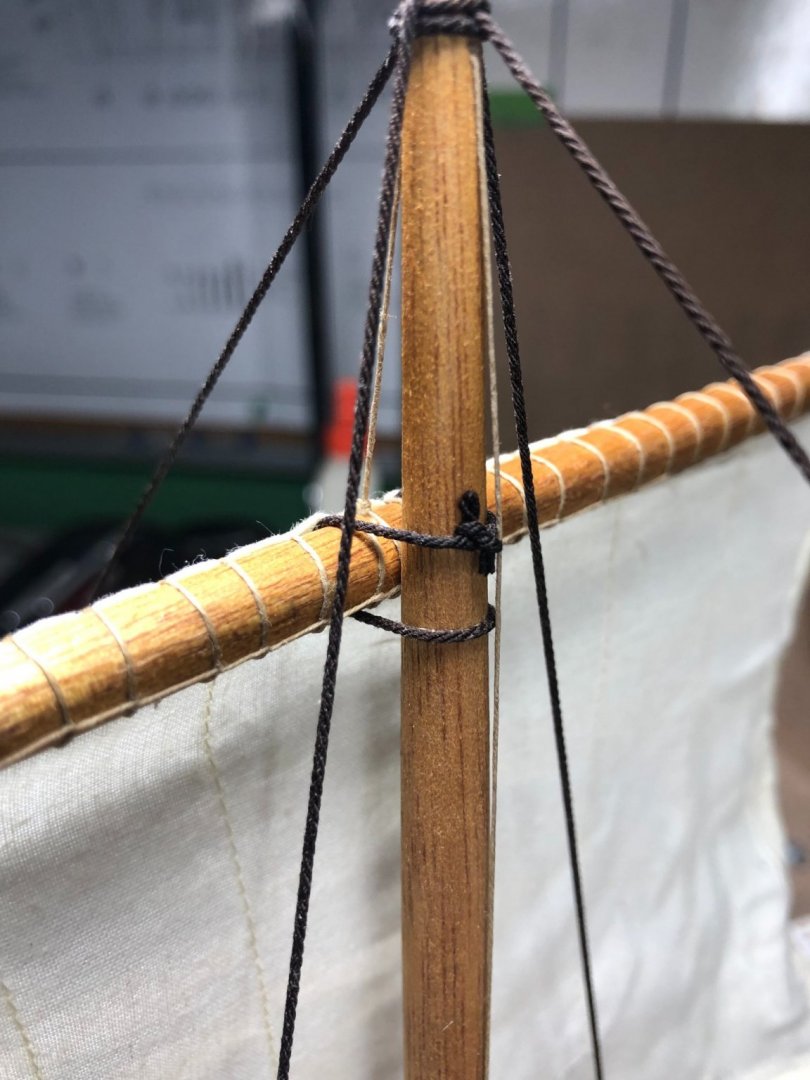
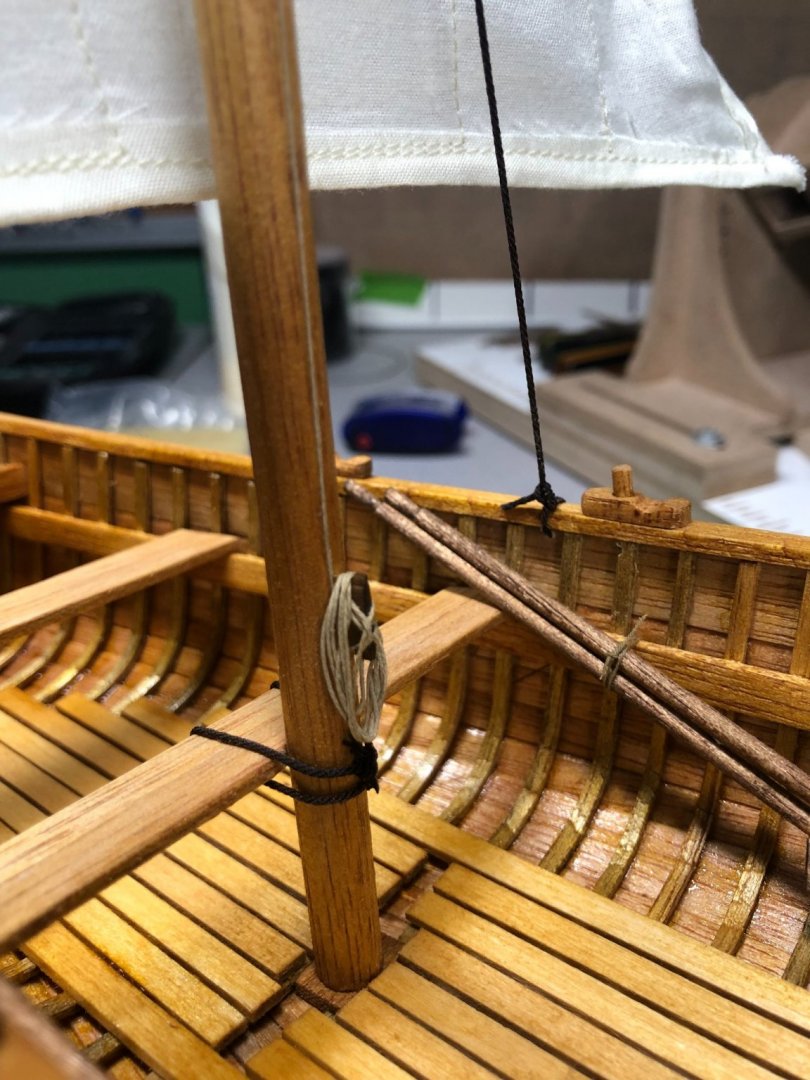
The sheet lines are actually made from a copper wire painted white... an interesting idea to keep the sail away from the mast and look more natural:
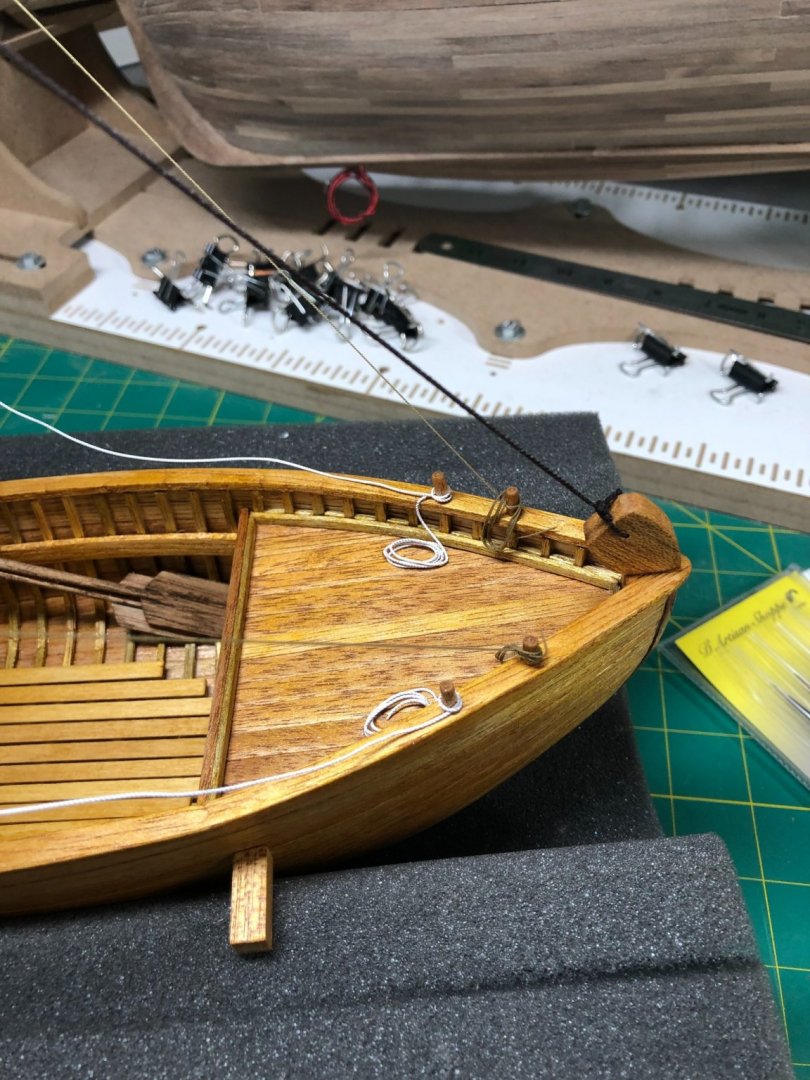
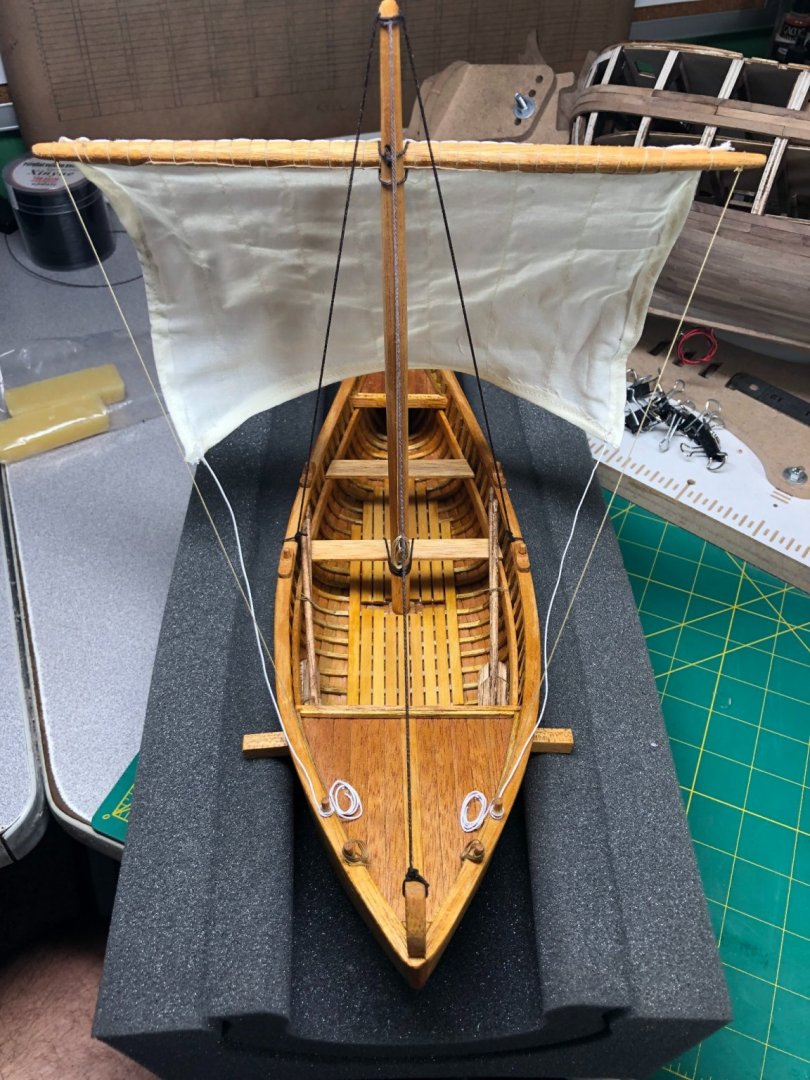
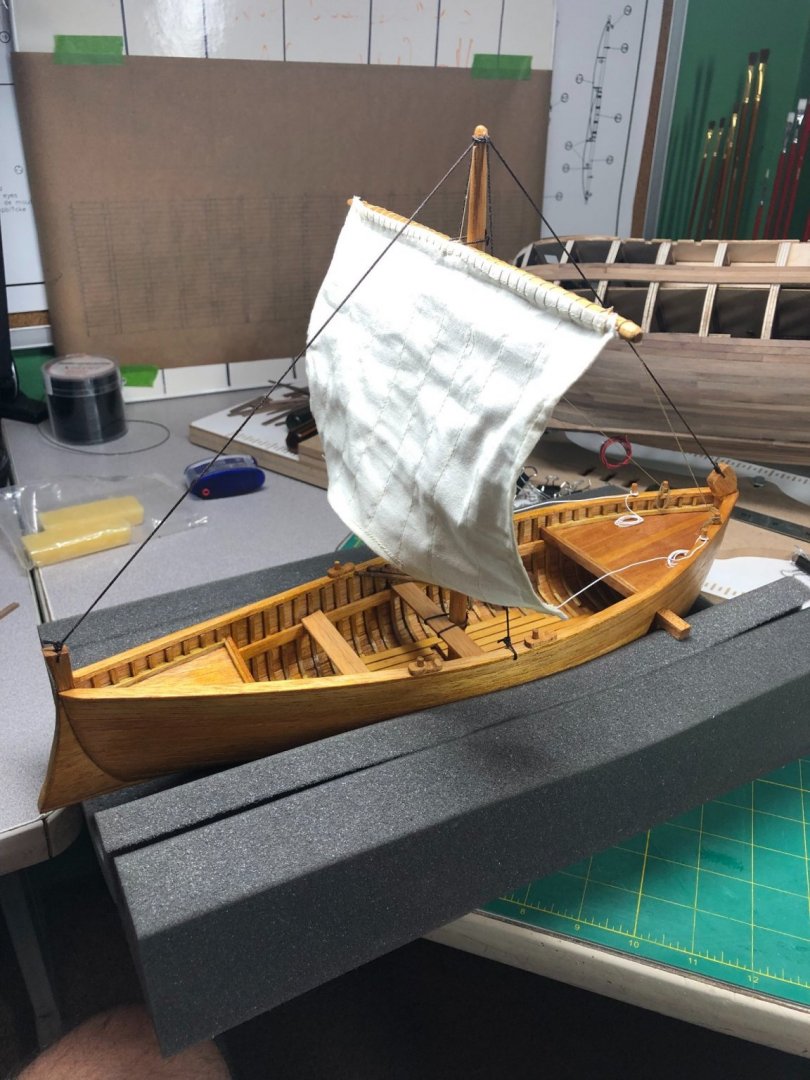
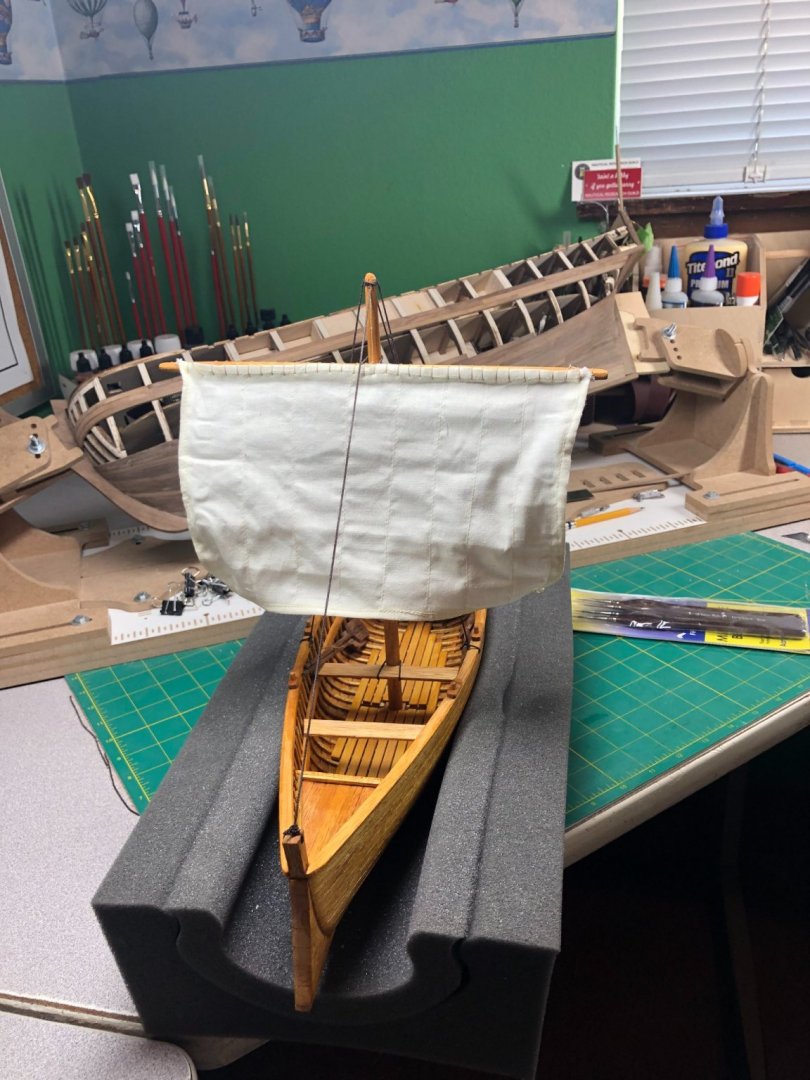
The stand:
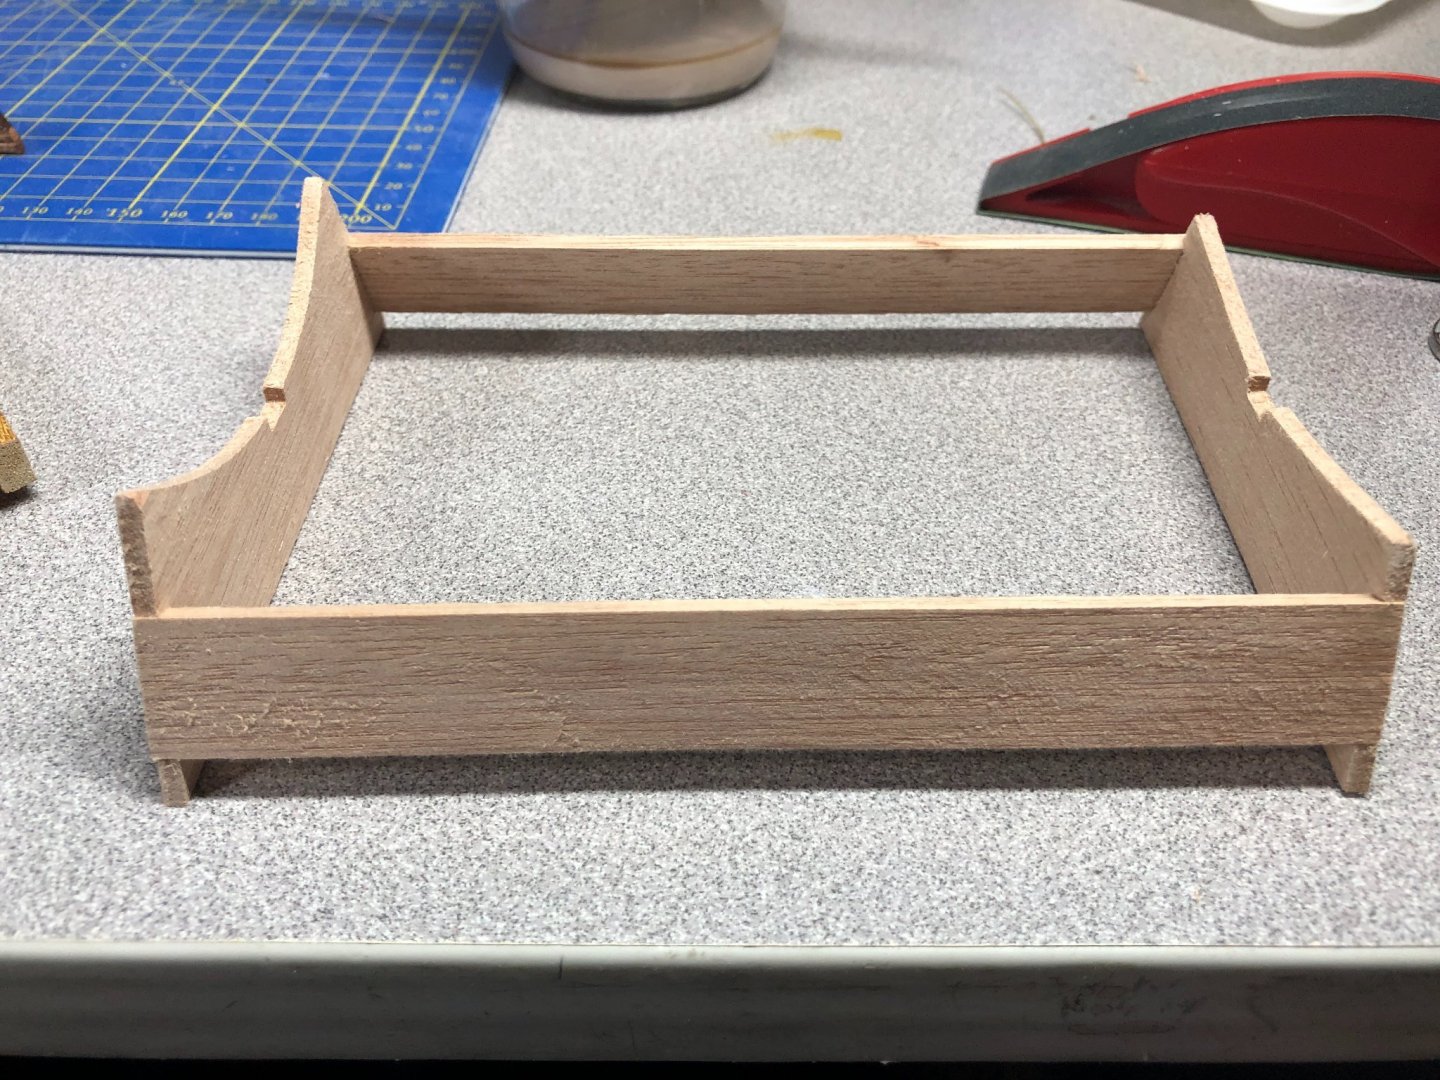
The fishing net, anchor and line and basket are all that remain to complete this model.
I do intend to work on the sail... shaping and removing the wrinkles are the main goals.
Gotta check the little things too. Sometimes, I get lost in the big job and forget to look closely for anything that may need a little attention. If you notice anything, please feel free to point it out!
The next post will be the final of this build log with pictures of the final build!
It will be a few days, as I would like to set up a good photo area and finishing the little bit I have left.
Also, once I present it to my dad, I'll post a few pictures of that too!
Lyle
"The only thing that stays the same is the constant state of change"
You're almost there, and it looks brilliant. Looking forward to seeing the presentation--thanks for including that. A small travel garment steamer might be useful. They work well in removing folds and wrinkles from clothing. Just pass the steam over the fabric. Don't hold it in place for too long. Those things are hot.
Experience is what you get when you don't get what you want
Current build: Model Expo Glad Tidings, Pinky Schooner
First builds:
Midwest Muscongus Bay Lobster Smack
Midwest Chesapeake Bay Flattie
Lyle
"The only thing that stays the same is the constant state of change"
Lyle,
Are you going to encase it?
Chuck Seiler
San Diego Ship Modelers Guild
Nautical Research Guild
Posted July 27
You guys and your awesome rope coils

Looks fantastic!
Paul
Current Build: HM Cutter Cheerful-Syren Ship Models 1/48
Completed Build: Artesania Latina Bluenose II
Completed Build : Lady Nelson
Lyle
"The only thing that stays the same is the constant state of change"
Posted July 27
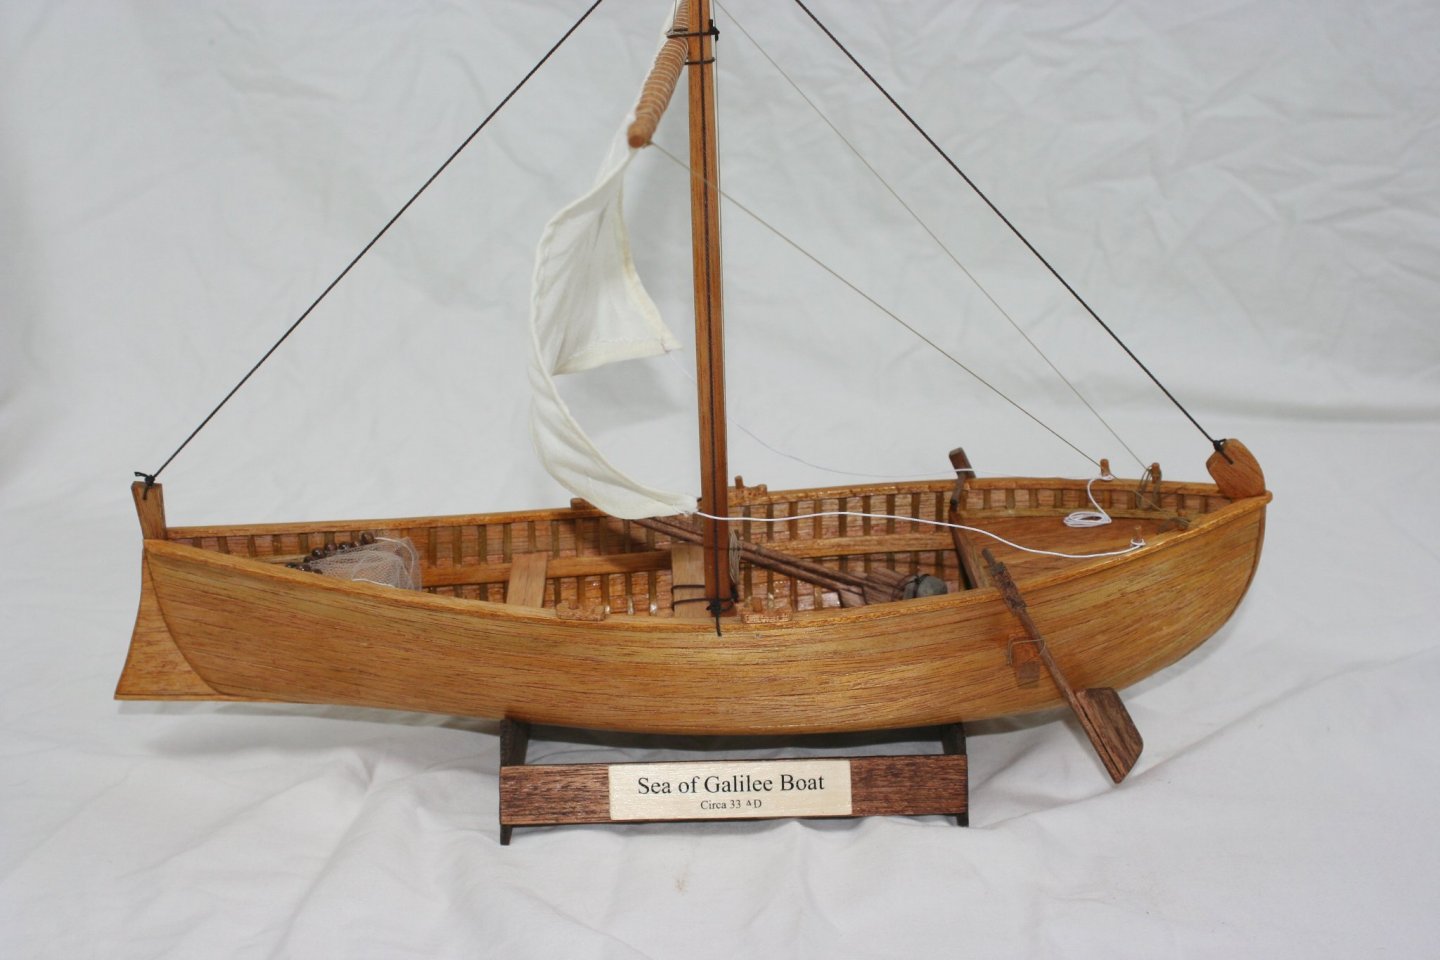
I made it! With a couple weeks to spare!
Below are pictures of the final product.
This has been a fun build and I've really enjoyed it.
Once I give it to my dad, I'll post a few more pictures!
Until then...
Oar locks, Oars, seats and rudders are assembled:
... and installed along with the rigging pins and rudder davits:
The rigging is so much simpler than the usual work! No complaints!
Standing rigging including the seat to mast and the oars. I decided to stain the oars and rudders in a contrasting color:
Bending the sail to the yard was a simple stitch:
My one regret is that I should have ironed the sail before bending it to the yard and hanging it on the mast... oh well! I have a few ideas to remove some of the wrinkles. I'll get to that last. Also, need to straighten out the stitching a little bit!
I began working on the remaining rigging. Again, very simple. As you may have noticed in the above (and below) pictures, I chose not to use the the supplied rigging lines and used the lines that I made with my rope making machine. The yard was bound to the mast and the line to raise and lower the yard were completed:
The sheet lines are actually made from a copper wire painted white... an interesting idea to keep the sail away from the mast and look more natural:
The stand:
The fishing net, anchor and line and basket are all that remain to complete this model.
I do intend to work on the sail... shaping and removing the wrinkles are the main goals.
Gotta check the little things too. Sometimes, I get lost in the big job and forget to look closely for anything that may need a little attention. If you notice anything, please feel free to point it out!
The next post will be the final of this build log with pictures of the final build!
It will be a few days, as I would like to set up a good photo area and finishing the little bit I have left.
Also, once I present it to my dad, I'll post a few pictures of that too!
Lyle
"The only thing that stays the same is the constant state of change"
Posted July 27You're almost there, and it looks brilliant. Looking forward to seeing the presentation--thanks for including that. A small travel garment steamer might be useful. They work well in removing folds and wrinkles from clothing. Just pass the steam over the fabric. Don't hold it in place for too long. Those things are hot.
Experience is what you get when you don't get what you want
Current build: Model Expo Glad Tidings, Pinky Schooner
First builds:
Midwest Muscongus Bay Lobster Smack
Midwest Chesapeake Bay Flattie
Posted July 27Excellent idea! Will give it a try!On 7/27/2021 at 7:08 AM, Estoy_Listo said:
A small travel garment steamer might be useful. They work well in removing folds and wrinkles from clothing. Just pass the steam over the fabric. Don't hold it in place for too long. Those things are hot.
Lyle
"The only thing that stays the same is the constant state of change"
Posted July 27Lyle,
Are you going to encase it?
Chuck Seiler
San Diego Ship Modelers Guild
Nautical Research Guild
Posted July 27
You guys and your awesome rope coils
Looks fantastic!
Paul
Current Build: HM Cutter Cheerful-Syren Ship Models 1/48
Completed Build: Artesania Latina Bluenose II
Completed Build : Lady Nelson
Posted July 27I don't think so. My dad has limited space and this guy should be pretty easy to keep clean!
Lyle
"The only thing that stays the same is the constant state of change"
Posted July 27
I made it! With a couple weeks to spare!
Below are pictures of the final product.
This has been a fun build and I've really enjoyed it.
Once I give it to my dad, I'll post a few more pictures!
Until then...
Thanks Bluebeard!GREAT!!!!!!!
Your building log for sure is more detailed than my.
Congratulations on your great build.
Very interesting building log - mayn thanks for sharing with us
LYLE, WHAT A BEAUTIFUL MODEL AND A FANTASTIC BUILDING LOG SO APPRECIATEVE OF IT, I WILL BE ORDERING THIS KIT AND HOPE TO HAVE IT READY FOR CHRISTMAS FOR MY SON-IN-LAW, MY BIGGEST WORRY IS MAKING THE RIBS AND SPACEING OF THEM NEED TO STUDY YOUR LOG THOURGHLY, THANKS AGAIN WHAT WONDERFUL ACOMPLISHMENT. GOD BLESS YOU AND YOURS STAY SAFE DON


