Server Built

Joined
Aug 4, 2018
Messages
1,266
Points
443

Location
Baltimore, Maryland USA
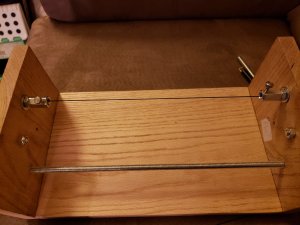
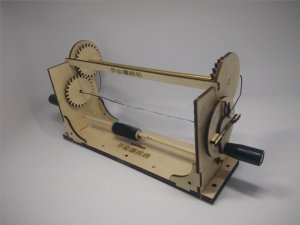
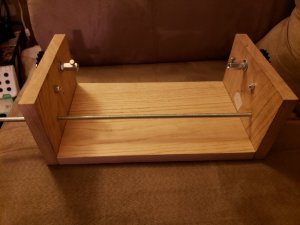
I had time today to get the rope server done. I wanted to use it for not only serving shrouds and such, but also for stropping Blocks. I used to do all this by hand sometimes with the aid of a fly tying vice and a tiers Bobbin. This build should help me do those tasks more efficiently. I chose Oak for this Project for its strength and because I love Oak wood
20180924_202613.jpg
20180924_203300.jpg
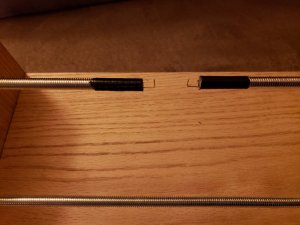
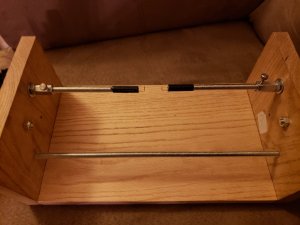
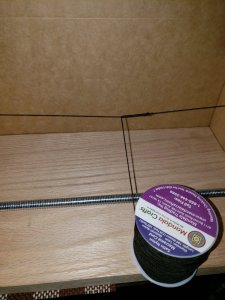
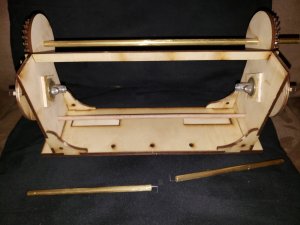
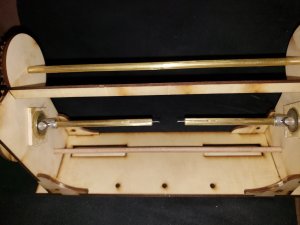
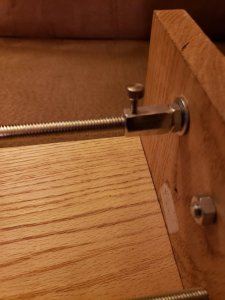
in the above Picture you can see I have the rope installed the 2 thumb screws are for the stropping attachments. I was able to 3D print a small plastic insert to grab the rope and use the thumb screws to hold everything taunt and in place so I don't damage my rope between the thumbscrew and threads in the turnbuclke. Below you can see the thumbscrew set up going through a turnbuckle the threaded rod sticking out is the block stropping attachment.
20180924_202946.jpg
20180924_202732.jpg20180924_202737.jpg
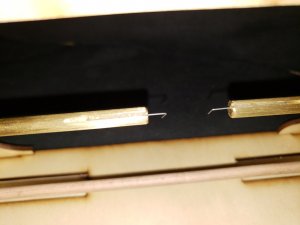
above you can see the attachments in lace and locked down by the thumbscrews. The wires in the ends of the attachments are epoxied in place.
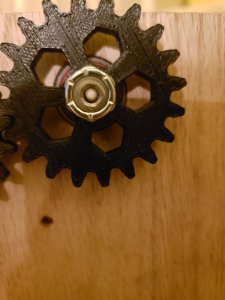
The picture below shows the hole I bored through a small piece of all thread rod the rope passes through that hole and excess on both ends will be Gathered up held together with a small piece of tape and alligator clipped to the gear I did this for both ends.
20180924_203012.jpg
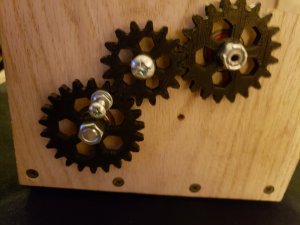
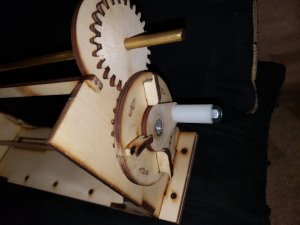
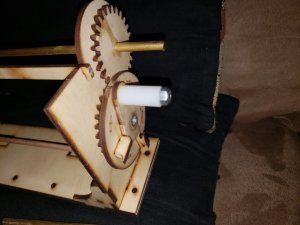
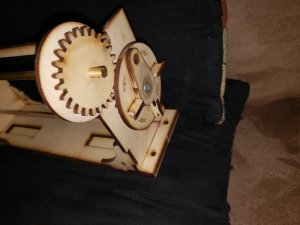
below are pictures of the gearing I wasn't worried about ratios as much as I was in getting the gears working together so I get No twist in the rope an I'm serving it
all but the center gear are on 608 bearings I needed two more so those are on order for the center gears. 20180924_202621.jpg20180924_202802.jpg
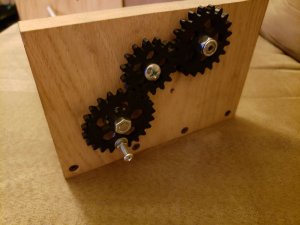
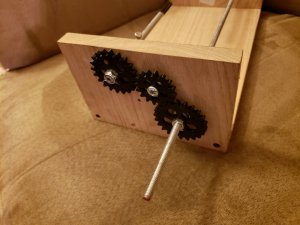
Above the threaded rod I left long so I can use my Drill to run the whole system if I choose to do so.
Below the gears show a small crank handle this will be replaced with a longer one and a piece of wood as the handle this crank handle will allow me to serve by turning the crank or for backing up the line incase I get overlap of the serving.
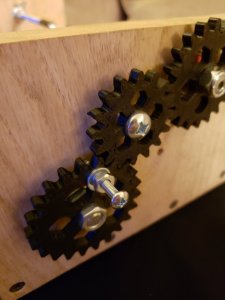
20180924_203757.jpg20180924_203812.jpg
And last below is the Drill installed to run the system
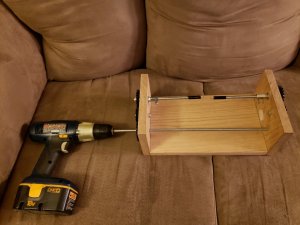
20180924_203510.jpg
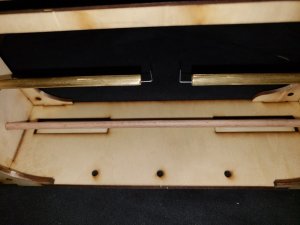
I still need to install a rod for the Serving spool but that will be easy and I plan to use hairpin cotter clips on the ends so I can pull it out to install the spools very easily.
The gears on this unit will be reprinted in High quality everything I have done to build this was proof of concept so now that I know it works Ill be re printing the gears and doing some odds and ends to improve what I have. Once I get everything the way I want it I'll post a parts list with the 3D gear files and build instructions. I will say this wont be an easy build for some folks due to tooling I bored the hole through the rod on my lathe it can be done on a drill press but it wont be the easiest way when you have to drill through close to 2.5" of all thread and lastly the hardest way is with a drill by hand. this build was at a cost of only $30 in materials with the wood being the biggest cost. this is made from a piece of red oak 3/4"X 8"X 24" and I used it all making the base 12" and the sides 6"
It certainly didn't need to be this large but I wanted room to work and clamp the jig to the workbench
 
I will post some when I get the spool rod installed. I forgot to grab some clips for it today from the fasteners bin at work. But here is a video of it running using the drill to drive it the gears are quite rough and noisy because I printed them in low quality to save filament just incase it wasn't gonna work lol Its noisy in the gears but some nice clean gearing should eliminate a good bit of the noise. I forgot to put the plastic spacers in on the line to keep it centered in the turnbuckles but just using a couple clamps held the line very well so I may not even need them. I used heavy line for the demo because small line wasn't showing up well through my phone. I have a nice cannon camera that in the shop being repaired I cant wait to get it back so my pictures are clearer I do have a few Go Pro cameras, but they don't have a macro feature like my Cannon does. video here >
20180925_195735.jpg
 
Very nice server epicdoom. Could you show how you are using that for stropping the blocks?
 
The rope climb working in my workshop, no problem. I have been using it for years without any hickup. Does not help with finance tough...
Janos
 
Very nice server epicdoom. Could you show how you are using that for stropping the blocks?
I can yes, I'll set it up later to show how I plan to do that for stropping the blocks. I'll hand crank it as there aren't a lot of turns needed to perform that operation.
Wow. That is nice !!!

I tried making a rope making machine that suspended from the ceiling ( an idea from YouTube). It was a total failure. I think what is discouraging for me on that project is spending valuable time on something all day only for it to not work. Therefore since my time is limited, that’s a whole day wasted.
I can make gears w my milling and lathe, but again the setup alone and design is a time hog of a project. CNC would be good, but I am broke now.
I am having to go to chiropractor per my primary doctor for neck and back problems. Bills keep adding up.

Half the battle is in the design. I had this set up for no gears then 2 gears each side only, but then when you hand operating it you have to crank backwards to serve over the top which is the way I like to serve rope over the top as apposed to under not that it really matters its a comfortable thing. The 3rd gear allows me to operate it the way I like and not confusing. It needs a few tweaks here and there, but the concept works so the rest will be easy. I deviated way off course from what I had in my head for this build. my initial plan was no gears a hook on one end and a hand crank on the other both going through bearings. The problem with that is the rope your serving will twist till its taunt enough to turn the hook in a bearing on the other end this creates a problem with the rope trying to untwist its self and can lead to the serving becoming loose. so I deviated from that idea to make both ends turn at the same time by using the gearing. then the 2 gear plan wasn't gonna work out how I wanted so I added another. Donnie I'm sorry to hear of any problems you have Brother. I've been through the back pain and even a pinched nerve over the years I know it can run the medical bills up and the pain you just don't want to do much activities. My Prayers are With you.
 
Here you go Brother There are a lot of gears I wanted the option for different ratios but in the end I chose the 3 larges gears of the bunch you will need two sets of this printed
 

Attachments

  • gears_even.zip
    378.2 KB · Views: 22
Serving the shrouds and blocks isn't a must do, but it adds that little extra to the build. I'll make a video today for using the hook attachments for serving or stropping the blocks.

Your “SERVER” looks like a great engineering feat. Alas being all thumbs and technically challenged I used Uwe’s Google technique and after a great amount of browsing found this simple machine. I think I can muddle my way through the assembly.

047E3630-D476-4674-8911-D8C4E594C916.jpegAAC5347A-E06A-475F-86A2-924FD69059F1.jpeg5FD74B49-6736-434F-AD6C-B9036D3F45C5.jpegC2DF0DD3-62F0-47D0-A8DB-746F0CDBE7CB.jpeg

I found several vendors, but I settled on Banggood.com. I used “ropewalk” for the search term. Their price was 10 to 20 dollars less than the other vendors. My cost was $27.00 USD with free shipping.

I’m thinking this little machine will help me understand all the fancy rope work that goes with this ship building hobby.
 
I Have seen those on ebay all from china for $40+there was one sold in the US but the moron jacked the price to $70 because he was the only US seller I didn't want to wait for one from china and I wanted something more substantial that I could hook blocks to also. I didn't see a way to do that with that rig so I just built one to suit my needs. when you get it You should review it as I couldn't find a lot of reviews on this one it is a copy of one that's built with much more Heft. I seem to forget that Banggood has a US shipped location I buy a good bit of electronic stuff from them.
 
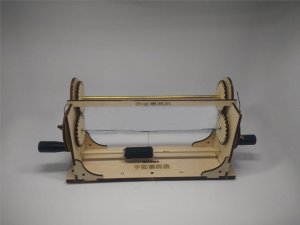
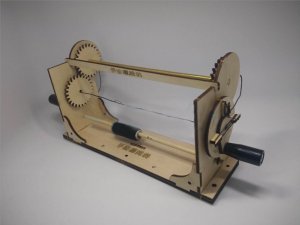
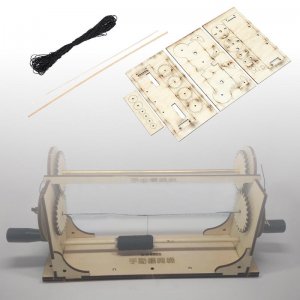
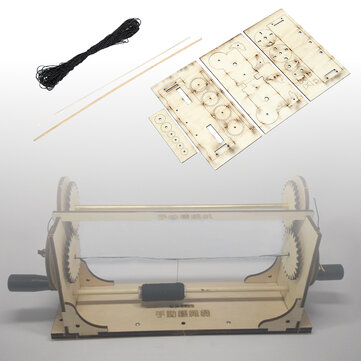
Server from Banggood:

The Server kit I ordered came today. I noted a couple small problems right away.
1) The box the kit was packed in was three times the size of the kit and looked like an Elephant had sat on it.

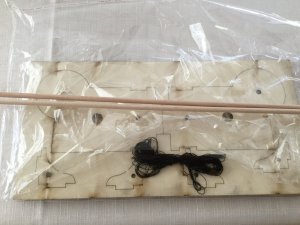
2) Laser cuts in the plywood are OK but the holding tabs need to be carefully cut out.

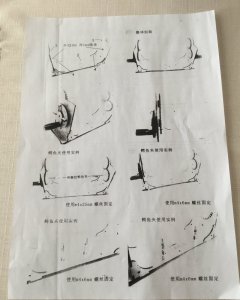
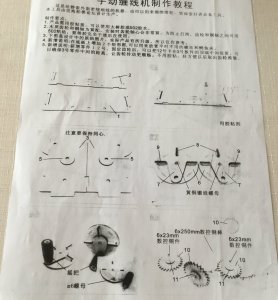
3) The instructions are a riot. The ink cartridge in their copier must have been almost empty. The instructions reference assembly by part number, but there are no numbers on the parts.

4) The instructions show two “handles/knobs “ but none are included in the kit.


717F4B61-723F-480D-BBDB-8E95074478ED.jpeg
Page 1

D1175A09-C68E-4E75-8ACA-9EA2BE7FAD67.jpeg
Page 2

2FD19818-AFC9-4A72-9F5B-77E51767A4C2.jpeg
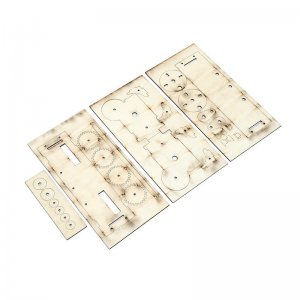
The kit material.

68735819-6C08-4202-A82B-D492C5B12B84.jpeg

The final product?? I’ll try to puzzle this out this weekend. It may wind up as kindling since it’s been cold enough to have the wood stove operating.
 
I bought one of these to see what all the hub hub was about with it there was no brass rod or handle as in the pictures and no instructions at all. bought from Banggood I complained about it to them and was reimbursed in full for it and told to keep it the one I got had broken dowels as it was shipped in an envelope which had holes in it even. so I took the parts I had from it and added a few more and came up with this. So let me explain what I did to make it work. First I bought from home depot in the hardware section there are bins with odd stuff in them that's where the white handle is from. I also bough a length of 3/8 aluminum rod I cut to pieces 1 3/4" long and drilled a 1/4' hole down the center I drilled out the wood that came with the kit to fit the rod I drilled and tapped to rod to hold a lock screw that will hold the attachments for serving blocks making beckets and so on. I had a 2' length of Brass rod that I cut for the attachments used a dremel to cut a slot into one end to hold the small wire you see in the picture. the wire is 20 guage music wire I epoxied the aluminum rod into the wood parts in the kit and epoxied the wire in the attachment arms. I use the rest of the rod to connect the gears so everything turns together I left the rod long to hook up a drill if I choose. this now works better then the one I made, Ill use both though. IMO what is given would be difficult at best to create a working unit without the addition of other items.
20181019_212331.jpg20181019_212337.jpg20181019_212356.jpg20181019_212403.jpg20181019_212452.jpg20181019_212501.jpg20181019_212513.jpg
 
Hi Joe,

I did notice that the assembled unit shown on the Banggood site had a Brass rod to connect the upper gears. Also the dowels supplied in the “KIT” do not fit any off the holes in the two side walls or in the spacers for the gears. The holes are either to large or to small.

Great explanation of your modification to this “KIT”. I’ll follow your steps to see if I can build a workable tool. If not, there’s is always the wood stove.
Exactly I was looking at it and with what's supplied you cant build a working device. This is what P--sed me off the most about it and why I sent them an email to complain. I fully planned to figure out how to make it work the refund was great to cover the cost of the parts I would need
 
My Critical review submitted to Banggood this morning.


  • Overall:One Star
  • Price::
  • Quality::One Star
  • Appearance::One Star
  • Engineer
    2018-10-20 07:55:10
  • The Ropewalk kit arrived in a cardboard box that looked like an Elephant sat on it. Box was three times the size required. The Ropewalk kit was not protected from bouncing around in the box. Sales picture of the kit shows a brass/copper bar connecting the upper gears. That was not included with the kit. The picture also shows two black knobs on the lower gears. These were also not included with the kit. The kit will need major modifications on my part to be useful.
Had to go with one STAR on the review, they didn't have anything less.
 
you should send them an email also brother I had high hopes for this thing it looked good in the pictures. I have everything but the Brass rod. and thumb screws. So I have the Aluminum rod I cut and drilled out I have the handle bolt and nut and a spare handle like the one I used. Id be happy to send that to you with a drawing of how to do the assembly of it all. all you have to do is drill out the aluminum and assemble it all if your not needing the attachments I have you can even buy a wood dowel to fit the hole size and just go with that as it would be much easier using a wood dowel aluminum Heats up quickly and clogs Bits so you have to nibble away at it letting it cool I should have chucked it up in the lathe and line bored it but figured it was just as simple to do it on the drill press. anyhow let me know what you want to do I can draw up how I assembled the gears for you if you want to use a wood dowel the right size or I can send you the aluminum and handle I have spare.
 
Joe,
I've sent an email to them and also checked off that the Kit was delivered. That gave me another chance to give them one star for Packaging, Appearance, and an opportunity to state why I was not pleased with the whole event.

Thanks for the offer of parts. I think I have enough "stuff" in my G scale railroad junk box to get by. I've got a bunch of hollow copper tubing I've been using to make street lights. I think I can use those both as a bearing and the Axel for the top gears. The handles will be Carriage bolts with a lock nut. I also have several small 6/12V motors scavenged from Turntables and old Tape players, I'll probably use one of those instead of a power drill.

Love cobbling things together.
 
Last edited:
Back
Top