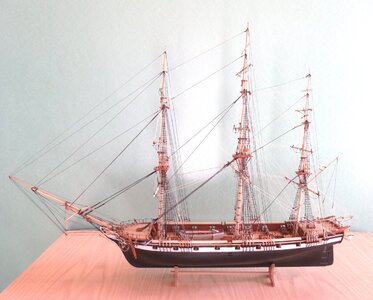
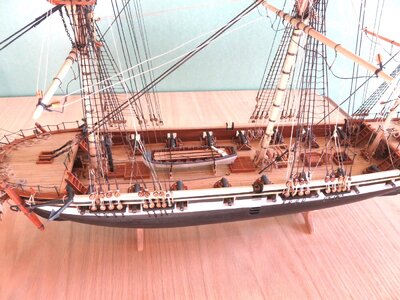
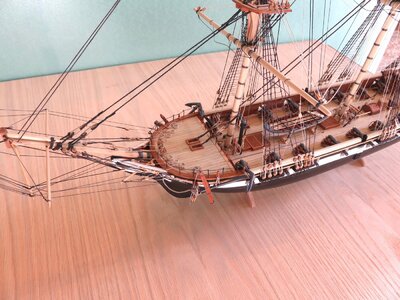
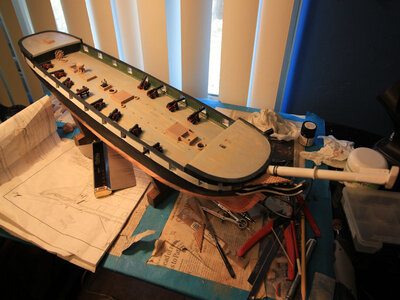
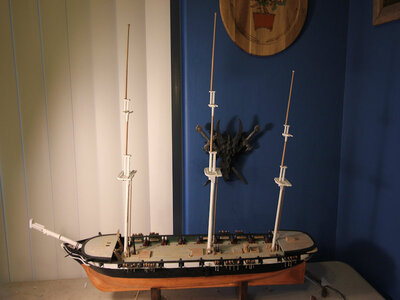
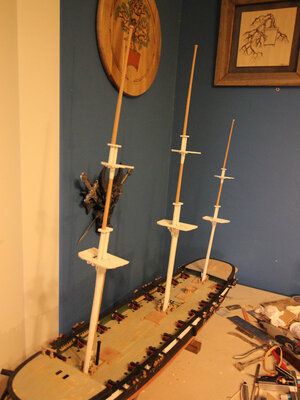
Sloop of War Austin, a soup to nuts project - scale 1:85

Part 20 Jib Boom

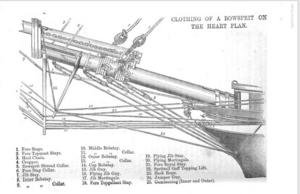
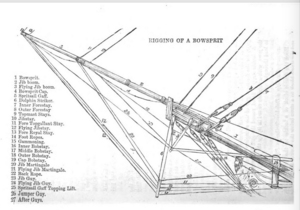
For me, the rigging around the bow, bowsprit, jib boom, and flying jib boom is the most complicated and challenging to do because of the crowded lines. The below two figures showing the details of rigging for the jib boom and flying jib boom were copied from “The Boys Manual of Seamanship and Gunnery” by C. Burney which can be found on the web (There are a number of books on rigging and seamanship from the 1800's that are available for free online and can be read on the books.google.com web site. ). I followed this rigging scheme since it is consistent with lithographs of sloops of war from the period of the Austin.
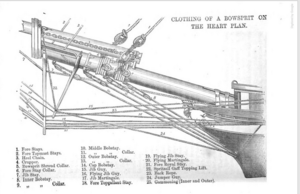
fig 51 bowsprit rig.pngfig 52 jiboom rig.png

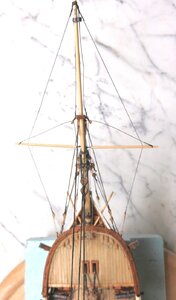
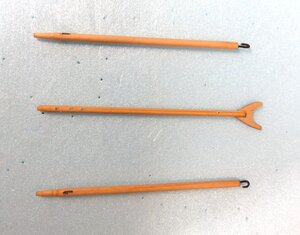
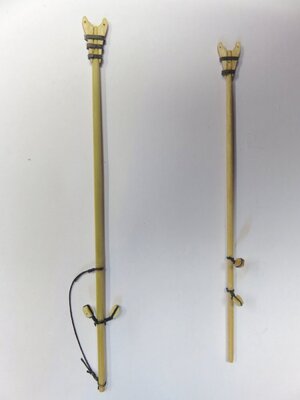
After the bowsprit cap was installed, the jib boom was passed through the cap and fastened to the saddle with a lashing. Next I constructed the dolphin striker and whiskers. Whiskers served to spread the guys form the jib boom and flying jib boom in the absence of a sprit sail yard . They were either hooked or lashed to the bowsprit and I choose to hook them into eyes. The two whiskers together, port and starboard, are the same length as a sprit sail yard, if carried. The whiskers and dolphin striker are shown below:

fig 53 dolphin striker IMG_1632.jpg

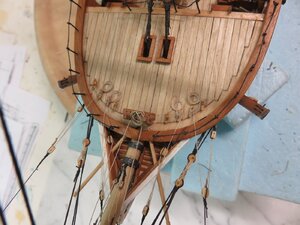
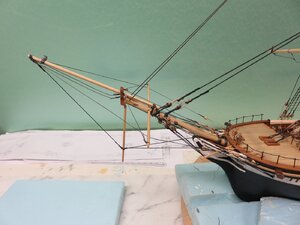
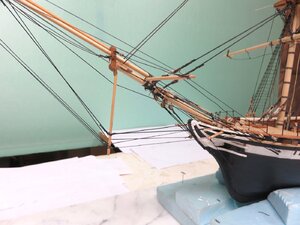
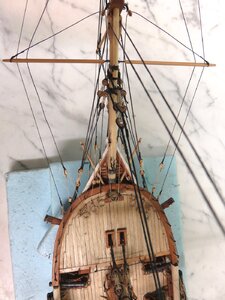
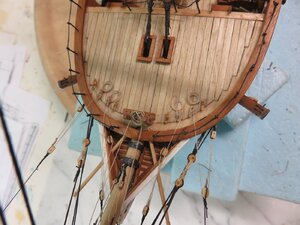
Rigging began with the martingale stay to the bottom of the dolphin striker and the back stays set up with tackles to eyes in the bow. Next, lifts were rigged to position the whiskers and then the jib boom guys were added, all with the associated tackles. Finally horses were put in place for the jib boom. This rigging is shown in the below 3 figures:
Fig 54 Dloph str rigIMG_1633.jpg

Fig 55 whisk rig IMG_1644.jpgFig 56 bow rig detail IMG_1635.jpg


Notein the figures the black metal bracket at the end of the jib boom for supporting the flying jib boom. Two pieces of brass tubing were soldered together and painted black. One end slid over the end of the jib boom, and the flying jib boom will pass through the other end when it is installed.
 
Part 20 Jib Boom

For me, the rigging around the bow, bowsprit, jib boom, and flying jib boom is the most complicated and challenging to do because of the crowded lines. The below two figures showing the details of rigging for the jib boom and flying jib boom were copied from “The Boys Manual of Seamanship and Gunnery” by C. Burney which can be found on the web (There are a number of books on rigging and seamanship from the 1800's that are available for free online and can be read on the books.google.com web site. ). I followed this rigging scheme since it is consistent with lithographs of sloops of war from the period of the Austin.
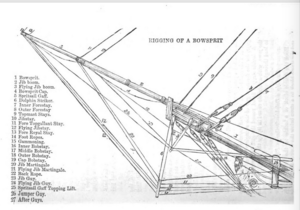
fig 51 bowsprit rig.png
fig 52 jiboom rig.png

After the bowsprit cap was installed, the jib boom was passed through the cap and fastened to the saddle with a lashing. Next I constructed the dolphin striker and whiskers. Whiskers served to spread the guys from the jib boom and flying jib boom in the absence of a sprit sail yard . They were either hooked or lashed to the bowsprit and I choose to hook them into eyes. The two whiskers together, port and starboard, are the same length as a sprit sail yard, if carried. The whiskers and dolphin striker are shown below:
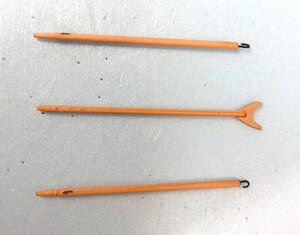
fig 53 dolphin striker IMG_1632.jpg

Rigging began with the martingale stay to the bottom of the dolphin striker and the back stays set up with tackles to eyes in the bow. Next, lifts were rigged to position the whiskers and then the jib boom guys were added, all with the associated tackles. Finally, horses were put in place for the jib boom. This rigging is shown in the below 3 figures:
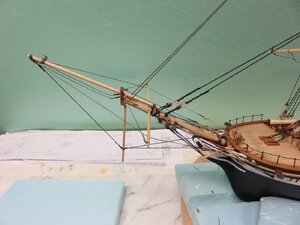
Fig 54 Dloph str rigIMG_1633.jpg
Fig 55 whisk rig IMG_1644.jpg

Note in the figures the black metal bracket at the end of the jib boom for supporting the flying jib boom. It was made from two pieces of brass tubing soldered together and painted black. One end slid over the end of the jib boom, and the flying jib boom will pass through the other end when it is installed.

Part 21 Top Gallant Yards

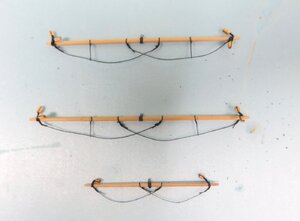
The top gallant yards were constructed in the same fashion as the other yards, by sanding tapers into the ends of dowels rotated in a drill press. The fore and main top gallant yards were 3/32” in diameter and the mizzen top gallant was 1/16”. I have found it difficult to find good hardwood dowels in small diameters; however, with a little searching bamboo skewers in diameters less than 1/8” can be located, which are quite strong and provided the starting material for the yards. They were first sanded to the needed diameter and then tapered. The yards are depicted below with horses, brace and lift blocks, and an eye for the tye attached:
Fig 57 top gal yds IMG_1674.jpg

The yards were suspended from the masts by a tye that passed through a sheave hole drilled into the masts before they were mounted, and then trusses were rigged to hold them against the masts.

Part 22 Rigging the Flying Jib Boom and Royal Masts

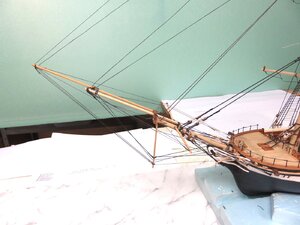
A flying jib boom was turned from a dowel, and a hole was drilled in the aft end for a #74 pin. After the pin was glued in place, a mating hole was drilled into the bowsprit cap to accept the end of the pin and align and support the flying jib boom. It was then glued in place at the bracket and the cap. The standing rigging for the flying jib boom, guys and a martingale stay, were then added. The guys passed through the whiskers and ended in thimbles at the bow.
Next, the flying jib stay and fore royal stay, which run from the fore top gallant and royal masts, were passed through the openings in the flying jib boom and dolphin striker and belayed at the bow. This completed the complicated rigging at the bow which required the insertion of 14 eye bolts , 7 on each side of the stem. If doing your own rigging plan, it is important lay out the positioning of these eyes before starting rigging so that all of the lines will run fair. The rigging at the flying jib boom is shown in the first figure below and details of the rigging at the dolphin striker and whiskers are shown in the next two.
fig 58 flyjib rigIMG_1677.jpgfig 59 dolphin strk rigIMG_1678.jpgfig 60 whisk rigIMG_1681.jpg

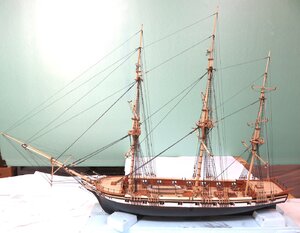
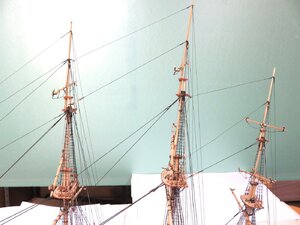
Finally, the remaining stays and backstays were rigged on all of the royal masts working from forward to aft. That completed all of the standing rigging which I began 5 months ago, and marks another benchmark along the way to completion. The rigging on the model at this point is shown in the below two figures:


fig 61 royal rigIMG_1676.jpgfig 62 royal rig detail IMG_1683.jpg
 

Attachments

  • Fig 56 bow rig detail IMG_1635.jpg
    Fig 56 bow rig detail IMG_1635.jpg
    207.1 KB · Views: 2
Part 23 Running Rigging

With the standing rigging in place and the yards mounted, the next task was to install the remaining running rigging consisting of lifts and braces on each yard. I did not add any of the blocks or lines associated with handling of the sails. Running rigging configuration gradually changed over the years, and to my knowledge there are many fewer references available for ships post-1820 as compared to pre-1820. I relied primarily on “Spars and Rigging” (Dover Edition) by Murphy and Jeffers which deals with American vessels circa 1849, and also on James Lees, “The Masting and Rigging of English Ships of War” for information.

The sequence I used was to work from bottom to top on each mast starting with the fore mast and moving aft. In hindsight I could have made my life easier by doing it in another fashion. The lifts finish their run vertically down along the masts, but as the braces are belayed they reduce access to the pin rails and belaying points in the waist. Contortions with tweezers were needed to work around these lines. The area between the main and mizzen masts was particularly congested with rigging since the main braces run aft and the mizzen braces run forward and they criss-cross. Had I to do it over again I would have rigged all of the lifts first, and then the braces starting at the top and working my way down in order to make belaying less taxing.

When rigging of the yards was completed I next made the gaff and boom as shown below.
Fig 63 gaff and boom IMG_1719 .jpg

Iron bands were simulated by blackened paper strips. Blocks and horses on the boom were added before they were installed.
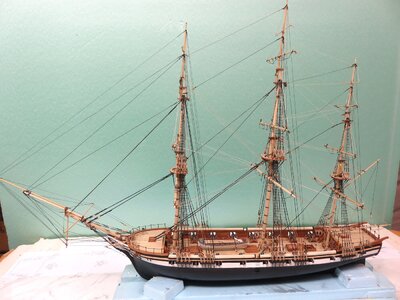
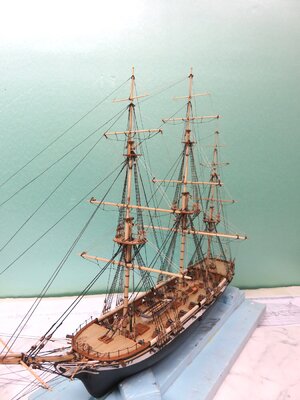
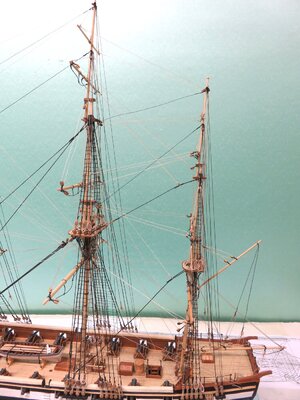
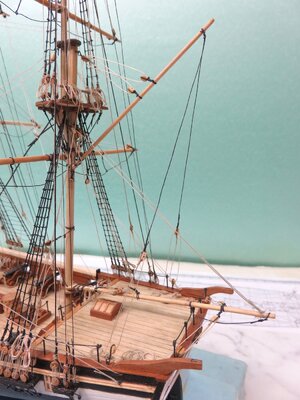
The completed rigging is shown in the two model views below:
Fig 64 rigged model IMG_1721.jpgFig 65 rigged model MG_1726.jpg

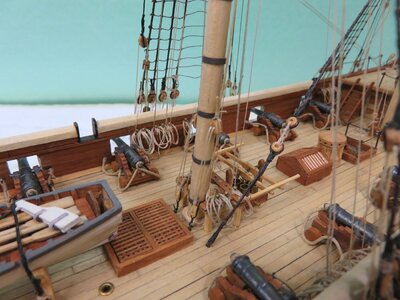
The maze of rigging between the main and mizzen and details of the boom and gaff rigging are illustrated in the next two figures :
Fig 66 Main and miz rigging IMG_1722.jpgFig 67 gaff and boom rig IMG_1724.jpg
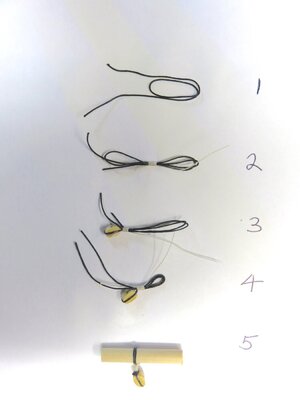
Finally, a few words about technique that might be helpful to novices. In the course of rigging numerous blocks have to be stropped to the masts and yards. My method for doing this, which may also be familiar to others, is illustrated in the below figure:
Fig 68 stropping IMG_1716.jpg

The steps in the process are:
Step 1. Make a double loop
Step 2. Add a seizing knot in the center (Light colored thread was used for visibility in the photo.)
Step 3. Slide the seizing to the left to make a loop that fits around the block
Step 4. Pull the two ends on the left to reduce the size of the loop on the right
Step 5. Put the right hand loop around the mast, yard, etc. and pull the two left hand ends to tighten
Finally, trim off all of the loose ends of line.

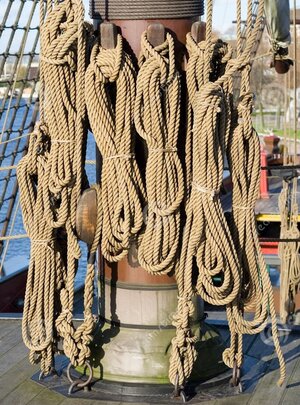
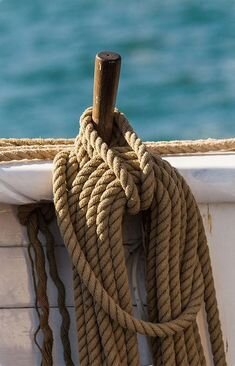
I do not make loops off the model to hang around belaying pins, bitts, or or other belaying points. For me, its easier to use extra lengths of rigging line and wrap the excess as loops around the pins. The loops are then stiffened with clear flat acrylic varnish to keep them in place. This is shown in the below figure:
Fig 69 belaying at waist IMG_1725.jpg

I have not solved the problem of making these loops appear as real lines would. They just do not hang right. This is due to the tension forces in the line being greater than the force of gravity, especially for lighter line. If anyone has solved this problem I would appreciate the information.

With the rigging complete, two more jobs remain: making a dingy to hang off the davits and making and rigging the anchors. This will be the subject of the next two installments.
 
and what I completely forgot to mention: looking very good - great work
 
Do not put the complete coil over the pin !
This will already help a lot
Than I would sling a small rope around the coil
View attachment 189356

These description will help in addition:
I think to get your suggestion to work I have to make the coils off the model and then hang them on the pins. I haven't put enough effort into getting this to work for me on past models but will give in another try at the next opportunity.
 
@Uwek, it was in this way we hung up the rope 30 years ago when I was sailing an 82ft galeas from Stavanger to Lisbon.
I have seen a lot of models without this way of hanging up the rope, but since I am not an expert on rigging, I have not dared to comment on this topic, there is some conclusion about this.TAU KVEIL.jpg
 
Part 24 Stern Boat

To fit the dimensions of the stern, a boat 3 5/16” long looked to be appropriate . At my scale of 1/85 this would correspond to a full size boat of 23.5', which is in line with the boat lengths for U.S. Navy boats in 1820 as given in Chapelle's book, “The History of the American Sailing Navy”.

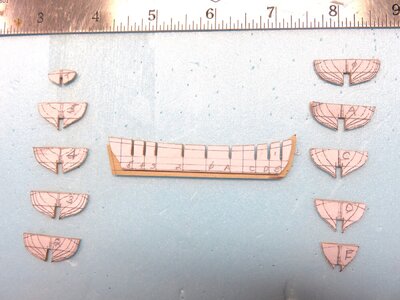
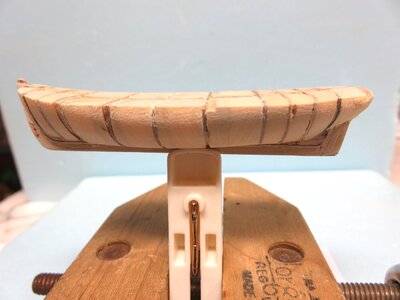
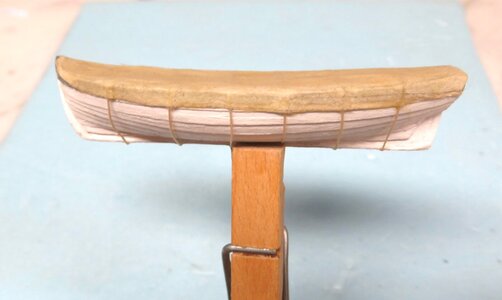
The plank on bulkhead method I use for building boats becomes less suitable for small boats. The thinest wood I work with is 1/32” thick corresponding to 2.65” at full scale which is over sized for construction of a real boat. As a result, after the boat is planked and ribs, thwarts, floors, etc. are installed the interior space is much reduced and it does not look realistic. For the 4 1/2” long launch on deck this was not particularly noticeable, but I was concerned about the appearance of the 3 5/16” stern boat. Consequently, I decided to build a solid hull for this boat, plank it with paper strips, and put on a simulated canvas cover. I used the plan of an 18' yawl in the frigate Essex book mentioned earlier as the basis for the design and copied the plan to the desired length to produce construction templates.
Bulkheads and a keel piece were cut from 1/32” plywood. To strengthen the keel piece additional pieces of 1/32” ply were glued on each side above the keel rabbet line. The bulkheads and transom were then glued on and the spaces between were filled with basswood. It was then sanded fair. This sequence is shown in the below three photos.fig 70 stern boat IMG_1751.jpgFig 71 stern boat IMG_1753.jpgFig 72 stern boat IMG_1756.jpg
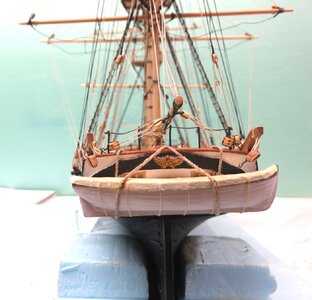
Planking was done with paper strips cut from 3x5 index cards. A plank width of 3/32” was selected at the dead flat bulkhead and the strips were cut 5/32” wide to allow for 1/16” overlap for each plank to give the clinker appearance. Planks were tapered as necessary at the ends, and glued on the hull starting at the garboard and working upward. From this experience I learned why paper models are so popular. The planks were made and installed very quickly as compared to working with wood. When planking was complete, the boat was given 2 coats of spray shellac to seal the paper and then painted white with grey trim to match the boat on deck. Finally a paper cover was glued on top along with hold down lines. The final result is shown below:
Fig 73 stern boatIMG_1763.jpg
Three cleats were put on the deck along the stern rail for attaching a line to support the boat and rigging was added to the davits. The final installation is shown in the below two views:
Fig 74 stern boatIMG_1770.jpg
Fig 75 stern boatMG_1774.jpg

Part 25 Anchors

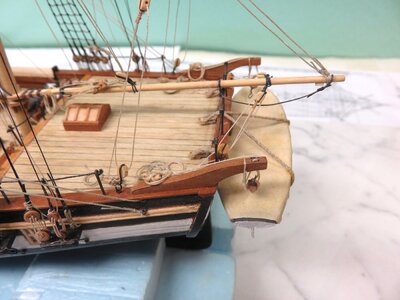
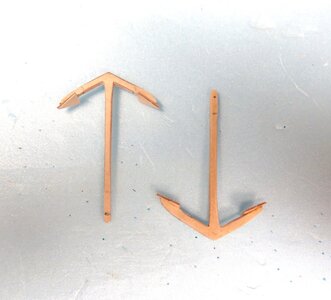
To size the anchor I used Table 520 in William Brady's book “The Kedge Anchor” which gives the weight of anchors and the size of the anchor cables for various classes of U.S. Navy vessels. With the weight established, the dimensions of the anchor can be found in the table on page 60 of Betty Curryer's book, "Anchors"(Chatham Publishers, 1999). The bower anchor shown in the Essex book had the exact proportions for the components as indicated by Curryers, so this diagram was used as the basis for my anchors.

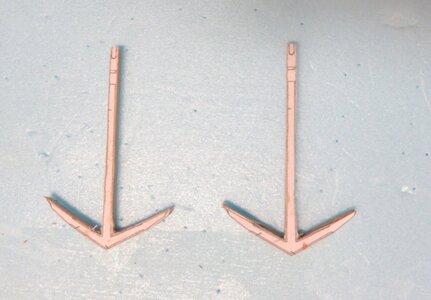
Anchors were were made from plywood. To get the required 3/32” shank thickness, 1/32” plywood was glued to 1/16” plywood to provide starting material. The Essex anchor plan was copied to the desired shank length, glued to the ply, and the shape was cut out. It was then sanded to the final shape and palms, cut from 1/32” ply, were glued on as shown on the below two figures.
Fig 76 anchor IMG_1758.jpg
Fig 77 anchor IMG_1762.jpg

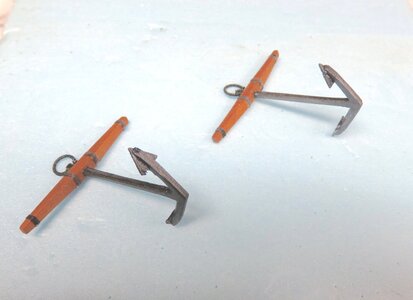
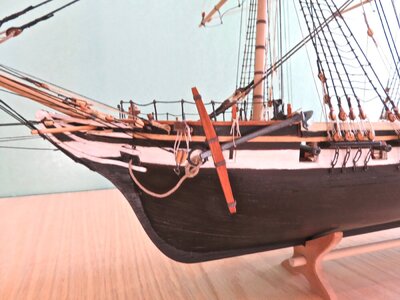
The anchor was painted with pearl noir acrylic paint to give an iron appearance. A stock made from cherry was then added and finally the anchor ring wrapped with thread. The completed anchor and the anchor installed at the bow are shown below:
fig 78 anchorIMG_1768.jpg
Fig 79 anchor MG_1777.jpg

Part 26 Completed Model

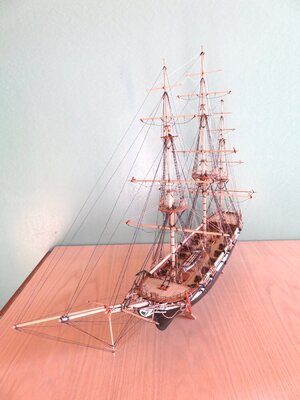
The banquet is finally over. I started with the soup and just ate the last of the nuts. After 14 months in my shipyard, the model is complete except for mounting it on a base which I will not bother with in this log. I thank everyone who stuck with me over the entire journey and hope some of the building methods I described will be of use. I'll end with some photos of the completed Austin.
fig 80 model from bow IMG_1792.jpgFig 81 model MG_1795.jpgFig 82 deck IMG_1779.jpgFig 83 bow IMG_1788.jpg
 
Congrats! She is beautiful and surely will be a nice attraction to your home visiters\friends!!
Thanks for the nice feedback. The model's final home port will be at the Houston Maritime Museum, and my last challenge will be getting it shipped 1200 miles from Pennsylvania to Texas in one piece.
 
Terrific work! You are shipping to Texas, I am hoping to interest an East coast museum into accepting my 12 1/72 scale US warships at some point in the future. 8 of them will be in the 5 foot long and 4 foot high area. I live just outside Tucson, AZ. That's what? 2000 miles or more? I will need a semi to deliver them!
This will help with my Germantown build. The Austin looks very similar. I have been wondering about the ladder arrangement to the poop and forecastle. I do not know if the stern galleries are the same. I will have to wait for my plan request from Seaport Independence Museum. I was wondering if the yards would have the octagonal bracing that larger ships had on their yards. Yours do not, so I suspect mine will not either.
 

Attachments

  • IMG_8062.JPG
    IMG_8062.JPG
    130.1 KB · Views: 5
  • IMG_8151.JPG
    IMG_8151.JPG
    82.5 KB · Views: 5
  • IMG_8152.JPG
    IMG_8152.JPG
    114.9 KB · Views: 5
Last edited:
Terrific work! You are shipping to Texas, I am hoping to interest an East coast museum into accepting my 12 1/72 scale US warships at some point in the future. 8 of them will be in the 5 foot long and 4 foot high area. I live just outside Tucson, AZ. That's what? 2000 miles or more? I will need a semi to deliver them!
This will help with my Germantown build. The Austin looks very similar. I have been wondering about the ladder arrangement to the poop and forecastle. I do not know if the stern galleries are the same. I will have to wait for my plan request from Seaport Independence Museum. I was wondering if the yards would have the octagonal bracing that larger ships had on their yards. Yours do not, so I suspect mine will not either.
Did you look at Part 1 of the Austin log? I used the Germantown plans found in Chapelle's "American Sailing Navy" for the Austin except at the stern. Germantown has an elliptical stern with quarter galleries and Austin has a square stern without galleries. The ladders are not shown on the plans but I added them. Re the yards, they do have an octagonal cross section in the center although that doesn't show well in the photos (see pix in Part 19). I start with an oversize dowel for the yards, draw lines on it to divide it into 8 equal sections and use a file to make flats between the lines. The rest of the dowel is then sanded in a drill press to the correct diameter and taper. FYI, there are many photos on the internet of the Constellation in Baltimore which was restored to its appearance in the 1800's. I used these pictures in deciding how certain features on the model should look.

I think I have seen your work on the wooden ship Facebook group and have admired it. The Austin took me 18 months to build so 12 models this size would represent 18 years of effort for me. I would love to hear about your building methods since you obviously can make them a lot faster than I can without sacrificing quality. In regard to shipping, I can only say it is a big problem unless you pay a fortune to a mover specializing in art. I always ship models with a plexiglas case for protection, pack it as carefully as I can, say a few prayers and hope for the best. So far my shipped models have arrived with no more than minor damage to the rigging. However, I have never sent anything as large as yours.
I have the same plan for the Germantown. I will glue battens on the yards to form the octagonal bracing to those that need them, as that is how they were done after 1833.

There is a collection of 24 sheets of plans for the Germantown in the John Lenthall Collection (he designed the Germantown) currently housed in the Seaport Independence Museum in Philadelphia. Unfortunately I cannot afford to travel to the museum and request to have copies made. If i could find some one in Philly that would act as my intermediary then I would not need to rely on the 3 person staff they have working on copy requests. In addition there are 7 other plans/collections I need to complete my builds.
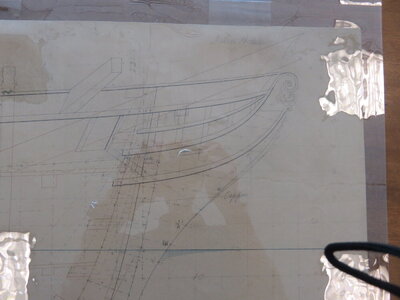
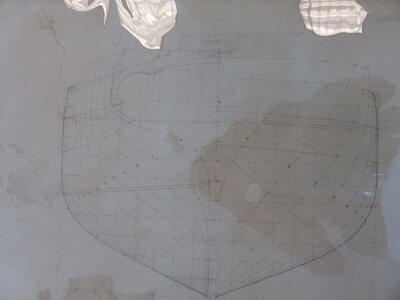
I live 45 min from Philly and went to see the Germantown plans while the museum was open in 2019 pre-Covid. I only looked at some of them for the deck and hull. They are on very large sheets and I image quite difficult to copy. I took some photos with my camera but it was difficult because the plans were in plastic covers and the print has faded. As I recall (and not well) most of the plans were for construction details and not particularly useful for model building. I am attaching two of the photos I saved for the body plan showing the stern and also the bow area in the shear plan.2019-08-29 11.57.09 copy.jpg2019-08-29 11.55.00 copy.jpg
 
the stern is my stopping block. I think I can build it from this! You are awesome! Chapelle's book has her sail plan so that is noting I need. I was hoping for spar deck layout for ladder location and possible railings/port and starboard poop deck pin rails such as the Columbus and Delaware and United States have in the plan set. I called the Museum just a while ago. They say it should not be long now, so I should have my info in a couple weeks.
 
Back
Top