• Ships of Scale has incorportated an extra level of security when you log In. Please follow on-screen prompts to acknowledge that you are not a robot via a "Check Box" or a "Pictorial Check Box Puzzle". This is needed due to higher level of AI Activity Security.
  • SUBSCRIBE TO SHIPS IN SCALE TODAY!

    The beloved Ships in Scale Magazine is back and charting a new course for 2026!
    Discover new skills, new techniques, and new inspirations in every issue.

    NOTE THAT OUR NEXT ISSUE WILL BE July/August 2026
  • Win a Free Custom Engraved Brass Coin!!!
    As a way to introduce our brass coins to the community, we will raffle off a free coin during the month of August. Follow link ABOVE for instructions for entering.

Soleil Royal by KevinW - Heller 1:100

Joined
Dec 14, 2021
Messages
391
Points
238

28/9/26

Here goes – another Heller SR! Actually, there aren’t so many build logs of this kit so one more shouldn’t be too repetitive. I’m very familiar with Marc’s (hubacs historian) build and have bookmarked others on SoS for reading over the next week or two. Sadly John Ott’s log was lost in the MSW hack, along with Bills (Bill97) invaluable step-by-step. Such is life!

I don’t really have much idea where this build will take me. I’ve always been under the impression that this kit has some moulding issues, but on opening the box and looking at the quality of the pressings I’m scratching my head as to why I had that thought. Mine appears to be one of the earlier pressings from the partnership between Heller & Aurora in the late 1970's. A superficial once-over has me seeing virtually no flash and very crisp, well defined profiles. Nor does it seem overly brittle.

Anyway, I will certainly remake all the guns and rigging parts: the guns, because I can make their assembly so much more enjoyable and the rigging, because 3D printed blocks are miles better than kit parts. I expect there’ll be a fair few smaller parts that are worth a remake too, but I’m not so sure about the décor panels.

So, before I get going, what are the ‘de riguer’ (to get into character) modifications? I’ve seen fender strips and strips on the outer edges of the hull side steps; hull thickening; shifting the waterline up (but by how much?). Is there anything else?
 
Looking forward to it! "De rigueur" modifications are those which are essential to the design of the hull or imposed by shipbuilding standards. One of those hull improvements is girdling. When a vessel was completed but found to be too narrow, unstable, or "tender" (meaning it leaned over too easily under the force of the wind), shipwrights would perform a girdling modification. This involved fastening a secondary layer of thick timber planks directly outboard onto the existing hull structure, specifically at and around the ship's waterline.

Below left: ship hull without girdling. Ship is "tender", which means when tipped to the side, the force that returns the hull to vertical is weaker than desired. Right: After girdling, the hull is wider, and the force which returns the hull to vertical is stronger, plus the ship is a bit more buoyant because the hull displaces more water. In addition to strengthening hull, girdling can often have the added benefit of making the ship more stable under heavy sail wind load.

1716381920910.png


Girdling was typically performed after a ship has been built, sailed, and found wanting in stability. I have no information on whether Soleil Royal ever needed girdling. Ships with a high center of gravity are good candidates for girdling.
 
Last edited:
Kevin - I’ve been waiting for this day! It is, of course, very exciting for me to see where you take all of this.

I will say that the early pressings of this kit are made with superior plastic. Mine is an original pressing, and it all remains as supple as the day it was moulded.

Generally, though, warpage is an issue. I found this, particularly, with the figurehead. You might get lucky, there, though. I didn’t use the kit QG’s, obviously, but when I made this model the first time, I found it advantageous to bind the QGs, through the middle gallery tier, with fishing line that I later disguised with paint. Also, the fit of the upper bulwarks to the lower hull requires quite a lot of massaging, in order to seat a solid joint. I heavily re-enforced all questionable joins with 1/16” styrene backing strips.

If I weren’t cutting the lower hull away, I would raise the waterline by at least 1/4”, and more likely 5/16”. Your anti-fouling paint line will certainly cross the lower wale, but as long as you are at least four scale feet (1/2” in 1:96) from the lowest sills of the lower deck ports, then you will not be stretching the bounds of credulity.

On the subject of SR’s sailing qualities, it was remarked upon that her initial sea trials were very favorable, however, there is much doubt that she was nearly fully armed. As a prestige ship, she and the Royal Louis were armed exclusively in bronze, and French foundries, of the day, could not match the pace of demand.

There is a nearly infinite degree of detailing that can be added, but I recommend that you think long and hard about which of those details really matter to you, as there is just so much repetition involved. I know that you hold yourself to a very high standard of workmanship, so this tendency towards more than less detail can become a bit of a bear.

For me, representing the iron work that holds the ship together was important, so I went all-in on that. I am sure there are more efficient ways to achieve the effects I did, but those were just the workable processes I arrived at. Tedious as it was, I did not mind the process. On the other hand, chain making and gun rigging were not enjoyable learning curves, but I think my guns going forward will be more-so. I’ve worked through the problems, at this point.

I suppose the first thing you have to ask yourself is this: do I want to try and represent SR at a particular epoch of her career (as launched 1670/refit 1689/new ship 1693), or am I okay with the composite ship that Tanneron’s model represents, and simply wish to upgrade the degree and quality of details?
 
If you decide to use the kit QG’s, I would say they are much improved by opening them up, so that the trophy of war ornaments can either be mounted to the QG interiors (as on Tanneron), or dispensed with in favor of something more coherent.

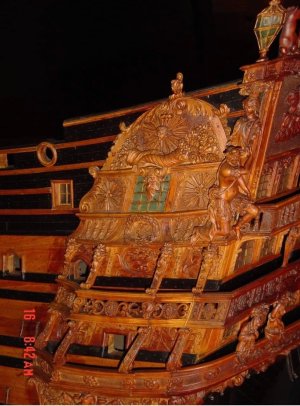
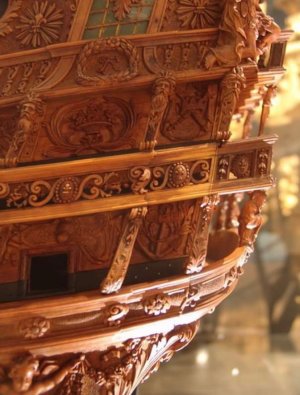
Interestingly, on Tanneron’s model, the trophies are separated, along the upper bulwark walls, by support brackets that support the gallery floors above:

IMG_4211.jpeg
IMG_4207.jpeg
photos courtesy of Yoann Guillemenet

They’re a little hard to made out in these pictures, but they’re there. This is a detail that I have yet to see anyone model on the Heller kit.
 
Last edited:
Hi Kurt, Marc, thanks for looking in and your advice

I'm going to start by assembling the major parts of the kit using dots of CA, just so that I can better see what problems lie ahead and how I might tackle them. I can't get a feel for the ideal build sequence from the Heller instructions and, as anyone who has built this kit will know, it doesn't lend itself so well to dry fitting. I guess a blessing of the separate upper bulwarks is that, if you do want to remake them, at least you don't have to cut them out of the hull!

I like the added depth of the opened up QG's and think these (the QG's) may not be overly difficult to remake. Let's hope those aren't famous last words! The same applies to the stern. Good as the mouldings are, the relief would be improved by a multipart approach.

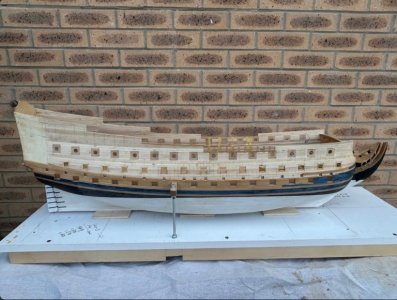
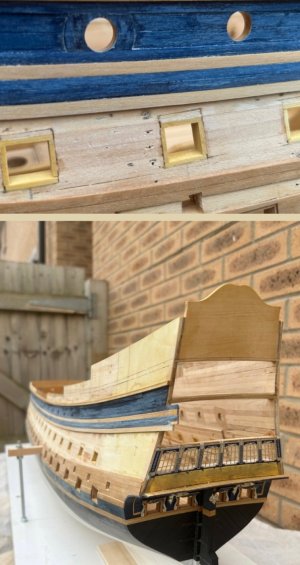
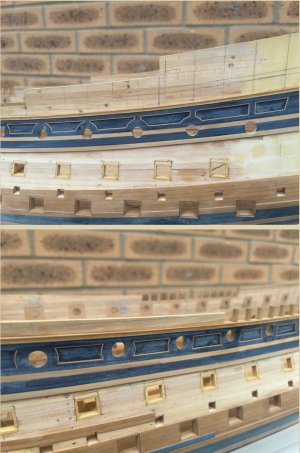
Going back to your log now, Marc, can I ask, are the boltheads to scale? And what are these four small square additions in the centre of the middle wale? (And the 5 of the same in the lower wale)?
1790775670332.png
 
Hi Kevin

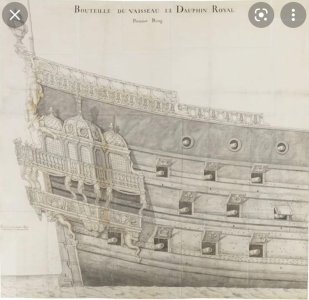
The wale through-bolts have been scaled by eye: the heads would be roughly 3” in diameter, based on what I’m representing here. Maybe that’s a tad large, but then - it looks in- line with what I see in contemporary drawings:

IMG_3398.jpeg
IMG_3822.jpeg
IMG_0874.jpeg

Puget, in my opinion, captures a sense of photo-realism that is on a par with the Van de Veldes:

IMG_0186.jpeg
IMG_0186.jpeg

Some modelers prefer to calculate scale dimensions to the thousandth, but I prefer to trust my sense of relative proportion - having spent so much time scrutinizing drawings like this.

As a matter of fact, I’ll tell you a little secret. When it comes to finally rigging my ship, I will not be doing any abstruse calculations of line diameter. I know that the line weights are graduated; heavier line on the lower sections of mast, and progressively lighter weights for each level, on up. The same is true for blocks. I will simply use the 1:96 drawing of the St. Philippe as a visual reference and I will go from there. The idea of turning the whole thing into an infinitely complex series of calculations is deeply unappealing to me, personally.

Everyone has their own approach, but sometimes the overall impression of the thing is more important than whether it is rigorously correct. When in doubt, it is generally better to err on the side of lighter rather than heavier.

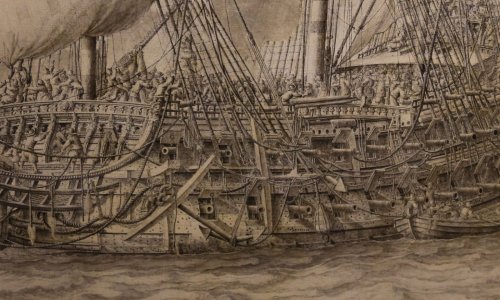
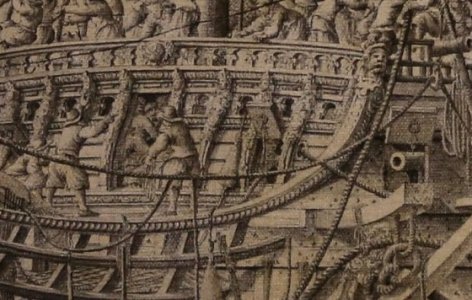
What you are seeing between the wales of my model are the scuppers, which also show up on the battle damaged vessel, above. What I have omitted, for now, on the lower tier of scuppers are the canvas backflow socks that you actually can discern on the VDV drawing. If I include them, they will be made from tissue, most likely, and not installed until I’m actually setting the model in it’s sea.

The wider scuppers represent the outflow from the bilge pumps, fore and aft of the main mast.

These are not an essential detail to include, but I thought they were a good addition because they are so important to the weatherliness of the ship.
 
I think I'm largely in the same camp - I am kind of viewing the SR as an art project, so for me it's the overall effect that matters. I mean this in the sense that, when I see very old machines, bridges, ships, cars, buildings etc, I am constantly attracted to the artistry as well as the engineering. This is why I like to remake so many parts of the kits, because the constraints of injection moulding sometimes means the artistry is lost. For instance the winches and pumps on the Cutty Sark are things of beauty; the Revell representations are crude lumps of plastic. I'm sure I'll find similar on the SR, once I open some of the bags.
 
Back
Top