Soleil Royal- Re-engineering Artesania Latina's New Kit by NMBROOK

NMBROOK

Staff member
Forum Moderator
Joined
Jul 15, 2013
Messages
2,660
Points
688

Location
Yorkshire England
Hi All

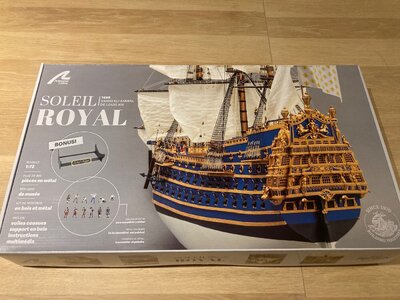
I was determined not to buy any more kits as I have enough projects and pastimes to keep me going beyond retirement. However this release changed all that, I simply HAD to build it. Not because it is an amazing model straight out of the box but more a case that I realised the potential of the kit.

The kit supplied decoration has far more than a passing resemblance to the late Michel Saunier's model.His build is shown on MSW and Gerard Delecroix's forum.The quality of the castings is far greater than the one's you get in a current Mantua group model.It also includes some very fine photo etch details for bow and stern.

The biggest issue is that whilst the bow and stern are done well, everything in-between needs a redesign if you want a model that follow's French practice of the period. The gunport spacings are wrong, the deck Sheer is wrong and all the decks are enclosed on their ends, these would have most likely been open.

When the marketing video first appeared it stated 1/65, now the box and catalogue state 1/72?? So which is it? Working from the height between decks, this works out at 1/65.You cannot work from the model's length, the design for some reason has been shortened and the model is far too short for either scale.Given that the original is stated as having a length (gun deck) of 160 French feet, this model is at least 100mm too short.

It is my intention to redesign the kit's false keel to make the model the correct length and space out the kit bulkheads to compensate.The last few bulkheads at bow and stern will remain stock spacing as not to interfere with the kit decor.I am hoping that this "stretch" shall maintain the hull profile and just make the transition of curves a little more gradual.

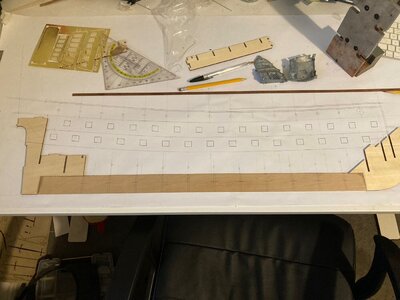
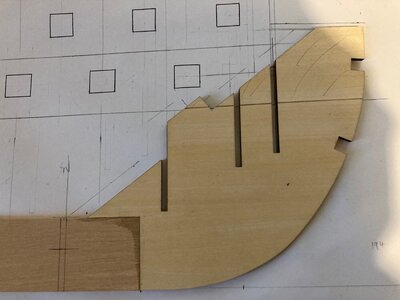
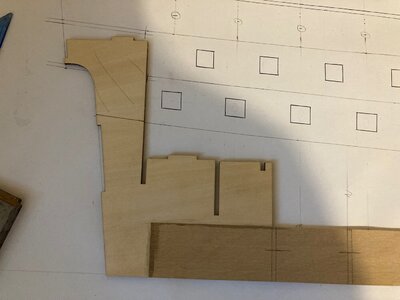
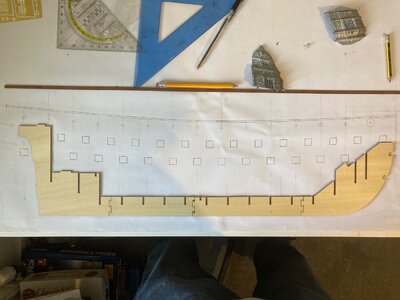
I have already started to draw out the revised side view of the ship and have enough information established to start on the keel.The picture below shows the kit keel dry assembled on top of my work in progress drawing.In the next post I will show the extended version

Kind Regards

Nigel
IMG_0230.jpgIMG_0246.jpg
 
OK - so third in still the front row - Nigel indeed very nice to see you again working in your shipyard. This project per your superb skill set will also be lots of fun following along...
My shipyard has been closed for a while - Home still a bit upside down with interior improvements.

As always --- Regards....
 
Boah, i think its difficult to start a kit with all the "errors", if you are familiar with the 17th centruy shipbuilding from Lemineur or Boudriot.
My last kit was a desaster..... and the take-off for my scratchbuilding-career.
But I wish you a lot of joy and many hours of fun in this building.
I know the problem, i could start every day a new project. I try to avoid it, but sometimes you have to do what a modeller have to do. :)
 
Thanks everyone

I have now replaced the centre sections with a nice piece of English boxwood I had kicking around in my stash.I have notched these in to the fore and aft sections rather than attempting to marry the ends up with the rather sloppy dovetails of the original.All the skeleton is laser cut 3mm ply and the boxwood was exactly the same thickness.
You will notice the deck lines on my drawing, these are actually the underside of the internal decks which will be 2mm thick (plywood + veneer planks). Yes, this model is getting an interior gunlock upwards.
You will also see the cut off line of the deck at either end of the assembly. Well it isn't simply a case of cutting these sections off, more on that later.Next step is to notch the false keel to take the kit bulkheads in their new positions.

Kind Regards

Nigel

IMG_0247.jpgIMG_0248.jpgIMG_0249.jpg
 
One thing all the kits get wrong is the oversize deck gratings. I reckon a sailor would put his foot through the grating its so large.
Brian have you built a Kolderstok model?
 
with the time we will see, which parts are really still from the kit, and which parts are scratch - and with the time we will see, if we should move this log to the scratch area .....
BTW: This is a big model - so I guess there is still some place in the first row - so I hope the friends already sitting there will move closer together .... ;)

Uwe,I had thought about which section to post this under and came to the conclusion that some builders in the kit section might learn a trick or two. Many in the scratch section are in the heady heights of POF builds (me included) and may not be so interested in kit bashing.

I would add though that I am trying to repurpose as much as possible of the kit material and also use a few bits and bobs from my stash to try and make this project as wallet friendly as possible.The kit has Birch 1st planking and basswood second planking. I am going for the blue painted finish as the original kit (sorry guys) as this what really grabbed me initially and I like it a lot.This means I can use the kit material, just maybe need to buy a few more basswood strips as the hull is longer, as I have had excellent results painting basswood.

Kind Regards

Nigel
 
I have discovered a small error in my drawings:mad: I thought I had everything nailed at the stern but the accumulation of deck heights means the head clearance under the Poop is insufficient.I need to drop all the decks down by 2mm at the stern in order for everything to work.This will reduce the sheer of my decks midships backwards, but only slightly.
I knew there was a reason why I chose to draw it all out, rather than make it up as I go that I have done in the pastROTF It is a lot easier to move some lines on paper than attempt major rework.

Kind Regards

Nigel
 
Hi All

I was determined not to buy any more kits as I have enough projects and pastimes to keep me going beyond retirement. However this release changed all that, I simply HAD to build it. Not because it is an amazing model straight out of the box but more a case that I realised the potential of the kit.

The kit supplied decoration has far more than a passing resemblance to the late Michel Saunier's model.His build is shown on MSW and Gerard Delecroix's forum.The quality of the castings is far greater than the one's you get in a current Mantua group model.It also includes some very fine photo etch details for bow and stern.

The biggest issue is that whilst the bow and stern are done well, everything in-between needs a redesign if you want a model that follow's French practice of the period. The gunport spacings are wrong, the deck Sheer is wrong and all the decks are enclosed on their ends, these would have most likely been open.

When the marketing video first appeared it stated 1/65, now the box and catalogue state 1/72?? So which is it? Working from the height between decks, this works out at 1/65.You cannot work from the model's length, the design for some reason has been shortened and the model is far too short for either scale.Given that the original is stated as having a length (gun deck) of 160 French feet, this model is at least 100mm too short.

It is my intention to redesign the kit's false keel to make the model the correct length and space out the kit bulkheads to compensate.The last few bulkheads at bow and stern will remain stock spacing as not to interfere with the kit decor.I am hoping that this "stretch" shall maintain the hull profile and just make the transition of curves a little more gradual.

I have already started to draw out the revised side view of the ship and have enough information established to start on the keel.The picture below shows the kit keel dry assembled on top of my work in progress drawing.In the next post I will show the extended version

Kind Regards

Nigel
View attachment 300503View attachment 300505
I would have loved to see you progress farther on your Sovereign of the Seas, since it's been a great guide for my build, but what the heck... Let's see what you can do with this one. Thumbsup
 
Very interesting. I will be watching this one. Have had a chance to look at the block that are laser cut and you have to drill them out too. That has been a big turn off for this kit for me.
 
Back
Top